- Why Scan Vulnerabilities on WordPress using VirtualBox?
- How to Scan Vulnerabilities on WordPress Using VirtualBox: Step-by-Step Guide
- Step 1: Setting Up VirtualBox for Vulnerability Scanning
- Step 2: Installing WordPress in VirtualBox
- Step 3: Vulnerability Scanning Tools for WordPress in VirtualBox
- Step 4: Running and Interpreting Vulnerability Scans
- Step 5: Handling Vulnerabilities
- Step 6: Implementing Security Improvements on the Live Site
- Conclusion
- FAQs
How to Scan Vulnerabilities on WordPress Using VirtualBox

- Why Scan Vulnerabilities on WordPress using VirtualBox?
- How to Scan Vulnerabilities on WordPress Using VirtualBox: Step-by-Step Guide
- Step 1: Setting Up VirtualBox for Vulnerability Scanning
- Step 2: Installing WordPress in VirtualBox
- Step 3: Vulnerability Scanning Tools for WordPress in VirtualBox
- Step 4: Running and Interpreting Vulnerability Scans
- Step 5: Handling Vulnerabilities
- Step 6: Implementing Security Improvements on the Live Site
- Conclusion
- FAQs
The following is a guide on how to scan vulnerabilities on WordPress using VirtualBox without affecting your live site.
With WordPress being the world’s most popular website platform, it remains at high risk of cyber attacks, but with proper precautions, you can safely keep your site.
One vital strategy is scanning for vulnerabilities on WordPress using virtual testing environments like VirtualBox.
Why Scan Vulnerabilities on WordPress using VirtualBox?
VirtualBox is an open-source virtualization utility that creates isolated environments or sandboxes for testing and debugging.
Scanning vulnerabilities in WordPress using VirtualBox is very effective for the following reasons:
- Your primary OS is not affected: By scanning your WordPress installation within VirtualBox, any problematic matters won’t affect your operating system.
- Cost-effective: VirtualBox is free to download and strong enough for detailed vulnerability scanning.
- Configurable: You can configure your virtual machine using VirtualBox to run multiple security tests without affecting the live site directly.
Learn how to scan vulnerabilities on WordPress using VirtualBox. The steps below will help you avoid costly downtime and build your understanding of the essentials of WordPress security.
How to Scan Vulnerabilities on WordPress Using VirtualBox: Step-by-Step Guide

Step 1: Setting Up VirtualBox for Vulnerability Scanning
To start scanning vulnerabilities on WordPress using VirtualBox, follow these setup steps:
1. Download and Install VirtualBox
Let’s head over to the VirtualBox website and download the latest version compatible with your OS; this is the software you’ll need to create virtual environments in which you can run security tests on your WordPress installation.
2. Install a Virtual OS (e.g., Ubuntu)
You will need a Linux-based OS for maximum compatibility with security tools to learn how to scan vulnerabilities on WordPress using VirtualBox.
Ubuntu is highly recommended here:
- Download the latest ISO file from Ubuntu’s website.
- Create a new virtual machine in VirtualBox. Set the type and version as Linux and Ubuntu.
- Install Ubuntu in your virtual environment by following the on-screen instructions.
3. Configure Networking
For scanning, it’s essential to set up proper network configurations. Set the Bridged Adapter setting in VirtualBox to connect your virtual environment directly to your network.
This setup ensures that your virtual machine can access your WordPress site as if it were part of your network.
Step 2: Installing WordPress in VirtualBox
With your virtual machine ready, it’s time to install WordPress to practice scanning for vulnerabilities.
1. Set Up the LAMP Stack
A LAMP stack (Linux, Apache, MySQL, PHP) is necessary for running WordPress on Ubuntu:
sudo apt update
sudo apt install apache2 mysql-server php libapache2-mod-php php-mysql
2. Download and Configure WordPress
Now, download and set up WordPress for your VirtualBox environment:
cd /home/u399670630/domains/devdiggers.com/public_html
sudo wget https://wordpress.org/latest.tar.gz
sudo tar -xvzf latest.tar.gz
sudo chown -R www-data:www-data /home/u399670630/domains/devdiggers.com/public_html/wordpress
3. WordPress Database Configuration
Complete the configuration now by creating a MySQL database for WordPress and then set it up in the wp-config.php file.
You are now good to go and run virtual boxes on your WordPress to scan for vulnerabilities.
Step 3: Vulnerability Scanning Tools for WordPress in VirtualBox
There are many high-power scanning tools available that can scan vulnerabilities on WordPress using VirtualBox. Amongst them, here is the best one:
1. WPScan for WordPress-Specific Vulnerabilities
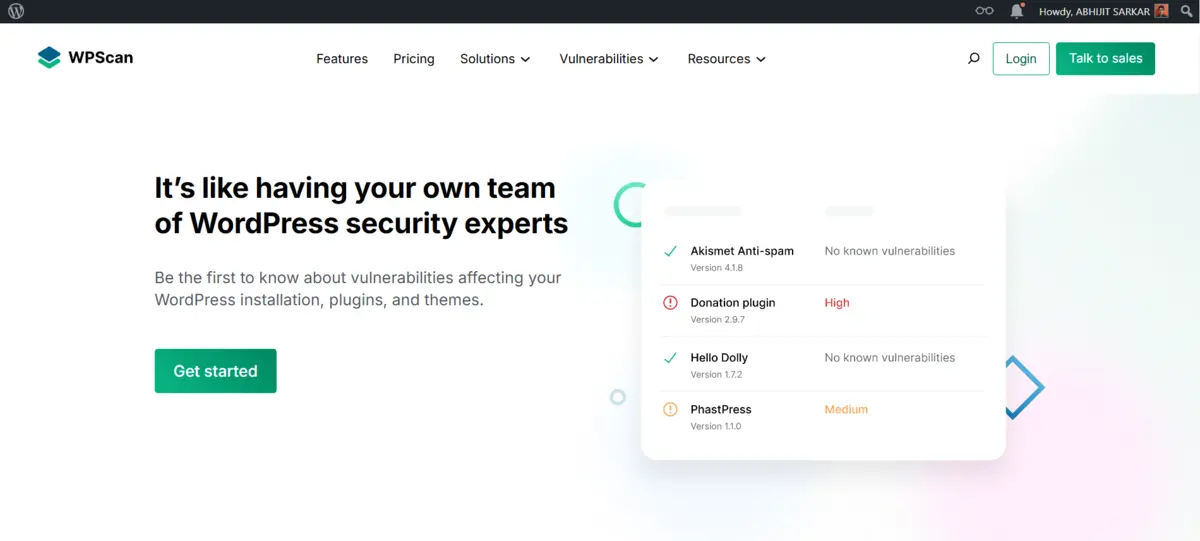
WPScan is a WordPress-focused vulnerability scanner that checks for weak passwords, outdated plugins, and security issues unique to WordPress.
To install WPScan:
sudo apt update
sudo apt install wpscan
To scan for vulnerabilities, use:
wpscan --url http://your_ip_address/wordpress
WPScan will analyze your WordPress setup and provide a report on vulnerabilities related to themes, plugins, and configuration.
2. Nikto for Server Vulnerabilities
Nikto is another useful tool for scanning web servers. While not exclusive to WordPress, it identifies server misconfigurations and outdated components.
Install Nikto:
sudo apt install nikto
Run a Nikto scan:
nikto -h http://your_ip_address/wordpress
You can scan for vulnerabilities on your WordPress site using VirtualBox and other scanning tools, such as Nikto, by finding vulnerabilities on a certain server that may compromise your site.
3. Burp Suite for In-Depth Security Testing
Burp Suite scans for injection points, XSS vulnerabilities, and much more. You can also use the proxy feature to sniff traffic and user interactions with your WordPress site and see how users interact with it.
- Download Burp Suite.
- Now run Burp Suite and set up your browser to route all its traffic through Burp Suite.
Adding Burp Suite with WPScan and Nikto makes the scanning process for WordPress vulnerabilities inside VirtualBox thorough.
Step 4: Running and Interpreting Vulnerability Scans
With tools installed, you are now all good to run scans on the WordPress setup inside VirtualBox.
1. WPScan
Use the WPScan to address WordPress-related issues. Look for older plugins, weak passwords, and unconfigured settings. Address all those issues, and your installation will be secured.
2. Nikto
Then, run a Nikto scan for server-level issues. Its scan results will highlight possible misconfigurations like open directories or outdated components.
3. Burp Suite-Deep Insight
Burp suite provides more advanced tools that help analyze deeper security vulnerabilities.
4. Additional Scanning Tools
For those looking to cover all bases, consider tools like Nmap for network scanning and Astra for added WordPress-focused security.
5. ClamAV for Malware Detection
There is ClamAV, which is a free, open-source antivirus tool aimed at detecting malware and viruses along with other harmful codes that might exist in your WordPress files. Though not detailed:
Step 5: Handling Vulnerabilities
Scanning for vulnerabilities within WordPress using VirtualBox should lead to an action towards the results. Here is how to handle the most widespread ones:
1. Update Plugins and Themes
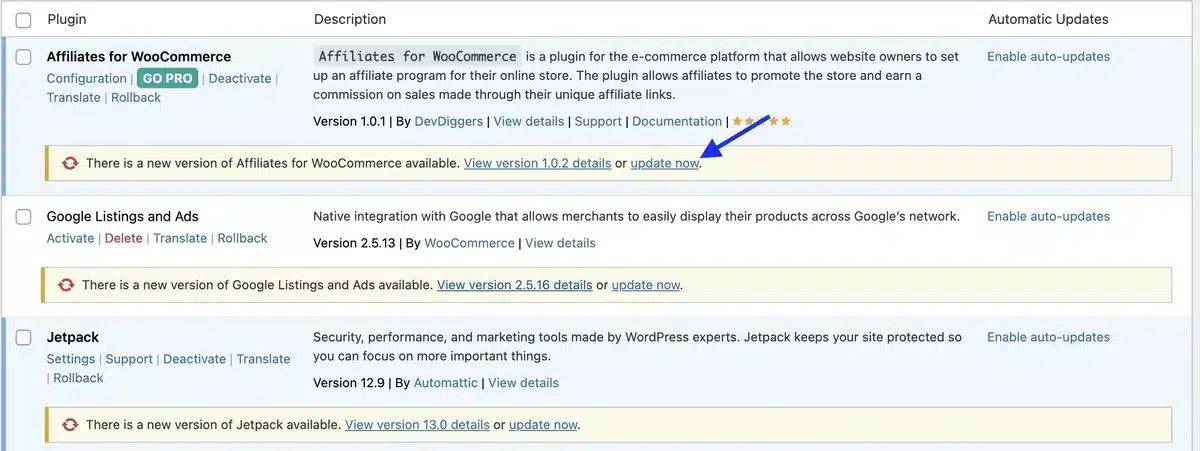
Keep all WordPress plugins and themes updated. This step alone can significantly reduce the risk of exploits.
2. Enforce Password Policy
In case the WPScan identifies weak passwords, then enforce password strength requirements and two-factor authentication (2FA).
3. Secure File Permissions
Verify that sensitive files, for instance, are wp-config.php, locked down so that no one can access them. Good settings are 644 on files, 755 on directories, etc.
4. Protect Against SQL Injection and XSS
Regularly updating WordPress, themes, and plugins can mitigate SQL injection and XSS risks. Consider adding security plugins like Wordfence or Sucuri for added protection.
Step 6: Implementing Security Improvements on the Live Site
Now that you know how to exploit WordPress through VirtualBox, go implement what you’ve learned on the live site:
- Always update your WordPress core, plugins, and themes. This is the best way to prevent exploits of which you are aware.
- Install a WordPress security plugin: Some of the most well-known ones are Wordfence or Sucuri. These add firewalls, malware scanning, and even some sort of anti-login protection.
- Alert yourself of logins: Set up alerts for suspicious login attempts to detect potential brute-force attacks.
- Regular Backup: In case something goes wrong, you can easily reconstitute your site by always keeping a backup of your data and content.
Conclusion
Knowing how to scan vulnerabilities on WordPress using VirtualBox will empower you to protect your site proactively.
VirtualBox lets you know how to create a safe environment for experimenting or scanning for vulnerabilities, which will keep your live site secure. Scanning on VirtualBox isolates scans, so you can try things and troubleshoot without danger.
From installing a VirtualBox environment to running WPScan, Nikto, or Burp Suite, this guide should give you everything you need to ensure you haven’t missed anything when it comes to all-inclusive WordPress security testing.
Take time to set up your VirtualBox environment, install these tools, and run your scans on a regular basis. These steps will keep your WordPress site safe and reliable, avoiding most known security pitfalls.
FAQs
Why use VirtualBox instead of scanning on my live WordPress site?
VirtualBox provides a safe, isolated testing environment, protecting your live site from risks and unintended changes.
Which OS works best for scanning vulnerabilities in VirtualBox?
Ubuntu (Linux) is recommended for compatibility with security tools and ease of setup.
Is WPScan free, and does it cover all WordPress vulnerabilities?
WPScan is free with limited features; a free API key unlocks more. Combine it with other tools for full coverage.
How often should I scan my WordPress site?
Every 1-2 weeks or after major updates to WordPress, themes, or plugins.
What should I do if I find a vulnerability?
Update affected plugins/themes, enforce strong passwords, adjust file permissions, and run another scan to confirm fixes.

Abhijit Sarkar
Hi, I’m Abhijit Sarkar. I am deeply passionate about creating engaging content and exploring. My journey includes gaining valuable experience in content writing and creating useful resources for my readers.

Leave a Reply