How to Install or Update CodeCanyon WordPress Plugins: Step-by-Step Guide

So, you’ve gone and bought a premium plugin from CodeCanyon—nice! You’ve got the plugin and are feeling excited, but you’ve hit a wall when trying to figure out how to install or update CodeCanyon WordPress plugins without crashing your site or losing data.
This is a common pain point. Unlike free plugins from the WordPress repository, CodeCanyon plugins do not typically allow for a one-click install or automatic updates. If you are only semi-diligent, then you may miss an update and end up with a plugin that is incompatible, buggy, or worse, a security risk.
This is why we have created this guide, to help you install and update CodeCanyon WordPress plugins the right way, whether it is manual updates or automating the whole process! This guide will walk you through every step, from downloading the file to establishing auto-updates via the Envato Market plugin.
How to Install CodeCanyon WordPress Plugins (Step-by-Step)
When you install a plugin from CodeCanyon, the process isn’t quite as plug-and-play as installing a plugin from the WordPress plugin repository—but it is still easy once you know how to do it. Below is a short guide to help you manually install CodeCanyon WordPress plugins, step-by-step, without too many problems.
Step 1: Download the Right Plugin File
After you purchase the plugin:
- Log in to your CodeCanyon account.
- Click your profile avatar > Downloads.
- Find the plugin and click the dropdown next to Download.
- Select “Installable WordPress file only” — this will be the ZIP file that you will upload.
💡 Do NOT click on “All files & documentation” in the download unless instructed to do so by the developer. That ZIP file contains extras you do not need, and these might break your upload.
Step 2: Upload the Plugin to WordPress
Now that you have downloaded the right ZIP file:
- Log in to your WordPress dashboard.
- Go to Plugins > Add New > Upload Plugin.

- Click Choose File, select your ZIP file from above and hit Install Now.
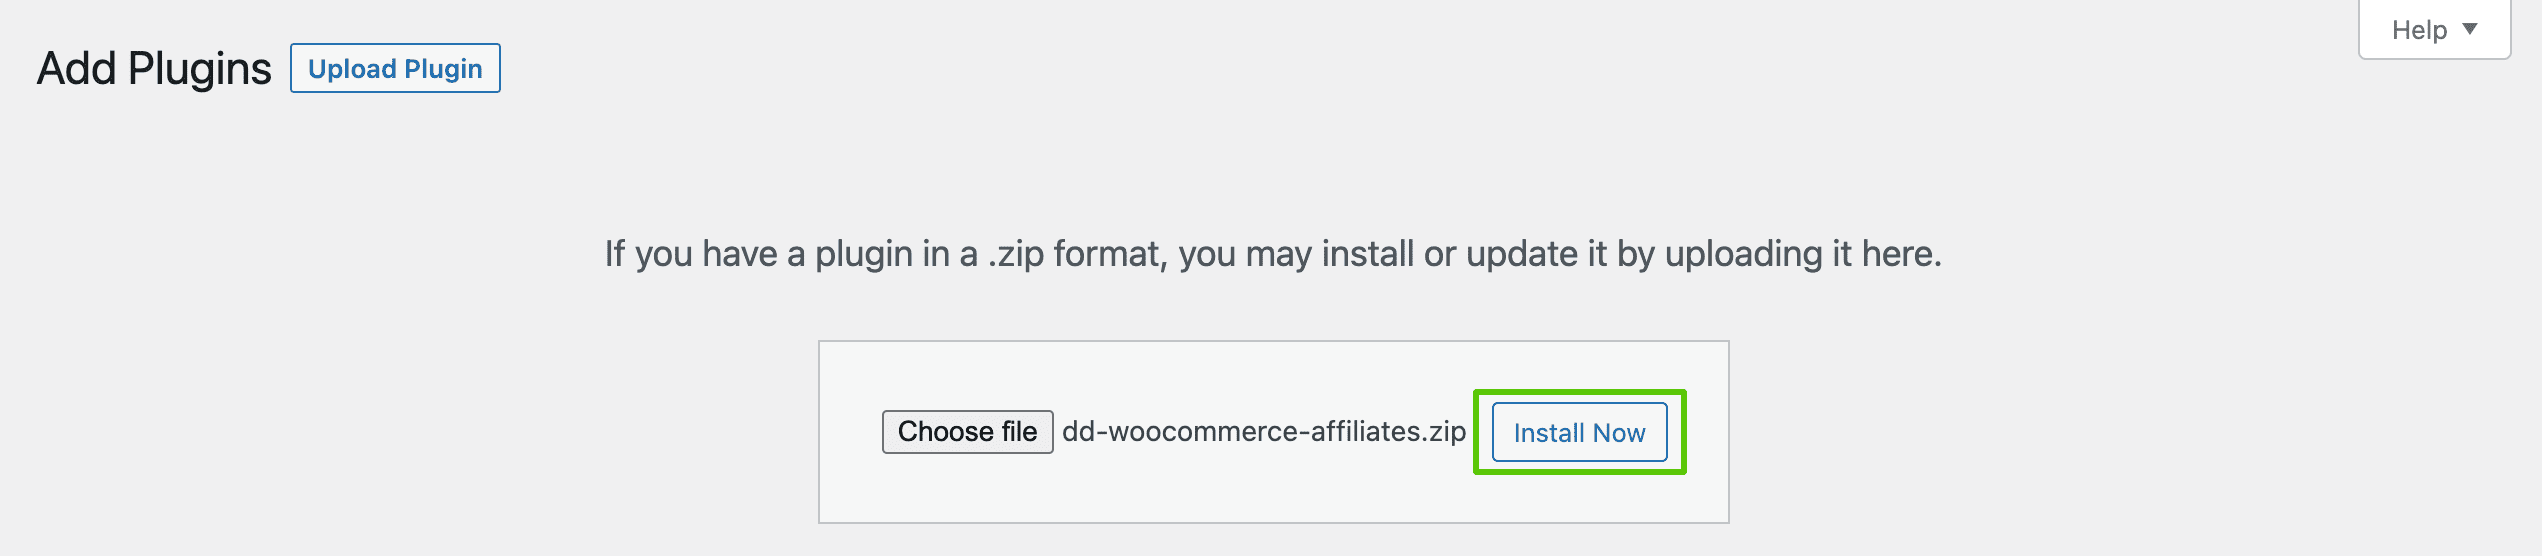
- After the install is done, click Activate Plugin.

Just like that—your premium CodeCanyon WordPress plugin is ready to go!
How to Manually Update CodeCanyon WordPress Plugins
Keeping your CodeCanyon WordPress plugins up-to-date is very important. Outdated plugins can impact the compatibility of your site, slow it down, and lead to security vulnerabilities.
However, CodeCanyon plugins are not like free plugins; they do not always provide an update icon from your WordPress dashboard, and you need to update them manually or automate them (this is what I will talk about in the next subsection, so stay tuned).
In essence, here is how you should manually update a CodeCanyon plugin:
- Backup Your Website: Use UpdraftPlus or from your hosting panel. This is not up for debate; you need to back up your website, especially when running a live site.
- Download the latest version from CodeCanyon:
- Go to your Downloads page.
- Click Download > Installable WordPress file only
- Deactivate the plugin that you will be updating from your WordPress dashboard.
- Go to Plugins > Installed Plugins
- Click Deactivate next to the plugin.
- Delete the Older Version: Don’t worry, most CodeCanyon plugins store their settings and data in the database, where they belong.
- Upload the new version
- Once again, go to Plugins > Add New > Upload Plugin.
- Select the new ZIP file and click Install Now.
- Once installed, click Activate Plugin.
Pro Tip: Before you update to a newer version, scan the plugin’s changelog at CodeCanyon or within the ZIP file. It gives you a heads-up on any new features they have added, any bug fixes, or if there may be changes to how certain functionality works.
How to Automatically Update CodeCanyon WordPress Plugins
To be frank, it’s tedious to manually update plugins every time there is a new version, especially when you have a lot of sites to manage. The good news is that you can get your CodeCanyon WordPress plugins to automatically update, so you will never miss a security patch or feature update again.
The Envato Market plugin is the official WordPress plugin provided by Envato specifically for WordPress users to manage and update their CodeCanyon and ThemeForest purchases.
The following are the steps you will need to complete to enable automatic updates for your CodeCanyon plugin(s):
- Download the plugin from Envato Market GitHub.
- Log in to your WordPress dashboard and navigate to Plugins > Add New > Upload Plugin.
- Upload the ZIP file, install, and activate it.
- In your sidebar, you should see Envato Market.
- Take the link provided and generate a Personal Token using your Envato account.
- Paste the token in the Envato Market plugin settings and save.
Please note that these token permissions should include:
- View and search Envato sites
- Download your purchased items
- List purchases
Once this has been accomplished, your CodeCanyon plugins will automatically indicate (and update, if available) inside your WordPress dashboard!
Final Takeaways: Taking Control of Your CodeCanyon Plugins
Managing the WordPress plugins you obtain from CodeCanyon shouldn’t feel overwhelming or problematic. With a little know-how, installing and updating premium plugins is easy, and you’ll never worry about breaking your site or losing out on fantastic features.
Here’s what you’ve learned:
- To install a CodeCanyon plugin, download the appropriate ZIP file to your computer and upload it through your WordPress dashboard.
- For manual updates simply deactivate, delete the previous version, and upload the latest version from your CodeCanyon account.
- You can configure automatic plugin updates with the official Envato Market plugin or license activation procedure within the plugin itself.
Taking the time to put plugin management in place now (10-15 minutes) is exponentially more beneficial than the time you would waste running around in circles trying to make upgrades in the future (AND the potential security risks).
💬 Did you feel stuck, or have a favourite tool for managing premium plugin auto-updates? Please leave a comment or contact us so we can add your tip to our next update!
Yash Kapoor
Yash Kapoor is the founder and lead developer at DevDiggers, where he builds WooCommerce plugins for loyalty programs, point-of-sale systems, digital wallets, and affiliate management. He writes about developer tools, site performance, and the technical side of running a WordPress store, drawing on years of building and maintaining production plugin codebases.
Join thousands of readers getting smarter every week.
Leave a Reply