How to Convert Sketch Design to WordPress Website (Complete Guide)


Converting a Sketch design to a WordPress website means transforming your static, UI mockups into a fully functional, live WordPress site: complete with proper theme files, responsive layouts, and working functionality. It’s one of the most common challenges in the workflow, from design to development and getting it right can save you weeks of rework.
Having built 25+ WooCommerce plugins and worked with store owners and development teams across dozens of industries, we’ve seen this process go smoothly, and we’ve seen it go badly. The difference almost always comes down to preparation and method selection, not coding ability.
Most guides start by listing your options. Here’s the thing: that’s only half the picture. The harder questions are how to set your Sketch file up correctly before you start, which conversion path actually fits your skill level, and what happens after you go live.
In this guide, you’ll learn exactly how to convert your Sketch design to a WordPress website, including the full manual process, a decision guide for choosing the right method, and a dedicated section on considerations specifically for WooCommerce that no other guide covers.
What Does It Mean to Convert a Sketch Design to WordPress?
Sketch is based on macOS, and it is a vector design tool built for UI and UX designers. It’s been a go-to for web and app design since around 2013, and it’s still widely used for producing pixel-perfect mockups, design systems, and interactive prototypes.
WordPress powers 42.2% of all websites on the internet, making it the natural destination for most web design projects. So the demand to bridge the two platforms is real and constant.
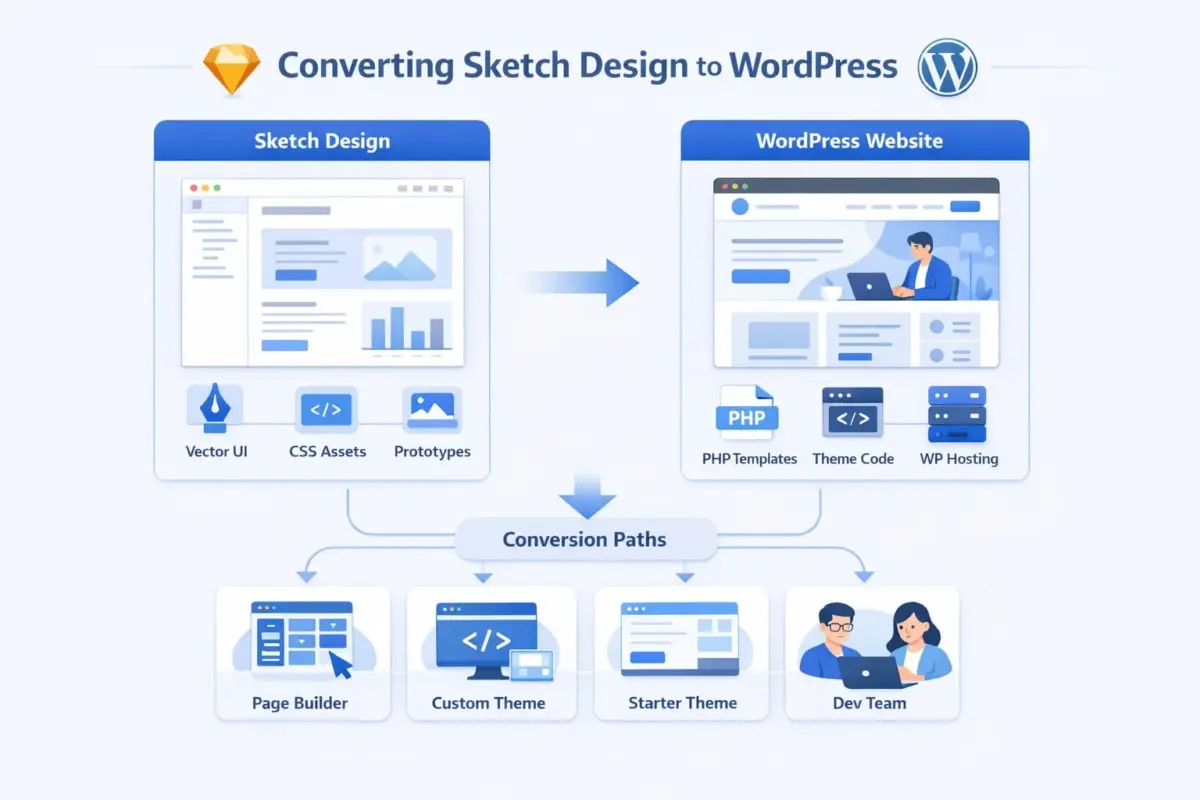
The challenge is that Sketch and WordPress don’t speak the same language. Sketch produces visual assets and CSS values. WordPress needs PHP template files, properly registered styles, scripts, and a functioning theme structure. There is no one-click conversion tool that reliably bridges that gap at a professional level.
What “converting” actually means in practice is one of the following: recreating the design inside a WordPress page builder, writing a custom WordPress theme based on the design, adapting a starter theme to match the Sketch file, or handing the Sketch file to a development team that handles the build. Each path has real trade-offs. We’ll cover all of them.
Prepare Your Sketch File Before You Start
This is the step most guides skip entirely, and it’s the one that causes the most friction later. A poorly organised Sketch file turns what should be a clean handoff into a guessing game for whoever builds the site.
Organise Layers and Name Them Logically
Every layer in Sketch should have a clear, human-readable name before you hand off the file. Names like “Rectangle 47” or “Group 12” tell a developer nothing. Names like “Hero / Background Image” or “Nav / Primary Link” communicate exactly what each element is and where it belongs in the page structure.
Group layers by section: header, hero, about, features, footer. Use Sketch’s nested grouping to mirror how the page will actually be structured in HTML. This makes it far easier to identify which assets need exporting and which are purely decorative references.
Use Symbols for Reusable Components
If your design has repeating elements — buttons, cards, navigation items, form fields — these should be built as Sketch Symbols rather than duplicated layers. Symbols work like components. They ensure visual consistency across artboards and, more practically, they signal to the developer which elements should become reusable WordPress template parts or Gutenberg blocks.
If you’re building a WooCommerce store, every product card, add-to-cart button, and price display should be a Symbol. This discipline in Sketch translates directly into cleaner code on the WordPress side.
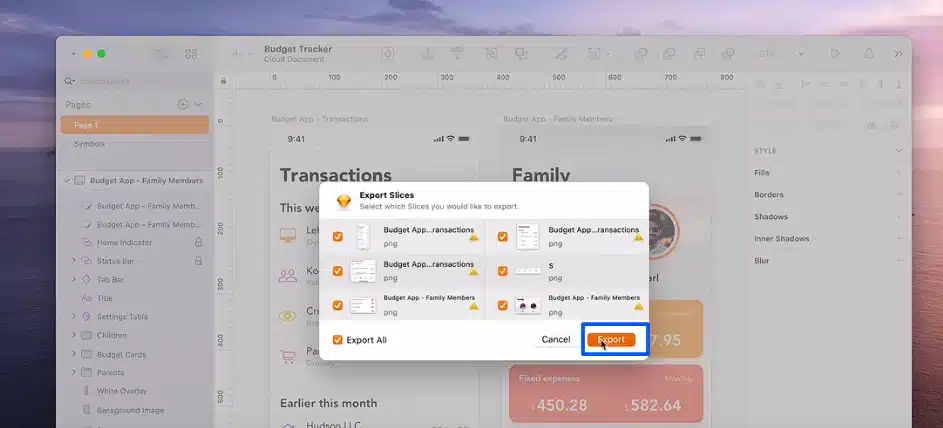
Export Assets Correctly
Sketch lets you mark layers for export and choose the format before you slice anything. For web use, follow this approach:
- SVG for icons, logos, and simple illustrations. SVGs scale without quality loss and keep file sizes small.
- WebP or PNG for photography and complex images. WebP is now supported across all modern browsers and typically cuts file size by 25 to 35% compared to PNG.
- 2x resolution for any raster assets used on high-DPI screens.
Go to File > Export in Sketch and export everything you need in a single pass before starting the WordPress build. Organise exported assets into folders that match your page sections. This keeps the build clean from day one.
4 Methods to Convert Sketch Design to a WordPress Website
Now that your file is ready, you need to choose your conversion path. Here’s an honest look at each option.
Method 1: Use a Page Builder (Elementor or Beaver Builder)
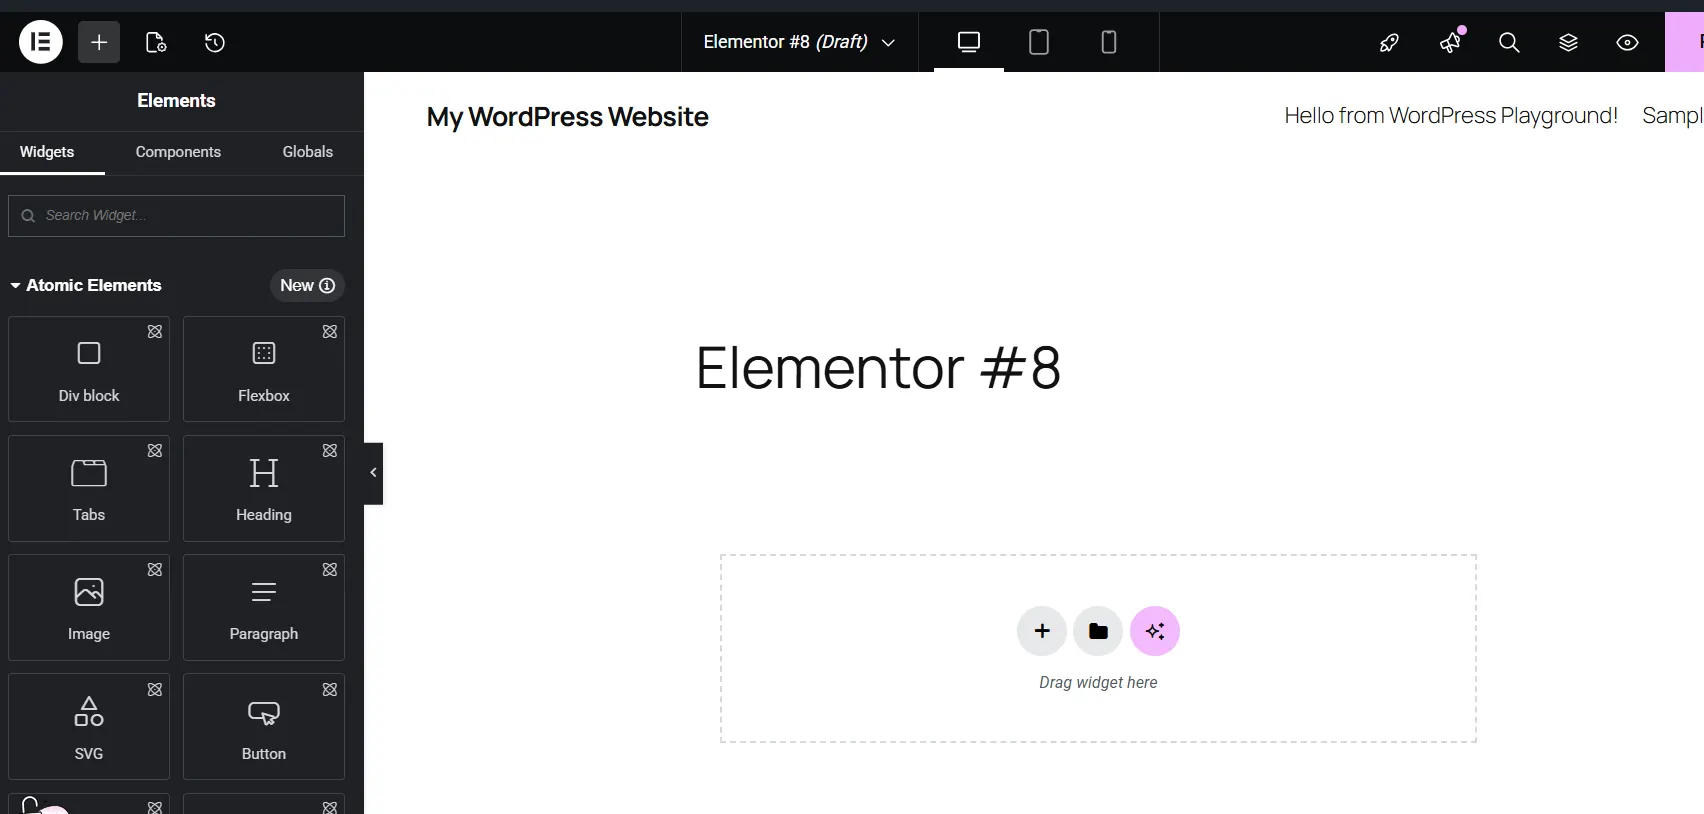
Page builders are drag-and-drop WordPress plugins that let you build pages visually without writing code. Elementor is the most widely used, with Beaver Builder and Divi also common choices.
The process is straightforward: you import your exported Sketch assets into WordPress, then recreate the design inside the page builder’s visual interface. You’re not converting the Sketch file directly. You’re using it as a reference and rebuilding the layout block by block.
What works well: Low barrier to entry. You can produce a solid result without knowing PHP. Most page builders have global style settings for typography and colours, which makes maintaining brand consistency manageable.
What doesn’t: Pixel-perfect accuracy is hard to achieve without at least some custom CSS. Page builder output tends to be heavier than hand-coded themes, which can affect performance. If you’re running a WooCommerce store, choosing one of the fastest WooCommerce themes as your base theme before adding a page builder will help offset any speed impact.
Method 2: Build a Custom WordPress Theme from Scratch
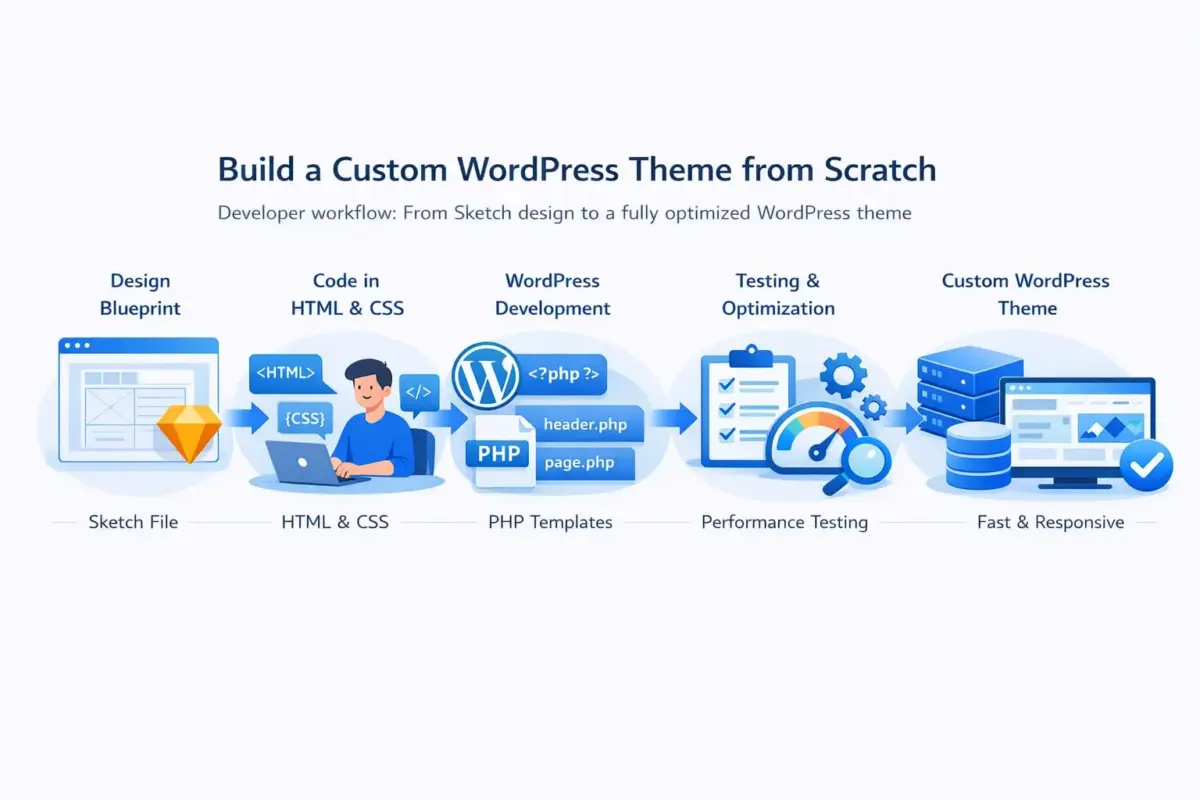
This is the developer path. You use the Sketch file as a blueprint, write the HTML and CSS manually, then convert that into a proper WordPress theme with PHP template files.
The output is clean, lean, and fully under your control. You’re not dependent on a plugin’s output. Performance, responsiveness, and code quality are all in your hands. This is the right choice for complex projects, ecommerce builds, or any site where performance matters.
The trade-off is time and skill. You need working knowledge of PHP, WordPress hooks and template hierarchy, and enough CSS to reproduce the design faithfully. If you’re building for a client, this method also requires more thorough testing time before handoff.
Method 3: Use a Starter Theme (Underscores or Sage)
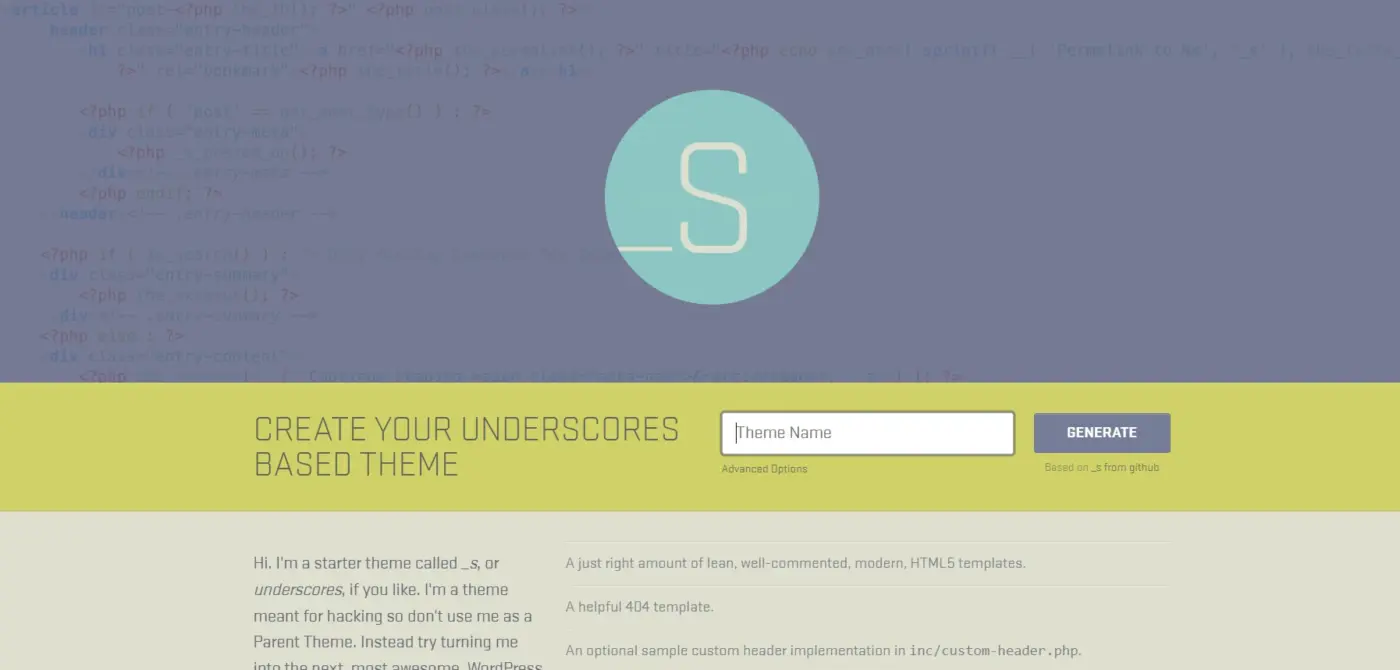
A starter theme gives you the WordPress theme scaffolding without the design opinions. Underscores (_s) is the most popular, maintained by Automattic. Sage by Roots is a more modern option with Blade templating and Tailwind support built in.
You get the correct file structure (index.php, header.php, footer.php, functions.php, and all the rest) without writing it from scratch. Your job is to apply the Sketch design on top of that structure using CSS and PHP.
This sits between the full custom build and the page builder approach. It’s faster than building from zero, but it still requires real development skills. For developers who want to move quickly without compromising on quality, this is often the most efficient path.
Method 4: Hire a WordPress Development Team
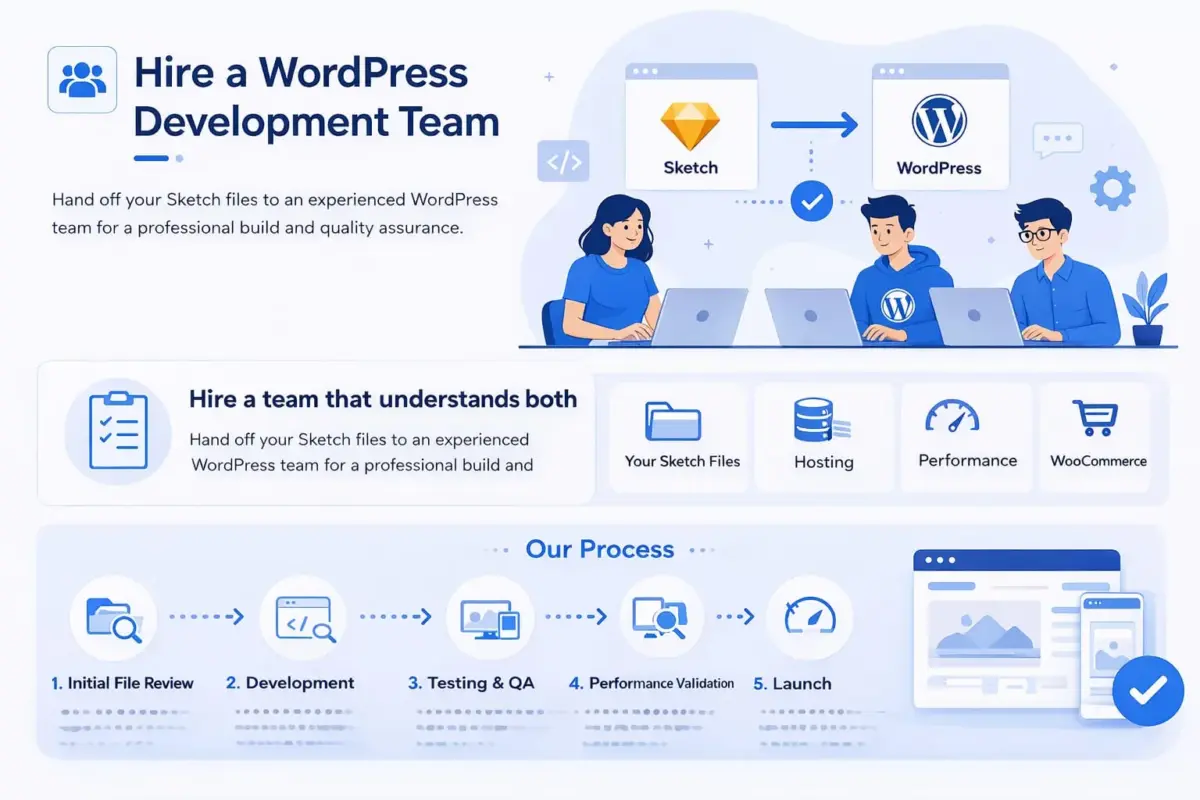
For non-technical business owners or agencies handling high-volume client work, handing off the Sketch file to an experienced WordPress development team is often the most practical choice. You get a professional build, responsive implementation, and someone accountable for quality assurance.
The key is choosing a team that understands both Sketch as a handoff format and WordPress as a development platform. They should ask questions about your Sketch file organisation, your hosting environment, your performance targets, and whether WooCommerce is involved. If they don’t ask those questions, that’s a signal worth paying attention to.
Our WordPress development services cover exactly this kind of Sketch-to-WordPress conversion work, from initial file review through to a tested, performance-validated live site.
Which Method Is Right for You?
This is the question most guides leave you to answer on your own. Here’s a direct breakdown based on who you are and what you’re building.
- No coding skills, personal or small business project: Use a page builder. Elementor, with a clean base theme, will get you live. Accept that some fine-tuning with CSS may be needed for the final 10% of visual accuracy.
- Developer building a client site or complex project: Build a custom theme or use a starter theme. Underscores are the right starting point if you want simplicity. Sage is right if you want a modern development workflow with asset bundling and templating.
- Agency or freelancer handling multiple client projects: Starter themes with a defined development process are the most scalable path. Invest time upfront in a reusable base theme that your team can apply consistently across projects.
- Non-technical business owner with a budget: Hire a development team. The cost of a professional build pays for itself in time saved, errors avoided, and the ability to launch with confidence. Be specific in your brief: share the Sketch file, specify your hosting environment, and state clearly whether WooCommerce is part of the build.
- WooCommerce store owner: Regardless of skill level, factor in the additional template complexity that WooCommerce requires. We cover this in detail in the section below.
The Step-by-Step Conversion Process (Manual Method)
This section walks through the full manual process: from Sketch export to a live WordPress theme. If you’re using a page builder, skim this for context. If you’re building a custom theme, follow each step.
Step 1: Export Sketch Assets
With your file organised and layers named, run your exports as described in the preparation section. Before you export, cross-check every artboard against the following list:
- Is every font used in the design available as a web font (Google Fonts or a self-hosted option)?
- Are all colours noted as HEX or HSL values in a style guide or Sketch colour palette?
- Are breakpoints defined for desktop, tablet, and mobile?
Export into a clean project folder. Name subfolders by section: /assets/images/hero/, /assets/icons/, /assets/fonts/. This structure will map directly into your WordPress theme’s /assets/ directory.
Step 2: Write the HTML and CSS
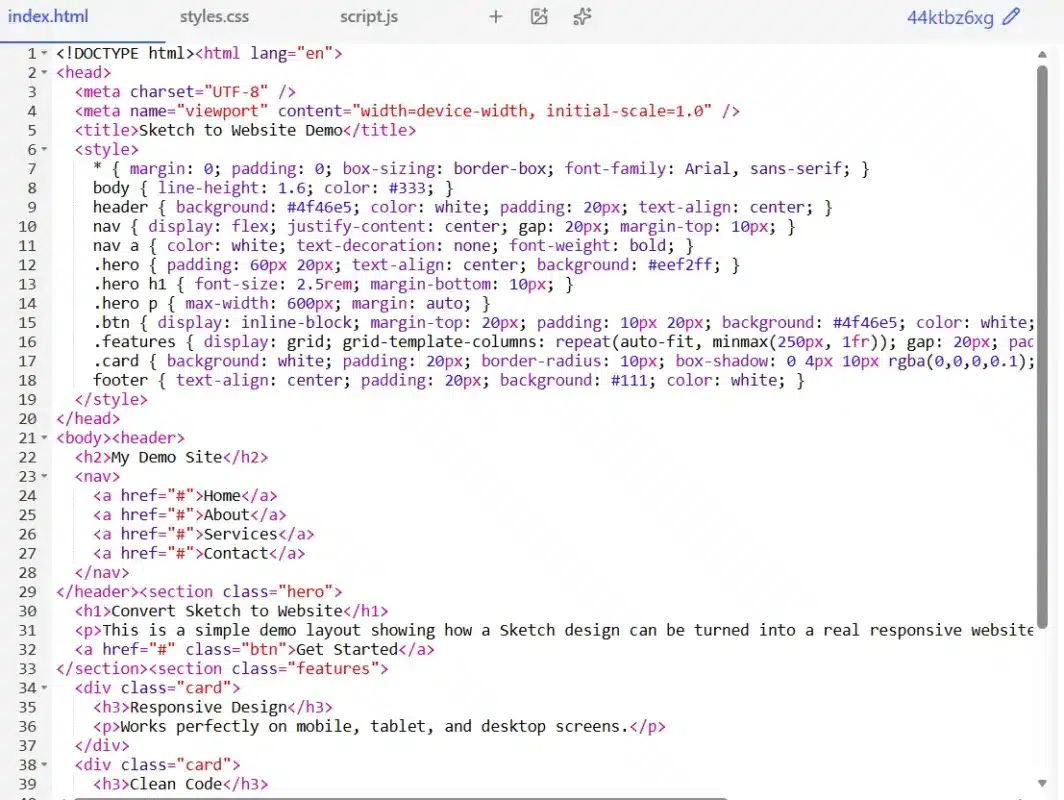
Build a static HTML prototype of the design first. This is faster to iterate than working directly in WordPress and lets you spot layout issues before they become theme development problems.
Write semantic HTML. Use <header>, <main>, <section>, <footer>, and <nav> elements correctly. Search engines and screen readers both benefit from this, and WordPress’s template system maps naturally onto these structures.
For CSS, write mobile-first styles. Start with the smallest breakpoint and use min-width media queries to scale up. This is the approach official WordPress responsive design guidance recommends, and it aligns well with how Gutenberg and most themes handle layout.
Sketch exports CSS property values for individual layers. Use these as a reference, not as production-ready code. The values are often absolute (fixed px widths, non-relative font-size) and need to be adapted to fluid, responsive units (%, em, rem, clamp()).
Step 3: Convert HTML to WordPress Theme Files
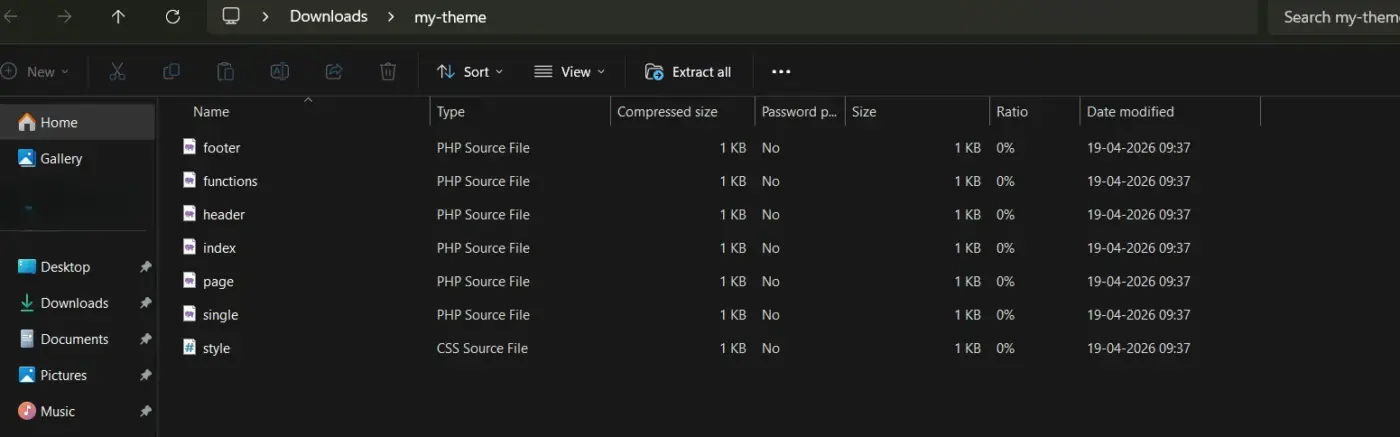
This is where your static prototype becomes a real WordPress theme. At a minimum, a functioning WordPress theme needs these files:
style.css— Theme declaration header and base stylesindex.php— The fallback templateheader.php— Site-wide header markupfooter.php— Site-wide footer markupfunctions.php— Enqueue styles and scripts, register menus, and add theme supportpage.php— Default page templatesingle.php— Single post template
Refer to the WordPress Theme Development Handbook for the complete template hierarchy. Understanding which template file WordPress loads for each URL type is essential for getting the right output on every page.
The basic pattern is: take your static HTML, split it at the appropriate points, and paste each section into the matching .php file, and replace hardcoded content with WordPress template tags like get_header(), the_title(), the_content(), and the_permalink().
In functions.php, enqueue your stylesheets and scripts using wp_enqueue_style() and wp_enqueue_scripts(). Never link CSS or JavaScript directly in your HTML files. WordPress has a dependency management system, and bypassing it causes conflicts.
Step 4: Test for Responsiveness and Cross-Browser Compatibility
Before launching, run through this testing checklist:
- Open the site in Chrome, Firefox, Safari, and Edge. Check layout, typography, and spacing in each.
- Use Chrome DevTools to simulate mobile and tablet viewports. Test at 375px (iPhone SE), 768px (tablet), and 1280px (standard desktop).
- Run a Google PageSpeed Insights test. A custom theme built from a Sketch design should achieve Core Web Vitals scores well above a bloated theme. If it doesn’t, check for unoptimised images and render-blocking scripts.
- Check all links, forms, and interactive elements work as expected.
WooCommerce Considerations for Your Sketch to WordPress Conversion

Here’s where most guides leave you without the information you actually need. If your WordPress site runs WooCommerce, the conversion process involves more than a standard page build. You need to design and develop additional template files that WooCommerce controls.
Having built 25+ WooCommerce plugins and worked with store owners across a wide range of industries, we know firsthand how often WooCommerce-specific templates get overlooked during the Sketch design phase. The result is a beautiful homepage and a mismatched shop page, because nobody designed the WooCommerce templates to match.
Before you start the WordPress build, make sure your Sketch file includes separate artboards for:
- Shop/archive page: product grid layout, filter sidebar position, pagination style
- Single product page: gallery layout, add-to-cart section, tabs (description, reviews), related products
- Cart page: item list, coupon field, order summary
- Checkout page: billing and shipping fields, payment section, order summary
- My Account page: dashboard, orders, address, account details
WooCommerce uses its own template hierarchy, separate from the standard WordPress template system. To override the default WooCommerce templates in your custom theme, you copy the template files from the WooCommerce plugin directory into a /woocommerce/ subfolder inside your theme. Once a template file exists there, WordPress and WooCommerce use your version instead of the plugin’s default.
Check the WooCommerce template structure documentation before starting your build. Understanding which files control which pages saves a lot of debugging time later.
For setting up WooCommerce on your WordPress site after your theme is built, the setup process is well-documented and straightforward. What takes time is making the WooCommerce output match your Sketch design. That’s where custom template files and targeted CSS come in.
If your Sketch design includes a heavily customised product page, you’ll also want to spend time on designing your WooCommerce product pages to make sure every visual element (gallery, pricing, CTAs) is implemented correctly and not just approximated with CSS overrides.
For stores with complex requirements, our WooCommerce development services include full Sketch-to-WooCommerce builds, handling both theme development and plugin integration from a single team that understands both layers.
Common Mistakes to Avoid When Converting Sketch to WordPress
A few issues come up repeatedly in real projects. Most are avoidable with a little foresight.
- Relying Too Much on Automated Conversion Tools: Tools like Anima App can export Sketch designs to HTML. They’re useful for prototyping and for small personal projects. They’re not suitable for production WordPress sites, and they’re not suited for anything involving WooCommerce. The HTML output is often absolutely positioned, non-responsive, and structurally wrong for WordPress’s template system. If you use one, treat the output as a starting point to inspect CSS values and asset references, not as code you’d publish.
- Skipping the Responsive Design Work: Sketch designs are built at fixed widths, usually 1440px for desktop and 375px for mobile. The gap between those two artboards is where most visual problems live. Tablet layouts, mid-range breakpoints, and fluid content areas need actual CSS work. You can’t just scale a desktop design down and call it ready for mobile. Following guidance around matching breakpoints to your design rather than fixed device sizes helps you build breakpoints that respond to the actual content, which is more reliable long-term than targeting specific screen dimensions.
- Treating Sketch’s Exported CSS as Ready for Production: Sketch’s “Copy CSS Attributes” feature is a time saver for getting accurate values for colours, spacing, and typography. It’s not production CSS. The output uses absolute units, ignores inheritance, and often includes redundant properties. Use it as a reference, rewrite it in context.
- Not Testing on Real Devices: Browser dev tools simulate screen sizes. They don’t simulate real device performance, touch interaction, or system font rendering. Before you launch, test on at least one real iOS device and one Android device. This applies doubly if the site includes WooCommerce, where checkout and cart interactions need to work correctly on touch screens.
Conclusion
Converting a Sketch design to a WordPress website is a multi-step process, but it’s completely manageable when you approach it in the right order. Start with a well-organised Sketch file. Choose the conversion method that matches your skill level and project complexity. Follow the theme development process carefully, and don’t skip the testing phase.
If your site runs WooCommerce, give the store template files the same attention you’d give any other page. Most problems in Sketch-to-WooCommerce builds come from leaving WooCommerce templates on the default output and trying to patch them with CSS after the fact. Planning them properly in Sketch first makes the build far cleaner.
If you want experienced hands on a Sketch-to-WordPress project, our WordPress development services are built for exactly this kind of work. Feel free to share your Sketch file with our team for an initial review.
Frequently Asked Questions
Q1. Can I convert a Sketch design to WordPress without coding?
Yes. Using a page builder like Elementor, you can recreate your Sketch design in WordPress without writing PHP. You’ll import your exported Sketch assets into the media library and rebuild the layout visually. Some CSS knowledge helps with spacing and typography, but it’s not required to get a solid result.
Q2. How long does it take to convert a Sketch design to a WordPress website?
It depends heavily on the method and the complexity of the design. A simple landing page built with a page builder might take one to two days. A full custom WordPress theme built from scratch for a site of multiple pages typically takes one to three weeks. Adding WooCommerce to the scope adds time, especially if you need custom template files for the shop and product pages.
Q3. What is the difference between converting a Sketch design and a Figma design to WordPress?
The conversion process is essentially the same. Both tools produce vector designs with exportable assets and CSS property values. The main practical difference is that Figma has more robust collaboration features and better access based on browser. From a WordPress development standpoint, the output you’re working with — exported assets and CSS references — is nearly identical between the two.
Q4. Do I need a specific WordPress theme before starting the conversion?
If you’re using a page builder, yes. You need a lightweight base theme to run the page builder on top of. If you’re building a custom theme, no. Your Sketch design becomes the theme. If you’re using a starter theme, you start with a barebones framework ready for WooCommerce, like Underscores and apply your design to it.
Q5. Can I convert a Sketch design to a WooCommerce store?
Yes, but plan for it in Sketch before you start building. Create separate artboards for the shop page, single product page, cart, checkout, and My Account pages. WooCommerce controls these pages through its own template system, which requires separate PHP files in your theme to override. Designing these artboards in Sketch first means you’re building toward a clear target rather than retrofitting the design after the fact.
Ekta Lamba
Ekta Lamba is a tech writer at DevDiggers focused on making WordPress and WooCommerce straightforward for non-developers. She covers plugin errors, platform updates, and WordPress basics, written so readers can follow along without a second tab open to translate the jargon.
Join thousands of readers getting smarter every week.
Leave a Reply