How to Set Up WooCommerce on WordPress (Step-by-Step Guide)

Setting up WooCommerce on WordPress turns any existing WordPress site into a fully functional online store in under an hour.
At DevDiggers, we’ve built and configured WooCommerce stores across dozens of industries, and the setup process is far more straightforward than most beginner guides make it look. That said, there are a few steps most tutorials skip entirely, and skipping them is exactly why some stores go live with broken product URLs or a checkout that silently fails.
In this guide, you’ll learn how to install the WooCommerce plugin, run through the Setup Wizard, configure payments and shipping, add your first products, and cover everything you need to do before your store goes live.
What You Need Before Installing WooCommerce
Before you install anything, three things need to be in place. If any one of them is missing, WooCommerce will either fail to install, or your store will have problems from day one.
- WordPress Hosting and Domain: WooCommerce runs on WordPress, which runs on a web host. You need a hosting plan that supports PHP 7.4 or higher and MySQL 8.0 or MariaDB 10.6 or higher. Most shared hosting plans from providers like SiteGround, Cloudways, or Kinsta meet these requirements out of the box. Your domain name is the address customers use to find your store. If you don’t have one yet, most hosts let you register a domain as part of the signup process.
- A Working WordPress Installation: You need WordPress installed and accessible before WooCommerce can be added. Most hosts offer a one-click WordPress installer through their control panel. If yours doesn’t, follow the WordPress installation guide on WordPress.org. Once WordPress is installed, log in to your dashboard at
yourdomain.com/wp-admin. That’s where everything else in this guide happens. - SSL Certificate: WooCommerce handles payments. That means customer card data moves through your site. Without an SSL certificate, that data is unencrypted, and your checkout page will trigger browser security warnings.
Most hosts provide free SSL certificates through Let’s Encrypt. Check your hosting control panel for a one-click SSL option before you go any further. And once your store is live, run through our WooCommerce security checklist to make sure nothing else is exposed.
How to Install the WooCommerce Plugin on WordPress
WooCommerce is free and available directly from the WordPress plugin directory. There are two ways to install it.
Installing from the WordPress Plugin Directory
This is the standard method and takes about two minutes.
- Log in to your WordPress dashboard.
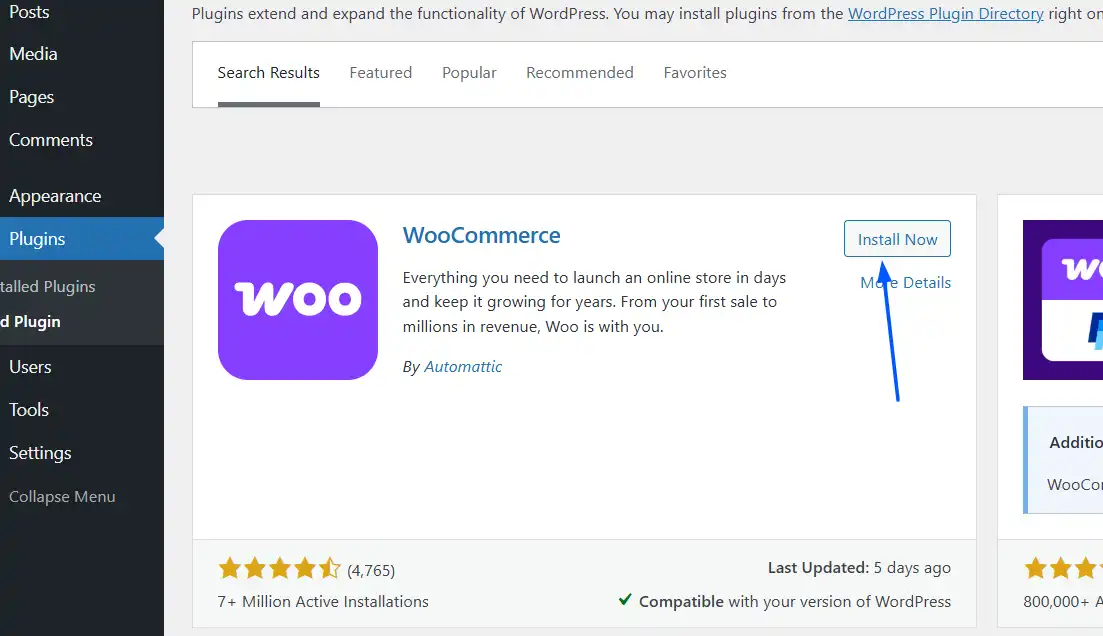
- Go to Plugins > Add Plugin in the left sidebar.

- In the search bar, type WooCommerce.

- Click Install Now next to the official WooCommerce plugin (developed by Automattic). Wait for the installation to finish, then click Activate.
After activation, WooCommerce will automatically launch the Setup Wizard. Don’t close it yet.
Installing via ZIP Upload (Alternative Method)
If you downloaded WooCommerce as a ZIP file from WordPress.org, you can install it manually.
- Go to Plugins > Add Plugin.
- Click the Upload Plugin at the top of the page.

- Click Choose File and select the WooCommerce ZIP file from your computer.
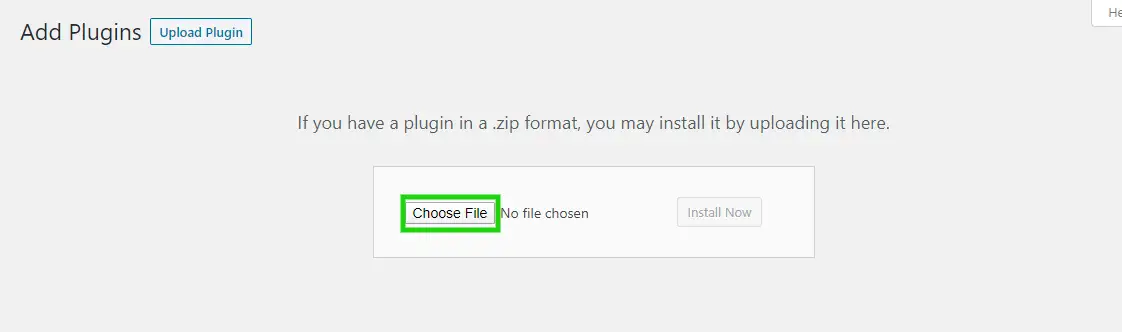
- Click Install Now, then Activate Plugin.
Both methods bring you to the same place. Once activated, the Setup Wizard opens automatically.
Running the WooCommerce Setup Wizard

The Setup Wizard is WooCommerce’s onboarding flow. It walks you through the basics so your store has a starting configuration. It’s worth completing rather than skipping, though it doesn’t cover everything you’ll need to configure later.
- Store Details and Currency: The first screen asks for your store address and currency. This matters for two reasons: WooCommerce uses your address to pre-configure tax settings, and your currency affects how prices display to customers. Set these correctly from the start. Changing your currency later can cause formatting issues across existing products.
- Industry and Product Type Selection: WooCommerce asks what industry you’re in and what type of products you plan to sell. This affects which recommended features it shows you next. If you’re selling physical goods, select Physical products. Selling downloadable files like ebooks or software? Select Downloads. You can sell both types from the same store.
What Happens If You Skip or Dismiss the Wizard

Here’s something no other guide tells you. If you close the wizard by accident or click away before finishing, you can get back to it.
- Go to WooCommerce in your dashboard sidebar.
- Click the Home menu.
- Set up your store.
You’ll be taken back to the wizard from wherever you left off. Worth knowing before you spend twenty minutes looking for it.
Configuring WooCommerce Store Settings
The Setup Wizard gives you a starting point. These settings give you the actual working configuration your store needs.
General Settings (Store Address, Currency, Tax Display)
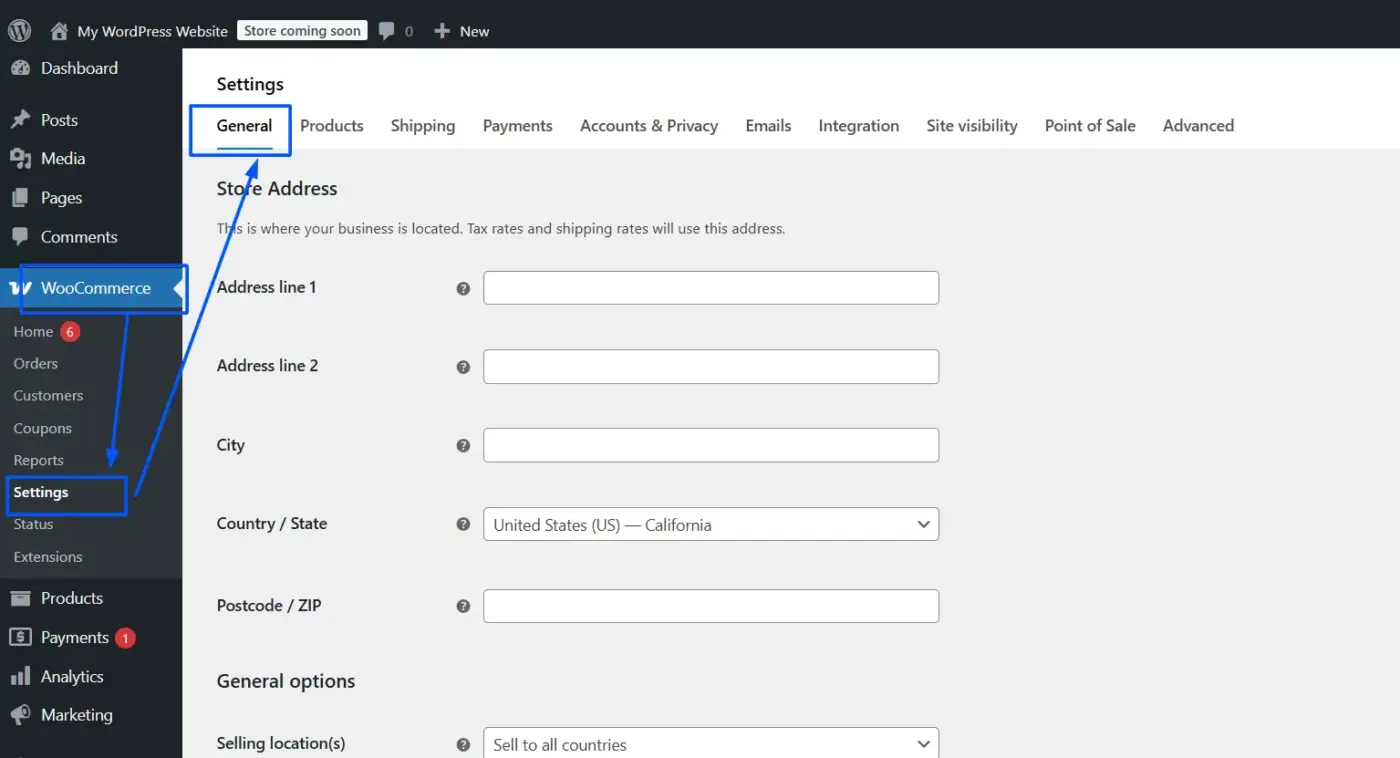
Go to WooCommerce > Settings > General. This screen controls your store’s base location, selling location (which countries you’ll ship to), currency, and how prices display.
A few things to set here:
- Selling location: If you only sell within your own country, restrict this. It simplifies shipping and tax configuration.
- Currency position: Decide whether the currency symbol appears before or after the number.
- Thousand and decimal separators: Match the convention your customers expect. US stores use a comma for thousands and a period for decimals. Many European stores use the reverse.
Save changes before moving to the next tab.
Setting Up WooCommerce Payment Gateways

Go to WooCommerce > Settings > Payments. This is where you connect the payment methods your customers will use at checkout.
WooCommerce includes a few options by default:
- WooPayments is WooCommerce’s own payment solution, built on Stripe’s infrastructure. It supports cards, Apple Pay, and Google Pay with no monthly fee, just transaction fees.
- Stripe is available as a free extension and handles most major cards and wallets.
- PayPal is supported natively and remains a popular choice, especially for stores with international customers.
- Bank transfer and Cash on Delivery are offline options, useful for local or wholesale stores.
Enable at least one card payment option and one offline fallback. Most store owners use WooPayments or Stripe as their primary gateway.
Once you enable a gateway, click its settings link to enter your account credentials. Each gateway has its own test mode. Leave test mode on for now. You’ll disable it after running a test order before launch.
WooCommerce Shipping Zones Setup
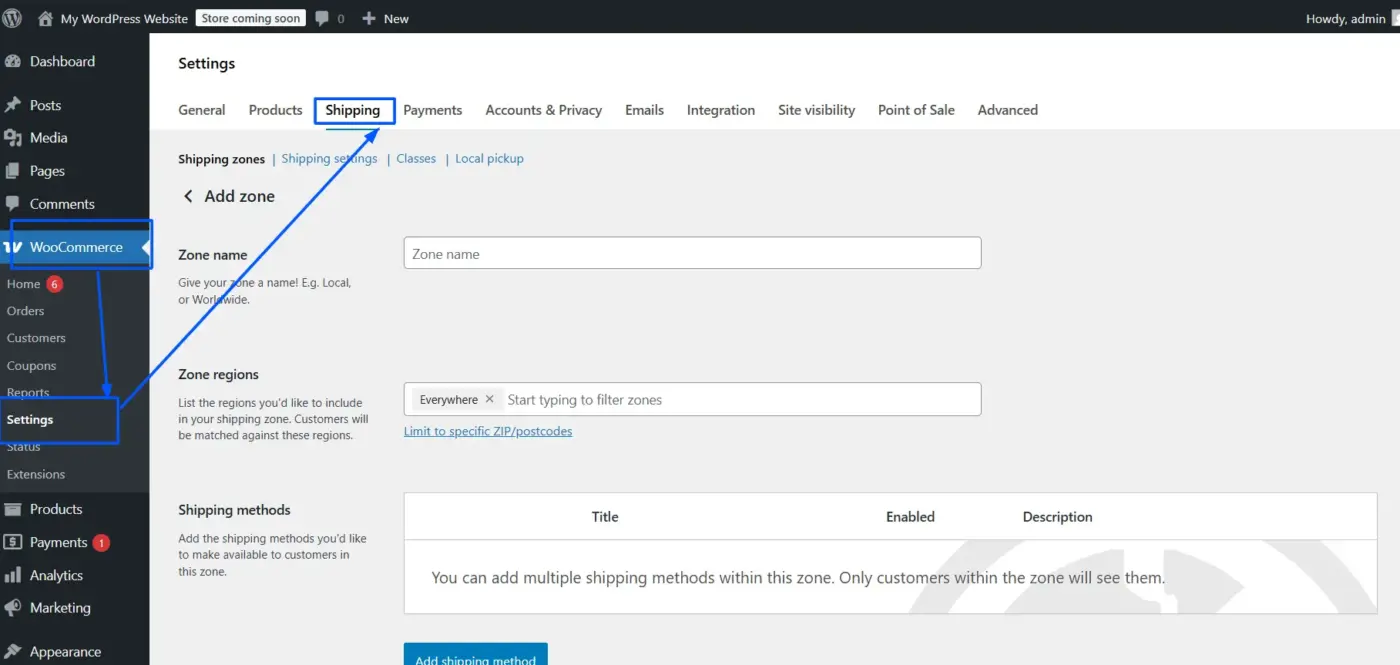
Go to WooCommerce > Settings > Shipping. Shipping zones let you define geographic areas and assign shipping methods to each one.
Here’s how to create your first shipping zone:
- Click Add shipping zone.
- Give the zone a name (for example: United States).
- Add the regions this zone covers using the country or state selector.
- Click Add shipping method and choose from: Flat rate, Free shipping, or Local pickup.
- Configure the method. For a flat rate, set a fixed cost. For free shipping, you can optionally set a minimum order amount.
Add a second zone for everywhere else if you ship internationally. Set its method to flat rate with a higher cost, or leave it empty if you don’t ship outside your primary zone.
If you want to offer free shipping to your store, then WooCommerce allows that, with options to specify the order value at which customers will be eligible for free shipping. When doing so, consider using a plugin to show a bar for the amount left for free shipping, indicating how much more customers need to add to their cart for free shipping. That plugin by WPFactory also comes with a free version if you want to test it before purchasing.
Tax Settings in WooCommerce
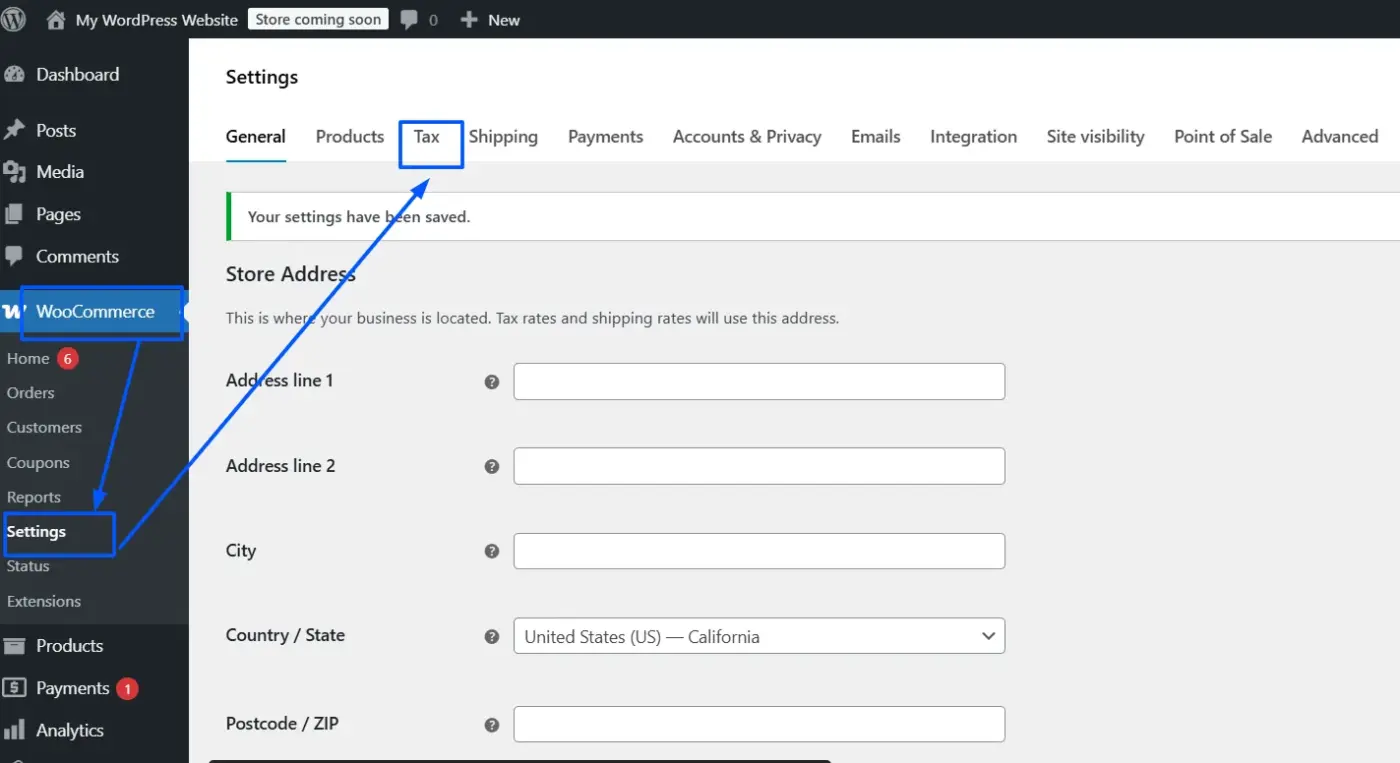
Go to WooCommerce > Settings > Tax. This tab only appears after you enable taxes in the General settings (look for the “Enable taxes” checkbox).
WooCommerce gives you two main options:
- Automated taxes via WooPayments: If you’re using WooPayments and have connected your WordPress.com account, WooCommerce can calculate taxes automatically based on customer location. This is the easiest option for most stores.
- Manual tax rates: Go to Tax > Standard rates and add your rates manually by country, state, and postcode.
Tax rules vary by country and product type. If you’re unsure what to charge, check with an accountant before enabling tax collection. Getting this wrong costs more than the time it takes to get it right.
Adding Your First Products in WooCommerce
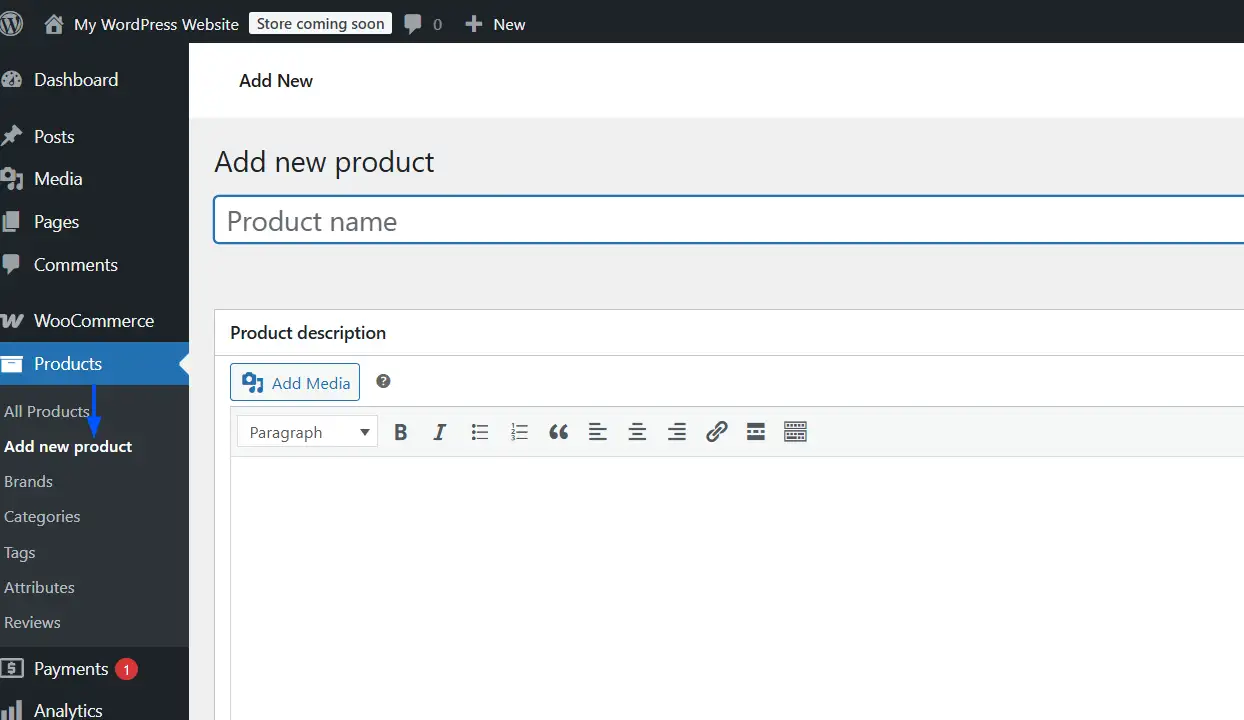
With settings configured, it’s time to add something to sell. Go to Products > Add New Product.
Simple Products vs Variable Products vs Downloadable Products
WooCommerce has several product types. The three you’ll use most often:
- Simple product: A single item with one price. Use this for most physical products where you don’t offer size or color variants.
- Variable product: A product with multiple options like size, color, or material. Each combination can have its own price, stock level, and SKU. More setup is involved, but necessary if your products come in variants.
- Downloadable product (virtual): A file the customer downloads after purchase. No shipping needed. Use this for ebooks, software, courses, or digital artwork.
Select your product type from the Product Data dropdown, then fill in the price, description, and stock information.
Product Images, Categories, and Tags
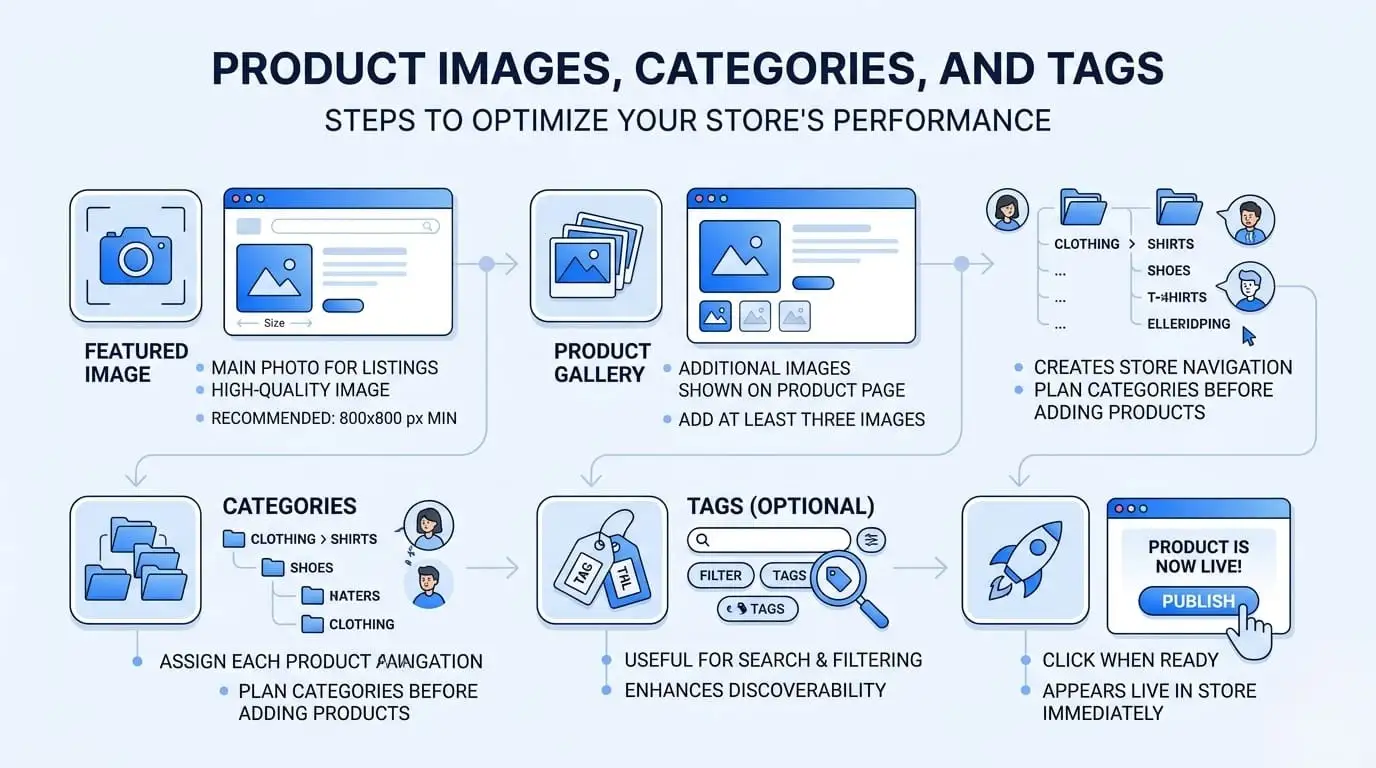
A few things here that affect how your store performs:
- Featured image: The main product photo shown in listings. Use a high-quality image, ideally at least 800×800 pixels.
- Product gallery: Additional images shown on the product page. Add at least three if you can.
- Categories: Assign each product to a category. This creates your store navigation structure. Plan your categories before adding products, not after.
- Tags: Optional, but useful for search and filtering.
Click Publish when the product is ready. It will appear live in your store immediately.
Choosing a WooCommerce Theme

Your theme controls how your store looks. Not every WordPress theme works well with WooCommerce. Some themes have custom WooCommerce templates that break the default layout or strip out important functionality.
Storefront is WooCommerce’s own free theme, built by Automattic. It’s a safe, reliable starting point. Astra and Kadence are popular lightweight alternatives with strong WooCommerce support.
If you want themes benchmarked for actual speed, our list of the fastest WooCommerce themes covers the top performers with real test data.
Install a theme from Appearance > Themes > Add Theme. After installing, click Customize to adjust colors, fonts, header, and layout.
What to Do Before Your Store Goes Live
This is the section most WooCommerce setup guides skip. It’s also the section that stops your store from launching with embarrassing problems.
Set Your Permalinks Correctly
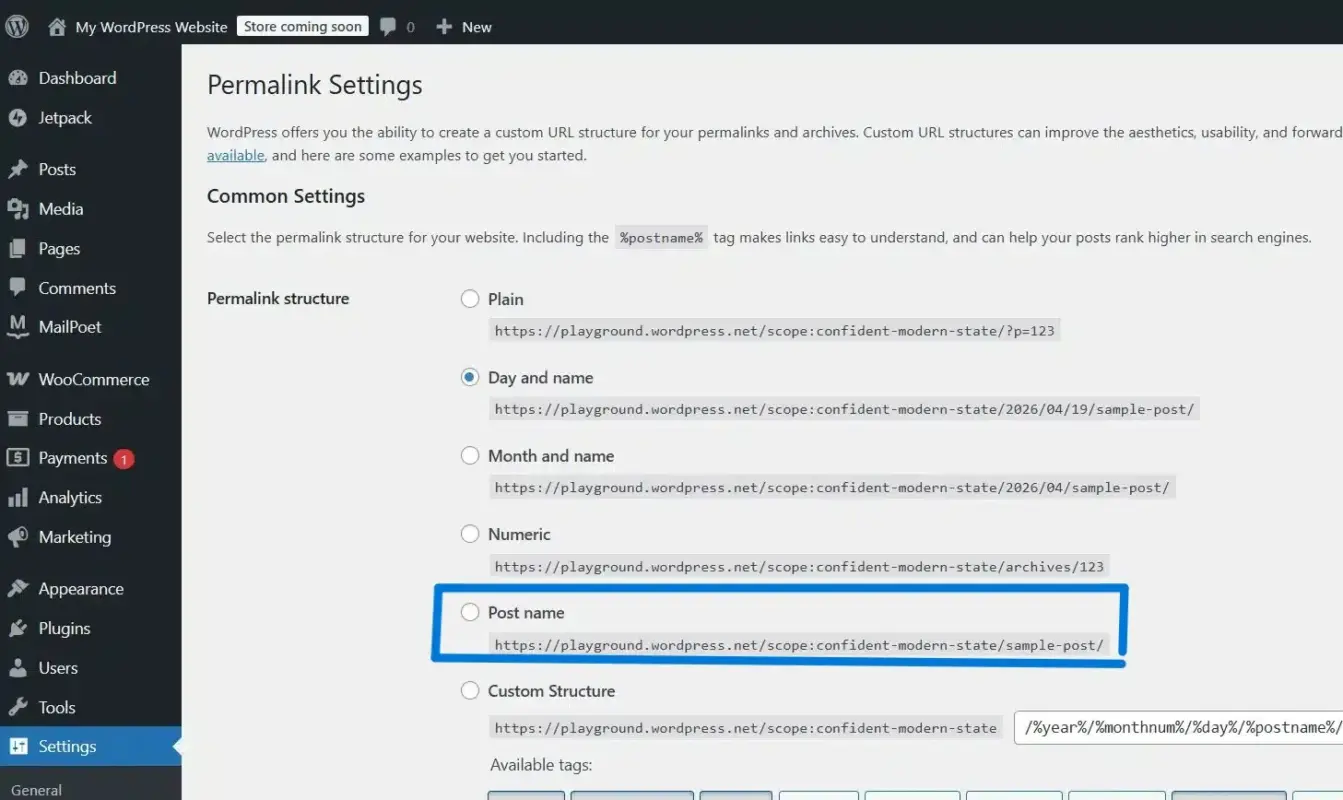
Go to Settings > Permalinks in your WordPress dashboard (not WooCommerce settings, the main WordPress settings). Make sure your permalink structure is set to Post name or any option other than Plain.
Here’s why this matters. WooCommerce creates URLs for your shop, product, and checkout pages based on your permalink structure. If permalinks are set to Plain, WooCommerce page URLs won’t work at all. Customers will hit a 404 error trying to visit your shop.
After changing this setting, click Save Changes even if nothing appears to have changed. WordPress flushes the rewrite rules on save. That step is what actually makes the fix stick.
This is one of the most common reasons a new WooCommerce store’s product pages don’t load. Most setup guides never mention it.
Enable HPOS for Better Performance

High-Performance Order Storage (HPOS) is WooCommerce’s modern order management system. It replaces the older post-based order storage with dedicated database tables, which makes order processing faster and more reliable, especially as your store grows.
New stores should enable it from the start. Go to WooCommerce > Settings > Advanced > Features and toggle High-Performance Order Storage to enabled.
Existing stores with large order volumes should test this on a staging site first. For a brand new store, just turn it on. For more details on speeding up your WooCommerce store beyond this single setting, we’ve covered the full picture separately.
Run a Test Order
Before your store goes live, place a test order yourself. This takes two minutes and tells you whether your entire checkout flow works end to end.
Here’s how:
- Enable test mode in your payment gateway settings.
- Add a product to your cart as a regular visitor.
- Go through checkout using the test card number provided by your gateway (Stripe’s is 4242 4242 4242 4242 with any future expiry).
- Complete the order.
- Check that you received the order confirmation email.
- Check that the order appears in WooCommerce > Orders in your dashboard.
- Disable test mode once everything checks out.
Many stores skip this. They find out a gateway credential is wrong or an email isn’t triggering the first time a real customer tries to buy something. Don’t be that store.
After Setup: Extending WooCommerce With Plugins
Out of the box, WooCommerce covers the fundamentals. As your store grows, you’ll want to add functionality: loyalty programs, affiliate systems, wallet-based store credit, POS for in-person sales, and more.
When choosing plugins, stick to well-maintained options from developers who actively support their work. Poorly maintained plugins are one of the top causes of WooCommerce stores slowing down or breaking after updates.
The WooCommerce SEO guide is a good next read once your store is set up. SEO is often an afterthought for new store owners, and it shouldn’t be.
If you want a store built to production standard from the start, our WooCommerce development services cover full store builds, custom plugin development, and performance optimization.
Conclusion
Setting up WooCommerce on WordPress is a process you can complete in a single session. Install the plugin, run the Setup Wizard, configure your payments and shipping, add your products, and pick a theme that works.
But the steps that separate a store that works from one that has problems at launch are the ones most guides skip: setting your permalinks, enabling HPOS, and running a test order before you open the doors.
Get those right, and your WooCommerce store will be ready to take real orders from day one.
Frequently Asked Questions
Q1. Is WooCommerce free to use on WordPress?
WooCommerce itself is a free, open-source plugin available from the WordPress plugin directory. You’ll need to pay for web hosting and a domain name, and some payment gateways charge transaction fees, but the core plugin costs nothing to install or use.
Q2. Do I need to know how to code to set up WooCommerce?
No. The Setup Wizard and dashboard settings handle everything a basic store needs without any coding. You’ll only need a developer if you want custom functionality, a heavily modified theme, or integrations that don’t exist as off-the-shelf plugins.
Q3. How long does it take to set up WooCommerce?
The core setup takes 30 to 60 minutes for a basic store. That includes installing the plugin, running the wizard, configuring payments and shipping, and adding a few products. A more complete store with multiple product categories, a polished theme, and all settings dialed in typically takes a few hours across a day or two.
Q4. Can I add WooCommerce to an existing WordPress site without breaking it?
Yes, and this is a common scenario. WooCommerce installs as a plugin and creates its own pages (Shop, Cart, Checkout, My Account) without changing your existing pages. Your current content stays intact. The one thing to watch is theme compatibility. Some themes need a minor CSS fix after WooCommerce is added, but your site won’t break.
Q5. What is the WooCommerce Setup Wizard, and can I skip it?
The Setup Wizard is an onboarding flow that walks you through the initial store configuration: store address, currency, industry, product type, and a few recommended features. You can skip it, but you’ll need to configure those settings manually afterward. If you accidentally close it, go to WooCommerce > Settings, click the Help tab in the top right, and select Setup Wizard to relaunch it.
Ekta Lamba
Ekta Lamba is a tech writer at DevDiggers focused on making WordPress and WooCommerce straightforward for non-developers. She covers plugin errors, platform updates, and WordPress basics, written so readers can follow along without a second tab open to translate the jargon.
Join thousands of readers getting smarter every week.
3 responses
-
Apakah blogger bisa untuk wooocommerce,??
-

Yes, if they want to sell anything on the site.
-
This is a fantastic guide on how to set up WooCommerce on WordPress! The step-by-step instructions make it super easy to follow. Thanks for sharing these tips—can’t wait to get started!
Leave a Reply