Learning how to add meta tags in WordPress takes about 10 minutes using an SEO plugin, or 20 to 30 minutes if you go the manual route through your theme files. Either way, the task is well within reach for beginners and developers alike.
Most guides skip one important detail before you start: that WordPress already generates some meta tags on its own. If you add those manually on top, you end up with duplicates in your <head> section, and that can break your social share previews entirely. Knowing exactly which tags you need to add (and which ones to leave alone) saves you from that headache.
This guide covers all three methods for adding meta tags in WordPress, including SEO plugin, header.php, and functions.php, plus a full verification checklist so you can confirm your tags are actually working after setup.
What Are Meta Tags in WordPress?

Meta tags are HTML snippets that sit inside the <head> section of your web page. Visitors never see them, but search engines and social platforms read them to understand your content and decide how to display it.
Meta tags and WordPress post tags are completely different things. Post tags are labels you assign to organise your content on the site. Meta tags live in the HTML source code and are invisible to readers. If you want to understand how WordPress post tags relate to SEO, WordPress Tags and SEO is worth reading separately.
The meta tags that matter for WordPress on-page SEO
- Title tag: The clickable headline shown in search results. WordPress generates a basic version from your post title and site name, but SEO plugins let you customise it per page. This is still a direct Google ranking factor.
- Meta description: The short summary (about 155 characters) is shown below the title in search results. It does not directly affect rankings, but it heavily influences whether people click your result. WordPress does not generate meta descriptions by default. If you skip this, Google writes one for you, and Google’s version is usually a random excerpt from your page.
- Meta robots tag: Tells search engines whether to index a page and whether to follow its links. Common instructions are
noindex(keep this page out of search results) andnofollow(don’t pass link equity through this page’s links). WordPress offers a site-wide option under Settings → Reading, but per-page control needs a plugin. - Open Graph tags: Control how your content looks when someone shares it on Facebook, LinkedIn, or other social platforms. Without them, social platforms guess what to display. They usually guess wrong.
- Twitter Card tags: The same idea as Open Graph, but specific to X (formerly Twitter). Most SEO plugins handle both together.
Now here’s the part most tutorials skip entirely.
What WordPress already generates vs. what you need to add?
| Meta Tag | Generated by WordPress? | Action Needed |
|---|---|---|
| Title tag | Yes (basic version) | Customise with an SEO plugin |
| Meta description | No | Add with a plugin or manually |
| Canonical tag | Yes (since WordPress 5.7) | No action needed |
| Viewport tag | Yes (via your theme) | No action needed |
| Robots tag | Partial (site-wide only) | Add per-page control with a plugin |
| Open Graph tags | No | Add with a plugin or manually |
| Twitter Card tags | No | Add with a plugin or manually |
| Meta keywords | N/A | Skip entirely. Google confirmed in 2009 that it does not use them for ranking |
The canonical tag is the one that trips people up most. Because WordPress has handled it automatically since version 5.7, adding it manually or via a second plugin creates duplicates. The same goes for the viewport tag, and your theme already outputs it.
How to Add Meta Tags in WordPress Using an SEO Plugin
For most WordPress sites, an SEO plugin is the right choice. You get per-page control over titles, descriptions, Open Graph data, and robots instructions, all without touching a single line of code. The plugin also generates sensible defaults for pages you haven’t manually optimised yet.
The three most widely used options are Yoast SEO, Rank Math, and All in One SEO (AIOSEO). The core workflow is similar across all three. Here’s how they compare:
| Feature | Yoast SEO (Free) | Rank Math (Free) | AIOSEO (Free) |
|---|---|---|---|
| Focus keywords per post | 1 | 5 | 1 |
| Open Graph tags | Yes | Yes | Yes |
| Twitter Card tags | Yes | Yes | Yes |
| Robots (noindex/nofollow) | Yes | Yes | Yes |
| Schema markup types | Basic | 18+ types | Basic |
| Snippet preview | Yes | Yes | Yes |
| Redirect manager | No (Premium) | Yes | No (Pro) |
| Google Search Console integration | No | Yes | No |
Rank Math offers the most in its free version. Yoast SEO has the largest community with over 12 million active installations and the most third-party documentation. If you’re unsure which to pick, Yoast is the safer default for beginners because of the sheer volume of tutorials available.
The steps below use Yoast SEO. If you’re using Rank Math or AIOSEO, the same fields exist under slightly different labels in their respective meta boxes.
How to add a WordPress meta description and title tag with Yoast SEO
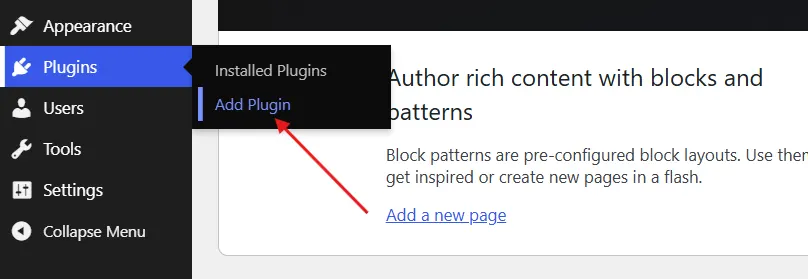
- Go to Plugins → Add New in your WordPress dashboard.
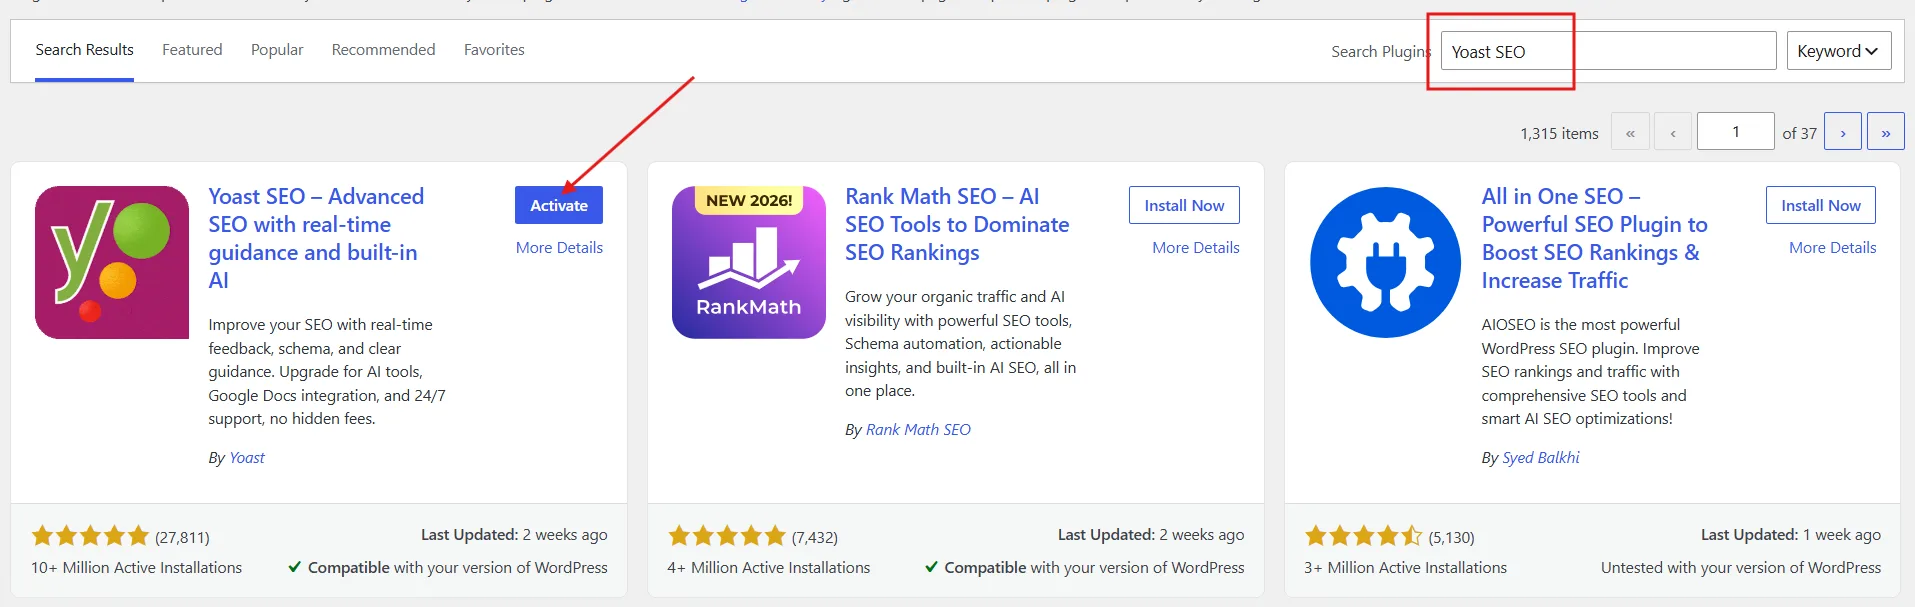
- Search for Yoast SEO, click Install Now, then Activate.
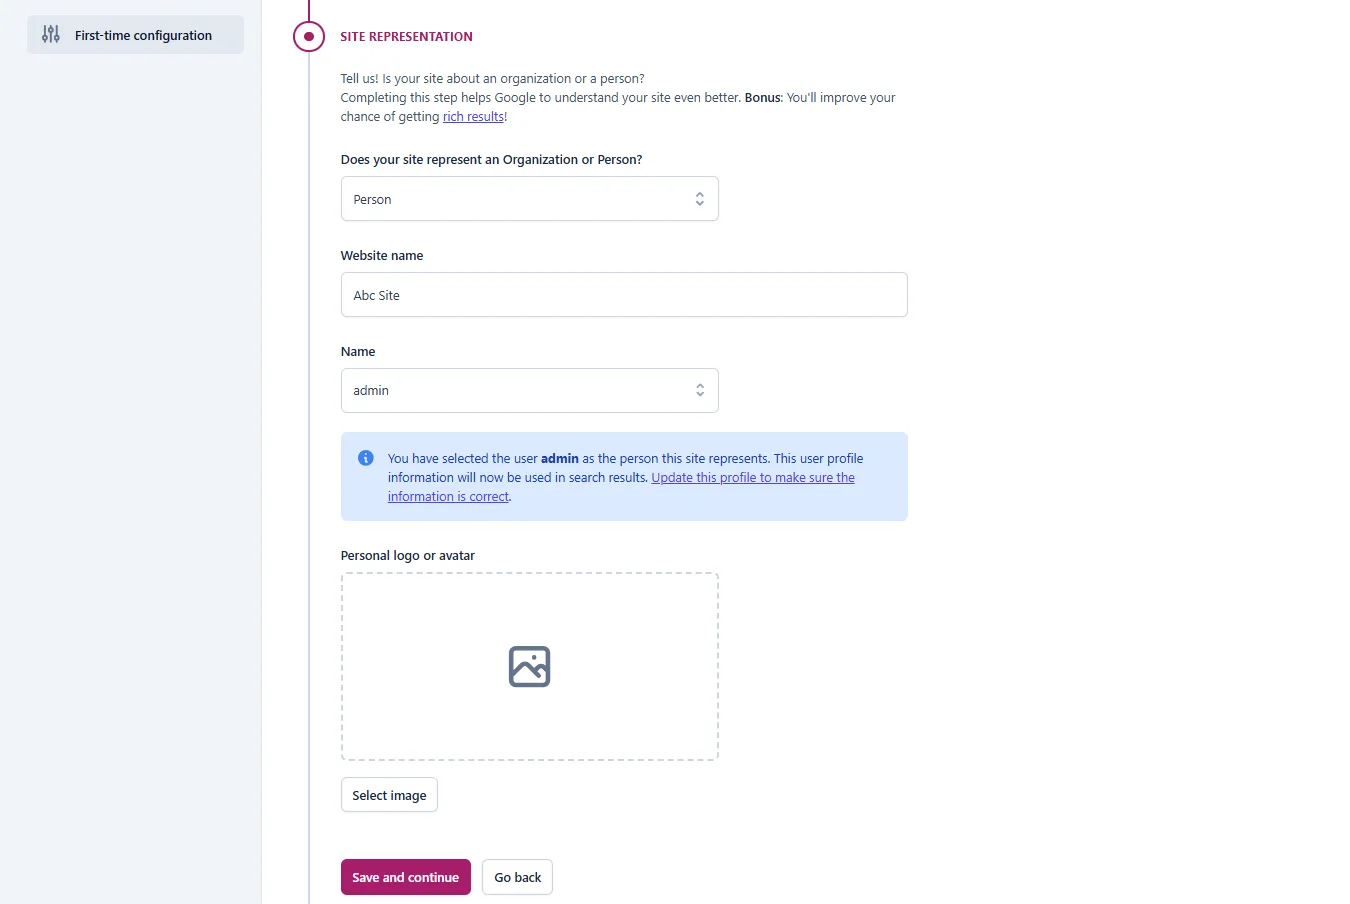
- Run through the Yoast configuration wizard. This sets your site-wide defaults: your site name, site representation, and logo, etc.
- Open the post or page you want to optimise in the block editor.
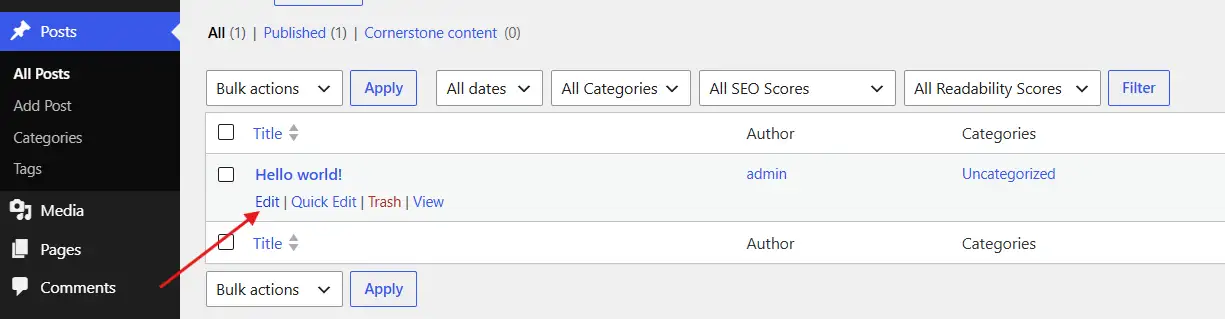
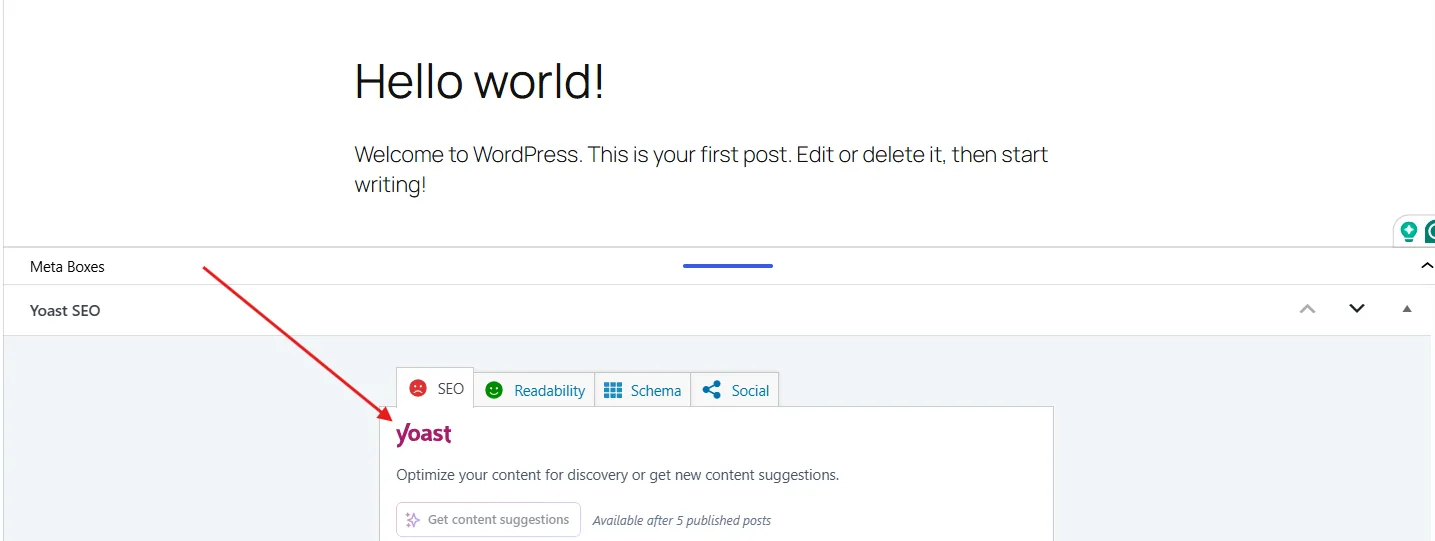
- Scroll below the content editor to the Yoast SEO meta box
.
- Enter your focus keyphrase, which is the keyword you want this page to rank for.
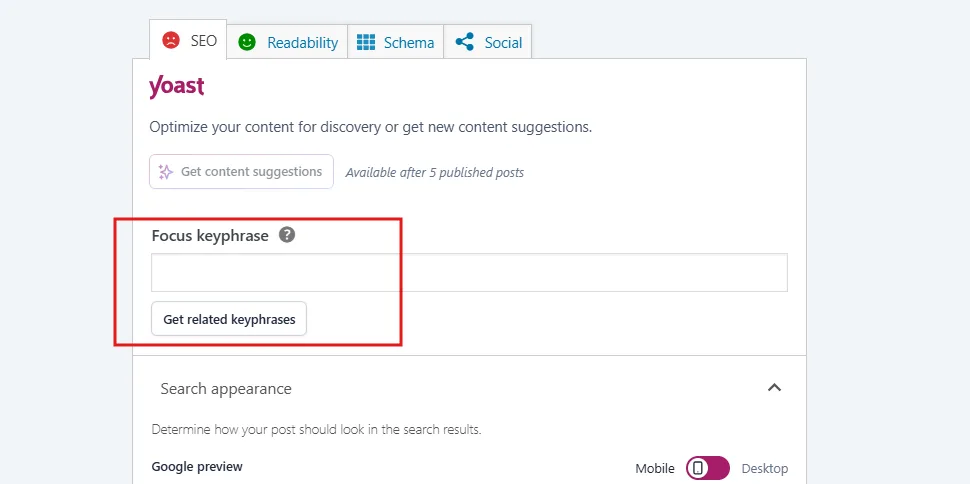
- Click the SEO title field to customise your title tag. Yoast uses variables like
%%title%%and%%sitename%%that auto-populate. Mix these with custom text if needed.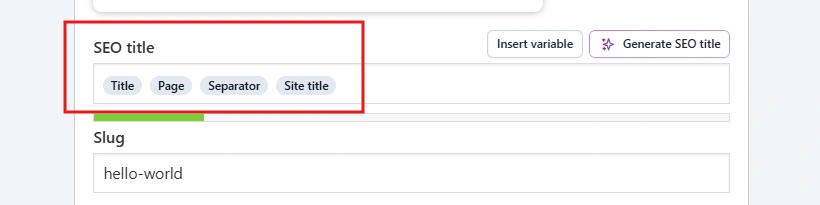
- Write your meta description in the description field. Yoast shows a character counter and a live snippet preview. Keep it under 155 characters and include your target keyword.
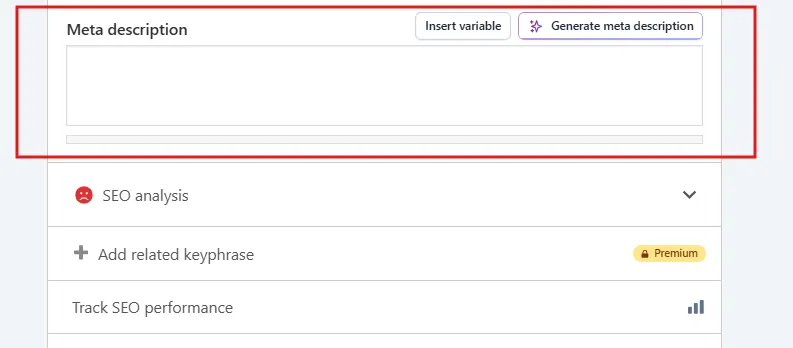
- Save or publish the post.
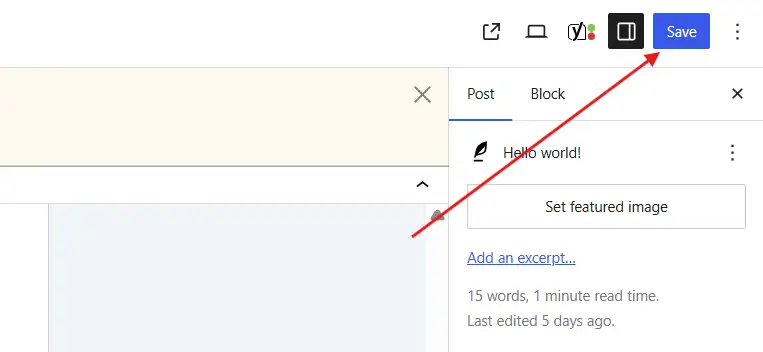
Repeat this process for every post and page you want to optimise. Pages you haven’t touched will use the site-wide defaults you set in the configuration wizard.
Worth knowing before you move on: Yoast also adds robots meta tags automatically based on your WordPress reading settings and per-page toggles. You don’t need to add those manually.
How to Add Open Graph Tags with an SEO Plugin
Open Graph tags in WordPress control what title, description, and image appear when someone shares your page on social media. Without them, Facebook and LinkedIn pull whatever they find first, often a sidebar image or the first sentence of body text.
In Yoast SEO, Open Graph tags are enabled by default. To check and customise them:
- Open the post in the block editor.
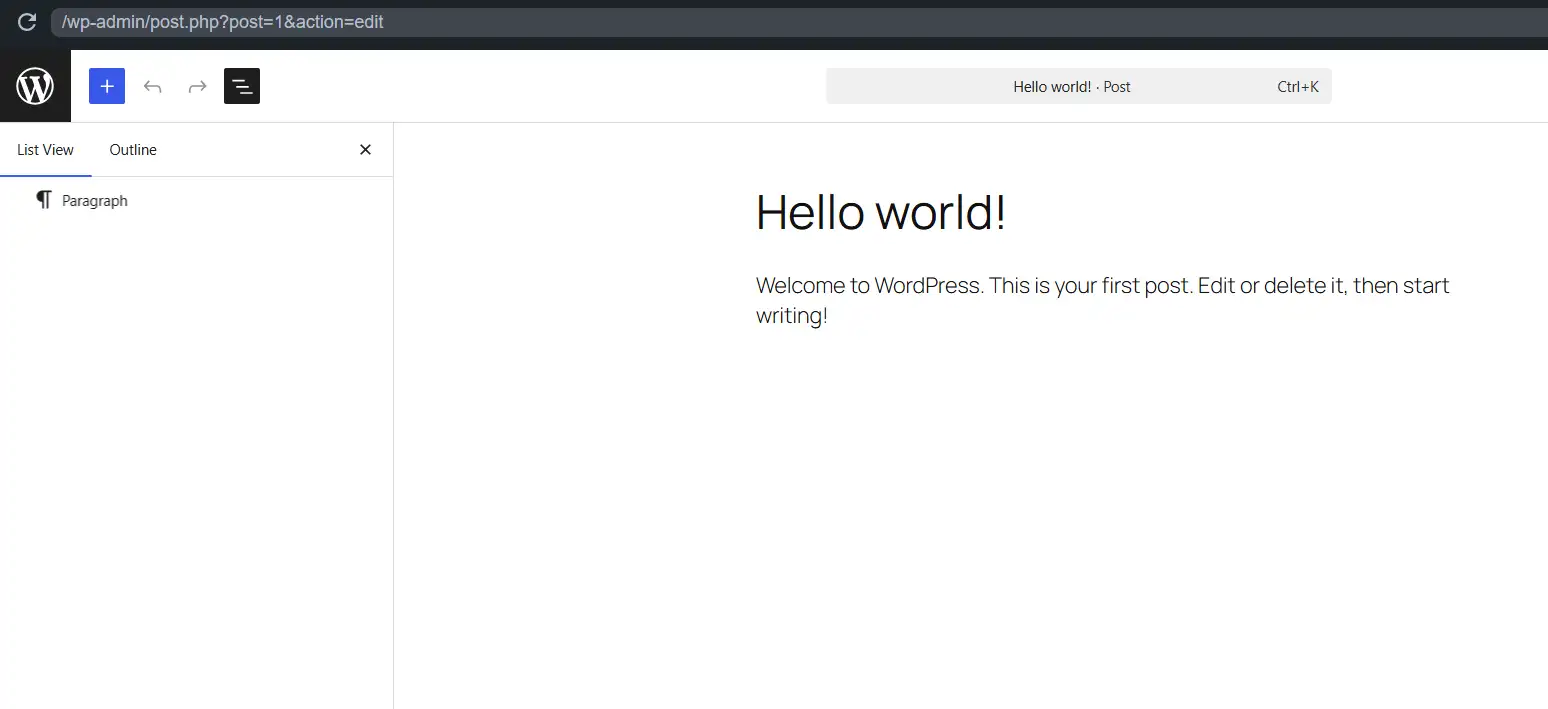
- In the Yoast SEO meta box, click the Social tab (the share icon).
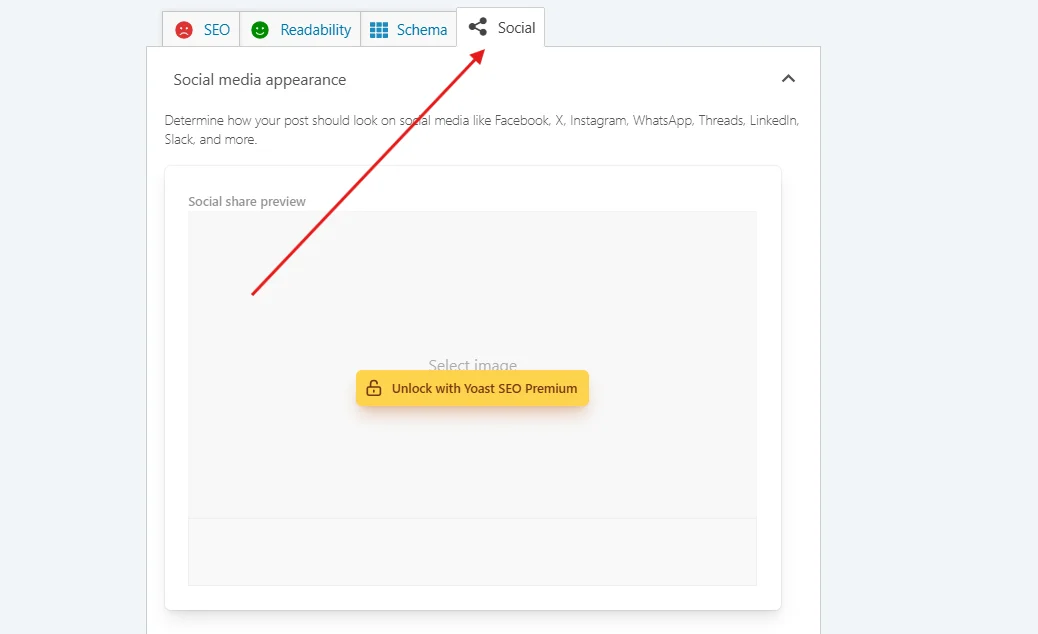
- Add a custom Facebook title, description, and image if you want them to differ from your SEO title and meta description.
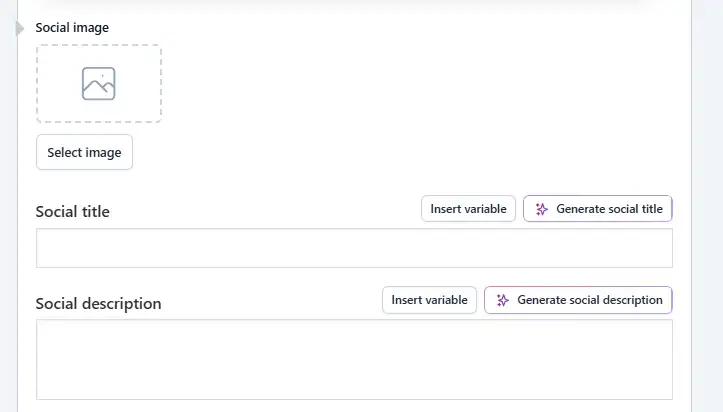
- Repeat for the X (Twitter) tab if needed.
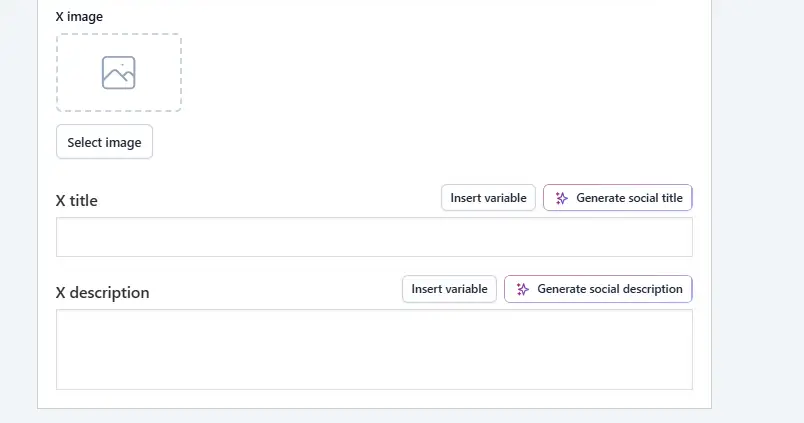
- Save the post.
One thing we see regularly: Store owners who have both an SEO plugin enabled and old Open Graph tags hard-coded in their header.php file from a previous developer. Both sets of tags appear <head> simultaneously. Facebook’s crawler picks up the first set it finds, which may be the outdated manual one, and shows the wrong image and description every time the page is shared. If your social share previews look wrong even after setting up Yoast, check your source code for duplicate og:title or og:description tags. That’s almost always the cause.
For WooCommerce product pages, Yoast and Rank Math are automatically set og:type to product and pull in product-specific data. You don’t need to configure this separately.
How to Add Meta Tags in WordPress Manually (Without a Plugin)
The manual approach makes sense in two situations: you’re building a lean site and want to avoid plugin overhead, or you’re a developer maintaining a custom WordPress build where SEO plugin output conflicts with existing code.
For everyone else, the plugin method above is faster and safer. But if manual is your path, here are both options.
Method 1: Editing header.php (Site-Wide, Static Tags)
This method adds the same meta tags across your entire site. It takes about five minutes, but there’s a real trade-off.
The trade-off: Every time your theme updates, your changes to header.php are overwritten. You lose everything unless you’re working inside a child theme in WordPress. If you don’t have a child theme set up, do that first or use WPCode (covered below) instead.
Steps:
- Go to Appearance → Theme File Editor in your WordPress dashboard.
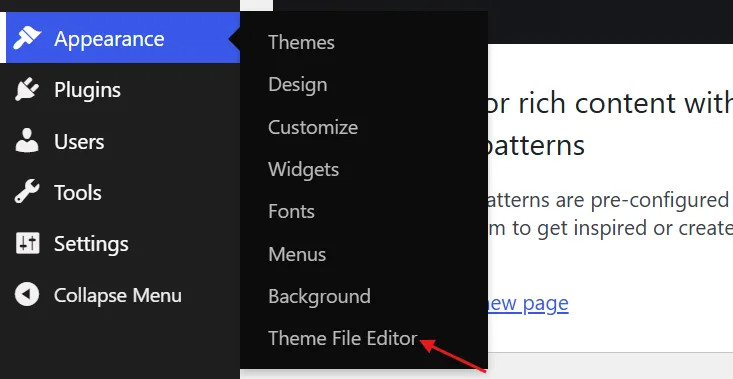
- In the right-hand file list, select header.php under your active theme (or child theme).
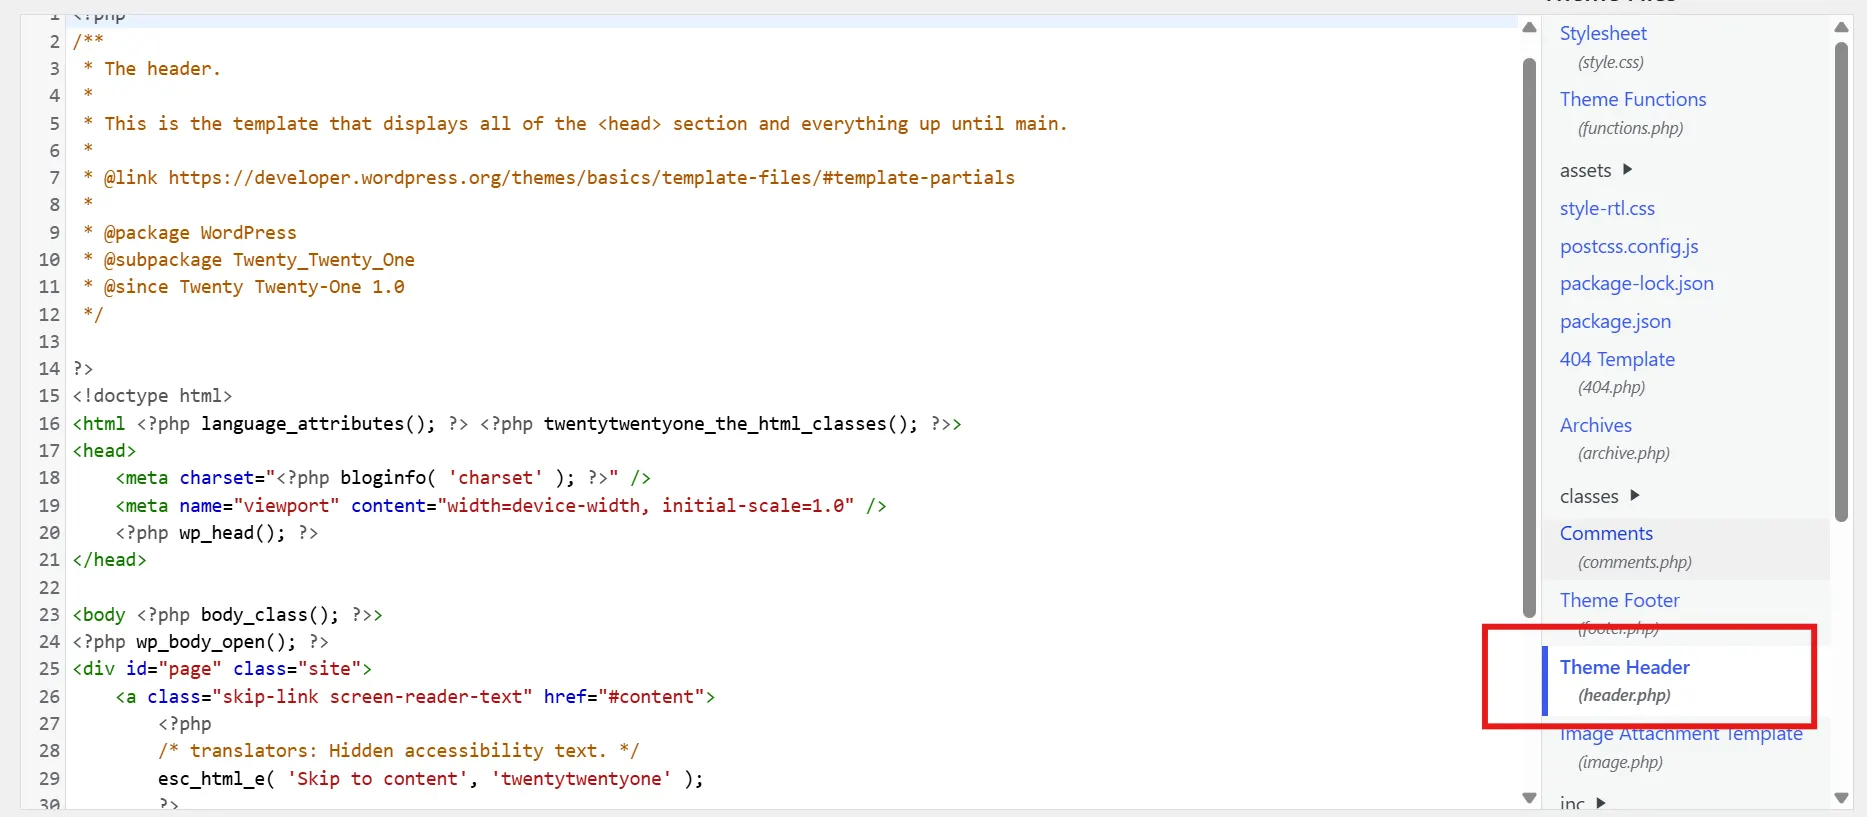
- Find the closing
</head>tag in the code.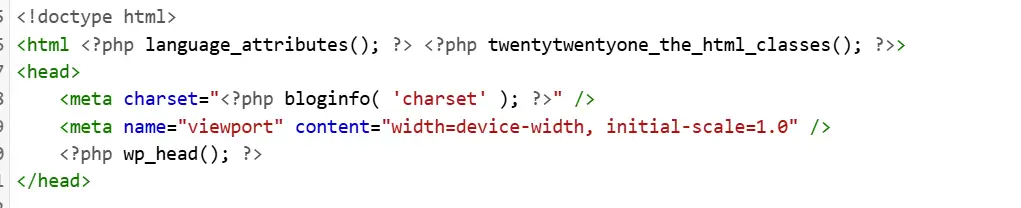
- Paste your meta tags just above
</head>:
<meta name="description" content="Your site description here." />
<meta property="og:title" content="Your Site Name" />
<meta property="og:description" content="Your site description here." />
<meta property="og:image" content="https://yoursite.com/your-image.jpg" />
<meta property="og:url" content="https://yoursite.com" />
<meta property="og:type" content="website" />
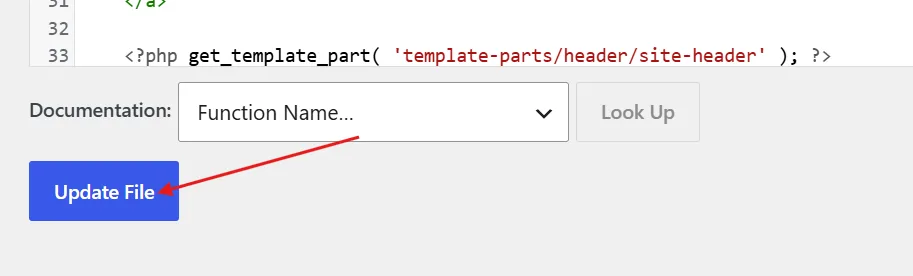
- Click Update File.
- Open your site in a browser, right-click the page, and select View Page Source. Search for
<metato confirm your tags appear in the<head>section.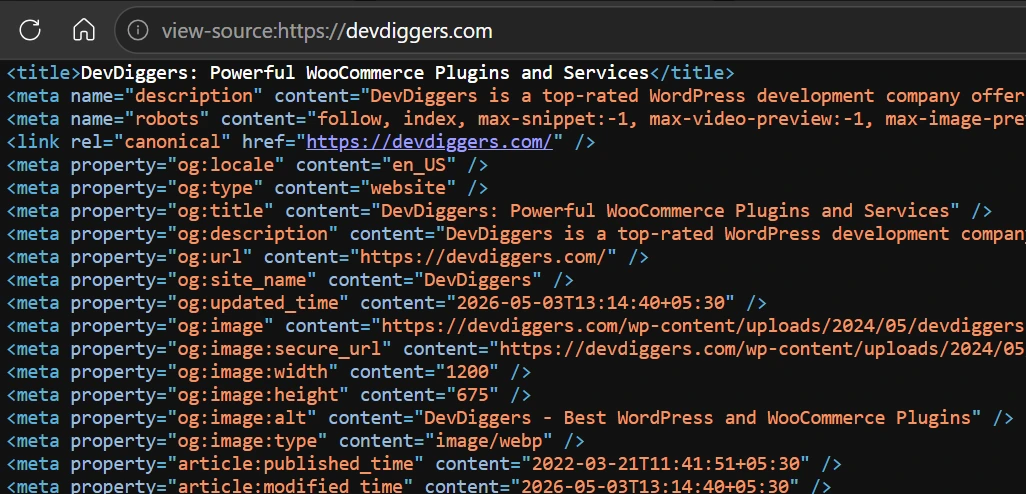
The limitation: These tags are static. Every page on your site shows the same description and the same Open Graph image. That’s fine for a small brochure site, but it breaks down fast on any site with multiple pages or posts that need unique descriptions.
Method 2: Using functions.php and the wp_head Hook (Dynamic, Per-Page)
This is the better manual method for blogs, content sites, or any WordPress build where pages need different meta descriptions. It uses the wp_head action hook functions.php to insert tags automatically based on which page is being loaded.
- In the right-hand file list, select header.php under your active theme (or child theme).
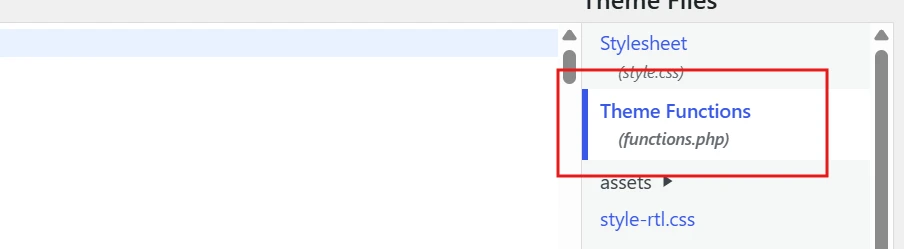
- Add this to your child theme’s
functions.phpfile:
function devdiggers_dynamic_meta_tags() {
    global $post;

    if ( is_singular() ) {
        // Use excerpt if available, otherwise pull from content
        if ( has_excerpt( $post->ID ) ) {
            $description = get_the_excerpt( $post->ID );
        } else {
            $description = wp_trim_words( $post->post_content, 30, '...' );
        }
        $description = esc_attr( strip_tags( $description ) );
        $title       = esc_attr( get_the_title( $post->ID ) );
        $url         = esc_url( get_permalink( $post->ID ) );
        $image       = esc_url( get_the_post_thumbnail_url( $post->ID, 'large' ) );

        echo '<meta name="description" content="' . $description . '" />' . "\n";
        echo '<meta property="og:title" content="' . $title . '" />' . "\n";
        echo '<meta property="og:description" content="' . $description . '" />' . "\n";
        echo '<meta property="og:url" content="' . $url . '" />' . "\n";
        echo '<meta property="og:type" content="article" />' . "\n";

        if ( $image ) {
            echo '<meta property="og:image" content="' . $image . '" />' . "\n";
        }

    } elseif ( is_home() || is_front_page() ) {
        $description = esc_attr( get_bloginfo( 'description' ) );
        $title       = esc_attr( get_bloginfo( 'name' ) );

        echo '<meta name="description" content="' . $description . '" />' . "\n";
        echo '<meta property="og:title" content="' . $title . '" />' . "\n";
        echo '<meta property="og:description" content="' . $description . '" />' . "\n";
        echo '<meta property="og:type" content="website" />' . "\n";
    }
}
add_action( 'wp_head', 'devdiggers_dynamic_meta_tags' );
Critical note before you add this: Do not run this code alongside an SEO plugin like Yoast SEO or Rank Math that already outputs meta descriptions and Open Graph tags. Both sets of tags will appear in your <head>, and bots will pick up whichever comes first, which may not be the one you want. If you’re switching from a plugin to manual code, deactivate the plugin first. If you’re going the other direction, remove this function before activating the plugin.
For OG images: Aim for 1200×630 pixels. This size renders well across Facebook, LinkedIn, and X without cropping or scaling issues.
Not comfortable editing functions.php directly? Use the WPCode plugin instead. Install it from Plugins → Add New, search for WPCode – Code Snippets, activate it, then go to Code Snippets → Add Snippet. Paste the function above as a PHP snippet and save. WPCode keeps your code separate from your theme files, so it survives theme updates without a child theme.
What Meta Tags Does WordPress Already Add by Default?
Most tutorials skip this. And that gap is exactly where problems start.
Before you add anything, check your page source and look at what’s already in your <head>. WordPress and your theme generate several tags automatically. Adding them again creates duplicates, and duplicate meta tags confuse bots and break social sharing.
Here’s what you can safely leave alone:
- Canonical tag: WordPress has generated canonical tags automatically since version 5.7. You do not need to add this manually or configure it through a plugin unless you have a specific duplicate content situation (like a product page accessible via multiple URLs).
- Viewport tag: Your theme outputs this. It tells mobile browsers how to scale the page. Leave it alone.
- Basic title tag: WordPress generates a title from your post title and site name. An SEO plugin improves and customises it, but you don’t need to add a title tag from scratch.
What you do need to add: Meta description, Open Graph tags, Twitter Card tags, and per-page robots instructions. None of those is generated by default.
This is a step most guides skip. That’s why stores and blogs end up with pages showing three different canonical tags, or duplicate og:image entries that make Facebook show a blank preview.
How to Verify Your Meta Tags Are Working?

Setting up meta tags is only half the job. Verifying they actually appear and appear correctly is where most people stop short.
Use these four tools to check your work after setup:
- View Page Source: Open your site in a browser, right-click the page, and select View Page Source. Press Ctrl+F (or Cmd+F on Mac) and search for
<meta. Scan through the results. You’re checking that your description, Open Graph tags, and any custom tags appear once each, not twice or more. - Google Search Console: Go to Search Console → URL Inspection, paste your page URL, and run the inspection. This shows how Google currently sees the page, including which title and description it will use. If Google is ignoring your meta description and writing its own, the description may be too generic or mismatched to the page content.
- Facebook Sharing Debugger: Go to developers.facebook.com/tools/debug and paste your page URL. This shows exactly what Facebook sees: the title, description, and image for the social preview. If you’ve made changes recently, click Scrape Again to force a cache refresh. This is the most reliable way to confirm Open Graph tags are working.
- metatags.io or LinkedIn Post Inspector: metatags.io gives you a visual preview of how your page will appear across multiple platforms at once. LinkedIn Post Inspector (linkedin.com/post-inspector) is useful, specifically if you’re sharing content on LinkedIn and the preview looks wrong. LinkedIn caches aggressively, so always use the Inspector after making changes.
Conclusion
Adding meta tags in WordPress comes down to three decisions: which tags you actually need (not all of them, and WordPress handles several already), which method fits your setup (plugin for most people, manual for developers), and whether you’ve verified the tags are live and correct after setup.
The plugin method is faster and safer for most sites. The functions.php method gives you more control but requires care around duplicates. Either way, run your pages through the Facebook Sharing Debugger and View Source after setup. That five-minute check saves hours of troubleshooting later.
For anything more complex, such as custom post types, WooCommerce product schemas, or multi-site configurations, the WordPress development services team at DevDiggers builds and maintains these setups regularly.
Frequently Asked Questions(FAQs)
Q1. Does WordPress automatically add meta tags?
WordPress adds a basic title tag, a canonical tag (since version 5.7), and a viewport tag through your theme. It does not add meta descriptions, Open Graph tags, or Twitter Card tags. For those, you need either an SEO plugin or manual code in your theme files.
Q2. Do meta tags affect Google rankings in WordPress?
Title tags are a direct Google ranking factor. A descriptive, keyword-relevant title helps Google match your page to the right searches. Meta descriptions are not a direct ranking factor, which Google has confirmed repeatedly. But a well-written meta description increases click-through rates, and higher CTR signals to Google that your result is relevant. Meta robots tags affect indexing directly because a noindex tag removes a page from search results entirely. Get that one wrong, and you’ll wonder why your pages disappeared from Google.
Q3. What is the difference between meta tags and WordPress post tags?
Meta tags are HTML code in your page’s <head> section that is invisible to visitors but read by search engines and social platforms. WordPress post tags are labels you assign to organise blog content on your site. They serve entirely different purposes and are completely unrelated to each other.
Q4. Do I need both Yoast SEO and manual meta tags in header.php?
No. Running both simultaneously creates duplicate tags in your <head> section. Duplicate meta descriptions and Open Graph tags cause social platforms to pull incorrect data and confuse search bots. Pick one method and stick with it. If you switch, remove the old tags before activating the new setup.
Q5. How do I add meta tags to a specific page only in WordPress?
An SEO plugin is the cleanest way. Both Yoast SEO and Rank Math show a meta box below every post and page editor where you can set a unique title, description, and social tags per page. For the manual functions.php method, use WordPress conditional tags like is_page( 42 ) or is_singular( ‘post’ ) to target specific pages.
Q6. Can I add meta tags in WordPress without touching any code?
Yes. Install an SEO plugin like Yoast SEO or Rank Math, run the setup wizard, and fill in the meta fields on each post or page. No code editing required. If you need to insert custom meta tags beyond what a standard SEO plugin handles, WPCode lets you add PHP snippets safely without editing theme files directly.
Q7. Why is Google showing a different meta description than the one I wrote?
Google rewrites meta descriptions when it decides your version does not match the search query well enough. This is expected behaviour. The description is too short, too generic, or doesn’t reflect what the page actually covers. Google also rewrites descriptions for many long-tail queries where it finds a more relevant excerpt on the page. Write descriptions that accurately summarise the specific page content, keep them between 120 and 155 characters, and include your target keyword naturally.
Q8. What image size should I use for Open Graph tags in WordPress?
Use 1200×630 pixels. This renders well on Facebook, LinkedIn, and X without cropping. Go below 600 pixels wide, and Facebook may ignore the image entirely and show a text-only preview. Set your featured image to this size for posts, and configure a backup OG image in your SEO plugin settings for pages without a featured image.