How to Add Local Business Schema to WordPress


As a local business owner, you’re probably well aware that being found on the internet can make or break your success. You could have the best products, the friendliest staff, and unbeatable prices – but if your customers can’t find you through a Google search, they’re going to go to your competitor.
That is where Local Business Schema comes in! By learning how to add Local Business Schema to WordPress, you are giving Google Local SEO schema markup (structured data) on your business, so they have a proper map of every aspect of your business, from your name, address, phone number, and opening hours, to your services, and even reviews.
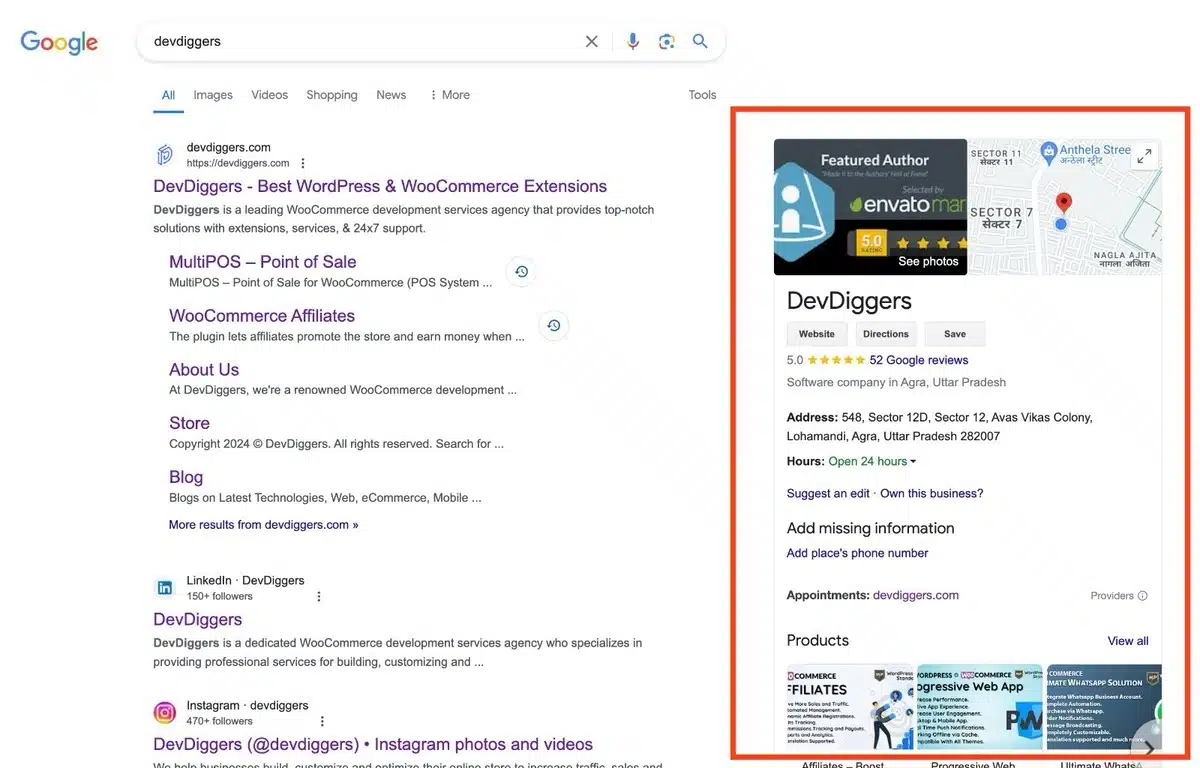
Creating a schema will provide the structured data for Google, enabling it to display relevant results to local searches. This could make a difference in rich snippets, which help you stand out. Additionally, the Google local map pack is another section local businesses can gain from schema, enabling you to show your hours, services, and reviews, ultimately building trust with your customers.
All that goes to say that the more places you can have people click, the more foot traffic you’ll get at your shop, and the more sales you will make.
In this step-by-step tutorial, we’ll break down what Local Business Schema actually is, and why it is a fundamental slab in your arsenal to rank well in local SEO, and we’ll show you how to add Local Business Schema to WordPress using the best plugins like Yoast SEO, Rank Math, AISEO, and Schema Pro – so you can add schema without coding in WordPress.
What is the Local Business Schema?
Local Business Schema is a specific type of structured data markup — essentially, behind-the-scenes code that you add to your WordPress site to enable search engines, including Google, Bing, and Yahoo, to clearly understand your business details.
Think of it as a cheat sheet for your business from Google, complete with your name, address, phone number (NAP), type of business, opening hours, services, and even customer reviews, all in a specific format using structured data from Schema.org vocabulary — essentially structured data for local SEO.
By learning how to add Local Business Schema to WordPress, you are giving search engines everything they need to:
- Provide your information in the Google Knowledge Graph panel.
- Feature you in the Local Map Pack results.
- Show rich snippets (ratings, hours, images, etc.) in the search results
- Answer voice search questions like “Where’s the nearest coffee shop?” with your business information.
Example:
If you own “Mike’s Auto Repair” in Chicago, Local Business Schema can tell Google to show:
- Your business name exactly as it appears on your signage.
- Your address, phone number, and geo-location.
- Your operating hours and holiday schedule.
- Verified customer reviews and star ratings.
- Your logo or storefront image.
For WordPress users, the best part is that you don’t need to write a single line of code to do this. With the right plugin, adding Local Business Schema is as easy as filling out a form.
Why is Local Business Schema Markup Crucial?
Adding Local Business Schema to your WordPress site is not just “nice to have” – it is one of the fastest ways to improve your local SEO without spending a dime on ads.
Here’s why you should make it a priority to learn how to add Local Business Schema to WordPress:
- You’re Going to Dominate Local Search Results: When you correctly use schema, you increase your chances of appearing in the Google Local Pack SEO results, Knowledge Graph, and rich search snippets. This means that when customers search for businesses nearby, your business is right at the front of the pack.
- You’ll Increase Click-Through Rates (CTR): Rich snippets for local businesses displaying ratings, hours, and direct contact information make your listing pop and stand out from the plain text results, and attract more clicks.
- You’re Going to Optimize for Voice Search: Whether someone’s asking Alexa, Siri, or Google Assistant, “best coffee shop near me”, schema helps voice assistants pull your details as the answer to voice searches.
- You’re Going to Get the Jump on Competitors: Many local businesses are still not using structured data, so you can acquire search visibility before your competition.
- You’re Going to Build Trust, Right Away: When customers see accurate, consistent, and verified information before they even click your site, they will trust you more and be more inclined to choose you over competitors.
If you’re looking for more website traffic, foot traffic, and customers, implementing Local Business Schema is one of the easiest and most effective things you can do this year.
How to Add Local Business Schema to WordPress with Plugins
If you’re looking for how to add Local Business Schema to WordPress without writing a line of code, you’re in luck – the WordPress ecosystem has multiple powerful plugins that make this task easy for novice users while allowing for limitless customization for advanced users.
Below, we will provide an overview of four effective methods that provide you with step-by-step instructions, best practice tips, and testing resources to ensure your schema works seamlessly.
1. Adding Local Business Schema with Yoast SEO
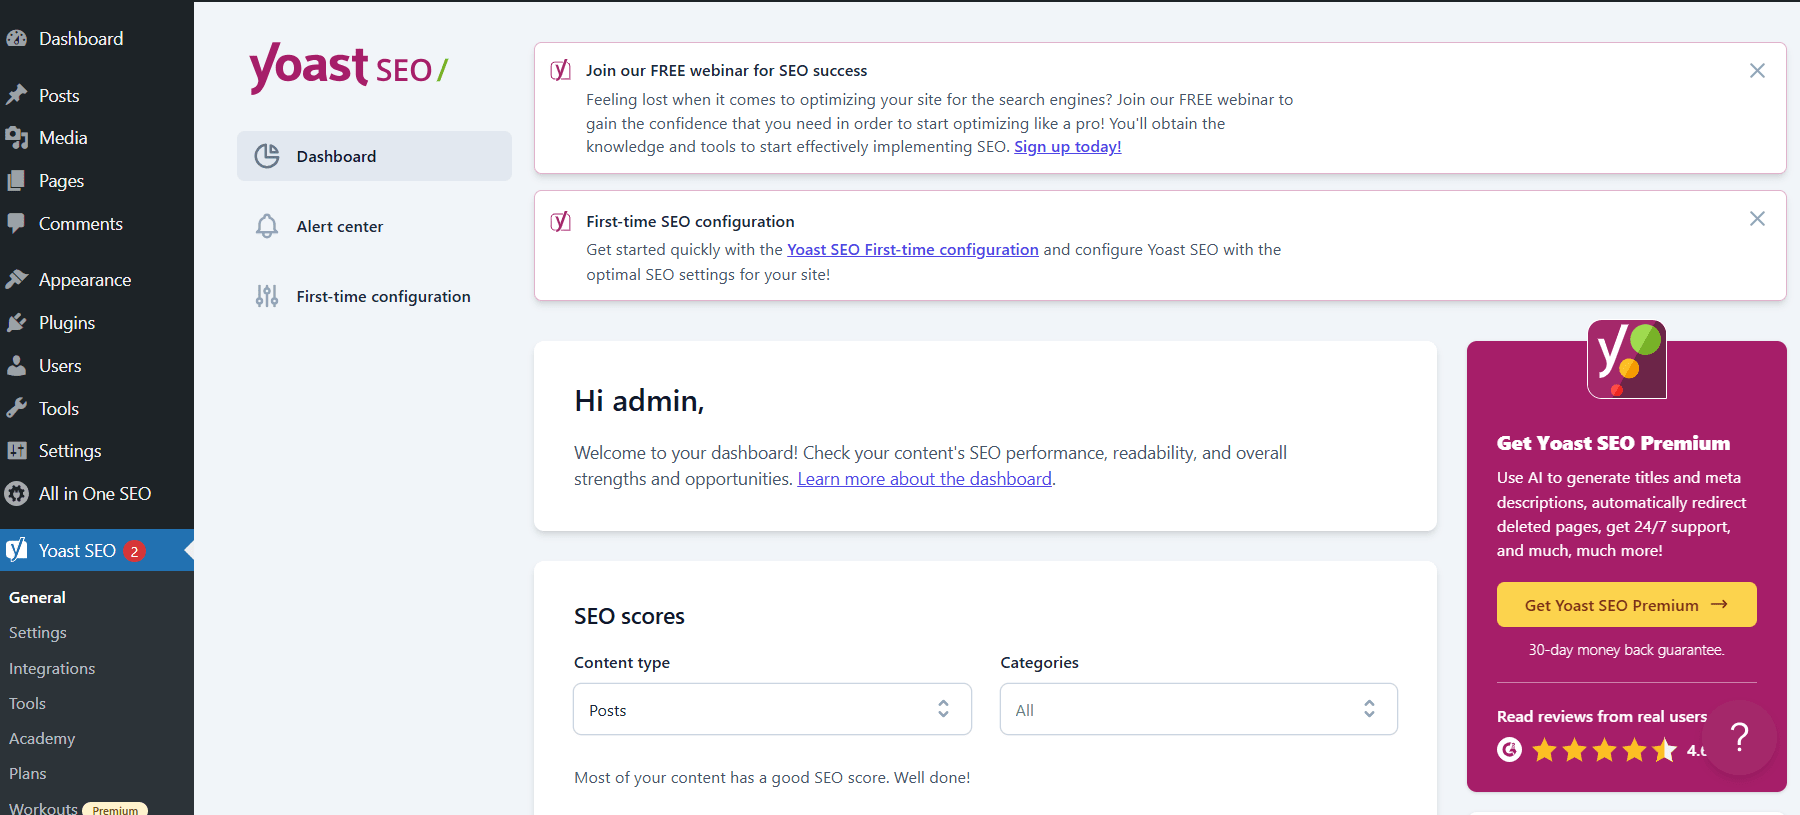
Yoast SEO is one of the most popular SEO plugins, and while its free plugin takes care of basic schema, its premium Local SEO add-on allows you to have full control over Local Business Schema.
How to do it:
- Install Yoast SEO:
- Go to Plugins → Add Plugin in your WordPress dashboard.
- Search for Yoast SEO, click Install, then Activate.
- Set Up Your Business as an Organization:
- Go to SEO → Search Appearance → General.
- Select Organization (not Person) under Knowledge Graph & Schema.org.
- Put your business name in exactly as it shows on your signage and paperwork.
- Upload your logo in a square format and never smaller than 112px x 112px – for example, 400px and larger is even better.
- Add Your Local Business Info (with add-on):
- Install and activate the Yoast Local SEO add-on (premium).
- Go to the SEO → Local SEO in your dashboard.
- Enter your Name, Address, Phone (NAP) in exactly the same format as your Google Business Profile.
- Fill out the opening hours, map location, and geo-coordinates.
- Add Local Schema to Your Contact Page:
- Add your information on your contact page using the Local Business block in the WordPress block editor.
- Yoast will add the structured data in the background.
- Test Your Schema: Run your markup via Google’s Rich Results Test.
Pro Tip: Yoast SEO still creates a basic version of organization schema, even with the free version, and that’s better than no schema at all. The Local SEO add-on is worth it, especially if local search is a big part of your playbook.
2. Adding Local Business Schema with Rank Math
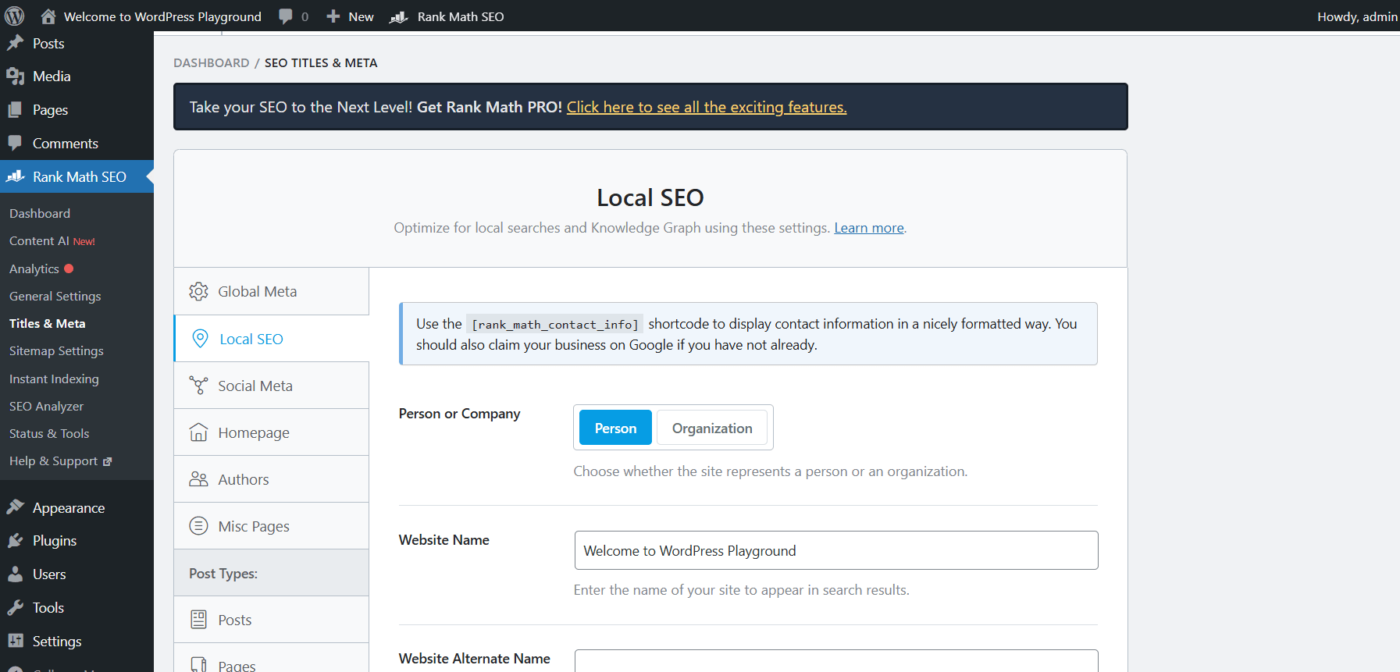
Rank Math gets a lot of love for its full-featured free version and the simple-to-use interface, which is useful for site owners who want more control over schema without paying more.
How to do it:
- Install & Activate Rank Math:
- Go to Plugins → Add Plugin and search for “Rank Math.”
- Install and activate.
- Enable Schema Module:
- Navigate to Rank Math → Dashboard.
- Ensure the Schema (Structured Data) module is enabled.
- Set Up Local SEO Settings:
- Go to Rank Math → Titles & Meta → Local SEO.
- Select your business type from the dropdown as applicable (Restaurant, Dentist, Auto Repair Shop, etc.).
- Fill in your NAP, geo-coordinates, price range, and operating hours.
- Add Schema to Specific Pages:
- Open your Contact or About Us page in the WordPress editor.
- Scroll down to the Rank Math SEO Meta Box → Schema tab.
- Select the Local Business Schema and ensure all relevant fields are completed.
- Test Your Schema: Use Schema.org Markup Validator to check for correctness.
Pro Tip: Rank Math has added convenience for Business Schema, so that you can set it to be global for your entire site, or per page for customization, if you have multiple locations.
3. Add Local Business Schema using AIOSEO (All-in-One SEO)
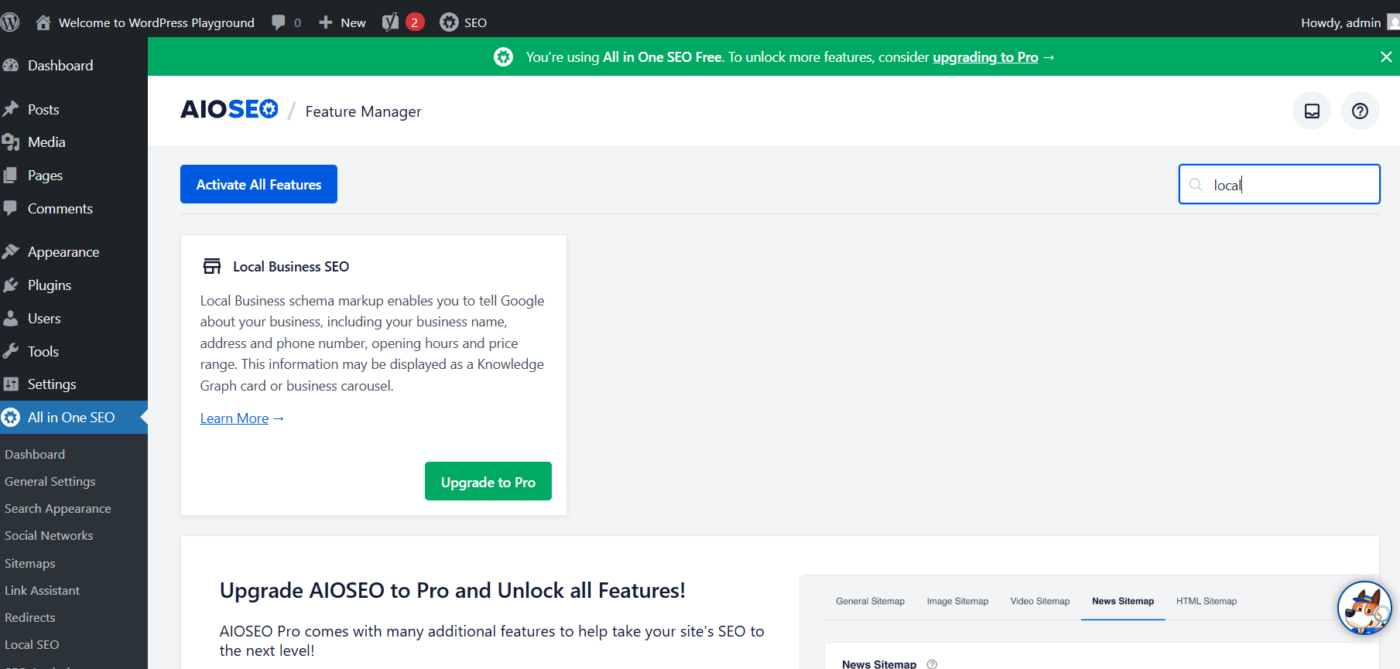
All in One SEO(AIOSEO) is a long-established WordPress SEO plugin and has a specific module for local SEO and schema markup.
Steps
- Install & Activate AIOSEO: From the WordPress dashboard, go to Plugins → Add Plugin, search for “All in One SEO” and install and activate.
- Activate Local SEO Module:
- Go to All in One SEO → Feature Manager
- Enable the Local SEO feature.
- Enter Your Business Data:
- Go to All in One SEO → Local SEO.
- Enter your Business Name, Business Address, Business Phone, and Business Email.
- Select your business type from those provided.
- Enter your opening hours and any holiday hours.
- Assign Schema to Your Pages:
- Edit your contact or locations pages.
- In the AIOSEO settings box, select Local Business from the Schema Type dropdown.
- Perform a Schema Test: Check your markup with Google’s Rich Results Test.
Pro Tip: AIOSEO allows for multiple business locations and can automatically generate a store locator map on your website.
4. Add Local Business Schema using Schema Pro

Schema Pro is an advanced premium plugin developed by Brainstorm Force (the developers of the Astra theme) that gives you advanced schema customization.
Steps
- Install & Activate Schema Pro:
- Purchase and download from the Schema Pro website.
- Upload through Plugins → Add Plugin → Upload Plugin.
- Create a New Schema Markup:
- Go to Schema Pro → Add New.
- Select Local Business as your schema type.
- Include Business Information:
- Enter your business name, address, phone number, email, and logo.
- Include your geo-coordinates and price range.
- Map Your Schema Fields: One of Schema Pro’s most useful features is that you can map your fields to WordPress meta, meaning that when you update your business hours on the site, it updates in your schema.
- Assign Schema Display Rules: Choose where your Local Business Schema appears – all pages, specific pages, or just your contact page.
- Validate: Verify using both Google’s Rich Results Test and Search Console.
Pro Tip: Schema Pro supports advanced schema types (e.g., Product, Review, Event) – which means you can combine your Local Business Schema with other markup for a serious SEO boost.
Final Thoughts
It’s one thing to learn how to add Local Business Schema to WordPress and think you’ve checked the SEO box. It’s another way to take control of your local search market. When you get it right with the right plugin, you can provide Google (as well as other search engines) with precise information about your business so customers can find, trust, and use you instead of a competitor.
Whether you choose Yoast SEO, Rank Math, AIOSEO, or Schema Pro, these WordPress schema plugins make the process simple and effective. Remember these golden rules:
- Keep your NAP details consistent across the board.
- Regularly test your schema for errors.
- Make sure to update the markup each time you change a detail of your business.
In 2026, as AI-powered search and voice-activated assistants gain traction, structured data won’t be optional; it will be one of the most important local SEO ranking factors. The sooner you apply it, the sooner you will see the results of more visibility, clicks, and customers.
So what are you waiting for? Pick a method from this guide, add your Local Business Schema now, and get listed wherever your customers are searching.
FAQs – How to Add Local Business Schema to WordPress
Q1. Will Local Business Schema help improve my Google rankings?
Not directly, but it can help you get more visibility in rich results and local map packs and, in many cases, boost your click-through rates. Subsequently, with more clicks and engagement, you may indirectly improve your rankings over time.
Q2. Do I need to know coding to get the Local Business Schema into a WordPress site?
No — Plugins such as Yoast SEO, Rank Math, AIOSEO, and Schema Pro make adding Local Business Schema user-friendly for beginners by filling in forms, and the plugin writes the code.
Q3. Can I use more than one schema plugin?
Not recommended. If you use multiple schema plugins, you can end up duplicating some markup. This might help confuse Google Search Console, and more importantly, confuse your users. Use one schema plugin for the sake of consistency and cleaner schema output.
Q4. How can I test to see if I have Local Business Schema working?
You can utilize the Google Rich Results Test or the Schema.org markup validator. These will show you exactly how Google reads your schema.
Q5. Does the Local Business schema even work for online-only businesses?
The Local Business schema is meant for brick-and-mortar or service area businesses. If you are online, only use the Organization schema or the Website schema instead.
Ekta Lamba
Ekta Lamba is a tech writer at DevDiggers focused on making WordPress and WooCommerce straightforward for non-developers. She covers plugin errors, platform updates, and WordPress basics, written so readers can follow along without a second tab open to translate the jargon.
Join thousands of readers getting smarter every week.
Leave a Reply