How to Optimize Images in WordPress for Faster Load Times and Better SEO

Imagine that you have a superb looking WordPress site, but it takes forever to load the pages because of a large bunch of uncompressed images. Now your customers get annoyed, bounce rates shoot up, and the worst is your ranking in search engines gets affected.
Here’s the great news! WordPress image optimization is one of the simplest techniques to solve this issue. Also, it is an effective and labor-intensive step that a lot of website owners still fail to consider.
Here in this article, we will discuss all the techniques of image optimization for WordPress correctly, from preprocessing images before uploading to selecting the most suitable plugins that will both enhance your web speed and improve SEO.
Why Image Optimization Matters for Your WordPress Site
Images might be a great asset to your site in terms of appearance, but they do come with a latent price. Usually, images constitute approximately 50% of the complete webpage size on websites; however, numerous site owners are hardly ever bothered with image optimization. Consequently, it results in slow-loading webpages, annoyed users, and declining search performance.
These slow pages negatively affect everything: the bounce rate, conversions, and even the rankings on Google. Google’s Core Web Vitals, especially the Largest Contentful Paint (LCP) metric, highlight how heavy and unoptimized images can severely impact your SEO score.
Here is the great thing: if you do image optimization the correct way, you will be able to significantly reduce your loading time without any loss of visual appeal. Your website will still be fast, neat, and professional-looking.
Stat Callout
According to a 2026 industry report, a one-second delay in page loading could lower conversions by as much as 7%, which illustrates the considerable impact of speed on user behavior and revenue [1].
Step 1 — Prepare Your Images Before Uploading to WordPress
You can almost half your page size before even hitting the “Upload” button in WordPress by simply preparing your images properly.
This is the step that alone will keep your site from having bloated pages and slow running.
Pick the right file format
One of the easiest ways to get a great result is by using the proper format:
- JPEG → Perfect for photos
- PNG → Most suitable for graphics, icons or images that require transparency
- WebP → The new standard for pretty much everything
Reasons to go for WebP:
WebP can maintain the visual quality of JPEG/PNG while the file size is significantly smaller.
Change image size to fit the layout
Uploading massive photos directly from a DSLR or a phone is one of the biggest mistakes WordPress users make.
Don’t ever upload 4000px-wide pictures when your content area is only 800px wide. In that case, you will be unnecessarily slowing down your site.
You should stick to these sizing guides:
- Max content image width: 1600px (this is the size frequently maxed out on guest post sites)
- If you decide to use a header/hero image, it can be a bit bigger, but you should still refrain from using super-large files.
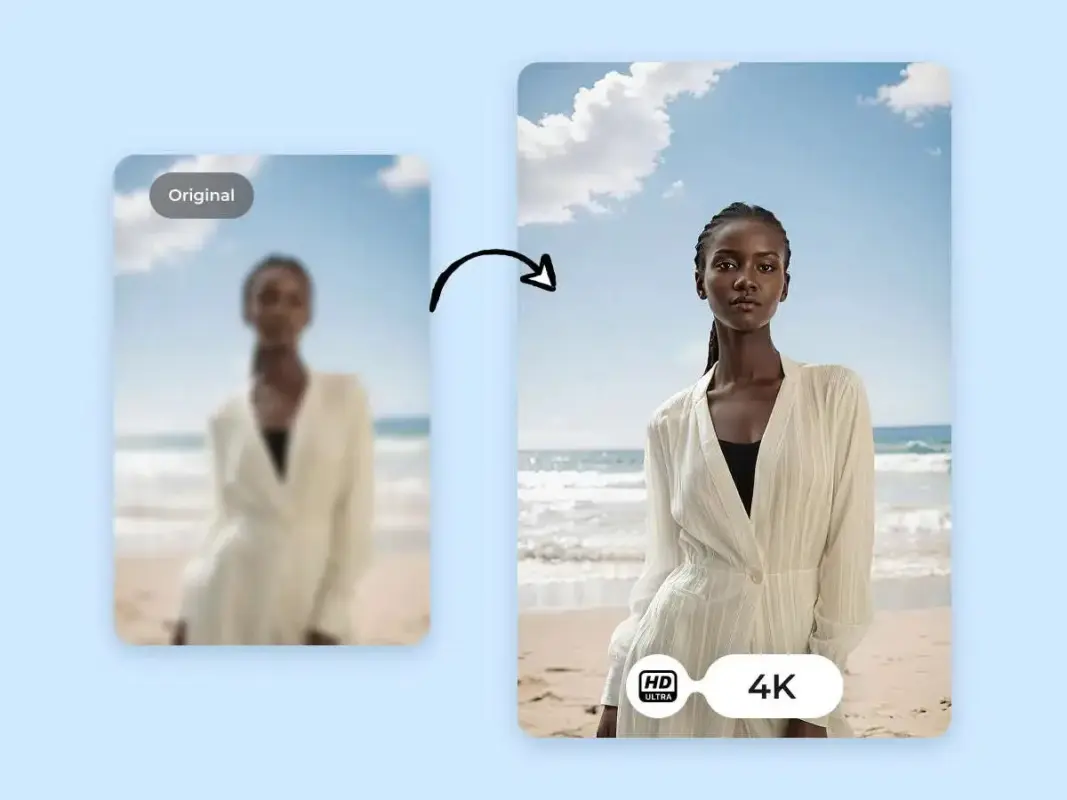
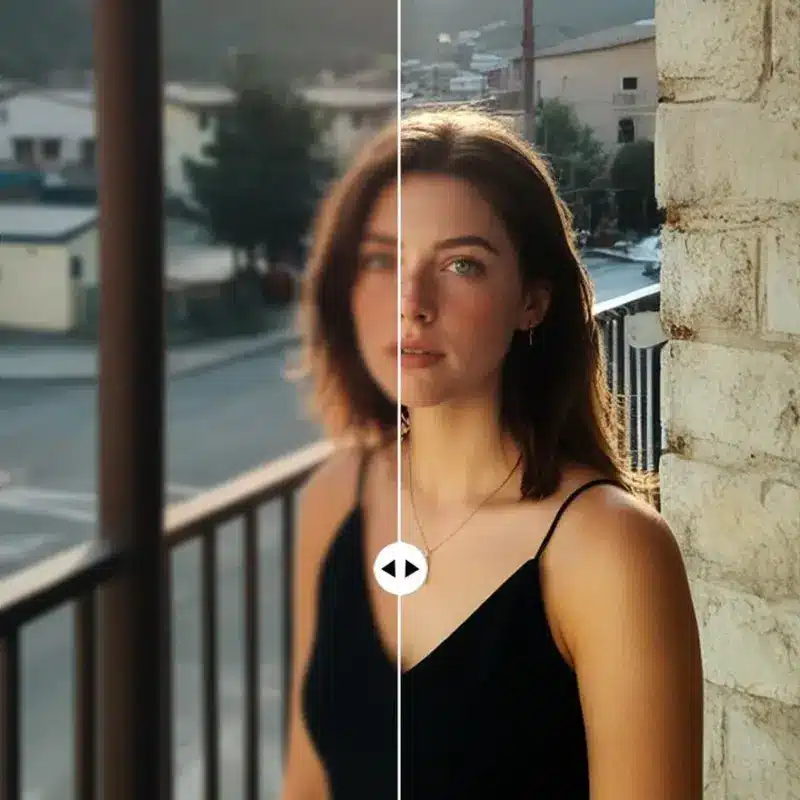
Enhance Image Quality Before Compression
Make sure your images have a crisp, clear appearance before shrinking their sizes. Compressing a photo that is dull, grainy, or of low quality merely intensifies these issues.
AI services such as Zawa AI Image Enhancer can get rid of the blur, recovering the hidden elements, enhancing the sharpness of the outlines, and enlarging the low-quality images to maintain their sharpness even after the file size reduction.
Thanks to fast upload, HD or Ultra HD ability to enhance one’s batch processing for up to 20 images, it guarantees that your WordPress pictures will have a professional appearance without slowing down your website.
Step 2 — Convert Images to the Correct Format
After you have improved and prepared your images, the main thing is to convert their format. WebP is the best format for WordPress, as a matter of fact, the guest posting site even made it a requirement that files must be in WebP format and less than 100KB. WebP gives an equal visual quality to JPEG and PNG but in a much smaller size, which results in faster loading times for your pages.
The problem is that most designers still export images in JPG or PNG by default. It is a good idea to change the format of the images prior to uploading them if you want to be sure, and it is a method that does not entirely depend on a plugin.
To help you through this process, you can try using an HD photo converter such as the Zawa HD Photo Converter. It’ll allow you to upload up to 20 images at a time, enhance their sharpness, and finally convert them to HD or UHD resolution before exporting them in WebP format.
The batch editor is a convenient tool to change resolution, downsize, and even keep each file less than 100KB without quality loss. Note that upgrading should be the first step and conversion the last to get the best results.
Step 3 — Use a WordPress Image Optimization Plugin
After you do all the prep work for your images manually, you still will need a plugin to make sure that everything keeps working well. An ideal plugin for WordPress image optimization should not only be capable of automatically compressing images that get uploaded images but also provide the feature of batch-processing all the images that are already present in your media library.
Thus, you get more time, your website remains light and fast, and your performance doesn’t get affected even when you add more content.
Top Plugins to Consider in 2026
| Plugin | Best For | Compression Type | Free Plan? |
| EWWW Image Optimizer | Privacy-focused users who prefer server-side processing | Lossy & lossless | ✅ |
| ShortPixel | Big libraries, WooCommerce stores | Lossy, lossless, glossy | ✅ (limited) |
| Optimole | Set-and-forget optimization with CDN delivery | Dynamic/adaptive | ✅ |
| Imagify | WP Rocket users and beginners | 3 compression levels | ✅ (limited) |
What to Look for in an Image Optimization Plugin
The key features you’ll want to consider when picking a plugin are as follows:
- Highly effective compression that shrinks file size but doesn’t seriously degrade visual quality.
- Lazy loading features are integrated directly into the plugin, so that images outside the viewport are loaded only as needed.
- Automatically converting images to WebP format.
- Optionally, supporting a CDN to make content delivery worldwide faster.
Don’t ever install more than one performance optimization plugin simultaneously. Running multiple plugins can result in conflicts such as image distortions, redundant processing, or a slowdown of your server.
Step 4 — Implement Lazy Loading and Responsive Images
One of the best ways to increase your page load speed is lazy loading. It loads the images only when they become visible to the user. From WordPress version 5.5 and on, this comes as a feature right out of the box. However, it does not hurt to verify that it’s turned on.
You can even check for it by right-clicking on an image, doing an inspect, and then searching for the loading=”lazy” attribute. You will be good to go if you spot it there.
Checking whether your theme supports responsive images is something you should consider doing as well. Apart from simply making four versions of different sizes, WordPress will go ahead and add the srcset attribute so that each device gets the version that is suitable for it. You can verify this by inspecting any image and the presence of the srcset attribute.
Step 5 — Add Descriptive Alt Text to Every Image
Alt text is equally important for opening your content to more people and improving SEO. It gives screen readers, as well as Google, a very clear description of what is in the image, which helps Google associate images with relevant queries.
Moreover, alt text makes your content more accessible. Keep your alt text short, simple, and naturally related; do not overuse keywords. Here is a straightforward way you can produce alt text:
[contents of the image] + [additional context if necessary]
This method results in alt text that is informative, precise, and optimized for SEO without keyword stuffing.
Step 6 — Audit and Maintain Your Image Library Regularly
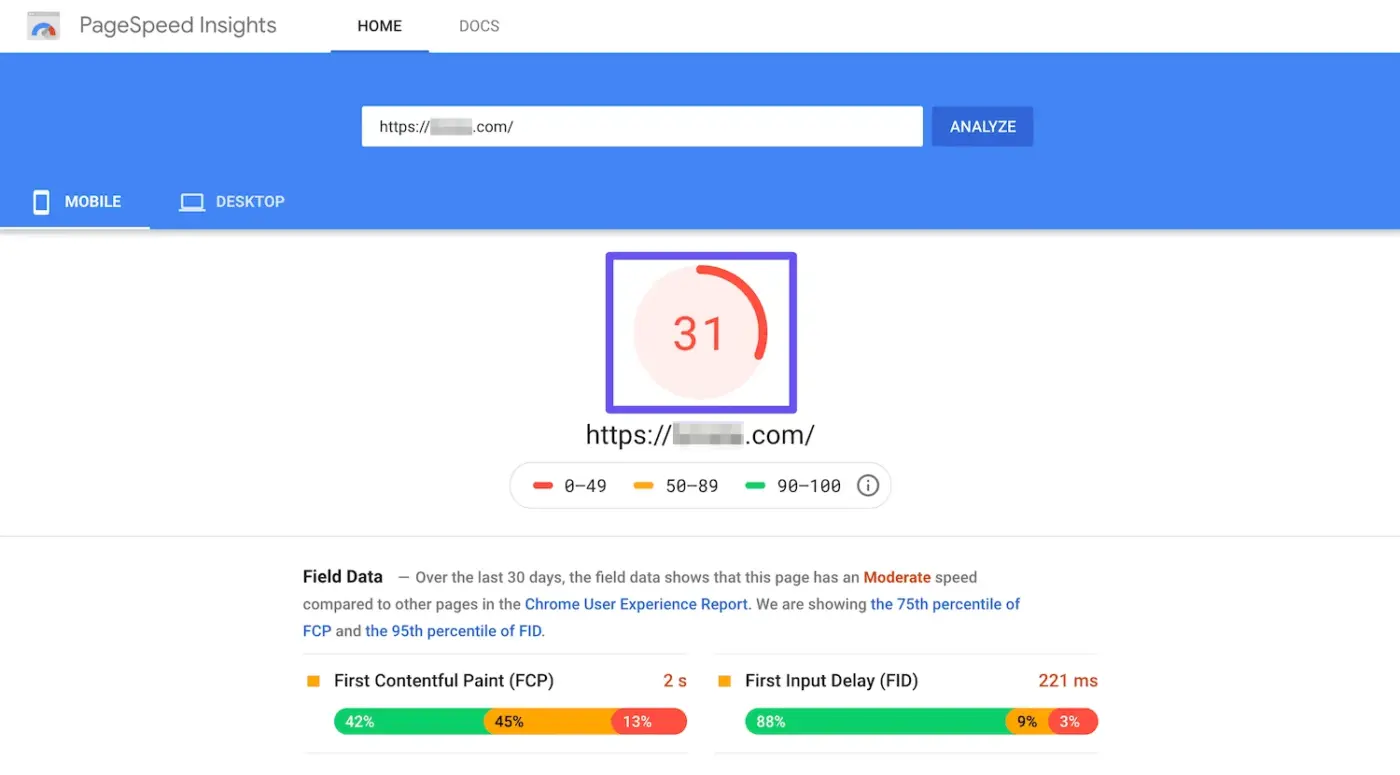
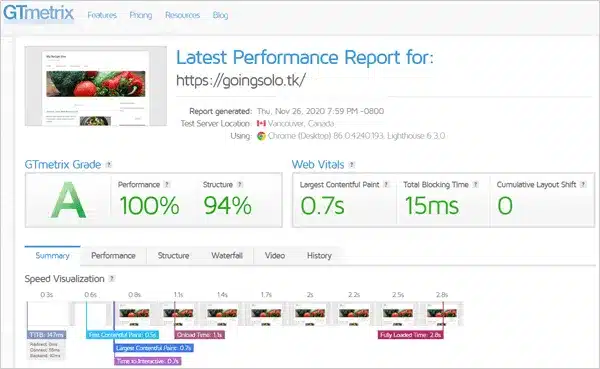
Image optimization isn’t a single-time activity. Each blog post or new product addition indicates more images, so periodic checks can make your website faster. A quarterly examination by means of tools such as GTmetrix or Google PageSpeed Insights will help you identify the largest or the least optimized files.
Remove overlooked images from your media library to decrease the size of your database and boost your performance. And stick to an easy pre-upload checklist every time: enhance → convert → compress → add alt text → upload.
Quick Pre-Upload Image Checklist
- Enhance low-res or blurry images with an AI photo enhancer
- Resize images to a maximum width of 1600px
- Convert images to WebP format and keep file size under 100KB
- Write concise, descriptive alt text
- Upload and let your optimization plugin handle compression
- Verify lazy loading is active
- Test page speed with Google PageSpeed Insights after adding new images
Conclusion
WordPress image optimization can be the quickest way to improve your website’s speed, user experience, and search engine readiness.
You can significantly speed up your website without downgrading the image quality if, besides other things, you optimize your pictures using a tool like Zawa, switch to WebP format, compress them with a plugin, add alt text, and activate the lazy loading feature.
Periodic evaluation and a simple upload checklist are great methods to ensure that the website is always at optimum performance as new content is added.
Start following these steps today and you will see your WordPress website functioning better, attaining higher rankings and having a longer time of visitors’ attention.
Yogesh Rude
Yogesh Rude is an SEO and content writer at DevDiggers who focuses on eCommerce visibility and on-page optimization. His guides cover the SEO decisions WooCommerce store owners face most often, including product page structure, metadata strategy, and how search engines interact with site content.
Join thousands of readers getting smarter every week.
Leave a Reply