

WordPress image optimization means serving image files that are no bigger than the screen needs. You can finish the core work in one sitting by choosing a format, resizing, compressing and checking what WordPress adds.
We tested every step on a WordPress 7.1.3 test site in October 2026 with one 4,000 pixel test photo. We measured file sizes, ran Smush and Squoosh, and read the loading attributes WordPress writes into the page.
This guide covers what core already does and seven steps in order. After that come five plugins, a code route with no plugin and the mistakes we would avoid.
What Is WordPress Image Optimization?
WordPress image optimization is the work of making each image file small enough to load fast without visible damage. It covers the format, pixel size, compression level and the way the page loads the file. Slow images hurt your Largest Contentful Paint, and Google asks sites to keep that at 2.5 seconds or less.
Images carry the most bytes on both mobile and desktop pages. The 2025 Web Almanac reports that the median mobile home page used 911 KB of images.
WordPress does part of the job for you. It scales any upload above 2,560 pixels, and the filter that sets the limit lists a default of 2560. It also builds smaller copies and adds srcset so each screen can pick a size.
WordPress does not choose a modern format, shrink the original file or write your alt text.
Core also keeps the original upload on disk. A reply on the WordPress 6.5 core post says WordPress will always preserve the originally-uploaded file. That is where most of the waste hides, and the test numbers below show how much.
How to Optimize Images in WordPress
To optimize images in WordPress, work through seven steps in order. Pick a format, resize and compress before you upload. Then check what WordPress generates, confirm lazy loading, write alt text and fix the images already sitting in your Media Library.
Step 1: Choose the Right Image Format
Use JPEG for photos, PNG for graphics that need sharp edges or transparency, and WebP when you want smaller files. WordPress 6.5 added AVIF support, and the core post says AVIFs are supported in all major browsers. Google reports that lossy WebP files are 25 to 34 percent smaller than comparable JPEG files.
| Format | Best for | What we saw in our test |
|---|---|---|
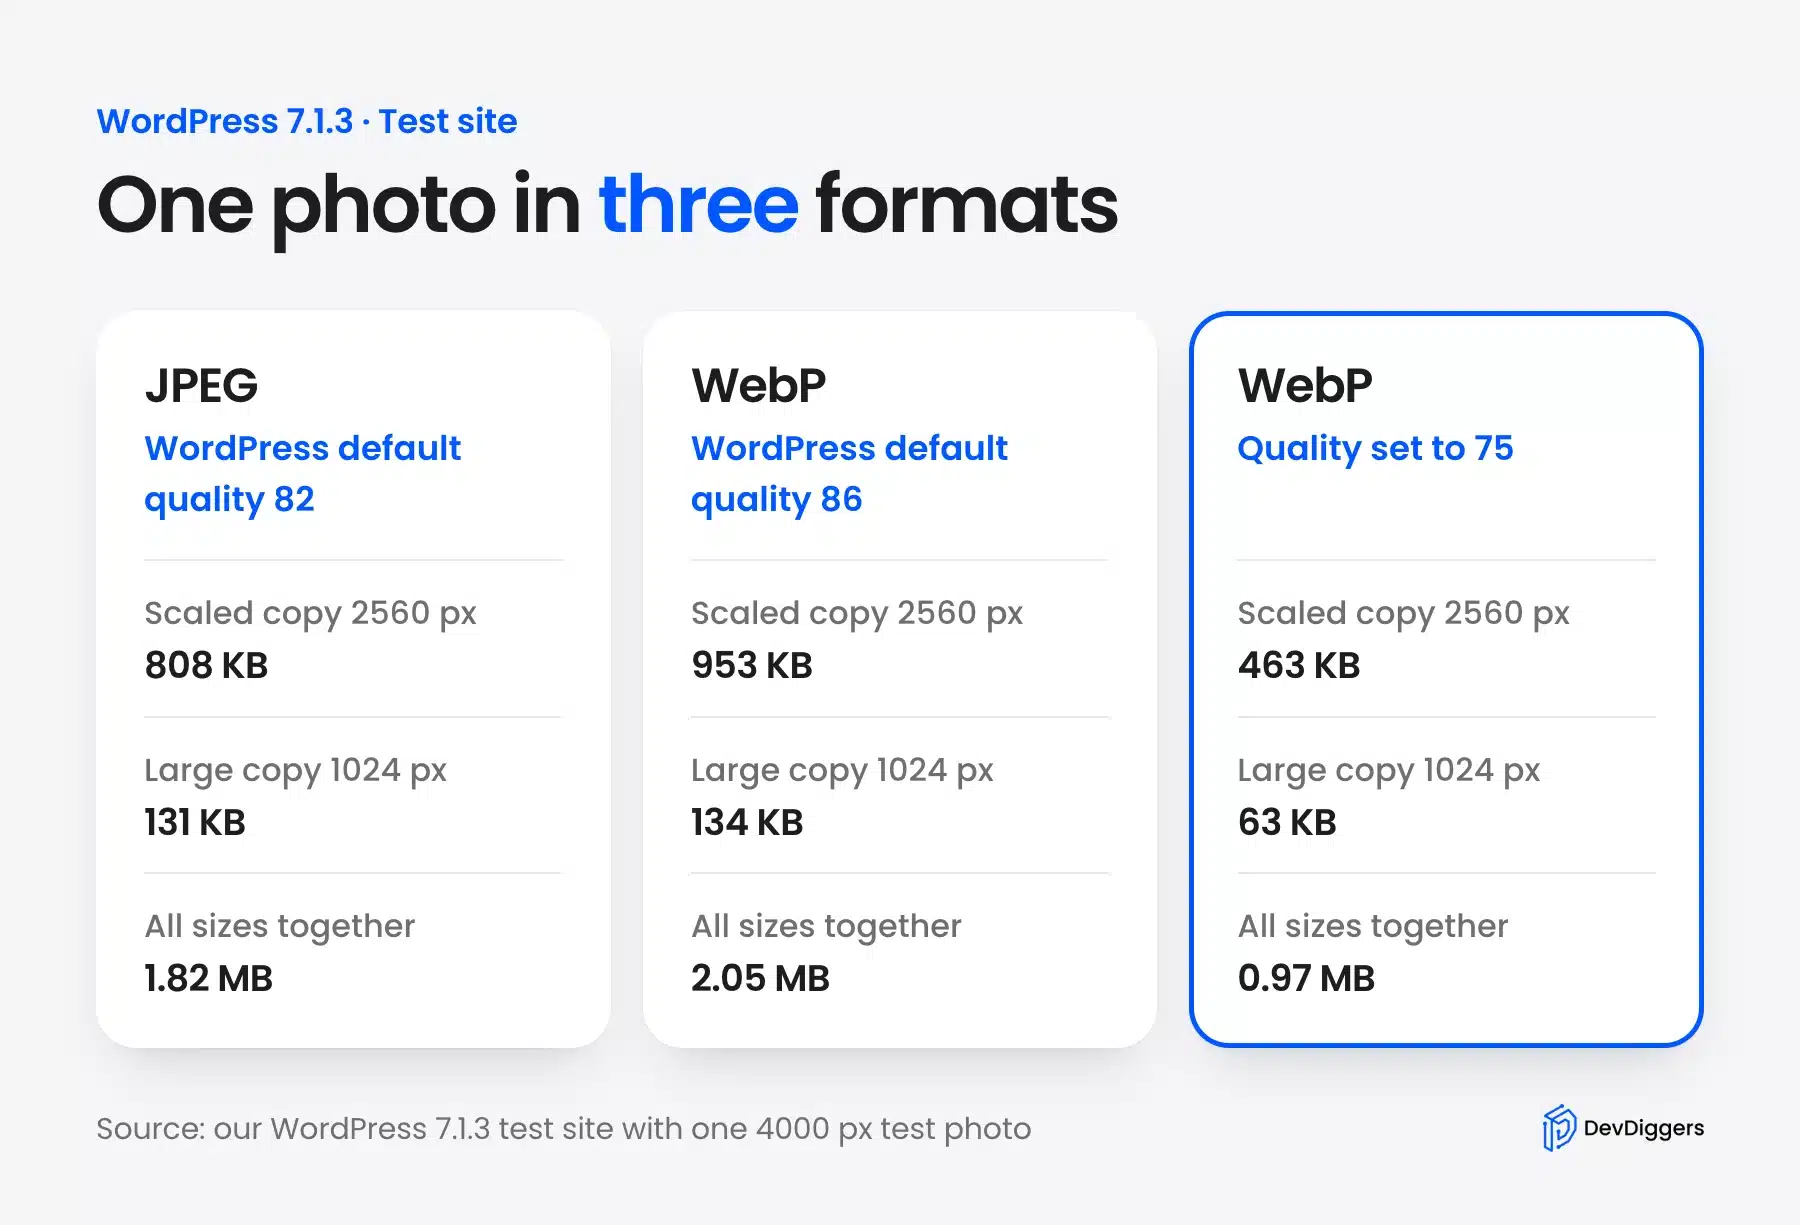
| JPEG | Photos | 808 KB for the 2,560 pixel copy at WordPress quality 82 |
| PNG | Logos, screenshots and transparency | 5.19 MB for the same photo at 2,560 pixels |
| WebP | Most web images | 953 KB at WordPress quality 86 and 463 KB at quality 75 |
| AVIF | A modern format with core support | Supported since WordPress 6.5, and we did not benchmark it |
Our test was less tidy than Google’s figure. WordPress saved the WebP copy at its default quality of 86, and that file came out larger than the JPEG at quality 82.
Setting the quality to 75 cut the same copy to 463 KB.
Quality numbers do not match across formats. Judge the file by size and by eye. Never convert a photo to PNG, because it was more than six times the size of the JPEG here.
Step 2: Pick the Right WordPress Image Size
The right WordPress image size is the width your layout shows the image at. For sharp results on high-density screens, upload a little wider than the display width. A blog column that is 800 pixels wide rarely needs a file wider than 1,600 pixels.
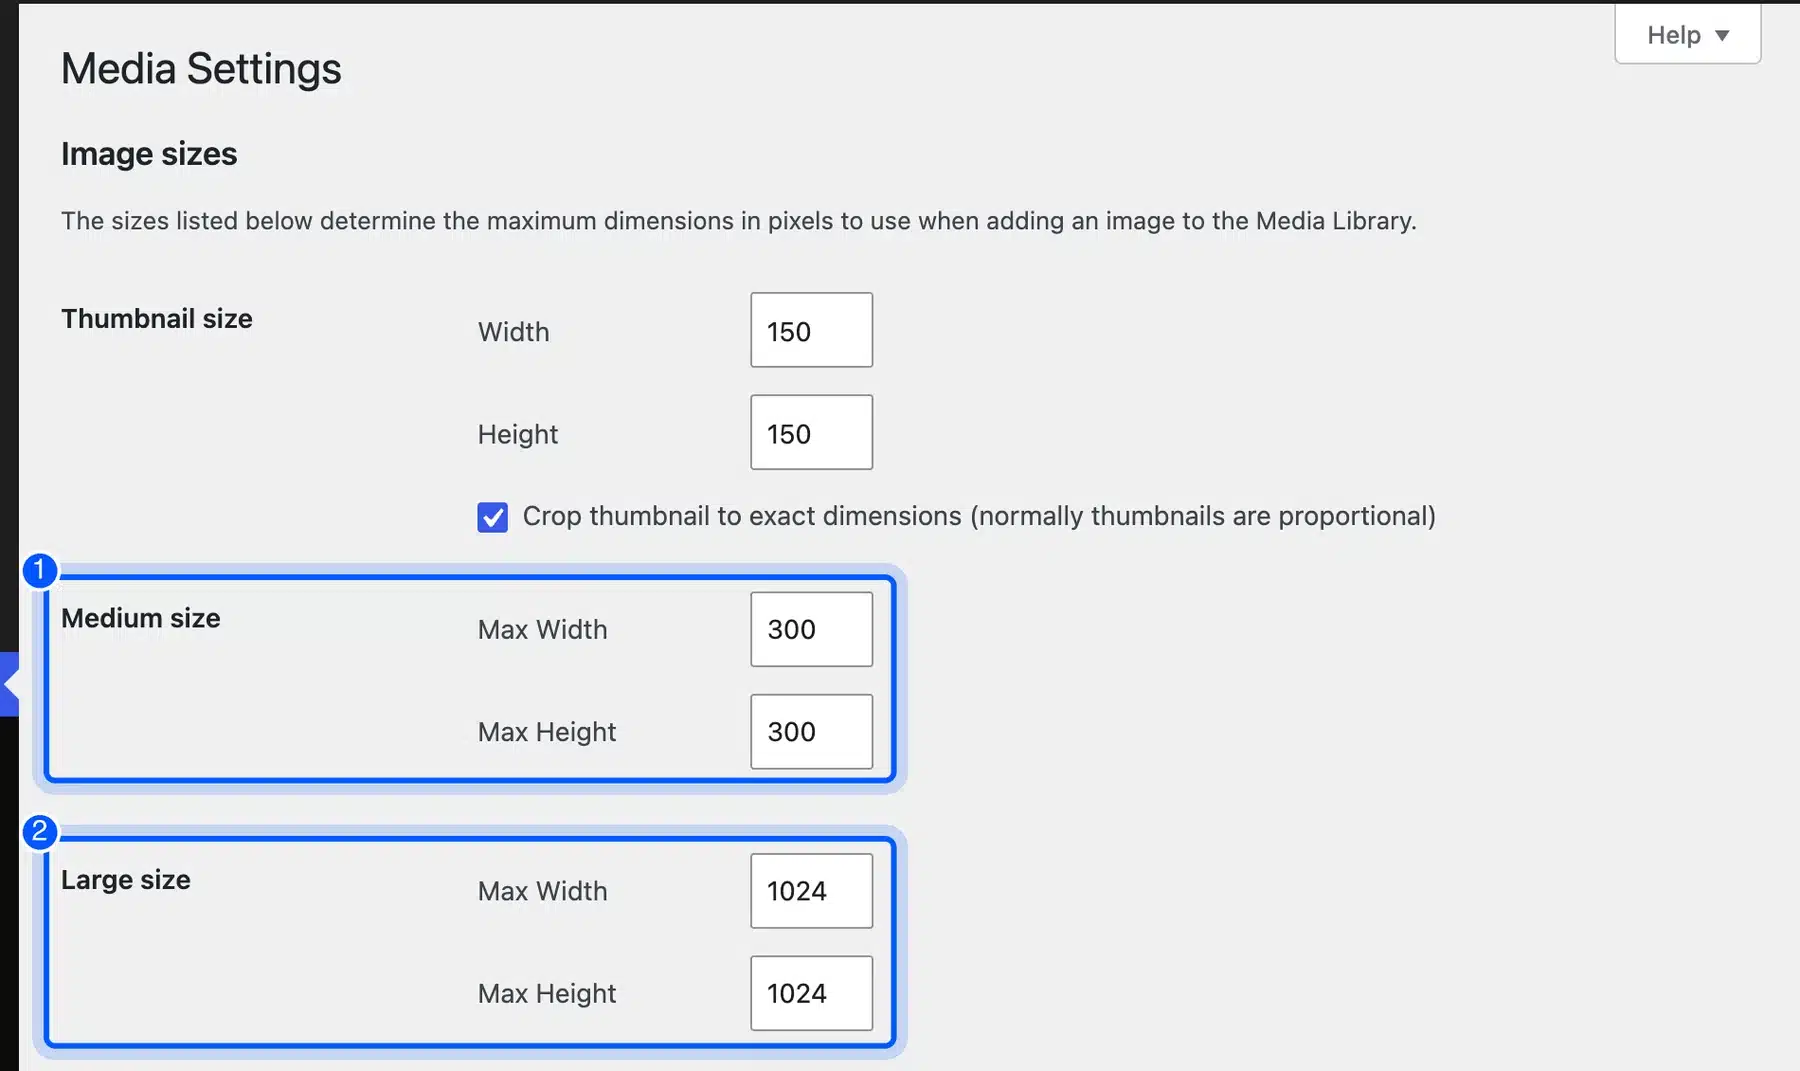
Open Settings > Media to see the sizes WordPress creates. On our test site they were 150, 300 and 1,024 pixels, and the upload also produced 768, 1,536 and 2,048 pixel copies. Change the values only if your theme shows images at other widths.
If you have an oversized photo already, our guide to resizing WordPress images covers the editor tools. Resize first and compress second, because a smaller image compresses further.
Step 3: Compress Before You Upload
Compression shrinks the file by dropping detail you will not notice. Lossy settings remove more data than lossless ones.
Always look at the result before you save it. Doing this on your computer means WordPress receives a small file from the start.
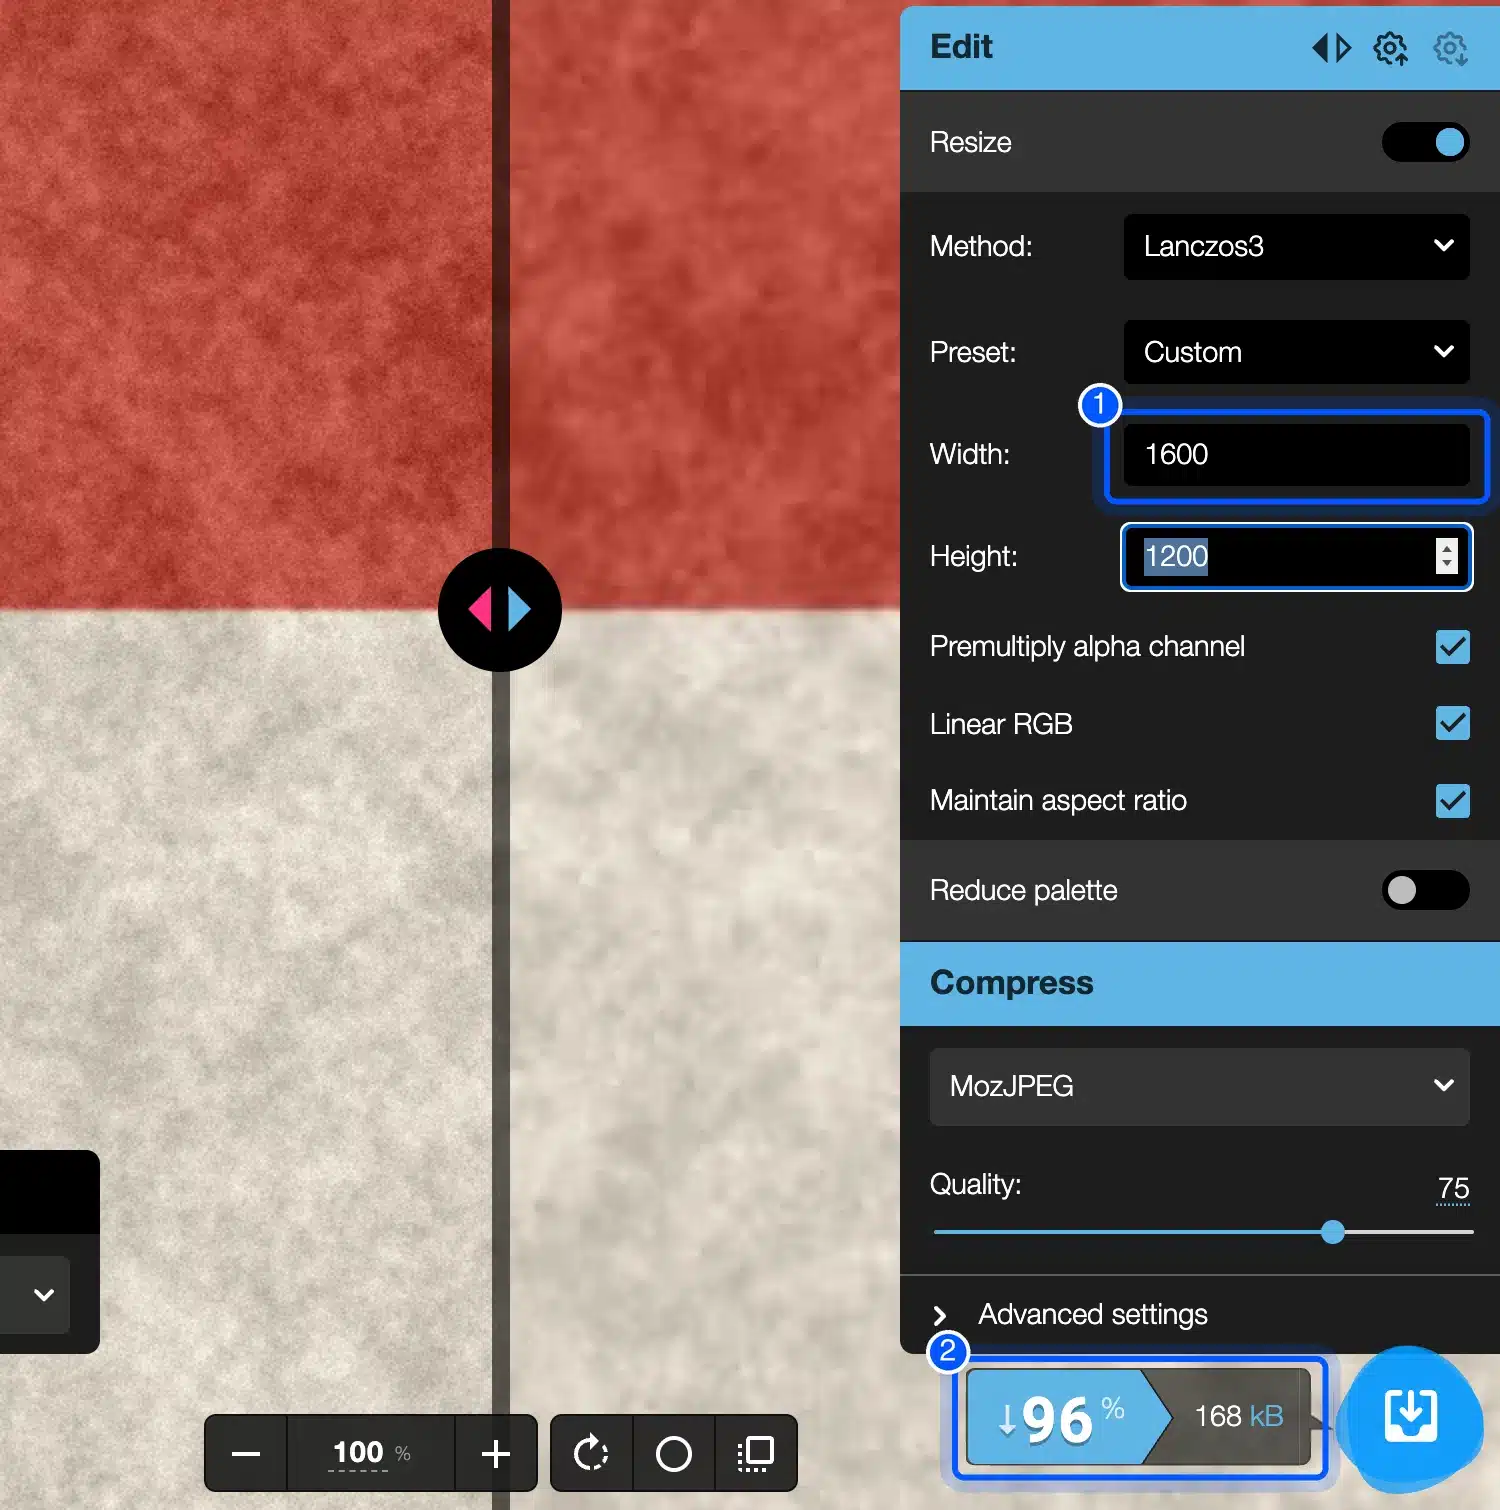
We opened the 4.36 MB test photo in Squoosh, set the width to 1,600 pixels and kept MozJPEG at quality 75. Squoosh reported a 168 kB file and marked it 96% smaller.
Your own photos will give different numbers. Detail and noise change how far a file shrinks.
This is the WordPress image compression step with the biggest return in our test. It beat every plugin setting we tried, because it shrinks the pixels as well as the bytes.
Step 4: Upload and Check What WordPress Creates
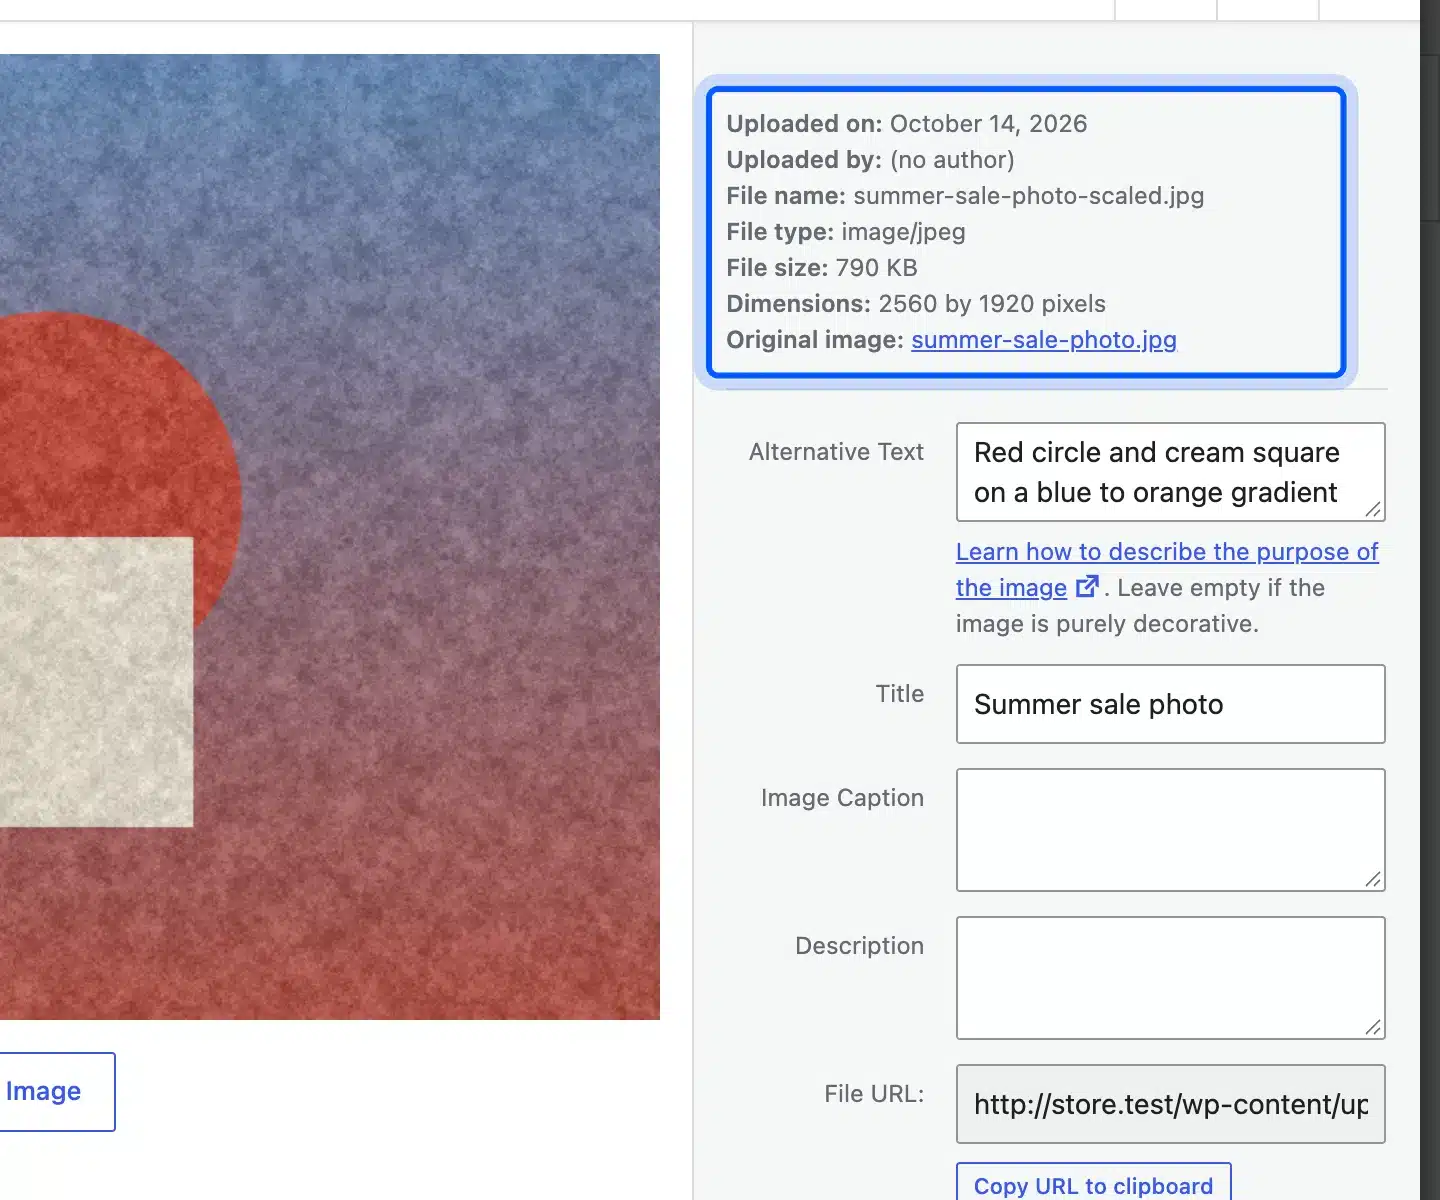
After you upload, open the image in the Media Library and read its details. WordPress shows the file name, size and dimensions it kept. A name that ends in -scaled means the upload was above 2,560 pixels and WordPress made a smaller working copy.
On our test site the 4,000 pixel photo produced a scaled copy of 2,560 by 1,920 pixels. WordPress lists it as 790 KB.
That is 808,483 bytes, because WordPress counts 1,024 bytes to a KB. The original upload stayed on disk as well.
All the copies together took 6.18 MB for one photo. The uploads folder and database hold all of them. A big original costs disk space even when visitors never see it.
Step 5: Check Lazy Loading and the First Image
WordPress adds loading="lazy" to images so the browser waits to fetch them until they are near the screen. The WordPress 5.5 announcement says images are lazy-loaded by default with the native attribute. Lazy loading helps images far down the page and harms the one at the top.
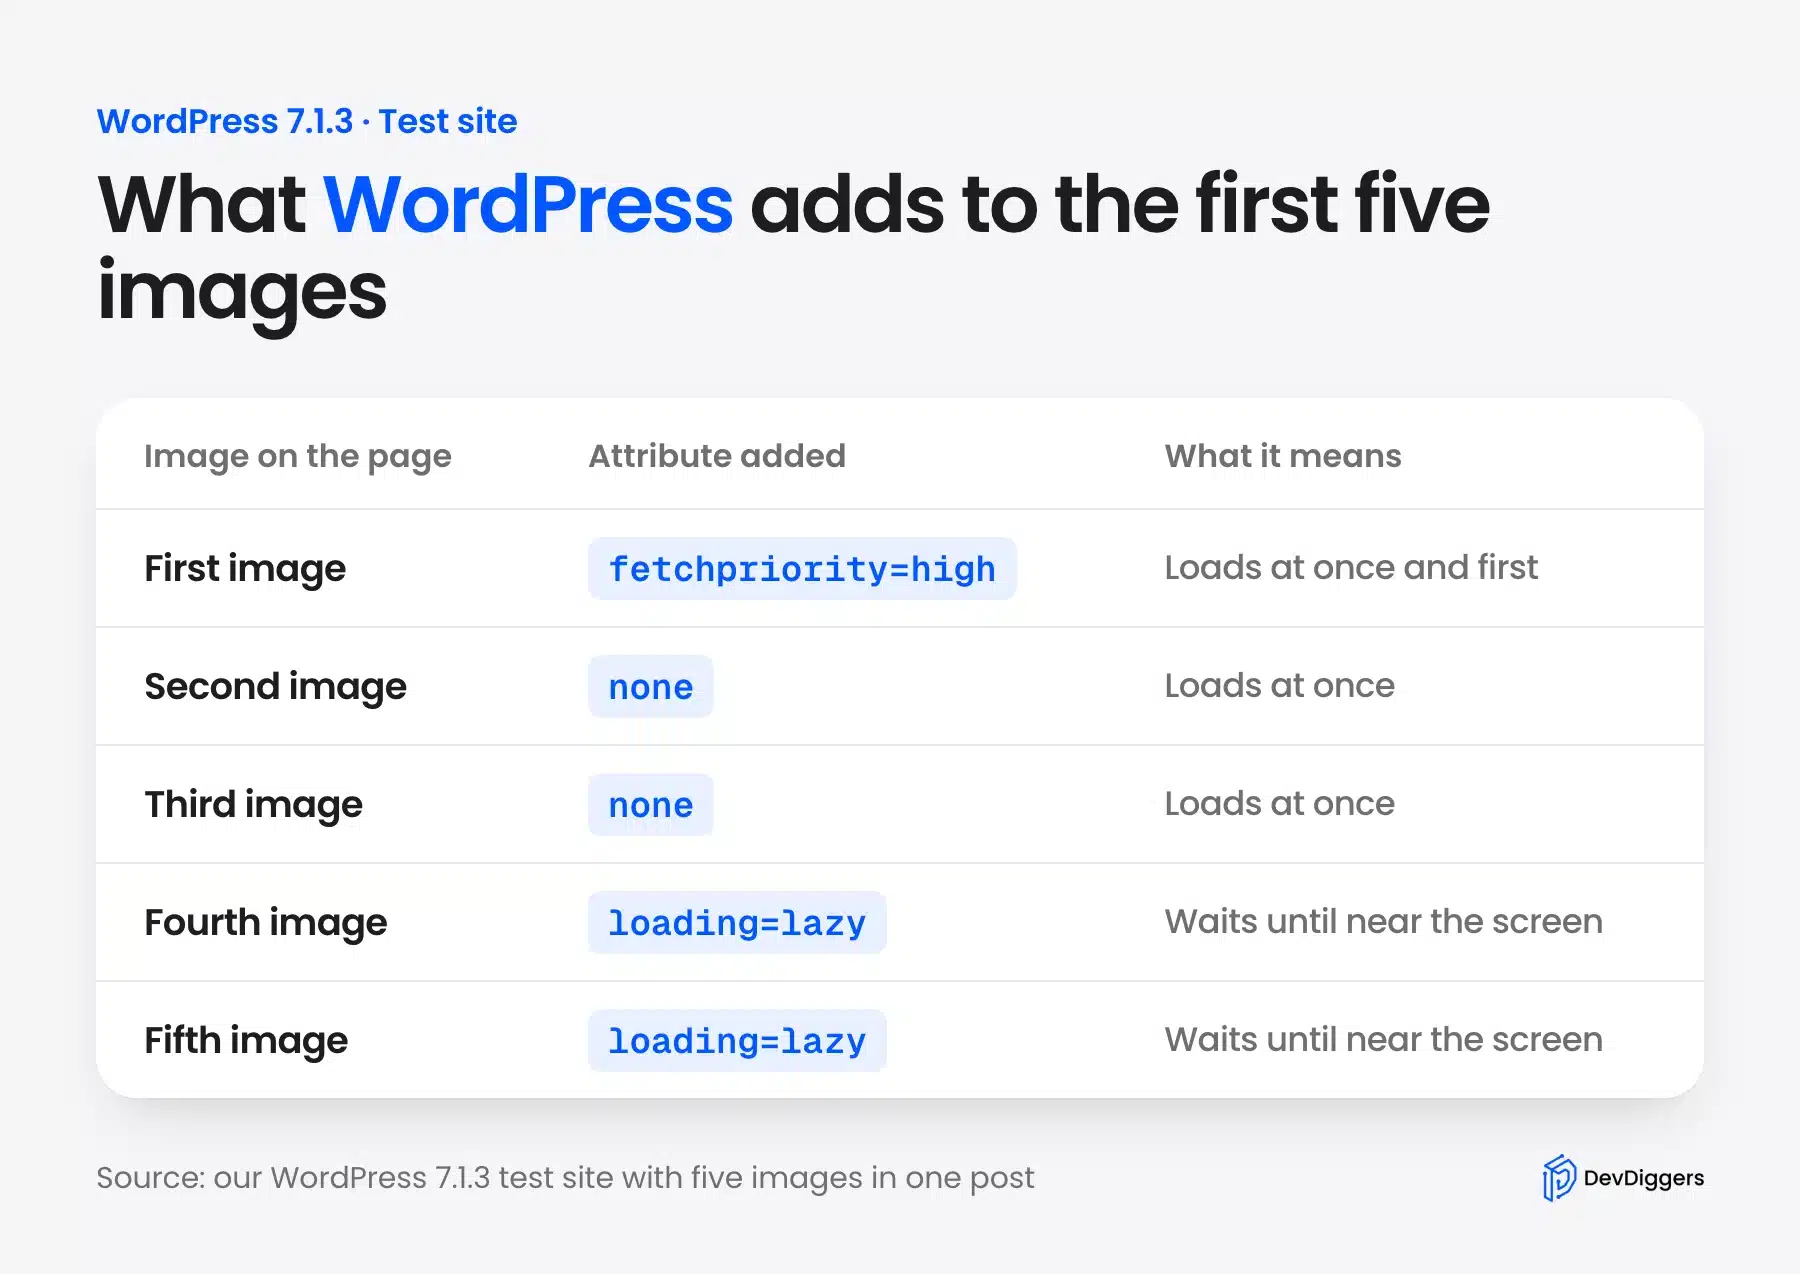
The filter for the threshold skips the first three content images, and that default changed from 1 to 3 in WordPress 6.3. We put five images in one post to see the result. The first image got fetchpriority="high", images two and three got nothing, and images four and five got loading="lazy".
So put your main image first in the content. Google’s web.dev article on lazy loading and Largest Contentful Paint tested a fix that avoids lazy loading images above the fold.
Step 6: Write WordPress Alt Text and Clear File Names
Write alt text that describes what the image shows, in one short phrase. Google calls alt text the most important attribute for describing an image, and it warns against filling alt text with keywords. The same page asks for short and descriptive file names instead of names like image1.jpg.
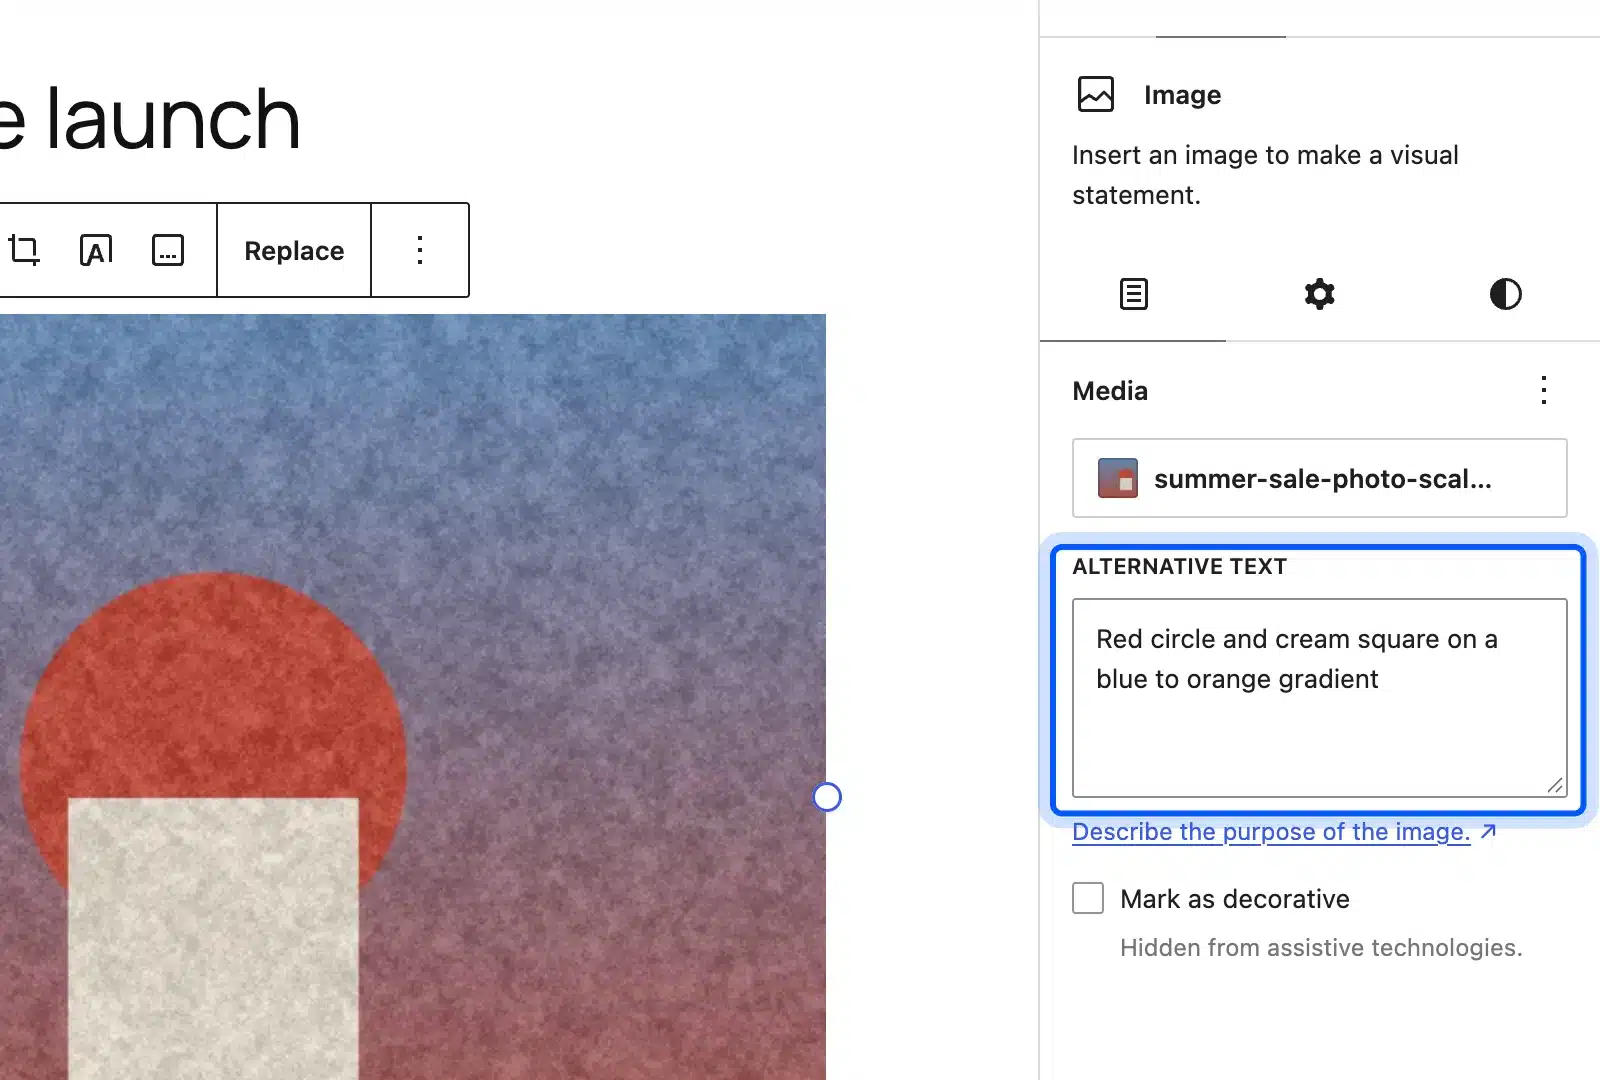
In the block editor, select the image and open the Block tab. The Alternative text field sits under the media preview, and a checkbox marks decorative images that need no description. Our guides on adding alt tags to images and naming images for SEO go deeper.
Rename the file before you upload it, because changing the name later breaks every place that links to the old file.
Step 7: Fix the Images Already in Your Media Library
Images you uploaded last year are still the same big files. A bulk optimizer plugin can compress your whole library in one run and then handle every future upload. This is the step where a plugin earns its place.
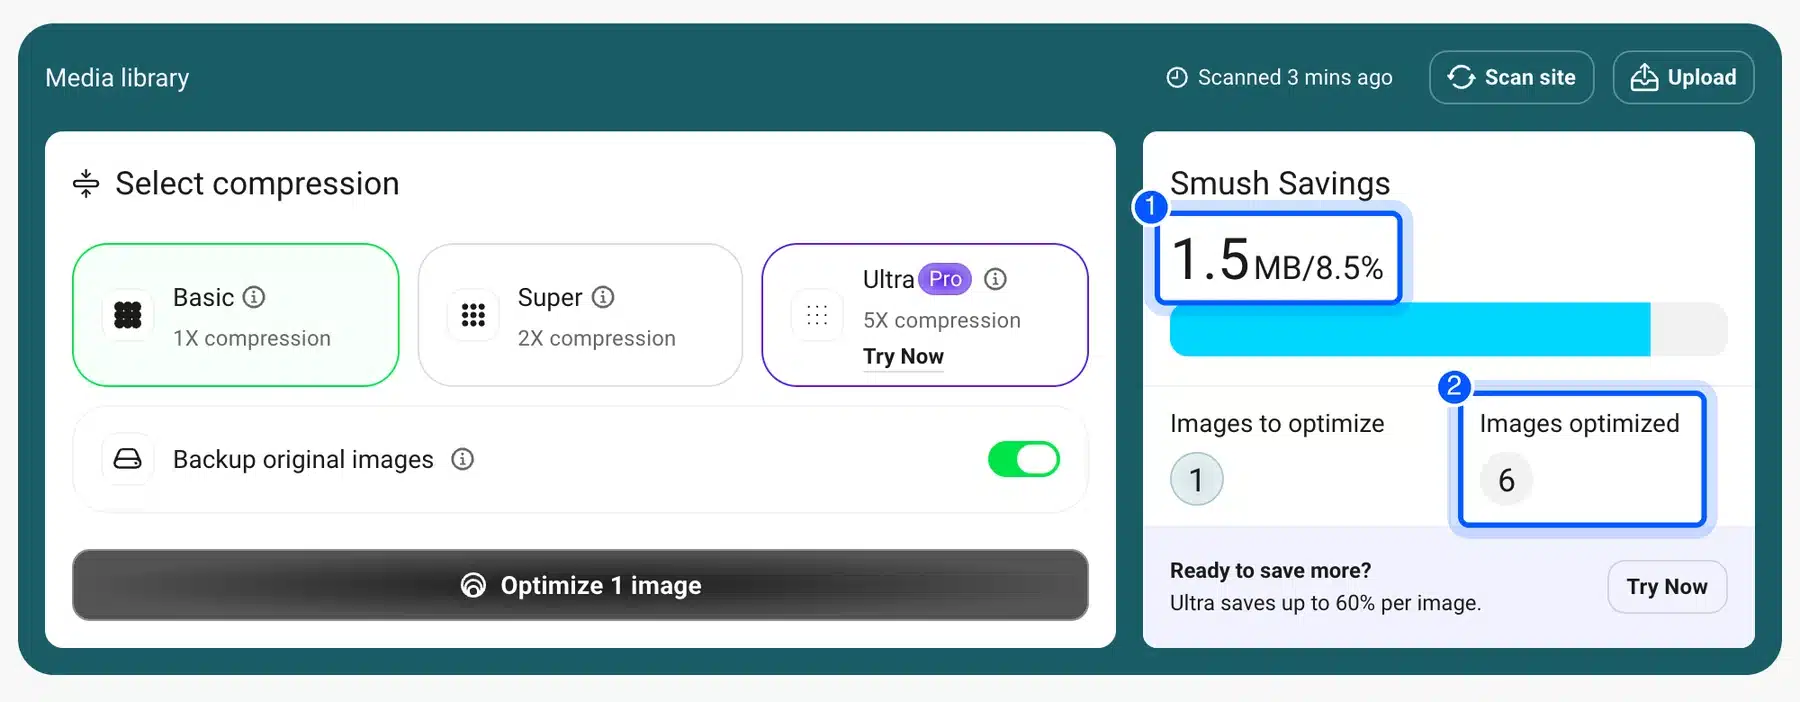
We ran the free Smush plugin with its default Basic compression on our test uploads. Smush reported 1.5 MB saved and showed it as 8.5% across the six images it processed. The scaled copy of the 4,000 pixel photo fell from 808 KB to 740 KB, and the original fell from 4.36 MB to 3.90 MB.
That is a modest gain, because Basic compression is lossless and keeps every pixel. Smush also leaves the format alone, since its WebP and AVIF conversion is a paid feature on its WordPress.org listing.
What Our Test Showed About Resizing
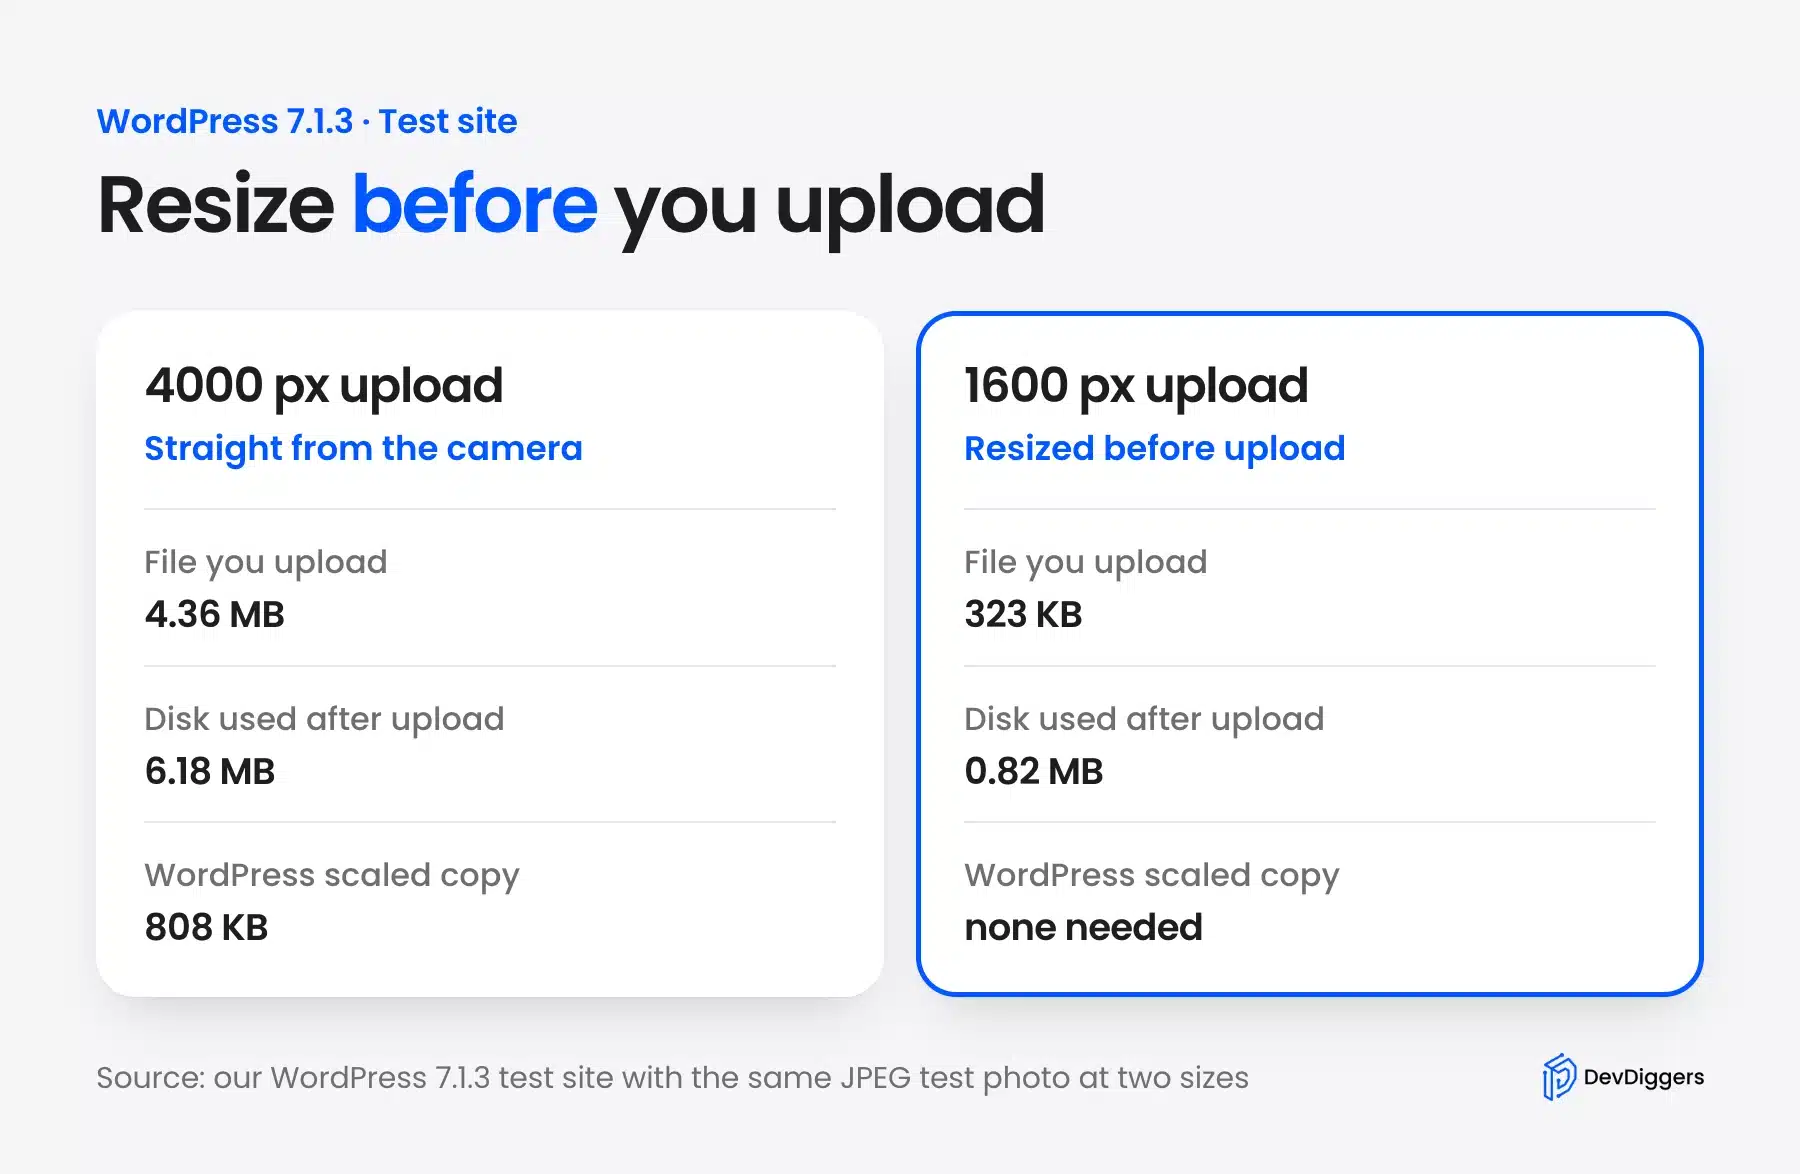
Resizing before you upload saved far more than any compression setting we tried. The same JPEG used 6.18 MB on disk after a 4,000 pixel upload and 0.82 MB after a 1,600 pixel upload. That is 87% less storage for the same page.
| Test on our WordPress 7.1.3 site | Disk used for the photo |
|---|---|
| Upload the 4,000 pixel JPEG as it is | 6.18 MB |
| Same upload after Smush Basic compression | 5.57 MB |
| Resize to 1,600 pixels first and save as JPEG at quality 82 | 0.82 MB |
| Upload as WebP at quality 75 with the code below | 0.97 MB for the generated sizes |
The WebP row counts the generated copies only, and the original JPEG stays on disk as well. Resizing first also removes the scaled copy, because the file is already under 2,560 pixels.
A photo that is already web-sized gains little from a plugin. Resize first and compress second. Your numbers will differ with your own photos, because our test file was a 4,000 pixel JPEG with fine texture.
Best Image Optimization Plugins for WordPress
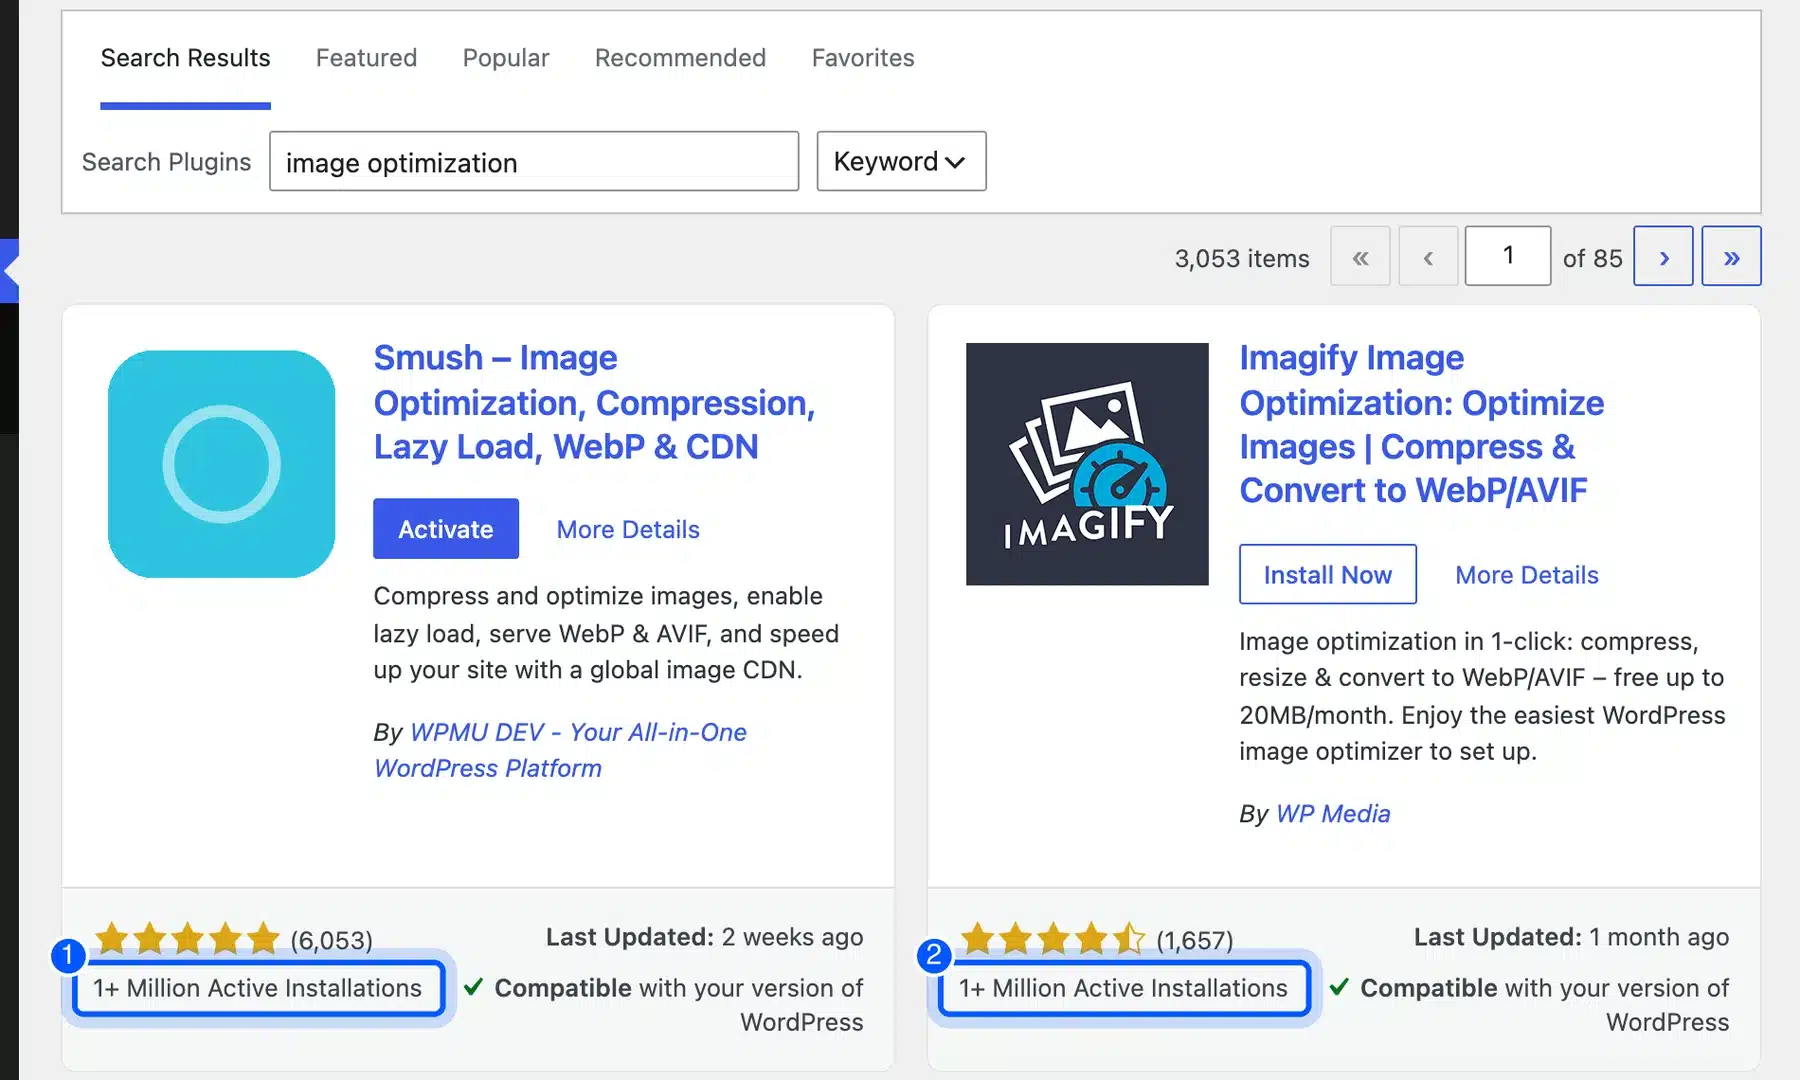
The best image optimization plugin for WordPress depends on how many images you have and where you want the work done. Smush, EWWW Image Optimizer, ShortPixel, Imagify and Optimole all list free plans on WordPress.org. We tested only Smush, and we read the other four from their listings on 15 October 2026.
| Plugin | Active installs | Free plan | Formats and limits |
|---|---|---|---|
| Smush | 1+ million | Lossless and lossy compression | Free skips images over 5 MB, WebP and CDN are paid |
| EWWW Image Optimizer | 1+ million | Local compression and WebP conversion | AVIF needs the paid Easy IO service |
| ShortPixel | 300,000+ | 100 credits a month with an API key | WebP and AVIF conversion with paid credits beyond that |
| Imagify | 1+ million | Up to 20 MB of images a month | WebP and AVIF conversion included in the free plan |
| Optimole | 200,000+ | Up to 2,000 monthly visits | Cloud delivery through a CDN while original files stay on your server |
Choose a local plugin like EWWW if you want files to stay on your own server. Choose a cloud service like Imagify, ShortPixel or Optimole if your host cannot run image tools or you want a CDN. Run one image optimizer at a time, since two plugins can compress the same file twice.
Images are one part of a slow page. Scripts, fonts and hosting often cost more, and fixing those takes more than a plugin. Our WordPress speed optimization services cover the full page.
Can You Optimize WordPress Images Without a Plugin?
Yes, WordPress core can do the format and quality work with two small filters. The image_editor_output_format filter turns JPEG uploads into WebP, and the wp_editor_set_quality filter sets the quality. Both are in the WordPress 6.5 AVIF post and the quality hook reference.
Add this code to a must-use plugin or a child theme. We ran it as a must-use plugin on our test site:
add_filter( 'image_editor_output_format', function ( $formats ) {
	$formats['image/jpeg'] = 'image/webp';
	return $formats;
} );

add_filter( 'wp_editor_set_quality', function ( $quality, $mime_type ) {
	return 'image/webp' === $mime_type ? 75 : $quality;
}, 10, 2 );
After that, every new JPEG upload produced a scaled WebP copy and WebP versions of the smaller sizes. WordPress lists our scaled copy as 452 KB. That is the same 463 KB used above, counted in WordPress units.
The Attachment details panel still lists the file type as image/jpeg, because it reports the original upload. The file name ends in .webp.
We also ran wp media regenerate on an older upload. It rebuilt the sizes as WebP files while the original JPEG stayed.
Note: The test used a 4,000 pixel JPEG on WordPress 7.1.3. Check the result on a staging copy first, because a theme or plugin can expect JPEG file names.
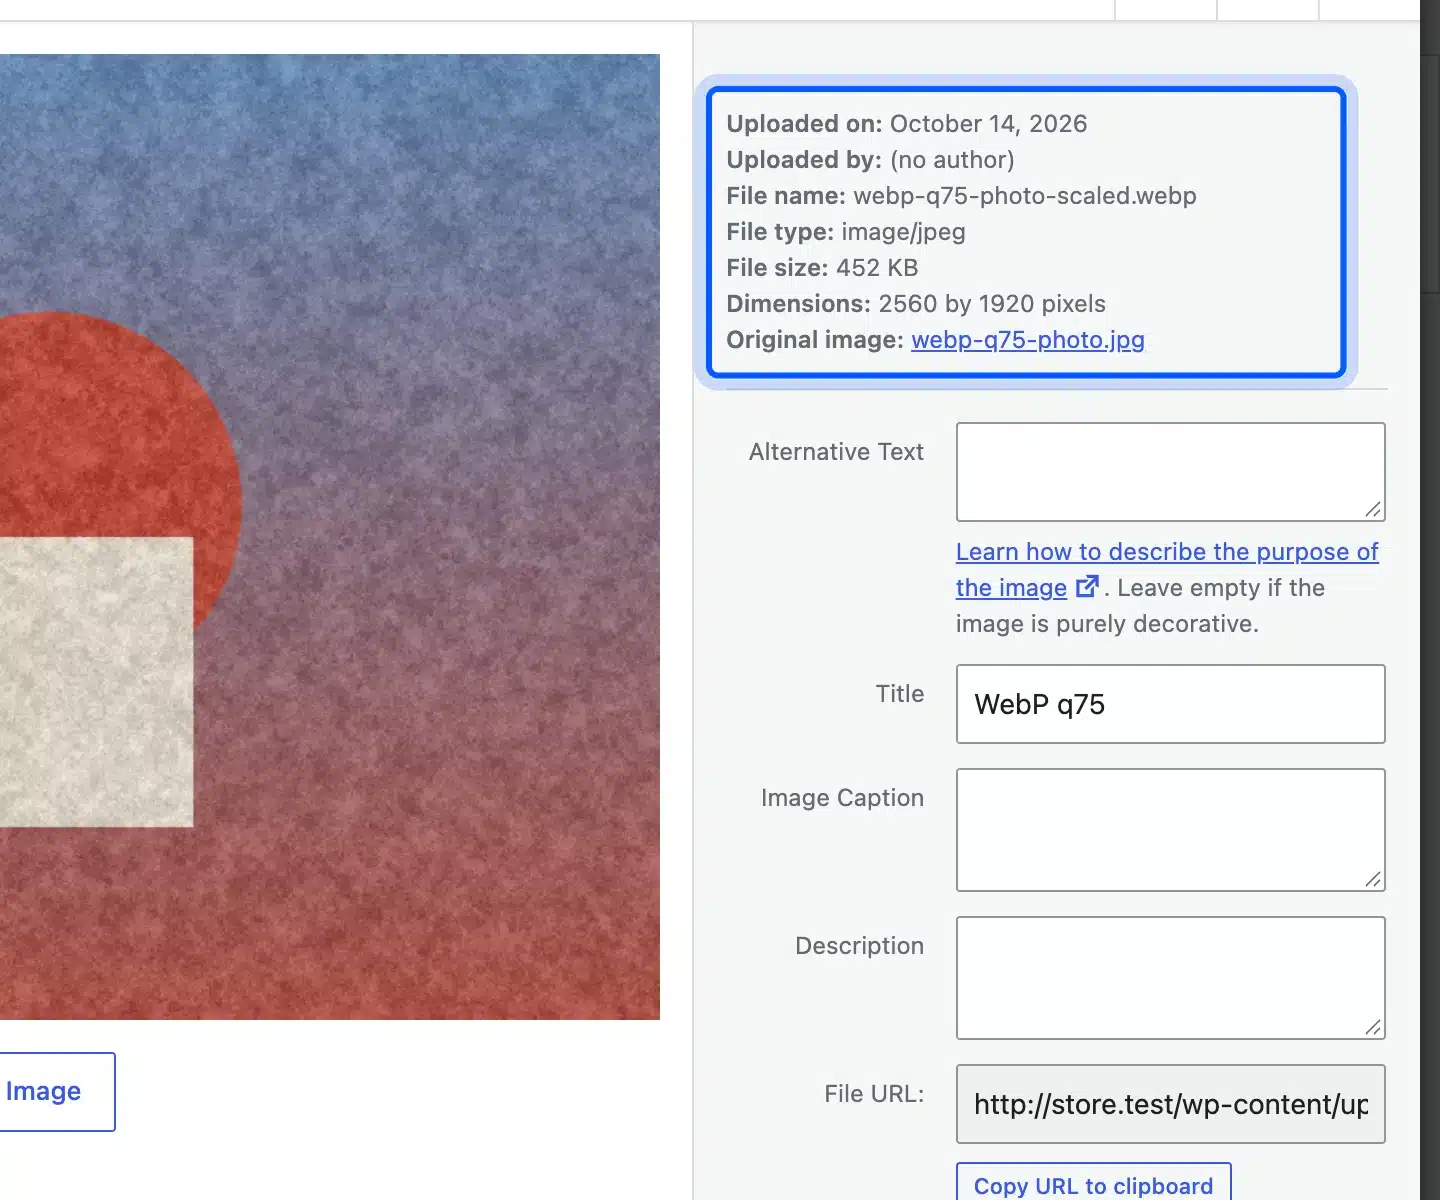
Image Optimization Mistakes to Avoid
Most image problems come from five habits, and each one is easy to fix once you spot it. Our tests and the sources above point to the same list. Check your own site against it before you add another plugin.
- Camera-size uploads: One 4,000 pixel photo used 6.18 MB on disk in our test, against 0.82 MB for the 1,600 pixel version.
- Lazy-loading the main image: WordPress skips the first three content images on purpose. Do not add lazy loading to your top image by hand.
- PNG photos: The PNG copy of our photo was 5.19 MB at 2,560 pixels, against 808 KB as a JPEG.
- Two optimizers at once: Each plugin can re-compress the file the other one already shrank.
- Keyword-stuffed alt text: Google warns against filling alt attributes with keywords. Describe the image instead.
How to Check Your Image Optimization Worked
Check the result with Google’s PageSpeed Insights and your browser’s network panel. PageSpeed Insights reports your Largest Contentful Paint and flags images that are larger than they need to be. The network panel lists every image file with its size.
Aim for the Largest Contentful Paint of 2.5 seconds or less that Google’s guidance gives as a good score. Test the page again after each change to see which step helped.
Conclusion
WordPress image optimization comes down to sending smaller files in a sensible format at the right size. Resize and compress before you upload, check the copies WordPress makes and keep your top image out of lazy loading. Then use one plugin for the images already in your library.
In our test, resizing before upload cut disk use by 87%, and a lower WebP quality halved the scaled copy. Start with those two changes and measure again.
Frequently Asked Questions (FAQs)
Q1. Does WordPress compress images automatically?
Partly. WordPress re-encodes the copies it creates, and its default JPEG quality was 82 on our WordPress 7.1.3 test site. It leaves the original upload untouched.
Q2. Is WebP better than JPEG for WordPress?
Often, because Google reports lossy WebP files are 25 to 34 percent smaller than comparable JPEG files. In our test, WordPress’s default WebP quality of 86 gave a larger file than the JPEG. Lower the quality and check the result.
Q3. Can I turn off the 2560 pixel scaling?
Yes. The big_image_size_threshold filter says that returning false disables the scaling. Only do this if you need the full-size file served, because it keeps the largest copy in use.
Q4. Does image optimization help SEO?
It helps in two ways. Smaller images can improve your Largest Contentful Paint, and Google’s image guidance asks for descriptive alt text and short file names. Neither guarantees a ranking.
Q5. Should I use AVIF instead of WebP?
WordPress 6.5 and later accept AVIF uploads, and the core post says all major browsers support it. We did not benchmark AVIF and cannot give you a size figure. Test a few of your own photos first.
Q6. Why does my image look blurry after compression?
The quality setting is probably too low, or the image is smaller than the space it fills. Raise the quality a few points and compare the result side by side. Keep the original file so you can try again.