MultiPOS – Point of Sale for WooCommerce Plugin Documentation

MultiPOS is a comprehensive and full-featured Point of Sale (POS) plugin specifically created for WooCommerce. It is intended to assist businesses in monitoring their physical shop activities. This plugin enables businesses to seamlessly combine their online and offline sales channels, facilitating centralized management of sales, inventory, and customer information.
MultiPOS – Point of Sale for WooCommerce is a user-friendly interface designed to simplify the management of business sales operations. The plugin is specifically created to integrate smoothly with WooCommerce, offering a variety of sophisticated capabilities for businesses to tailor their POS system to suit their requirements.
MultiPOS – Point of Sale for WooCommerce stands out for its real-time synchronization with WooCommerce. Businesses may maintain their inventory and sales data in real-time, regardless of whether the sale occurred online or in-store. Businesses may oversee their complete product library, pricing, and promotions through a unified dashboard.
MultiPOS – Point of Sale for WooCommerce offers several tools and capabilities to manage multiple physical locations. The plugin allows businesses to establish several outlets and oversee inventory at numerous locations. It also enables the assignment of distinct user roles and permissions for each site.
The plugin offers sophisticated reporting and analytics capabilities for businesses to monitor their sales, inventory, and customer information. The information provided consists of comprehensive sales statistics, inventory overviews, and customer profiles, enabling data-driven decisions on pricing, promotions, and product offers.
MultiPOS – Point of Sale for WooCommerce is a robust and versatile plugin that provides businesses with a straightforward and efficient solution for overseeing their brick-and-mortar retail activities. The plugin offers tools and capabilities to help you improve sales operations, manage inventories effectively, and obtain insights into consumer data.
Why choose our plugin?
Our products stick to WordPress’s quality requirements in security, quality, performance, and contemporary coding standards. Envato has given us a WP Requirements Compliant Badge for our CodeCanyon Profile.
Installation
To access the admin panel in WordPress, navigate to the menu section and hover your cursor over the Plugins menu to see a submenu. From there, click on the Add New submenu.

Next, the user must click the Upload Plugin button to upload the plugin zip file.

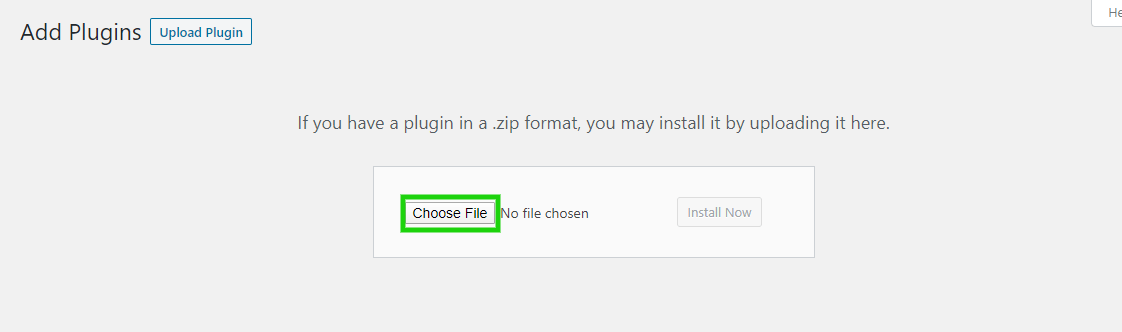
Upon hitting the Upload Plugin button, you can view the picture below. Next, use the Choose File option to locate the MultiPOS – Point of Sale for WooCommerce plugin.
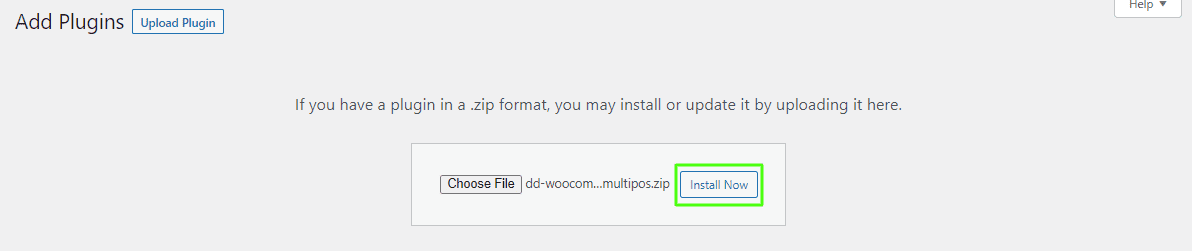
Upon choosing the MultiPOS – Point of Sale for WooCommerce plugin zip file, it will be displayed below. Click the Install Now button to complete the plugin installation process.
Once installed, click Activate Plugin to enable the MultiPOS – Point of Sale for WooCommerce plugin.

Admin End
Click on Configuration to access the plugin’s configuration page, or hover over the MultiPOS – Point of Sale admin menu to view various submenus. Access the configuration page by clicking on the Configuration submenu.


The configuration page has 6 tabs for altering various settings in the plugin: General, Payments, PWA, Login, Printer, and Layout.
General Configuration
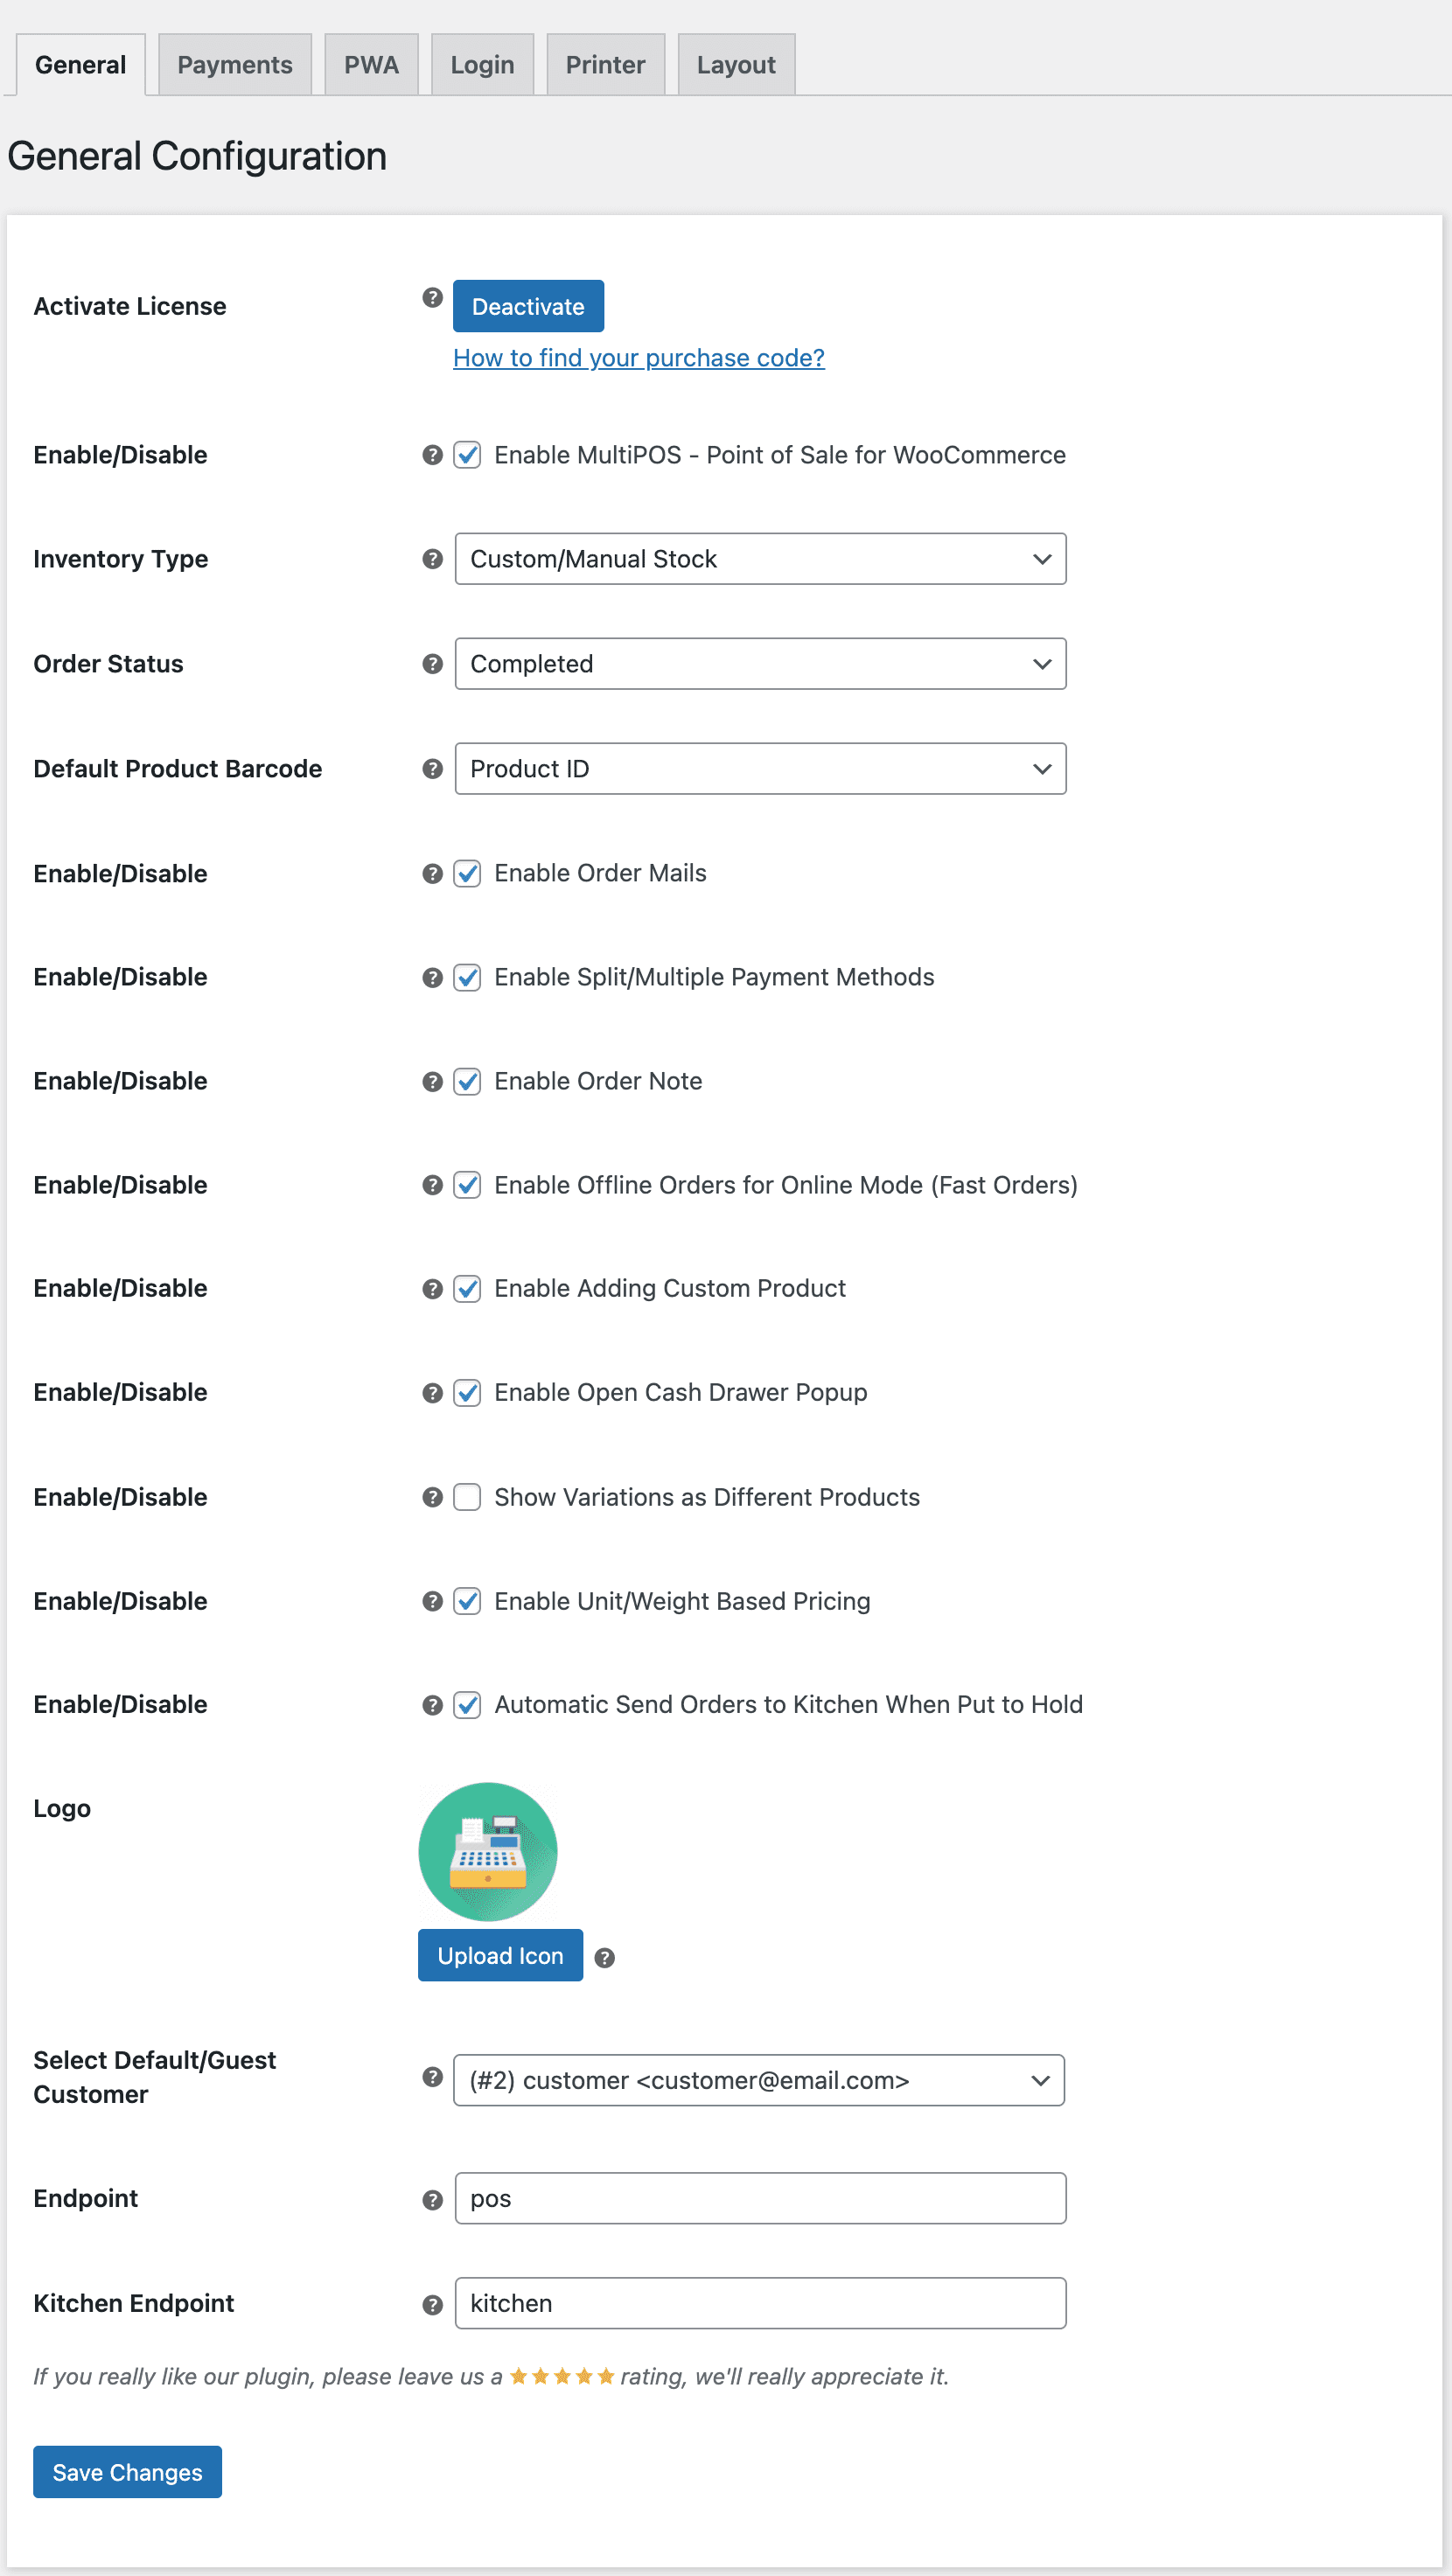
Activate License
You must input the payment code to activate your license and use this plugin.
Enable/Disable:
The admin can activate/deactivate the module features for customers.
Inventory Type
The Admin can choose the inventory type for the Point of Sale, either Custom or Centralized/WooCommerce stock. Custom stock allows assigning unique stock numbers to items at various outlets besides the Online/WooCommerce shop stock. Centralized/WooCommerce stock is shared across the Point of Sale and online store.
Order Status
Admin can choose the order status for the orders generated at the POS end.
Default Product Barcode
The admin can choose the default barcode, either Product ID or SKU, enabling automated generation of barcodes for goods that can be scanned at the point of sale.
Enable Order Mails
The Admin can activate/deactivate email notifications for orders made at the point of sale.
Enable Split/Multiple Payment Methods
The Admin can activate/deactivate split/many payment methods at the POS end, allowing clients to make payments using several manual ways.
Enable Order Note
The Admin can activate/deactivate the feature that allows entering order notes for orders made at the point of sale.
Enable Offline Orders for Online Mode (Fast Orders)
The Admin can activate/deactivate the option to allow or disallow the generation of orders offline before automatically syncing them online to expedite the order creation procedure in online mode.
Enable Adding Custom Product
The Admin can activate/deactivate the feature that allows adding custom products with custom pricing at the point of sale.
Enable Open Cash Drawer Popup
The Admin can activate/deactivate the automated popup feature that prompts the user to enter the open cash drawer amount daily at the point of sale end.
Show Variations as Different Products
Admin can activate/deactivate the feature that shows variants as separate goods at the point of sale.
Enable Unit/Weight Based Pricing
The Admin can activate/deactivate the feature that allows the pricing of items with weight to be adjusted based on the weight entered at the point of sale.
Automatic Send Orders to Kitchen When Put to Hold
The admin can activate or deactivate the feature that automatically sends orders on hold to the kitchen from the point of sale terminal.
Logo
Admin can upload the brand logo and sales receipts/invoices on the POS screen.
Select Default/Guest Customer
The admin can choose a default client for all orders placed at the point of sale (POS) and update it within the POS system.
Endpoint
The Admin can establish the endpoint for the Point of Sale here.
Kitchen Endpoint
Admin can establish the endpoint for the Kitchen View, which is exclusive to restaurant mode outlets at the POS end.
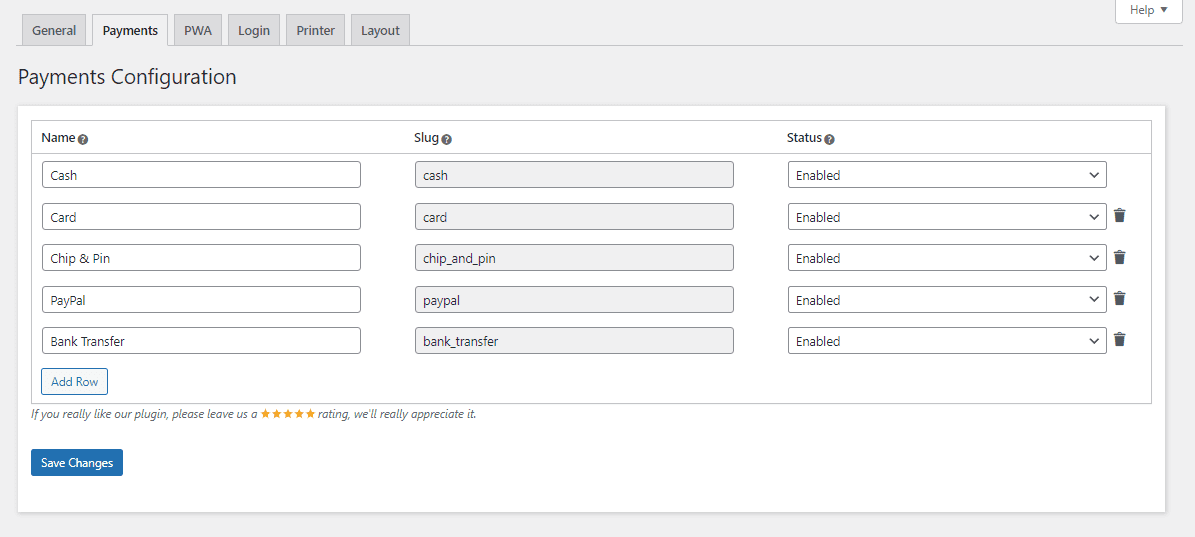
Payments Configuration
The admin establishes several payment ways to manage manually at the point of sale (POS). An unremovable default cash method is included, and the slug for the payment methods is uneditable.
PWA Configuration
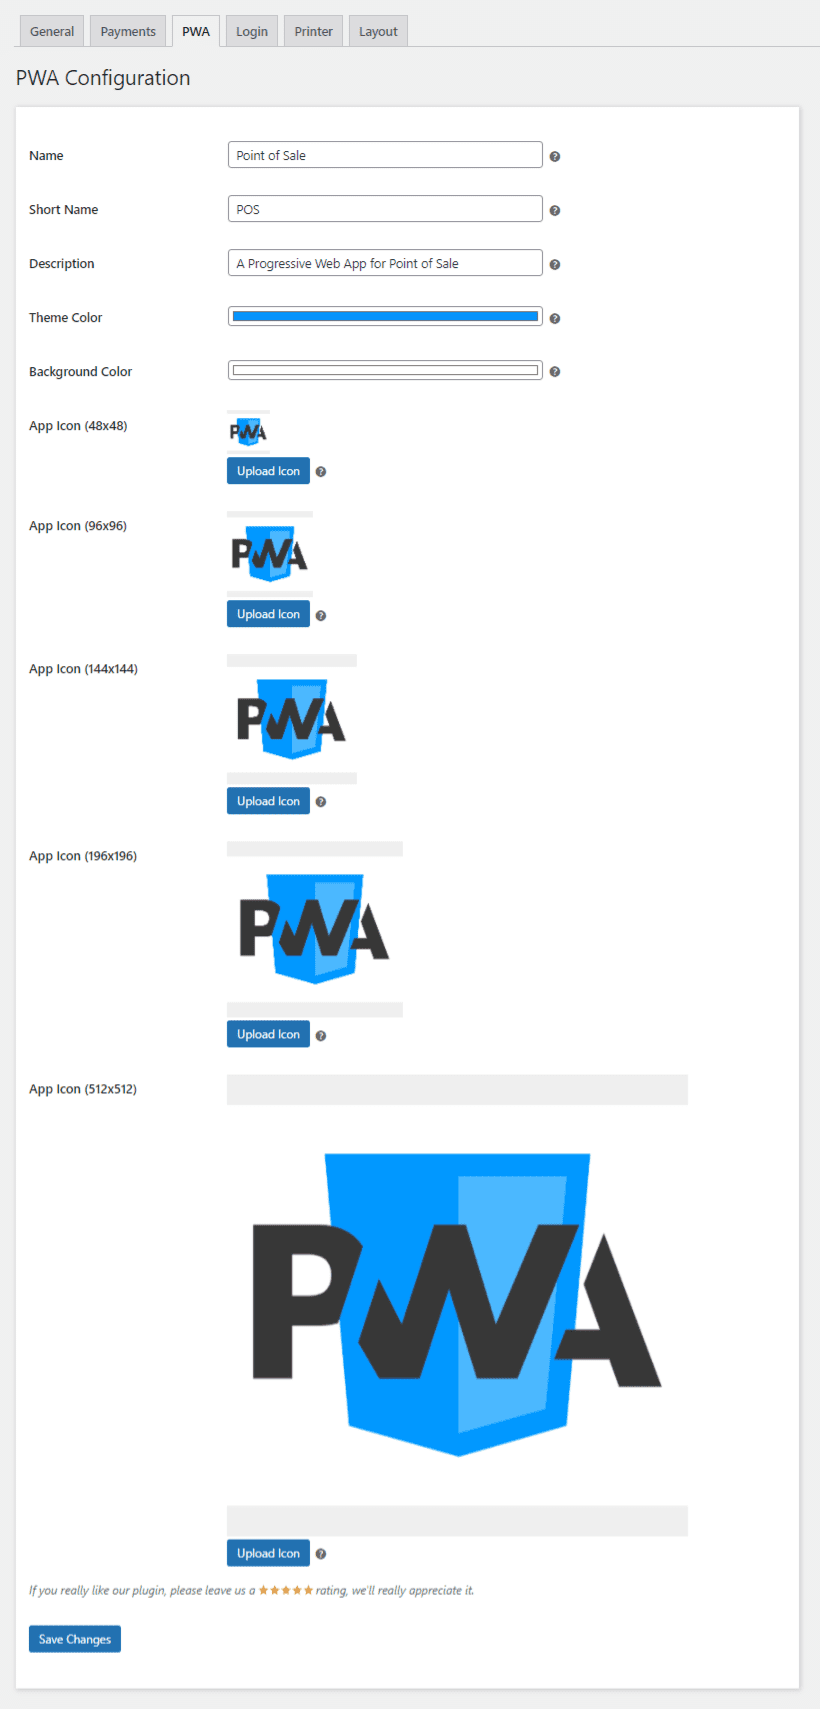
Name
The admin can set up the name of the Point of Sale application.
Short Name
The admin can set up the shortened name of the Point of Sale application.
Theme Color
The admin can set the theme color for the Point of Sale application’s splash screen.
Background Color
Admin can choose the backdrop color for the Point of Sale app splash screen.
App Icons
Admin may customize the Point of Sale app icons for different sizes here.
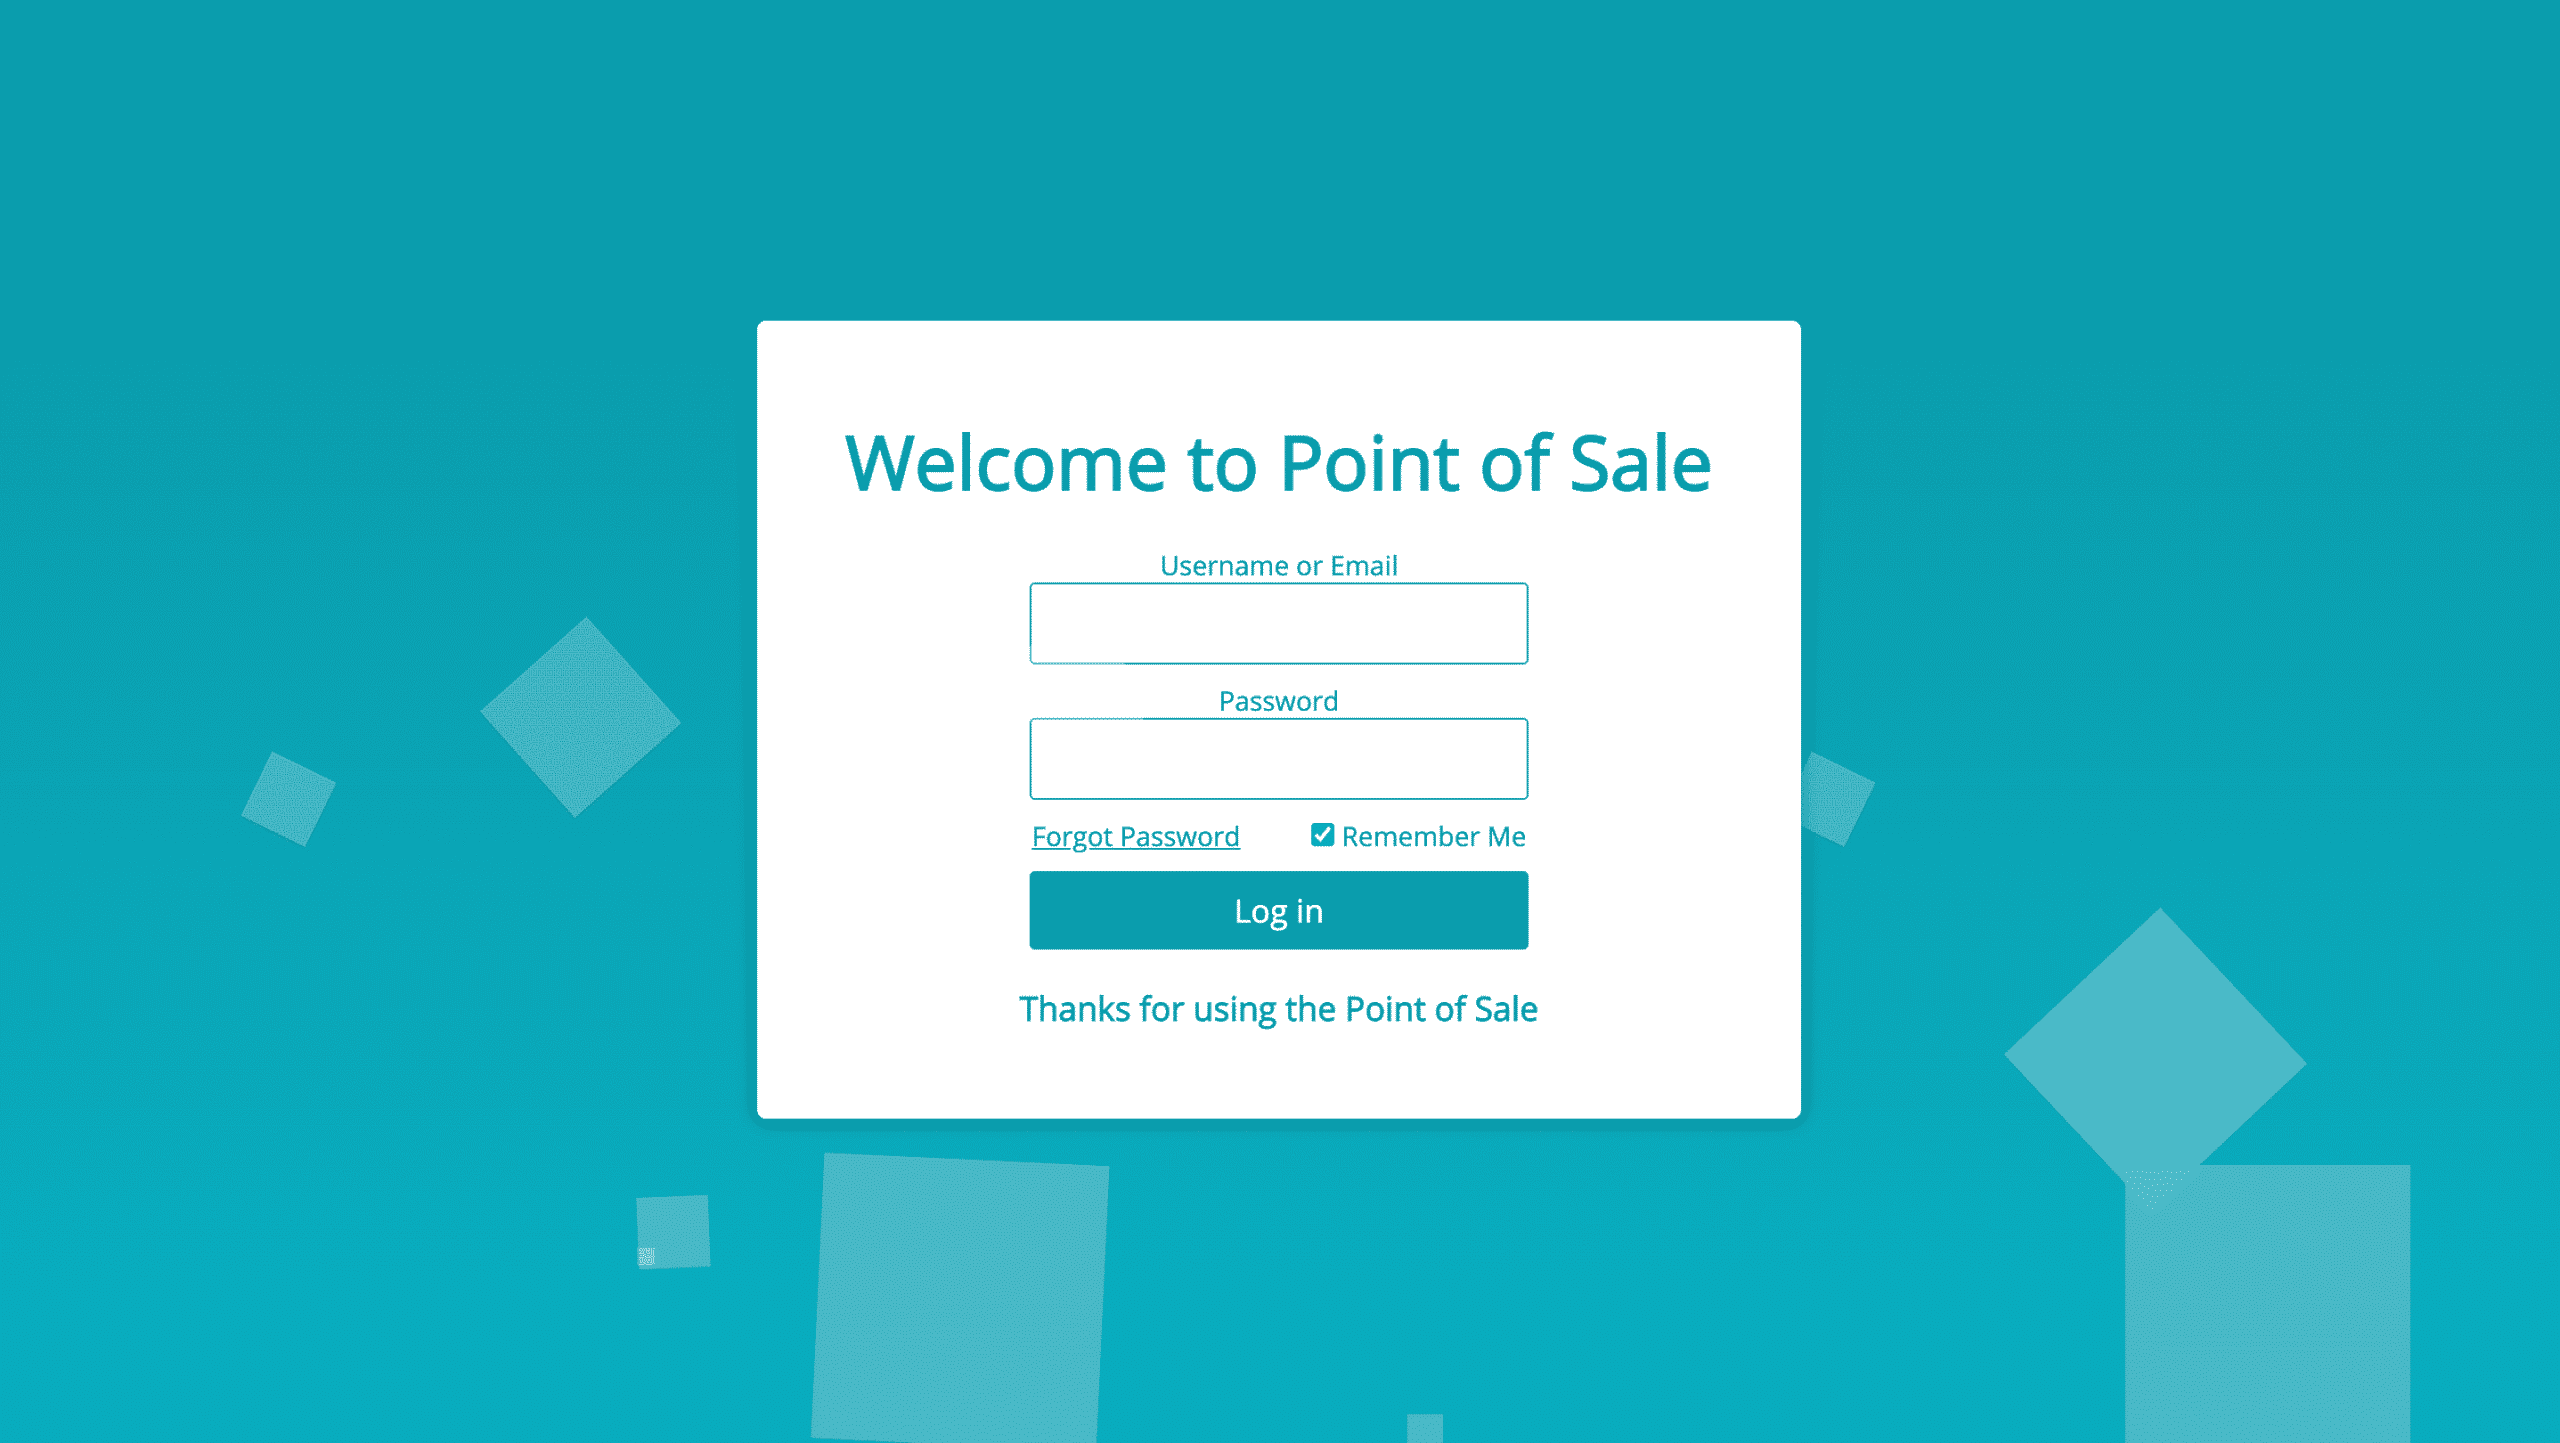
Login Configuration
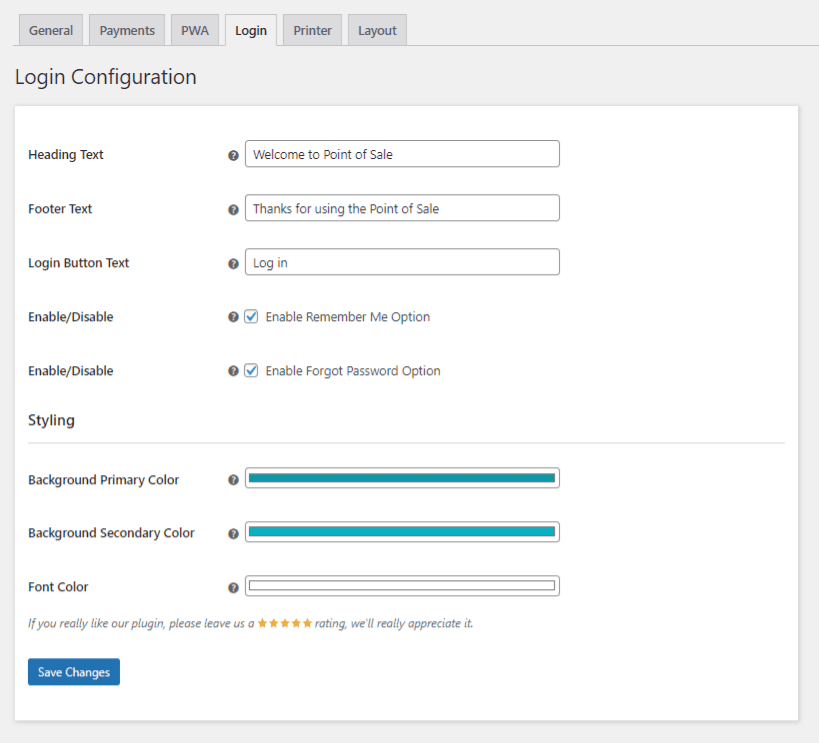
Heading Text
Admin can set up the header wording for the POS login screen.
Footer Text
Admin can set up the footer text for the POS login screen.
Login Button Text
The Admin can set up the wording shown on the login button of the POS login screen.
Enable the Remember Me Option
The Admin can activate or deactivate the “remember me” feature on the POS login page.
Enable the Forgot Password Option
The Admin can activate/deactivate the visibility of the forgotten password link on the POS login screen.
Background Primary Color
The Admin can set the primary color of the backdrop gradient on the POS login screen.
Background Secondary Color
Admin can specify the secondary color of the backdrop gradient on the POS login screen.
Font Color
Admin can set the font color for the POS login screen.
Printer Configuration
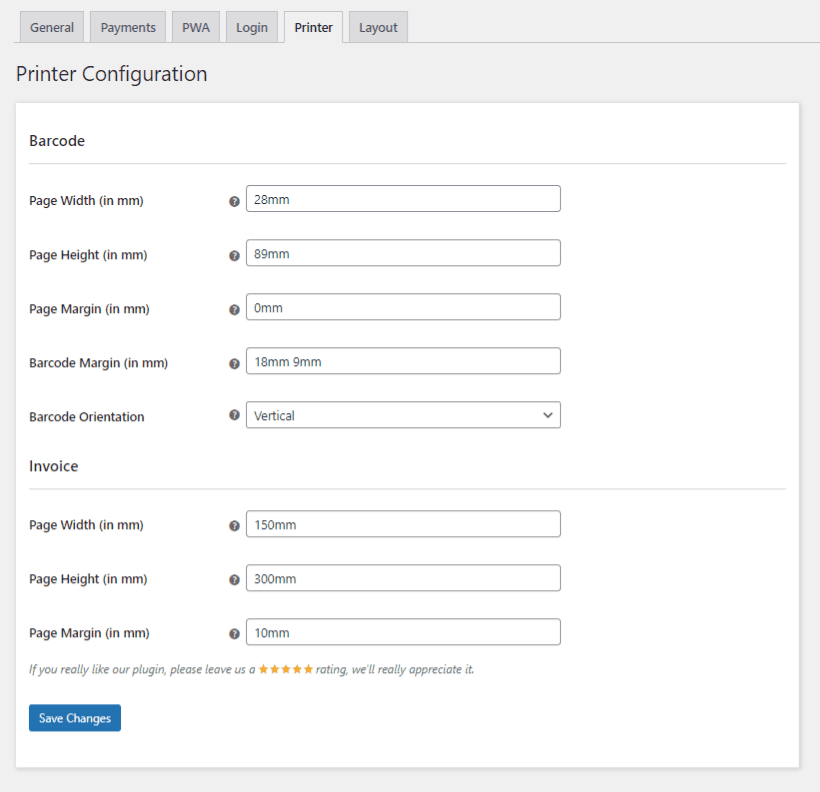
Barcode Page Width (in mm)
The Admin can specify the width of the printing page in millimeters for generating the barcode.
Barcode Page Height (in mm)
The Admin can specify the height of the printing page in millimeters for generating the barcode.
Barcode Page Margin (in mm)
The Admin can choose the margin of the printing page in millimeters where the barcode will be created.
Barcode Margin (in mm)
The Admin can choose the margin of the barcode in millimeters to separate numerous barcodes for printing.
Barcode Orientation
When printing, the Admin can choose between horizontal or vertical orientation for the barcode.
Invoice Page Width (in mm)
The admin can specify the width of the printing page in millimeters for generating sales receipts/invoices.
Invoice Page Height (in mm)
Admin can specify the height of the printing page in millimeters for generating sales receipts/invoices.
Invoice Page Margin (in mm)
The Admin can specify the margin of the printed page in millimeters for generating sales receipts/invoices.
Layout Configuration
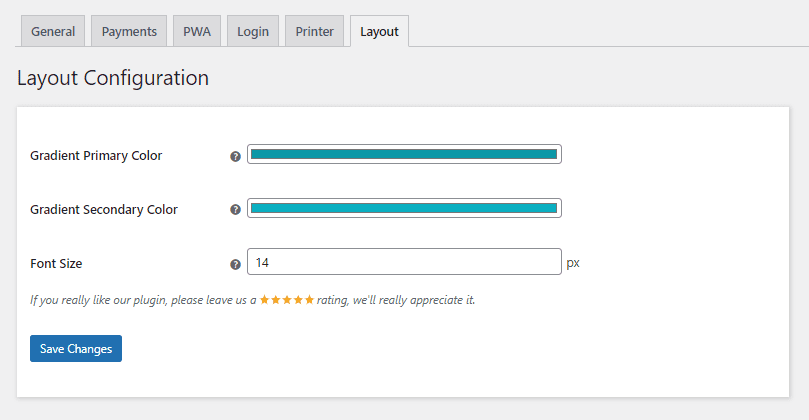
Gradient Primary Color
The Admin may set the primary color of the gradient to be utilized in the Point of Sale.
Gradient Secondary Color
The Admin may set the secondary color of the gradient to be utilized at the Point of Sale.
Font Size
The Admin can establish the text size for the Point of Sale.
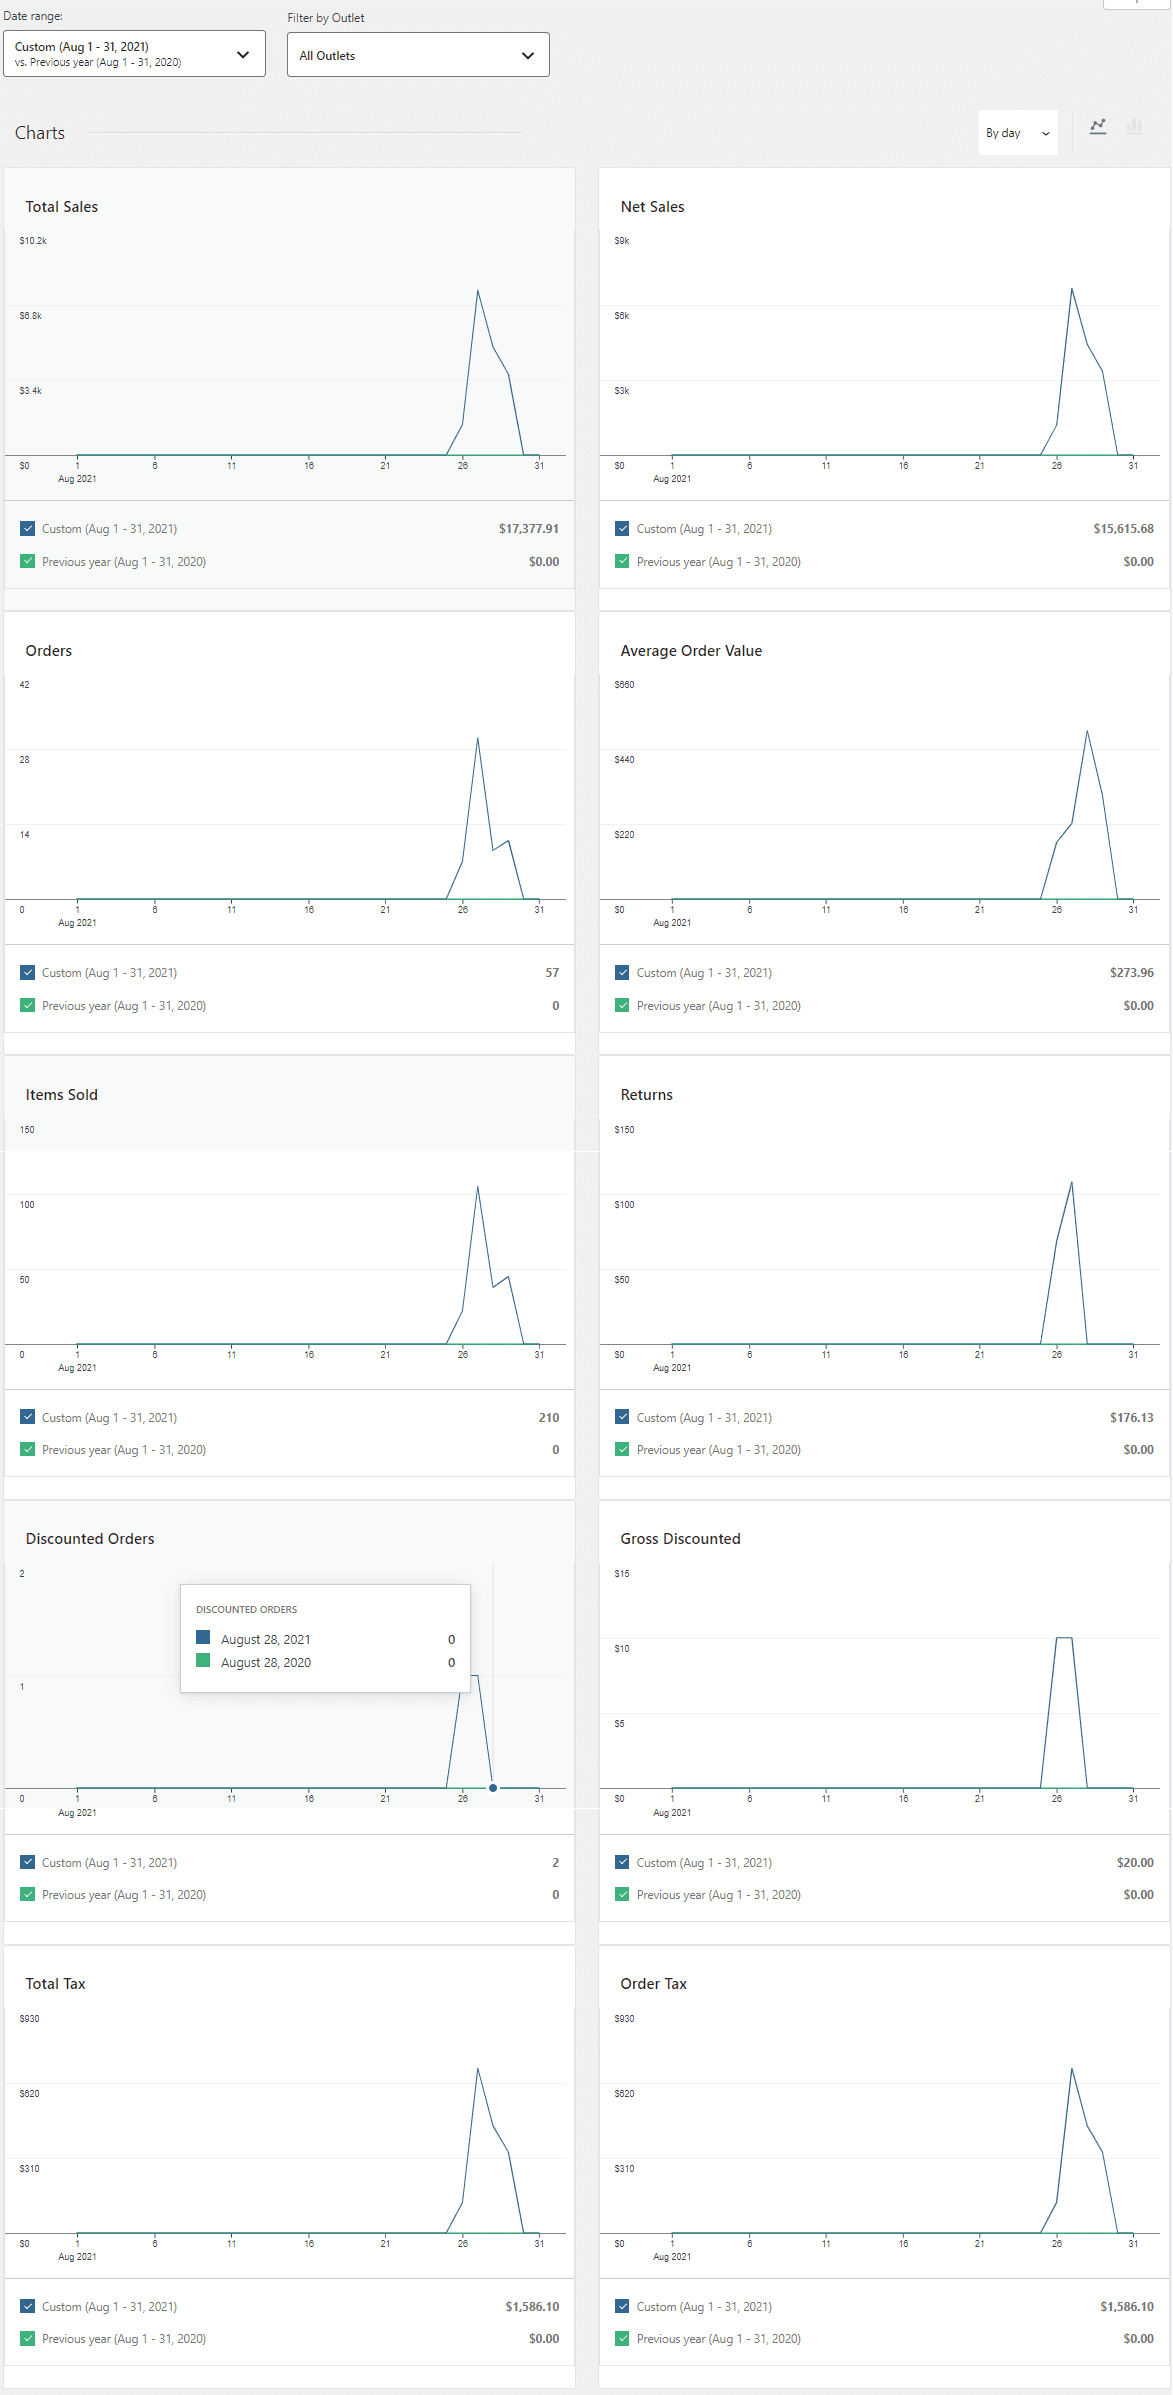
Analytics
You may view the sales report generated at the Point of Sale under the Analytics submenu. Various data displayed include total sales, net sales, orders, average order value, items sold, returns, discounted orders, gross discounted orders, total tax, and order tax. You may use various date filters to refine sales reports.
Outlets
You may build many outlets under the Outlet’s submenu for the Point of Sale system and then assign them to different cashiers for operation. Kitchen View may be accessible for the restaurant-style outlets from this point.

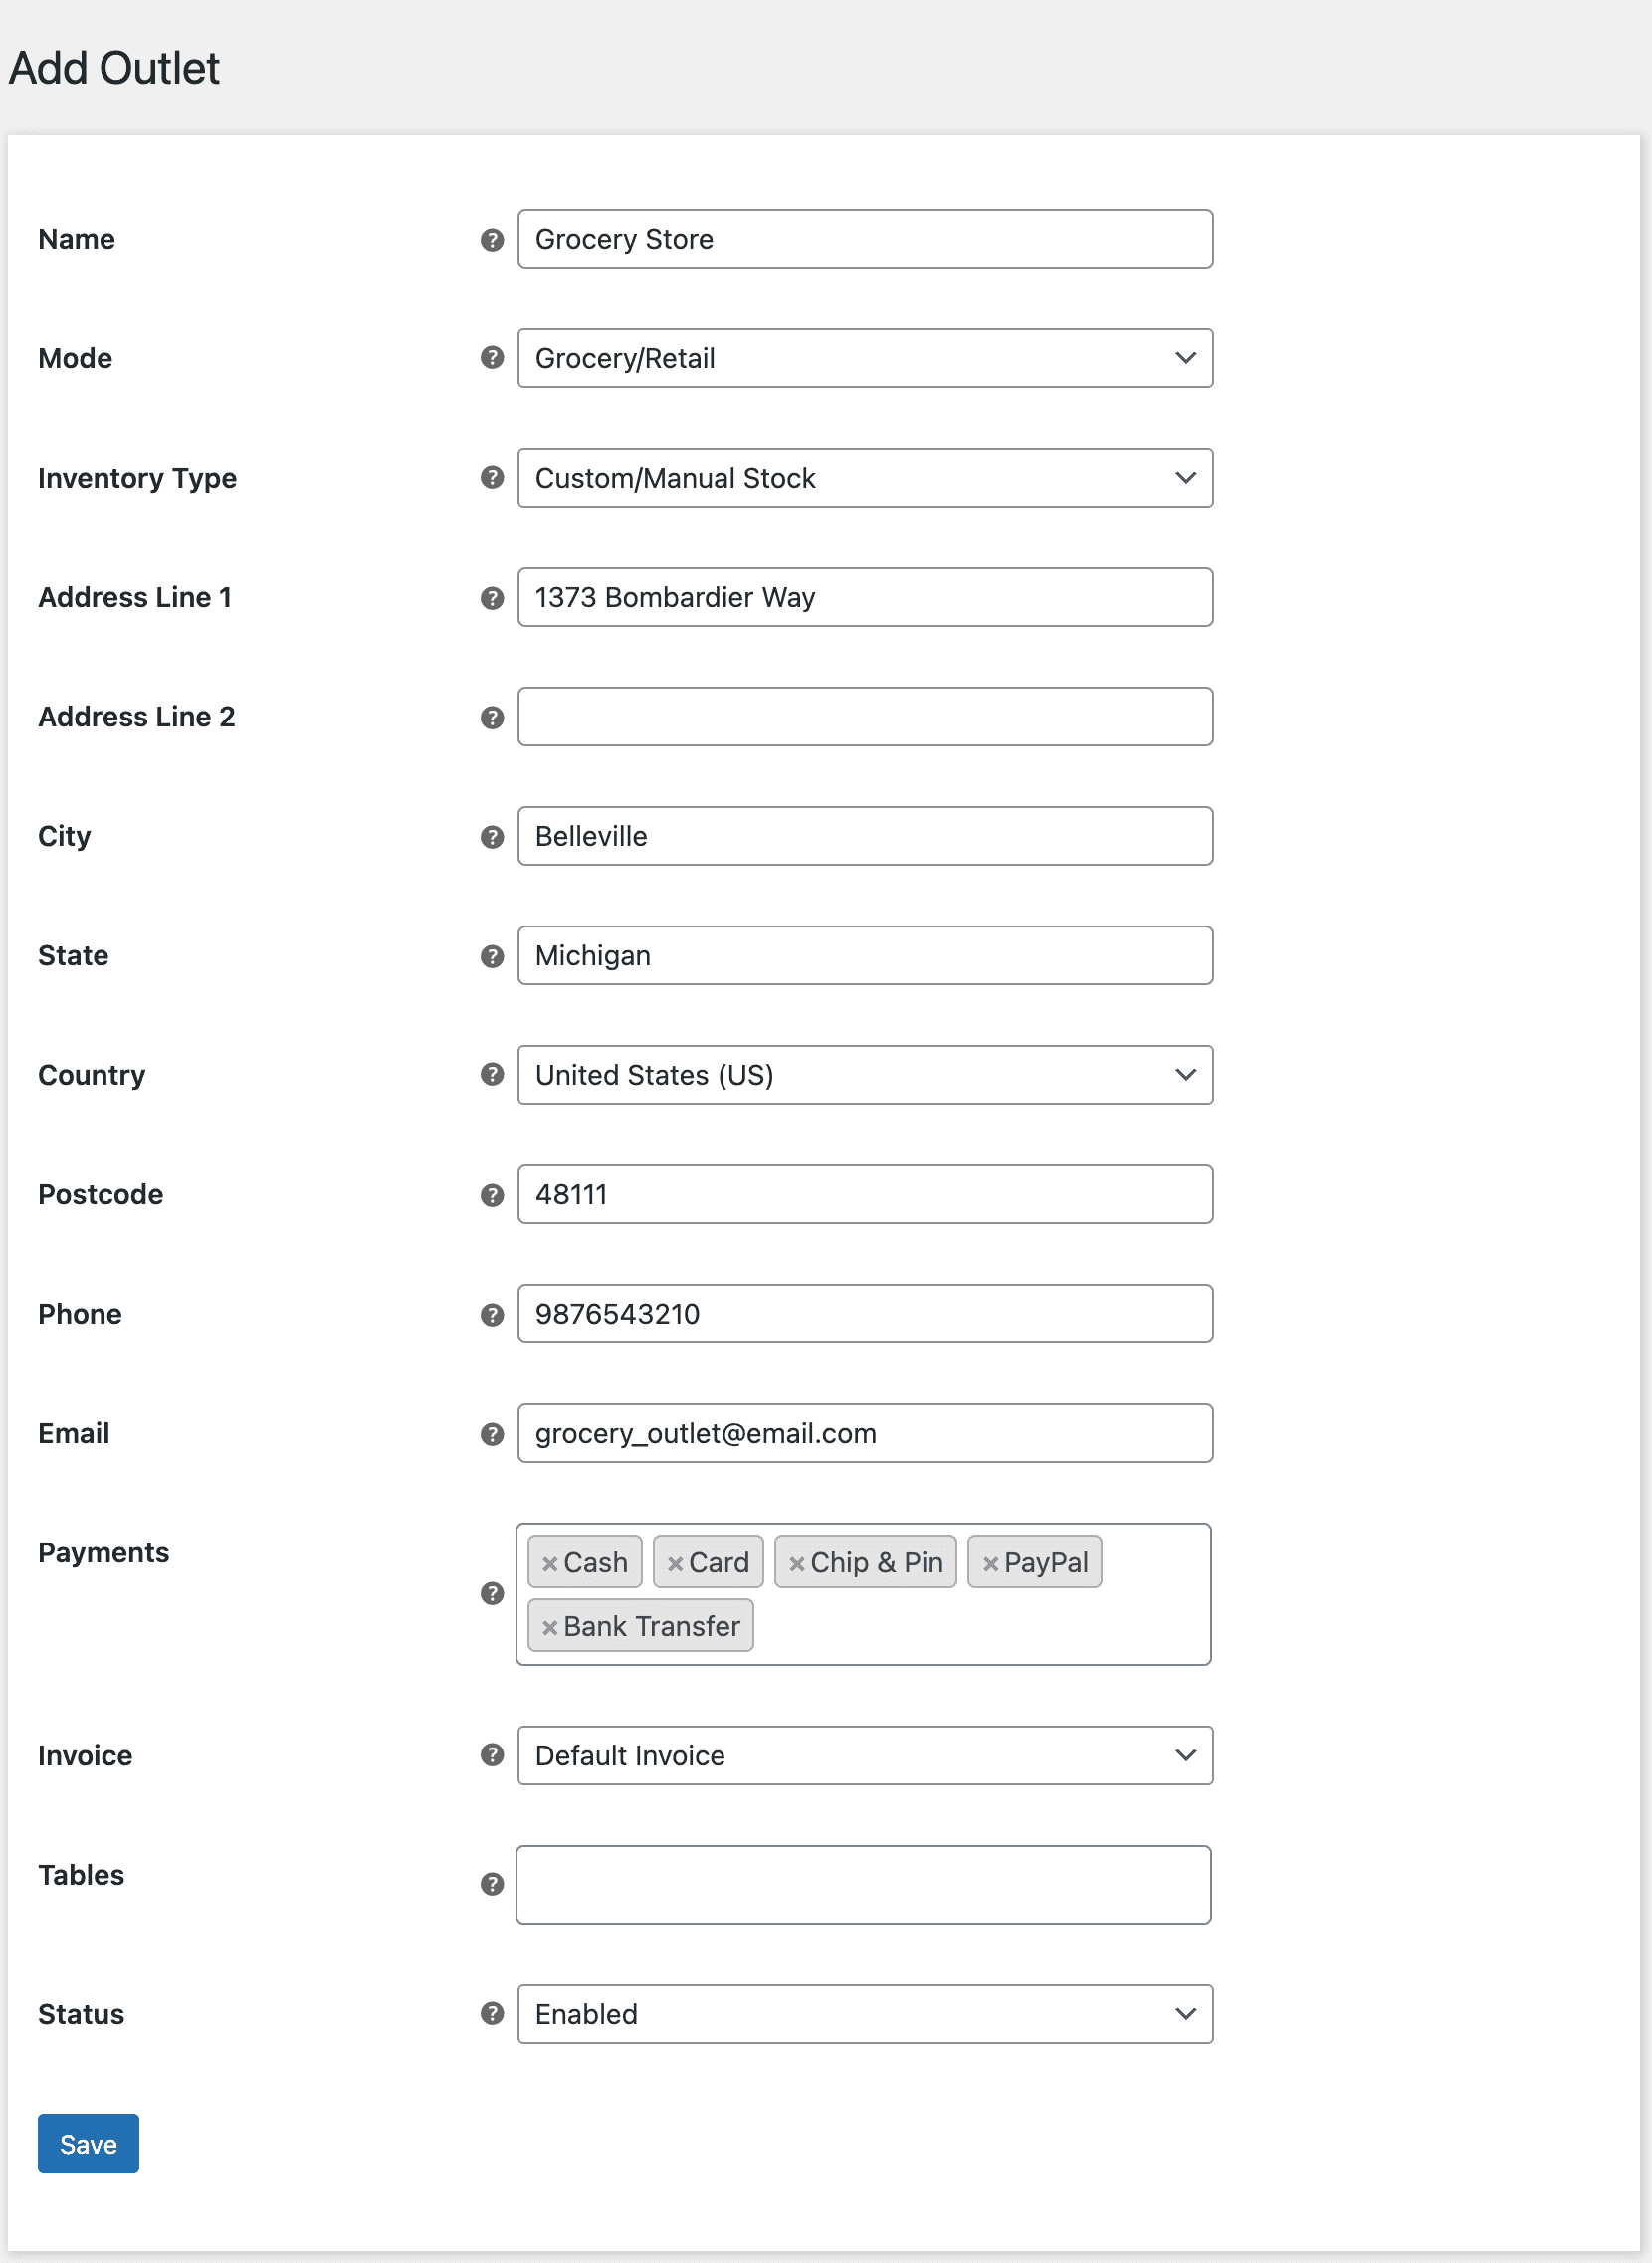
Add Outlet
Please provide the necessary information for the outlet. Outlets can be categorized as either Grocery/Retail or Restaurant/Cafe. In Restaurant/Cafe mode, you may allocate multiple tables to the outlet for processing orders in the Point of Sale system. Various payment methods may be linked to the outlet and will serve as options for clients to utilize when paying for their orders.
Cashiers
To manage many outlets, you can create various cashiers in the Cashiers submenu for the Point of Sale.
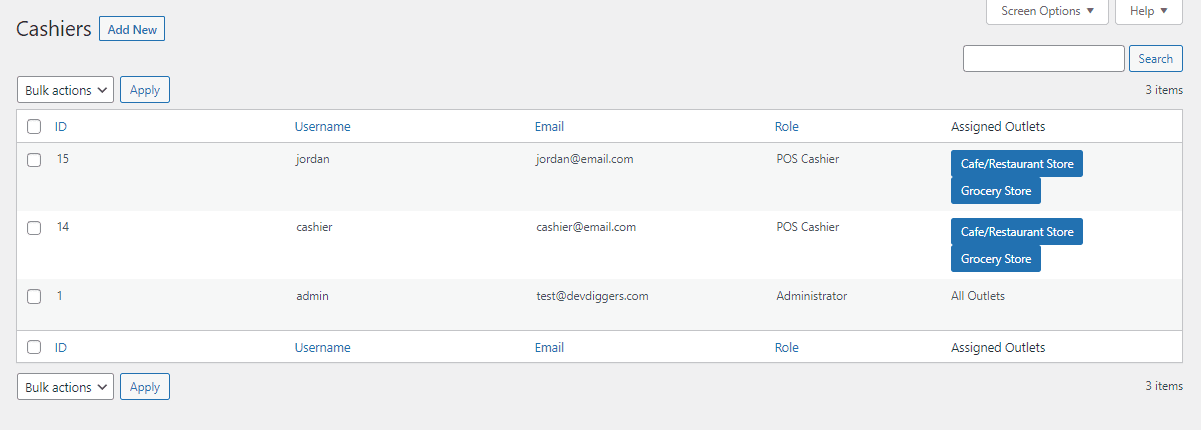
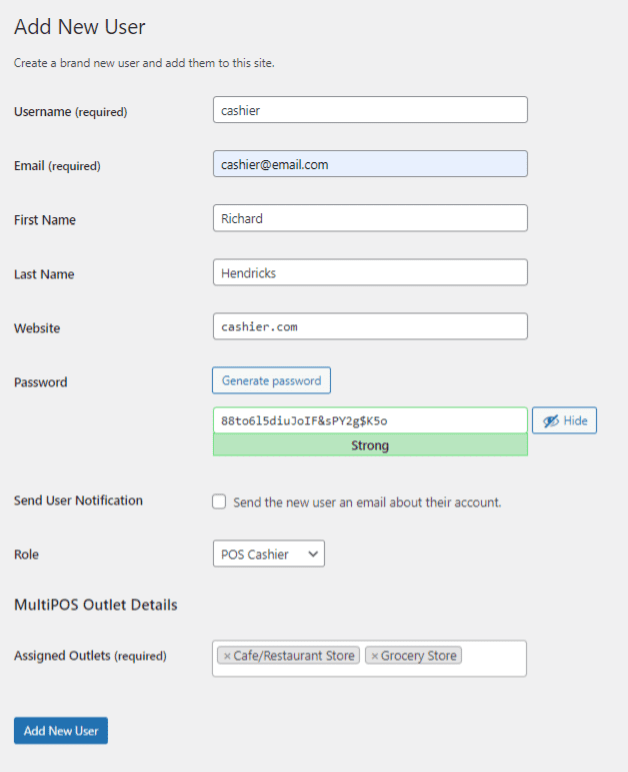
Add Cashier
The admin can create a new user account with the designation of POS Cashier. They may also allocate various outlets to the user, granting them access to the point of sale end.
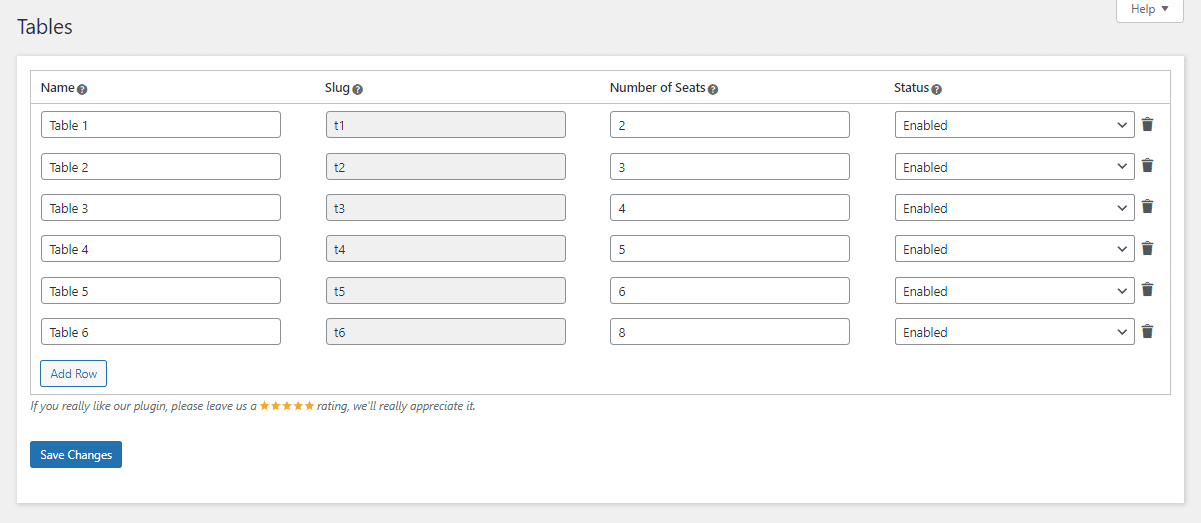
Tables
Within the Tables submenu, the admin can create several tables that may be utilized in Restaurant/Cafe outlets for order processing. Fill in the Name, Slug, Number of Seats, and Status boxes to create the table.
Assign Barcodes
You may attach a custom barcode to goods and print several barcodes simultaneously under the attach Barcodes submenu. All items will have ID-based barcodes by default. To assign barcodes to all items in bulk, utilize the WooCommerce import product CSV feature and include metadata with meta key “_ddwcpos_barcode_init“. Set the meta value as the desired barcode number to assign.
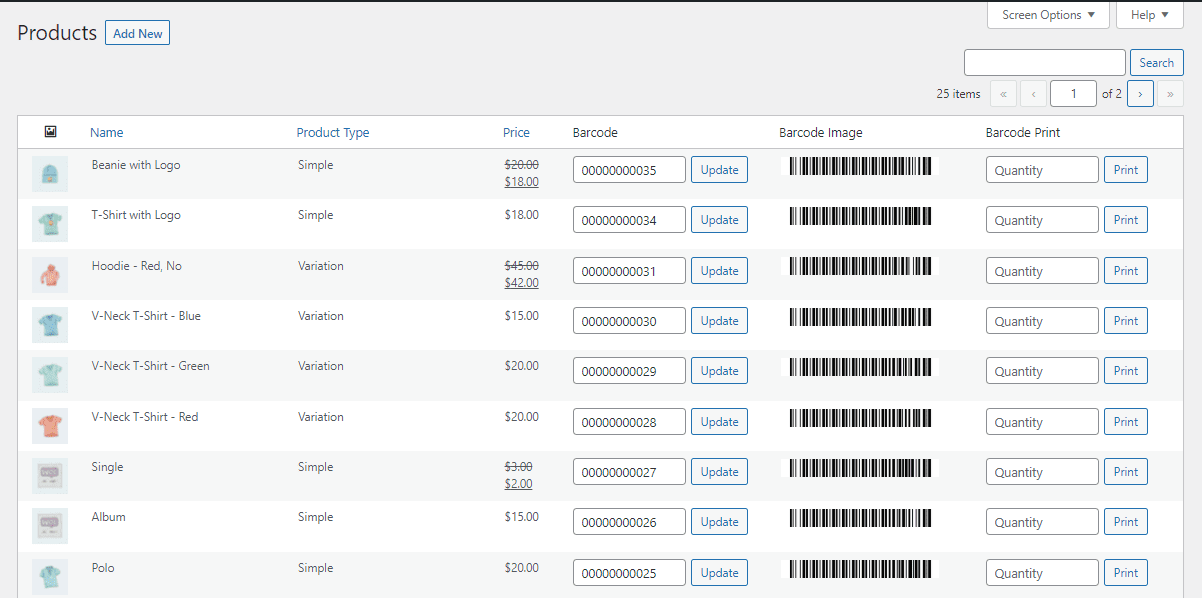
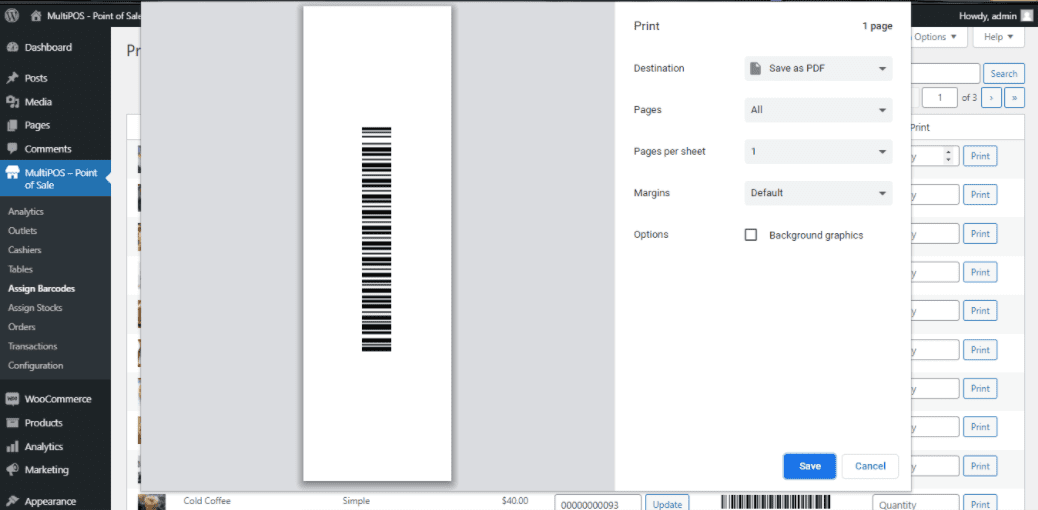
Barcodes can be printed in various quantities as specified by the admin on this page.
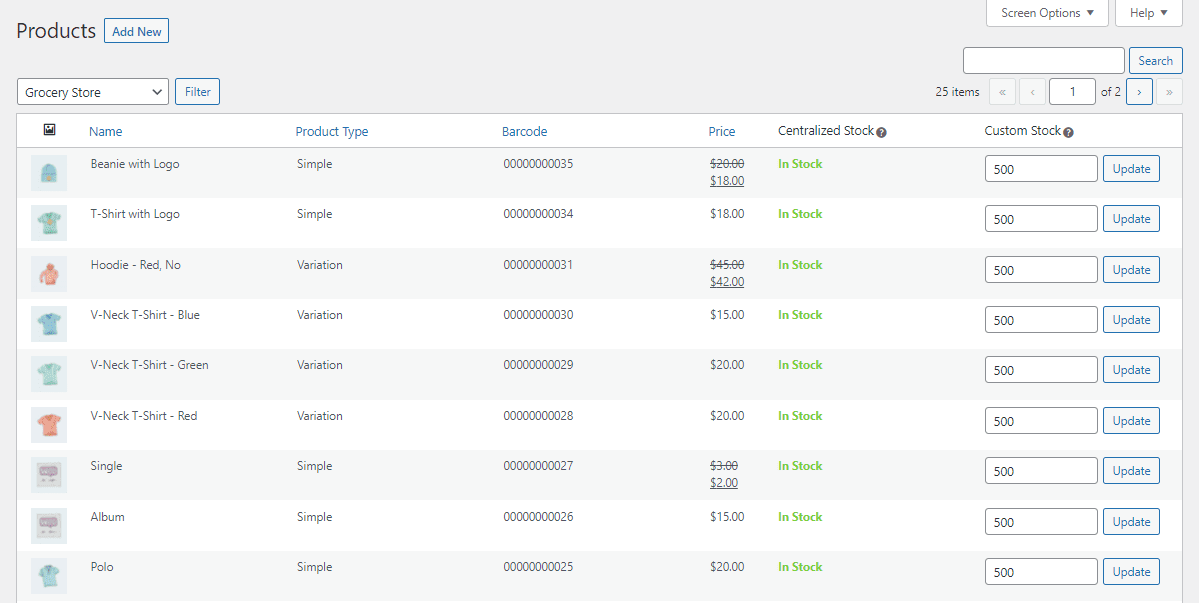
Assign Stocks
You may assign custom stocks to the goods by choosing the outlet in the Assign Stocks submenu. Custom inventories change among outlets, but centralized stock remains consistent for all outlets and the WooCommerce shop. Admin may assign custom stock to all items in bulk using the WooCommerce import product CSV feature. This can be done by utilizing metadata with the meta key “ddwcpos_outlet_stock{outlet_id}” and setting the meta value to the desired stock quantity. The meta key will be “_ddwcpos_outlet_stock_1” for the outlet with ID 1, where {outlet_id} is the specific outlet ID.
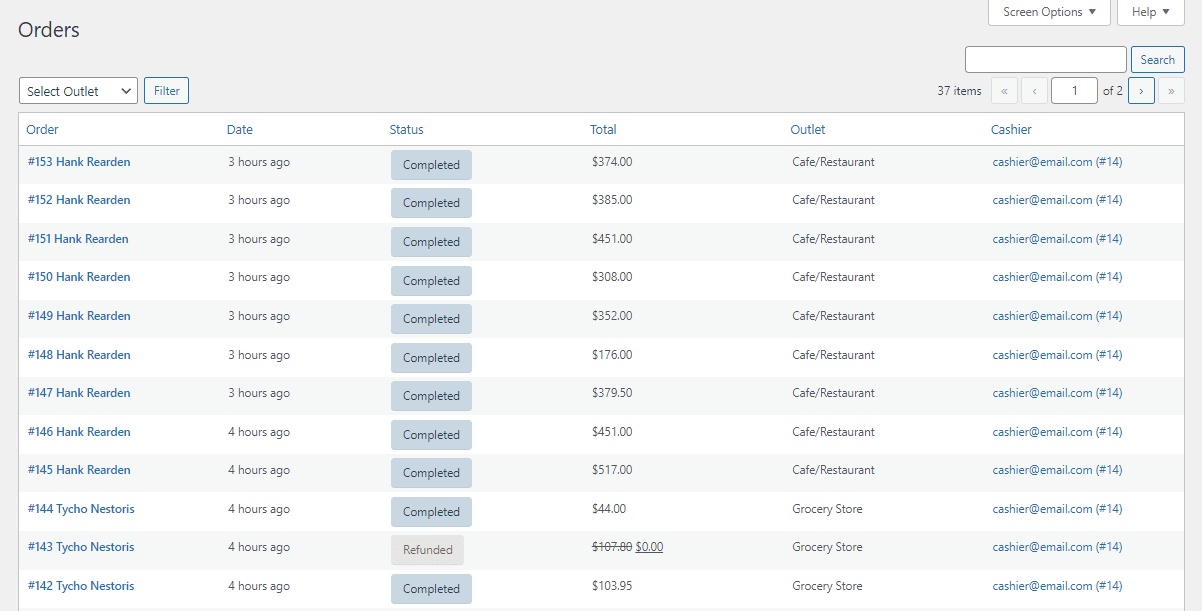
Orders
The Orders submenu displays all orders generated at the point of sale, including client details, date, status, total outlet, and cashier information.
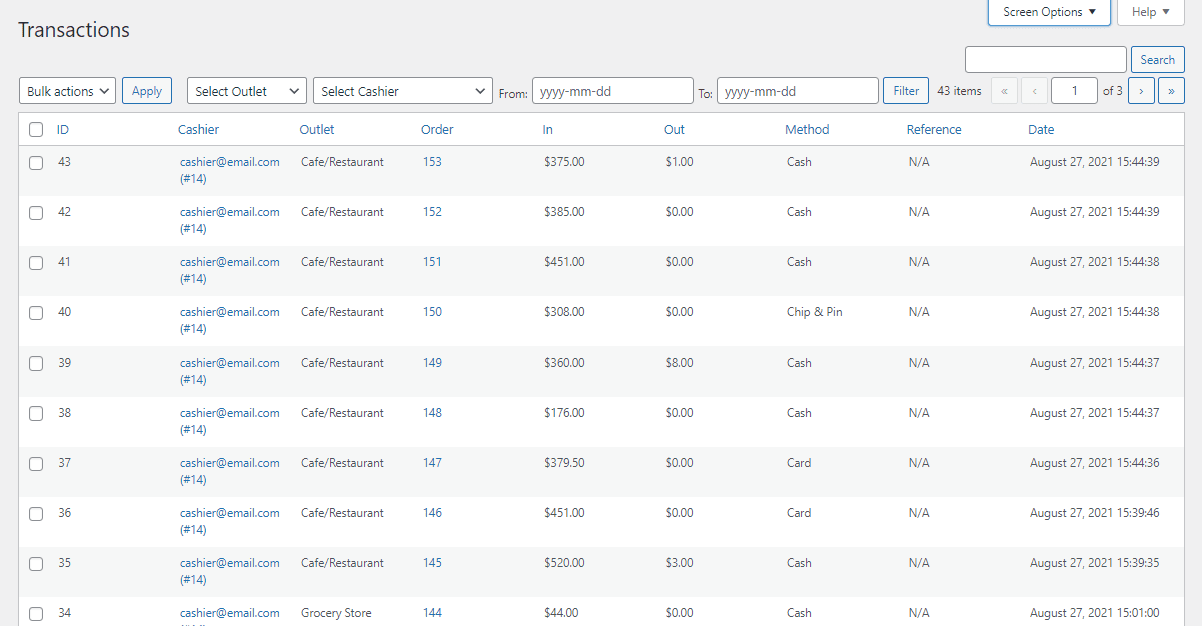
Transactions
You may view all transactions created at the Point of Sale in the Transactions submenu. These transactions show the inflow and outflow of funds through the outlet. Various filters are available here to refine transactions as required.
Invoices
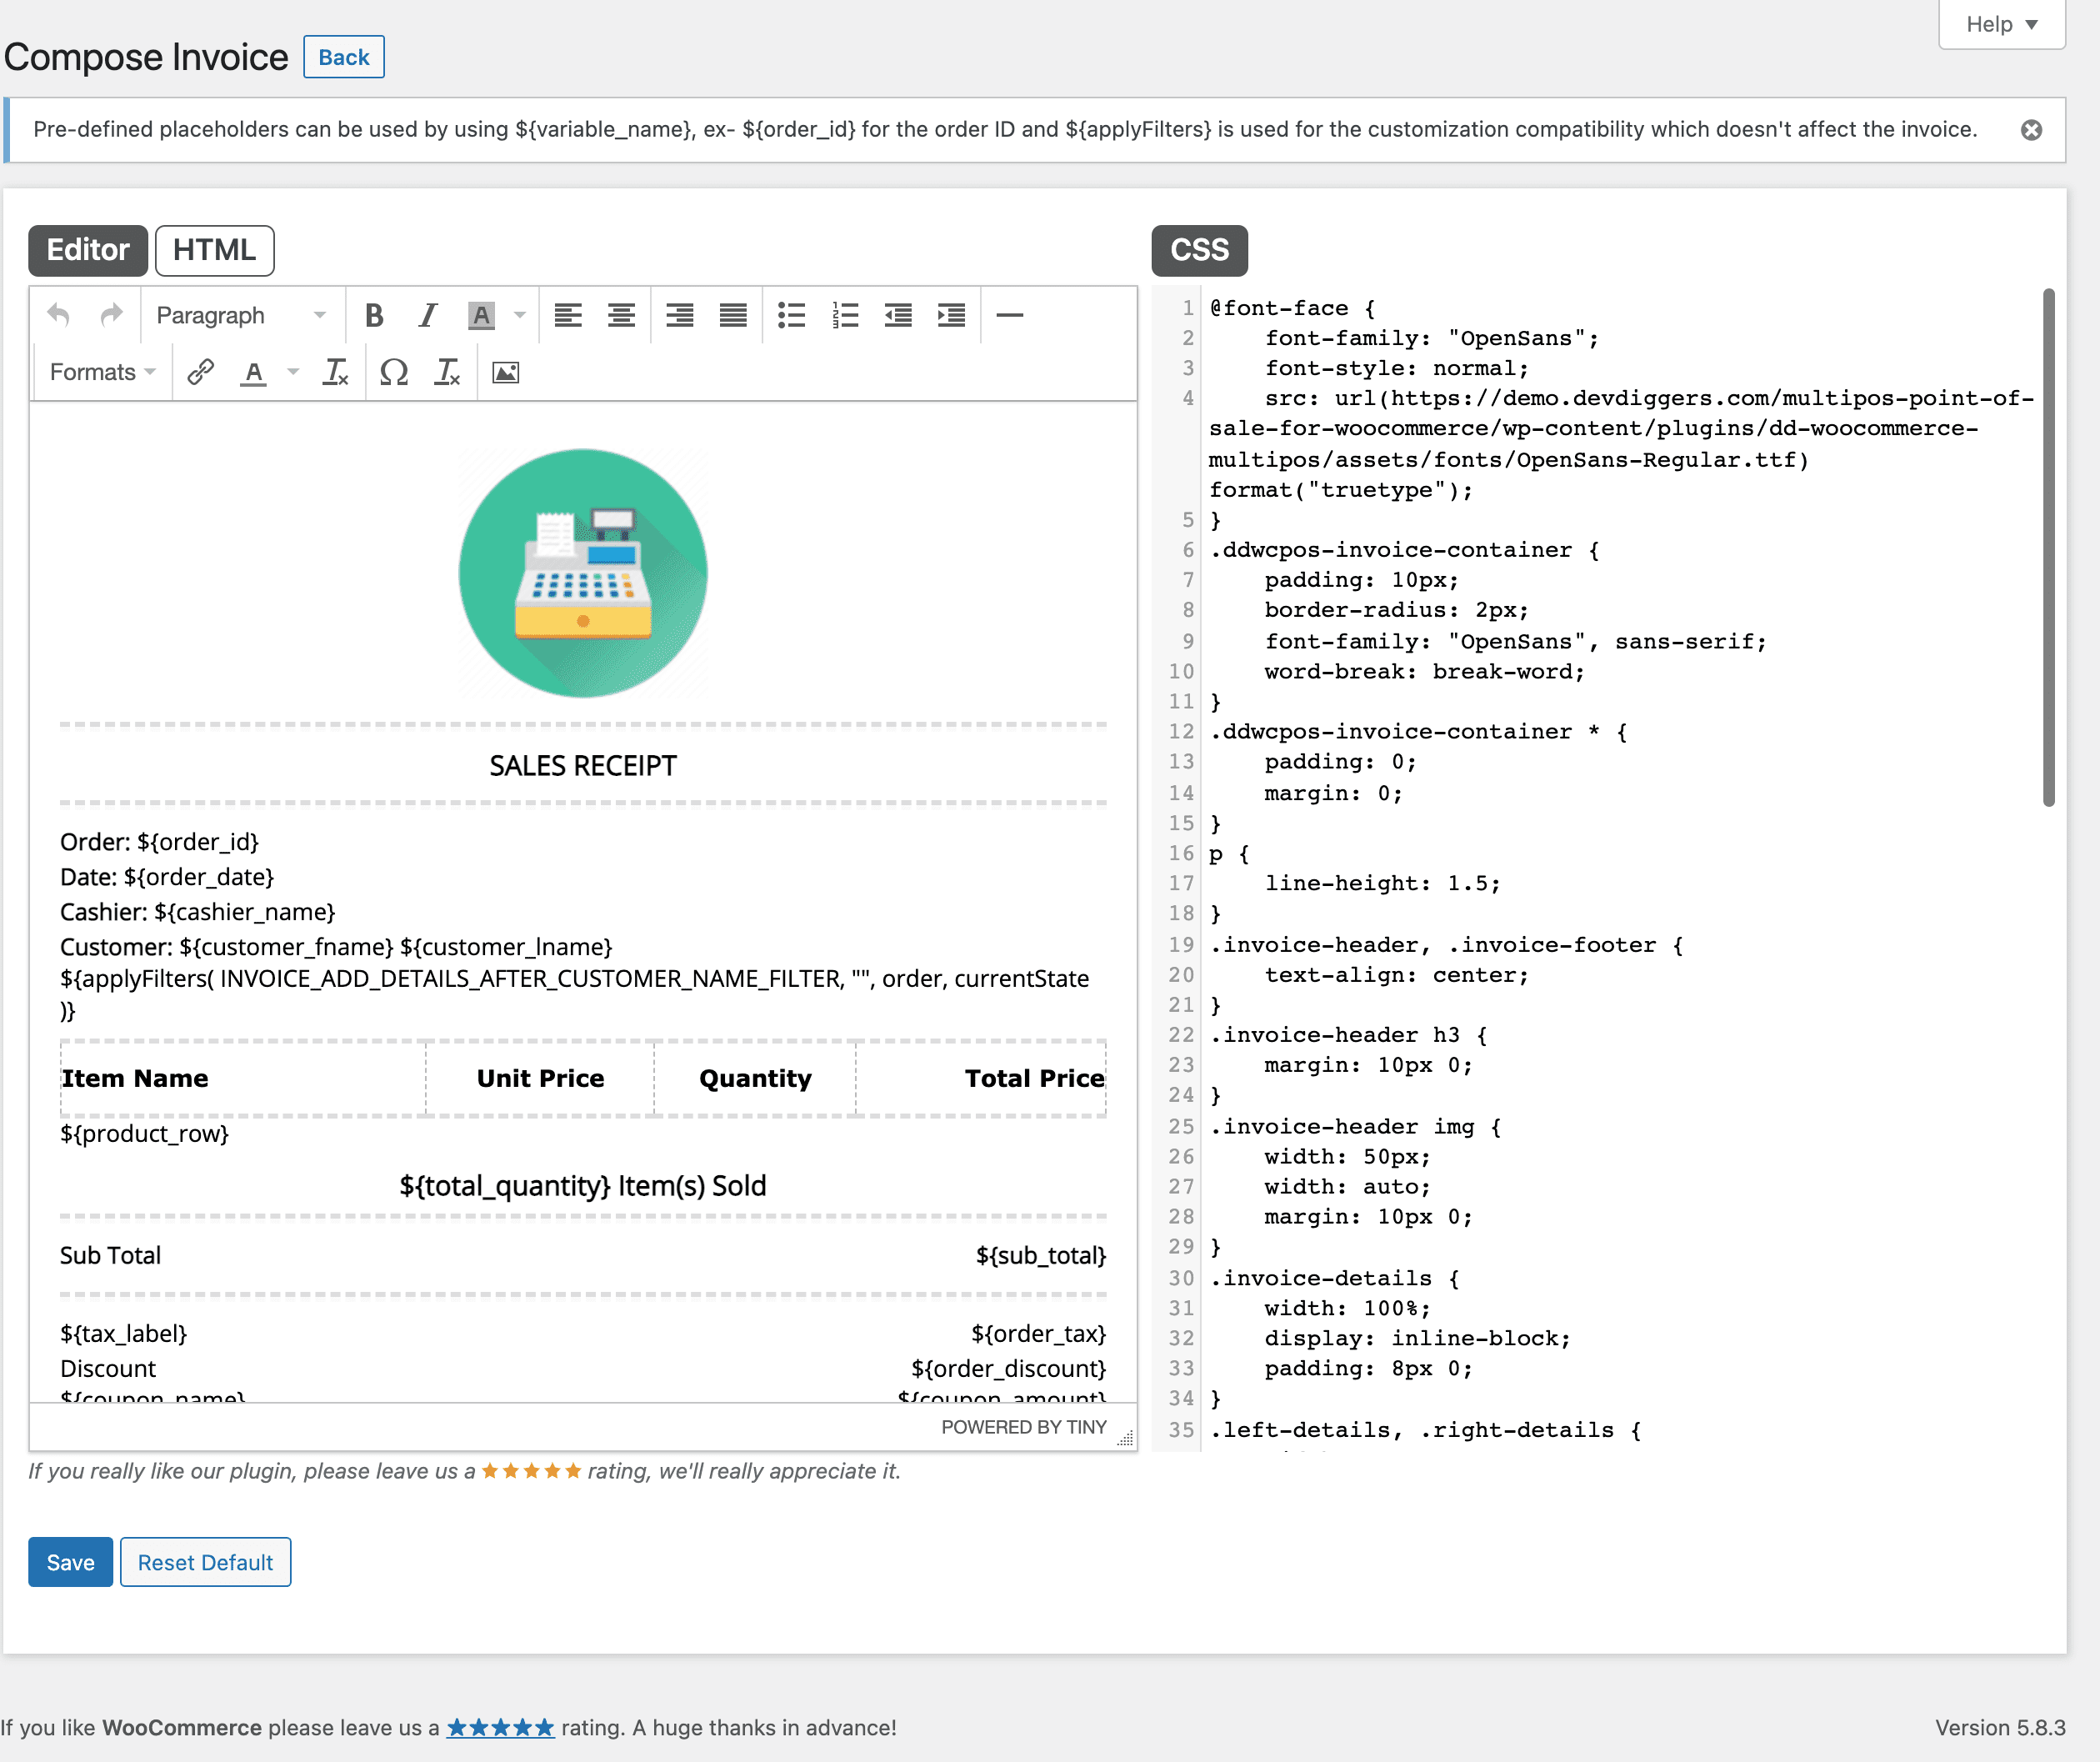
The Admin has included one basic invoice with a standard layout within the Invoices submenu. The admin can generate several invoices and fully personalize them from this platform. Enabled invoices will be displayed in the outlet invoice menu for selection. Various retailers may own the same or distinct invoices.
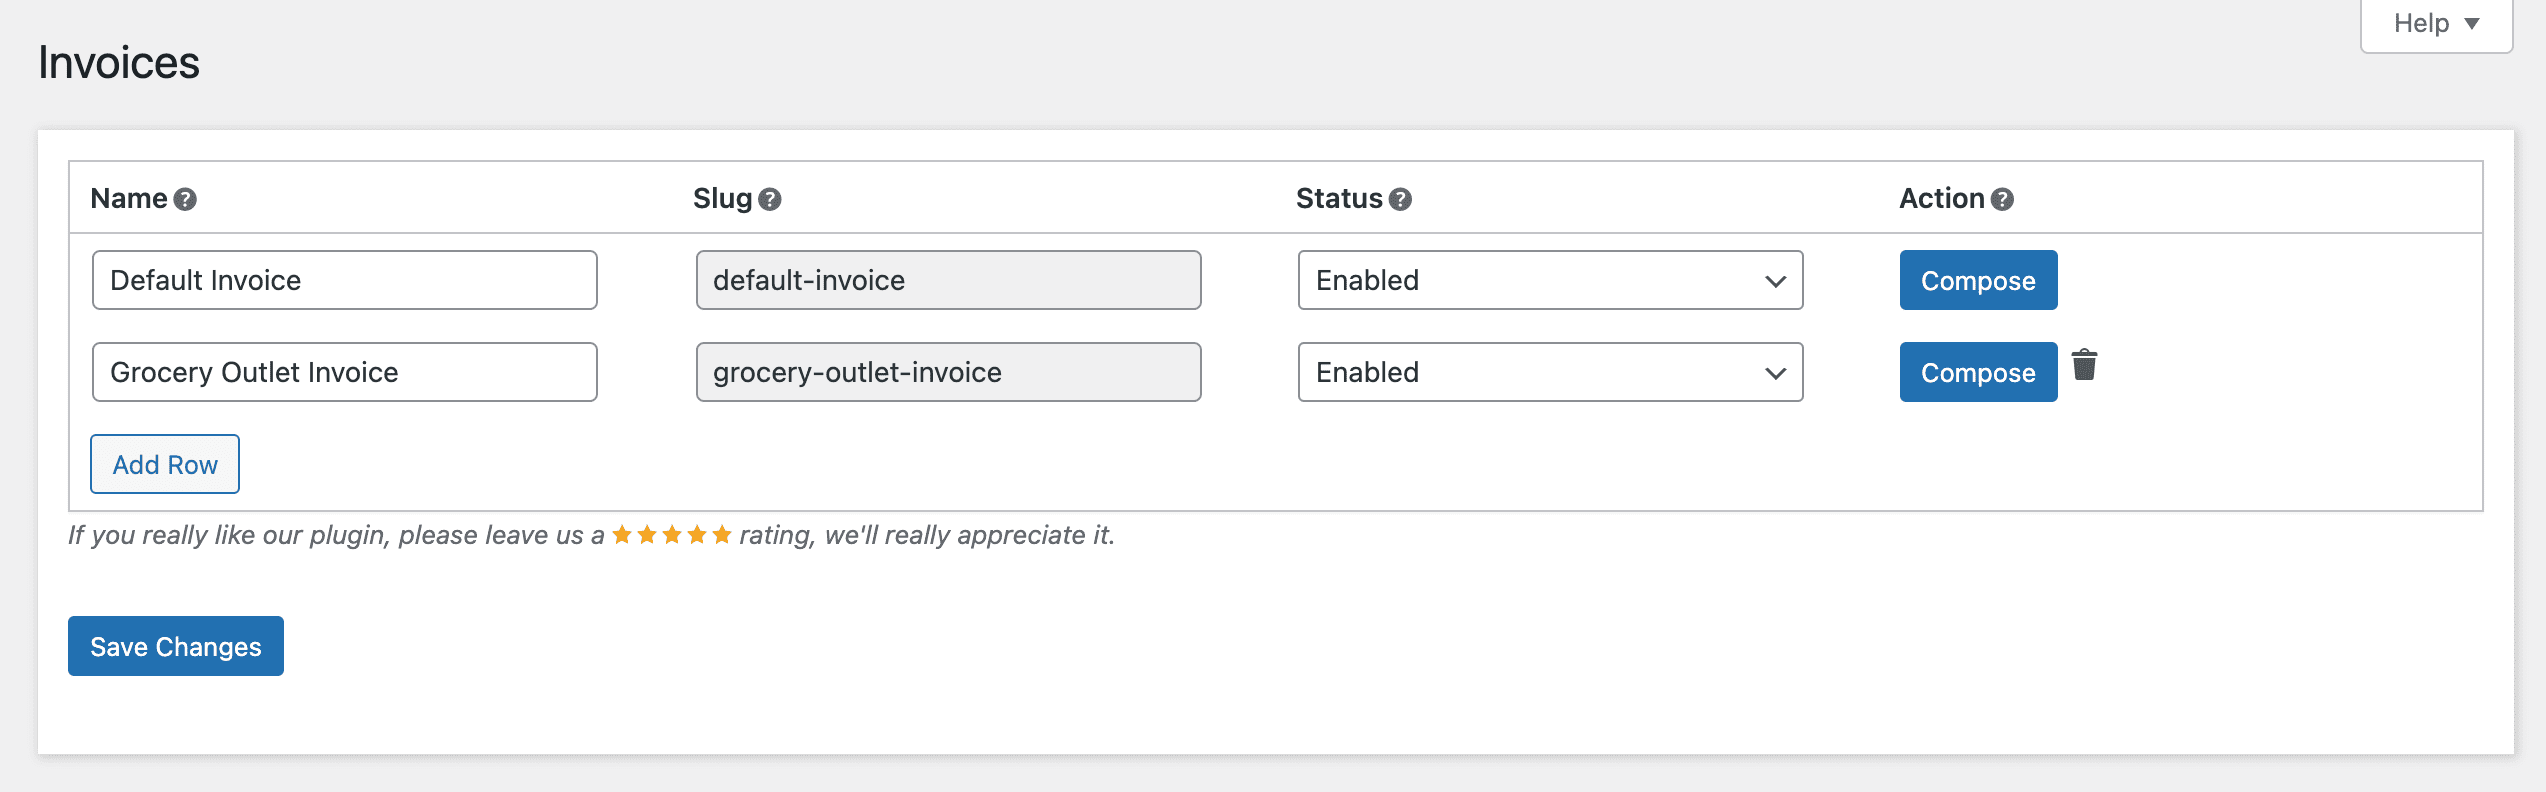
When the admin clicks the compose button, they may personalize the invoice using the editor provided below.
POS End
Login Screen
Accessing the POS endpoint triggers the display of a login screen where cashiers and administrators may log in to manage the outlet.
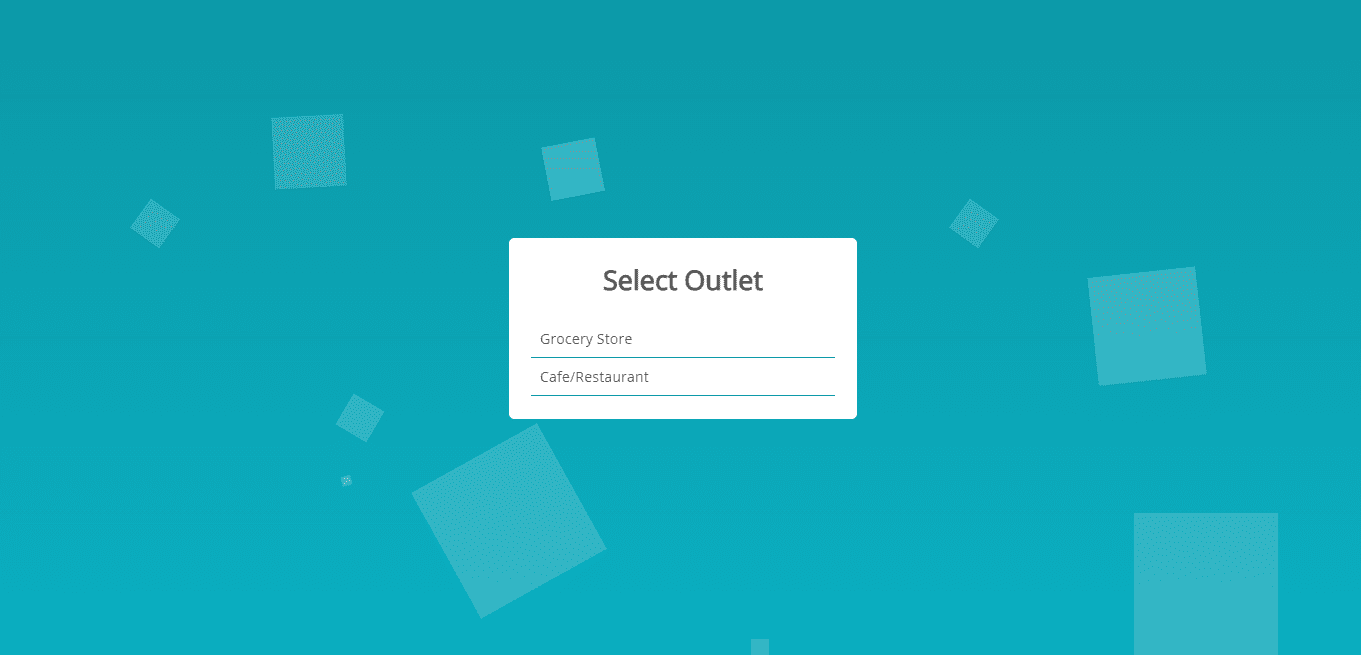
Select Outlet Screen
Upon logging in successfully, the cashier will be provided with a list of allocated outlets and must choose the specific outlet where they will work. Once the output is selected, all the data will be fed.
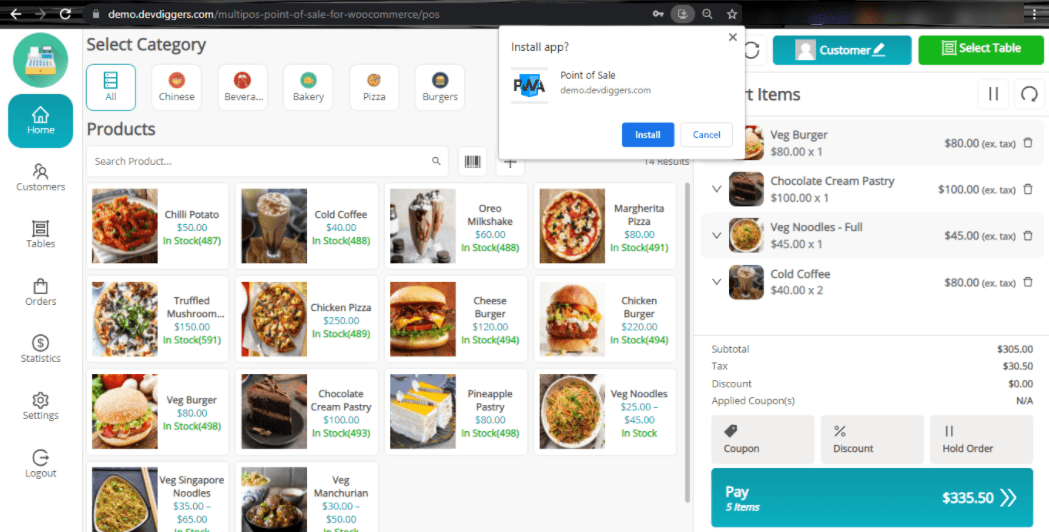
Progressive Web App
A Progressive Web App designed for the Point of Sale may be set up and loaded on PCs, tablets, and mobile phones. This will generate an app icon on the home screen, allowing users to manage the Point of Sale using the app interface.
Grocery/Retail Outlet Workflow
The picture below illustrates the entire grocery/retail business process. It shows how goods may be efficiently put into the cart manually or by barcode scanning, selecting the client for the purchase, placing it, and generating the invoice or receipt.
Restaurant/Cafe Outlet Workflow
This is the comprehensive workflow of a restaurant/cafe outlet where products can be efficiently added to the cart either manually or through barcode scanning. Next, the customer and table for the order are selected, and the table can be put on hold for the order to be prepared in the kitchen. Once the customer finishes eating, the cashier can place the order and generate the invoice or receipt.
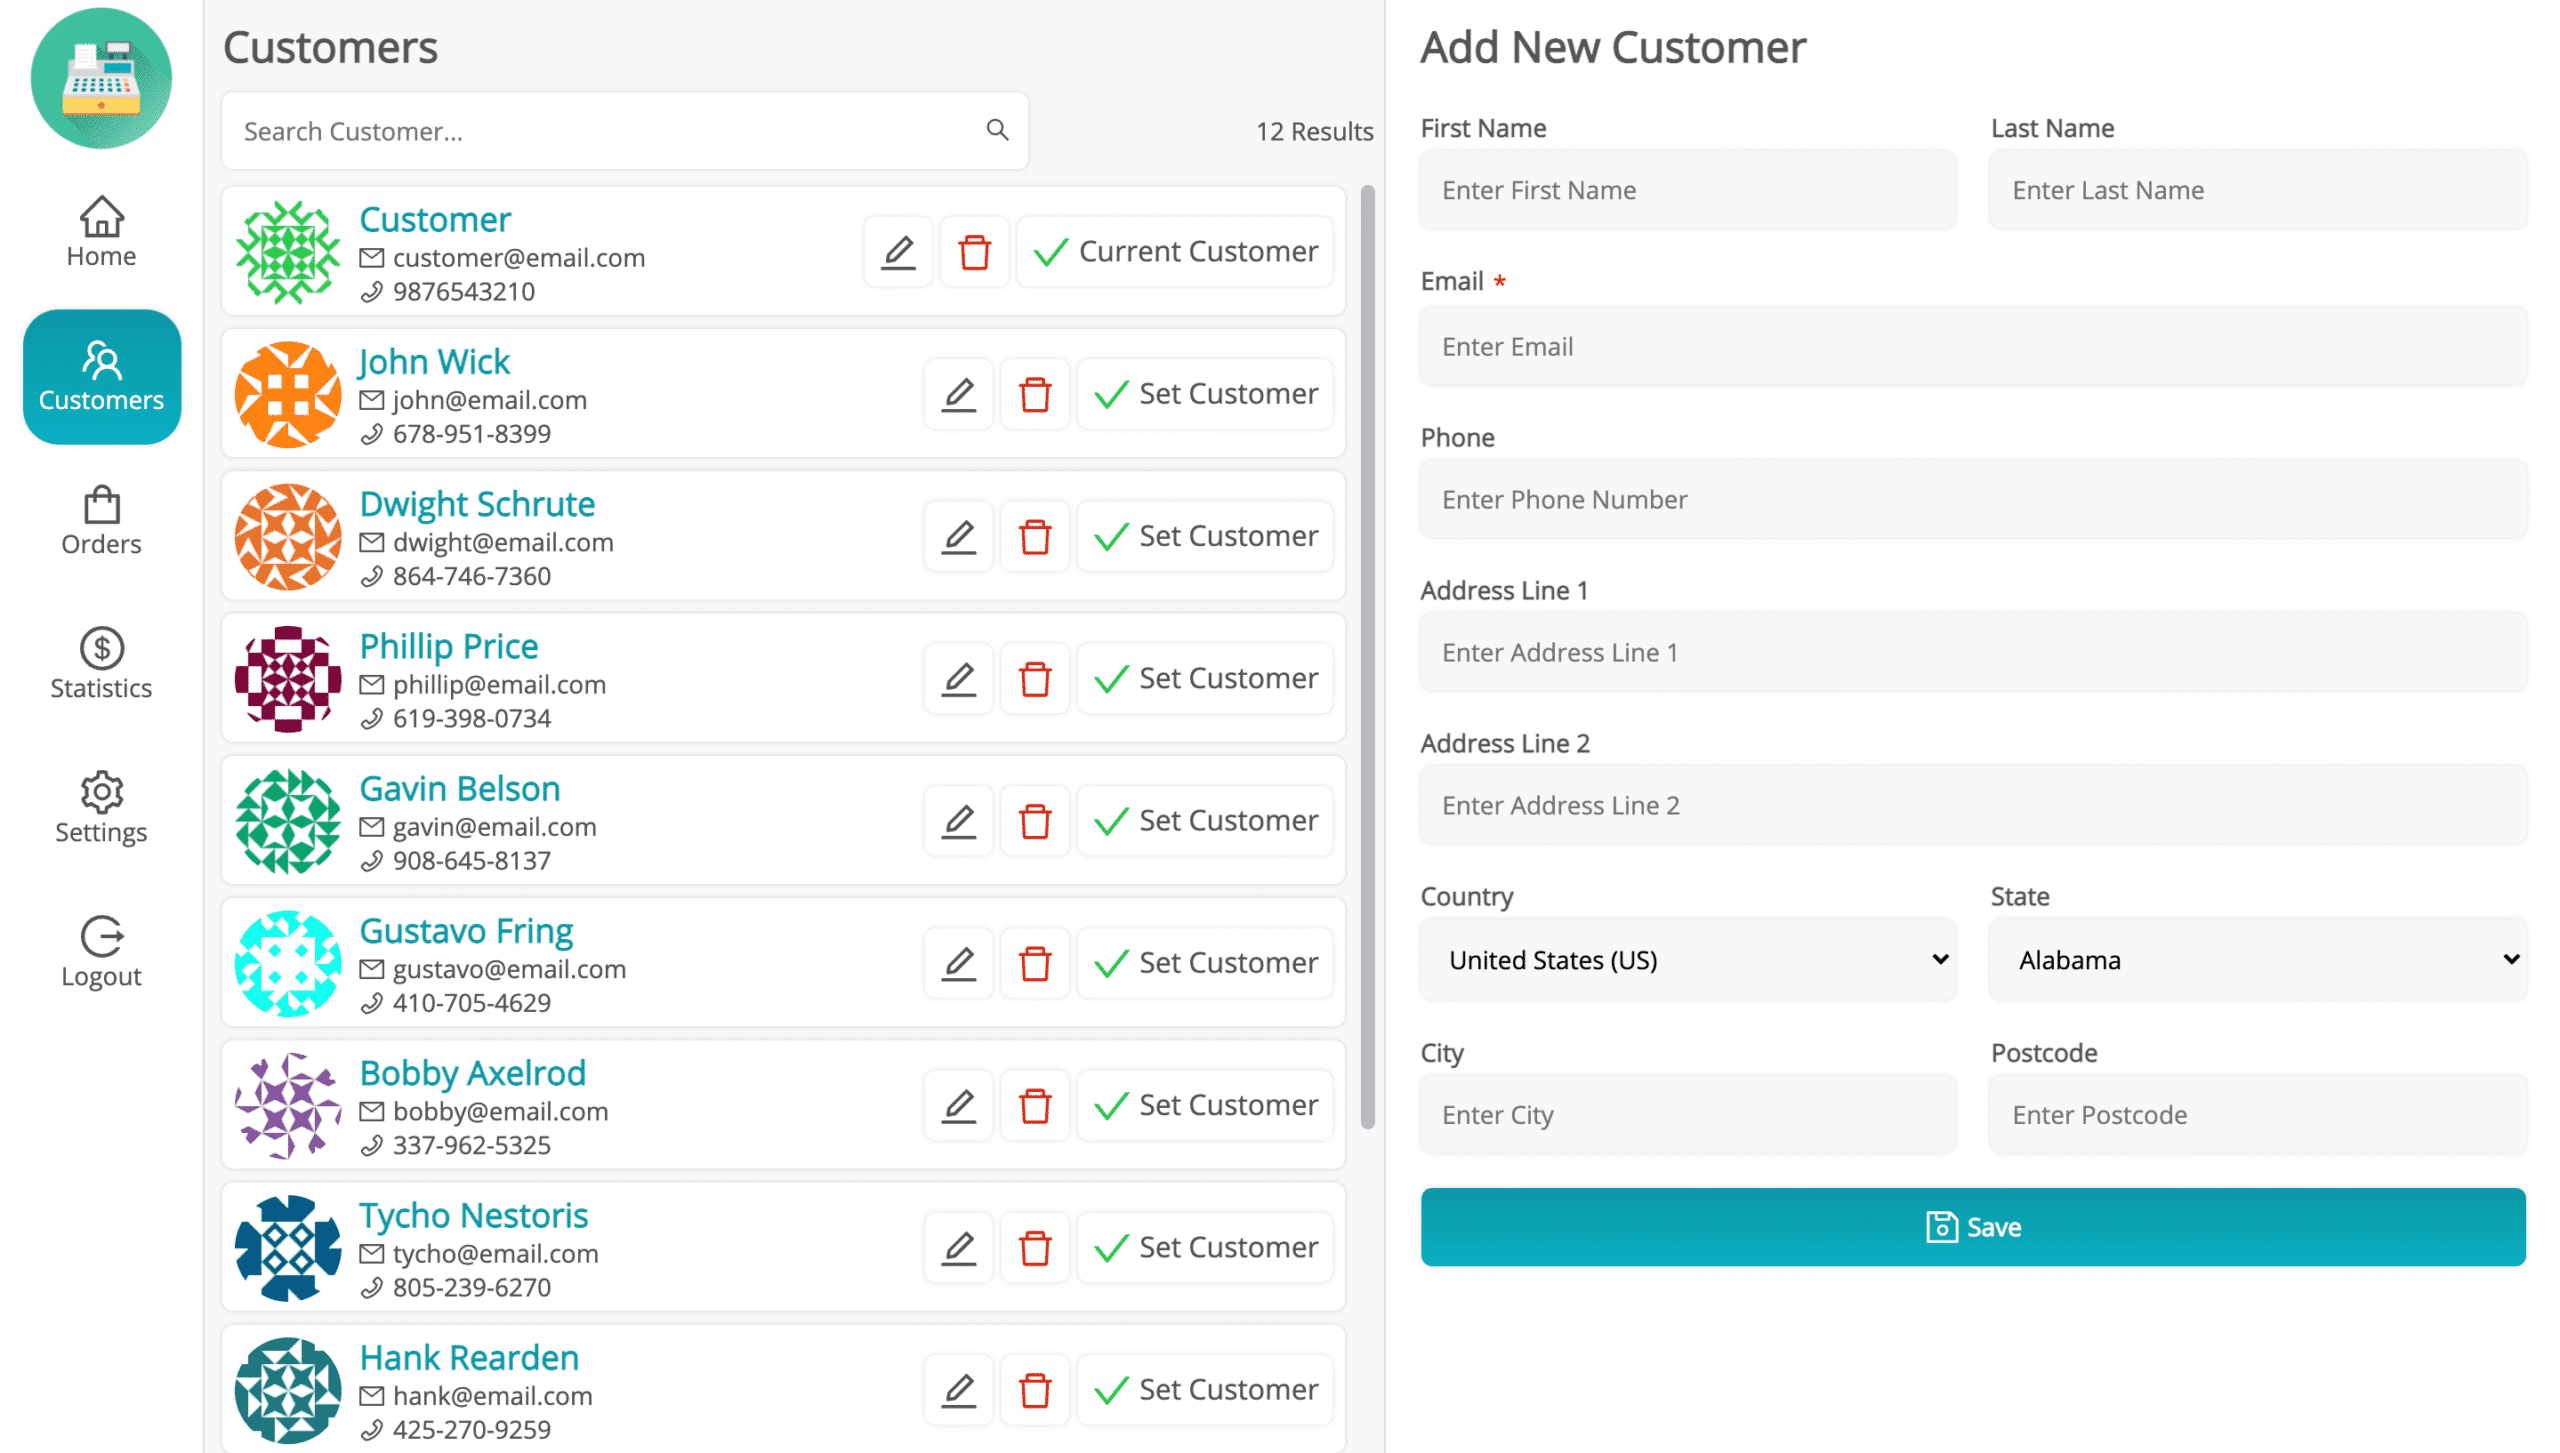
Customers Menu
Cashiers can add, update, and delete customers in the customer menu. To make an order, the cashier must pick a client by searching for them using their name, email, or phone number. Once found, the cashier may click the Set Customer option to select that person for the purchase.
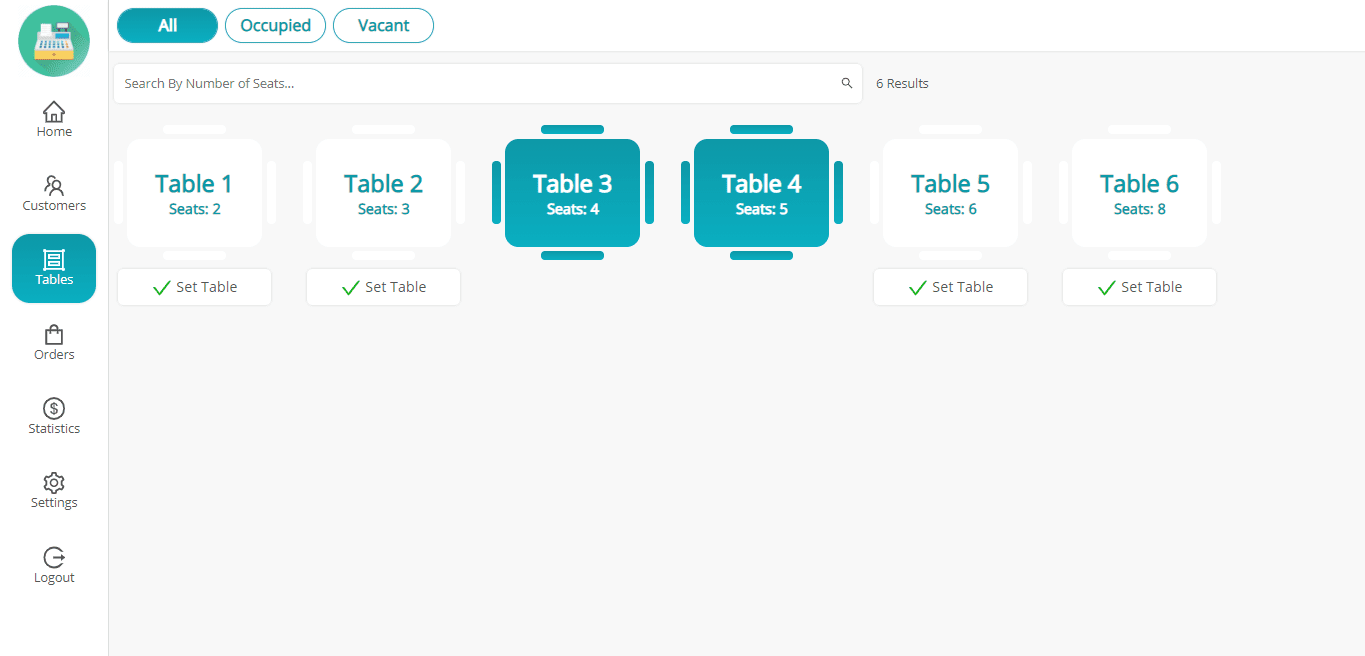
Tables Menu (Only in Restaurant/Cafe Outlets)
Cashiers can choose an available table for the customer and add things to the menu. The order is placed on hold before being processed to the kitchen. When the customer requests the bill after finishing their meal, the held order from their table is added to the cart and processed, and a sales receipt/invoice is generated and sent to the customer.
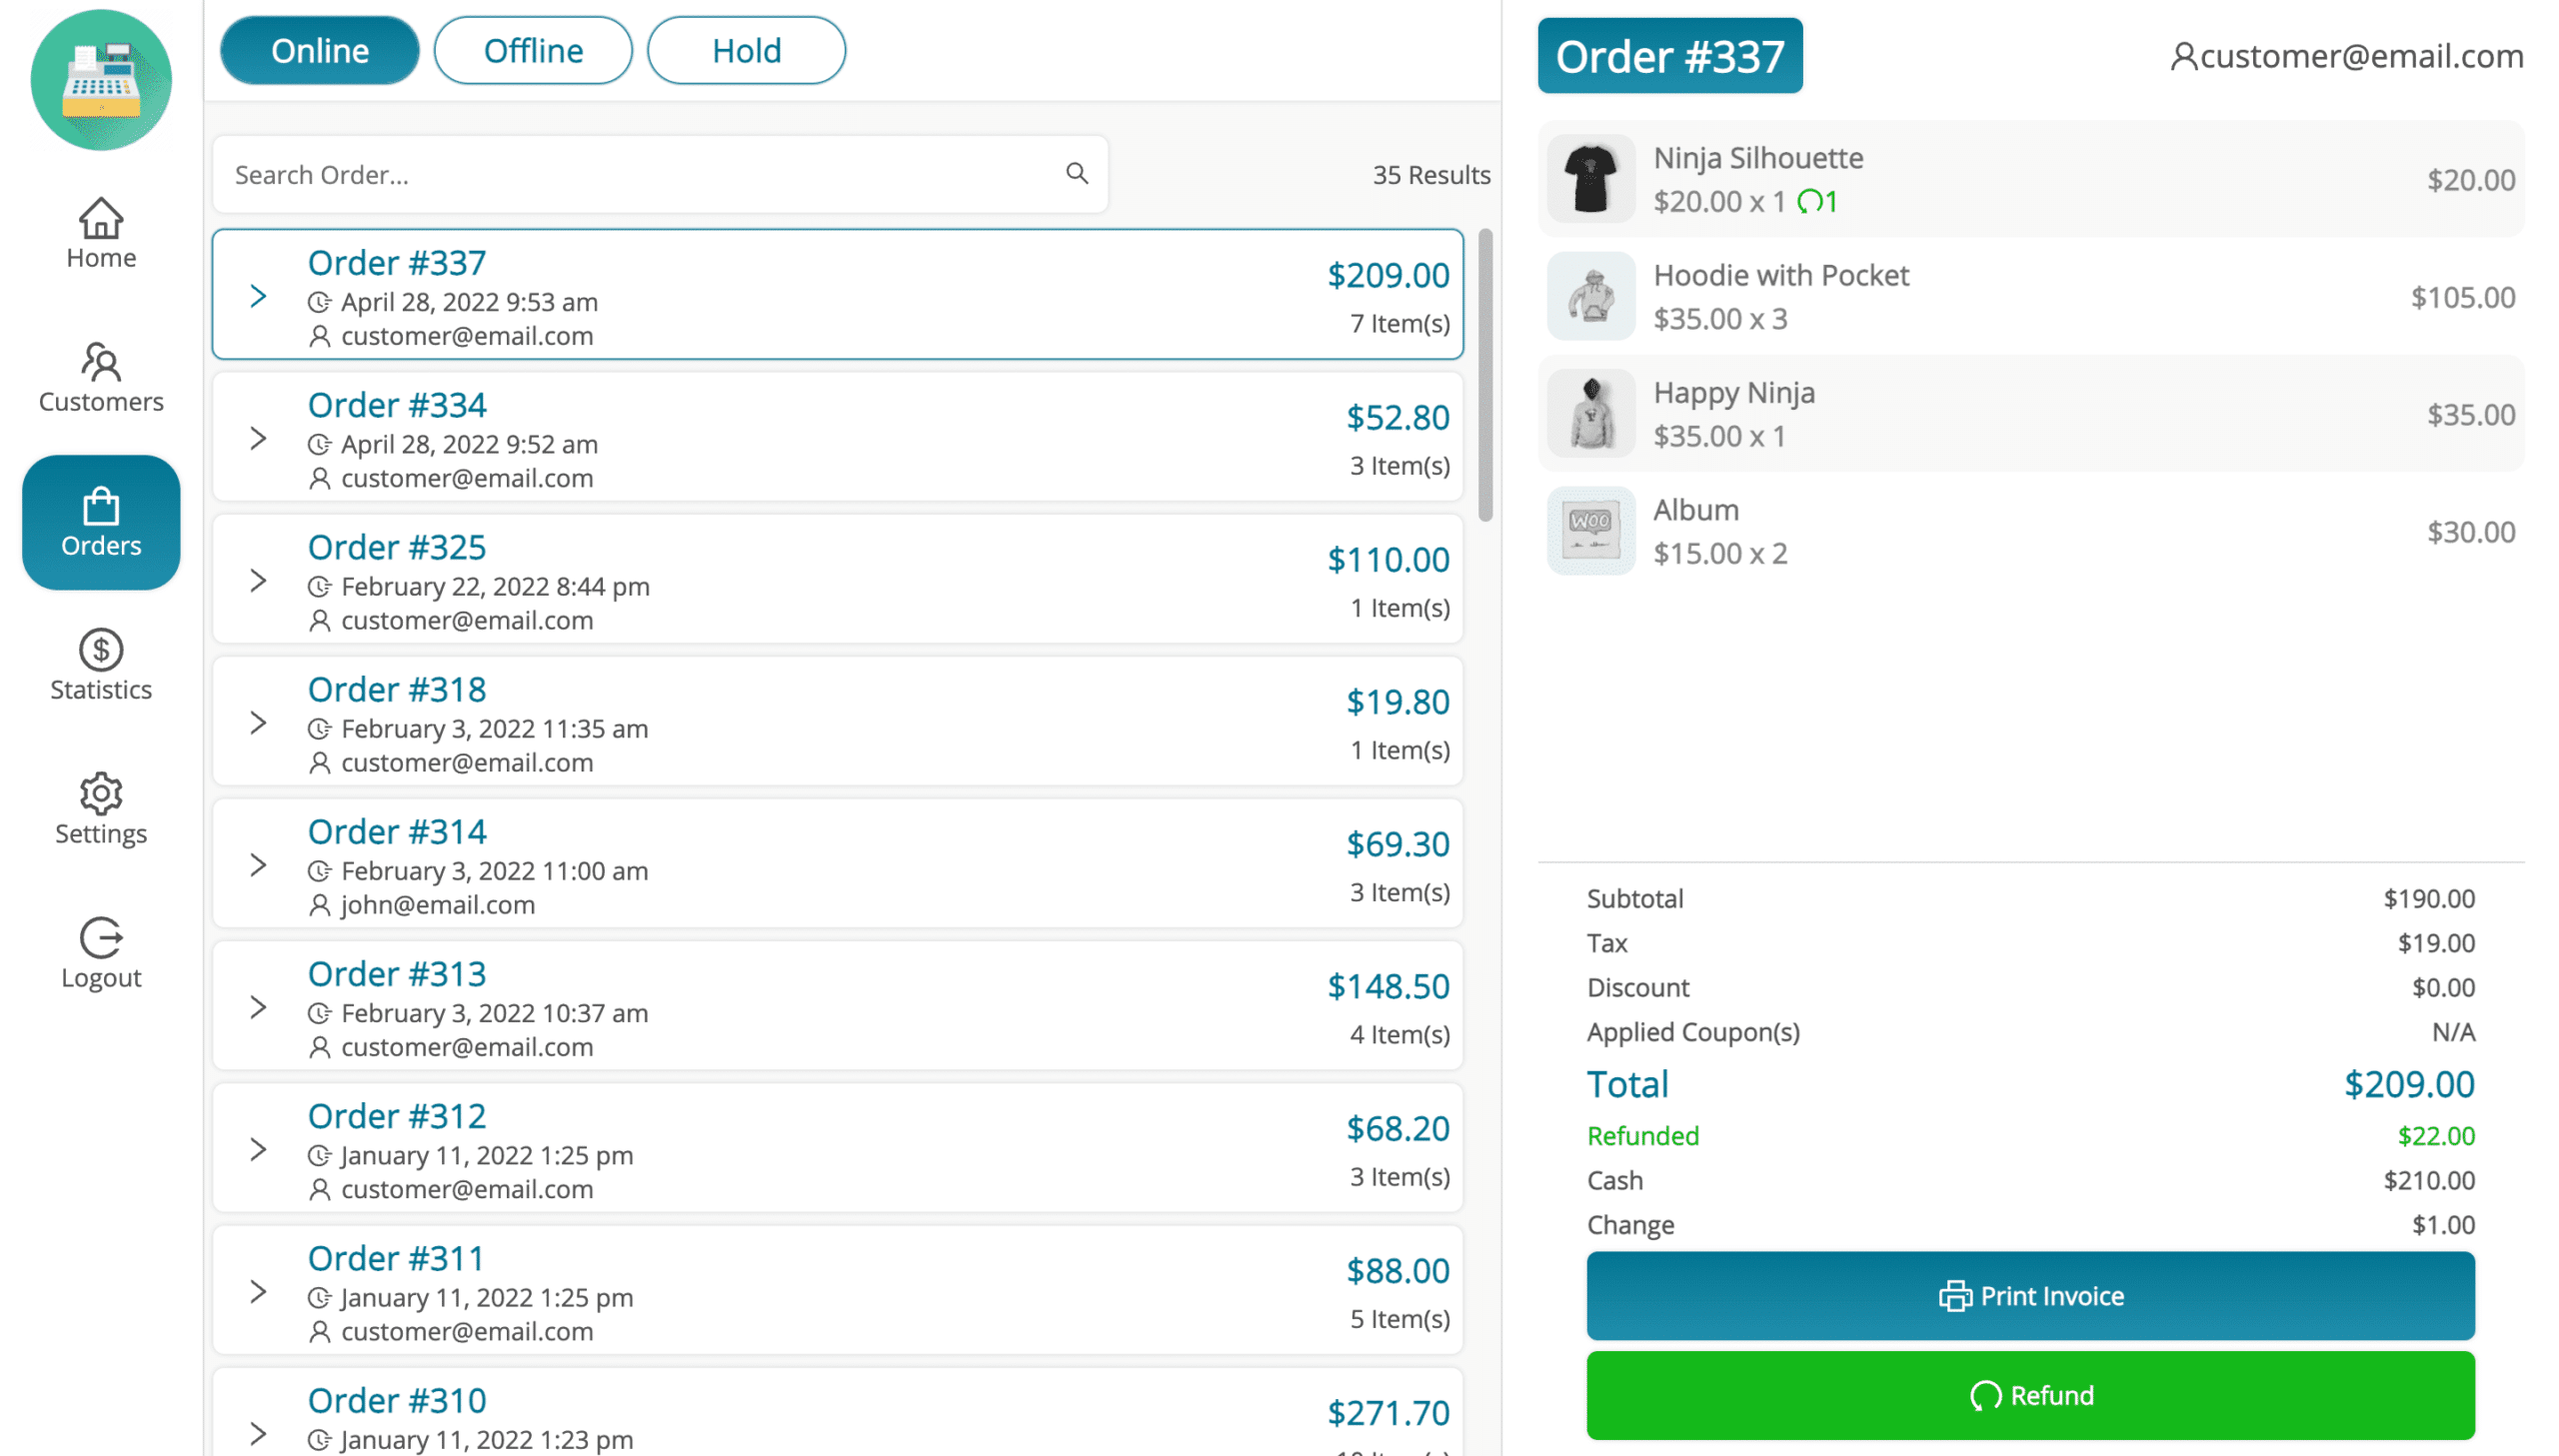
Orders Menu
Cashiers may verify order information online and offline and save them in the orders menu. Receipts/invoices may be created for both online and offline orders. Hold orders can be re-added to the cart for placement, transferred to the kitchen for preparation (only at restaurant/cafe outlets), or removed. Orders are eligible for returns and refunds.
Statistics Menu
The cashier may view the daily sales report in this menu, which includes details such as the open cash drawer amount, cash sale, total sale, and predicted drawer amount. This option displays a list of daily produced transactions and allows users to create transactions for incoming and outgoing cash reports manually.

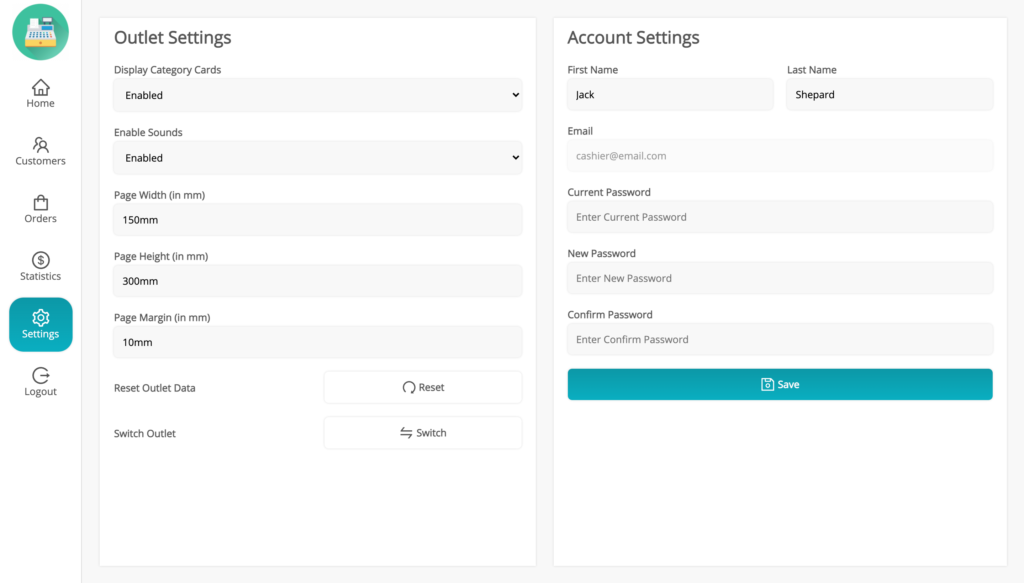
Settings Menu
There are two categories of settings in this menu: Outlet and Account. The cashier can control the display of category cards in the main menu, enable or disable noises while adding goods to the cart, and customize the printer page based on the printer settings. The default backend configuration will be loaded automatically.
To load updated data in the outlet after making changes in the backend, click on Reset Outlet Data. The Switch Outlet feature allows the current cashier to switch to any other designated outlet. The cashier can modify their name and password in the account settings.
Logout
Upon selecting the Logout button, a confirmation popup prompts the cashier to authorize deleting all data from the browser. Deleting data will start the system to load the most recent information upon the cashier’s next login. If the data is not deleted, the existing information will persist in the POS for quicker loading upon subsequent logins. Any updates to the data can be loaded from the POS settings.
Adding Product via Barcode
Items can be placed in the cart by inputting or scanning the barcode within this popup window.
Adding Custom Product
Custom Products can be included in the cart if activated in the backend. The cashier must input the product’s name, price, and quantity before purchasing it. It works with the WooCommerce exclusive tax setting only.
Unit/Weight-Based Pricing
This feature may be activated/deactivated. A popup will prompt the user to enter the weight of each product in the cart with an associated weight. The product’s pricing is determined automatically based on the entered weight.
Hold Order
The cashier can place an order on hold in the grocery outlet upon customer request. In restaurant or cafe outlets, the order can be put on hold after selecting a table, prepared, and then added to the customer’s bill when requested. Orders may be submitted to the kitchen automatically or manually using the Send to Kitchen button.

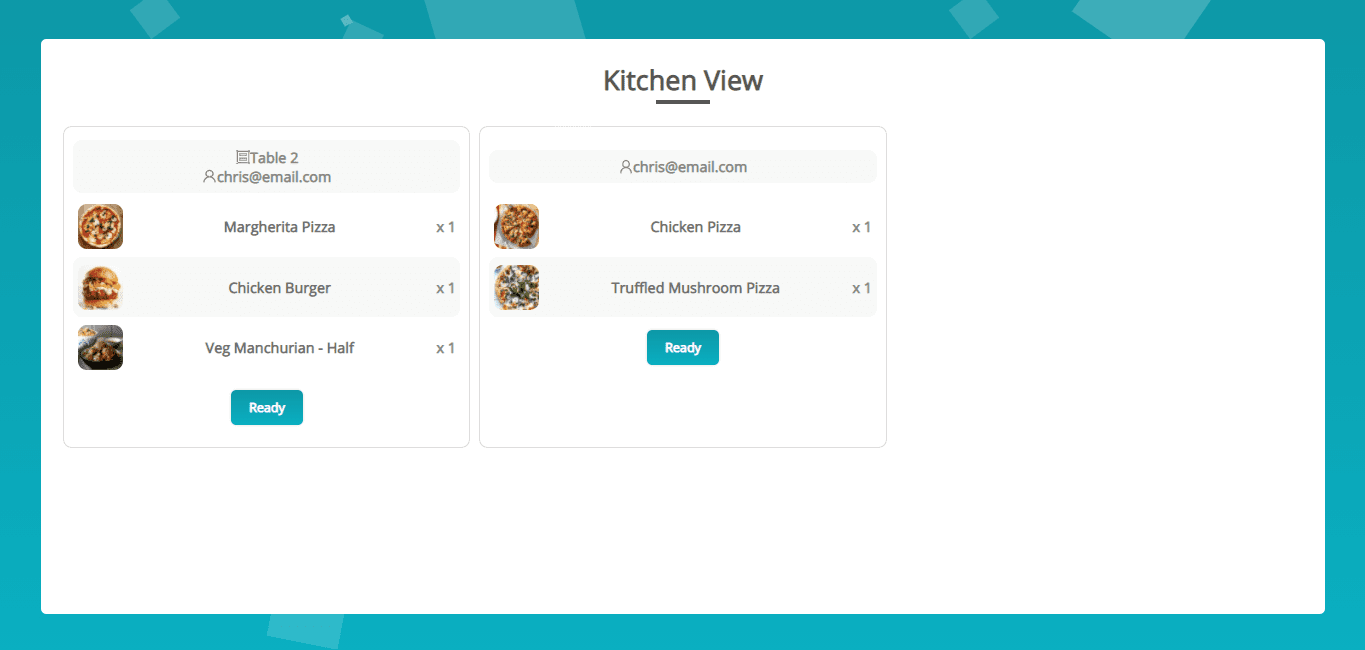
Kitchen View (Only in Restaurant/Cafe Outlets)
Orders may be held in the restaurant mode outlets and viewed on the kitchen display, which is compatible with any kitchen system. Click on the Ready button to remove a prepared order from the Kitchen View.
Updating Cart Products
The cashier can modify the price and quantity of the goods directly from the basket.
Adding Coupons and Discounts
Cashiers can apply coupons and create custom discounts, either in fixed amounts or percentages, directly in consumers’ shopping baskets.

Offline Order
You can use the offline order functionality using the “Custom/Manual Stock” inventory mode for the outlet in which you can assign custom stock to the outlet.
You need the internet to load all the data into the POS, but once the data is loaded and your internet is down in the middle, then you don’t have to worry at all.
Orders will be placed offline when there is no internet connection. Once the internet connection is restored, the cashier may sync the offline orders online.
You can’t use the offline order functionality with the “Centralized/WooCommerce stock” inventory mode as it is a security bug if we allow for this because anyone can order from the online site because there is no sync of inventory due to no internet connection but in actual, you don’t have any stock to fulfil that order.
Order Refund/Return
The cashier may process refunds or returns for purchases directly from the POS terminal by choosing the goods in the order. You can choose to activate or deactivate the feature that restocks returned products and provide a justification for the refund.
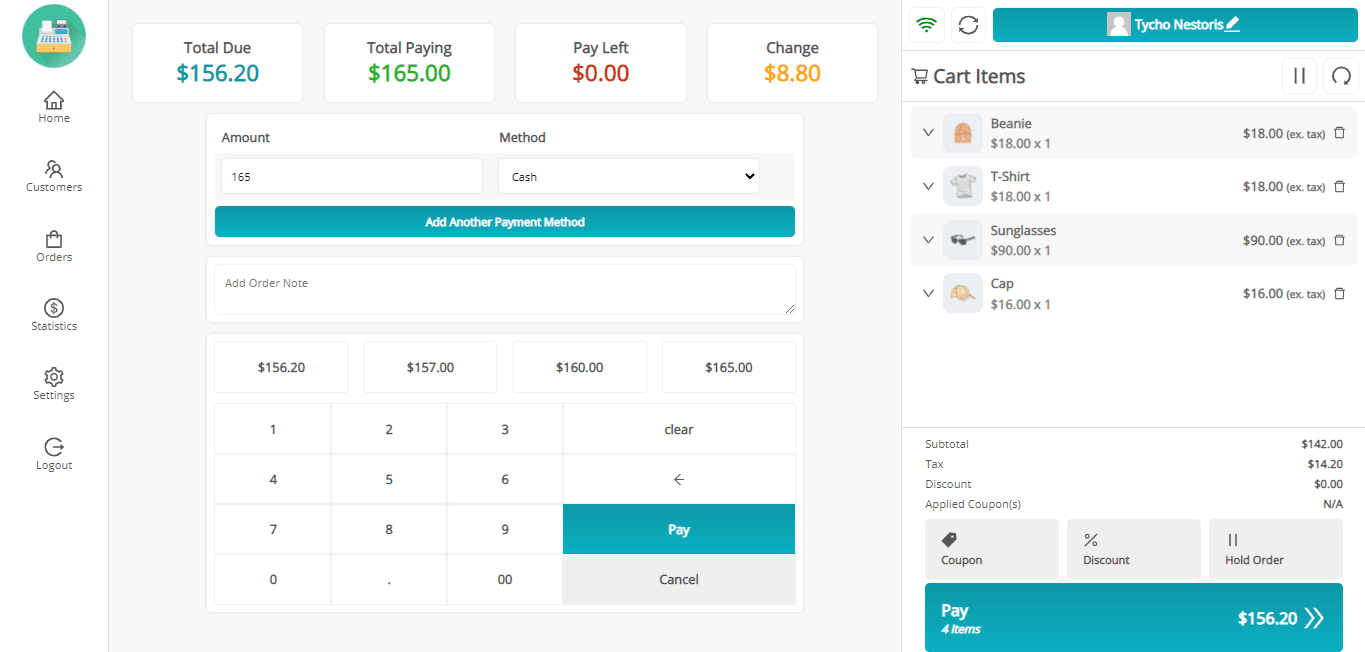
Pay Screen
The cashier can enter the amount using several payment methods that consumers choose to use for payment. An Order Note can be included if it is activated in the backend settings for the order. Automated recommended options will be provided to expedite the checkout process for the cashier.
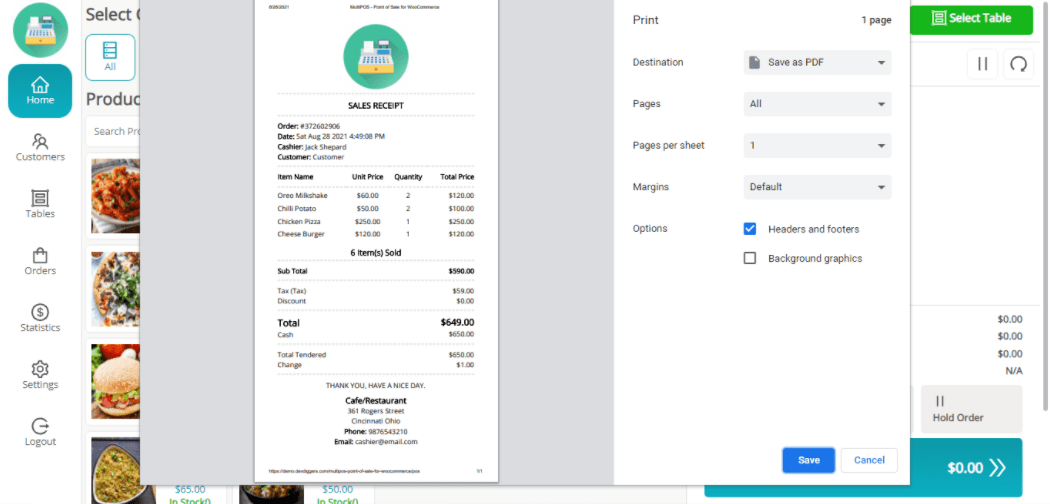
Sales Receipt/Invoice
Upon ordering, a sales invoice/receipt may be created and printed. Invoices for previous orders may be printed from the orders menu.
Multilingual
The plugin includes a POT template file. You may create PO and MO files from the “ddwc-multipos.pot” file using the Loco Translate plugin or Poedit software. Kindly create PO and MO files in the standard WordPress languages/plugins directory.
Support
If you have any concerns, need assistance with our WooCommerce extensions, or want customizations, contact us through our contact page. We will do our best to provide immediate assistance.
Kartika Musle
Kartika Musle is a tech writer at DevDiggers covering WooCommerce features, web design, and development security. Her articles translate technically dense subjects into guides that a non-developer can follow without losing the detail that matters, drawing on a background that touches both design and development.
Join thousands of readers getting smarter every week.
18 responses
-
I’ve made all the settings, but I can’t load the product.
-

Kindly connect with us from our contact page or mail us at support@devdiggers.com so our team can help you.
-
There are about 4000 products.
-
We don’t provide support through comment forms so kindly connect with us from our contact page or mail us at support@devdiggers.com for further discussion.
-
i check this demo how can i use the take a way opetion
any possiblelity to download reports like a PDF or xel-
You can normally place an order without selecting the table that will become your takeaway order. Once that order is placed, it will be sent to the kitchen screen for preparation, and after it is prepared, the customer can take his/her order.
You can use the browser print option to print any page or save it as PDF. Also, you can use the WooCommerce exports functionality for the reports.
-
-
Can I make an order as Guest in POS?
-
Yes, you can. You can easily create a guest customer and place orders for that customer.
-
-
Is possible to put Order number on the receipt like 500 501 so on so end of the day reset to one again with different number and I want to print On receipt say Take away or Dine in
-
Actually, WooCommerce doesn’t provide this kind of order number functionality. Still, we can achieve it via customization for you, for which you can connect with us from our contact page for further discussion.
-
-
is it possible to configure for Grocery store ?
-
Yes, our MultiPOS plugin is fully configurable for grocery stores.
-
-
Hi
Is it possible to modify order after saving? Per example order contain 2 lines and i want to delete 2 lines.-
You can do that from the backend.
-
-
hello is it possible to have 2 currencies to show the product price or at least the Total price.
-
No, by default, WooCommerce allows only 1 currency, so our plugin follows the WooCommerce standards. If you want any kind of additional functionality, then we can achieve it via customisation for you, for which you can connect with us from our contact page for further discussion.
-
-
does this app print KOT receipt
-
No, but there is a kitchen view screen included in the plugin which works in real-time.
-
Leave a Reply