Music is the one universal language that anyone can connect through. It is known to be a thriving industry, never-ending with its continuous introduction of genres and songs.
With the rise of music, it is no surprise that platforms emerged that sell, stream, and play music. Among the most popular are Spotify and Amazon Music.
While this might be intimidating and throw you off when selling your music, we’re here to help. WooCommerce is a platform that makes your dreams achievable through minimal effort.
However, we have compiled this article to help you understand where to start and what exactly you should do to sell music online with WooCommerce.
Hence, don’t worry. Even if things seem unfamiliar now, we’ll guide you through the process.
AirPlay Not Working: Troubleshooting Tips for Your Online Music Store
Before we discuss the process of setting up your store and selling your content, there is one thing we need to establish. When selling music online, you should aim to provide a seamless listening experience to ensure customer satisfaction.
Since many will enjoy streaming their music directly from their devices to speakers or TVs using AirPlay, it is important to guide them through the process. If they find AirPlay not working, it might deter them from listening to your music.
So, provide a simple guide where you explain what they should do if they cannot connect to AirPlay. Redirect your clients from frustration to provide them with the ultimate experience with your online music store.
Why Choose WooCommerce for Selling Music Online
Since you aim to sell your music online, you should know that choosing an adequate platform is crucial for your success.
So, why choose WooCommerce when you have various options online? It stands out as the best option for musicians, bands, and record labels for a reason.
Here are the top reasons you should choose this platform over others:
- Ease of use: The tool is well-known for being user-friendly, making it accessible even to those without extensive technical knowledge.
- Flexibility and customization: You can choose from many WooCommerce extensions and themes. These will assist you in creating a unique shopping experience that fits your ideas.
- Digital product support: The platform is specifically designed to handle digital products. It is seamlessly integrated with download management systems, so customers can easily purchase and download.
- Scalability: As your business and name grow, you’ll eventually need to expand. This is where WooCommerce comes in, as it can handle increased traffic and sales volume without compromising performance.
- Strong community: We all run through hiccups and get stuck on technical issues. So, with the vast and active community of developers, designers, and users, you can reach out and gain access to a wealth of resources and support.
Hence, by choosing WooCommerce, you’re offering the best for yourself and your customers.
How to Sell Music Online with WooCommerce: Simple Steps
Okay, now comes the important part of this article you’ve probably been waiting for. In this section, we will discuss the process of selling your audio on WooCommerce and how you can set up the platform.
First and foremost, do you want to sell digital or physical products, such as vinyl and albums, that you would want to deliver to your clients? That is the first decision you have to make. Regardless, the initial process of setting up your music piece is the same: create a product.
To create a WooCommerce downloadable product, you start by going to the side menu and following these steps:
- Click on Products and go to Add New. This will launch the creation page. You will be prompted with a form to write your product’s name and description.
- Now, in the section underneath, you will find Product Data. Here, you can add details about your physical product if you have chosen to sell physical equipment.
- Conversely, if your current product is digital, you must check the two boxes for Virtual and Downloadable.
- You can now set the price you want, add the audio file, and define other aspects. For instance, you can decide how often the customer can download the file and whether the link will expire after a specific time.
This is the most basic way to set up your online music store with WooCommerce. While it’s not flashy or appealing, it will get the job done. When clients purchase the audio file, they receive an email with a download link. It will also be available in their account’s downloads section.
Selling Music on WooCommerce Using the Product Table Plugin
So, do you want to learn how to sell music online more effectively? One of the best options is the WooCommerce Product Table plugin.
This plugin allows you to access filters, custom fields, and advanced search options. Below, we break down the process to assist you in creating your music store.
1. Install and Activate the WooCommerce Product Table Plugin
The process is simple. You need to install the Woosuite Core plugin and activate it using a license key. This will allow you to gain access to the Product Table plugin. It is the essential step that will open up many possibilities.
2. Add Downloadable Music as a Product
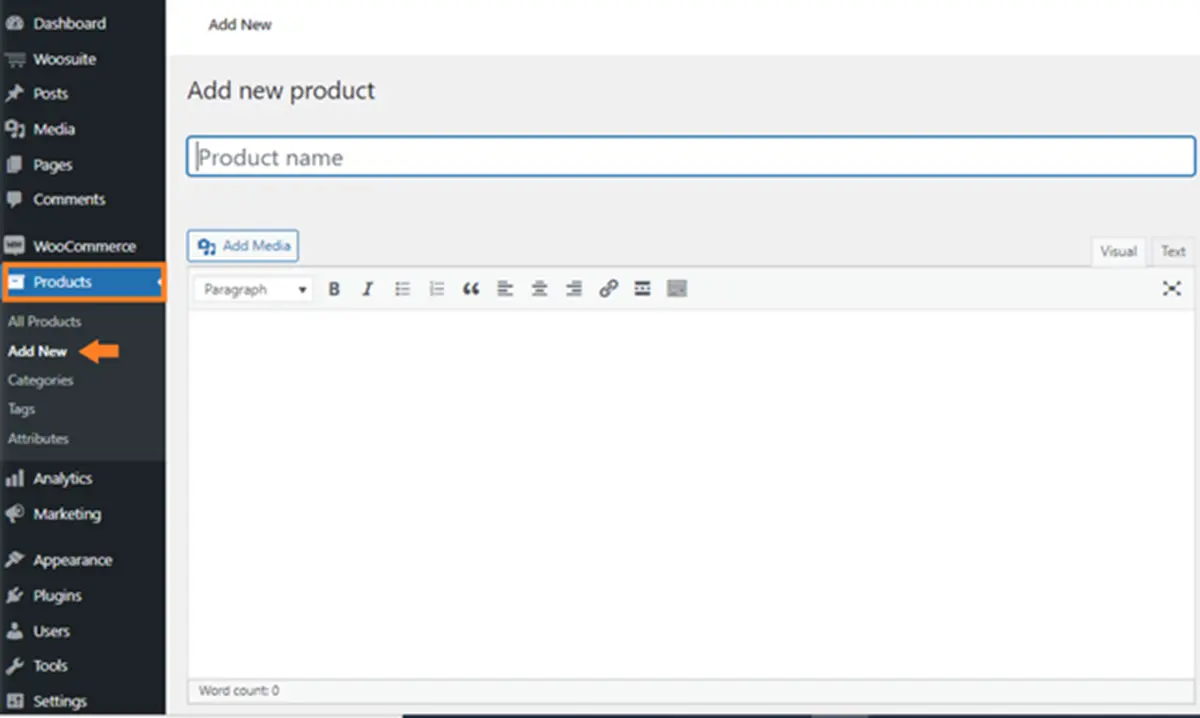
Now, you will have to follow the same steps we mentioned earlier. To reiterate, you have to do the following. First, go to the dashboard, then click on Products and click on Add New. Here, you can write the product name and a short description.
We recommend you add a URL to the audio file if it is available online so your customers can get sample audio before purchasing your product.
You can also add the image under Product Image and create the downloadable product by checking the boxes for Virtual and Downloadable.
Enter the product’s price and upload the audio file you want to sell under Downloadable files. Lastly, hit the Publish button to make the product go live.
3. Adding Custom Fields
You can further perfect this process by creating custom fields, such as genre, length of the song, and album name. To do so, you need to access the Advanced Custom Fields plugin.
To simply do this, follow the steps below:
- Install the plugin by going to Plugins and clicking on Add New. Search for the plugin, which is called Advanced Custom Fields.
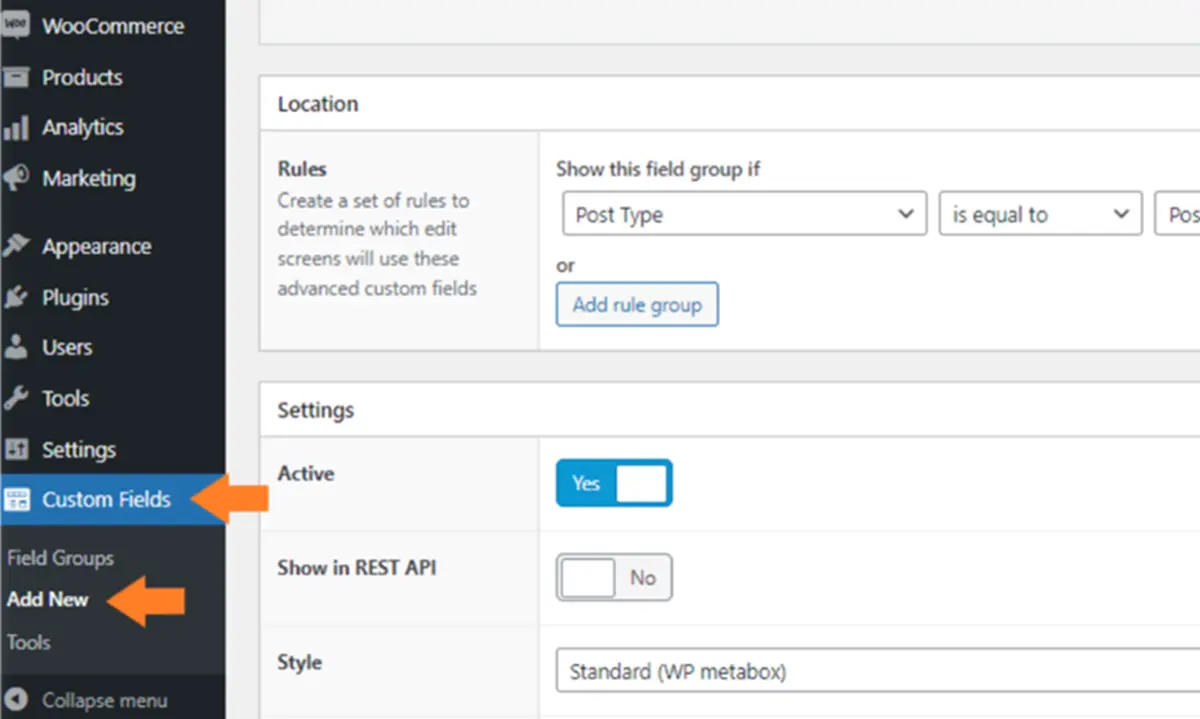
- Once you activate it, look for the Custom Fields option in the sidebar and click Add New.
- Under Add Title, you should name the field group.
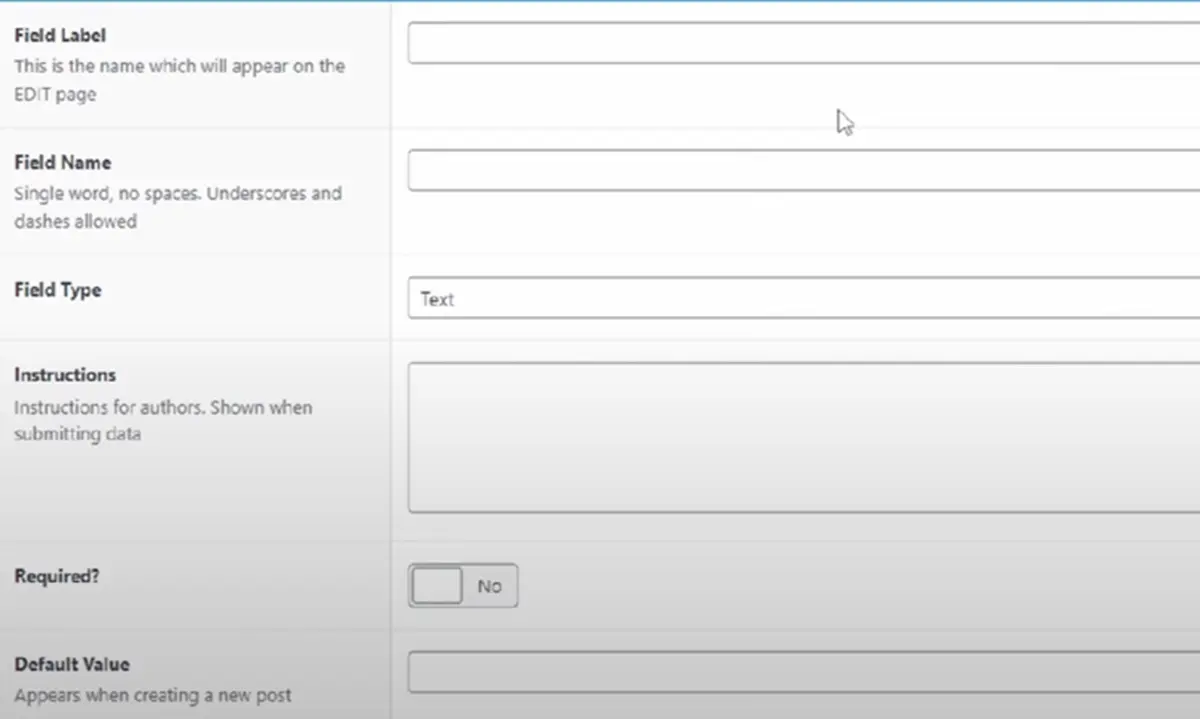
- The Add Field button allows you to add a field.
- You can play around with the settings and options, such as setting the field label and type.
- Once you scroll down, you will find the Location section. This section lets you choose where to position and display the custom field you created.
- Click on the Publish button when you are done.
Now, you can easily edit this information by going to the product’s edit page. Underneath it, you will find the custom fields you have created with spaces to fill in information.
4. Go to the Product Table Settings
Now, you want to create a table to display your products beautifully.
- Go to Woosuite and navigate to Product Table from the dashboard.
- Creating a table is simple now.
- Click on Add New Table.
Once you do so, you’ll be prompted with a wide range of options that allow you to control the table’s different settings.
Here are simple things you can do in the settings:
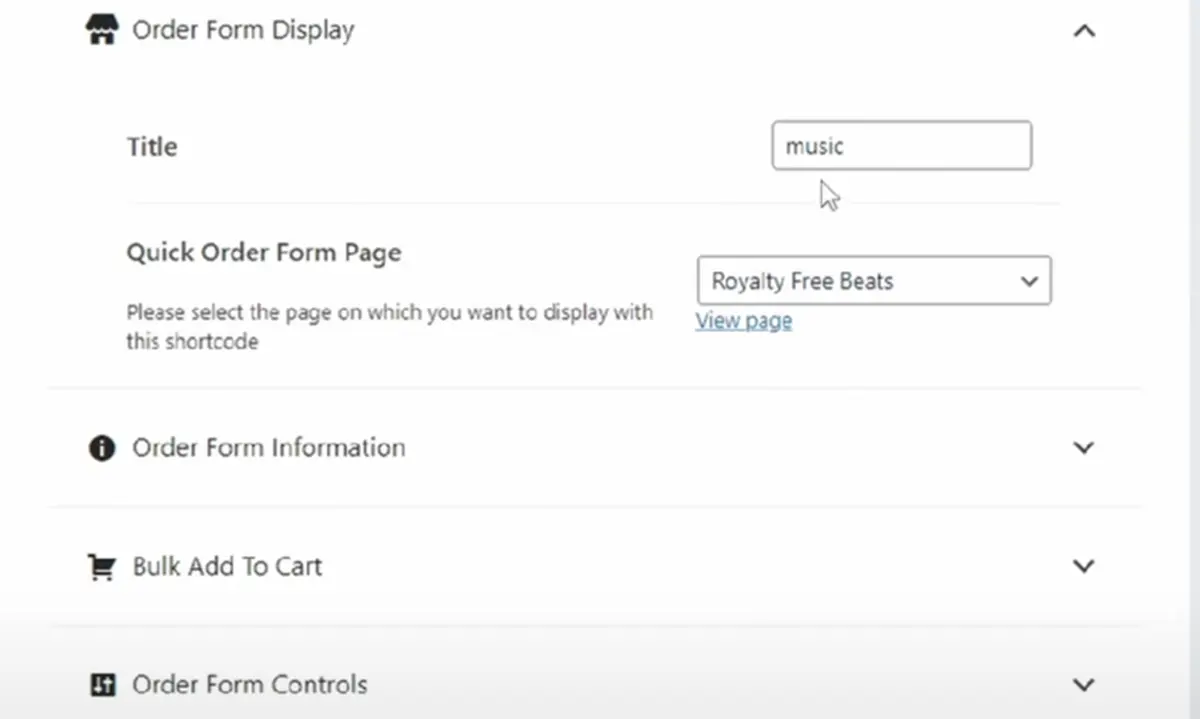
- Order Form Display: You can provide a name to your table.
- Order Form Information: In this section, you can decide which columns to add to the table. You can drag them from the available columns and drop them in the selected columns.
- Change column names: To change the column names, navigate to the pencil icon under the currently selected columns.
- Add cart icon: If you scroll down, you will see the Add to Cart icon. This allows you to upload a cart icon to display instead of having the cart text available.
5. Set as Default
To set the table as the default shop page layout, go to General Settings under the plugin and select the table from the dropdown next to Shop pages.
6. Saving Changes and Results
To save all the work you just completed, click on Save Changes, which can be found in the top right corner of the page. Finally, if you want to see your results, you can head to the shop page of your store. There, you can see the table you just created with all the pieces of music and songs that you listed.
Pricing Strategies for Music Sales on WooCommerce
When you sell your music online, you cannot simply decide on a random price and set it under the price category. Correct pricing is the key to attracting customers, maximizing sales, and staying in the competition. Below, we discuss a few strategies you should consider.
First, consider competitive pricing. Research the prices of similar music stores online for your genre and niche. While your pricing should definitely be competitive, it should also reflect quality and uniqueness. After all, you need to stand out to distinguish yourself from the rest.
Second, you can integrate tiered pricing using the WooCommerce Tiered Pricing plugin. Offer tiered pricing based on the format and quality of the music. For instance, MP3 versions could be sold at a lower price. On the other hand, you can charge a premium for high-quality FLAC files. This way, you provide your clients with different options that cater to their needs.
Third, think about bundles. These encourage customers to buy more items as you offer bundles. For example, you can bundle up an entire album at a discounted rate compared to buying individual tracks.
Last, consider subscription models. These work best if you regularly have a large music catalogue and many customers. They would also suit you if you regularly release new tracks.
This way, customers can pay a recurring fee to access your entire music collection or receive novel pieces of music as they are released. Since you will be using WooCommerce, know that it supports subscription products, allowing you to generate steady revenue.
Conclusion
So, if your customers are looking for ways to learn how to download embedded audio, you just provide them with the perfect solution.
Throughout this article, we discussed everything you need to know about creating a music store on WooCommerce, pricing techniques, and the best way to display your audio files on your website.
That said, do not forget that your customers might get lost occasionally. Hence, it is a good idea to provide walkthroughs and technical guides to assist them when they get stuck.
Providing the ultimate experience to your clients means focusing on your business goals while catering to their needs.
For that, WooCommerce provides excellent tools that you will need to manage your music catalogue effectively.
Feel free to contact us if you have any questions or need further assistance with setting up your online music store using WooCommerce. Our team is here to help you every step of the way.