If you’ve ever looked at a WordPress URL like yoursite.com/?p=123 and wondered why it looks nothing like the clean, readable links you see elsewhere, you’ve found one of the most overlooked settings in WordPress. That default structure works, but it tells search engines and visitors nothing about the page.
Learning how to set up pretty permalinks in WordPress fixes this in minutes.
This guide covers the step-by-step tutorial to set up WordPress pretty permalinks correctly, how to fix the most common errors, and the best practices professionals use when they configure permalinks on client sites.
By the end, you’ll have a URL structure that’s clean, consistent, and built to last.
What is a WordPress Permalink?
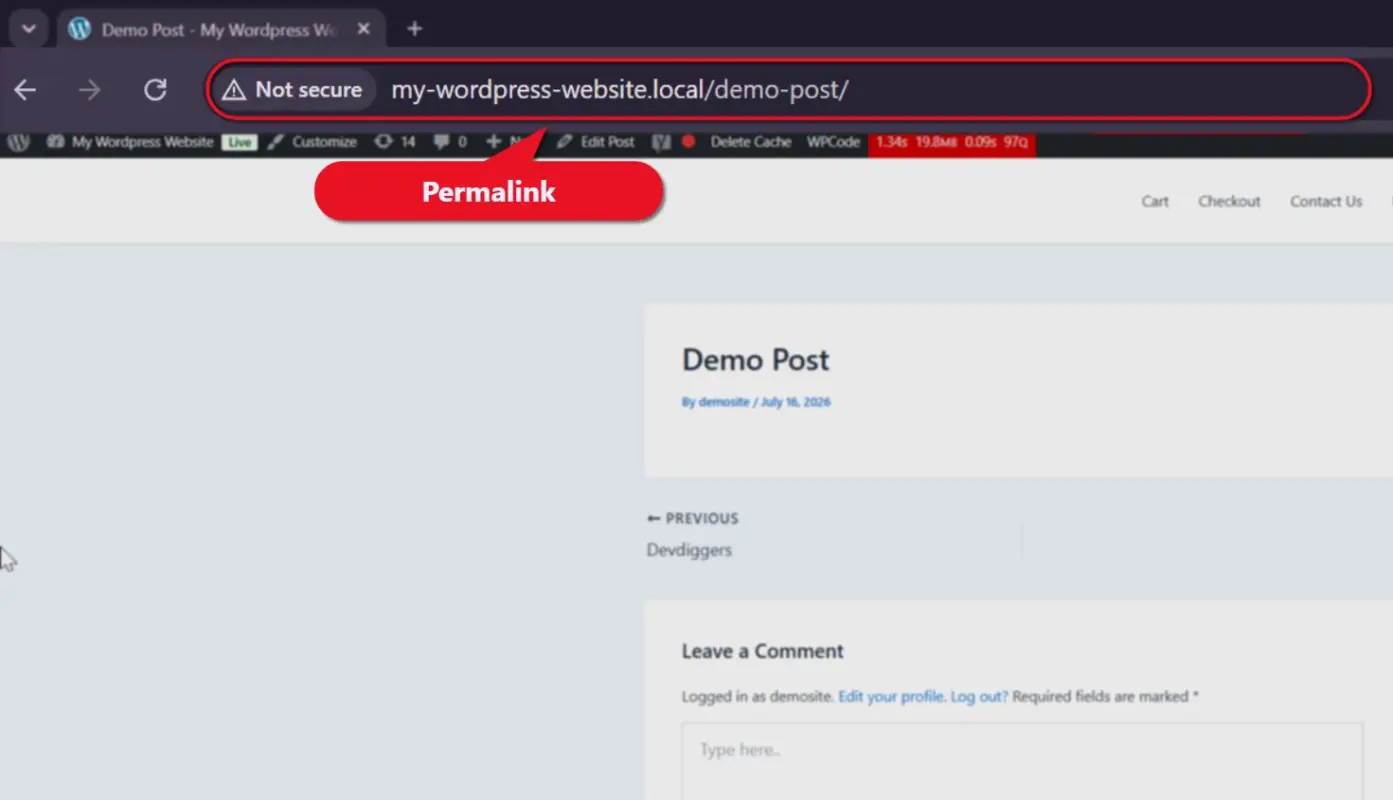
A permalink is the permanent URL for any post, page, or piece of content on your site. WordPress generates one automatically at publish time, though the format is up to you, as covered in WordPress’s official permalinks reference.
By default, WordPress uses a “plain” structure like yoursite.com/?p=147. That number is a database ID, meaningless to readers and barely useful to search engines. A pretty permalink instead reads yoursite.com/how-to-set-up-pretty-permalinks/, telling you what the page covers before you click.
Why Permalinks Matter for SEO and User Experience
Permalinks shape how readers and search engines interpret a page before it ever fully loads. A clean URL structure signals relevance instantly, while a string of database numbers signals nothing useful at all.
Search engines treat URLs as a real, if modest, ranking input. Backlinko’s analysis of 4 million Google search results found that URLs containing a keyword earn a 45% higher click-through rate than URLs without one. It’s one of the clearest reasons teams set up pretty permalinks in WordPress before a site ever goes live.
Beyond rankings, permalinks also build trust. A readable slug invites a click. A cryptic string gets skipped, every single time.
Pretty permalinks are a small setup change with a lasting SEO return.
How to Set Up WordPress Pretty Permalinks: Step-by-Step Tutorial
Here’s the exact process to set up pretty permalinks on any self-hosted WordPress site.
Step 1: Log In to Your WordPress Dashboard
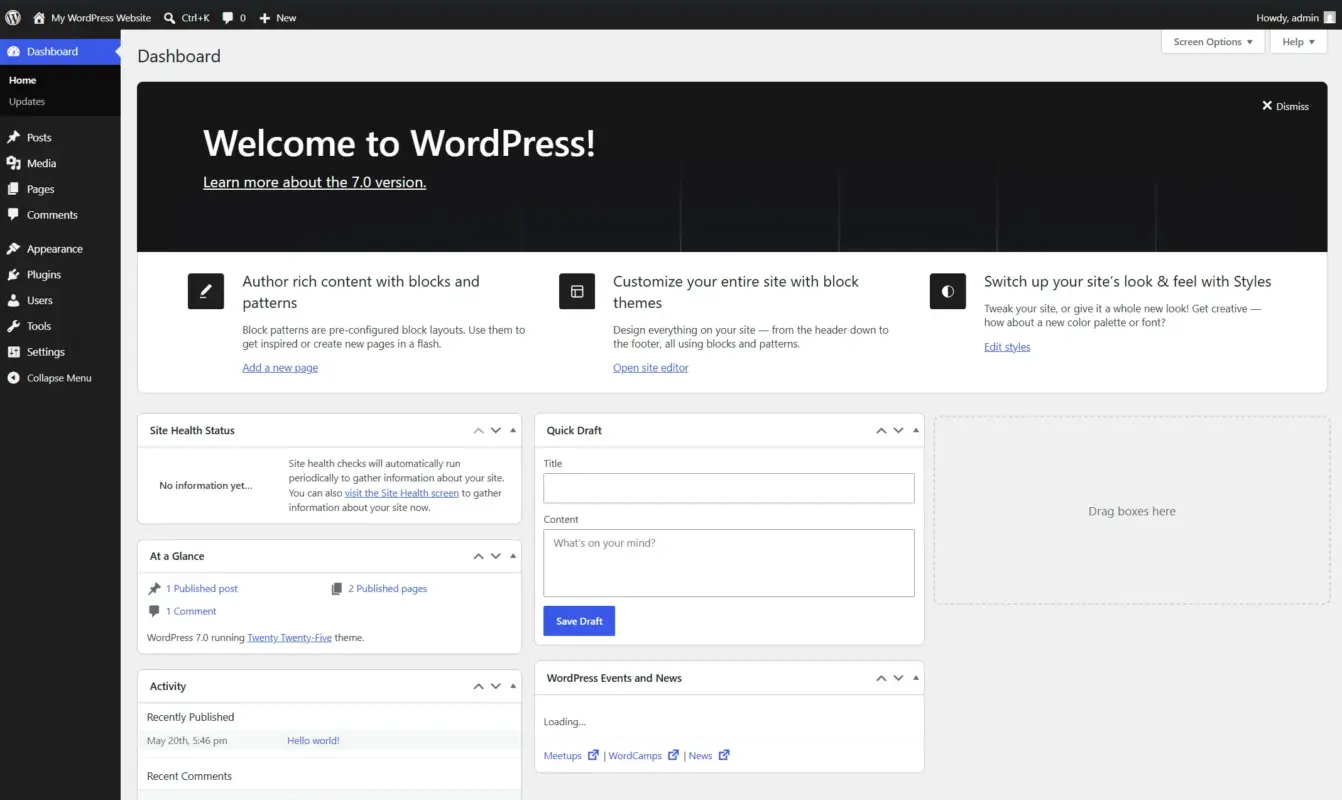
Head to yoursite.com/wp-admin and log in with your administrator credentials. Permalink settings are only accessible to users with administrator privileges, so if you’re logged in as an editor or contributor, you won’t see this menu.
Step 2: Navigate to the Permalinks Settings Page
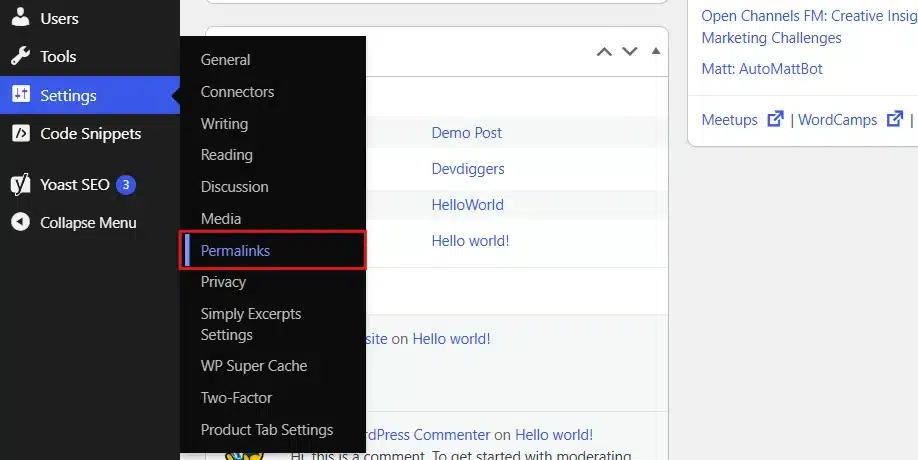
- From the left-hand admin menu, hover over Settings
- Click Permalinks from the dropdown that appears
This opens the Permalink Settings screen, where every available URL structure is listed as a radio button option.
Step 3: Choose Your Permalink Structure
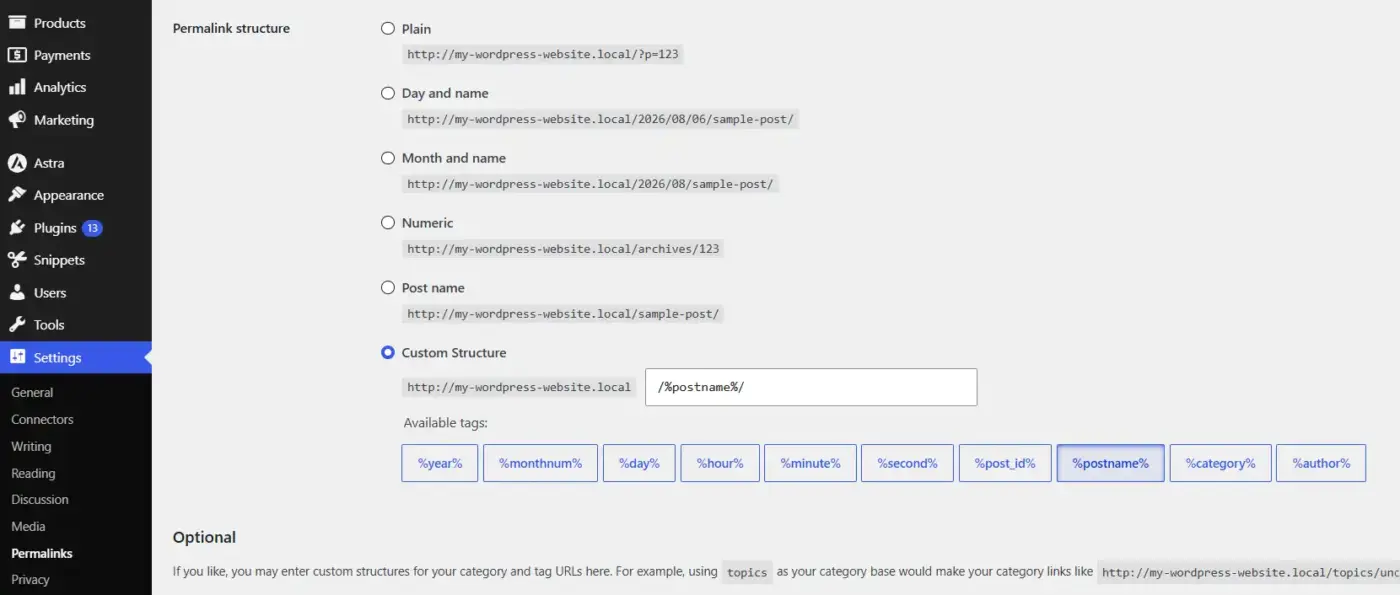
WordPress gives you several built-in options. Here’s what each one produces, using a sample post titled “Sample Post”:
- Plain:
?p=123(the default, not recommended) - Day and name:
/2026/08/06/sample-post/ - Month and name:
/2026/08/sample-post/ - Numeric:
/archives/123 - Post name:
/sample-post/ - Custom Structure: lets you build your own format using structure tags
For the vast majority of blogs, business sites, and portfolios, Post name is the option to pick. It produces the cleanest, shortest, most keyword-relevant URLs and is the industry-standard choice when people set up pretty permalinks for SEO purposes.
Step 4: Select “Post Name”
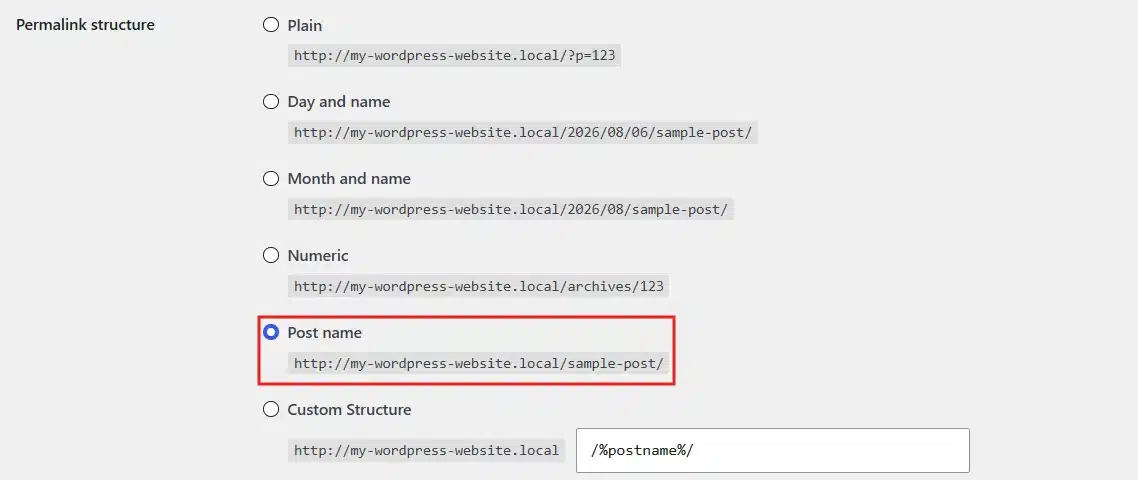
Click the radio button next to Post Name. You’ll see the structure tag /%postname%/ appear in the Custom Structure field automatically. This tag tells WordPress to use the post’s slug (the URL-friendly version of its title) as the entire URL path.
Step 5: Save Your Changes
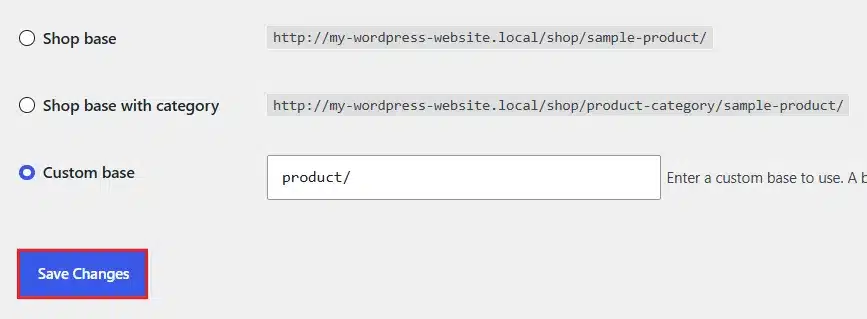
Scroll to the bottom of the page and click the Save Changes button. WordPress will flush and regenerate its rewrite rules in the background. This single click is the moment you officially set up pretty permalinks on your site.
Step 6: Test Your New URLs
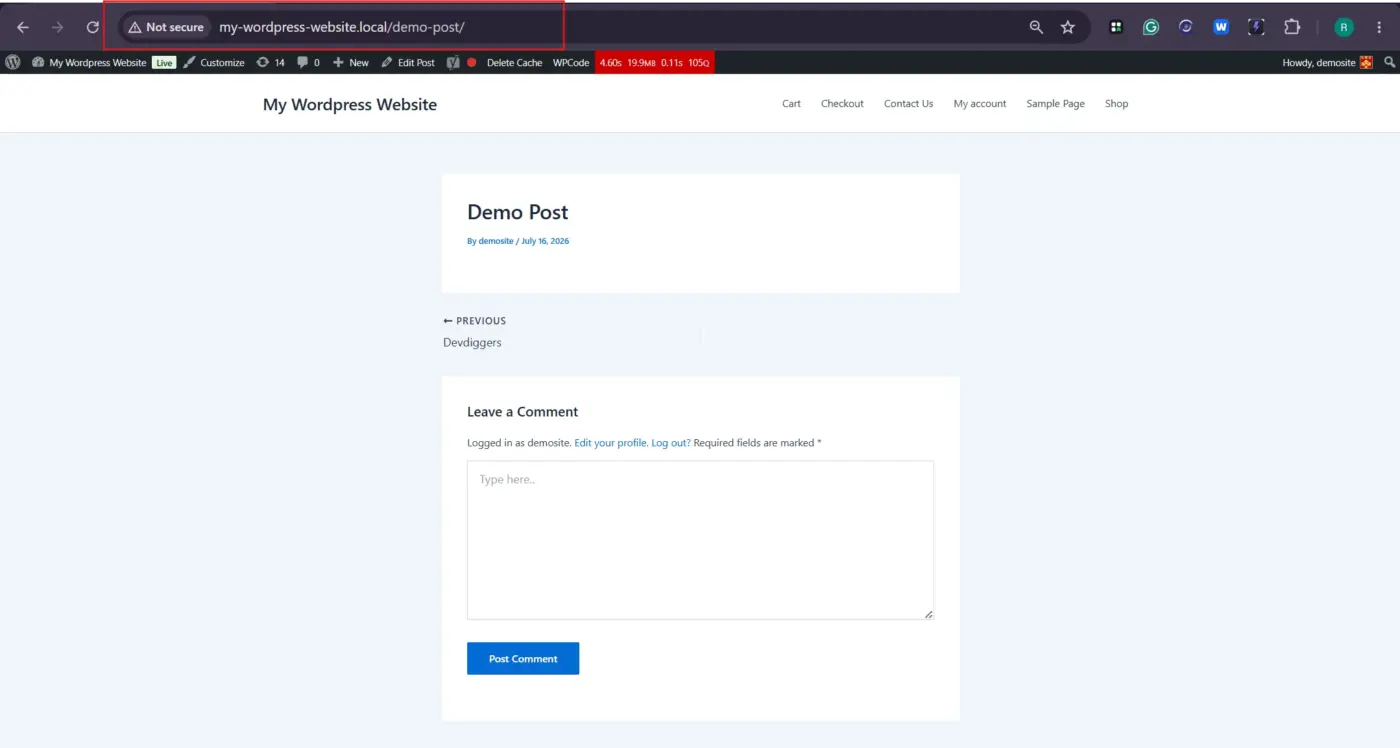
- Open a published post from your site
- Check that the URL in your browser’s address bar now shows the readable slug format
- Click through to two or three other posts and pages to confirm the change applied site-wide
If every link loads correctly, you’re finished. If you see a 404 error on posts that used to work, move on to the troubleshooting section below. That’s the single most common snag people hit after they set up pretty permalinks, and it has a quick fix.
When Pretty Permalinks Go Ugly: Troubleshooting
Most of the trouble people hit after they set up WordPress pretty permalinks traces back to one of these four issues:
- Every post returns a 404 error: Revisit Settings → Permalinks and click Save Changes again to force a rewrite.
.htaccessFile missing or unwritable: Restore or create it via FTP, then save permalinks once more.- Homepage works, subpages don’t: Clear your caching plugin and any server-level cache.
- Permalinks revert after an update: Reselect Post name under Settings → Permalinks and save again.
- Keep it short: Aim under 60 characters; a lean slug communicates the topic instantly.
- Hyphens, not underscores: Search engines parse hyphens as word breaks; underscores don’t reliably work the same way.:
- Trim stop words: Cut “a,” “the,” and “of” from slugs to keep them lean and scannable.
- Skip dates on evergreen content: Dated URLs make timeless guides look outdated fast.
- Set structure early: Changing permalinks after a site earns backlinks requires 301 redirects to protect rankings.
- Keep slugs lowercase: Mixed-case paths can create duplicate content problems on some servers.
Conclusion
Setting up WordPress pretty permalinks takes minutes, but the payoff compounds across every page you publish. A clean, keyword-relevant URL earns trust from readers and a measurable edge in click-through rate from search engines, backed by real data on how searchers behave.
The process itself is simple: pick the right structure, save it, and confirm it. The troubleshooting steps exist for the rare cases when a server hiccup gets in the way, not because the feature is fragile.
For any site, new or established, choosing to set up pretty permalinks in WordPress is one of the highest-return, lowest-effort changes available. A few minutes in the Permalinks settings pays off for as long as the site exists. For more WordPress optimization walkthroughs, visit the DevDiggers blog.
Frequently Asked Questions (FAQs)
Q1. Do I need a plugin to set up WordPress pretty permalinks?
No. Pretty permalinks are a built-in WordPress feature available under Settings → Permalinks with no plugin required. Some SEO plugins offer additional URL customization options, but the core feature works out of the box on any standard WordPress install.
Q2. Will changing my permalink structure hurt my SEO?
Changing the structure on a site that already has indexed pages and backlinks can cause a short-term dip if old URLs return 404 errors. Set up 301 redirects from every old URL to its new equivalent to preserve your existing search rankings and avoid broken links.
Q3. Why does my homepage work but every other page returns a 404 error?
This is almost always a caching or .htaccess issue rather than a problem with the permalink setting itself. Clear your caching plugin, then revisit Settings → Permalinks and click Save Changes again to force WordPress to regenerate its rewrite rules.
Q4. What’s the difference between a permalink and a slug?
A slug is just the last segment of a permalink, the part that identifies one specific post or page. The permalink is the full URL, including your domain and any structure tags you’ve configured. When you set up WordPress pretty permalinks using the Post name option, the slug becomes the entire path after your domain.
Q5. Can I customize the permalink structure differently for posts and pages?
WordPress pages always use a simple structure based on their slug, regardless of what you choose for posts. The Permalinks settings screen controls post URLs specifically. If you need more granular control, such as different structures for custom post types, that typically requires a plugin or custom code in your theme’s functions file.