
Have you ever landed on a website in Chrome, only to find that the font is too small, too thin, or looks odd? You are not alone! Millions of users face this problem every day – and that’s on top of the many hours of work or late-night readings on their computers.
The problem is that most people don’t know how to change the font on Google Chrome, so they end up sticking with the uncomfortable default settings. And, over time, they experience headaches, difficulty concentrating, and decreased reading comprehension, which does not help improve productivity or increase accessibility.
The good news? You have many ways to change fonts, font size, and readability in Google Chrome without ruining websites or downloading something that could get you into trouble!
In this guide, you will learn exactly how to change the font on Google Chrome using built-in settings, more advanced customization options, and credible extensions. You’ll be able to surf happily, read quickly, and most importantly, reduce your eye strain no matter what site you are on!
Can You Change the Font in Google Chrome?
Absolutely, you can do it on Google Chrome. But there are a couple of restrictions that you need to understand before going further.
Google Chrome enables a user to personalize the styles of the default fonts, the size of the fonts, and the minimum sizes of the fonts through settings in the browsing program. Even with this aspect in place, Google Chrome does not enable a user to select fonts on an individual website if they have designed its typography in accordance with CSS.
Here’s what you can and cannot do in Chrome:
What Google Chrome Allows You to Change?
- Standard font (body text)
- Serif font
- Sans-serif font
- Fixed-width font (used for code and technical text)
- Font size and minimum font size
These settings are more than enough for improving readability and eye comfort for browsing purposes.
What Google Chrome Does Not Allow by Default?
- Changing fonts on an individual website
- Forcing a single font across all websites
- Overriding website-specific font styles
That’s where extensions come in. And if you want complete control and truly understand how to change the font in Google Chrome for all sites, Chrome extensions will let you do that without affecting layouts and performance.
How to Change the Font on Google Chrome Using Settings
The best, most convenient, and safe approach for personalizing fonts is via the settings available in Google’s Chrome browser itself. It does not need extensions, nor does it slow down your browser.
Now, follow these steps below to learn how to change the font of Google Chrome with the default settings.
Step-by-Step Instructions
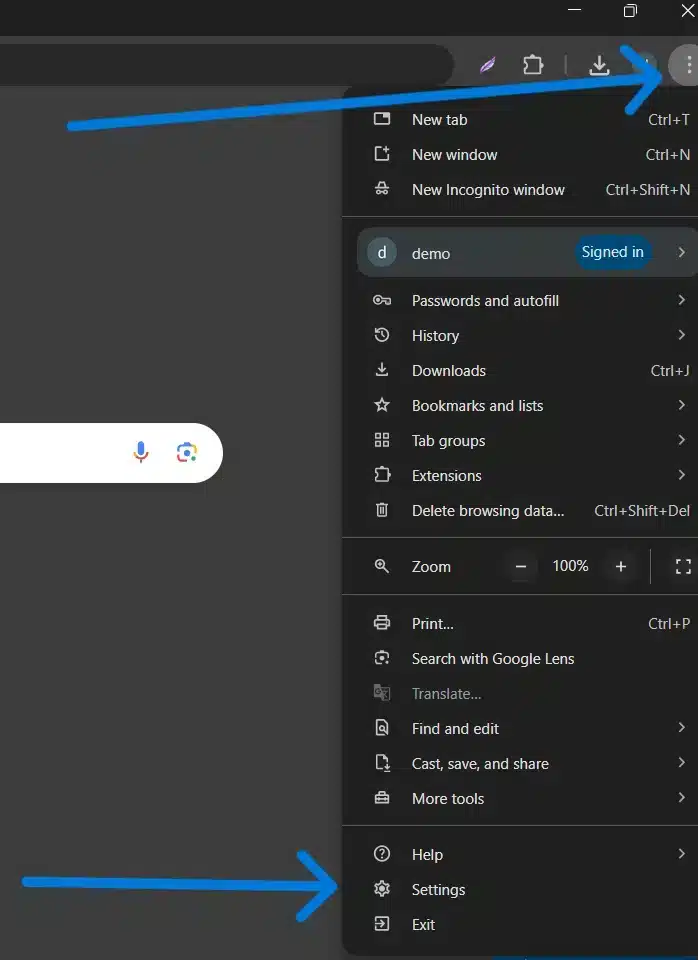
- Open Google Chrome.
- Click on the three-dot menu in the top-right corner and select Settings.
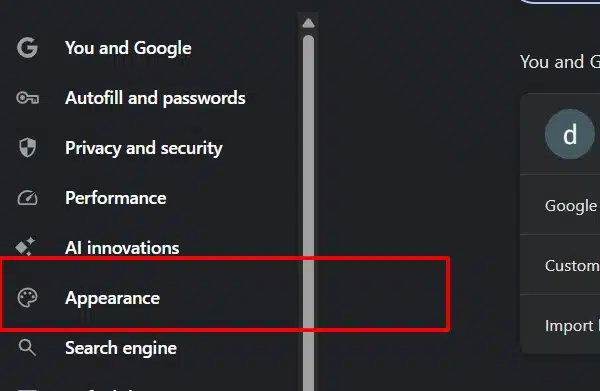
- Scroll down and click on Appearance.
- Click Customize fonts.
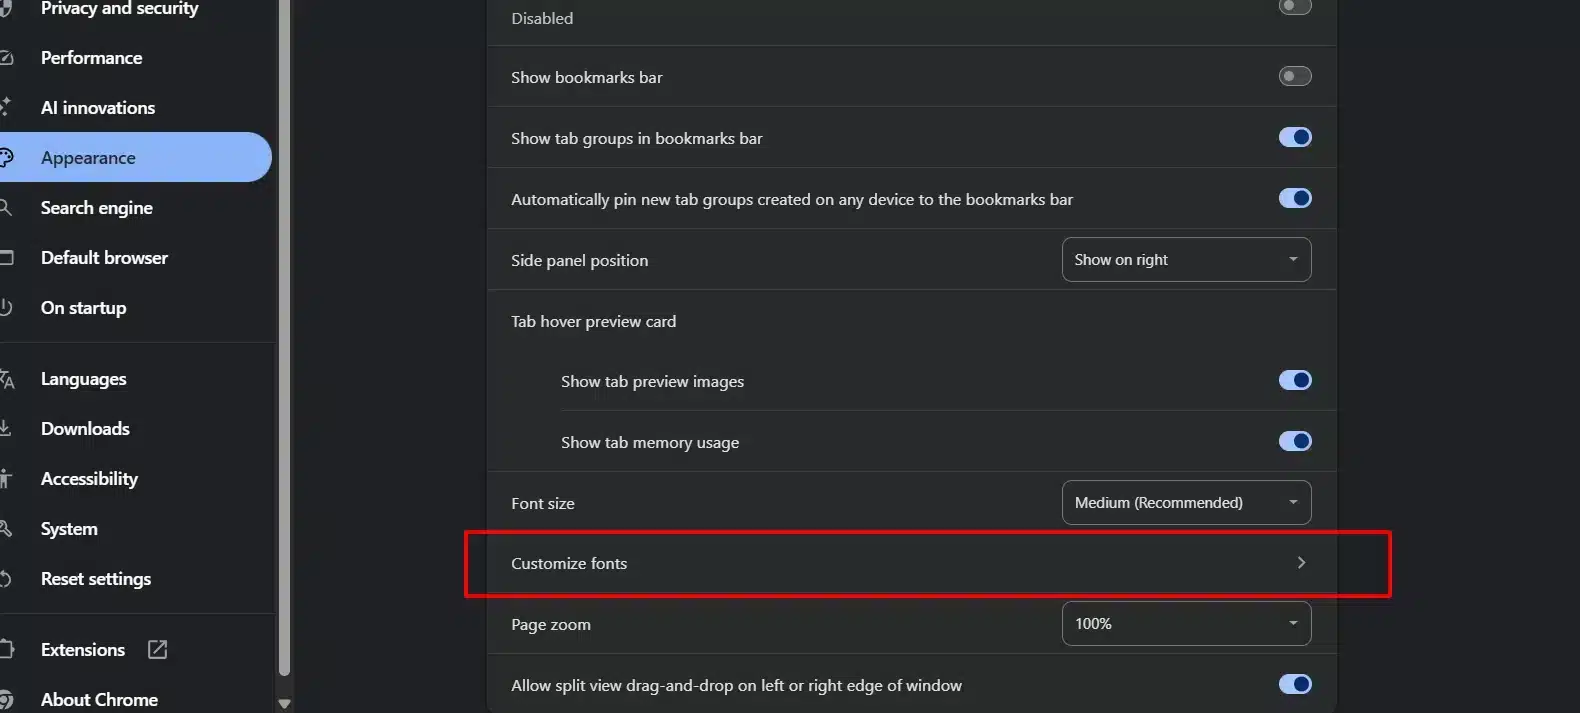
In Google Chrome, this will automatically open a panel for customizing fonts.
Understanding the Options for Chrome Fonts
Within the Customize fonts menu option, you have several categories of fonts available to you. Each of these categories is intended for a separate use.
- Standard Font: This is the font used by Chrome to display most of the text on websites. This will make the most visual difference in your browser. Best choices for Readability:
- Arial
- Verdana
- Roboto
- Open Sans
- Serif Fonts: Used on websites that use serif fonts. Popular serif fonts include:
- Georgia
- Times New Roman
- Sans-Serif: Often seen on blogs, dashboard sites, and SaaS sites. Recommended options:
- Arial
- Helvetica
- Lato
- Fixed-Width: Primarily used for code blocks, developer tools, and writing technical documentation. Good choices:
- Consolas
- Courier New
- Source Code Pro
Changes Apply Instantly (No Restart Required)
Once you choose a new font, the effect is instantaneous in Chrome. No need to reload the browser, making it swift to explore various fonts.
Pro Tip: Opening the blog view, news view, and doc view each in a separate tab lets you see what your font selection will look like.
Important Limitation to Know
Although this method is the foundation of how to change the font on Google Chrome, you must remember that there is a limitation to this process:
Certain sites use their own CSS, which overrides the browser’s font settings.
This means that your font may not be available on every website, which is perfectly normal. Future sections of this guide will show you how to force your font choice through extensions if you want that control.
Advanced Font Customization in Google Chrome
If you find that the default font settings in Chrome do not provide you with the control you need, there are also more advanced techniques that can be used to fine-tune the appearance of the font in various web pages.
Such techniques aren’t required for most users, but they’re useful if you want more precision while learning how to change the font on Google Chrome at a deeper level.
Using Chrome Flags for Font Rendering (Advanced Users Only)
Chrome has some features that can be accessed through Chrome Flags. These features enable advanced font features but involve certain risks.
How to access Chrome Flags:
- Type
chrome://flagsin the address bar and press enter.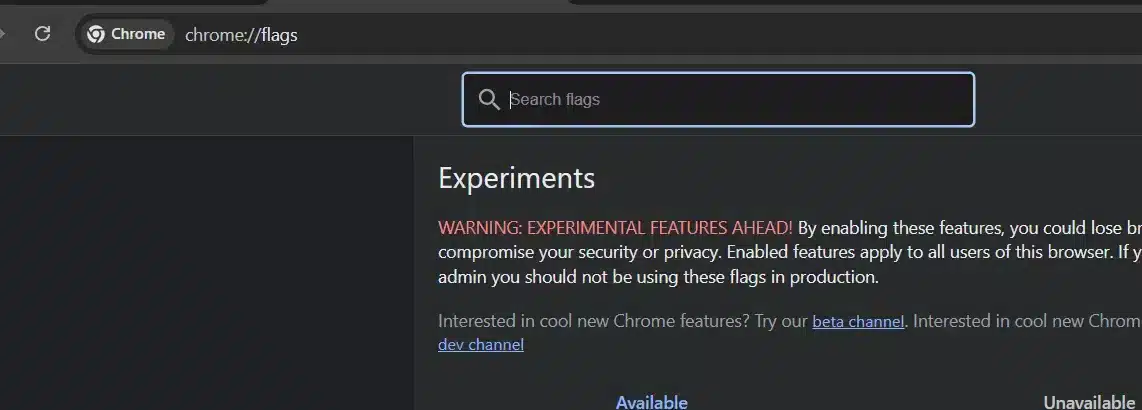
- Search using the search bar for font options.
You may find flags related to:
- Font rendering
- Text contrast
- Accessibility improvements through experimentation
Important Warning: Chrome Flags can be experimental. Turning on an incorrect option could result in a browser crash or a problem with performance or rendering.
Best practice:
- Replace one flag at a time
- Restart Chrome after changes
- Reset flags if problems occur
Syncing Font Settings Across Devices

Chrome will automatically sync your font settings when you’re signed into the same Google account.
To ensure consistency:
- Sign in to Chrome on all devices
- Enable Sync
- Ensure the Settings sync feature is enabled
This ensures your font preferences follow you across:
- Windows
- macOS
- Linux systems
This feature comes in handy, especially for professionals who use different devices on a daily basis.
When Advanced Customization Isn’t Enough?
Despite the advanced settings, it’s clear that the browser still adheres to styles set by websites. This is because it’s a design decision to ensure the integrity of the layout.
If your goal is to:
- Force one font everywhere
- Override website typography
- Apply custom rules per site
Then extensions are the next and best solution. We’ll cover those in the next section.
How to Change Fonts on All Websites Using Chrome Extensions
If Chrome’s built-in settings do not enable your selected font on all websites, extensions would be the most efficient way around this issue. Most websites ignore fonts used by browsers through CSS, which explains why people search for how to change the fonts on Google Chrome across all websites.
Chrome extensions resolve this problem by making your chosen font, size, and style apply everywhere—or to each site in particular.
Why Use a Font-Changing Extension?
Extensions enable you to:
- Override website-defined fonts
- Use one font on all websites
- Customize font size, spacing, and weight
- Enhance accessibility and readability
They are perfect for users who:
- Read long-form content every day
- Working on Chrome for hours
- Have accessibility or vision needs
Best Chrome Extensions for Font Customization
Here are some trusted and widely used extensions that can be downloaded from the Chrome Web Store:
1. Font Changer
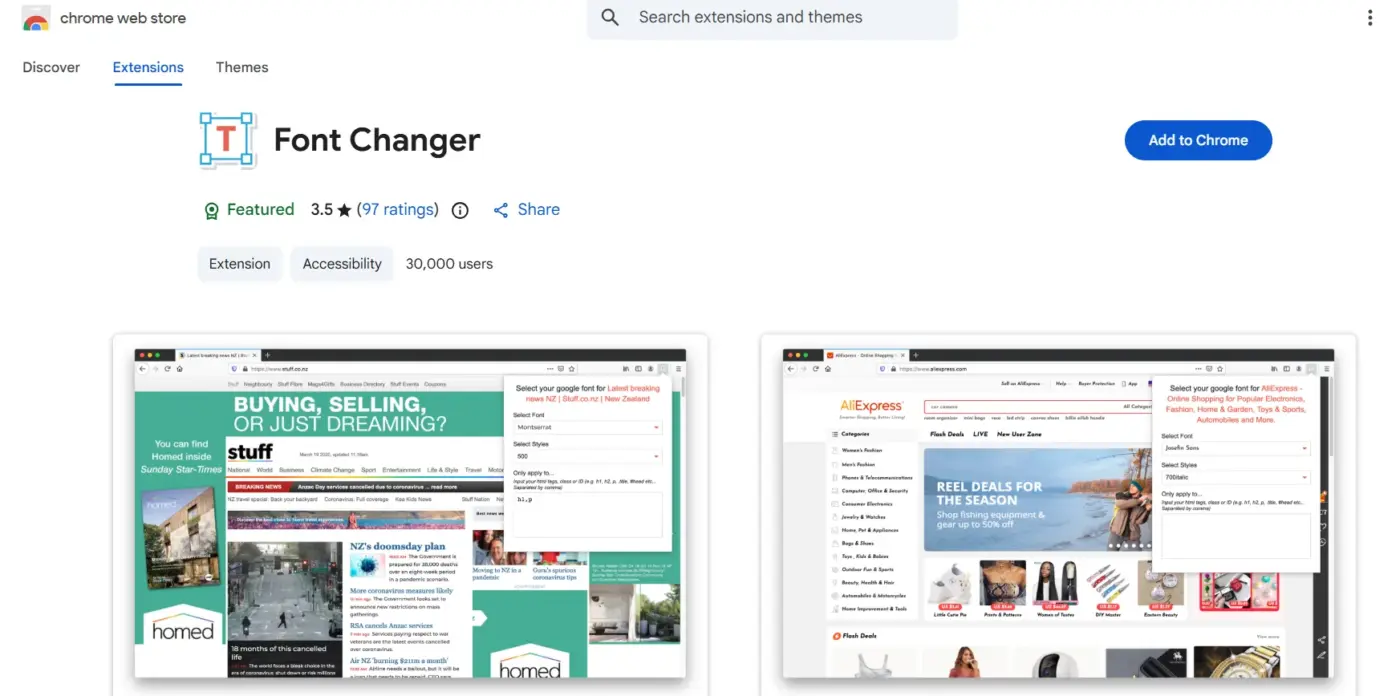
Best for: Beginners who want instant results
Key features:
- Force fonts on all websites
- Resize font and change the space between lines
- One-click enable/disable
How to use:
- Install Font Changer from the Chrome Web Store
- Click the extension icon
- You can select your desired font and size for reading
- Implement changes immediately
2. Advanced Font Settings (by Google)
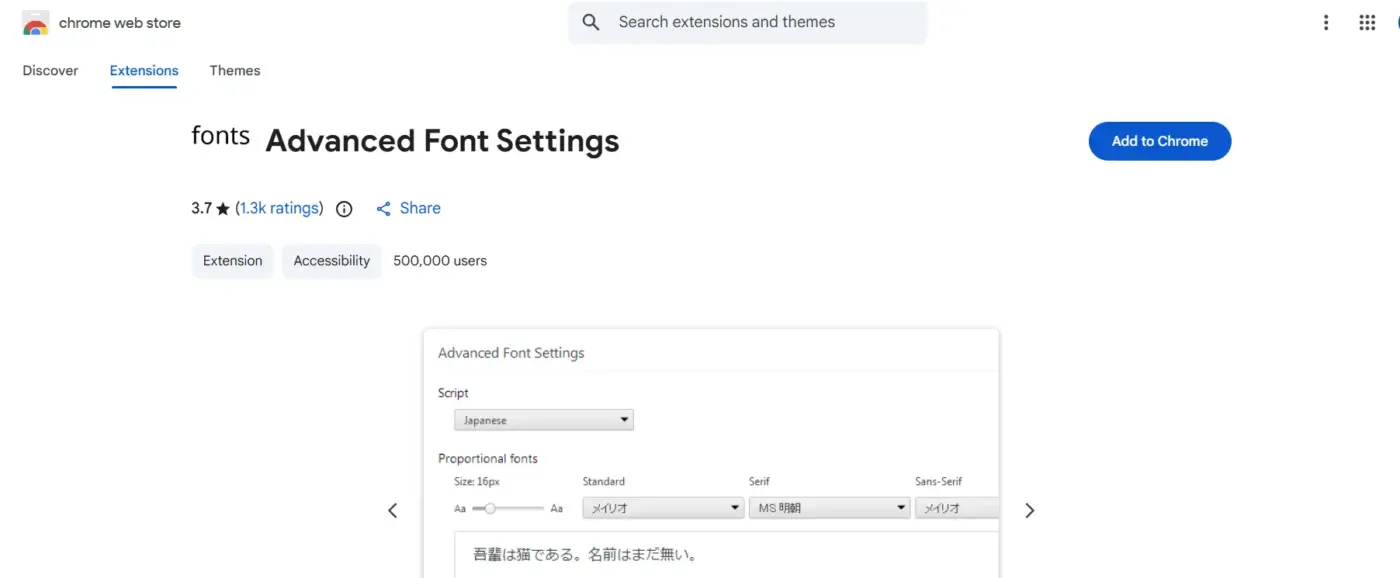
Best for: Safe and lightweight customization
Why it’s reliable:
- The Advanced Font Settings extension is developed by Google.
- It extends Chrome’s default font controls.
- There are no unnecessary permissions.
This is a good middle ground between basic settings and full CSS overrides.
3. Stylus (Advanced Users)
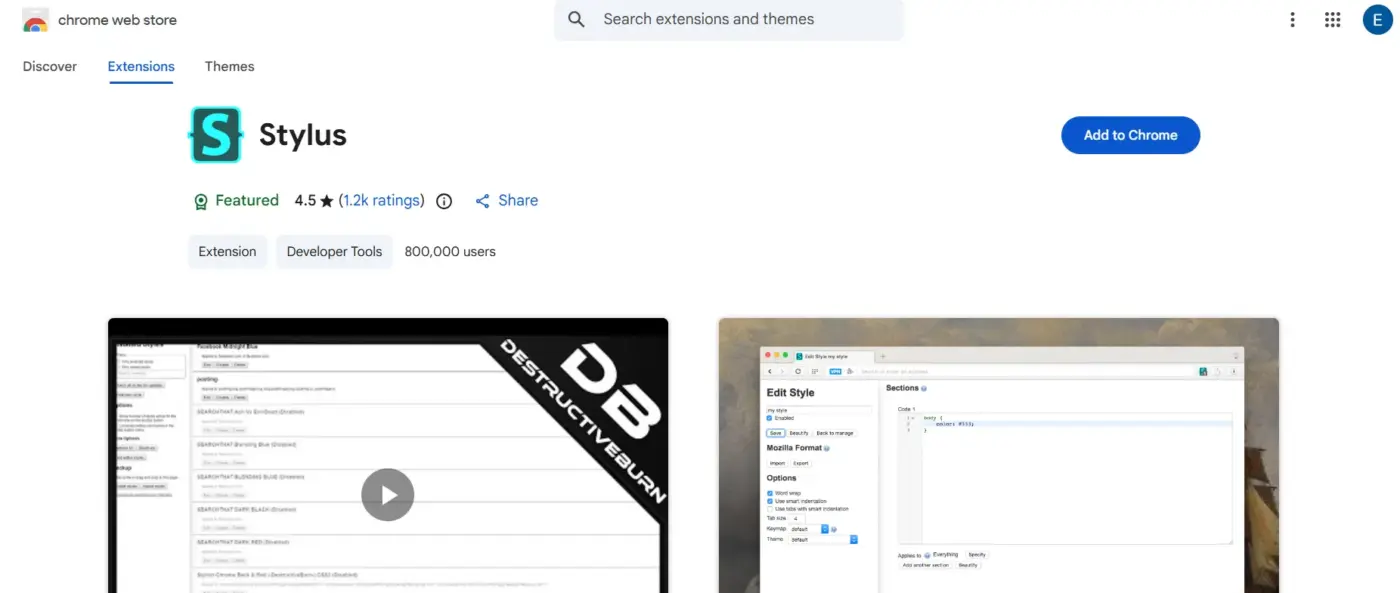
Best for: Power users and developers
What Stylus offers:
- Custom CSS for individual site
- Full control of typography
- Advanced styling rules
Note: Requires basic knowledge of CSS, but offers unmatched flexibility.
Safety Tips When Using Extensions
To protect your browser:
- Extensions should be installed only from the Chrome Web Store.
- Do not use apps that demand too many permissions.
- Check recent reviews and updates.
- Uninstall extensions that are no longer required.
Trusted extensions do not commonly impact system performance when used responsibly.
When Extensions Are the Best Choice?
Use extensions if you want to:
- Make one font work well on every site
- Repair stubborn websites that disregard settings
- Customize typography beyond Chrome’s limits
Now, you have mastered how to change the font on Google Chrome at the uppermost level.
Common Problems When Changing Fonts in Chrome (And How to Fix Them)
Even after learning how to change the font on Google Chrome, you may still experience that not everything is working as expected. This is normal. Google Chrome values the stability of website design more, and sometimes it may adversely affect the fonts.
Below are the most typical issues with fonts—and what to do to solve them.
Problem 1: Font Changes Don’t Apply on Some Websites
This is the most common complaint.
Why does it happen: There are a lot of sites that have custom CSS rules to set their fonts against browser defaults.
How to fix it:
- Use a font-forcing extension like Font Changer or Stylus
- Activate the extension globally or for a site
- Refresh the page after making changes
This is normal and not a bug in Chrome.
Problem 2: Fonts Look Blurry or Pixelated
The reason is usually a conflict of font rendering or hardware acceleration.
Quick fix:
- Open Chrome Settings
- Go to System
- Turn off Use hardware acceleration when available
- Restart Google Chrome
If the issue still exists:
- Try using a different font
- Increase font size slightly
- Check your display scaling settings
Problem 3: Font Settings Reset After Restarting Chrome
If your font changes are not lasting, then something is interfering with Chrome’s preferences from being stored.
Possible causes:
- Conflicting extensions
- Corrupted Chrome profile
- Syncing problems across devices
How to fix it:
- Disable font extensions one by one
- Sign out and back into Chrome
- Reset Chrome preferences (last resort)
Problem 4: Fonts Break Website Layouts
Certain fonts consume more space than others, leading to inconsistencies in layout.
Best practices to avoid this:
- Do not use overly decorative fonts
- Use only web-safe fonts and Google Fonts
- Test changes on multiple websites
Fonts like Arial, Roboto, and Open Sans are known for maintaining layout consistency.
Problem 5: Font Changes Affect Only Certain Pages
The font rules for Chrome are applicable differently based on website structure.
Solution:
- Use extensions with per-site rules
- Clear the cache and refresh the page
- Check minimum font size settings
Final Thoughts
The ability to adjust the appearance of text in your web browser is often overlooked; however, improving your text presentation can significantly enhance your level of comfort, concentration, and accessibility.
In this guide, we’ve shown you that you do not need to be a tech expert or use dangerous software tools to learn how to change the font on Google Chrome. By using the Chrome web browser’s built-in feature, you can easily adjust the font style, size, and minimum font size you want to read in.
If you need more detailed control of how text appears in your browser, then you can take advantage of an excellent set of Chrome extensions from trusted developers that will enable you to change the font across all pages that you visit on the Internet.
In addition, we have provided solutions to the most commonly experienced problems when using alternative fonts, as well as additional accessibility suggestions.
The main point to remember is that never accept default browser fonts that are uncomfortable for your eyes. Take a few moments now to set up your Google Chrome browser exactly how you want it, experiment with different settings until you find the best combinations for your eyesight, and use those combinations going forward to enhance your readability and productivity while browsing the Internet.
By creating personalized font style settings in Google Chrome, using Google Chrome’s web browser to browse will be easier and much more fun!
Frequently Asked Questions (FAQs)
Q1. Are Font changer extensions in Chrome safe to use?
Yes, provided you get the extensions from the Chrome Web Store, provided they have a decent set of reviews, and don’t have too many permissions. According to a survey, people use on average between 5 and 10 browser extensions regularly.
Q2. Can Google Chrome mobile browser change fonts?
Google Chrome for Mobile Phones has very limited options for changing fonts. All possible font changes, especially changing fonts to other styles, can be done only by Google Chrome Desktop.
Q3. What is the preferred reading font in Google Chrome?
The best fonts for the purpose of readable typography are Arial, Open Sans, and Verdana. These fonts are preferred for their optimal use of spaces.
Q4. Is website performance affected by changing fonts?
No, changing fonts through Chrome preferences does not affect speed. Extension tools may consume a bit of memory, but reliable software is lightweight and secure to use.
Q5. Does the change of font help accessibility?
Absolutely. Customize fonts and font sizes that can reduce eye strain and improve the ability to focus. It would be ideal for the visually impaired as well.