How to Create a WooCommerce Plugin: A Step-by-Step Guide

Creating a WooCommerce plugin from scratch is something most WordPress developers can do in an afternoon. The actual steps take about 30 to 60 minutes once your local environment is ready.
What trips people up isn’t the code, it’s the WooCommerce-specific details that plain WordPress tutorials skip: the activation check, the right hook to use, and the HPOS compatibility declaration that every new WooCommerce install now requires. This guide walks you through all of it.
You’ll learn how to set up your environment, structure your plugin files, hook into WooCommerce correctly, declare HPOS compatibility, and avoid the three mistakes that break most first plugins before they ever reach a live store.
What You Need Before You Start
Before writing a single line of PHP, get three things in place.
- A local WordPress development environment: You need WordPress and WooCommerce running on your machine before you touch anything. Two tools worth knowing: LocalWP is quick to set up and works well for most developers. DevKinsta is a solid choice too, especially if you’re already working with Kinsta hosting. Both are free. If you’re still getting up to speed with WordPress as a platform, spend time there first. WooCommerce plugin development sits on top of that foundation.
- Comfort with PHP: WooCommerce is built on PHP. You don’t need to be an expert, but you should be able to write a class, understand functions, and follow an object-oriented structure. HTML, CSS, and basic JavaScript help for anything front-end-facing.
- A code editor with syntax highlighting: VS Code is the most common choice. Install the PHP Intelephense extension, and you’ll get autocomplete and inline error detection that saves real time.
Here’s the key distinction that matters for this guide: WooCommerce plugin development extends WordPress plugin development. The structure is the same, but WooCommerce adds its own hooks, its own data APIs, and as of WooCommerce 8.2, its own order storage system (HPOS) that your plugin needs to declare compatibility with. That last part is what most tutorials from 2022 and earlier miss entirely.
How to Create a WooCommerce Plugin: Step by Step
This walkthrough builds a simple plugin that displays a custom notice on every WooCommerce product page. It’s deliberately simple so you can follow the full structure without getting lost in business logic. Once you understand the pattern, you can apply it to anything.
Step 1: Create the Plugin Folder and Main PHP File
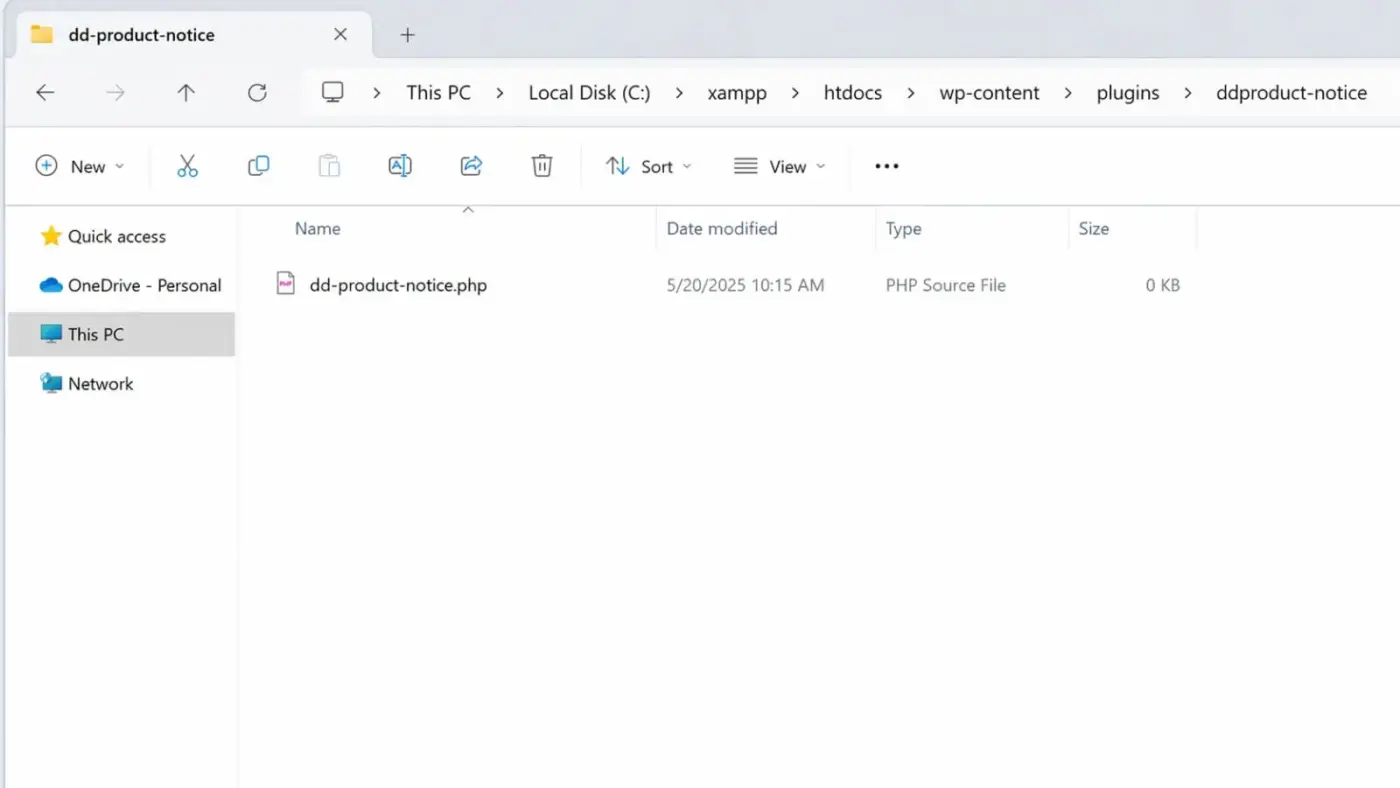
Open your local site’s wp-content/plugins/ folder. Create a new folder — name it something like dd-product-notice. Inside that folder, create a PHP file with the same name: dd-product-notice.php.
The dd prefix is deliberate. More on that in a moment.
Your folder should look like this:
wp-content/plugins/
└── dd-product-notice/
    └── dd-product-notice.php
Step 2: Add the Plugin Header
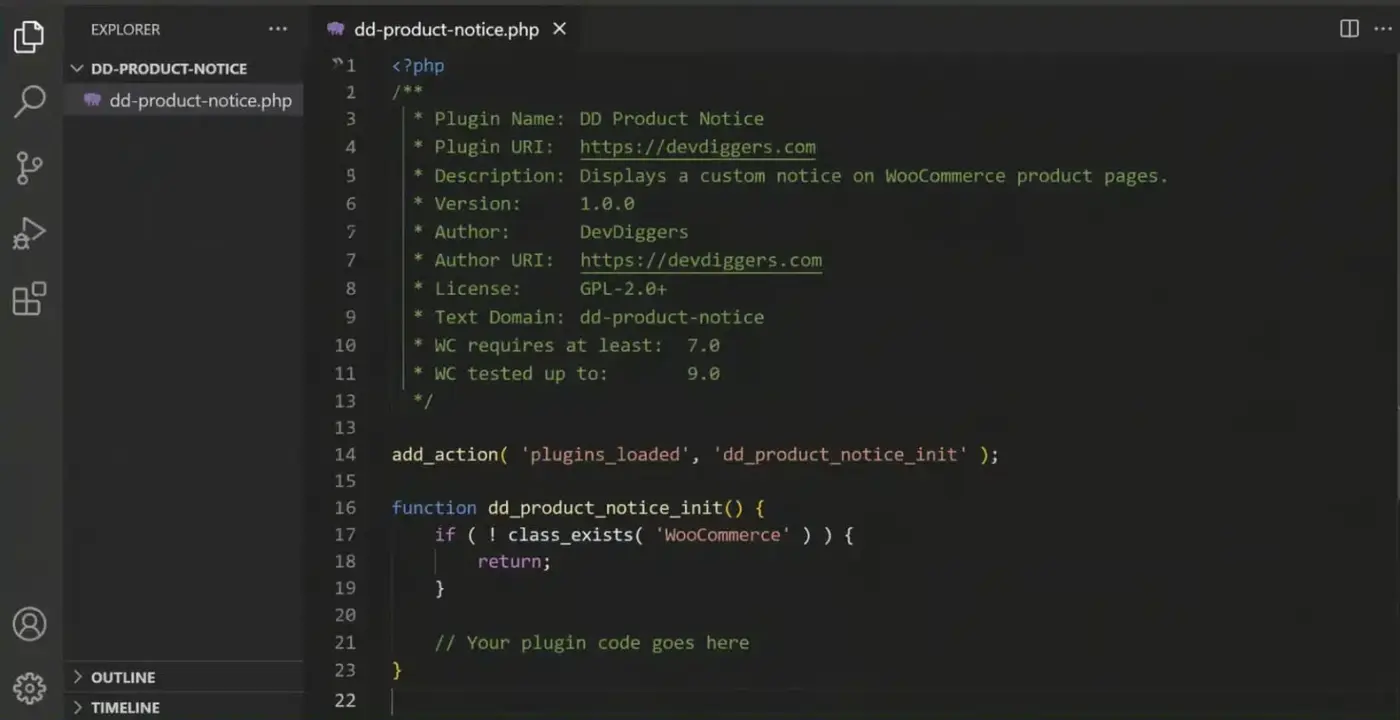
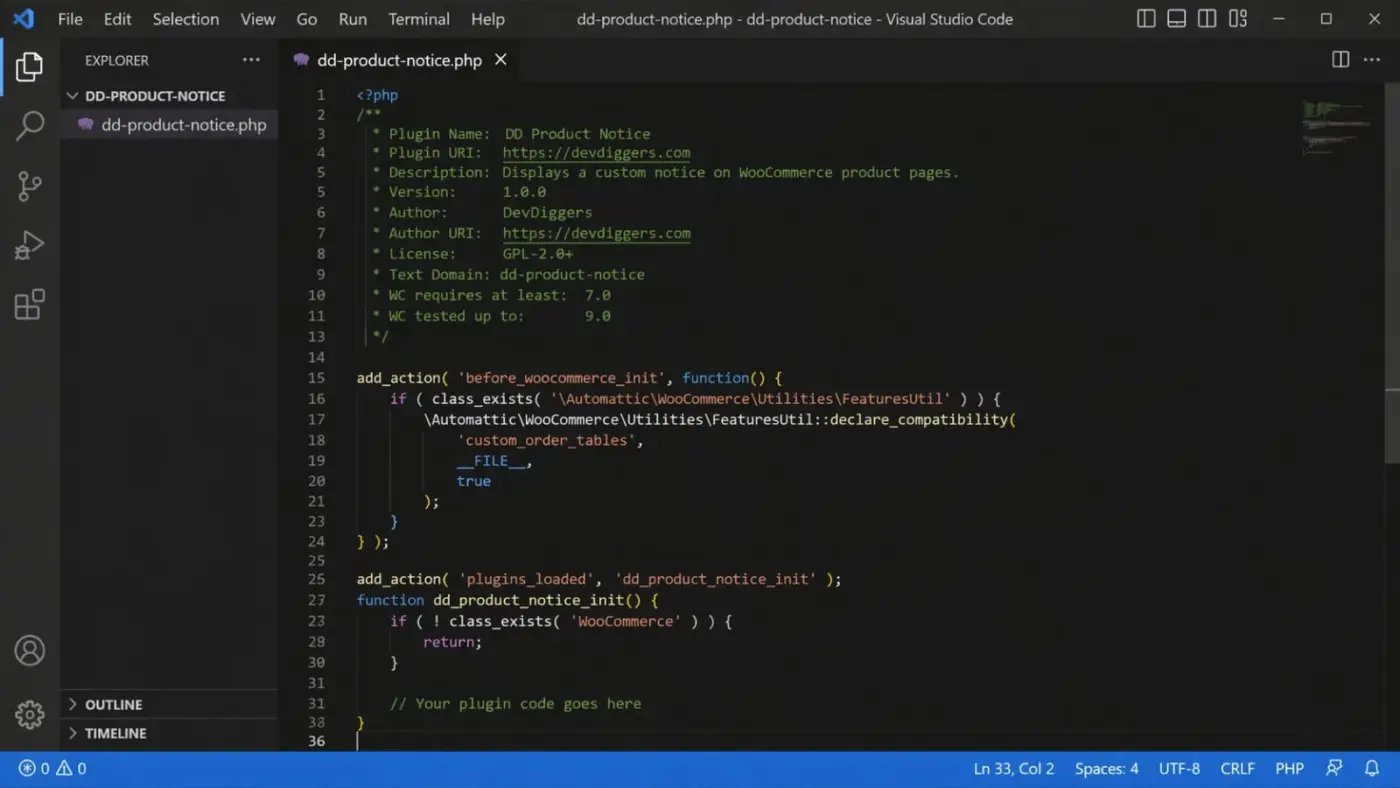
Open dd-product-notice.php and add this at the very top:
<?php
/**
 * Plugin Name: DD Product Notice
 * Plugin URI:  https://devdiggers.com
 * Description: Displays a custom notice on WooCommerce product pages.
 * Version:     1.0.0
 * Author:      DevDiggers
 * Author URI:  https://devdiggers.com
 * License:     GPL-2.0+
 * Text Domain: dd-product-notice
 * WC requires at least: 7.0
 * WC tested up to: 9.0
 */
The WC requires at least and WC tested up to lines are worth adding from the start. According to the WooCommerce developer documentation, declaring these in your header helps WooCommerce flag compatibility issues before a store owner activates your plugin on a mismatched version.
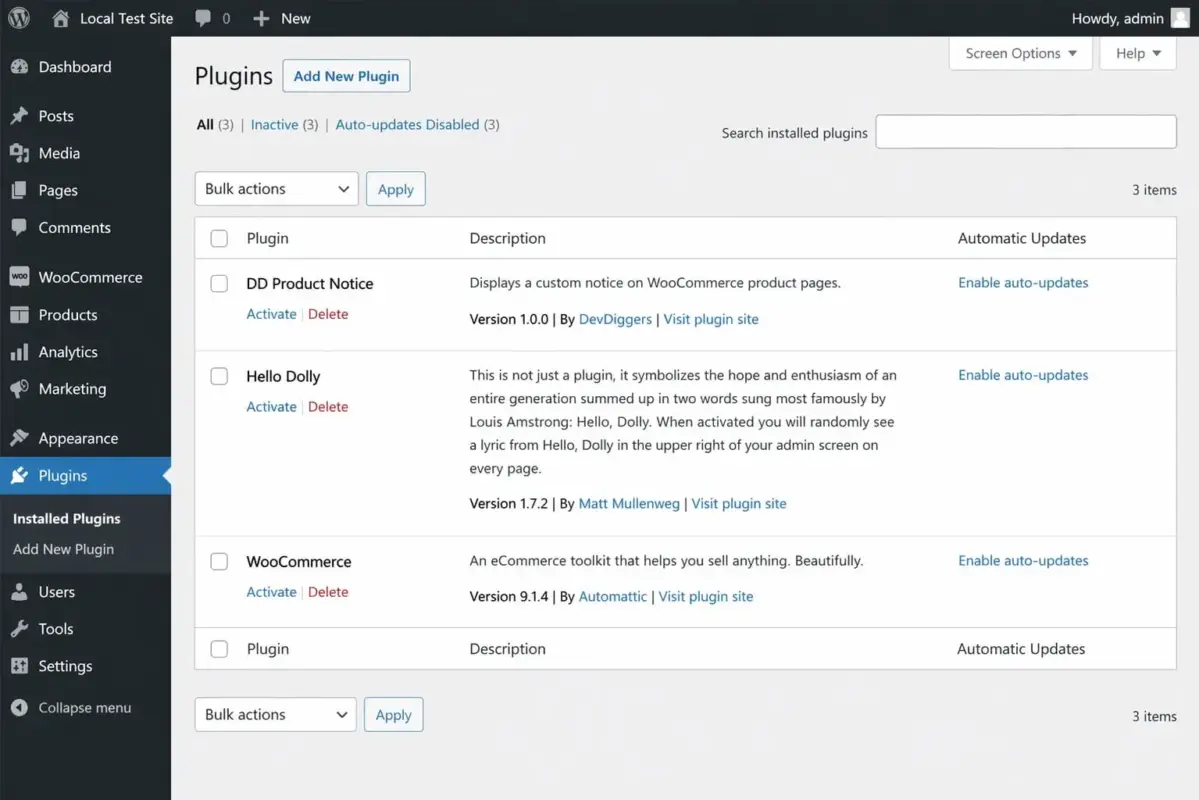
Save the file. Go to your WordPress dashboard, navigate to Plugins, and your plugin will now appear in the list. Don’t activate it yet.
Step 3: Check That WooCommerce is Active
Your plugin should only run if WooCommerce is actually installed and active. Wrap your code in a check like this:
add_action( 'plugins_loaded', 'dd_product_notice_init' );

function dd_product_notice_init() {
    if ( ! class_exists( 'WooCommerce' ) ) {
        return;
    }
    // Your plugin code goes here
}
This check runs after all plugins load. If WooCommerce isn’t active, your code never runs, and nothing breaks.
Worth knowing before you go further: some developers use woocommerce_loaded instead of plugins_loaded. Both work, but woocommerce_loaded fires after WooCommerce has fully set up its classes and objects. If your plugin depends on WooCommerce objects being available immediately, use woocommerce_loaded. For most straightforward use cases, plugins_loaded with the class check above is fine.
Step 4: Declare HPOS Compatibility
This step is not optional on modern WooCommerce installs. Since WooCommerce 8.2, released in October 2023, High-Performance Order Storage (HPOS) is enabled by default for all new stores. If your plugin doesn’t declare compatibility, WooCommerce will flag it with a warning in the admin dashboard.
Add this block before the plugins_loaded hook:
add_action( 'before_woocommerce_init', function() {
    if ( class_exists( '\Automattic\WooCommerce\Utilities\FeaturesUtil' ) ) {
        \Automattic\WooCommerce\Utilities\FeaturesUtil::declare_compatibility(
            'custom_order_tables',
            __FILE__,
            true
        );
    }
} );
This tells WooCommerce your plugin is ready for HPOS. We see this missed in support regularly. Developers ship a plugin, install it on a client’s store, and immediately get a compatibility warning. It’s a two-minute fix that saves an embarrassing conversation later.
Step 5: Hook into WooCommerce with Actions
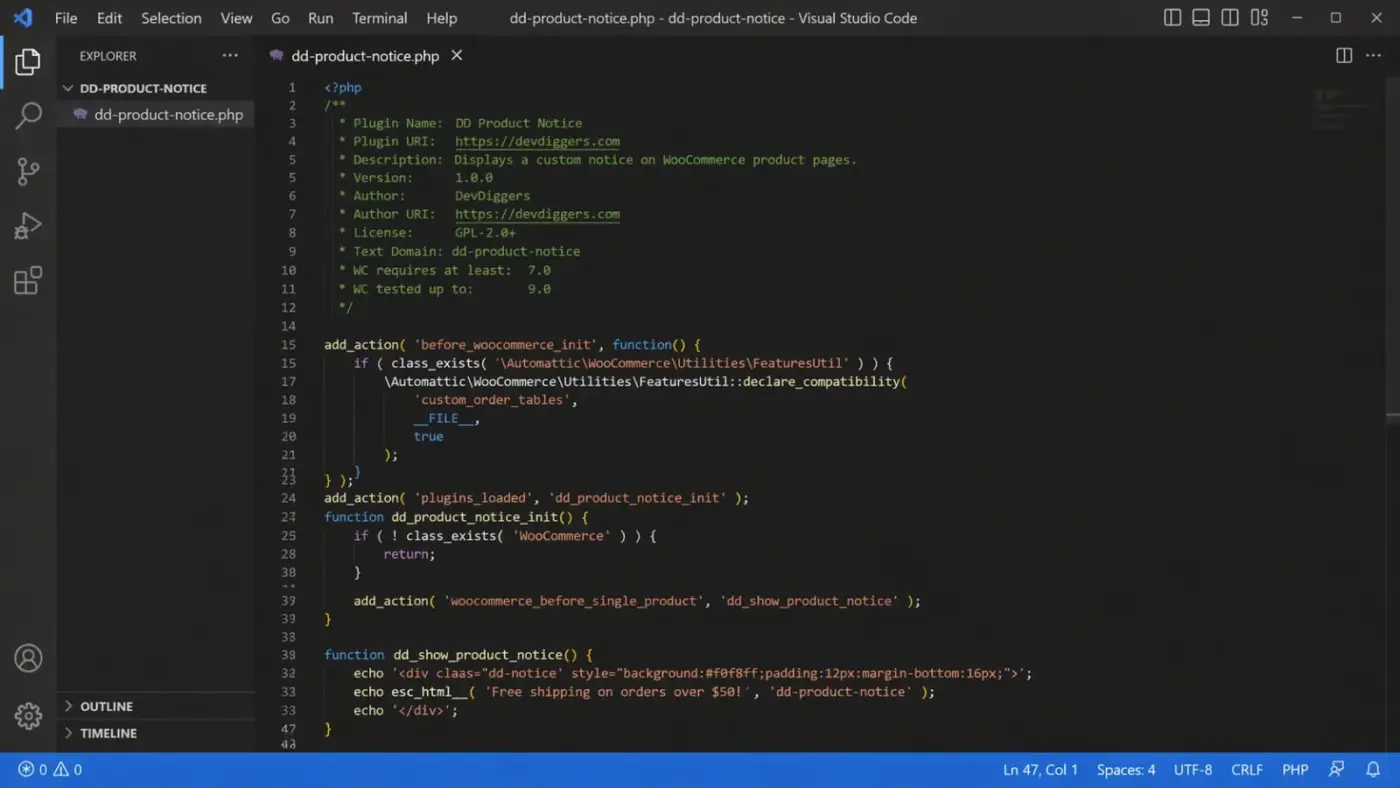
Now add the actual plugin logic inside the dd_product_notice_init() function:
function dd_product_notice_init() {
    if ( ! class_exists( 'WooCommerce' ) ) {
        return;
    }

    add_action( 'woocommerce_before_single_product', 'dd_show_product_notice' );
}

function dd_show_product_notice() {
    echo '<div class="dd-notice" style="background:#f0f8ff;padding:12px;margin-bottom:16px;">';
    echo esc_html__( 'Free shipping on orders over $50!', 'dd-product-notice' );
    echo '</div>';
}
woocommerce_before_single_product is an action hook that fires just before the product content on a single product page. WooCommerce has hundreds of hooks like this. The full list is in the WooCommerce hooks reference.
Notice two things in the code above. First, the function names start with dd_. Second, the text goes through esc_html__(). Both of these matter more in the next section.
Step 6: Activate and Test
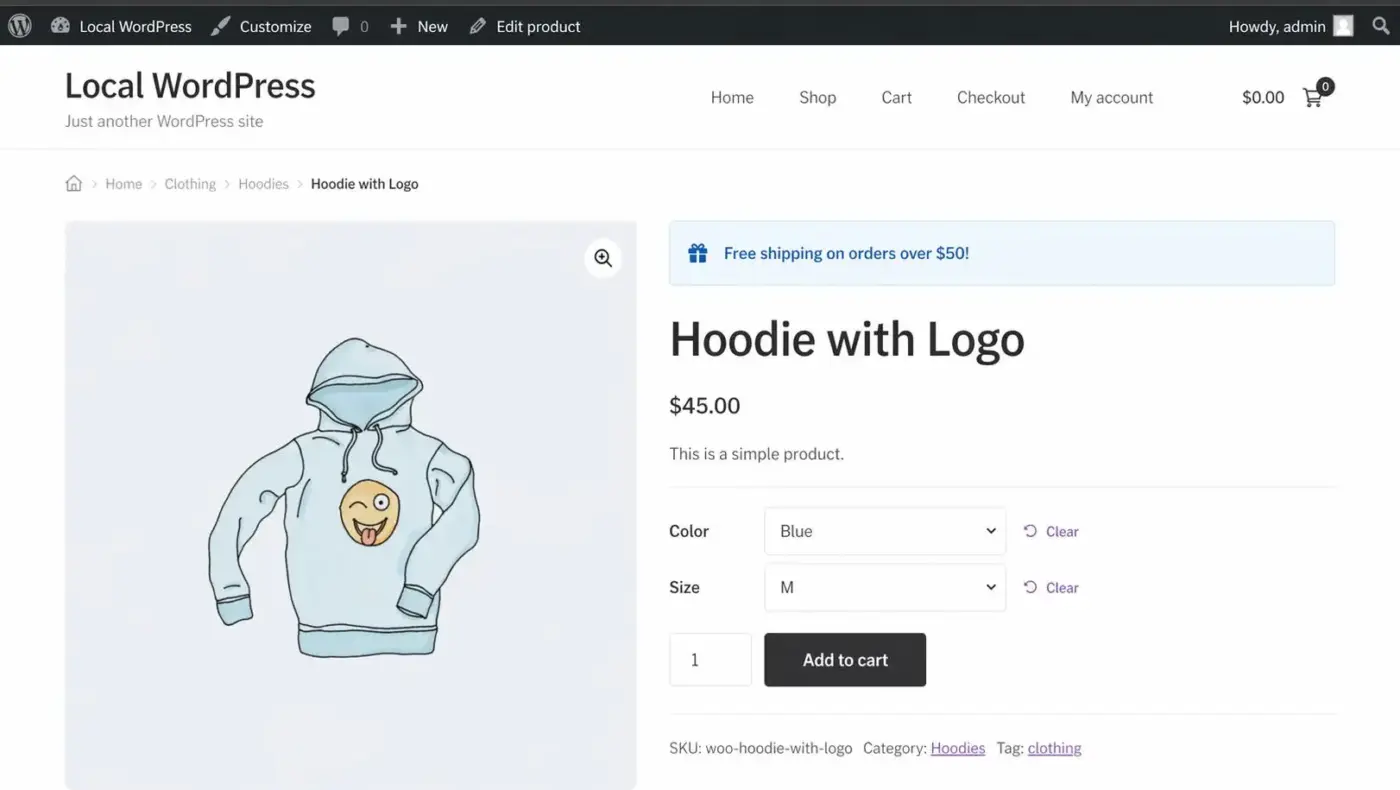
Go to your WordPress dashboard, activate the plugin, and visit any product page. Your notice should appear above the product content.
If nothing shows, check two things first: WooCommerce is active, and you’re on a single product page (not the shop archive). The woocommerce_before_single_product hook only fires on single product pages.
Step 7: Test on a Clean Staging Environment Before any Live Site
Your local install is not a real-world environment. Before shipping anything, test on a staging site that mirrors a live setup. Check for PHP warnings, check for JS console errors, and confirm the HPOS warning doesn’t appear in WooCommerce settings.
WooCommerce Hooks: The Part Most Tutorials Rush
WordPress hooks and filters are how your plugin talks to WooCommerce. Understanding the difference is the most useful thing you can learn early.
Actions let you run code at a specific point in WordPress or WooCommerce execution. The add_action() function attaches your function to a named hook. woocommerce_before_single_product is an action. When WooCommerce reaches that point in its template, it fires your function.
Filters let you modify a value before WooCommerce uses it. The add_filter() function attaches your function to a named filter. Your function receives the value, changes it, and returns the modified version.
Here’s a simple filter example that modifies a product price:
add_filter( 'woocommerce_product_get_price', 'dd_modify_price', 10, 2 );

function dd_modify_price( $price, $product ) {
    // Apply a 10% discount to all products
    return $price * 0.90;
}
The 10 is the priority (lower runs first). The 2 tells WordPress your function accepts two arguments: the price and the product object. Miss that second argument, and the filter won’t work — WordPress won’t pass the product object to your function.
A note about WooCommerce actions and filters specifically: WooCommerce wraps many of its own hook names around core WordPress hooks. Before writing a custom implementation, search the WooCommerce source or developer docs for an existing hook that does what you need. Nine times out of ten, one already exists.
Most guides on this topic show you the hooks without explaining the priority system. That’s where things go wrong when two plugins hook into the same action. If your function needs to run after another plugin’s, raise the priority number. If it needs to run before, lower it. Default is 10.
Three Mistakes That Break Your First WooCommerce Plugin

These are the patterns that show up repeatedly, and they’re all fixable before you ship.
Mistake 1: Querying wp_posts Directly for Order Data
A lot of older code on Stack Overflow and in older tutorials retrieves orders with direct database queries against wp_posts. That worked before WooCommerce 8.2. With HPOS enabled, orders now live in dedicated tables (wc_orders, wc_order_meta), not in wp_posts. Direct queries will return nothing or produce errors on HPOS-enabled stores.
Use the WooCommerce CRUD API instead:
// Wrong — breaks on HPOS stores
$orders = $wpdb->get_results( "SELECT * FROM {$wpdb->posts} WHERE post_type = 'shop_order'" );

// Right — works regardless of storage mode
$orders = wc_get_orders( array( 'limit' => 10 ) );
According to the WooCommerce HPOS documentation, plugins that use WooCommerce’s CRUD API work correctly in both storage modes without any changes. Always use wc_get_orders() and WC_Order methods.
Mistake 2: Not Prefixing Your Function Names
WordPress runs all active plugins in the same PHP scope. If two plugins both define a function called show_product_notice(), you get a fatal error. Every function, class, and variable in your plugin should start with a unique prefix tied to your project. That’s why this guide is used dd_ throughout. Short, specific, yours. If you’re seeing a plugin trigger a fatal error on activation, a naming collision is often the reason.
The cleaner long-term solution is namespaces and classes, but for a simple plugin, consistent prefixing works fine.
Mistake 3: Skipping Sanitization and Escaping
Every value that comes from a user, a URL, or a database query is a potential attack vector. Two rules cover most cases:
- Sanitize on input: Use
sanitize_text_field(),absint(), or similar functions when you read user-submitted data. - Escape on output: Use
esc_html(),esc_attr(),esc_url()when you print anything to the page.
The WooCommerce security checklist covers this in more detail if you want to go deeper on store security. For plugin development, the habit to build early is: never echo a raw variable. Always escape it.
If your plugin needs custom settings in the WordPress admin, also add nonce verification to your form submissions. One line prevents a class of cross-site request forgery attacks that affect thousands of plugins every year.
Before You Ship: A Quick Checklist
This is the step most tutorials skip entirely. Run through this before you install your plugin on any live store.
- Does your plugin header include
WC requires at leastandWC tested up to? If not, add them. WooCommerce uses these to warn store owners about version mismatches. - Have you added the HPOS compatibility declaration? The
before_woocommerce_initblock from Step 4 needs to be there. Without it, your plugin will show as incompatible on every WooCommerce 8.2+ store. - Are all your functions and classes prefixed? Scan the file. If any function name could plausibly clash with another plugin, rename it.
- Did you escape every output? Search for
echoin your files. Everyone should be paired with an escape function. - Did you test on a staging environment with WooCommerce active and HPOS enabled? Local testing with a default install misses real-world conflicts. Enable HPOS under WooCommerce Settings, then Advanced, then Features, before you test.
- Is this actually something you need to build? Worth asking honestly. If an existing plugin does 90% of what you need, extending it with a small custom snippet is often faster than building a full plugin from scratch. Building a custom WooCommerce extension makes sense when the feature is specific to your store’s logic, you need tight control over performance, or nothing available does the job without significant bloat.
If you get stuck or the scope grows beyond a quick plugin into something that needs proper architecture, our custom WooCommerce development services are worth a look. We build WooCommerce plugins from the ground up for stores that need something the market doesn’t offer.
Conclusion
Creating a WooCommerce plugin starts with the same foundation as any WordPress plugin: a folder, a PHP file, and a header.
What makes WooCommerce development different is the activation check, the hook system, and the HPOS compatibility requirement that most tutorials written before 2023 don’t cover. Get those three things right, and you’ll avoid the errors that frustrate most first-time builders.
The key takeaways:
- Always check that WooCommerce is active before running your code
- Declare HPOS compatibility from day one
- Use WooCommerce’s CRUD API for any order-related queries
- Prefix everything
- Test on staging with HPOS enabled before you ship.
Frequently Asked Questions
Q1. Do I need to know PHP to create a WooCommerce plugin?
Yes. PHP is the primary language for both WordPress and WooCommerce. You should be comfortable with functions, classes, and basic object-oriented PHP before starting. You don’t need to be an advanced PHP developer, but complete beginners will hit walls quickly. JavaScript and CSS knowledge help with front-end elements, but the core logic is PHP.
Q2. What is the difference between a WooCommerce plugin and a WordPress plugin?
A WooCommerce plugin is a WordPress plugin that specifically interacts with WooCommerce. It uses the same structure as plugin header, hooks, and PHP, but hooks into WooCommerce-specific actions and filters rather than (or in addition to) core WordPress ones. It also needs to declare compatibility with WooCommerce features like HPOS, which plain WordPress plugins do not.
Q3. Can I submit my WooCommerce plugin to the WordPress.org plugin repository?
Yes. A plugin built for WooCommerce follows the same submission process as any WordPress plugin. You’ll need to meet WordPress.org’s review guidelines, which include security standards, code quality, and license requirements. If you plan to sell it commercially on the WooCommerce Marketplace, there is a separate review process through WooCommerce directly.
Q4. How long does it take to build a WooCommerce plugin?
A simple plugin with one feature, like a product notice or a custom checkout field, takes about 30 to 60 minutes once your environment is ready. A plugin with admin settings, multiple hooks, and user-facing output typically takes a few hours to a few days, depending on complexity. The time investment is mostly upfront in planning the feature and understanding which WooCommerce hooks to use.
Q5. How do I add a settings page to my WooCommerce plugin?
The cleanest approach for WooCommerce-specific settings is to add a tab under WooCommerce Settings using the woocommerce_get_sections_ and woocommerce_settings_ filters combined with the WC_Settings_Page class. For simpler needs, a standard WordPress Settings API page under the Settings menu also works.
Ekta Lamba
Ekta Lamba is a tech writer at DevDiggers focused on making WordPress and WooCommerce straightforward for non-developers. She covers plugin errors, platform updates, and WordPress basics, written so readers can follow along without a second tab open to translate the jargon.
Join thousands of readers getting smarter every week.
Leave a Reply