How to Translate a WordPress Plugin Using Loco Translate (7 Steps)

You can translate any WordPress plugin using Loco Translate in about 15 minutes, directly from your dashboard, without writing a single line of code. The whole process comes down to installing the plugin, picking your language, choosing the right file location, and translating your strings.
Most guides skip the part that actually trips people up: not every plugin can be translated. Before Loco Translate can do anything useful, the plugin has to be built with translation support, meaning it uses a POT file and standard WordPress localization functions. If that’s in place, you’re good to go.
This guide covers the full process: what Loco Translate does, a 7-step guide for translating a plugin, how to choose the right file location (and why getting this wrong means losing your work after every update), how to use auto-translate, and what to do when translated strings refuse to show up.
What Is Loco Translate and How Does It Work?
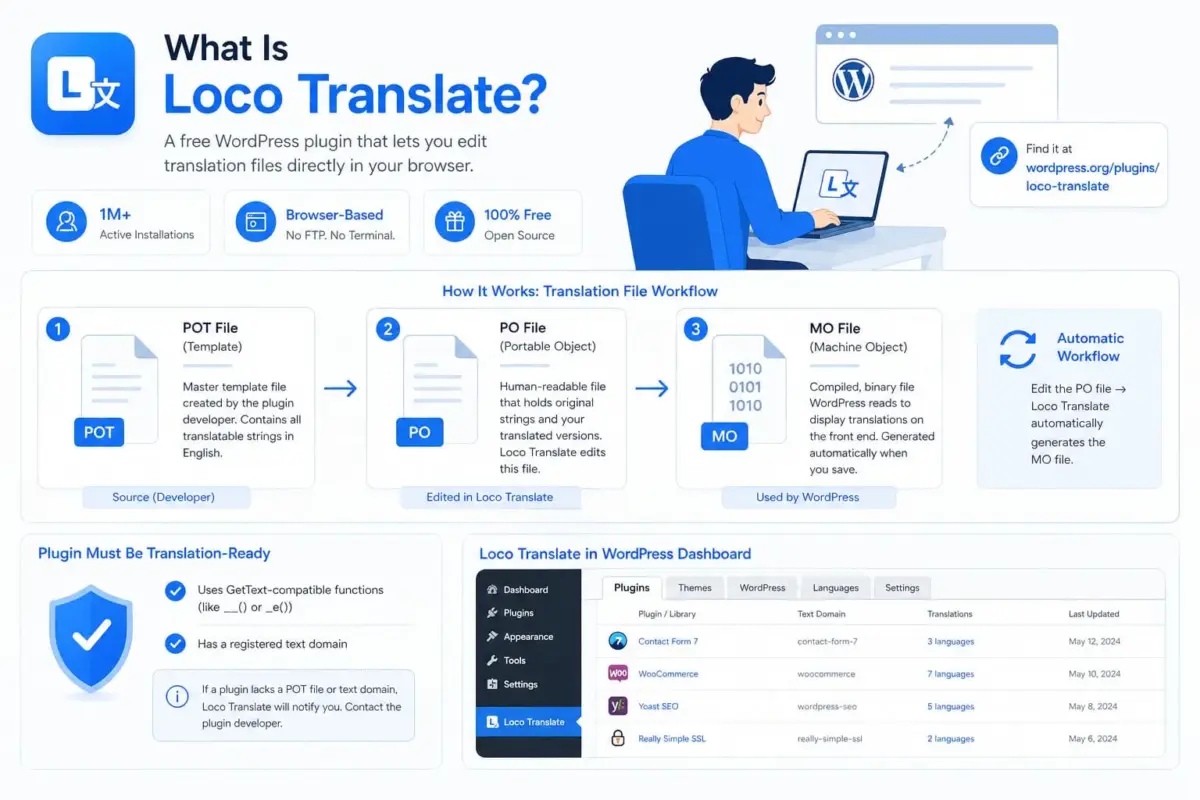
Loco Translate is a free WordPress plugin built by Tim Whitlock. It has over 1 million active installations and lets you edit WordPress translation files directly in your browser, no FTP client, no terminal, no external software needed.
Before you use it, it helps to understand what it’s actually editing. WordPress plugin localization relies on three file types:
- POT file (Portable Object Template): The master template file created by the plugin developer. It contains every translatable string in the plugin’s code. Think of it as the original English text waiting to be translated.
- PO file (Portable Object): A human-readable file that holds both the original strings and your translated versions. Loco Translate edits this file directly.
- MO file (Machine Object): A compiled, binary version of the PO file. WordPress reads this to display your translations on the front end. Loco Translate generates the MO file automatically every time you save.
A plugin must be ready for translation for any of this to work. That means the developer used functions compatible with GetText to display strings (like __() or _e()) and registered a text domain. If the plugin doesn’t have a POT file or a text domain, Loco Translate will tell you, and you’ll need to contact the plugin developer before going further.
If you’re looking to go beyond the translation of a single plugin and create a multilingual WordPress site, there are additional tools and approaches to consider. But for translating a specific plugin, Loco Translate is all you need.
How to Translate a WordPress Plugin Using Loco Translate (Step by Step)
The whole process takes about 10 to 15 minutes for a small plugin. Larger plugins with hundreds of strings take longer, especially if you’re translating manually.
Step 1: Install And Activate Loco Translate
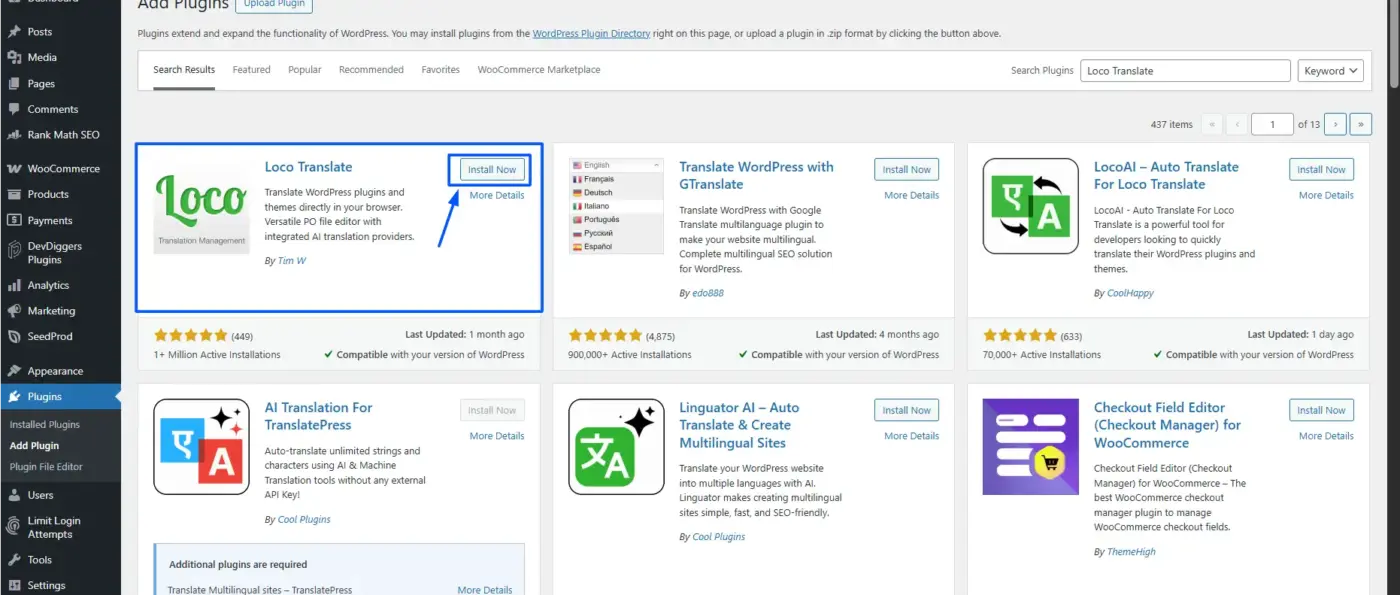
Go to Plugins > Add Plugin in your WordPress dashboard. Search for “Loco Translate,” then click Install Now and Activate.
Step 2: Go to Loco Translate > Plugins
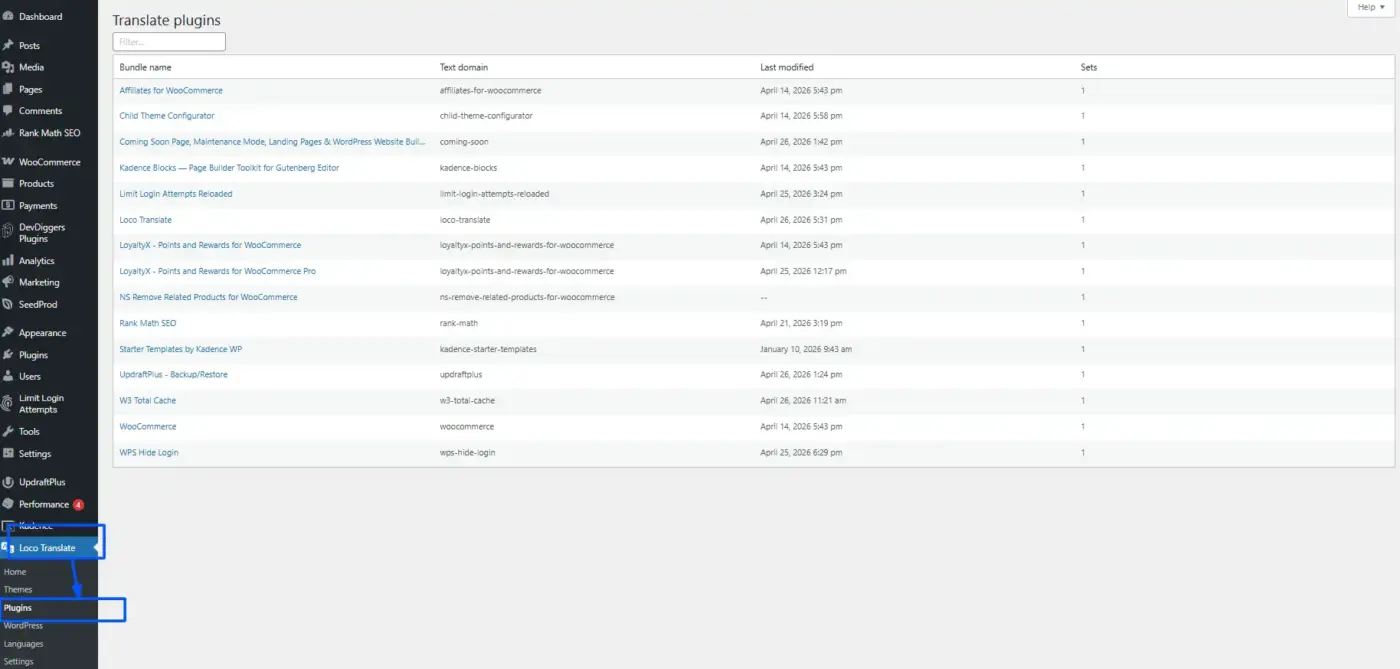
Once activated, a new “Loco Translate” menu appears in your left sidebar. Click it, then select Plugins. You’ll see a list of every plugin installed on your site that Loco Translate can detect.
Step 3: Select The Plugin You Want To Translate
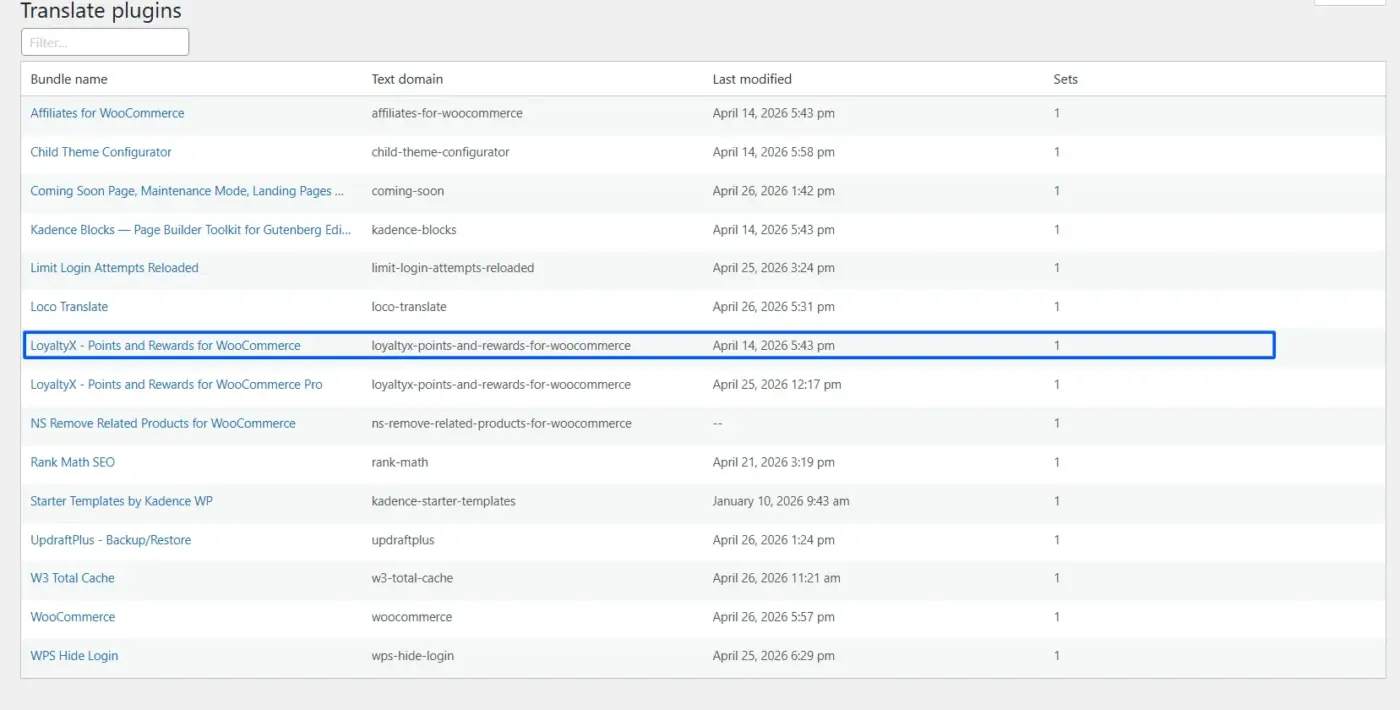
Click the plugin name. You’ll land on the plugin’s language overview screen. If language files already exist for your language (community translations), they’ll appear here. If not, the list will be empty.
Step 4: Click “New Language”
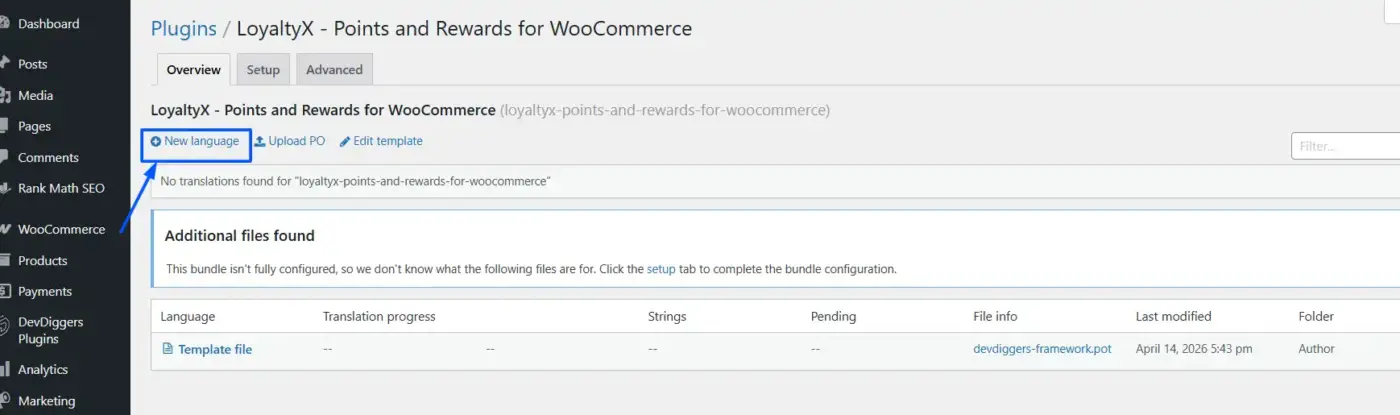
Hit the + New Language button. A screen appears where you choose your target language from a dropdown.
Step 5: Choose Your File Location
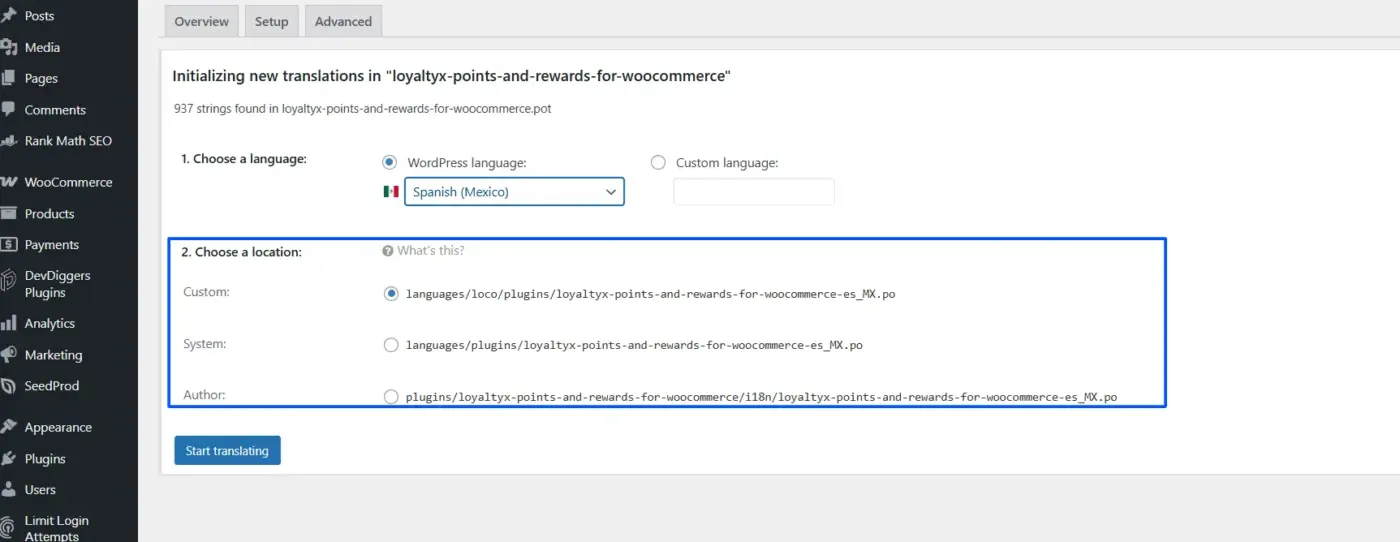
This is the step most guides rush past. You have three options: Custom, System, and Author. Choose Custom. The next section explains exactly why, but the short version is that Custom is the only location that protects your WordPress translation files from being wiped out during a plugin update.
Step 6: Click “Start Translating”
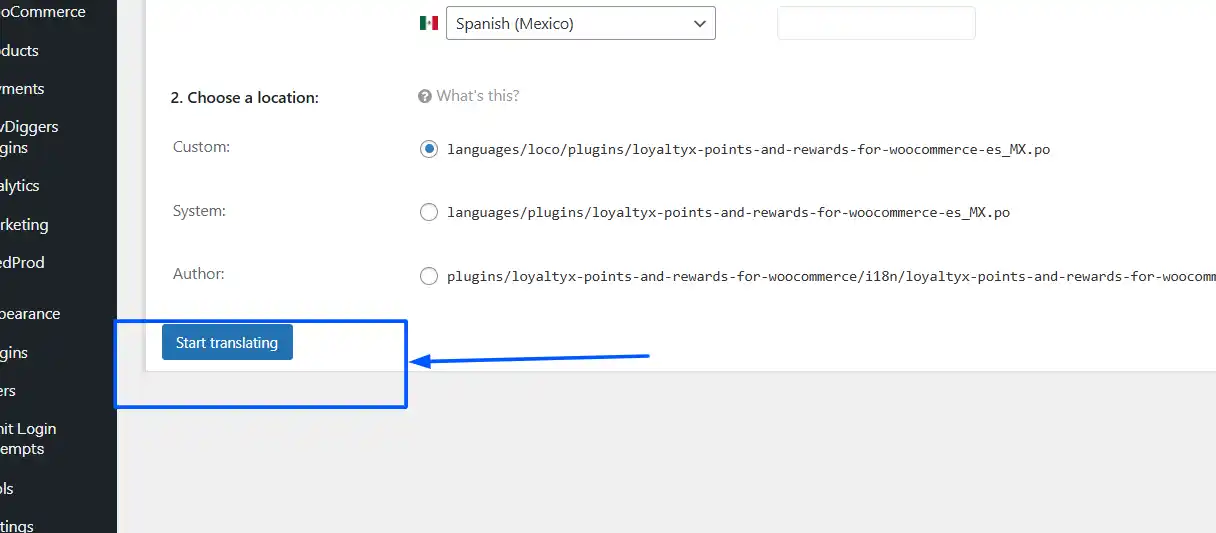
You’ll land in the Loco Translate editor. On the left side, you’ll see each source string (the original English text). Click a string to select it. In the field below, type your translation. Repeat for every string you want to translate.
The filter bar at the top lets you show only untranslated strings, which speeds things up significantly on larger plugins. You can also use the search box to jump straight to a specific string.
Step 7: Save and Verify
Click Save. Loco Translate compiles your PO file into an MO file and stores both in the location you chose. To check it’s working, go to Settings > General in your dashboard and set Site Language to your translated language. Visit your site, and the translated strings should appear. If they don’t, see the troubleshooting section below.
Custom vs System vs Author: Which File Location Should You Choose
This is where most people get burned. Choosing the wrong location means your translations disappear every time you update the plugin. Here’s what each option actually does:
| Location | File Path | Safe From Plugin Updates? | Safe From WordPress Updates? | Recommended? |
|---|---|---|---|---|
| Custom | wp-content/languages/loco/plugins/ | Yes | Yes | Yes |
| System | wp-content/languages/plugins/ | Yes | Sometimes not | Use with caution |
| Author | Inside the plugin folder | No | No | Never (unless you’re the developer) |
- Custom is Loco Translate’s own protected folder. WordPress doesn’t touch it during updates. Loco also gives Custom files loading priority; they load before System or Author files, which means your translations always win if there’s a conflict with community translations.
- System saves files to WordPress’s global language directory. Plugin updates won’t overwrite it, but WordPress’s automatic language installer can replace these files if an official translation becomes available for your language. That’s usually fine, but it means you might lose custom wording you’ve added.
- The author saves files inside the plugin’s own folder. When the plugin updates, that folder gets replaced entirely. Your translations are gone. Don’t use this unless you’re the plugin developer and you’re distributing the translations as part of the plugin itself.
One practical note from working with this directly: if your translations stop loading after a WordPress 6.7 update, the cause is often a plugin that loads its translation files too early, before Loco Translate has had a chance to start up.
According to Loco’s official documentation, WordPress 6.7 now raises a PHP notice when this happens: “Translation loading for the [textdomain] domain was triggered too early.” Check your error logs if translations from the Custom folder stop working after a core update. The fix sits with the plugin developer; they need to call load_plugin_textdomain on the init hook, not earlier.
How to Use Loco Translate’s Auto-Translate Feature
Manual translation is accurate but slow. For large plugins with hundreds of strings, auto-translate gets you most of the way there in seconds. You still review it, but you’re correcting, not starting from scratch.
Loco Translate supports connections to several translation APIs: DeepL, Google Translate, Microsoft Translator, and OpenAI. Each requires an API key, which you add under Loco Translate > Settings. DeepL tends to produce the most natural results for European languages. Google covers more languages overall.
Here’s how to use it:
- Open your plugin’s translation file in Loco Translate and click the Auto button in the top toolbar
- Choose your API provider from the dropdown
- Click Translate
- When the results come back, click Merge Translation
- Choose Mark new translations as Fuzzy if you want to review each one before saving, or Overwrite existing translations to accept all results
- Click Start Adding Process, then Save
Fuzzy strings are shown with a yellow marker in the editor. They’re translated but flagged for review. This is worth using. Automatic translation handles technical plugin text reasonably well, but often misses context: “Checkout” might get translated as “Check Out” when you actually want the payment checkout term in your language.
Worth knowing: If you’re translating a DevDiggers plugin, such as the Wallet for WooCommerce plugin or any other plugin from our store, the POT file is already included. Loco Translate picks it up immediately, no extra setup needed.
What to Do When Translations Aren’t Working
You’ve translated the strings, saved the file, and… nothing changed. Here are the four problems we see most often, and how to fix each one.
Problem 1: Translated Strings Are Missing After A Plugin Update
The plugin updated and overwrote your translation files. This happens when you save in the Author location. Fix: go to Loco Translate > Plugins, select the plugin, open the language file, and click Relocate. Move the files to the Custom folder path (wp-content/languages/loco/plugins/). Going forward, use Custom for all new translations.
If the plugin added new strings in its update, your existing translation file is now out of sync. Click the Sync button in the Loco Translate editor. This pulls in any new strings from the POT file without wiping out your existing translations. As BugWP notes, losing translations after updates is almost always a file location problem, not a Loco Translate bug.
Problem 2: Translations Saved But Not Showing On The Front End
Two quick checks. First, go to Settings > General and confirm your Site Language is set to the language you translated into. If it’s still set to English, WordPress won’t load your translation files at all. Second, clear your cache.
Caching plugins serve old page HTML, and your translated strings won’t appear until the cache is cleared. Clear everything: your caching plugin, any CDN cache, and your browser cache.
Problem 3: Some Strings Won’t Translate No Matter What
Not every string in a plugin goes through the standard WordPress translation system. Some plugins store text in the database (via settings or options), or output strings via JavaScript rather than PHP. Loco Translate only handles strings generated by PHP that use the GetText functions.
If a string lives in JavaScript, you’ll need JSON translation files; Loco does support these, but only if the plugin developer set up wp_set_script_translations correctly. Check with the plugin developer if strings from a specific UI element consistently refuse to translate.
Problem 4: Plugin Not Appearing in Loco Translate’s Plugin List
The plugin isn’t ready for translation. It either has no text domain registered or doesn’t use GetText functions. Loco Translate can sometimes extract strings directly from the source code if no POT file exists, but this isn’t reliable.
Your best option is to contact the developer and request that they add i18n support. If you run into plugin activation errors during this process, that’s a separate issue worth resolving first.
Conclusion
Translating a WordPress plugin using Loco Translate takes under 15 minutes once you know the steps. The process itself is simple: install Loco Translate, select your plugin, add a new language, choose the Custom file location, and start translating.
The part that catches most people is the file location. Always use Custom. It’s the only location that protects your work from plugin and WordPress updates. And after any plugin update, hit Sync before assuming strings are missing: nine times out of ten, that’s all it takes.
If you’re running one of our WooCommerce plugins, the POT file is already in place. Open Loco Translate, select the plugin, and start translating right away. No developer setup needed on your end.
Frequently Asked Questions
Q1. Can Loco Translate translate every WordPress plugin?
No. A plugin must be built with translation support to work with Loco Translate. This means the developer used functions (like __() or _e()) compatible with GetText and registered a text domain. If a plugin doesn’t appear in Loco Translate’s plugin list, or shows no translatable strings, the plugin isn’t ready for i18n. Contact the developer to request translation support.
Q2. Will my translations survive a plugin update?
Yes, as long as you saved them in the Custom location (wp-content/languages/loco/plugins/). This folder is protected from both plugin and WordPress updates. If you saved translations in the Author location (inside the plugin folder), they will be deleted when the plugin updates. Use the Relocate function in Loco Translate to move them to Custom before the next update.
Q3. Can I translate the same plugin into multiple languages?
Yes. Each language gets its own PO and MO file. Go to Loco Translate > Plugins, select the plugin, and click New Language again to add a second language. Loco Translate manages each language file separately, so translating into Spanish doesn’t affect your French translation.
Q4. What is the Sync button in Loco Translate, and when should I use it?
The Sync button updates your existing PO file with any new strings added in a recent plugin update. Click it after any plugin update before you check for missing translations. It adds new strings to your translation file without touching the translations you’ve already done.
Q5. Does Loco Translate work with premium plugins that aren’t on WordPress.org?
Yes, as long as the premium plugin is built with proper translation support. This includes paid plugins that are coded well. The plugin just needs a text domain and either a POT file or string functions compatible with GetText. DevDiggers plugins include a POT file, so they work with Loco Translate out of the box.
Ekta Lamba
Ekta Lamba is a tech writer at DevDiggers focused on making WordPress and WooCommerce straightforward for non-developers. She covers plugin errors, platform updates, and WordPress basics, written so readers can follow along without a second tab open to translate the jargon.
Join thousands of readers getting smarter every week.
Leave a Reply