How to Install Google Tag Manager in WordPress

Do you want to install Google Tag Manager in your WordPress site?
Tracking user interactions on your site is very important today. With Google Tag Manager (GTM), businesses can easily manage marketing tags on their website.
This means they can handle code snippets without changing the website’s main code. In this tutorial, we’ll show you how to install Google Tag Manager in WordPress in two ways – using a plugin or manually. This way, you can easily manage user data and interactions.
What is Google Tag Manager?
Google Tag Manager is a free service. It helps you manage and add marketing tags on a website or app. You don’t need to change the code directly. Tags like Google Analytics are code snippets that gather data from a website. They then send this information to other places.
Benefits of Google Tag Manager in WordPress
- Centralized Management: A single container holds all of your Google tags, scripts, remarketing tags, Ads conversion pixels, and Google Analytics tags.
- No Code Churn: Improved maintenance workflows because of no code churn. Update or add tags without redeploying plugins or themes, much like tweaking meta tags via our Meta Tags guide without touching code.
- Asynchronous Loading: Tags offer design benefits by reducing page rendering delays. This speeds up loading times, which is important for SEO and user experience.
- Version Control & Environments: It lets you test changes safely before going live. This is thanks to the built-in versioning and staging environments.
- Collaboration: The marketing and development teams can team up. They will use detailed user permissions in workspaces. This way, they won’t interfere with each other’s tasks.
How Google Tag Manager Works
Google Tag Manager (GTM) is a middleman between your site and other tracking or marketing solutions—such as Google Analytics, Facebook Pixel, or Google Ads. Rather than adding each tracking code individually to your WordPress theme or plugin, GTM allows you to manage them all in one place.
It accomplishes this by employing three main building blocks: Tags, Triggers, and Variables. A Tag is some code that does something, such as sending information to Google Analytics.
A Trigger instructs the tag when to fire, such as when a button is clicked or a specific page is loaded. Variables are small pieces of data that GTM makes choices about, such as the URL of a page or the text of a button click.
Once you install this in your GTM account and get the GTM container out to your site, you can control it all remotely without having to work with your site’s code ever again. That gets your setup for tracking more streamlined, quicker, and less painful to manageeven if you’re not a coder.
Prerequisites Before Installation
Before you jump into the steps, here’s what you’ll need:
- A Google Tag Manager account.
- Access to your WordPress admin dashboard.
- Basic understanding of WordPress (or someone to help if you’re unsure).
If you haven’t set up analytics yet, check out our guide on how to add Google Analytics on WordPress first.
How to Install Google Tag Manager in WordPress: Step-by-Step Guide
These are the steps to install Google Tag Manager on WordPress:
Step 1: Create a Google Tag Manager Account
Before you can install Google Tag Manager in WordPress, the first step is to set up your GTM account and generate the required code snippets. Here’s how you can do it:
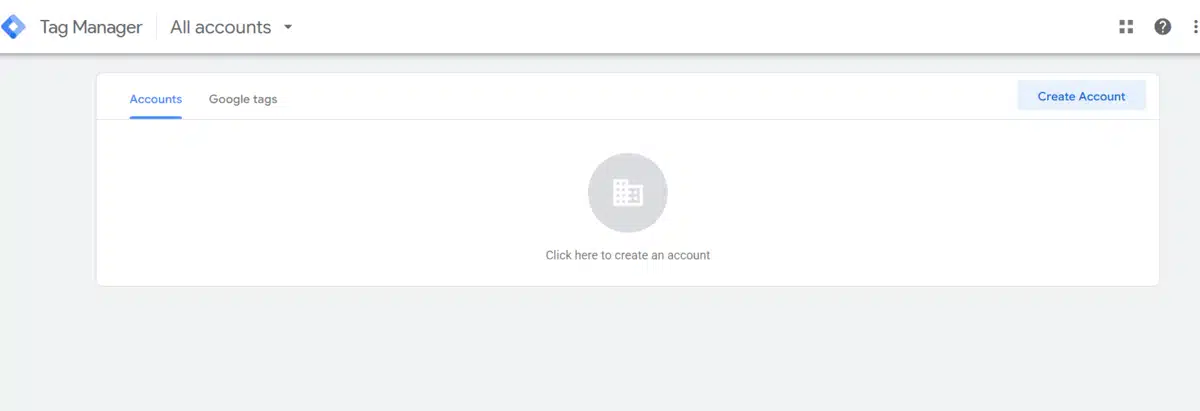
- Sign In: Firstly, go to the Google Tag Manager website and sign in with your Google account.
- Create Account: Click on Create Account and enter your account name (usually give your company name).

- Set Up Container: Enter a container name (typically your website’s name) and select Web on the target platform.

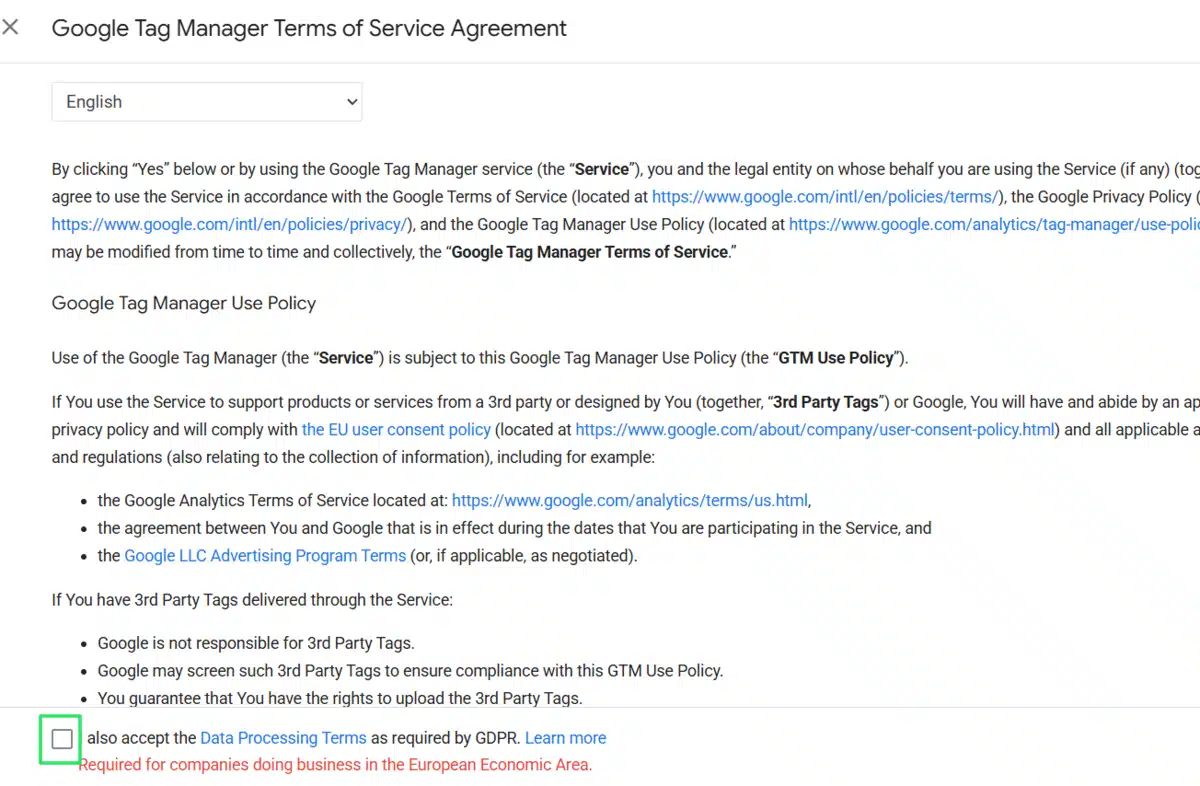
- Accept Terms: Review and accept the Data Processing Terms of Service.

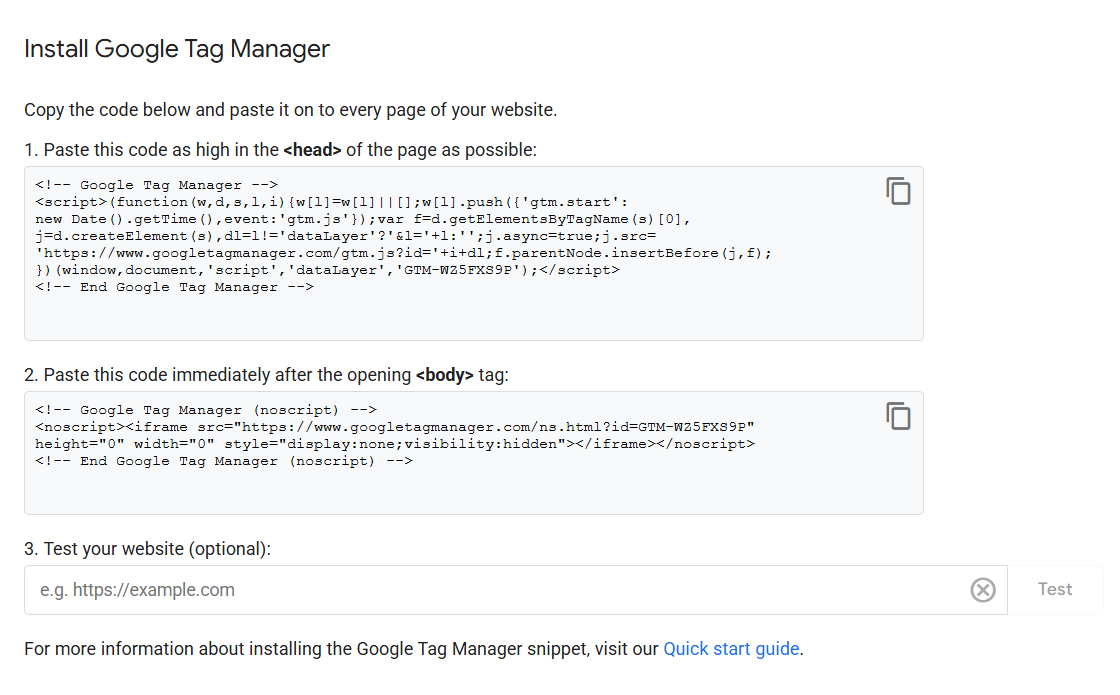
- Obtain Code Snippets: After setup, you’ll receive two code snippets:

- Head Snippet: To be placed immediately after the opening
<head>tag. - Body Snippet: To be placed immediately after the opening
<body>tag.
- Head Snippet: To be placed immediately after the opening

Step 2: Publish a New Tag in Google Tag Manager
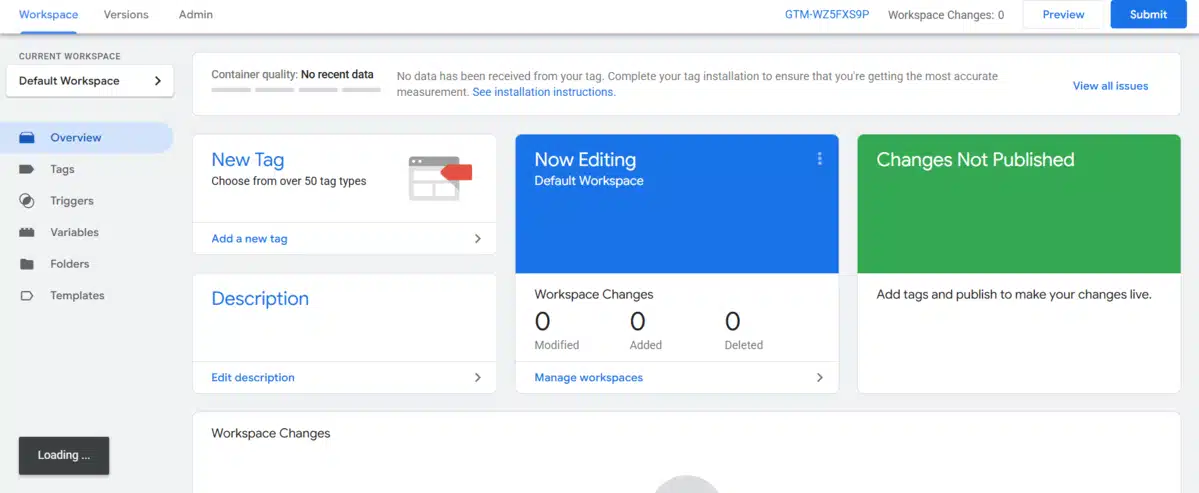
1. Access Your GTM Workspace
- Enter your Google Tag Manager account.
- Choose the container for your WordPress website.
2. Create a New Tag
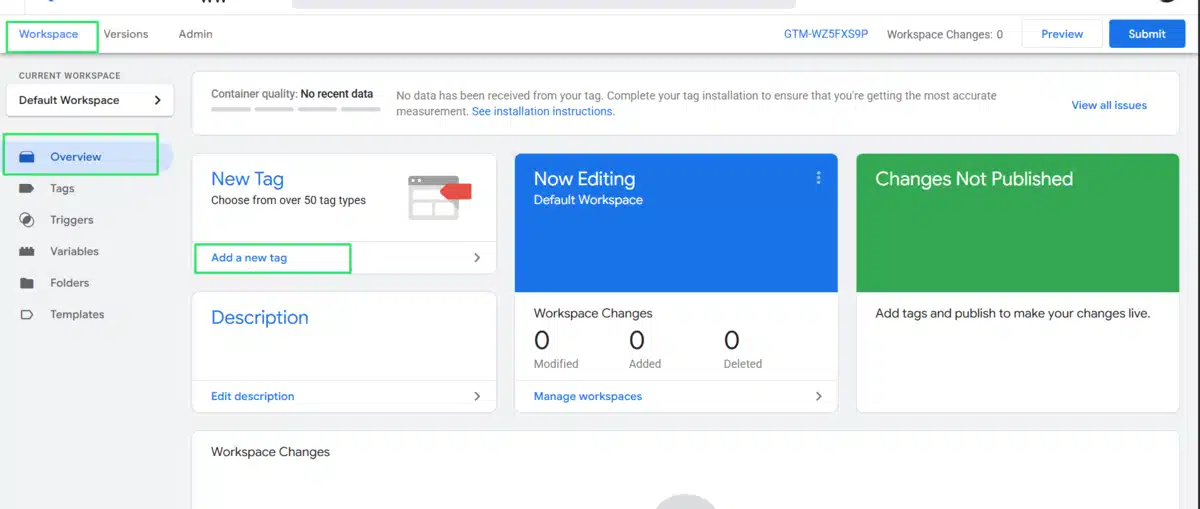
- Open the Workspace tab.
- Click on Add a new tag as indicated above.
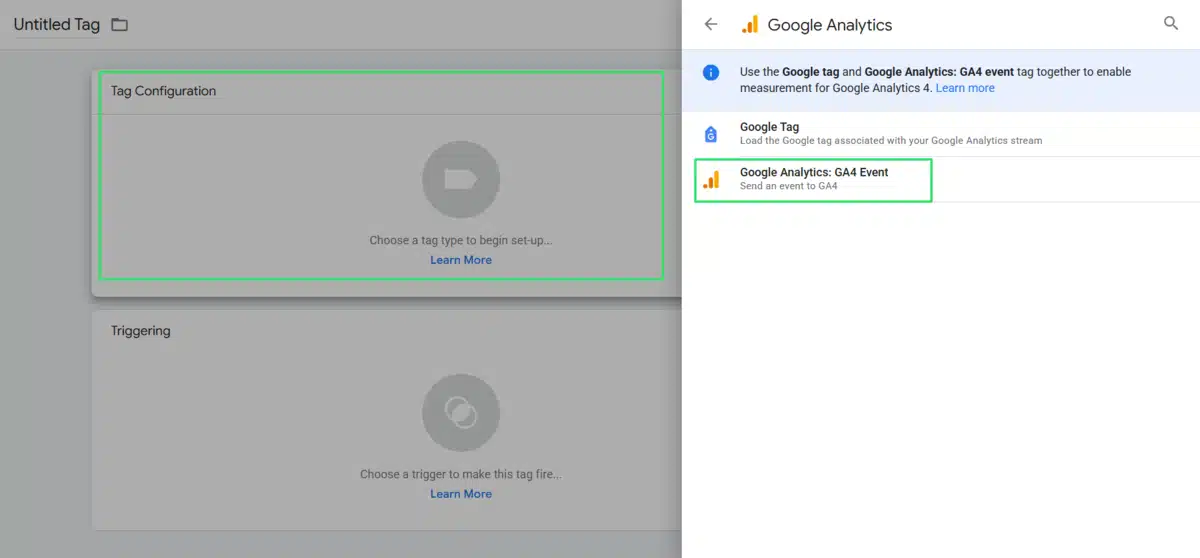
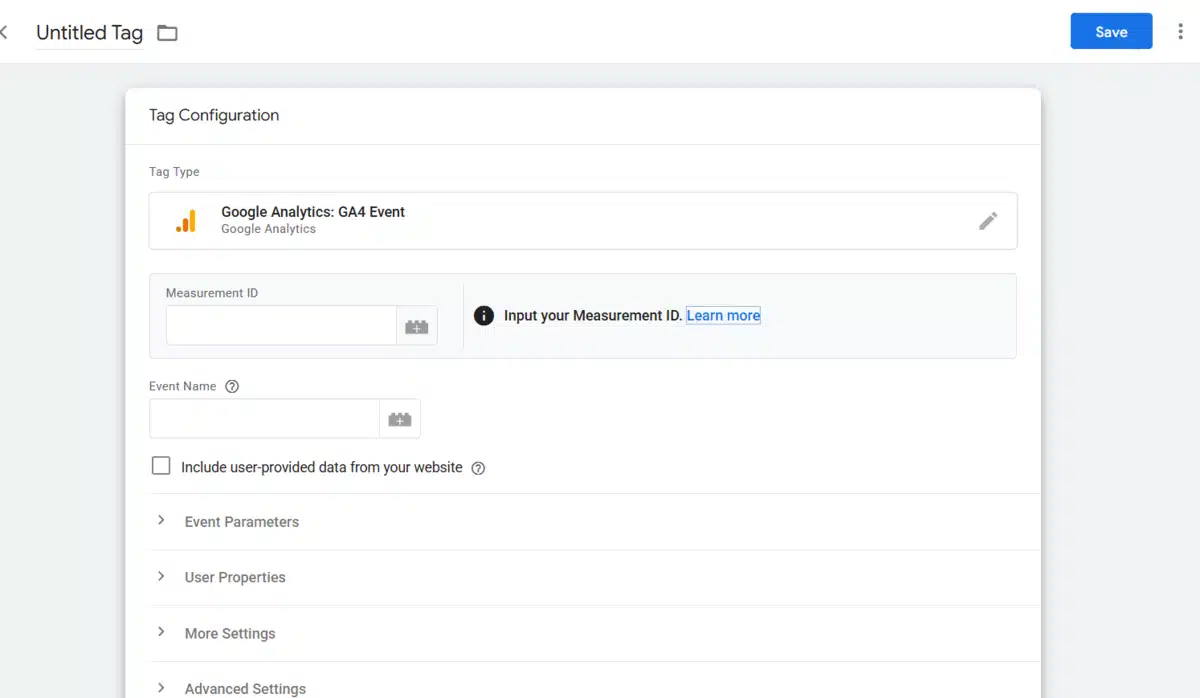
3. Configure the Tag
- Click Tag Configuration.

- Select a tag type, such as Google Analytics: GA4 Event.

- Enter the required data, including Measurement ID and Event Name.
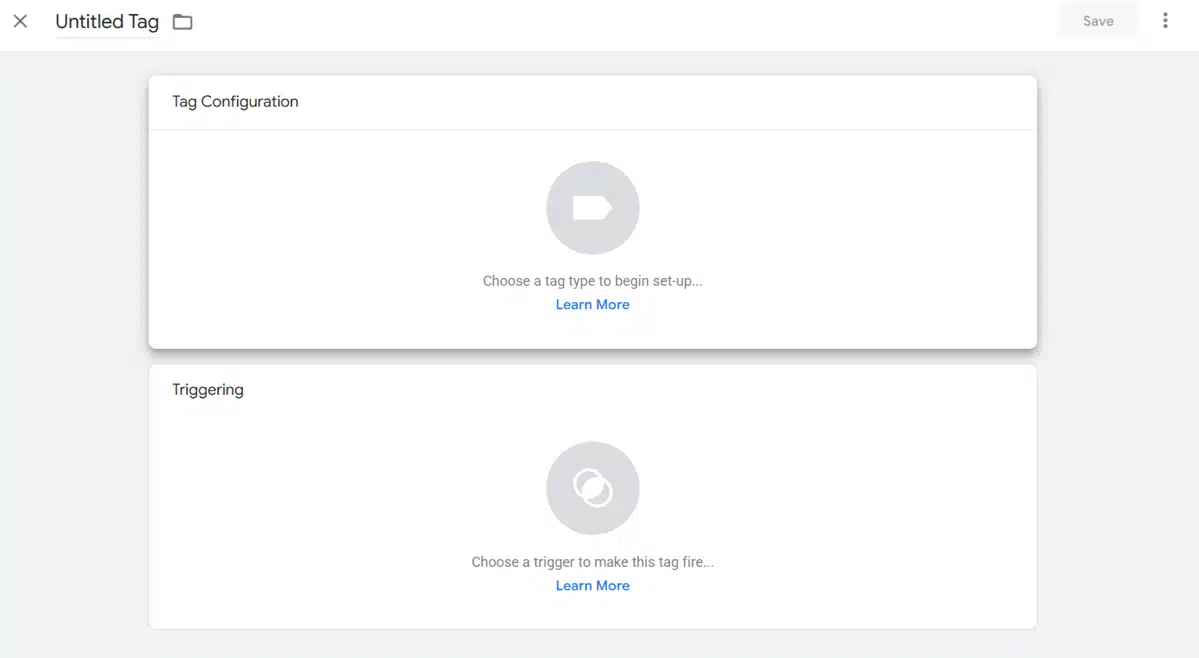
4. Set Up a Trigger
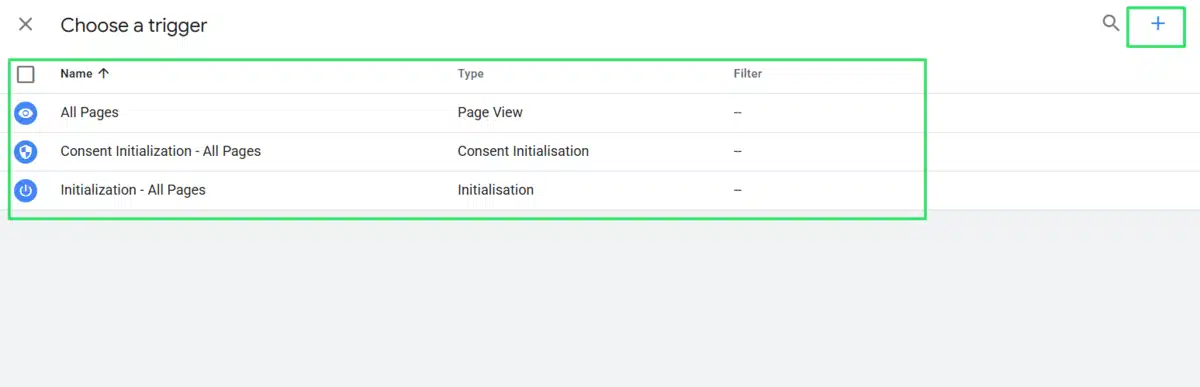
- Choose Triggering.
- Choose a new trigger or an already developed one, like All Pages or Just Links.
- Change the settings according to the trigger’s demand.
5. Name and Save the Tag
- Give your tag (e.g., Site Analysis) a clear descriptive name.
- Provide the specifics for your tag now.
- First, include the measurement ID.
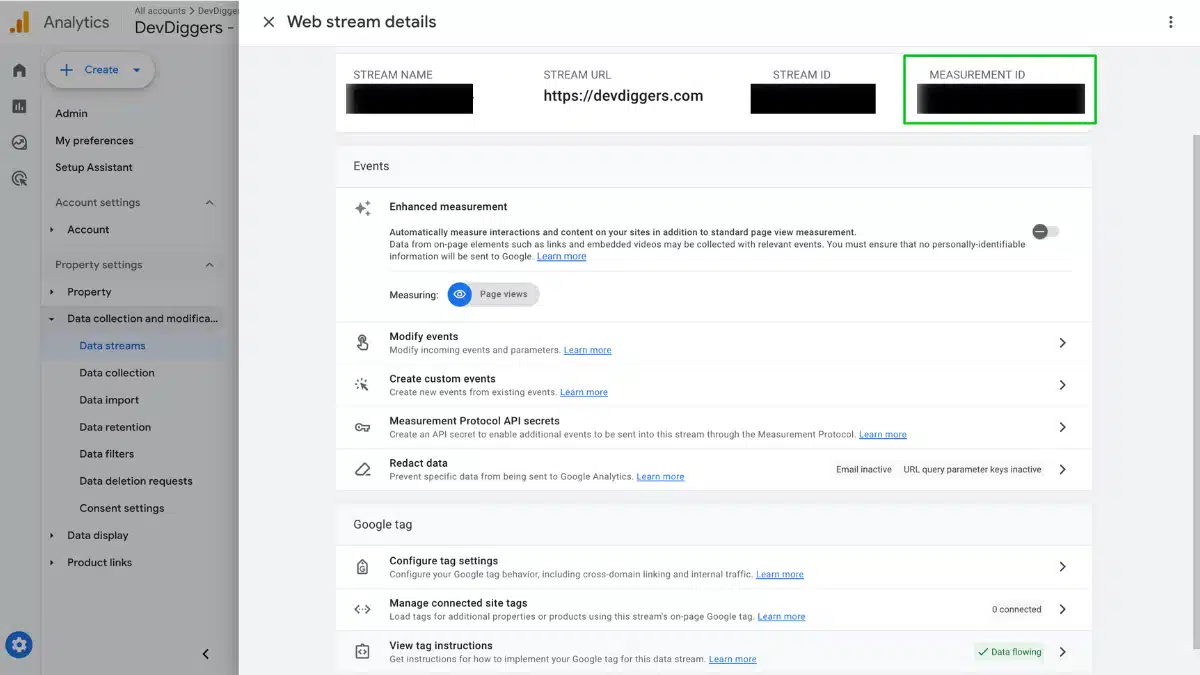
- Your Google Analytics account’s Measurement ID comes from Admin → Data Streams → Click your Web Stream → G-XXXXXXXX will show in the top-right corner.

- Click Save last to save your tag setup.

6. Submit and Publish
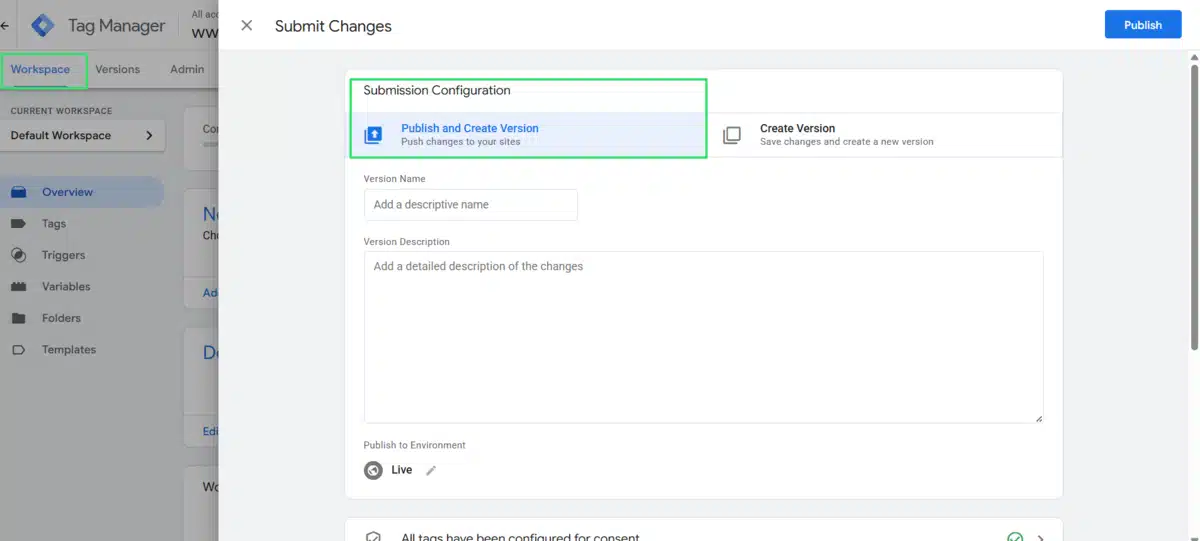
- Right side of the Workspace tab, click Submit.
- In Submission Configuration, go with Publish and Create Version.
- Type a version name and entry description—for example, Added GA4 Tag.
- Click Publish to publish your tag and have it active on your website.
Step 3: Choose an Installation Method
There are multiple ways to add GTM to your WordPress site:
Method 1: Using a Plugin
Option A: GTM4WP Plugin

- Install Plugin: Go to WordPress dashboard, to Plugins → Add New and find GTM4WP.
- Activate Plugin: Click Install Now and then Activate.
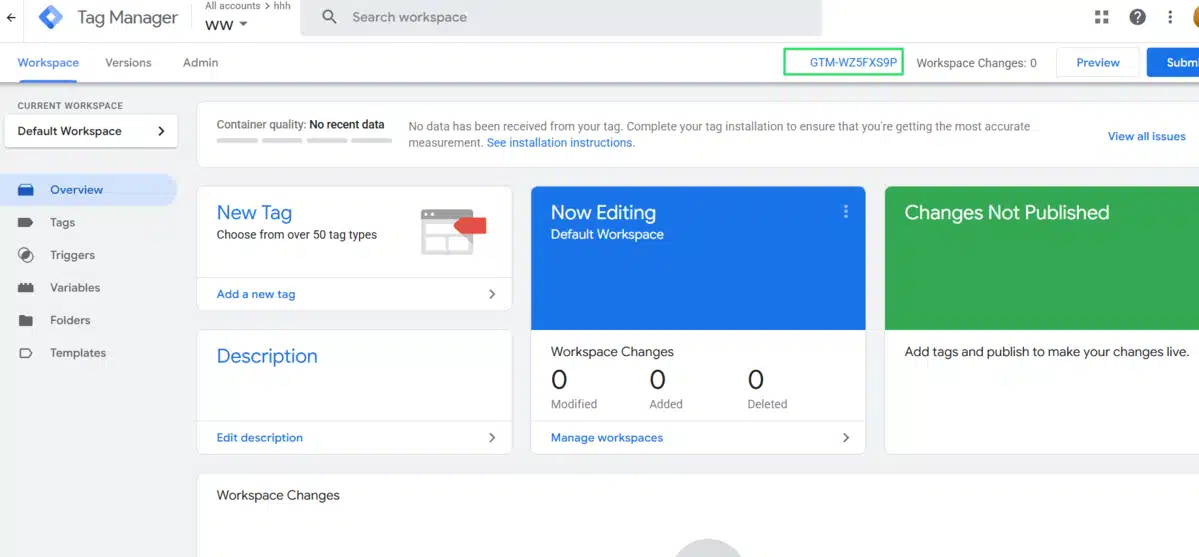
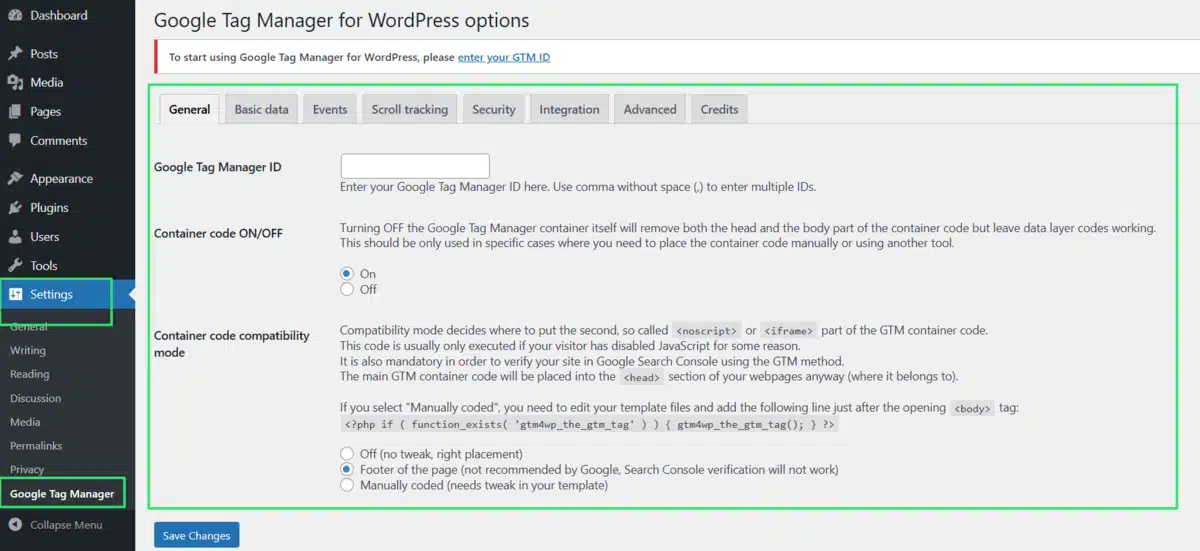
- GTM Container ID: Copy GTM Container ID from Workspace → Overview.

- Configure Plugin: Visit Settings → Google Tag Manager and fill in your GTM Container ID.

- Save Changes: Click Save Changes to implement the settings.
Option B: Insert Headers and Footers Plugin
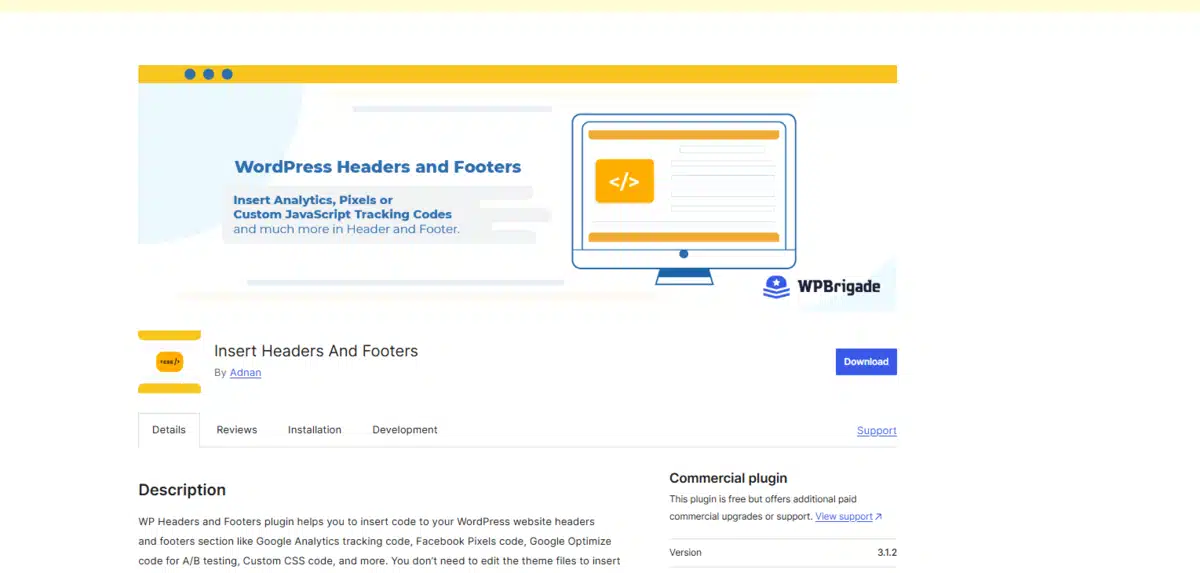
- Install Plugin: Go to Plugins → Add New and look for Insert Headers and Footers.
- Activate Plugin: Click on Install Now and then Activate.
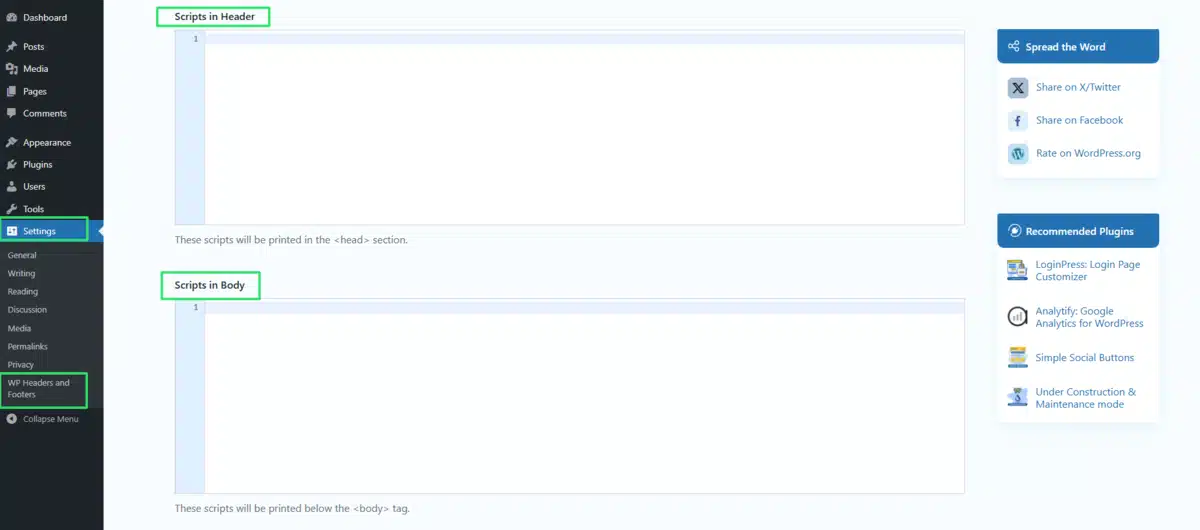
- Add Code Snippets: Go to Settings → Insert Headers and Footers.

- Paste the Head Snippet in the “Scripts in Header” field.
- Paste the Body Snippet in the “Scripts in Body” field.
- Save Changes: Click on Save to save the changes.
Method 2: Manual Installation
Observe: This approach is best suited for users who are comfortable editing theme files.
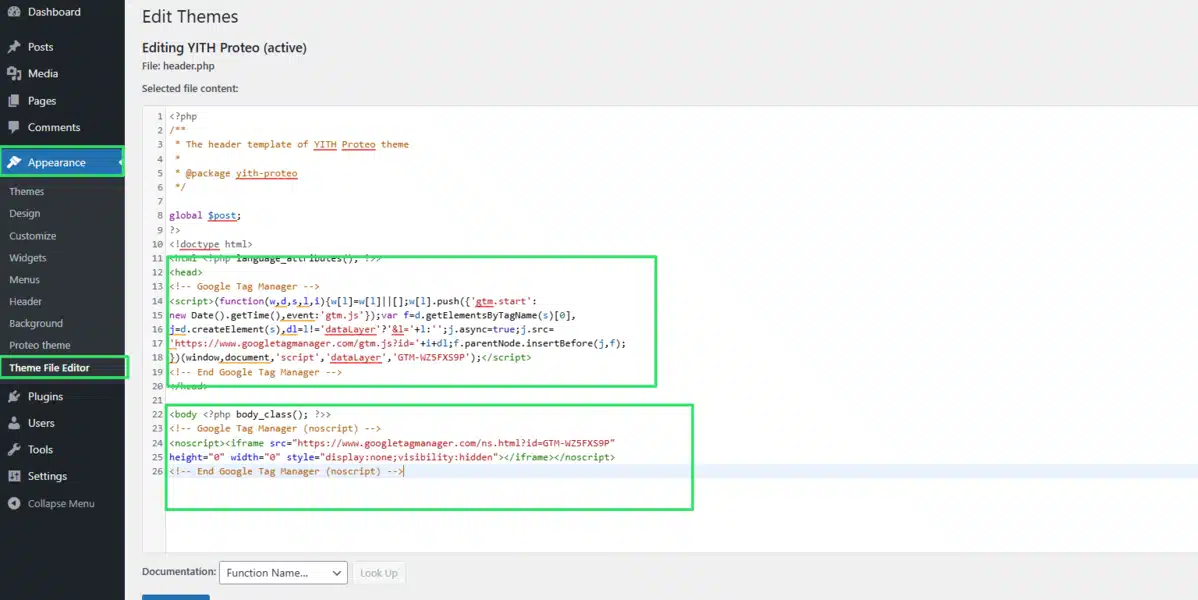
- Access Theme Editor: Go to your WordPress dashboard and open Appearance → Theme Editor.
- Edit header.php:
- Locate the header.php file and open it.
- Paste the Head Snippet directly after the opening tag.
- Paste the Body Snippet directly after the opening tag.
- Press Update File to apply your changes.
Warnings: These edits will be lost if your theme is updated. Use a child theme instead to ensure these modifications endure.
Step 4: Verify GTM Installation
After adding GTM to your site, it’s essential to verify that it’s working correctly.
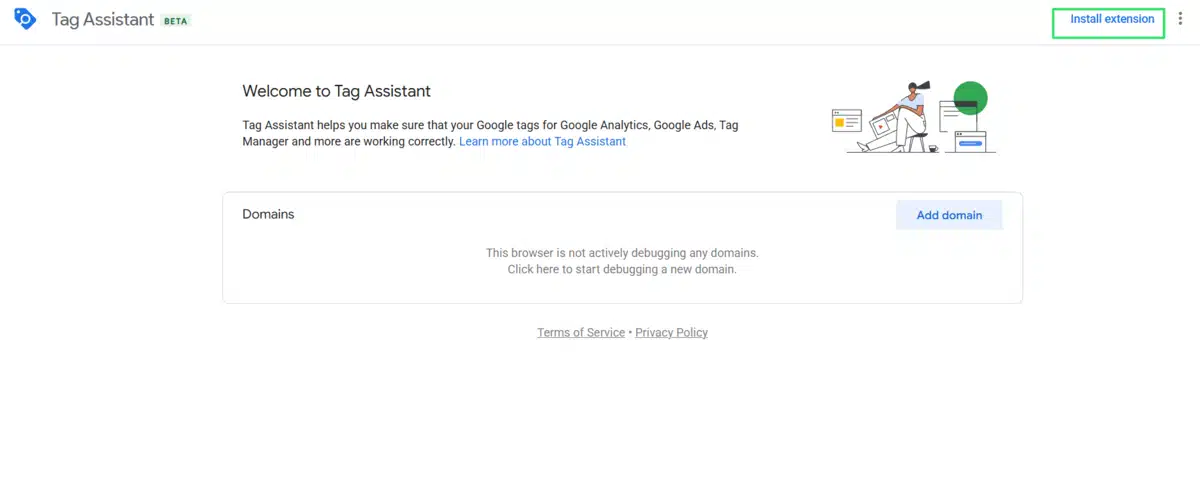
- Use Tag Assistant: Install the Tag Assistant browser extension to check if GTM is firing correctly.
- Preview Mode: In your GTM account, click on Preview to enter debug mode and test your tags.
- Check Source Code: View your website’s source code to ensure the GTM snippets are present in the correct locations.
Best Practices
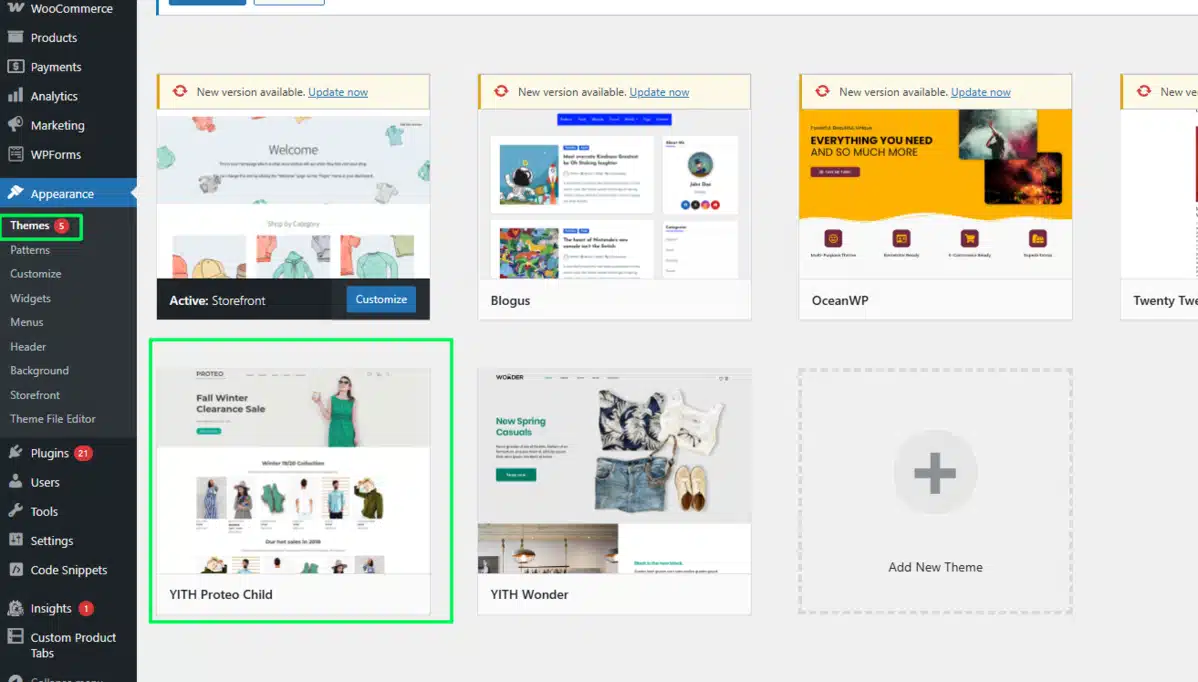
- Use a Child Theme: If you want to change theme files, create a child theme first. This way, your changes stay safe and won’t disappear after updates.
- Limit Plugin Use: Only use the plugins you need. Too many can cause conflicts and slow down your site.
- Update Tags for Tracking: Keeping tracking needs to be updated keeps tags and triggers relevant.
- Check Everything in GTM Preview Mode: Always preview changes before going live.
Google Tag Manager vs Google Analytics: What’s the Difference?

Google Tag Manager (GTM) and Google Analytics (GA) have different roles. However, they work together to improve tracking on your website.
GTM is a tag management system. It helps you manage and deploy tracking codes, such as Google Analytics. You can do this without changing your website’s code.
Google Analytics helps you track and analyse user behaviour on your website. It gives you valuable insights into traffic, user interactions, and conversions. GTM makes it easy to deploy tags. GA takes the data from those tags. Then, it helps you understand and improve user experience.
Troubleshooting Common Issues
- No Data Layer: If you can’t see a data Layer in your GTM preview, check the code. Make sure it’s right above the body open tag in the theme.
- Duplicate Tags: Don’t install GTM with a plugin and manually at the same time. This will cause tags to fire twice.
- Incorrect Container ID: Tags will be stagnant if there is a mistake with your GTM-XXX XXX ID and if there is a typo in it. Cross-verify your Admin ID in GTM with the one you believe is correct.
- Header/Footer Plugin Conflicts: If you use a basic header/footer plugin, ensure it doesn’t remove GTM scripts. Also, check if it’s blocking tags from working properly on other pages.
Final Words
Understanding your target audience is key to a successful website. Google Tag Manager makes this easier than ever. Managing all your tracking codes from one dashboard is a game-changer, whether for a blog or a business site. You won’t need to change your website’s code over and over. This makes it easy and helpful for every digital marketer.
Now, you know how to install Google Tag Manager in WordPress. You can do it with a plugin or by installing it manually. Each strategy has its pros and cons, which tend to suit different users.
The plugin approach is great for beginners. They want little to no effort. Advanced users, however, prefer manual installation. It gives them more control.
Frequently Asked Questions (FAQs)
Q1. Why would anyone use Google Tag Manager in WordPress?
In WordPress, Google Tag Manager is capable of adding and managing numerous tags such as Google Analytics, Facebook Pixel, tracking tags, and other marketing tags without requiring source code modifications.
Q2. Is it easier to approach Google Tag Manager through a plugin or manual installation?
Either option is effective. For users who opt for a simple, swift, and no-code method, a plugin is the best choice. Manual installation is excellent for those who prefer more control and have little need for plugins.
Q3. Is it permissible to install Google Tag Manager alone without having Google Analytics?
Yes, installing Google Tag Manager is permissible alone, and afterwards, you might wish to include Google Analytics (GA4) as a tag in GTM.
Q4. Does Google Tag Manager have an impact on the speed of WordPress sites?
No, GTM is asynchronous, which means the loading of GTM would not inhibit other elements of your page. GTM is designed to perform.
Q5. How do I verify the effectiveness of Google Tag Manager?
With GTM’s Preview Mode, you can see if the container and individual tags are firing correctly. The Tag Assistant Chrome extension can also verify that.

Abhijit Sarkar
I am deeply passionate about creating engaging content and exploring. My journey includes gaining valuable experience in content writing and creating useful resources for my readers.
Leave a Reply