This guide explains the process of adding your biometrics (fingerprints or face scans) to your WooCommerce account and how to manage or remove them.
Desktop Workflow #
1. Logging In #
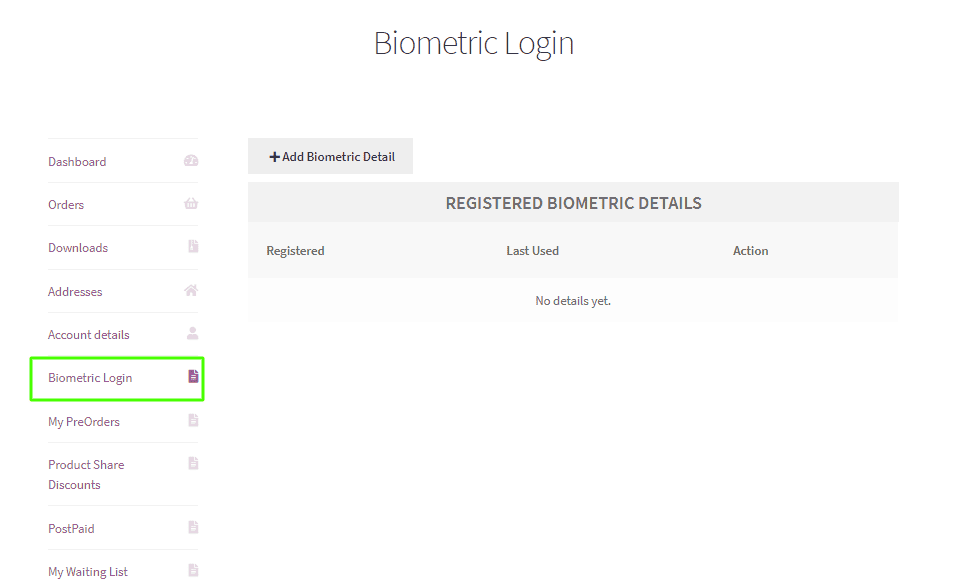
- Open your WooCommerce dashboard.
- On the account page, go to the section Biometric Login.
2. Adding Your Biometrics #
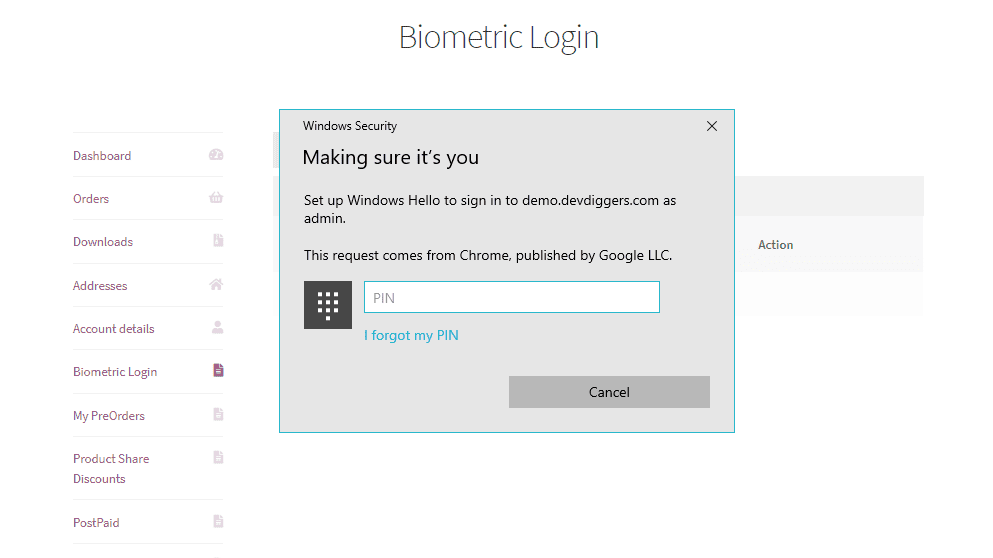
- Click on the Add Biometric Details button.
- Select the biometric method you want to use, which is Fingerprint or Face Recognition.
- Follow the steps on the screen to confirm and set up your biometrics.
3. Managing Biometric Details #
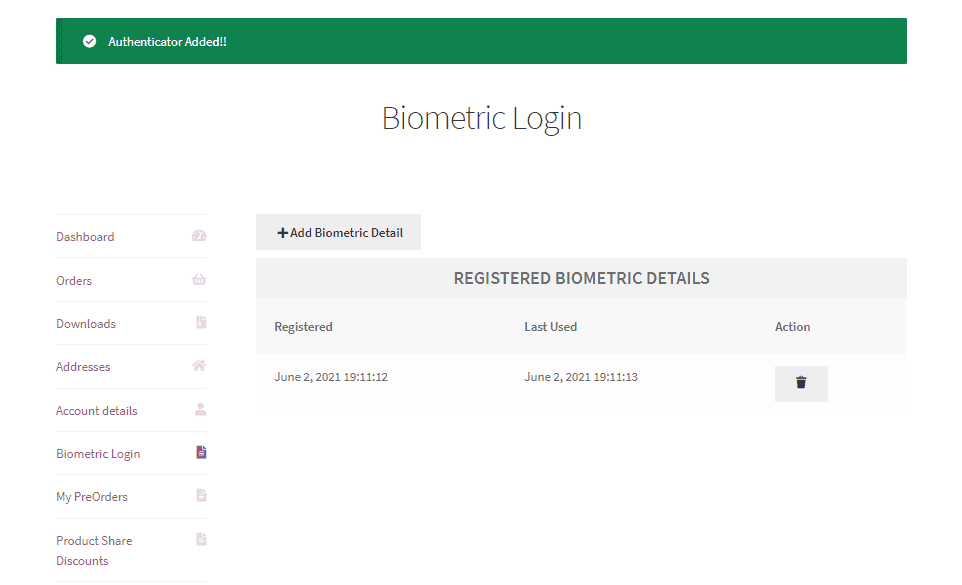
- After the biometric details are added, you will be able to see them in a list under My Biometric Details.
- You can delete any method of recognition by simply clicking the Delete option next to the entry.
Mobile Workflow #
1. Logging in #
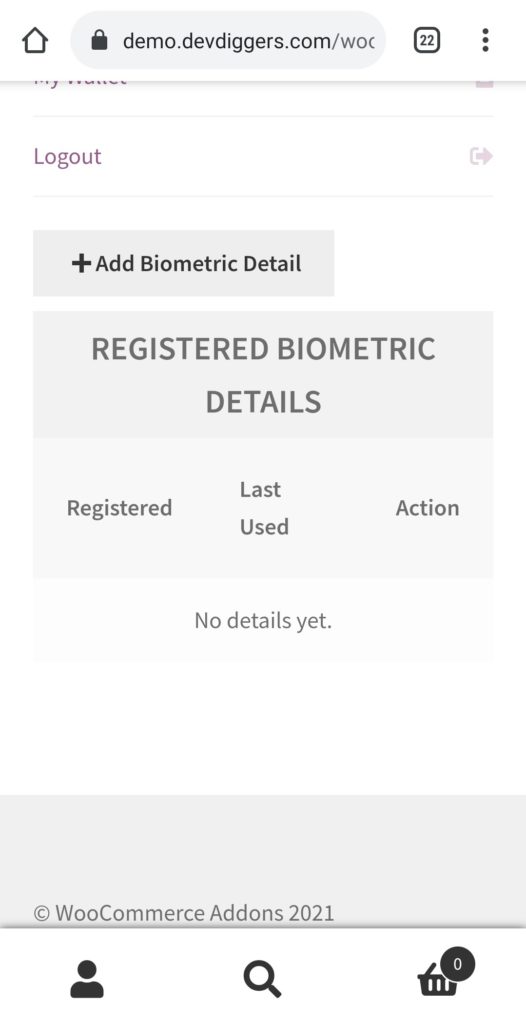
- Open the mobile view My Account section of the WooCommerce store.
- Go to the Biometric Login menu.
2. Adding Your Biometrics #

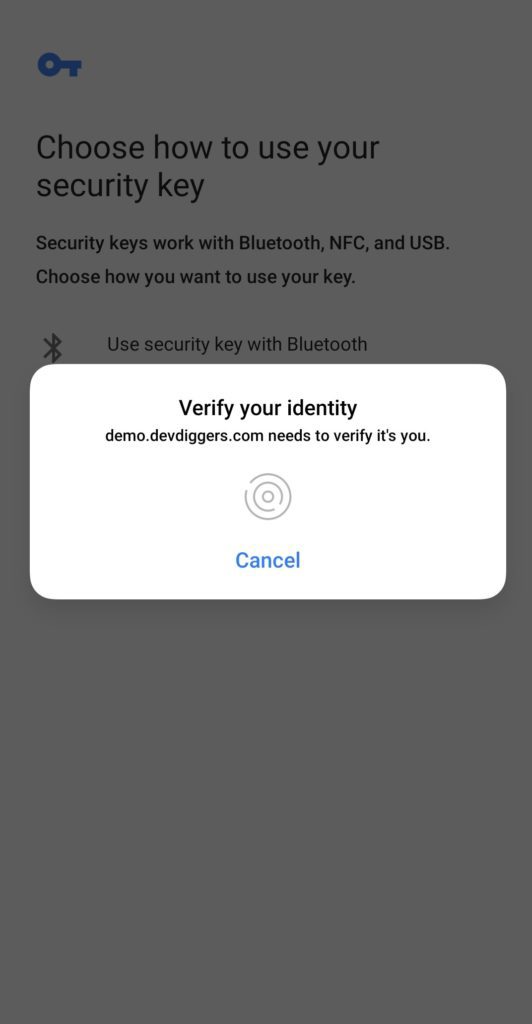
After clicking on the Add Biometric Details button, customers will get a popup like above.

After clicking on Get Started, customers will be presented with an opportunity to choose the third option to set up their screen lock using their fingerprints.
Finish the biometric setup as guided.
2. Managing Biometric Details #
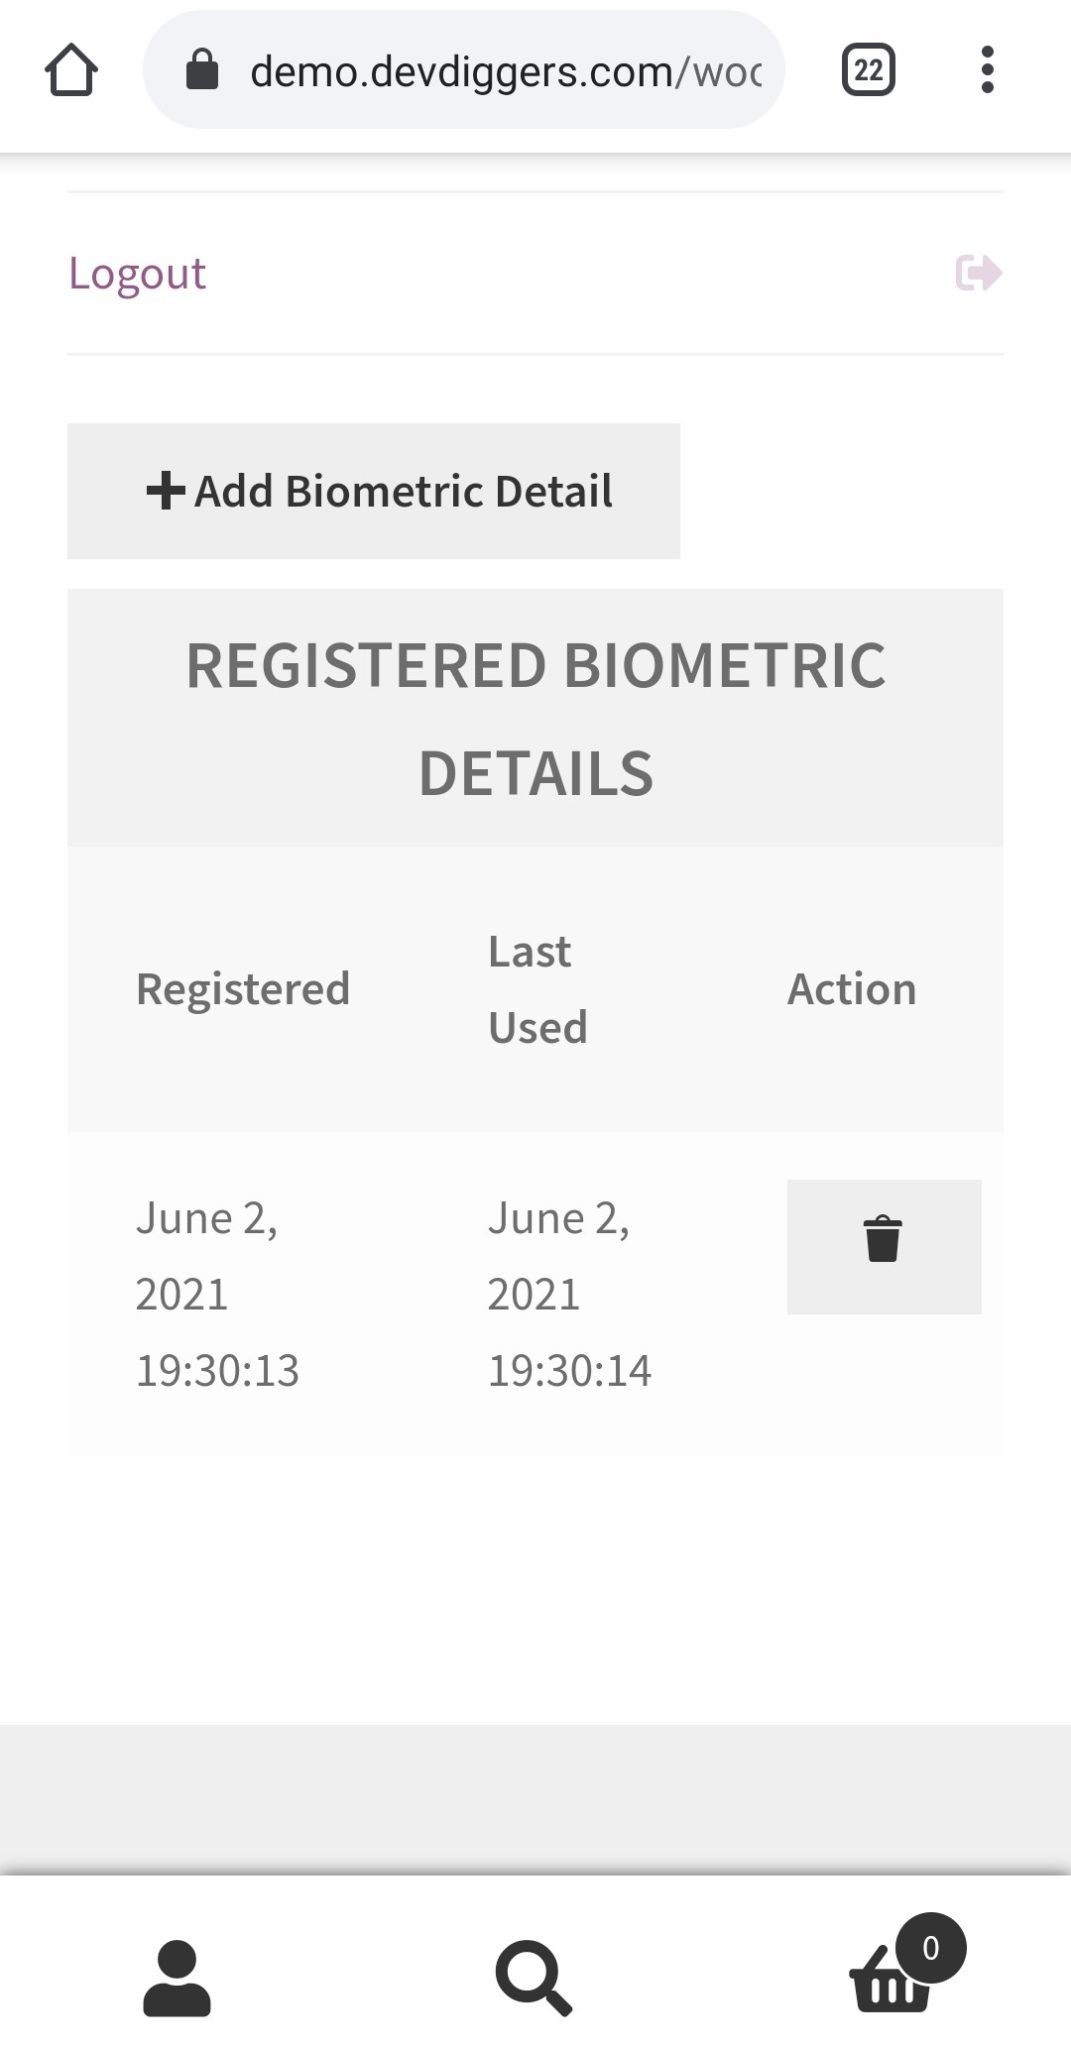
- My Biometric Details will show all the biometric login methods you have added.
- You can delete any method by clicking on the Delete button next to it.