To set up settings relative to your store’s needs after installing and activating the WooCommerce Biometric Login plugin, read this article for step-by-step instructions.
1. Start With Biometric Plugin Configuration #
- Open your WordPress admin dashboard.
- Access the Configuration page from the WooCommerce Biometric Login menu.
2. What Changes Can Be Made? #
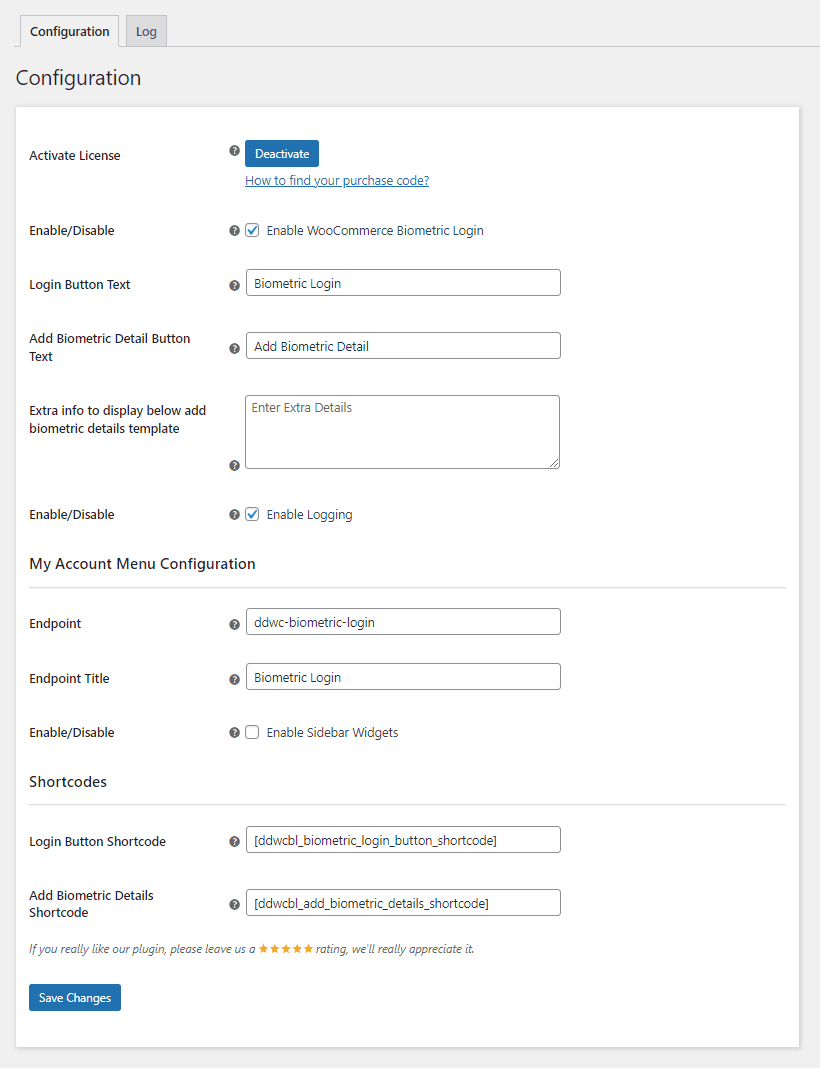
Enable or Disable the Plugin #
Clients may choose whether they wish to use the biometric login functionality.
Login Button Text #
Alter the login button texts seen by the users, such as changing them to Login with Biometrics.
Add Biometric Detail Button Text #
Change the button text used to add biometric details to one like Setup Biometrics, for example.
Extra Information Display #
Provide clarity by enabling more text to show underneath the users’ Add Biometric Details template.
Enable Or Disable Logging #
Turning logging on allows for debugging purposes. It is often crucial to resolve issues.
Set The Endpoint #
Determine the URL endpoint for Biometric Login configuration in the My Accounts page.
Endpoint Title #
Modify the name of the menu that is shown on the My Accounts page.
Enable Sidebar Widgets #
Activate or deactivate widgets to the My Accounts page menu.
Shortcodes #
Login Button Shortcode

This shortcode can be used anywhere in the store to display the button for logging in via biometrics.
Default Value: [ddwcbl_biometric_login_button_shortcode]
Add Biometric Details Shortcode:
This shortcode enables users to add their biometric details from any spot on the site where the shortcode is placed.
Default Value: [ddwcbl_add_biometric_details_shortcode]
3. Save Changes #
After the changes are made, remember to click Save Changes to implement the new settings.
The correct configuration of the plugin setting enables your customers to have a smooth biometric login experience. Always remember to set the options that are most appropriate for your store.