Progressive Web App for WordPress Plugin Documentation

WordPress Progressive Web App plugin is an innovative solution for eCommerce or blogging websites built on the WordPress platform. It converts your website into a fully complete Progressive Web App (PWA), offering users a quick, dependable, and engaging experience regardless of network connection or device.
The WordPress Progressive Web App plugin is simple to install and use, requiring no technical knowledge or coding experience. Once installed, the plugin improves the functionality of your website, allowing it to behave like a native app on mobile devices while maintaining full WooCommerce and WordPress capabilities.
Its main advantages are the WordPress Progressive Web App plugin’s dependability and speed. Using cutting-edge technologies, PWAs provide blazing-fast load times even on sluggish network connections. This smooths the user experience on any device or location, lowering bounce rates and increasing conversions.
A better user experience is also provided by the WordPress Progressive Web App plugin, which has features like offline access, push notifications, and an aesthetically pleasing UI. Customers continue to return, and user engagement is enhanced as a result.
With the help of this plugin, the admin can set up any website, including e-commerce (WooCommerce) and blogging (Simple WordPress), as a Progressive Web App (PWA). Users will be able to access your website by opening the app on their mobile device, and they will be able to interact with it via an interface similar to that of an app. Users who revisit your website can choose to receive push notifications on their desktop and mobile devices. WordPress and WooCommerce may power push notifications for newly published blogs, items, sales, offers, and in-stock reminders.
Together with these advantages, the WordPress Progressive Web App plugin protects user data and transactions using industry-standard encryption technology. The plugin is updated frequently to ensure it remains compatible with the latest security and performance standards.
The inexpensive nature of the WordPress Progressive Web App plugin is a further significant advantage. PWAs are comparatively cheap and straightforward to create, in contrast with traditional native mobile apps, which makes them an affordable option for eCommerce companies trying to reach a wider audience and interact with clients in novel ways.
The WordPress Progressive Web App plugin is an excellent option for eCommerce companies trying to improve the usability and functionality of their websites. This plugin is the best option for those who want to upgrade their WordPress or WooCommerce website due to its better security measures, intuitive interface, and fast and dependable performance.
Note: WooCommerce and WordPress can be used with this WordPress plugin for Progressive Web Apps.
Note: This plugin should function with a secure server (https).
Why choose our plugin?
Our products stick to WordPress’s quality requirements in security, quality, performance, and contemporary coding standards. Envato has given us a WP Requirements Compliant Badge for our CodeCanyon Profile.
Installation of WordPress Progressive Web App
The customer must log in to WordPress via the admin end. He must then navigate to the menu area, hover his cursor over the Plugins menu to open a submenu, and select the Add New submenu.

After that, the user must click the Upload Plugin button to upload the plugin zip file.

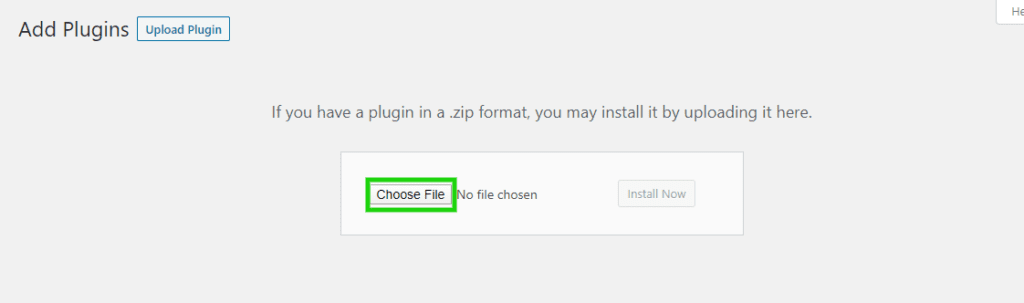
The image below will appear once you click the Upload Plugin button. The plugin can then be browsed by clicking the Choose File button.
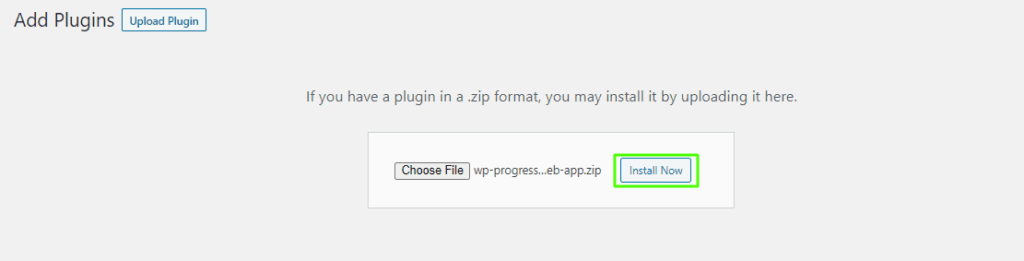
Next, when you select the WordPress Progressive Web App plugin zip file, your chosen zip file shows up here. Finally, click the Install Now option to install the WordPress Progressive Web App plugin.
To use the WordPress Progressive Web App plugin, click Activate Plugin after the plugin has been installed.

Creating Firebase Project Credentials for Push Notifications
You must enter your Firebase Project Credentials in the module setup to utilize this module for push notifications. Please click this link: https://console.firebase.google.com/ and follow the instructions below to create them.
Step 1:
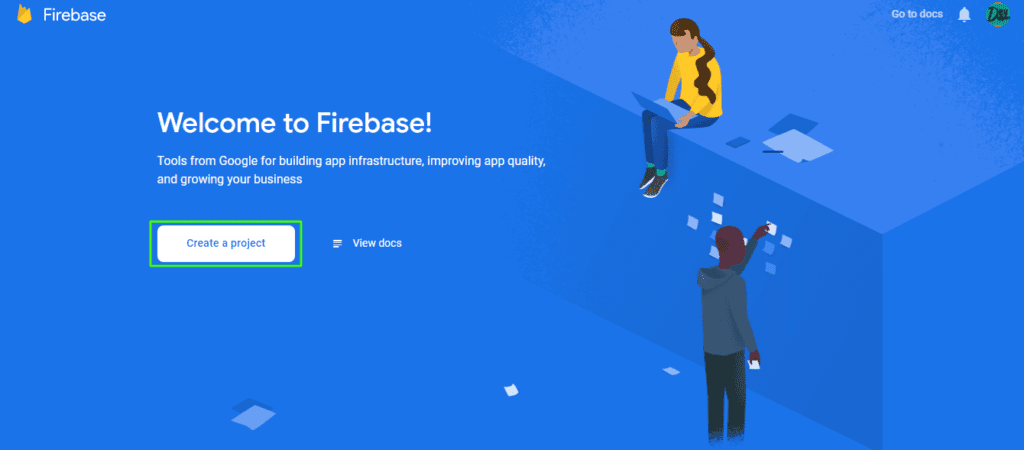
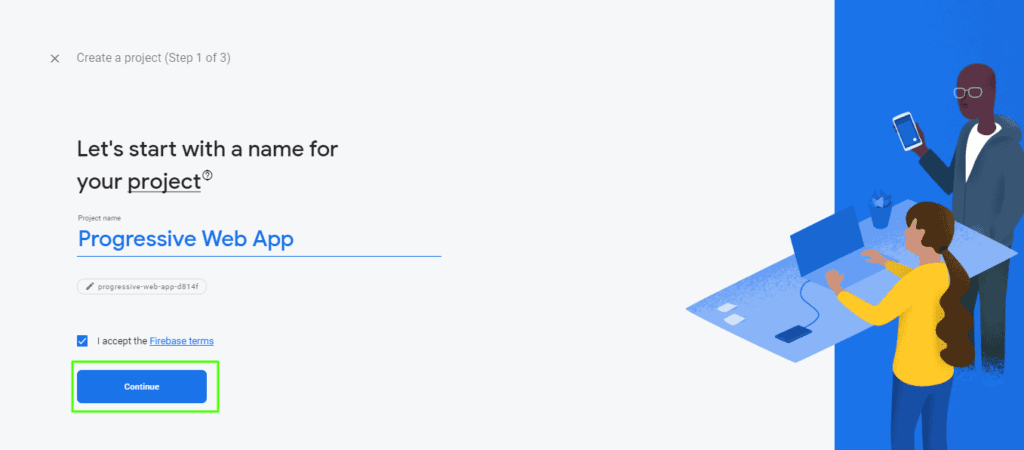
To start a Firebase project, click the Create a Project button.
Enter the project’s name now, choose “I accept the Firebase terms,” and click “Continue.”
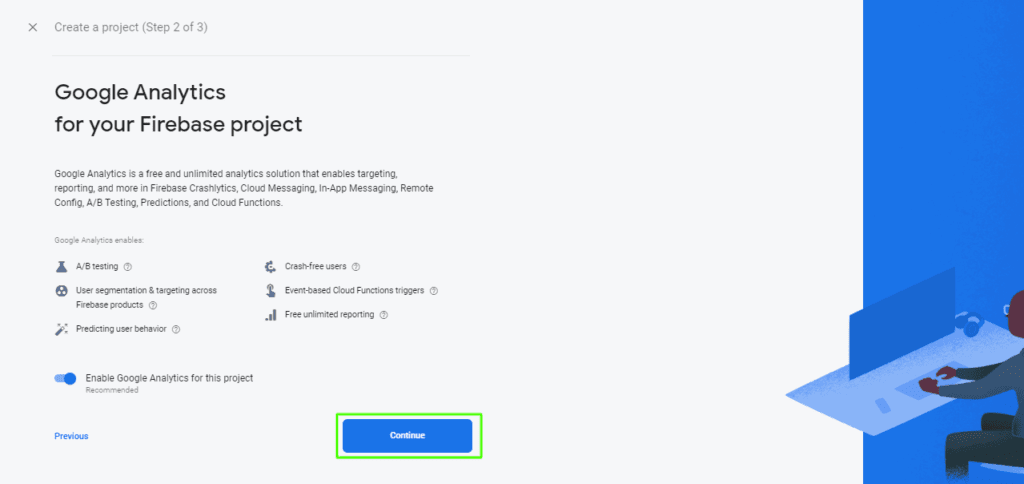
After that, click Continue after enabling Google Analytics for your project.
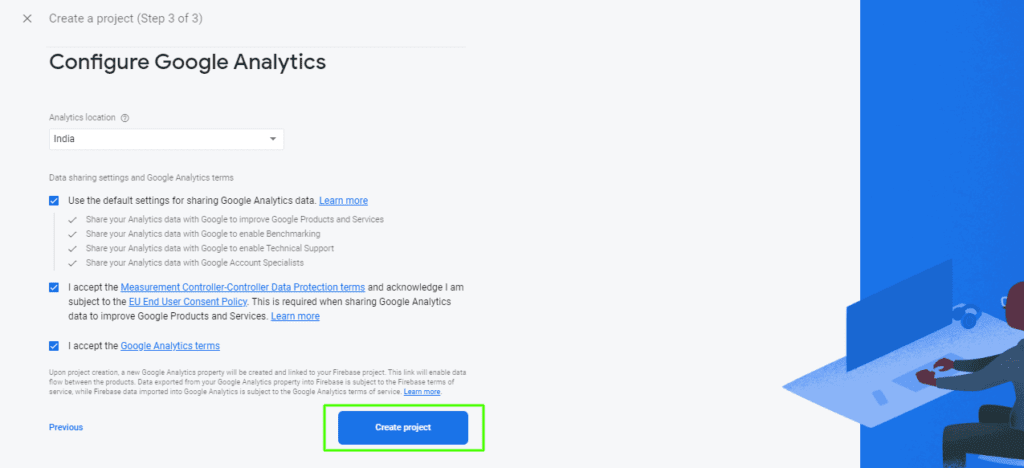
After that, select Create Project after selecting every box on the final step.
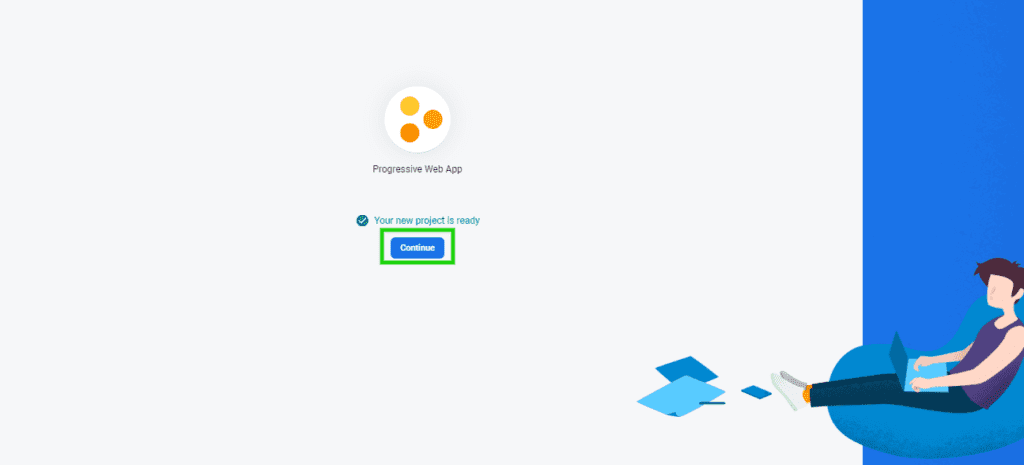
When your project is ready to use, a confirmation page will appear in a few seconds. Click Continue.
Step 2:
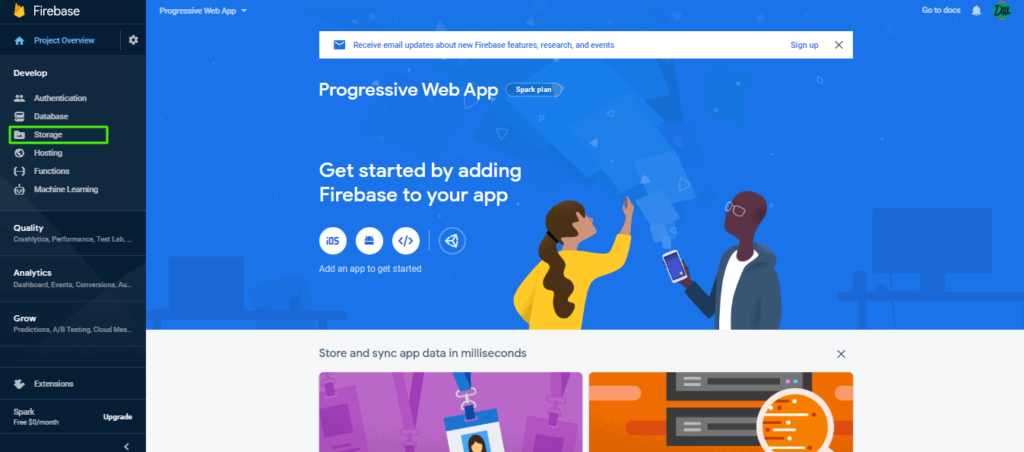
Click Storage once your new project has been created.
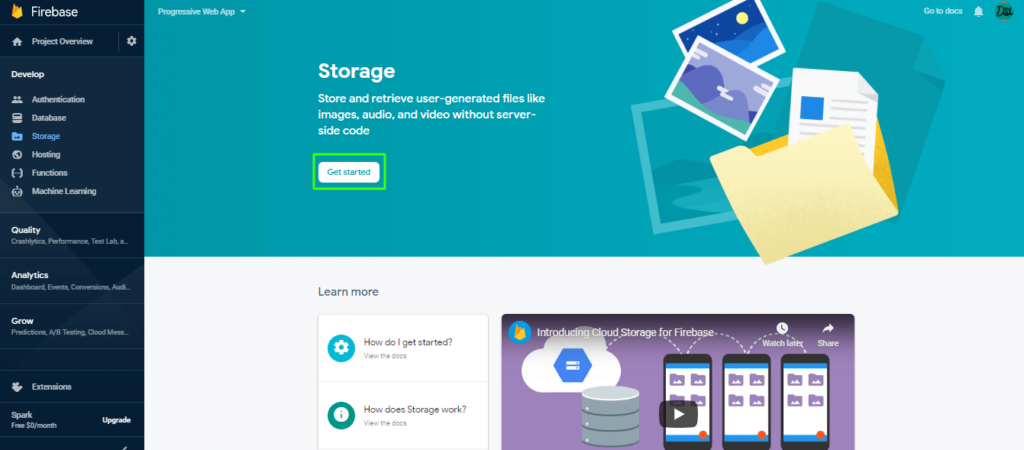
Next, select the Get Started button.
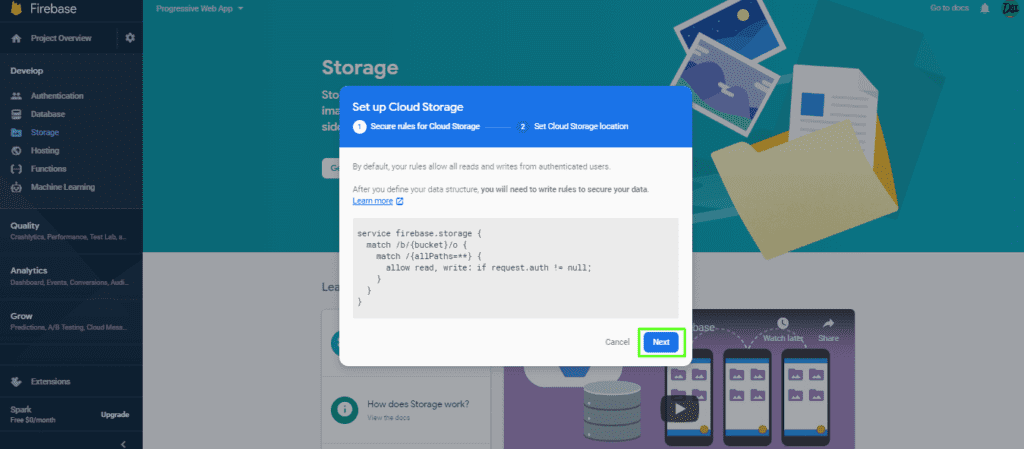
Next, select the Next button.
Step 3:
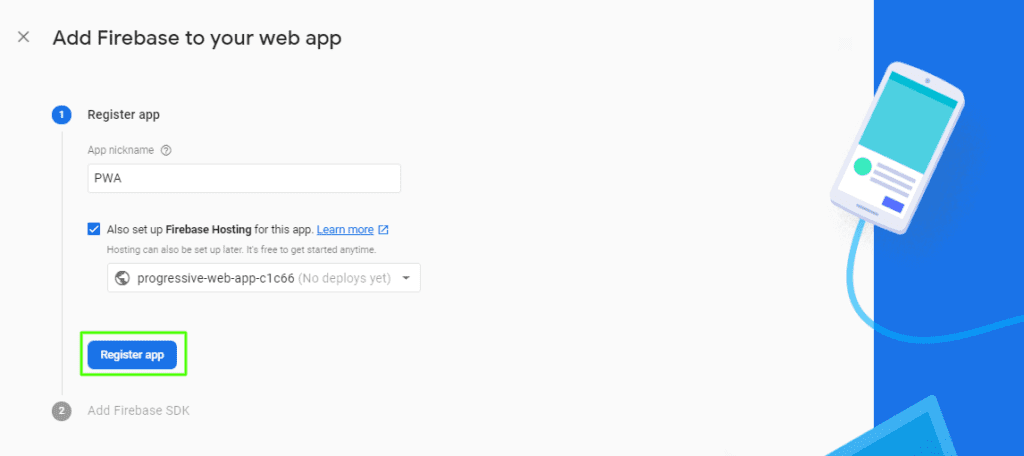
Next, select Project Overview and then click the Add an App to get started button.

Click the Register App button after entering the App nickname and selecting Firebase Hosting.
Next, select the Next button.
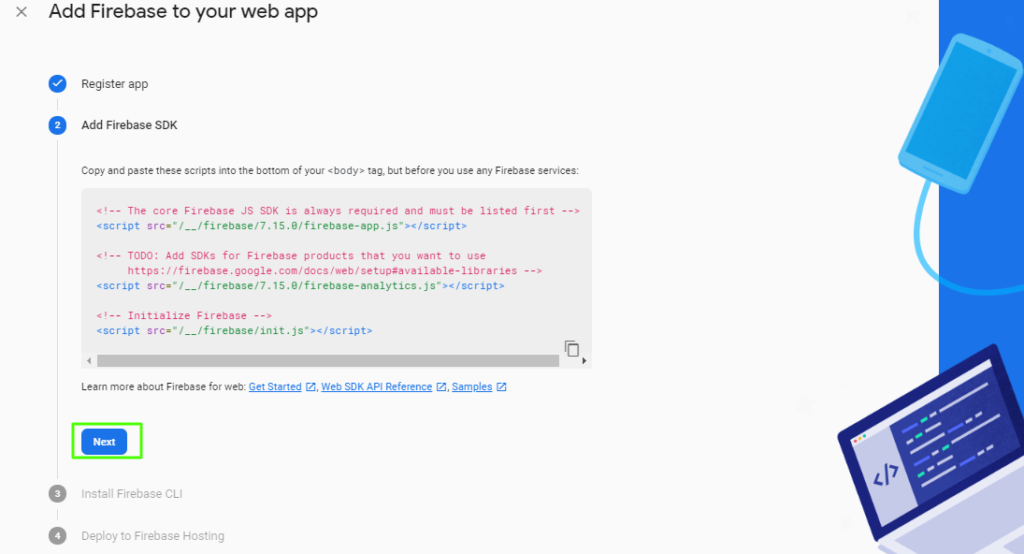
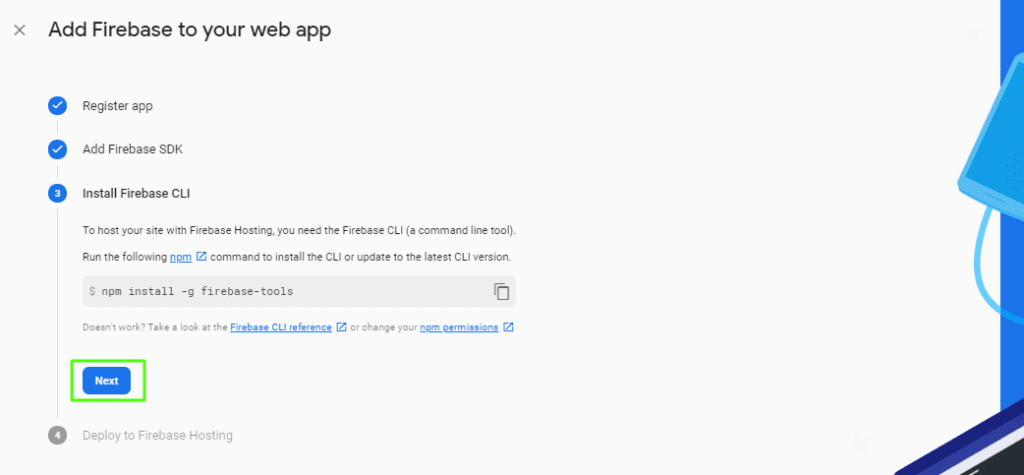
Click the Next button once more.
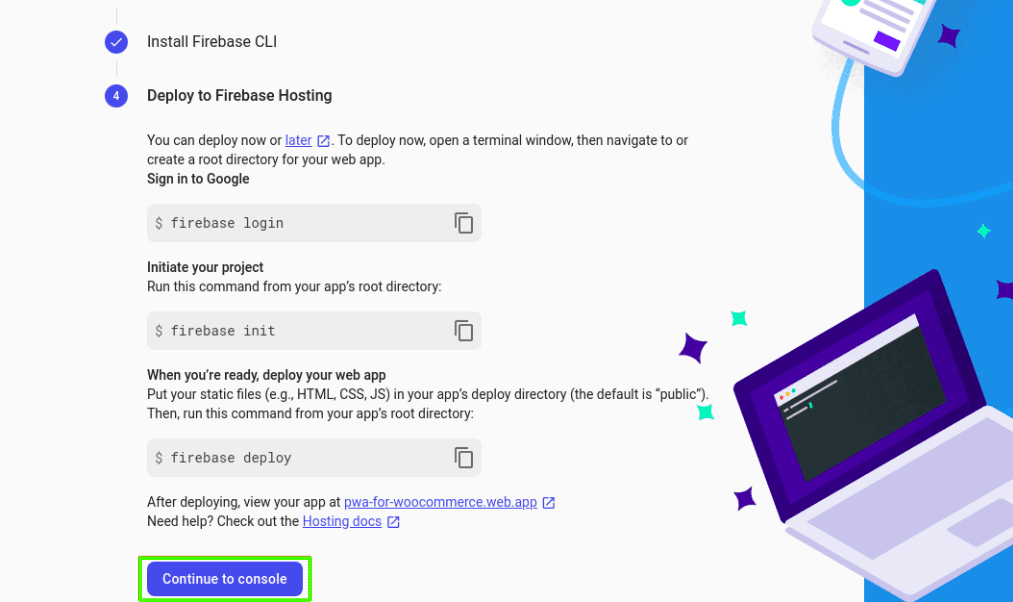
Next, select Continue to console by clicking.
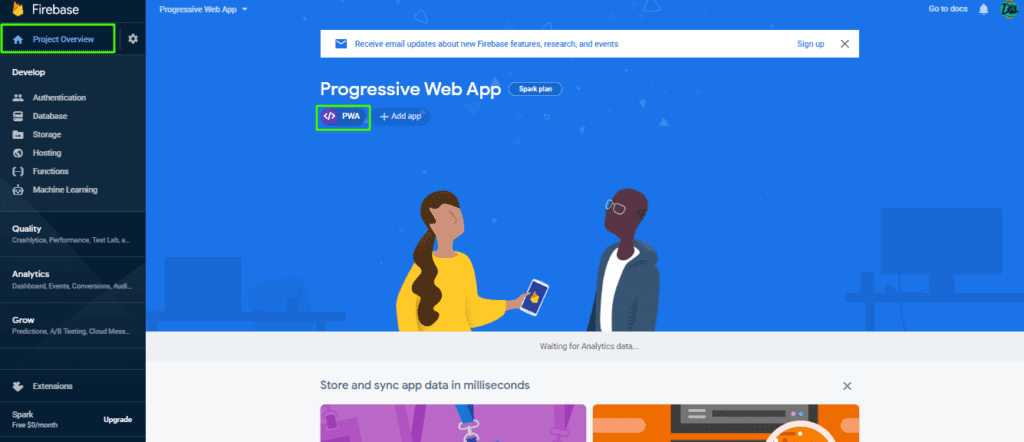
Proceed to the Project Overview section, choose the newly added App nickname, and then select the settings icon.
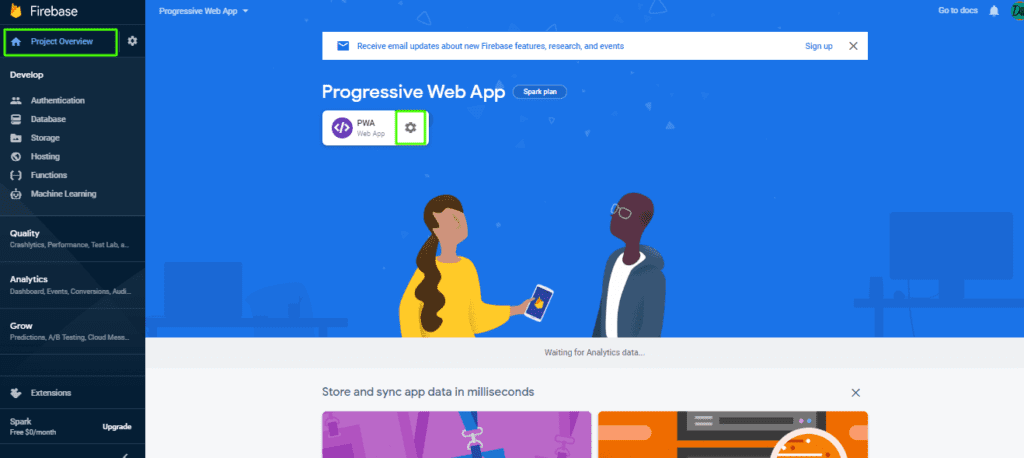
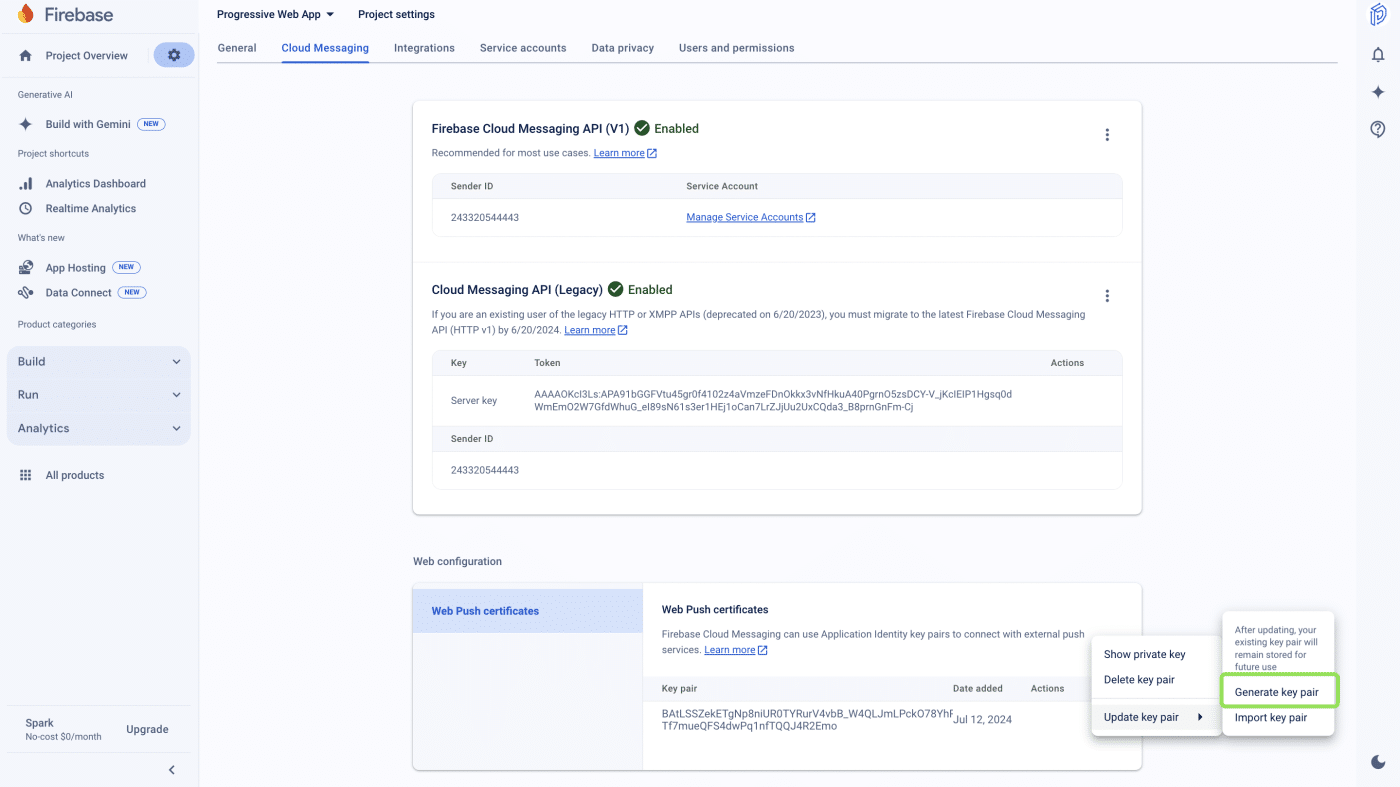
Step 4:
Now, select the Cloud Messaging tab. Enable if the Firebase Cloud Messaging API (V1) is not enabled and its Sender ID is used in the plugin’s option GCM Sender ID. Generate a Web Push Certificate key pair so you can use its public key in the plugin configuration.
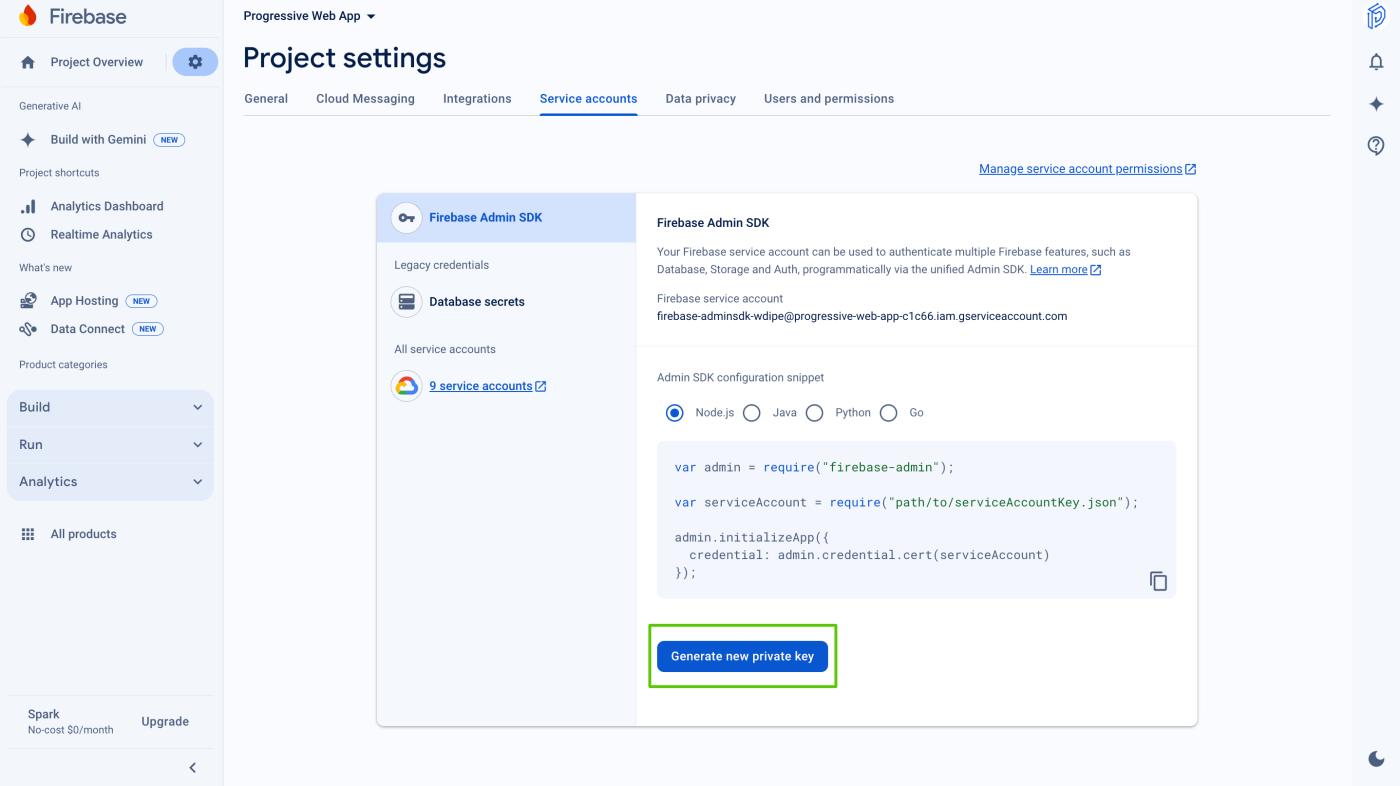
Step 5:
In the Service Accounts tab, please click on the Generate new private key button. It will download the JSON file for you which you need to upload in the plugin configuration to use the push notification feature.
Step 6:
On the General page, you’ll see your added apps below and a part of the Firebase SDK snippet. To access the Firebase Config, navigate to this section and select the Config option.
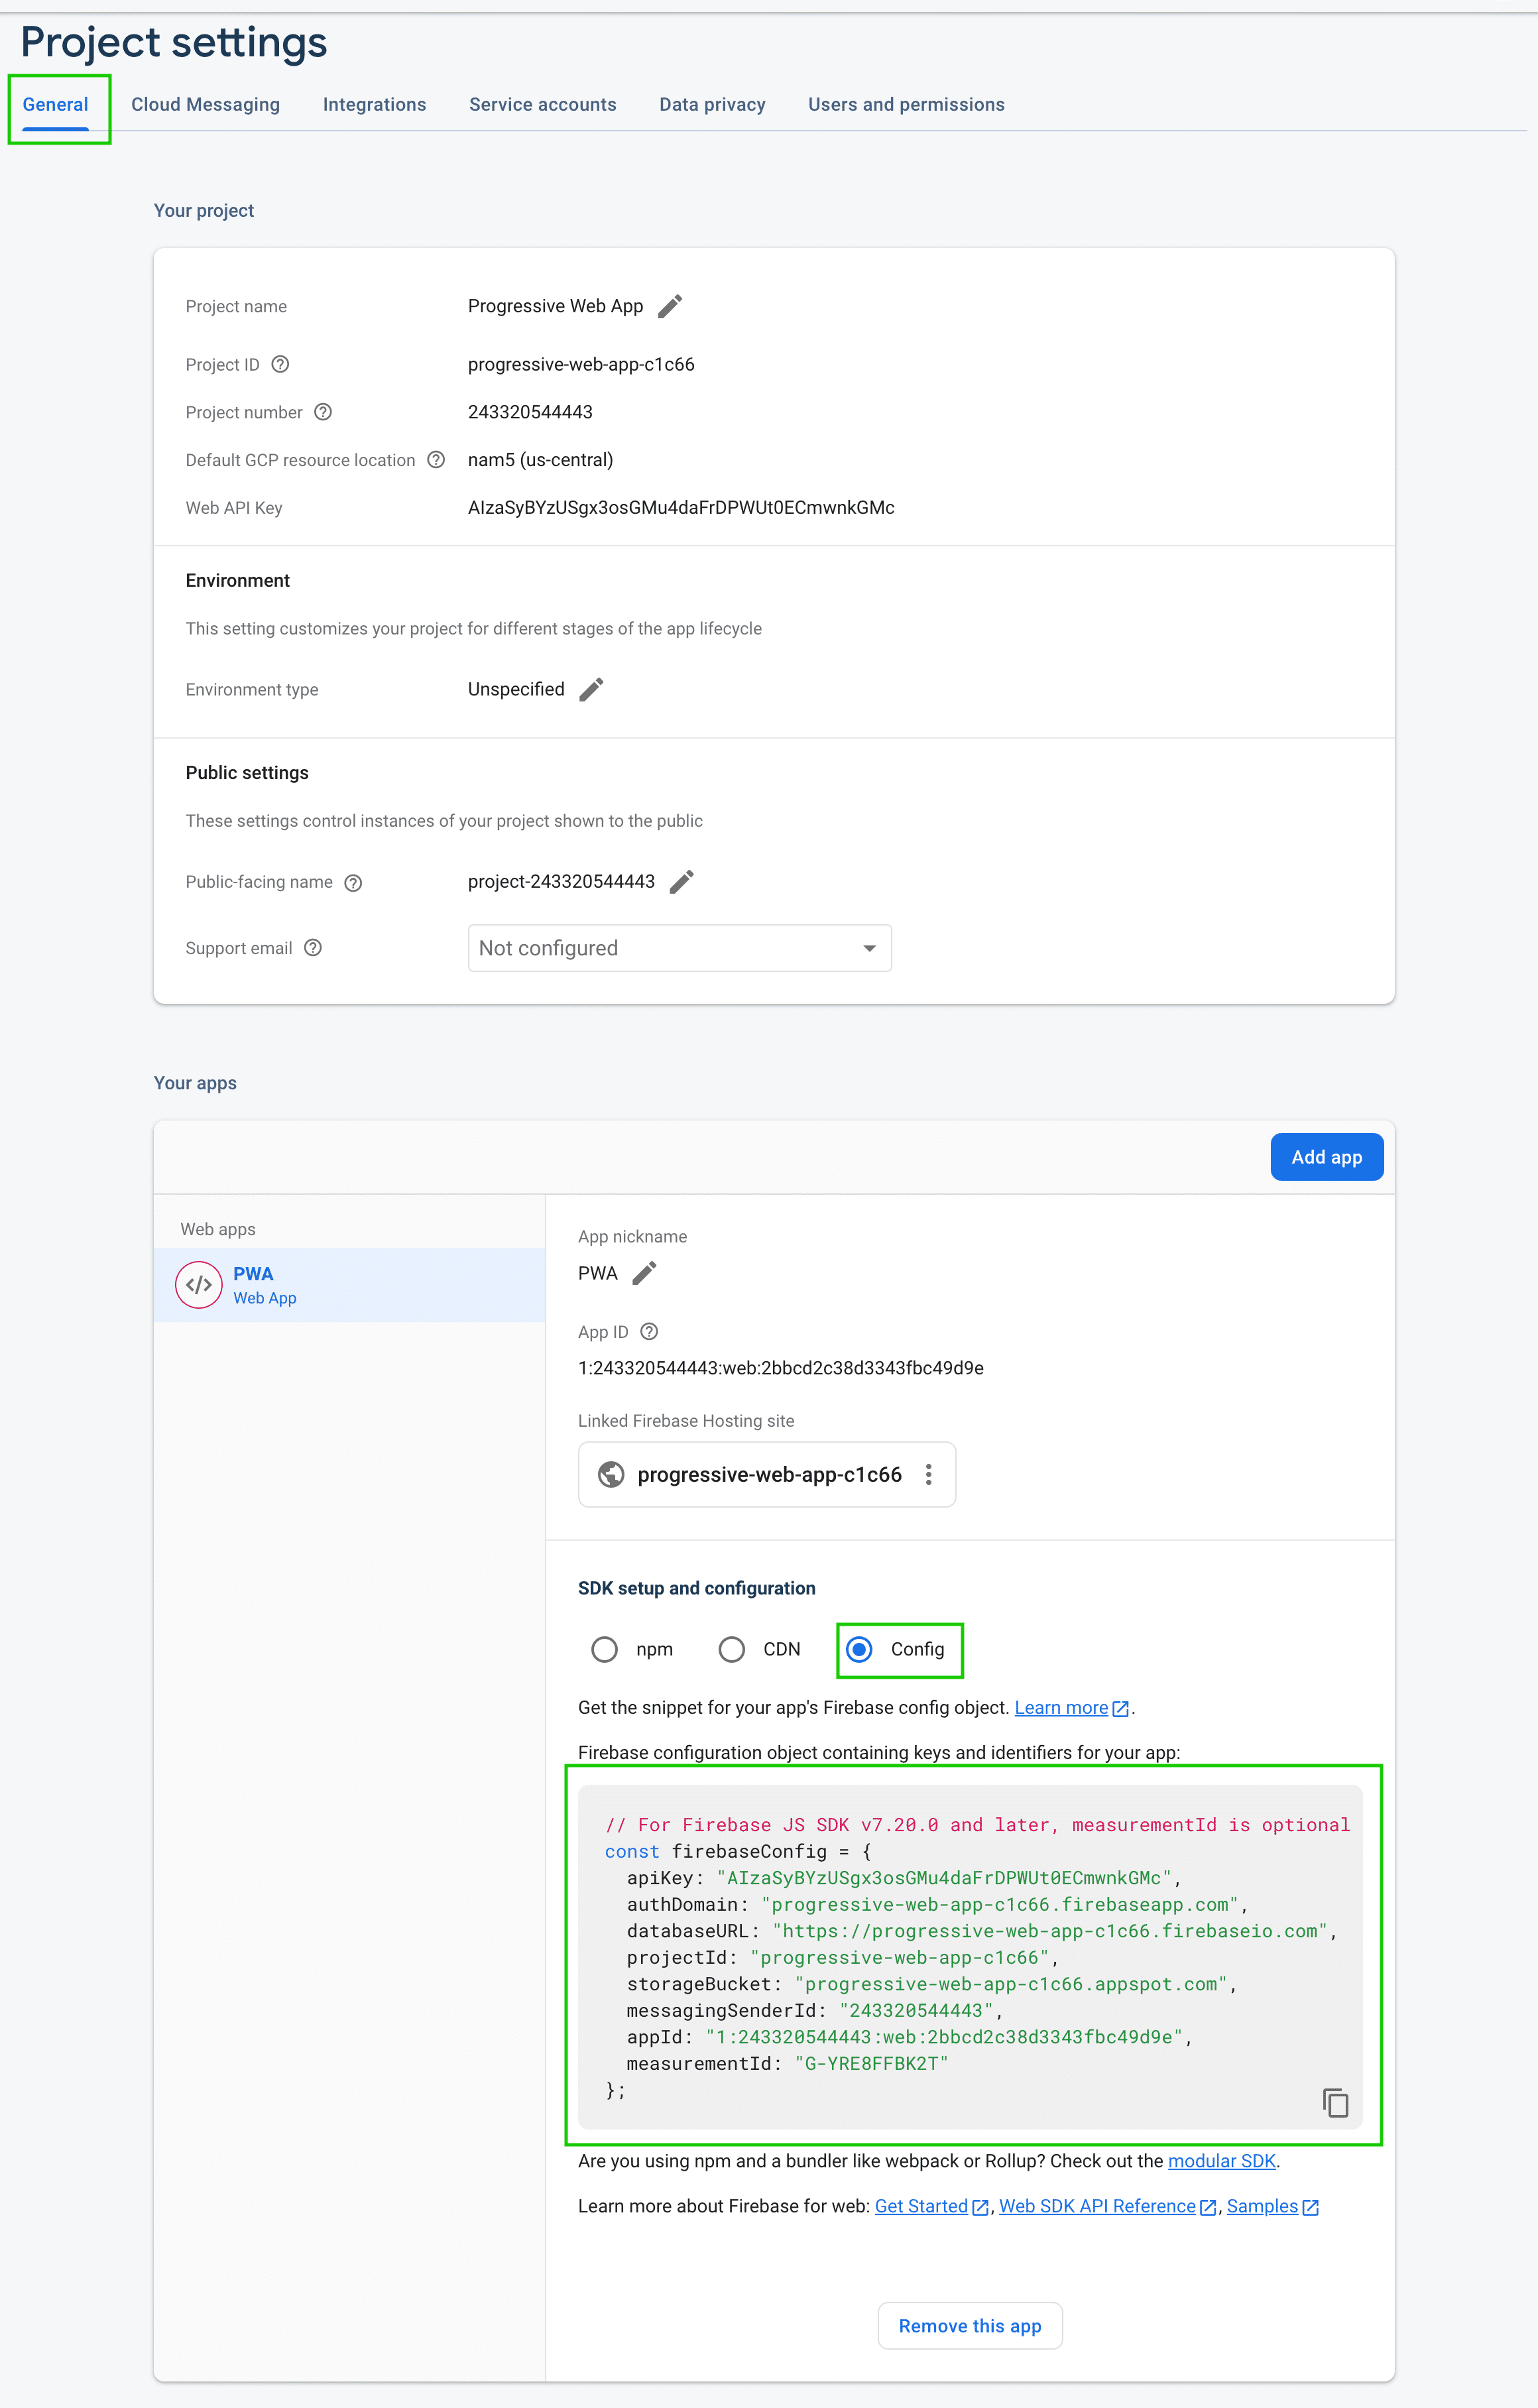
Copy the Firebase Config and Server ID; they will be used in the plugin configuration.
Admin End
Now, click Configuration to go to the plugin’s configuration page or visit the DevDiggers Plugins to access the plugin.

General Configuration
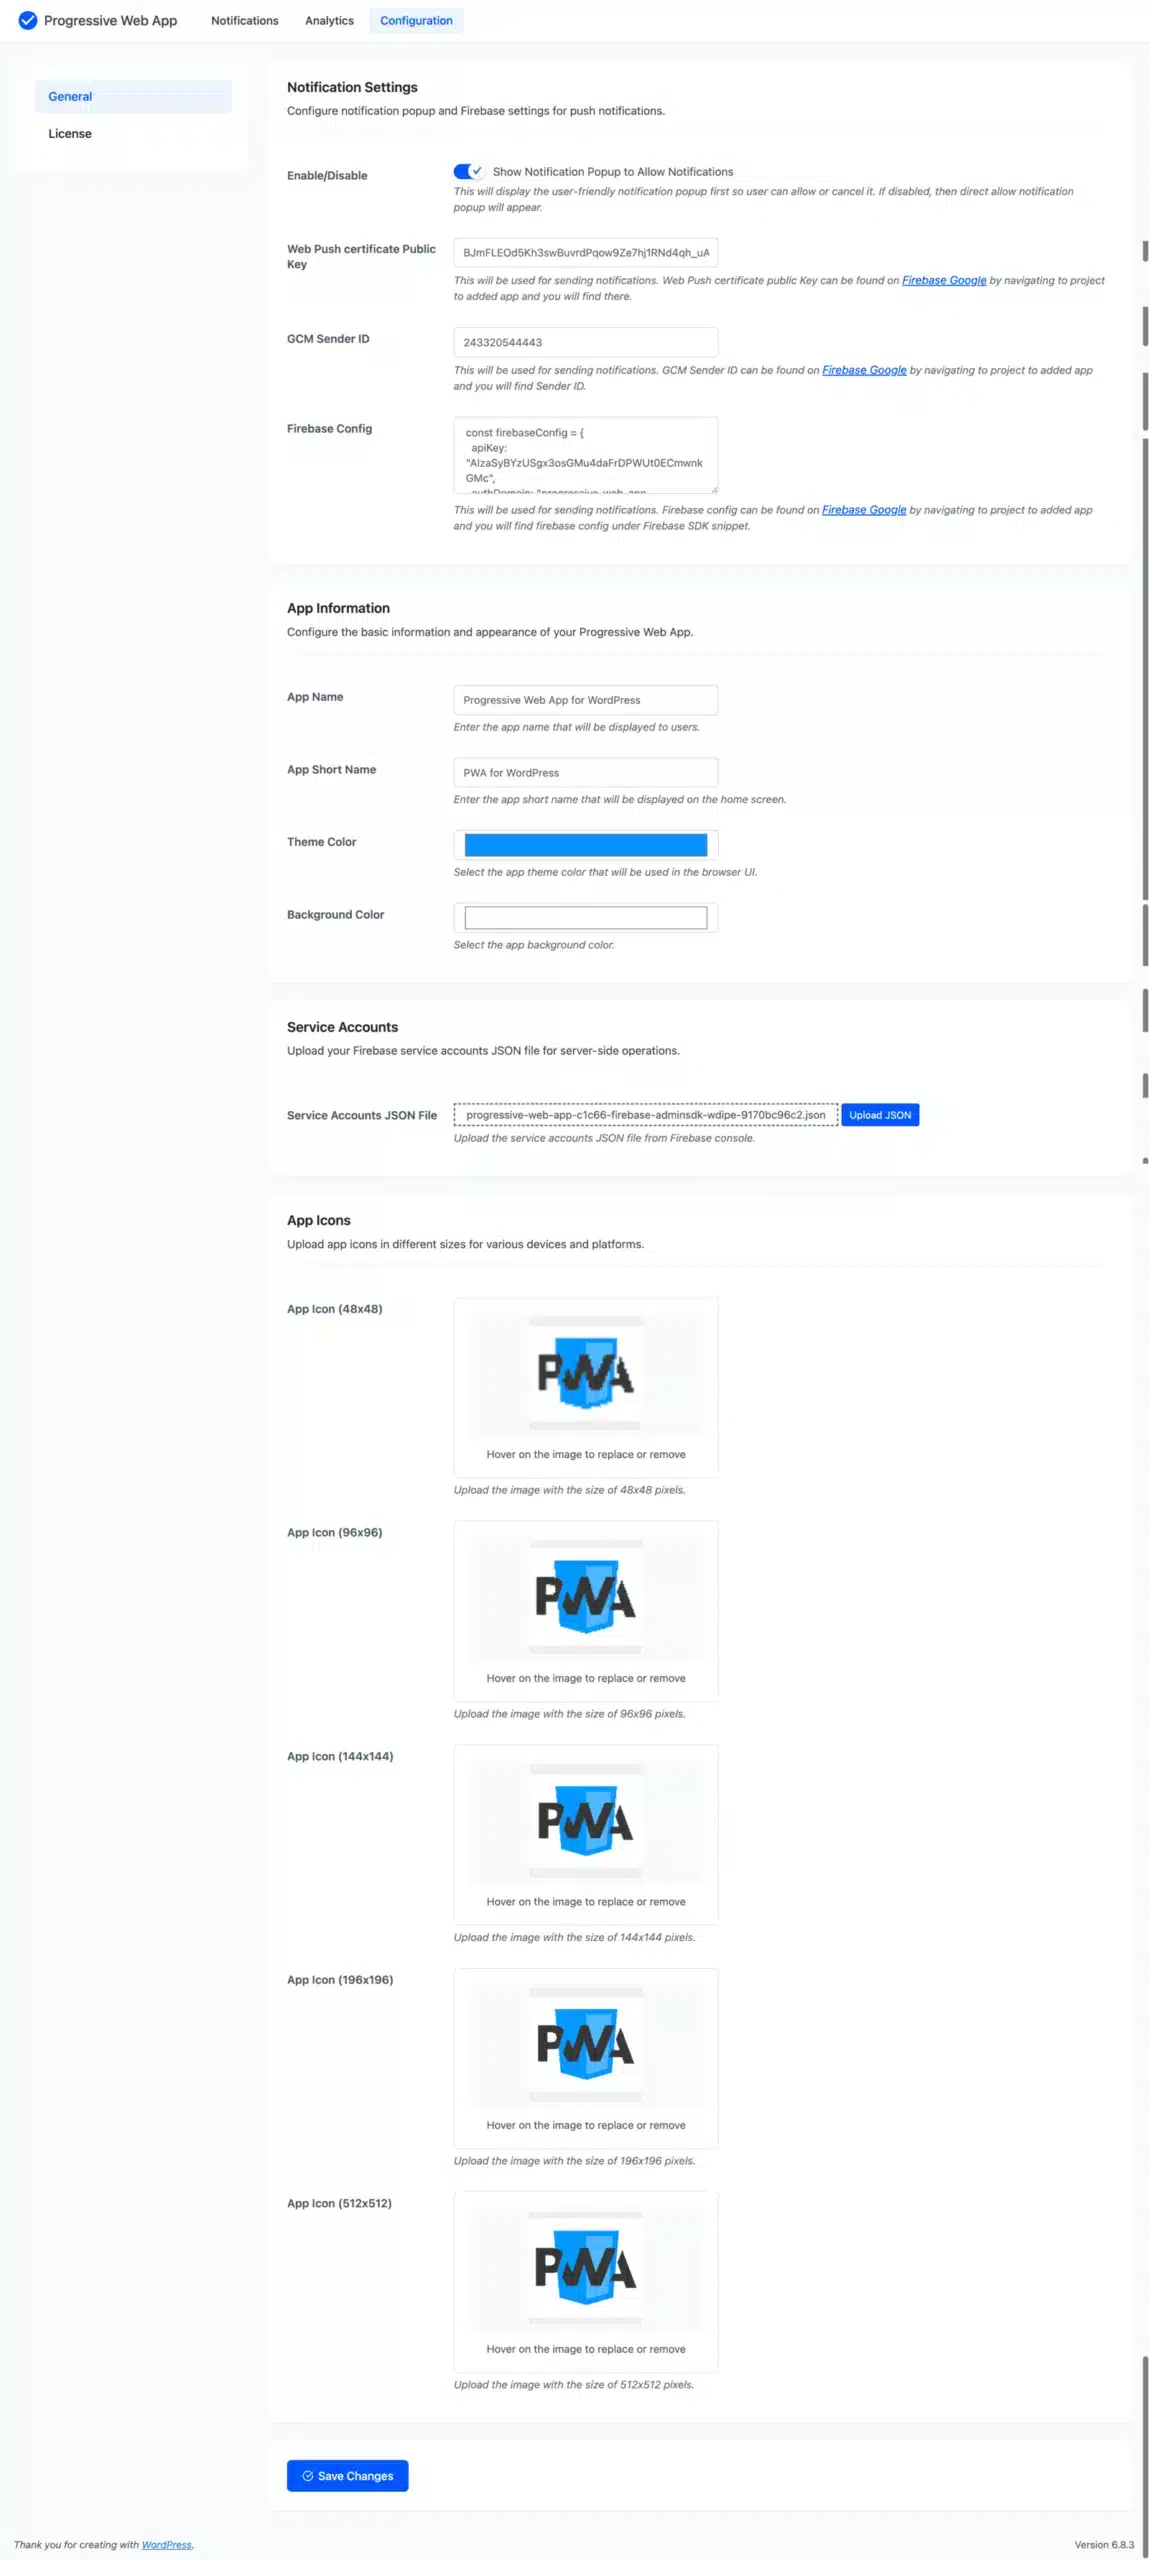
Notification Settings
Configure notification pop-up and Firebase settings for push notifications.
- Show Notification Popup to Allow Notifications: This will display the user-friendly notification pop-up first, so the user can allow or cancel it. If disabled, then a direct allow notification pop-up will appear.
- Web Push Certificate Public Key: This will be used for sending notifications. Web Push certificate public Key can be found on Firebase Google by navigating to the project, to the added app, and you will find it there.
- GCM Sender ID: This will be used for sending notifications. GCM Sender ID can be found on Firebase Google by navigating to the project, to the added app, and you will find the Sender ID.
- Firebase Config: This will be used for sending notifications. Firebase config can be found on Firebase Google by navigating to the project, to the added app, and you will find Firebase config under the Firebase SDK snippet.
App Information
Configure the basic information and appearance of your Progressive Web App.
- App Name: Enter the app name that will be displayed to users.
- App Short Name: Enter the app short name that will be displayed on the home screen.
- Theme Color: Select the app theme color that will be used in the browser UI.
- Background Color: Select the app background color.
Service Accounts
Upload your Firebase service accounts JSON file for server-side operations.
App Icons
Upload app icons in different sizes for various devices and platforms.
Push Notifications
Here, the admin may view a list of additional notifications and perform operations such as searching or editing any previously added notifications, deleting any notifications, or sending notifications to users.
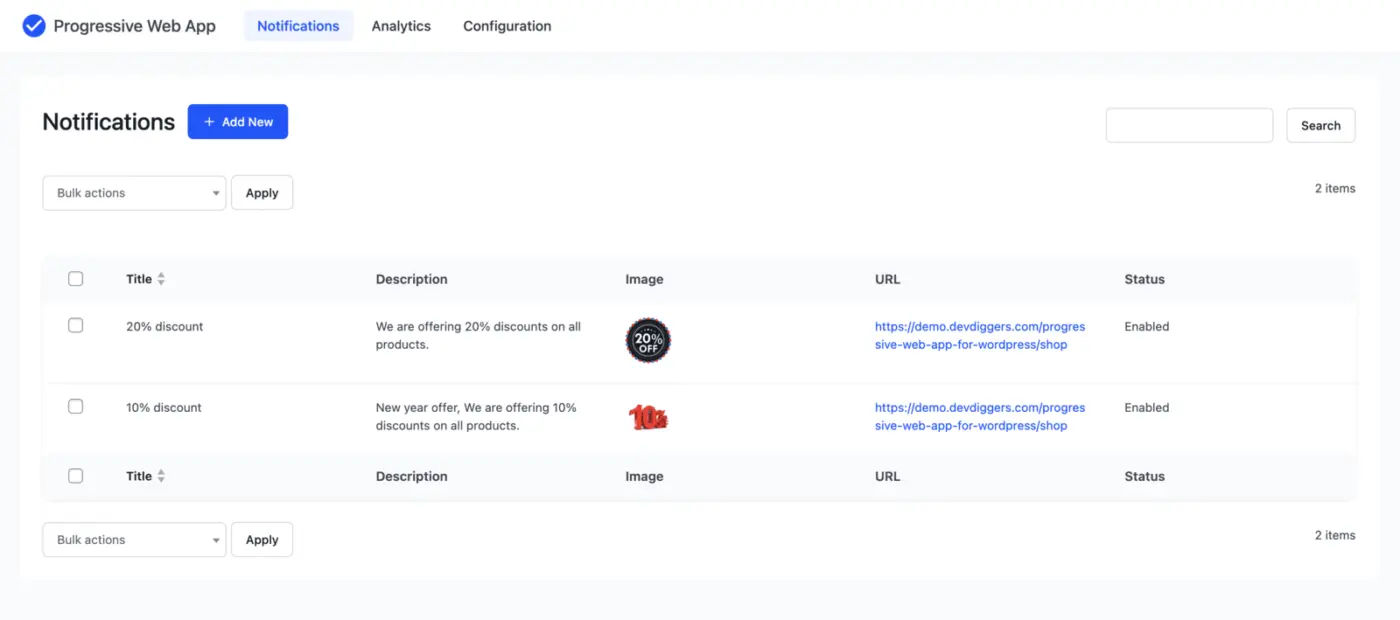
Add Notification
Admins can add new notifications from this page.

Title:
The title will appear in the push notification to the users.
Description:
The description will appear in the push notification to users.
Image:
The admin must upload or select a previously posted image, which will be displayed in the users’ push notifications.
URL:
Admin must enter the URL to which users get redirected when they click on the push notifications.
Status:
This is the notification status, which can be enabled or disabled.
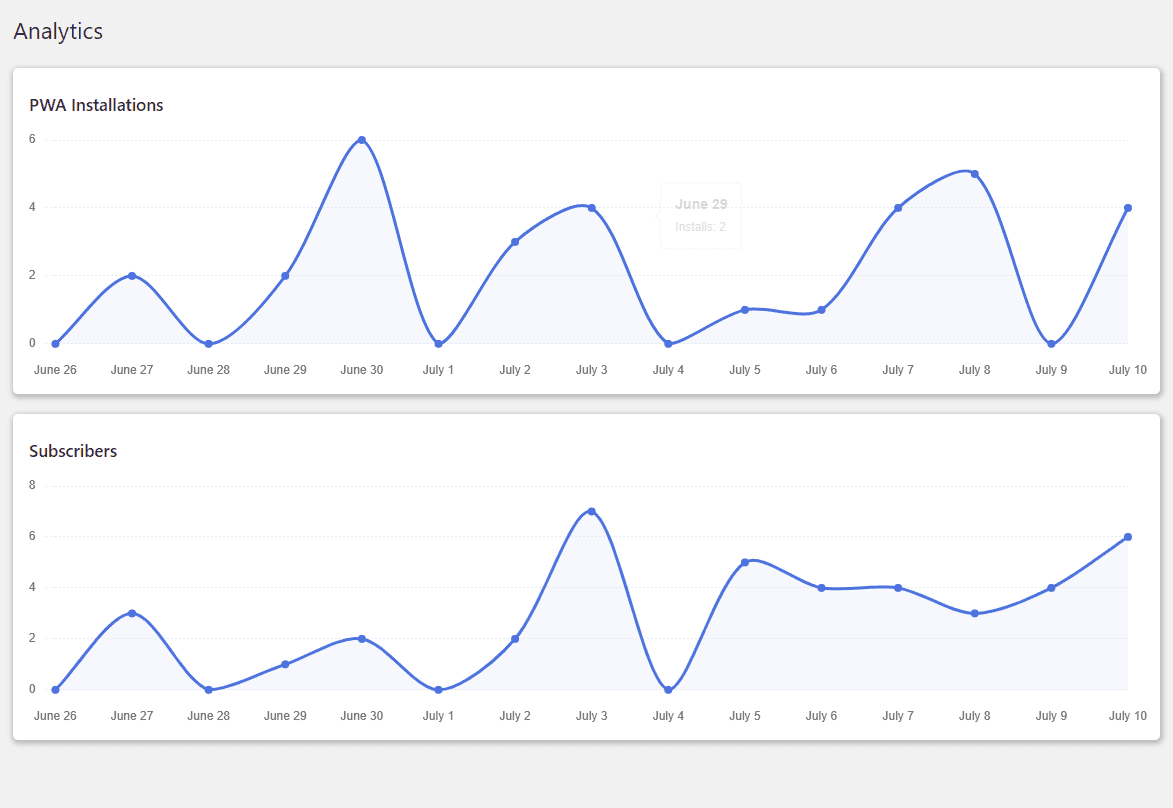
Analytics
Admin can review analytics reports for PWA installations and subscribers who have enabled notifications on your website. The admin can see the report’s most recent 15 days of data.
Customer’s End
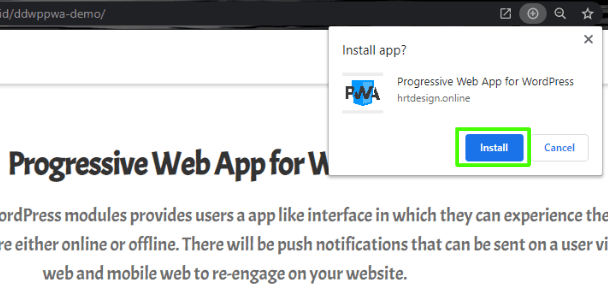
Progressive Web Desktop App:
Customers can visit your website and download the app using the plus icon, as illustrated in the image below. The program is then added to the customer’s desktop, and the user can use your site with the app.
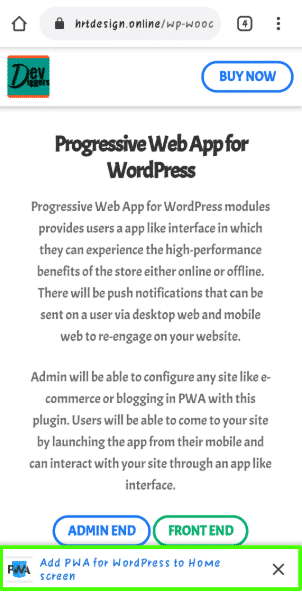
Progressive Web Mobile App:
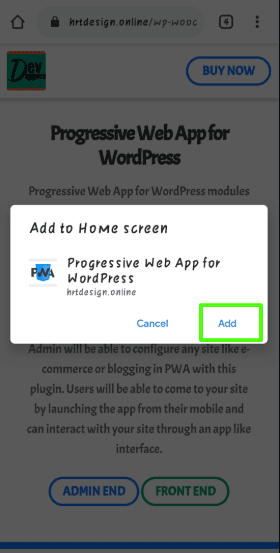
When a customer visits your site via a mobile browser, he or she will notice a popup to add the PWA to your Home screen option, from which he or she can add the PWA and use the app interface for your website. The steps are detailed in the images below.
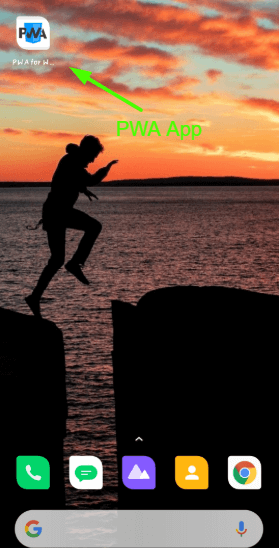
After adding the app, customers will see it on their mobile home screen, shown in the image below, from which they can access your website.
Push Notifications:
When the Admin sends a notification from the backend, users who have permitted notifications will receive it on their mobile phones and PCs.
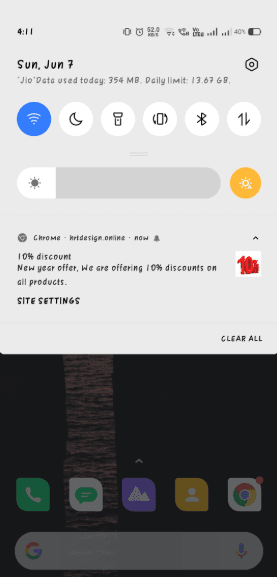
After clicking the notification, the app will open with the URL specified in the notification by the admin.
Multilingual
The admin can translate the plugin using the .pot file in the plugin’s i18n folder.
Support
If you have aIf you have any concerns, need assistance with our WooCommerce extensions, or want customizations, contact us through our contact page. We will do our best to provide immediate assistance.
Kartika Musle
Kartika Musle is a tech writer at DevDiggers covering WooCommerce features, web design, and development security. Her articles translate technically dense subjects into guides that a non-developer can follow without losing the detail that matters, drawing on a background that touches both design and development.
Join thousands of readers getting smarter every week.
10 responses
-
Hi partner,
Very cool this plugin and its tutorial.
How do I add the homescreen to appear on on mobile?
It just showed the notification.
Grateful for the support!-

Hi Sir,
Hope you are doing well
Thanks for the appreciation and you’ll get the popup to add the app on homescreen automatically. Kindly check this on our demo.
If you have purchased the plugin and facing this issue on your site so it also can be some configuration issue. Kindly share the admin details of your site at support@devdiggers.com so our support team can look into your query.
Thanks & Regards-
Good Morning! Homescreen opens in all browsers but samsung internet browser. Another thing: I would like to create a direct link to install pwa. I want to insert this link in the direct mail I’m going to send to clients. Do you have a tutorial or manual? Greetings
-
It is not supported in local internet browser of samsung as PWA support is not given in it and PWA can only be download by opening the site in the supported browsers as it gets downloaded through the browser. Also, if you like our plugin, kindly share your feedback on CodeCanyon and Trustpilot.
-
-
-
-
Is this support only for android? what about Ios and windows ?
-
Yes PWA supports on Android, iOS as well as on Windows.
-
-
O plugin é válido para quantos dominios?
-
1 License can be used on 1 domain.
-
hello sir, i have setup all setting on my wordpress website according to your documentation but not working the plugin.
-
Kindly connect with us from our contact page explaining your issue with screenshots and the admin access to your site so our team can look into it.
-
Leave a Reply