You can fix common SSL issues in WordPress yourself in under 30 minutes, even if you have never touched a line of code. Most SSL problems come down to just six root causes, and each one has a simple, repeatable fix.
Before you start, make sure you have access to your WordPress dashboard and your hosting control panel. That single requirement trips up more beginners than any actual SSL setting.
In this guide, you will learn how to spot each SSL error by its symptoms, fix it step by step, handle SSL issues on WooCommerce checkout pages, avoid the mistakes that cause SSL problems in the first place, and confirm your fix actually worked.
What Is SSL, and Why Do These Issues Happen?
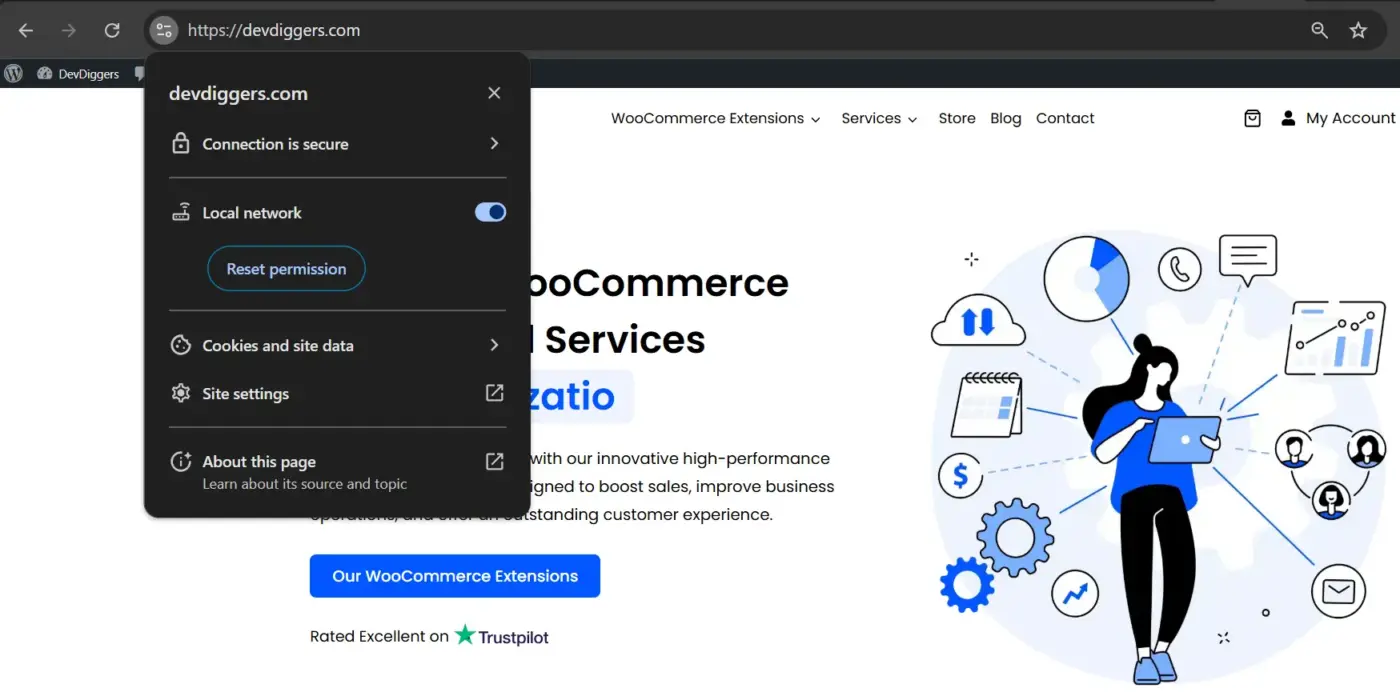
SSL, short for Secure Sockets Layer, is the technology that encrypts data moving between a visitor’s browser and your WordPress server. It is what turns your site’s address from http:// into https:// And puts a padlock icon next to it.
An SSL issue simply means something in that handshake broke. The certificate might not be installed correctly, part of your site might still be calling old HTTP links, or your server might be sending conflicting instructions about which version of your site to load. Every issue in this guide traces back to one of those three root causes.
How to Fix Common SSL Issues in WordPress: Quick Fixes at a Glance
Not sure which issue you have? Use this table to jump straight to your fix.
| Symptom | Likely Cause | Jump To |
|---|---|---|
| Site loads as “Not Secure” | SSL certificate not installed correctly | Issue 1 |
| No padlock icon, mixed content warning | Some images or scripts still load over HTTP | Issue 2 |
| “Too many redirects” error | Conflicting HTTP to HTTPS redirect rules | Issue 3 |
| Homepage is secure, inner pages are not | Hardcoded HTTP links in theme files | Issue 4 |
| Certificate expired warning | SSL certificate renewal was missed | Issue 5 |
| The site got slower after enabling SSL | Server not optimised for HTTPS traffic | Issue 6 |
This table alone can save you the guesswork most guides skip straight past.
Issue 1: SSL Certificate Not Installed Correctly
Your site still shows a “Not Secure” warning even though you paid for or activated an SSL certificate. This is the most common starting point for SSL issues in WordPress, and it usually means the certificate never fully connected to your domain.
- Log in to your hosting control panel, whether that is cPanel, Plesk, or your host’s custom dashboard, and look for an SSL/TLS section.
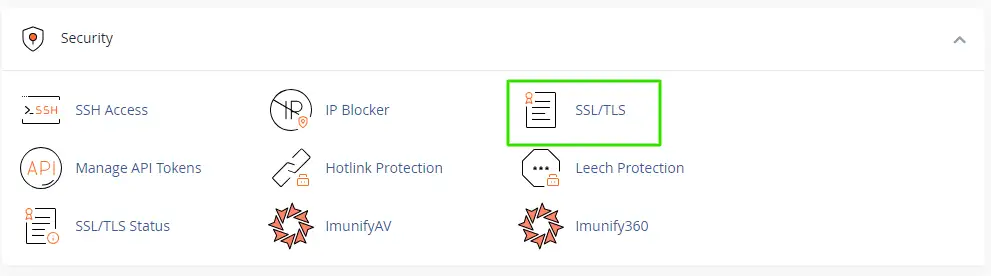
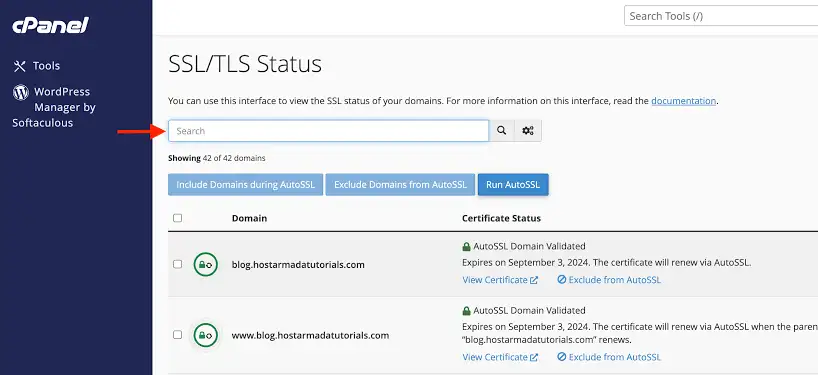
- Confirm that a certificate is listed as active for your domain. Most hosts issue a free certificate through Let’s Encrypt, so if nothing appears, request one directly from this section.
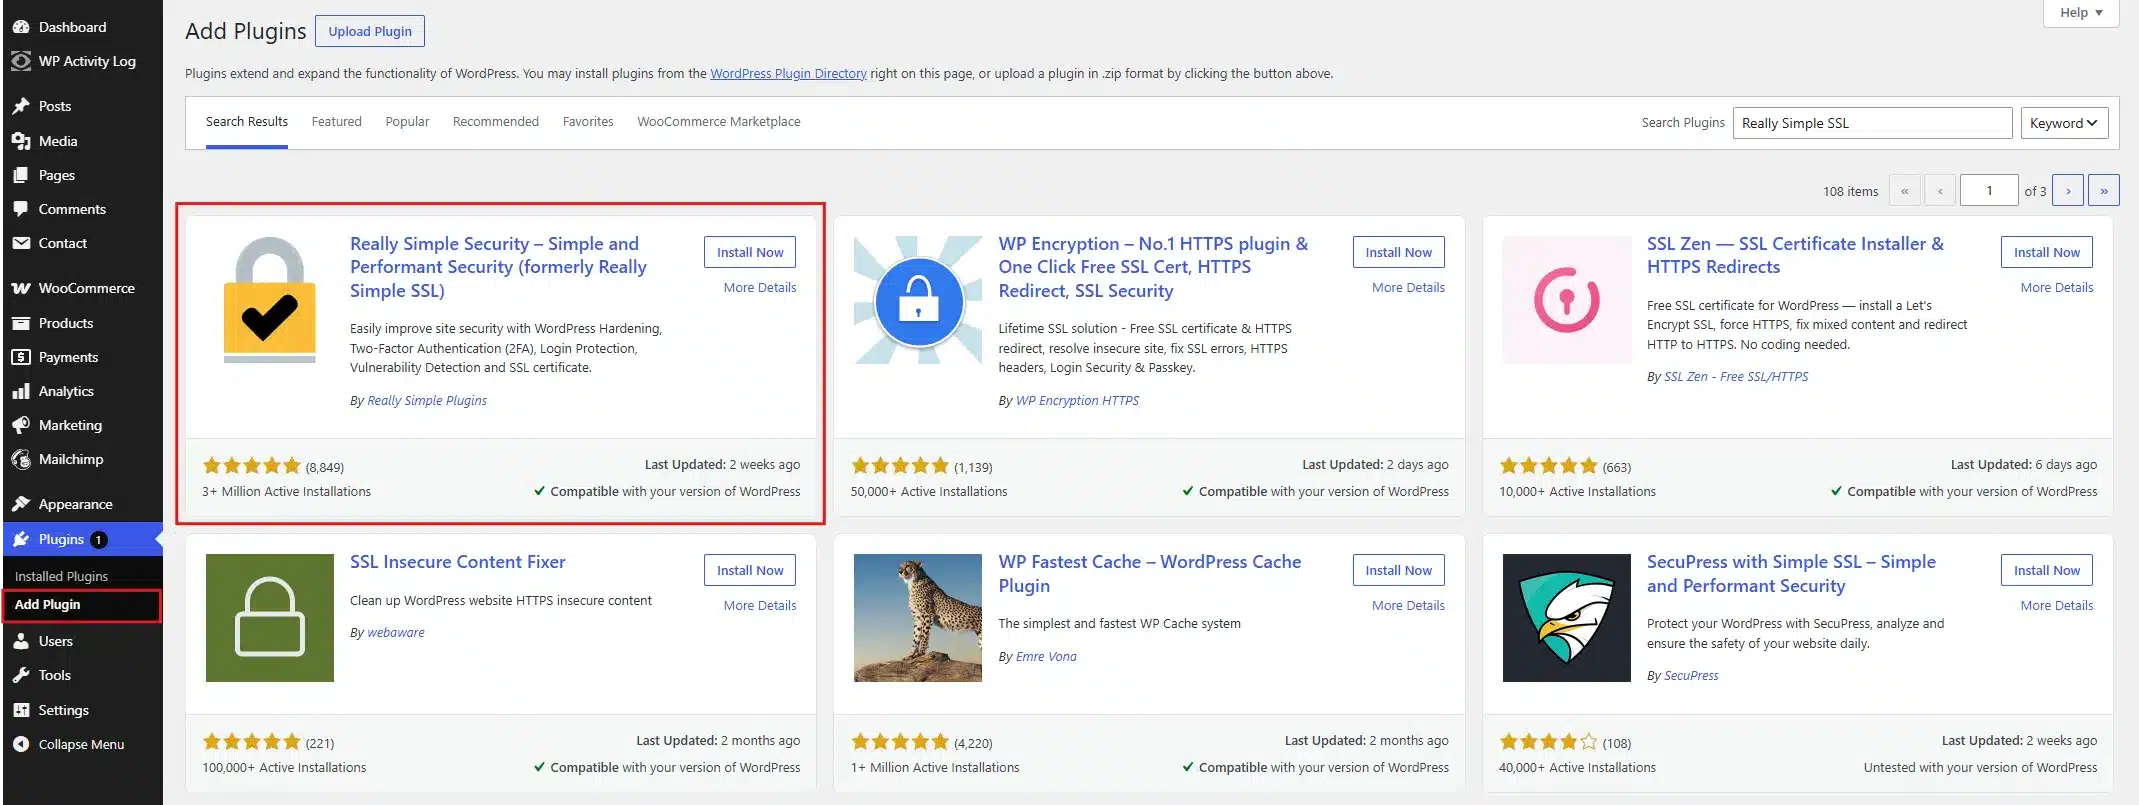
- Install and activate the Really Simple SSL plugin from your WordPress dashboard under Plugins > Add Plugin.
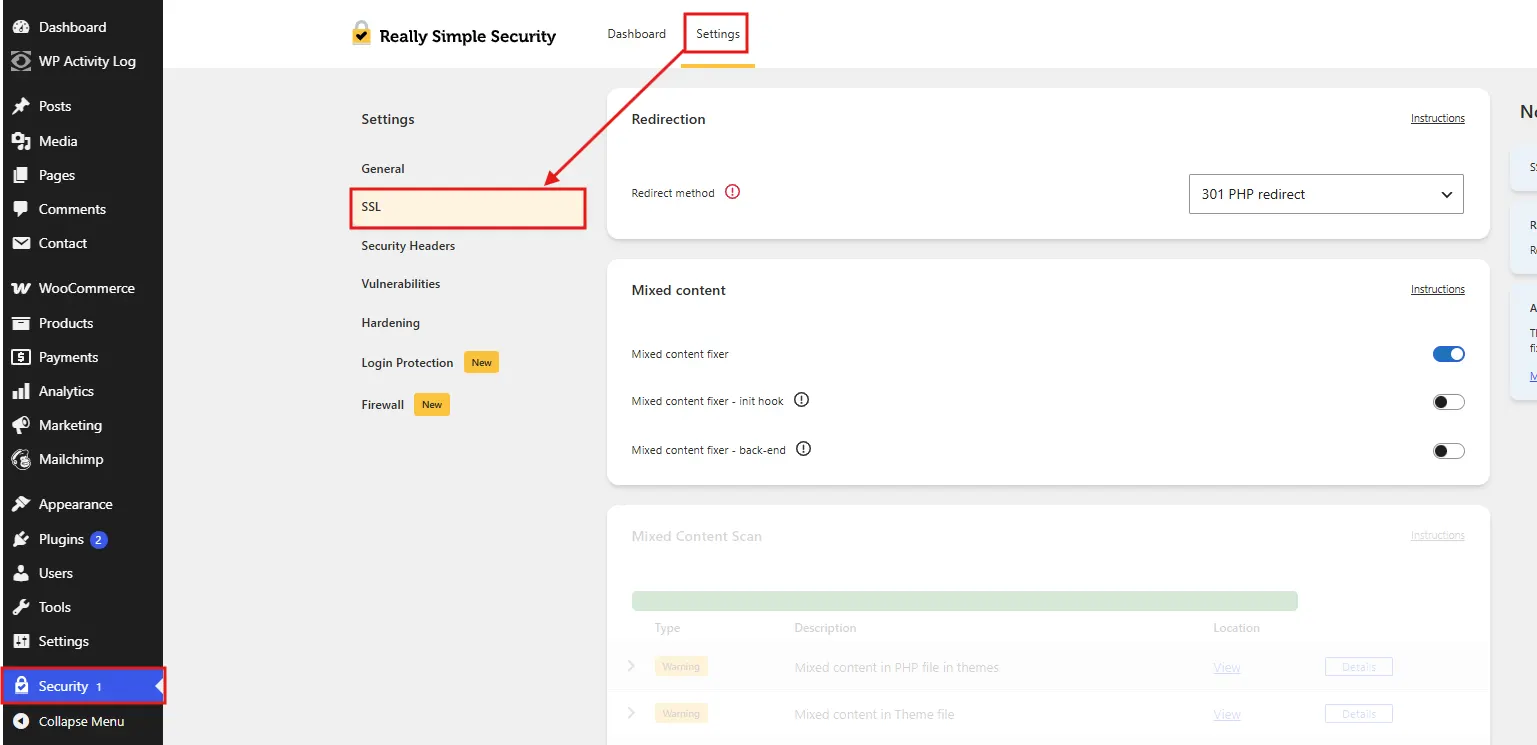
- Once it is active, go to Settings > SSL and confirm the plugin detected your certificate automatically.
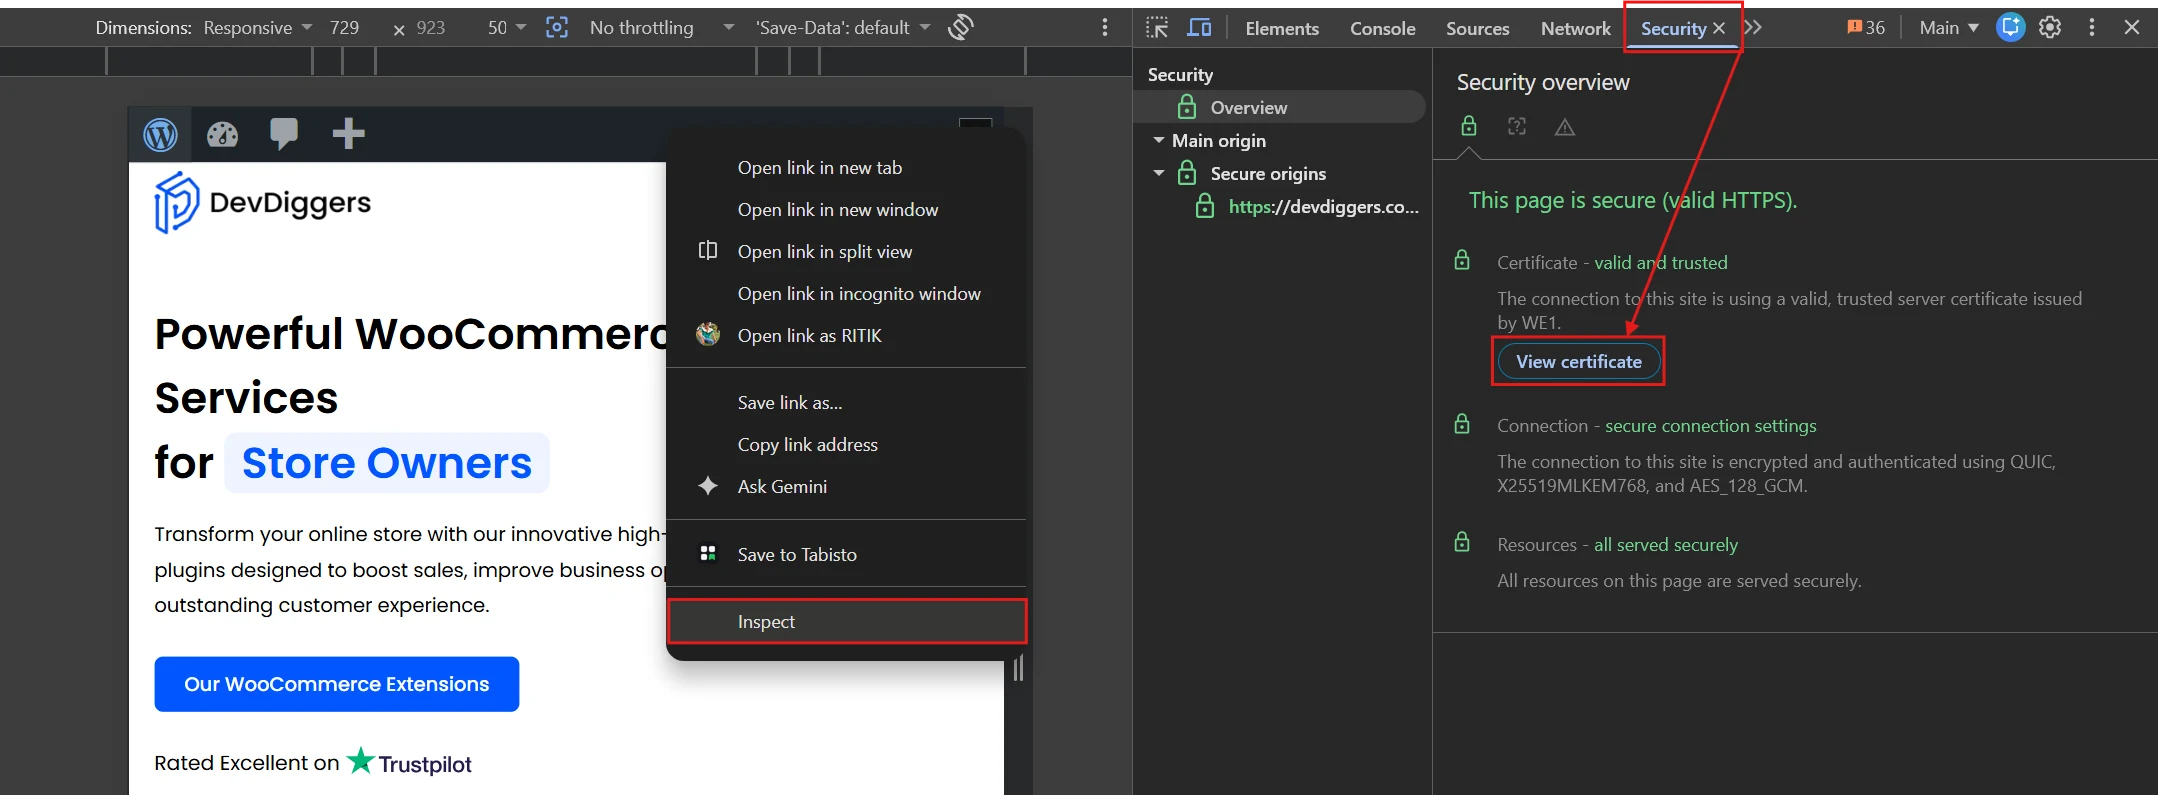
- Open your browser’s developer tools, click the Security tab, and confirm the certificate details match your domain exactly.
Some older hosting servers need a manual configuration update before they can handle HTTPS traffic correctly. If your host confirms the certificate is active, but your site still shows “Not Secure,” ask them to check server-level SSL support before you troubleshoot further on your end.
Issue 2: Mixed Content Warnings After Enabling SSL
Your site loads over HTTPS, but some images, scripts, or stylesheets still load over HTTP in the background. This is what blocks the padlock icon from appearing, even when your certificate itself is working fine.
- Go to Settings > General in your WordPress dashboard and confirm that the WordPress Address (URL) and Site Address (URL) fields both start with
https://.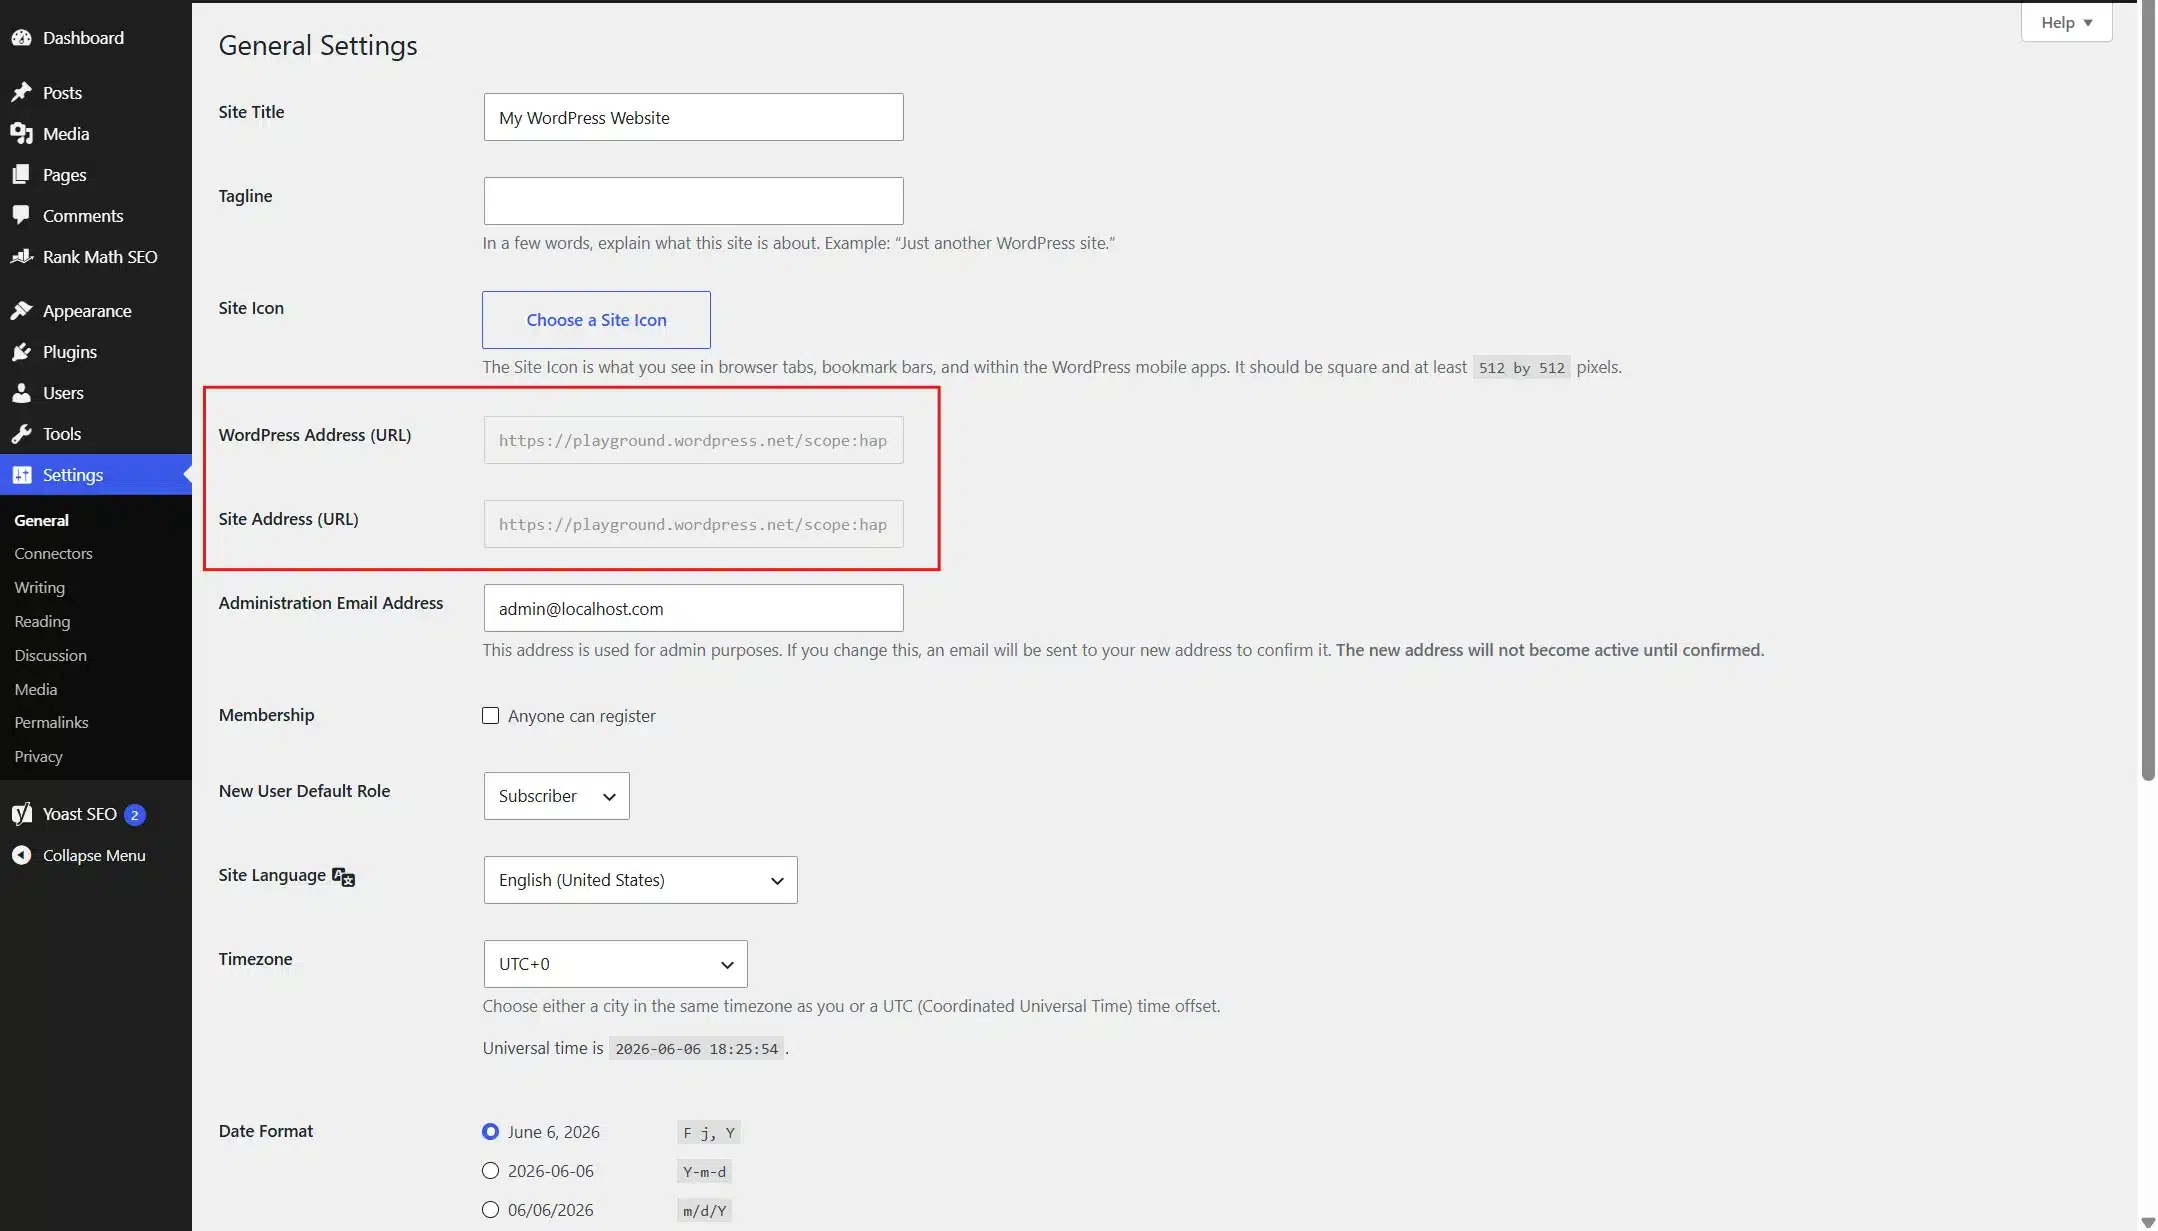
- Install and activate the Better Search Replace plugin from Plugins > Add Plugin.
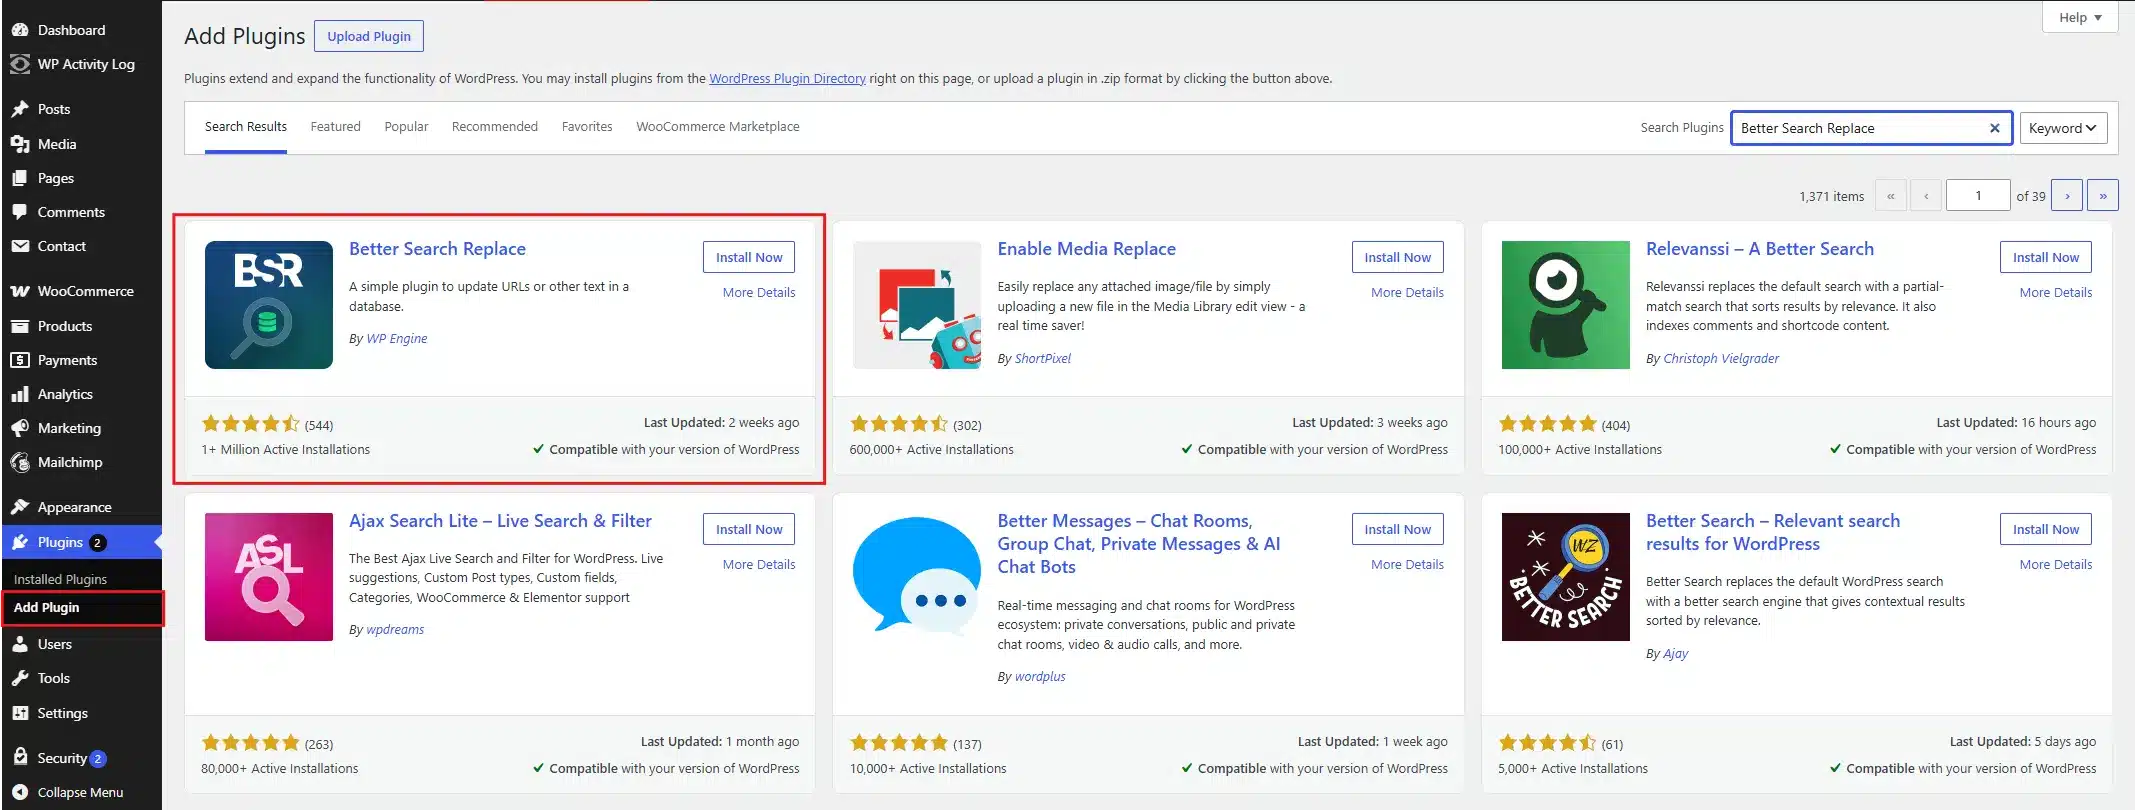
- Go to Tools > Better Search Replace, enter your old
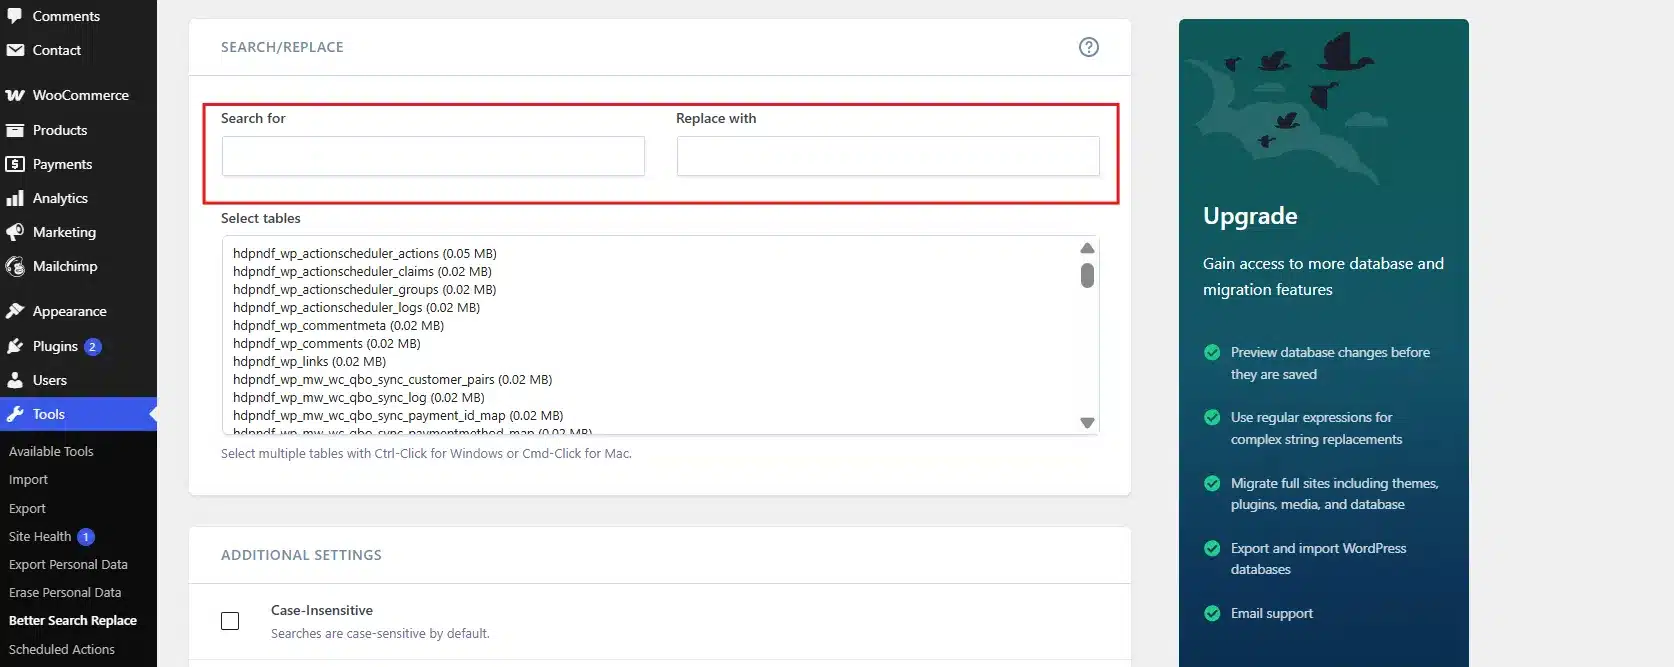
http://URL in the search field, and your newhttps://URL in the replace field.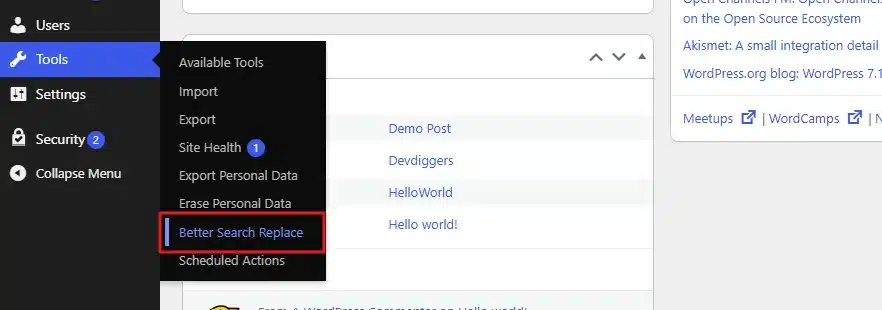
- Click Run Search/Replace. This updates every internal link stored in your database in one pass.
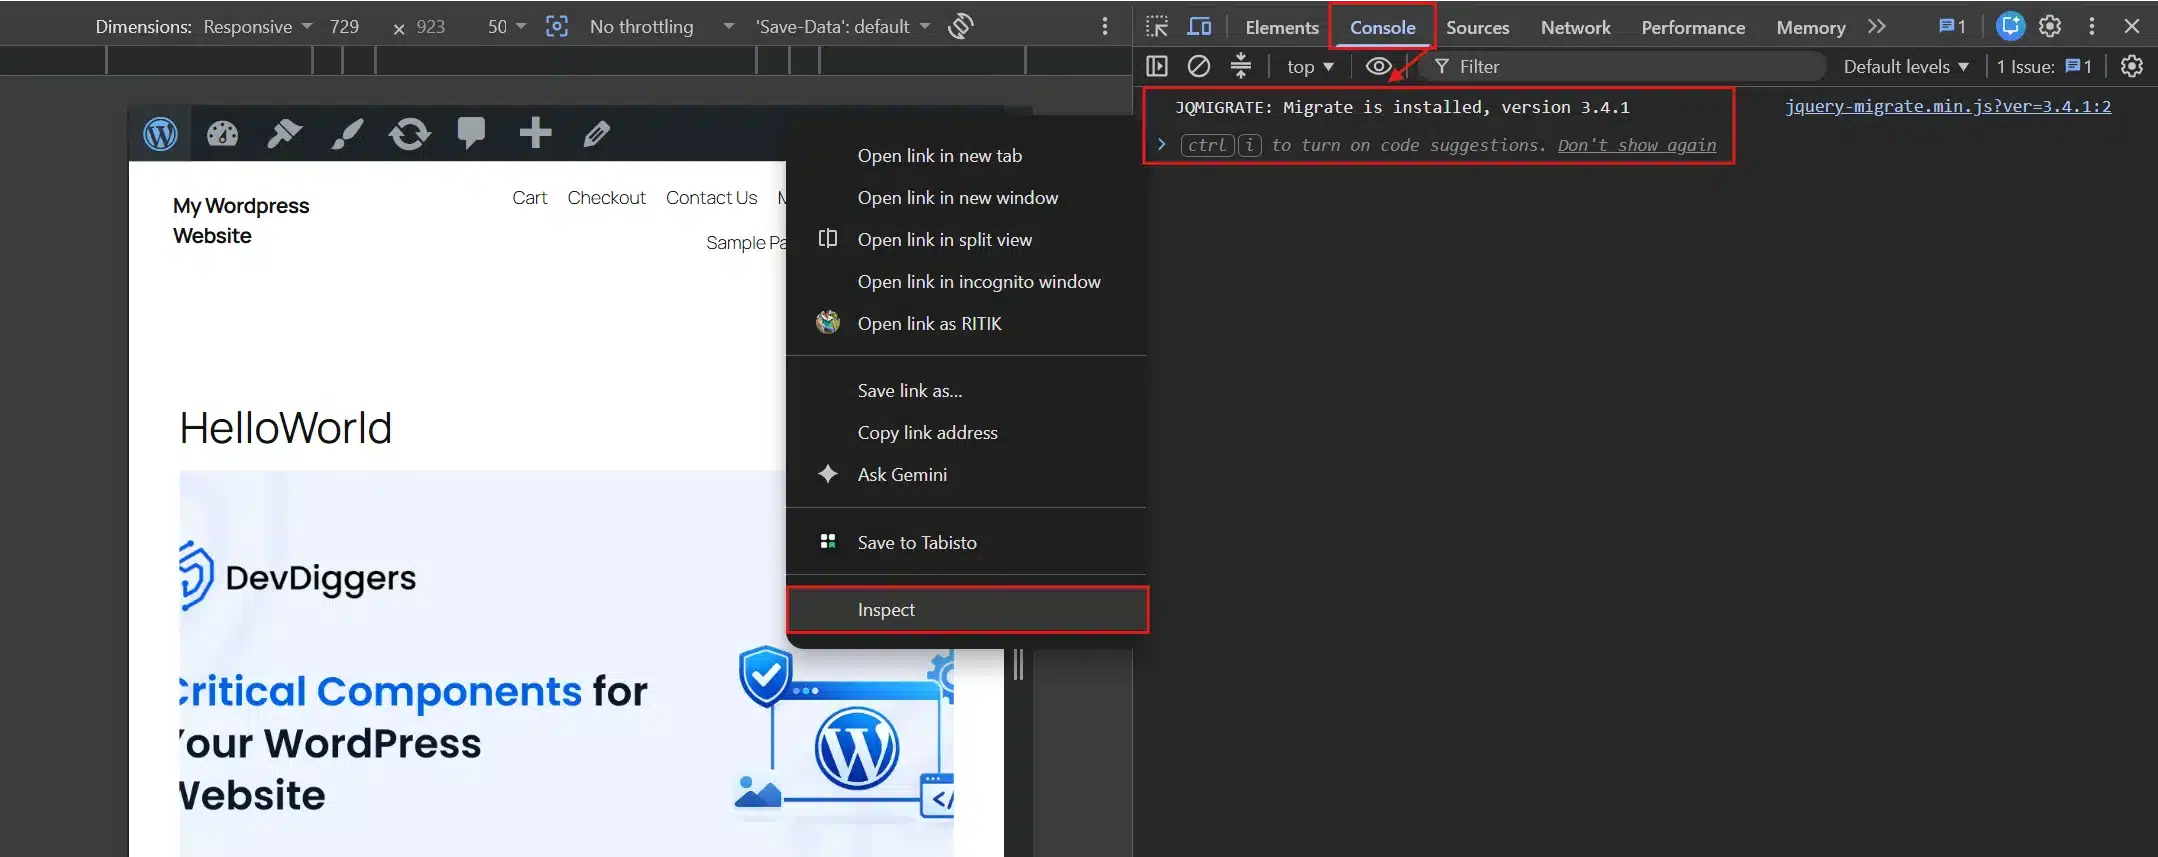
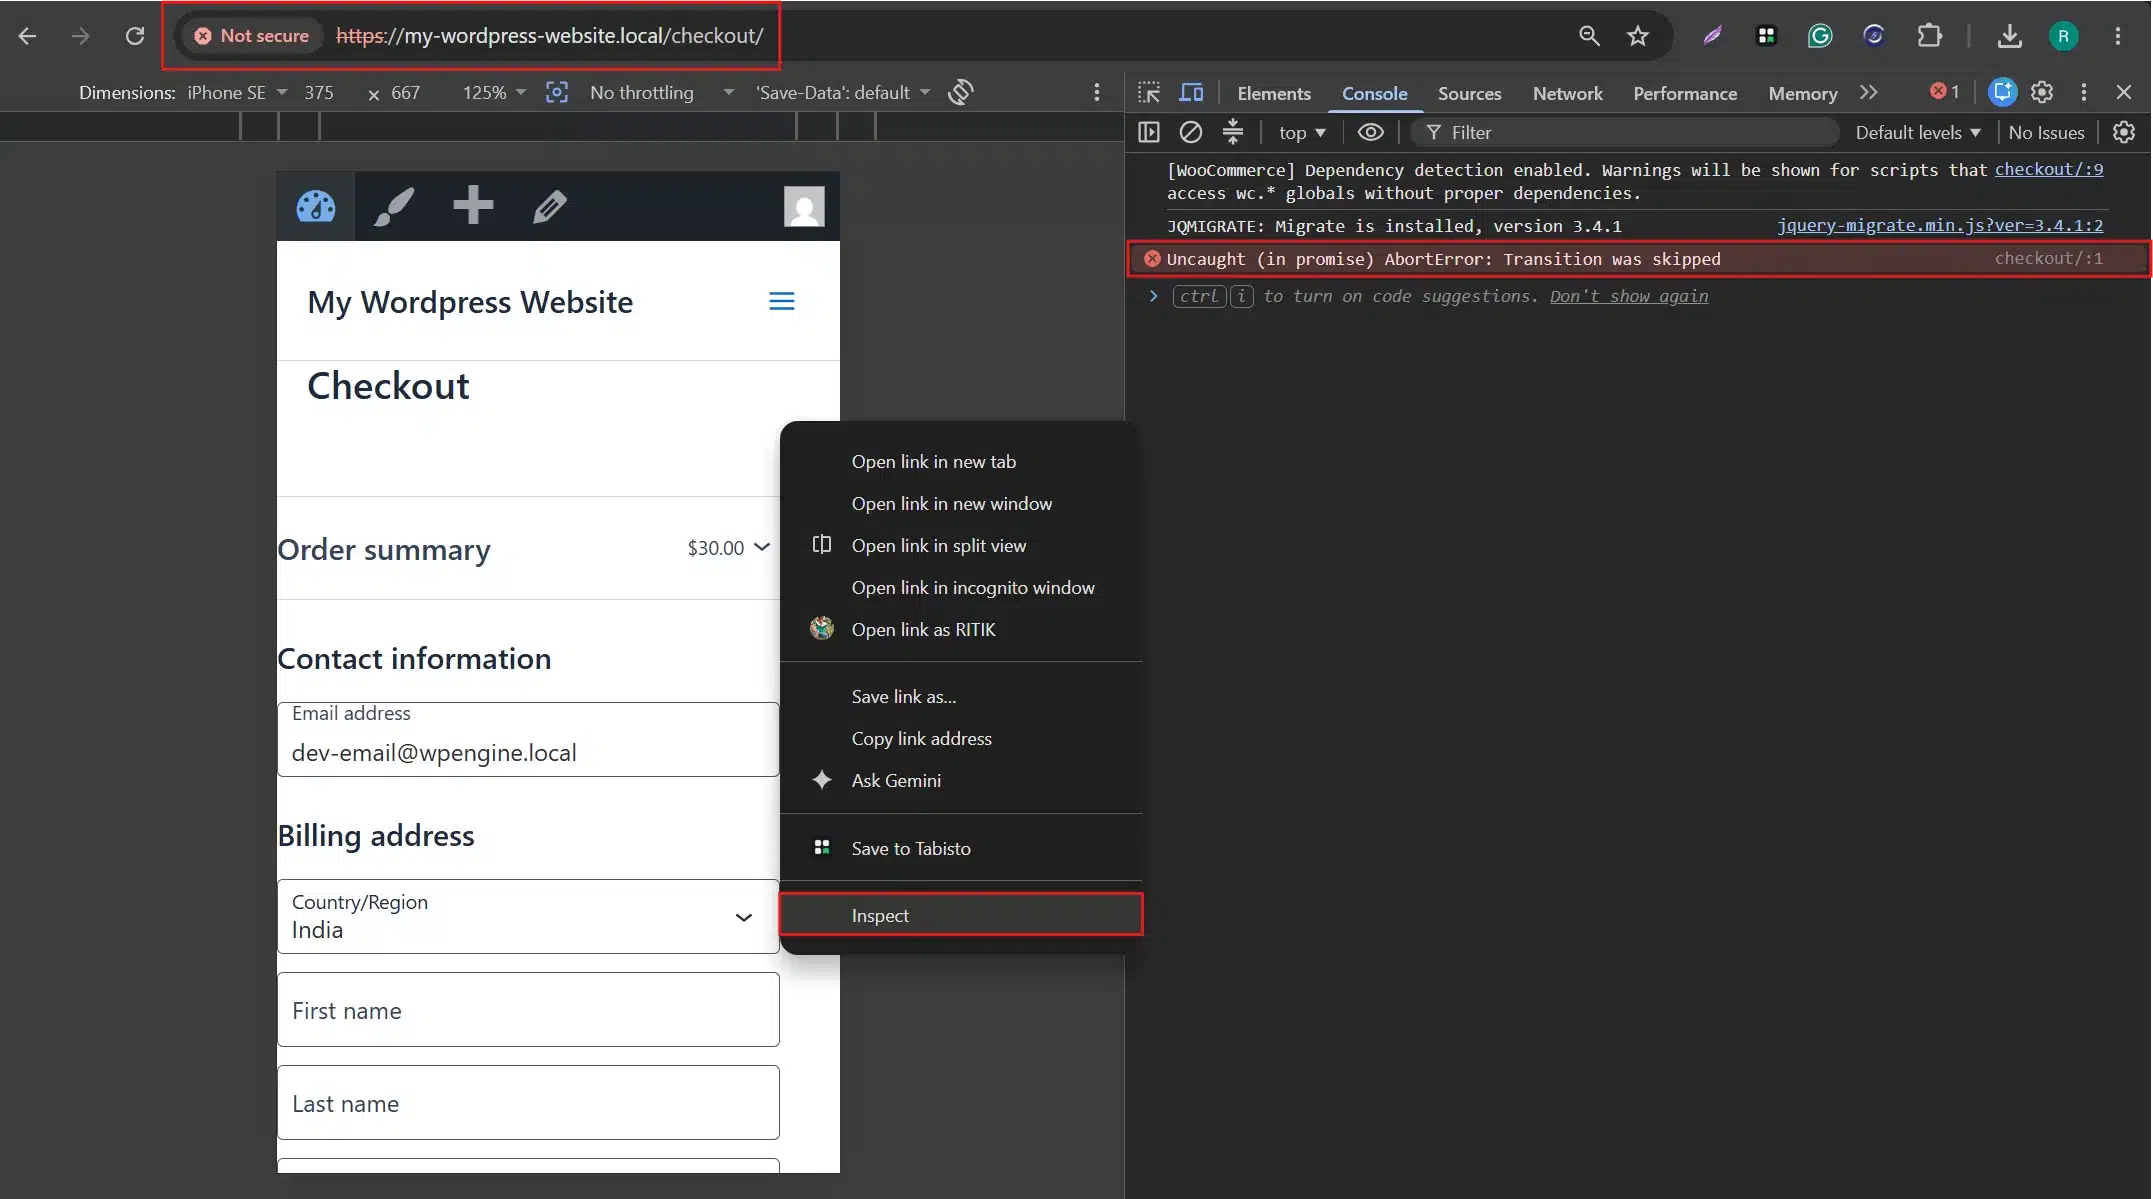
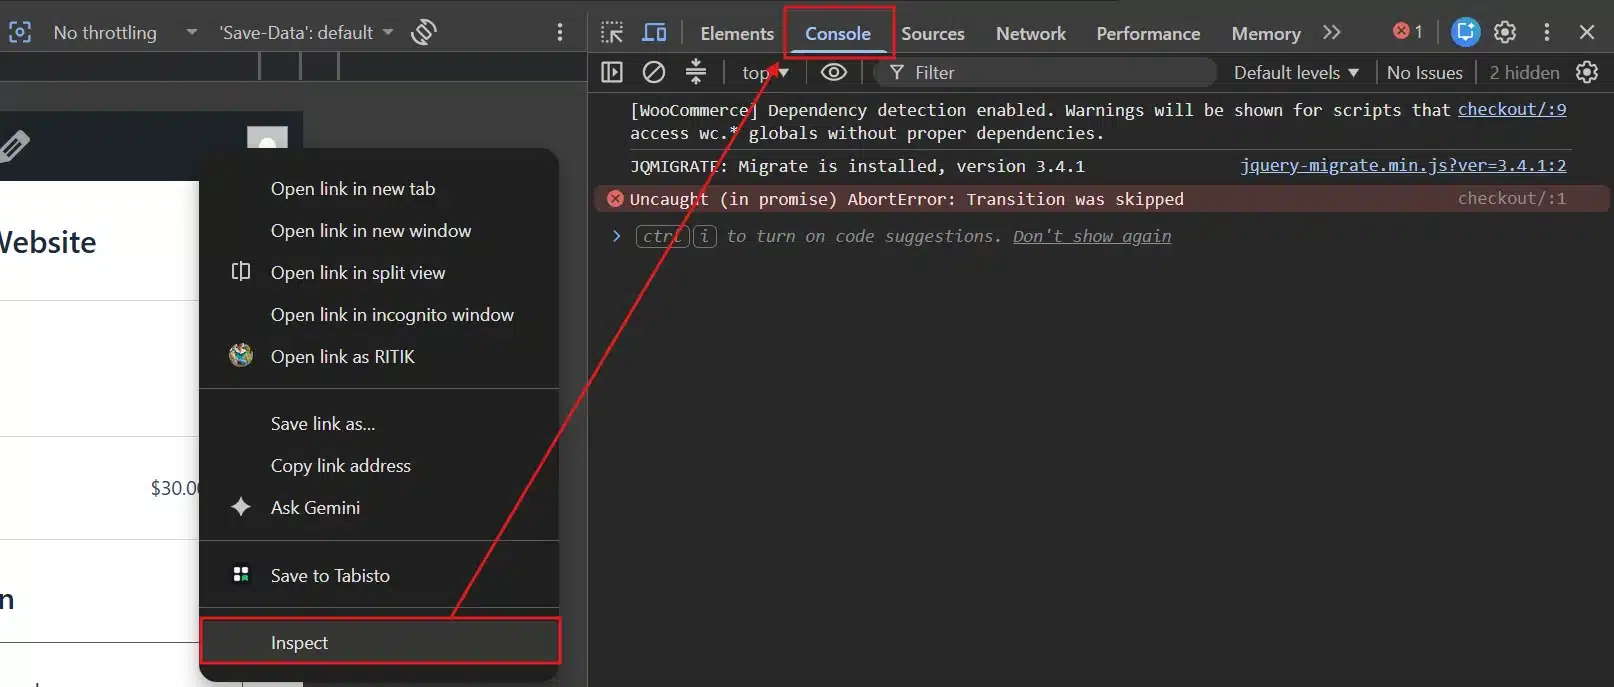
- Right-click any page, select Inspect, and open the Console tab to check for any HTTP resources that are still loading.
- For anything still flagged, open the specific page or theme file it points to and change that link to HTTPS manually.
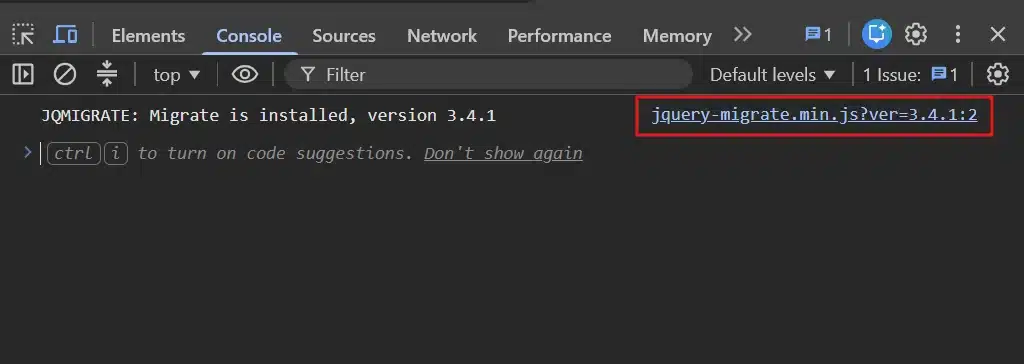
Clear your browser cache once you finish this process. The padlock icon sometimes takes a fresh page load to appear correctly, even after every link has been fixed.
Issue 3: Too Many Redirects After Enabling SSL
Your site gets stuck bouncing. Show more. Your site gets stuck bouncing between the HTTP and HTTPS versions, and browsers show a “Too many redirects” error instead of loading the page at all.
- Clear your caching plugin’s cache first. If you use WP Super Cache or W3 Total Cache, an old redirect rule saved in the cache is often the real cause.
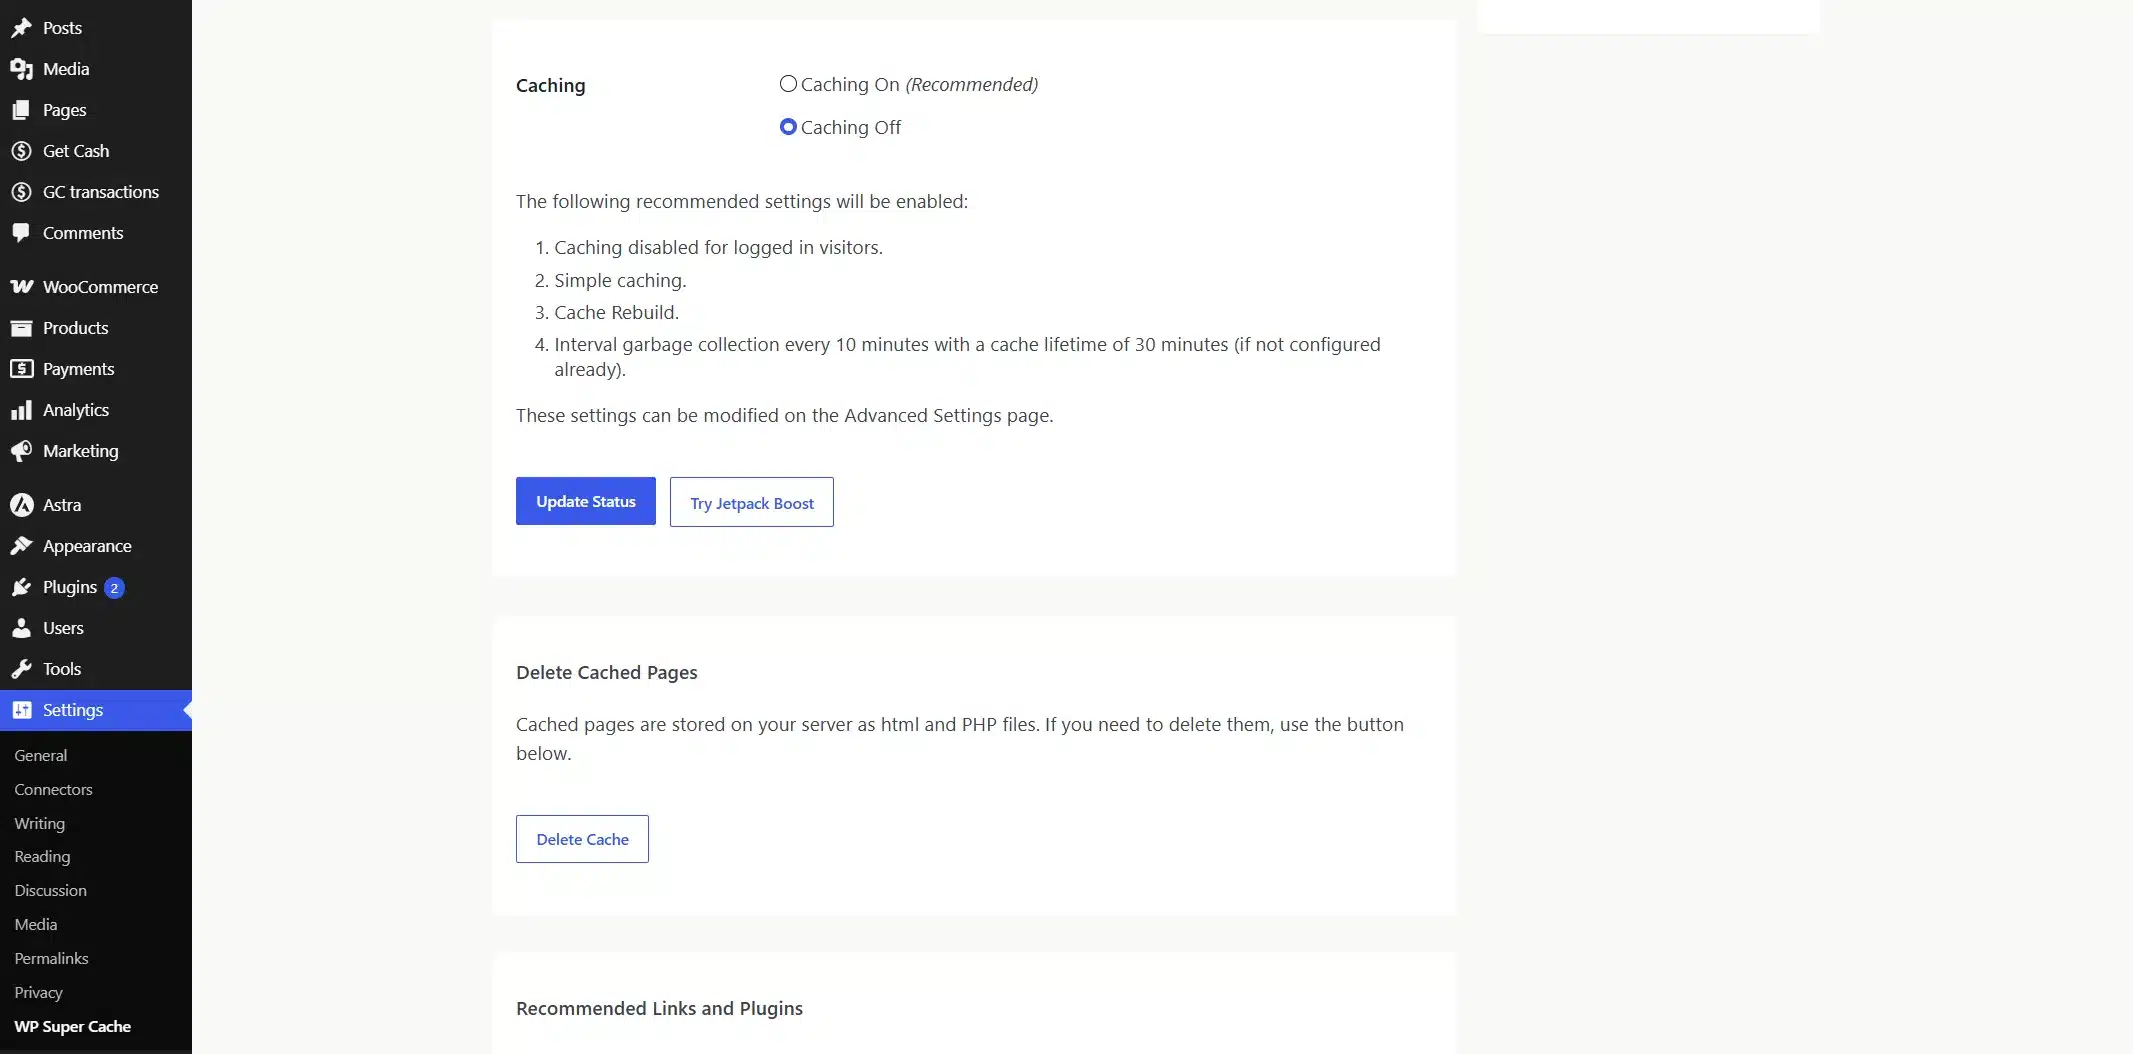
- Go to Settings > General and confirm both URL fields use
https://, exactly as covered in Issue 2 above. - Access your site’s .htaccess file through FTP or your Site’s Folder.
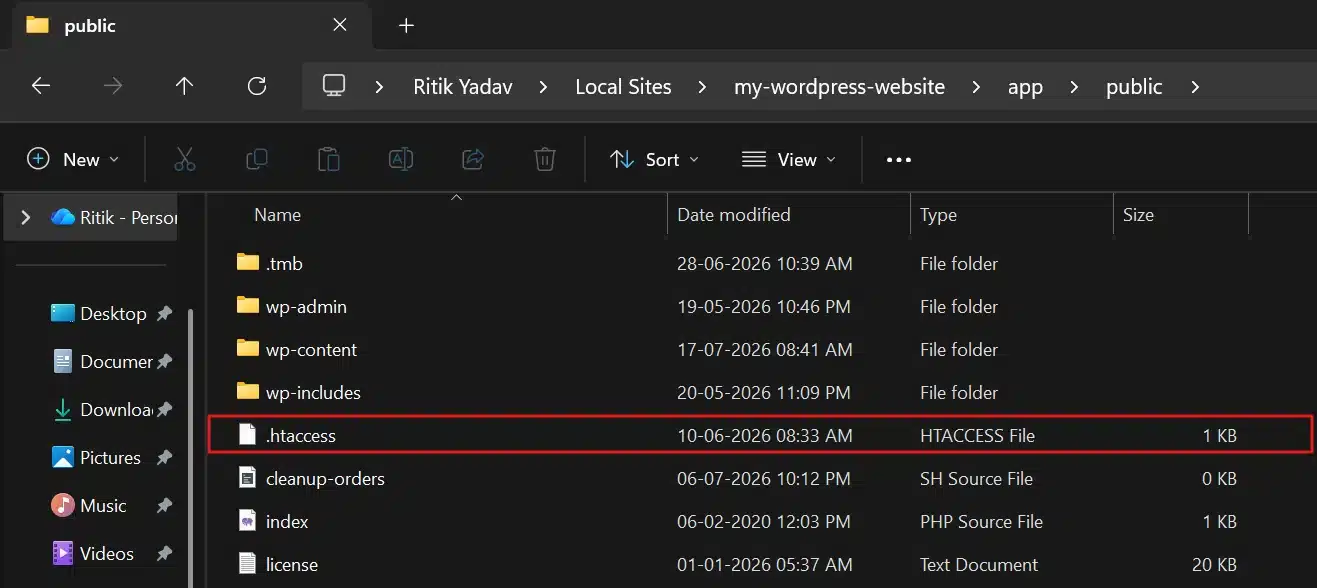
- Check for duplicate or conflicting redirect rules. You only need one clean rule, structured like this:
<IfModule mod_rewrite.c>
RewriteEngine On
RewriteCond %{HTTPS} off
RewriteRule ^(.*)$ https://%{HTTP_HOST}%{REQUEST_URI} [L,R=301]
</IfModule>
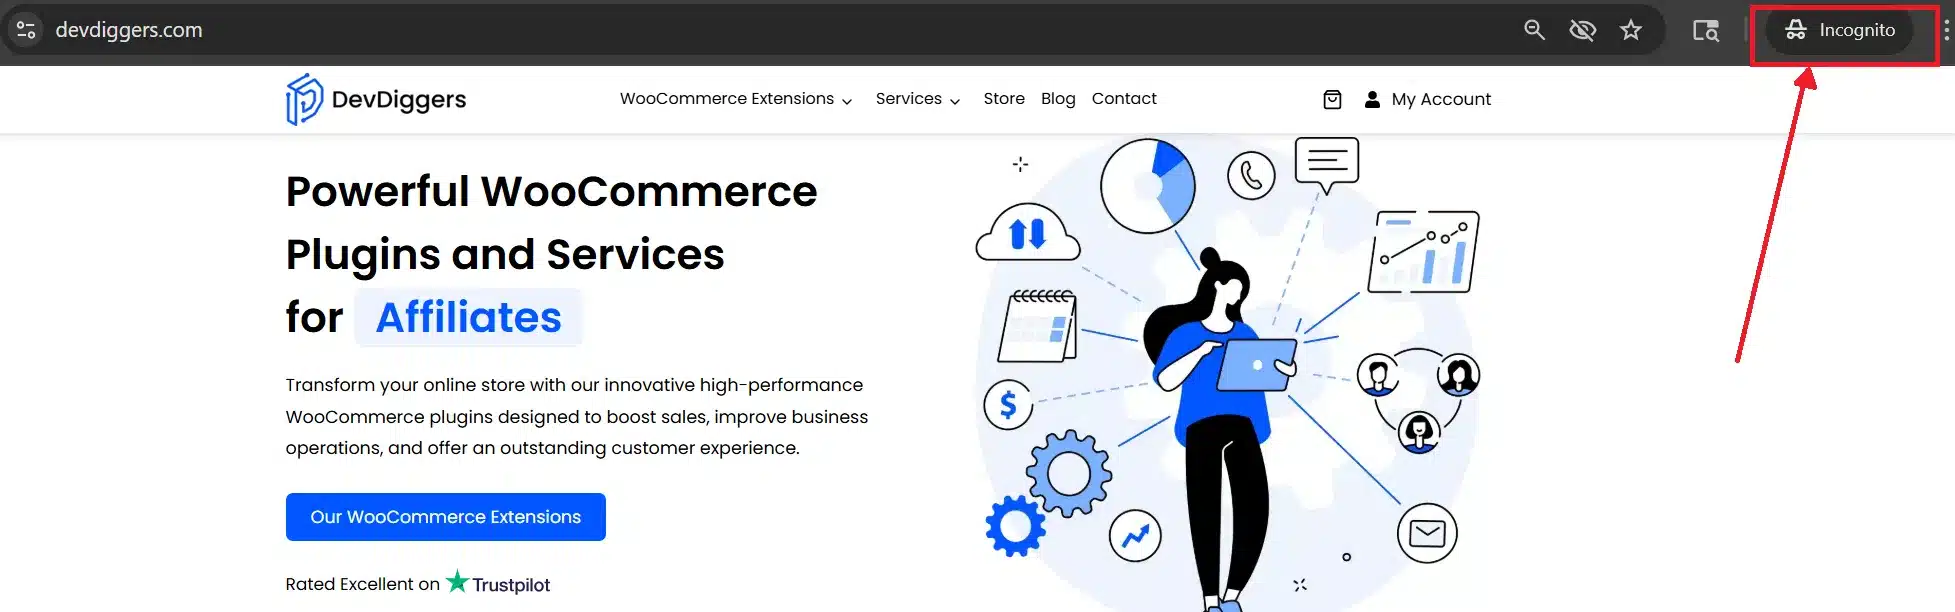
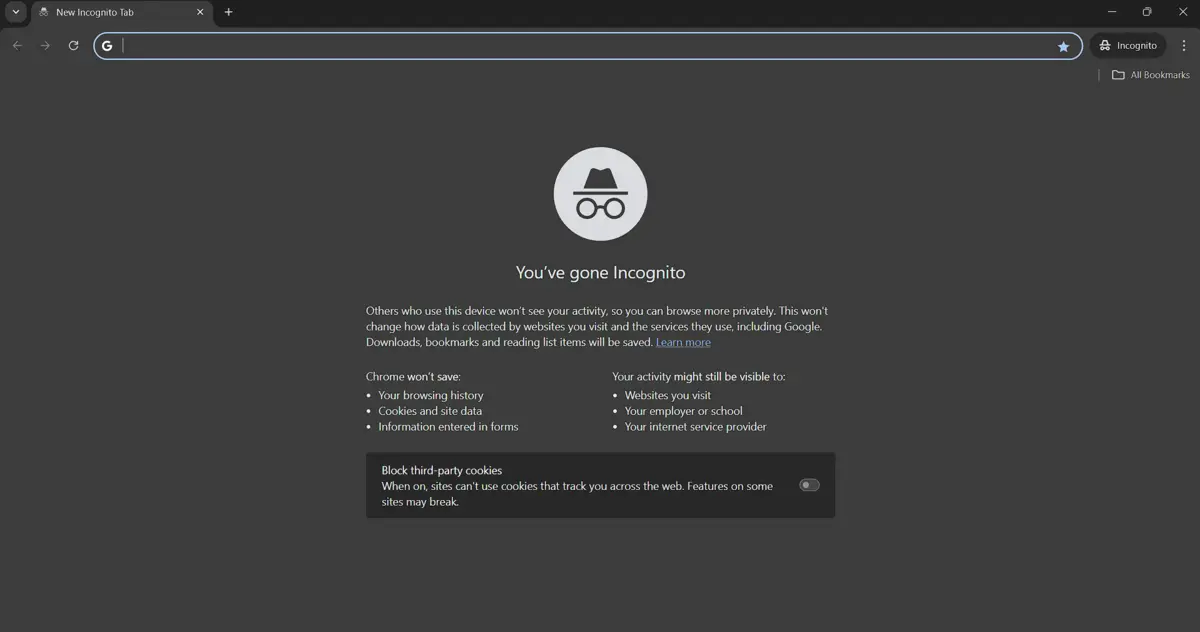
- Save the file and reload your site in an incognito browser window to rule out local caching.
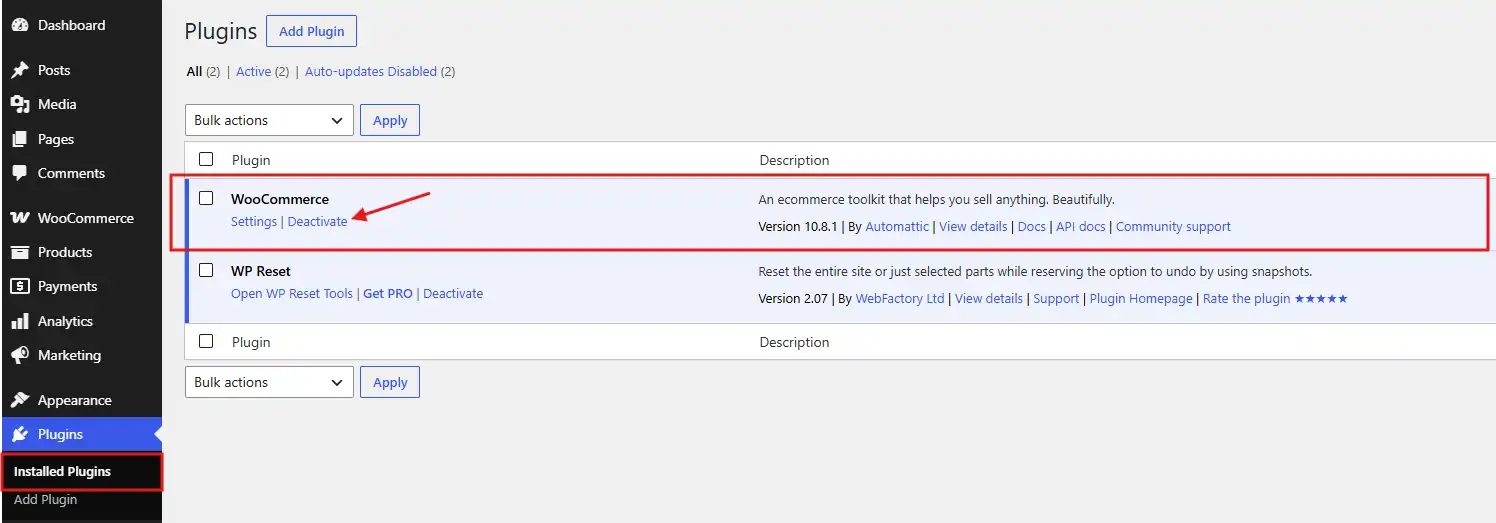
- If the error continues, deactivate all plugins from your WordPress dashboard, then reactivate them one at a time until you find the one causing the conflict.
If you use a CDN like Cloudflare, check that its SSL mode is set to Full or Full (Strict), not Flexible. A mismatched Cloudflare setting is a frequent cause of this exact too many redirects error, and it’s easy to miss since the setting lives outside WordPress entirely.
Issue 4: SSL Not Working on Some Pages
Your homepage shows the padlock icon just fine, but some internal pages still display as “Not Secure”, which almost always points to a link hardcoded somewhere WordPress cannot manage automatically.
- Open your theme’s header.php and footer.php files through Appearance > Theme File Editor.
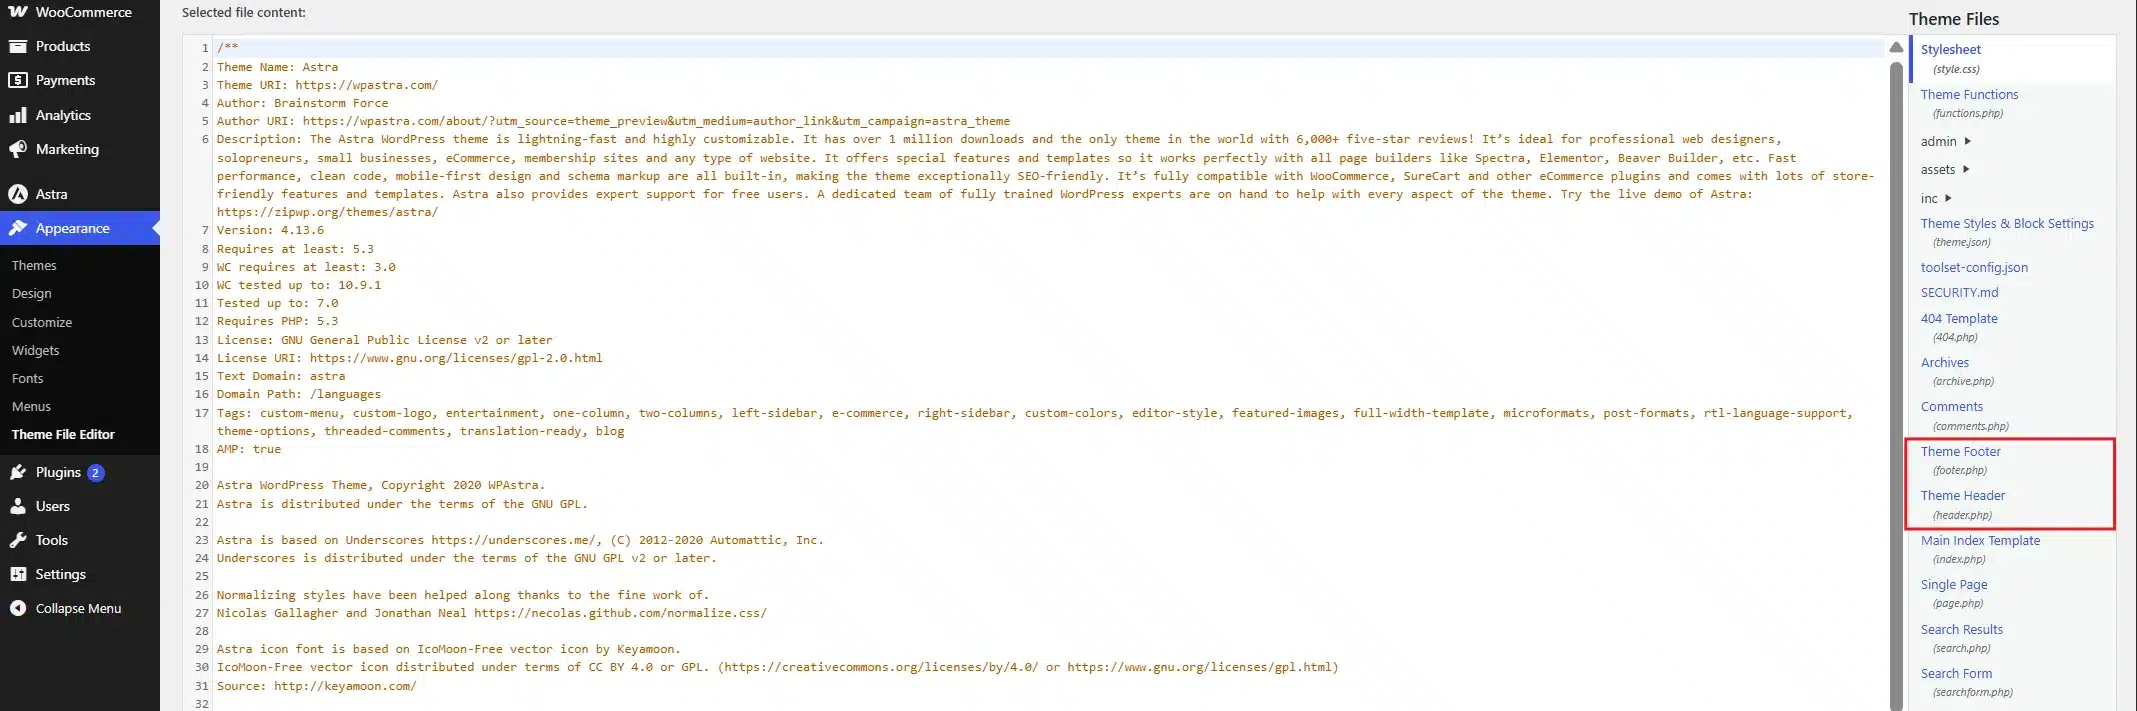
- Search both files for any hardcoded links that start with
https://instead ofhttps://.If not, replace each one with thehttps://version.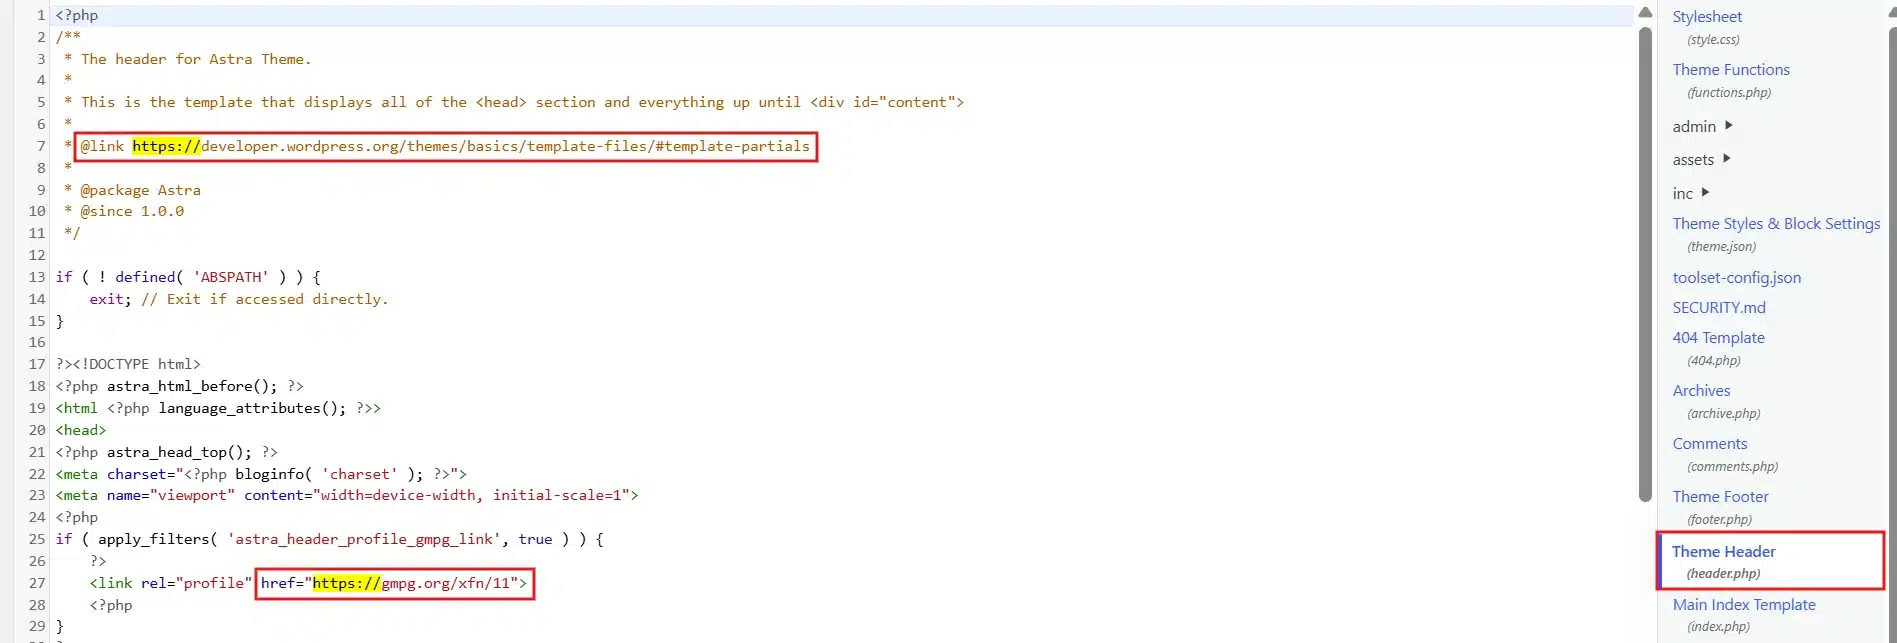
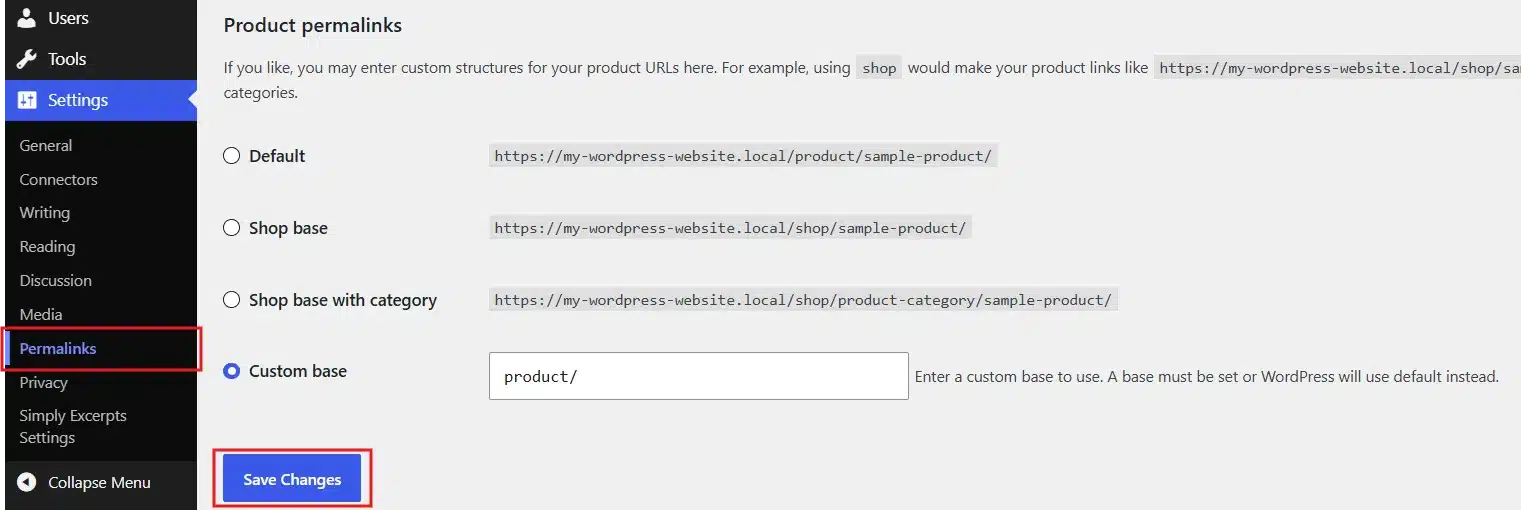
- Go to Settings > Permalinks and click Save Changes without editing anything. This quietly resets your permalink structure and often resolves page-specific SSL glitches on its own.
- Install the SSL Insecure Content Fixer plugin if hardcoded links keep appearing in widgets or theme settings you cannot easily edit by hand.
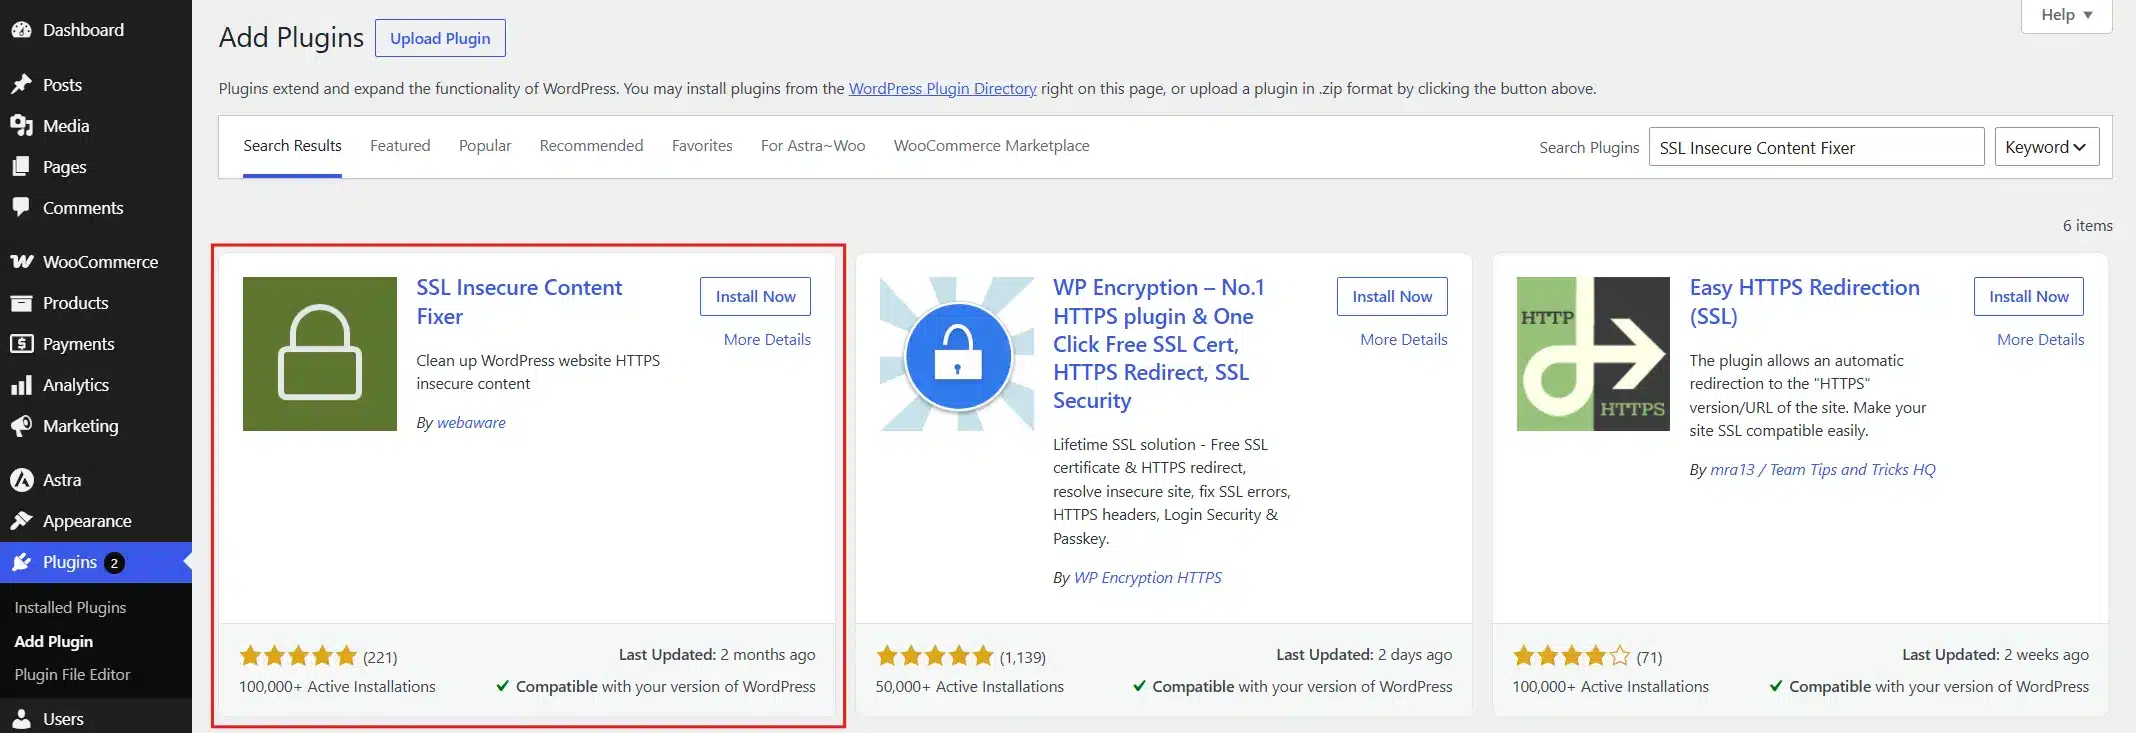
Open Chrome DevTools on the specific affected page rather than your homepage. It will point straight to the exact insecure resource causing that page’s problem, which saves you from guessing across your entire site.
Important Note: The Theme File Editor option is only available for classic themes (like Astra) and not for default themes (like Twenty Twenty-Five). If you’re using the Really Simple Security plugin, it automatically disables the Theme File Editor from the WordPress dashboard, so deactivate the plugin first before accessing that tab.
Issue 5: SSL Certificate Expired or About to Expire
SSL certificates are not permanent. Once one expires, your site becomes insecure immediately, and browsers flag it before a single visitor can load your homepage.
- Log in to your hosting account or SSL provider dashboard and check the certificate’s expiration date under the SSL/TLS section.
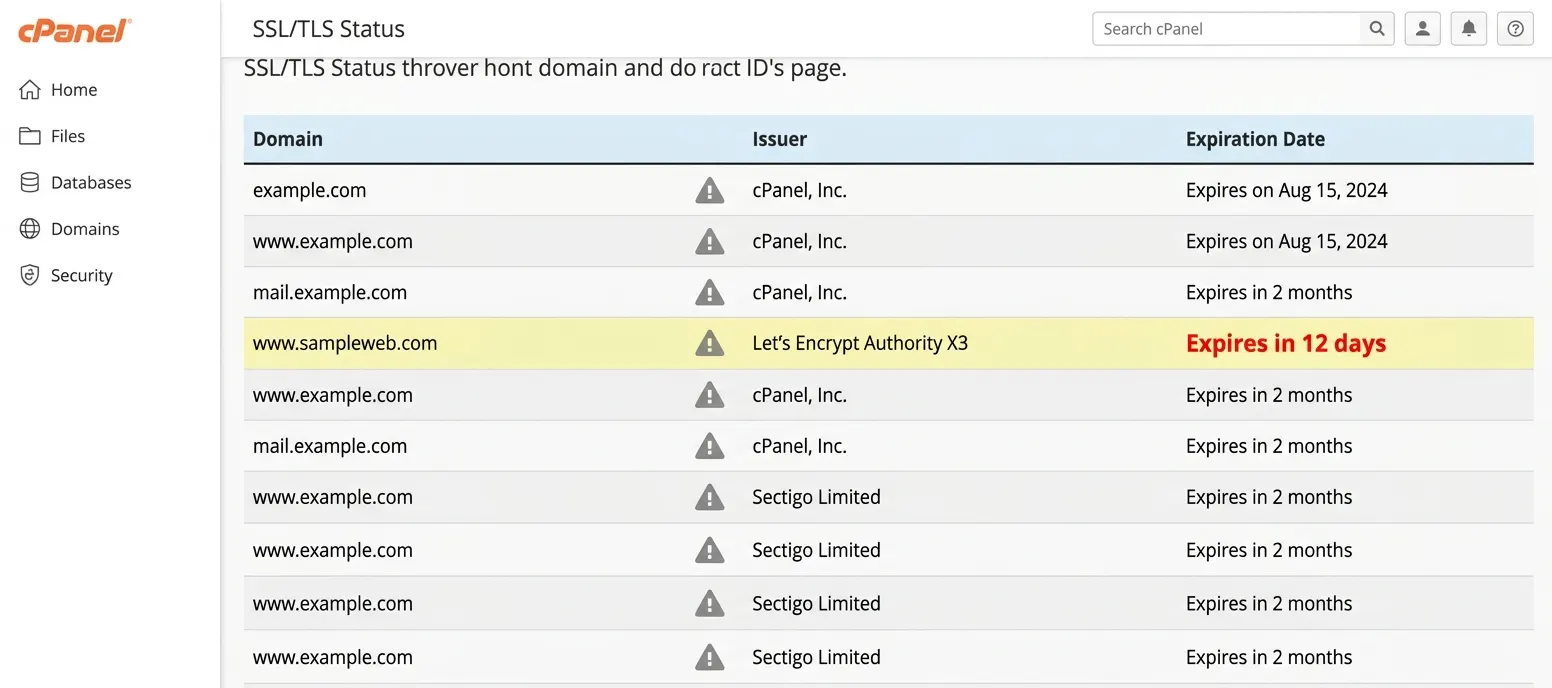
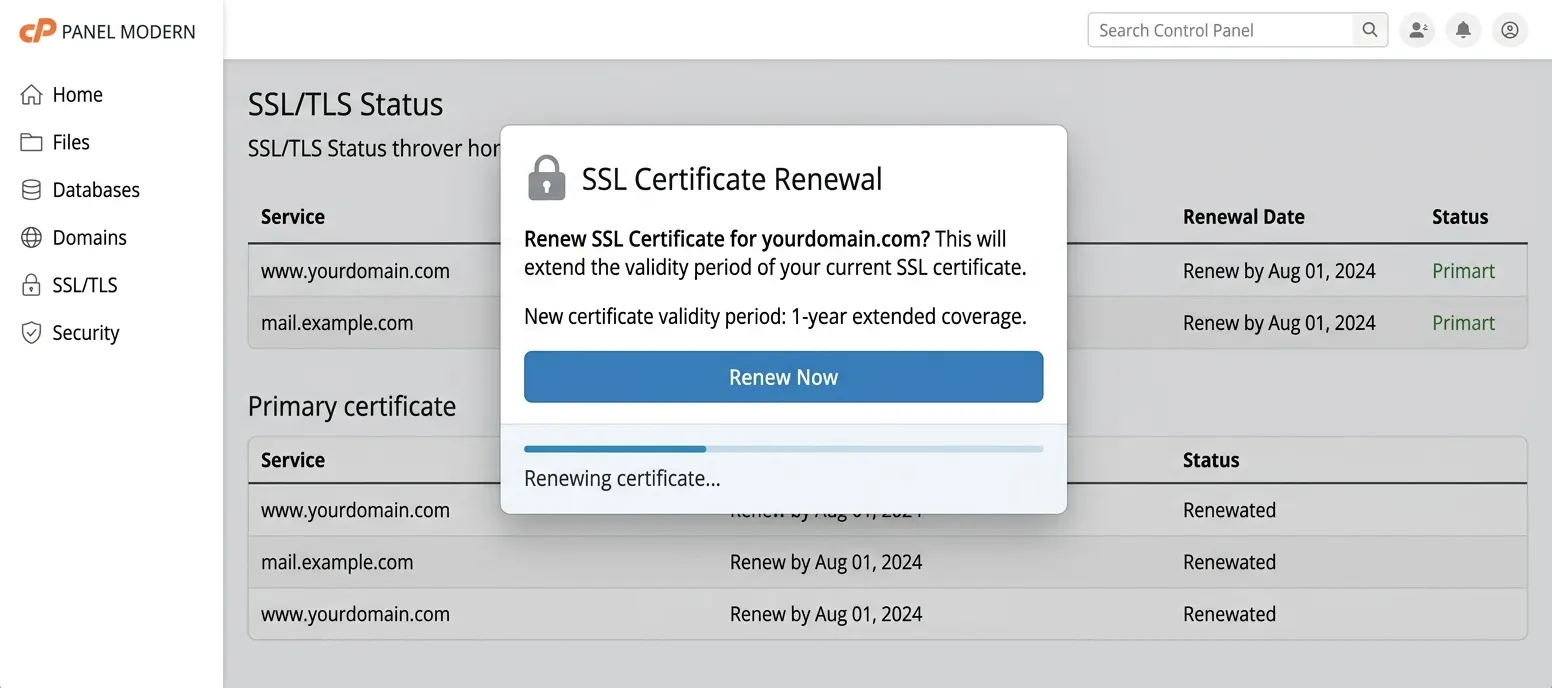
- Renew your SSL certificate directly through your host or SSL vendor as soon as you confirm the expiration date.
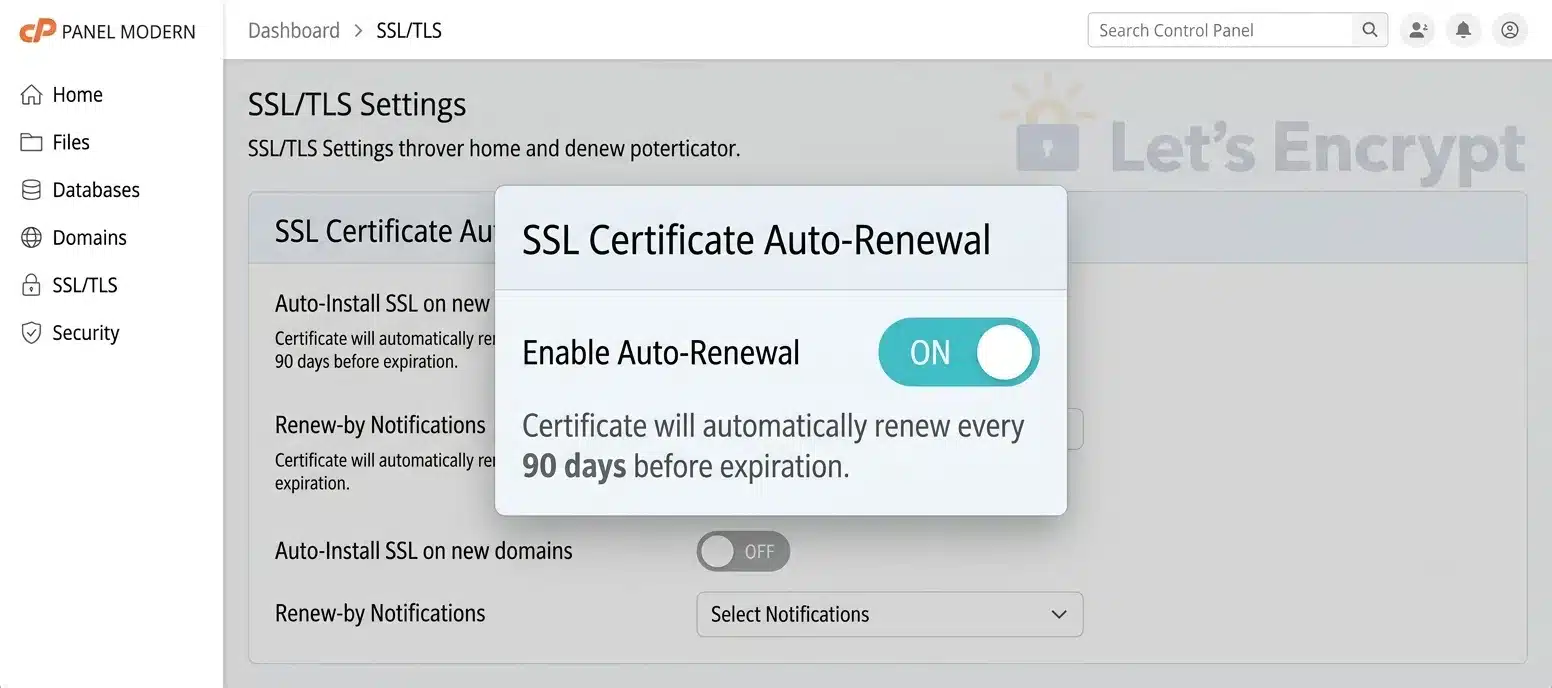
- Enable auto-renewal if your provider offers it. Most Let’s Encrypt certificates support this and renew automatically every 90 days, according to Let’s Encrypt’s own documentation.
- Set a calendar reminder 10 days before expiration as a backup, especially if your certificate is paid and does not renew on its own.
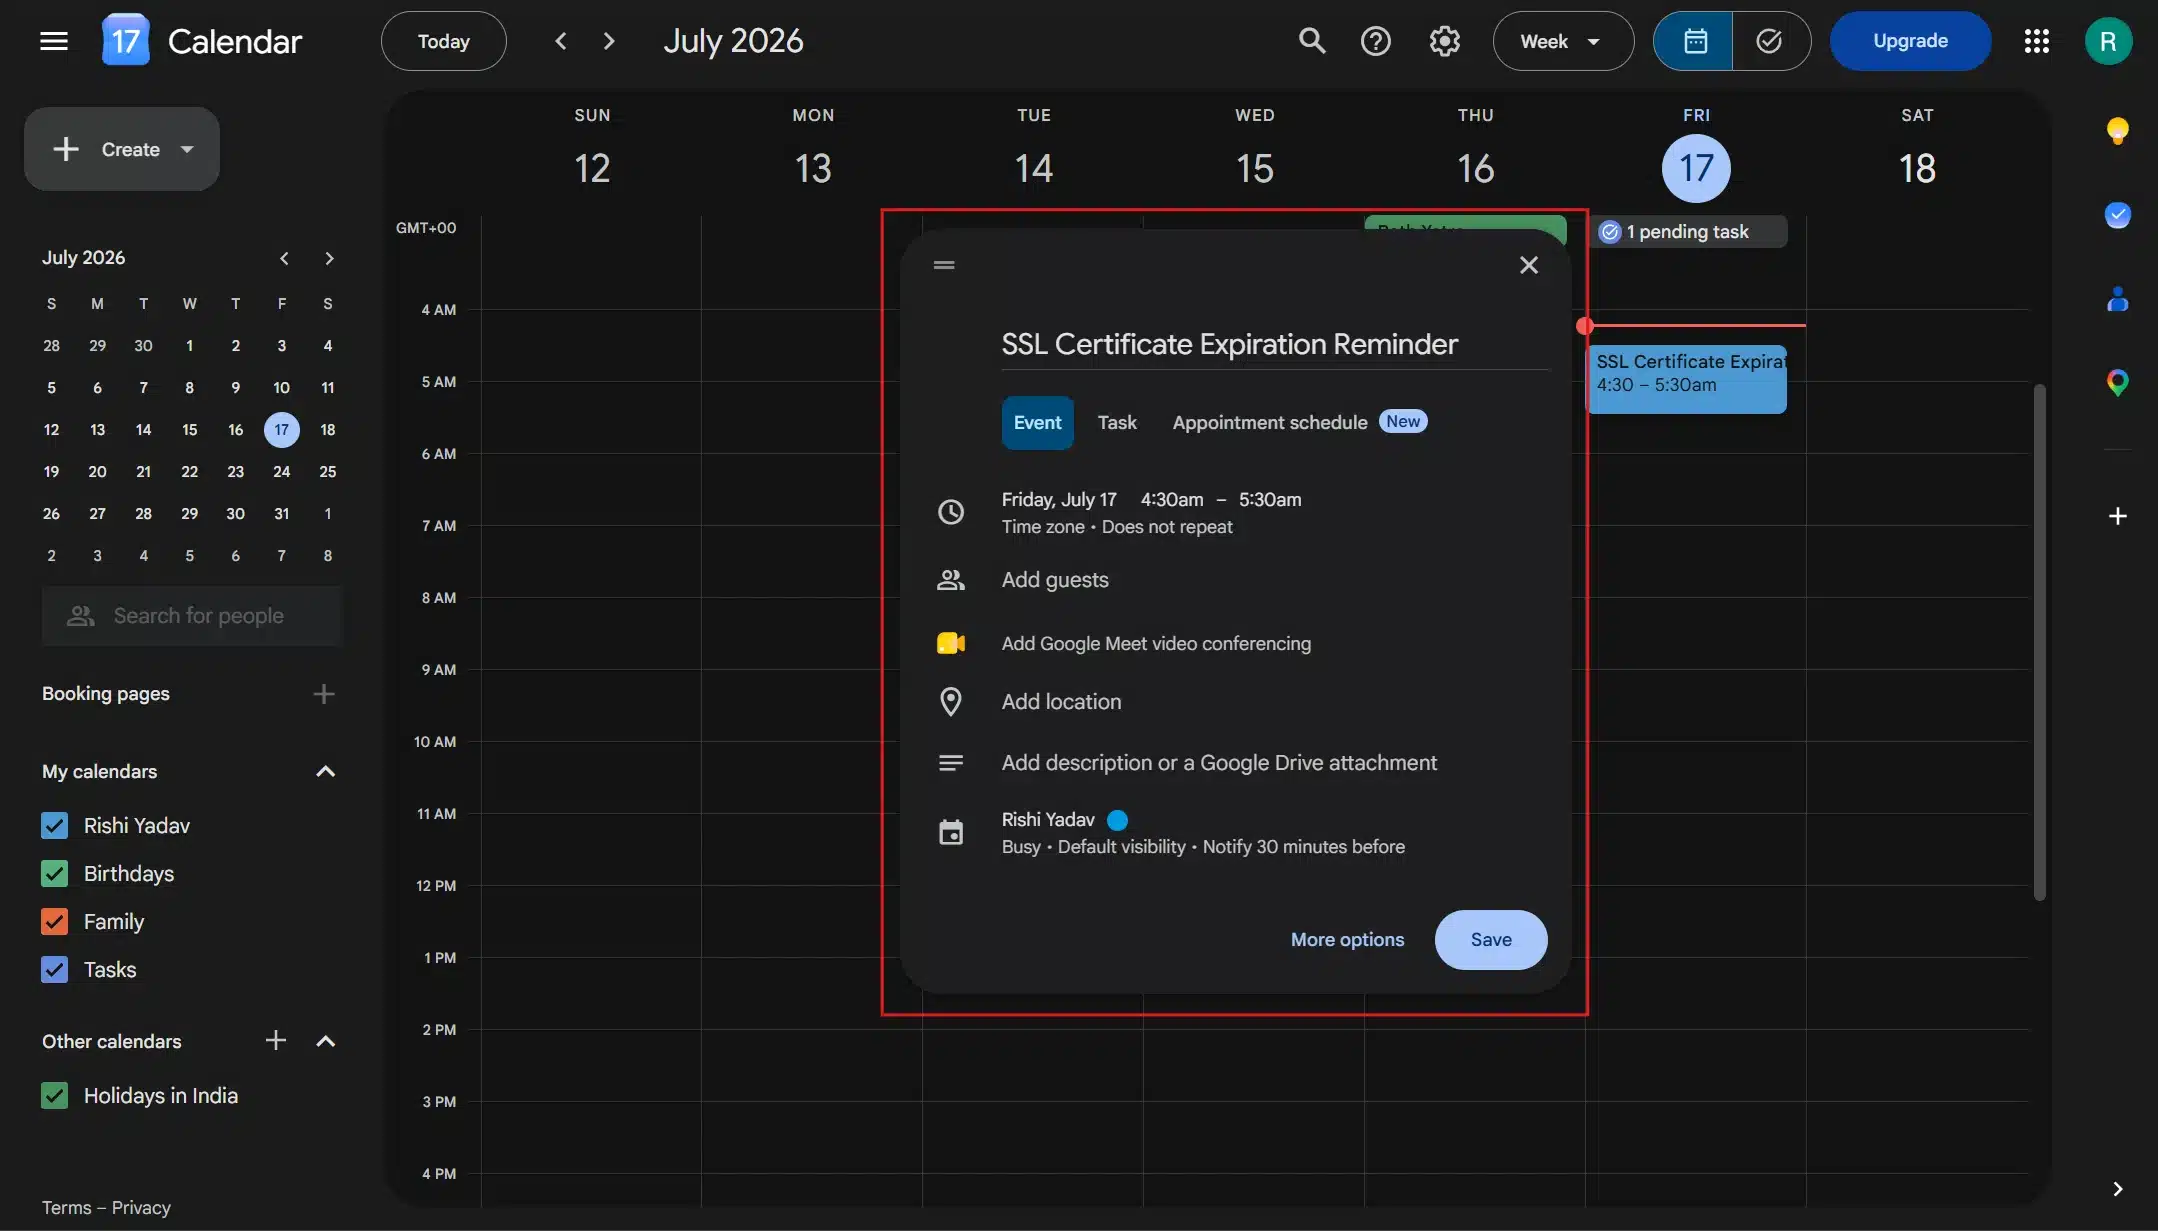
Most hosting providers send an email reminder before a certificate expires. Check your spam folder if you never received one, since these reminders get filtered out more often than they should.
Issue 6: SSL Slowing Down Your WordPress Site
Some site owners notice a slowdown right after switching to HTTPS. This is rare, and it usually means the server was never optimised for SSL traffic in the first place, not that HTTPS itself is inherently slow.
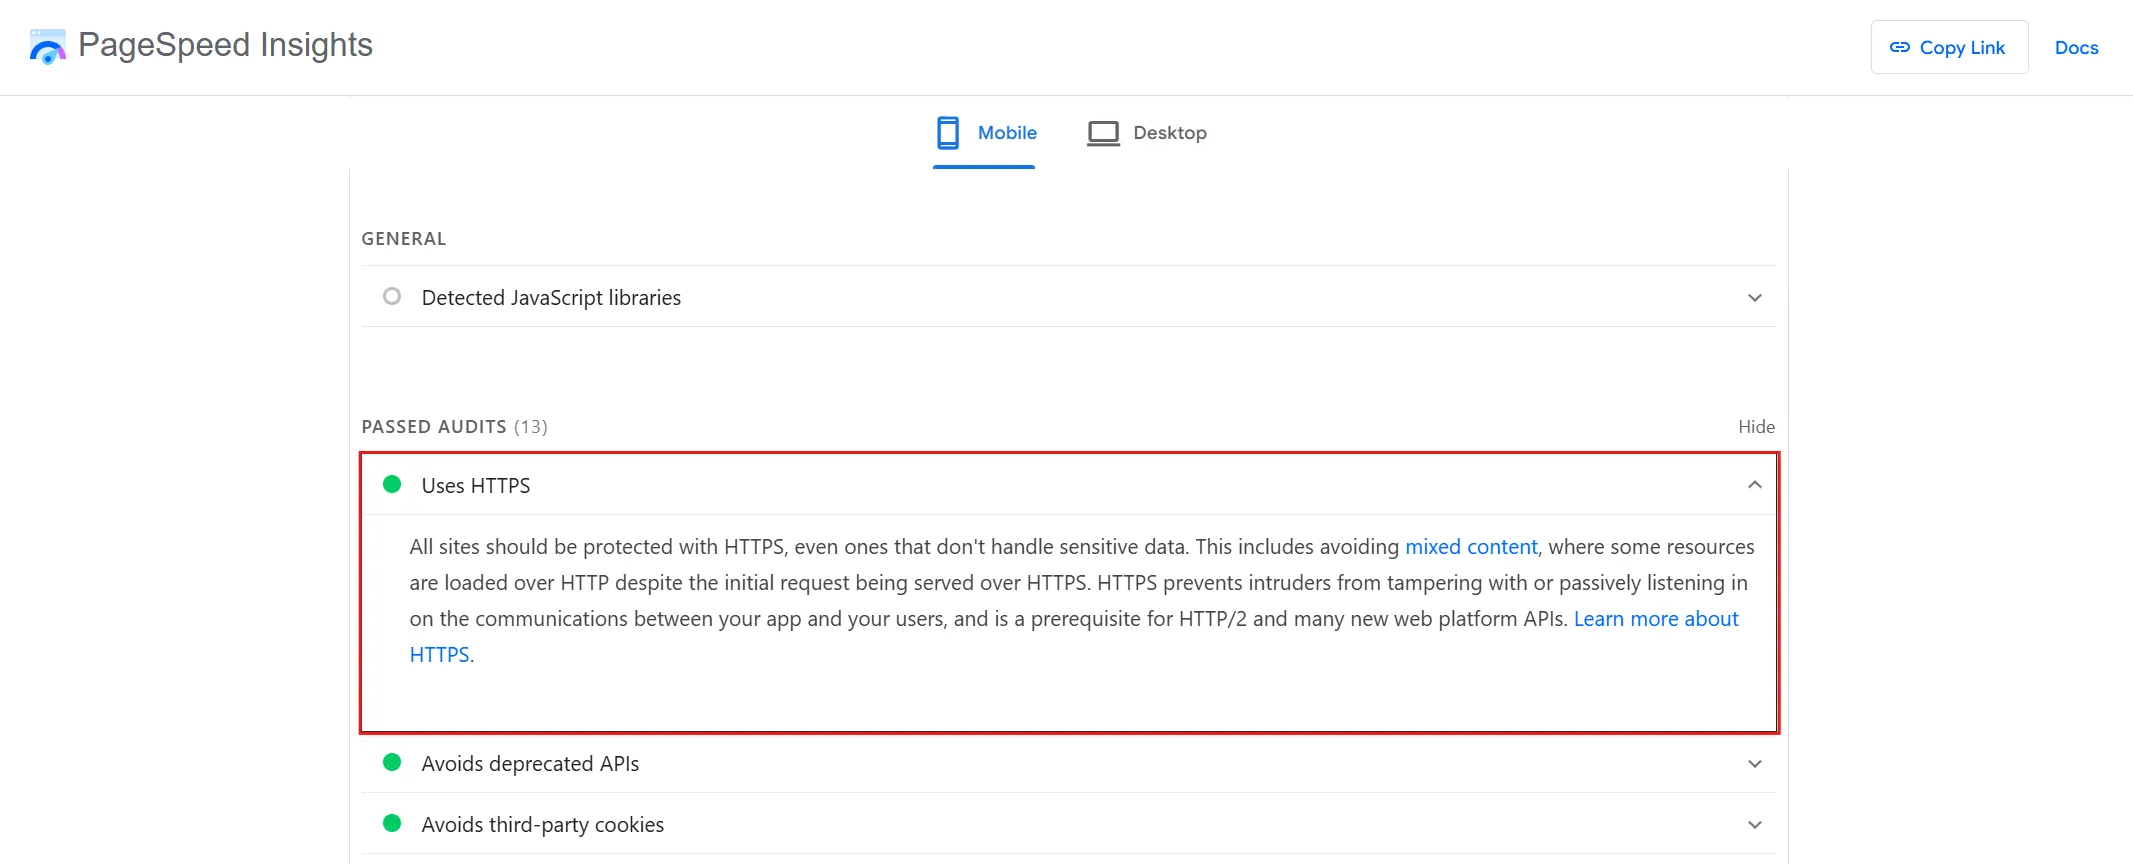
- Run your site through Google PageSpeed Insights or GTmetrix to confirm the slowdown is real and not just a one-off loading hiccup.
- Add a CDN like Cloudflare in front of your site. This offloads SSL processing to a global network instead of your origin server.

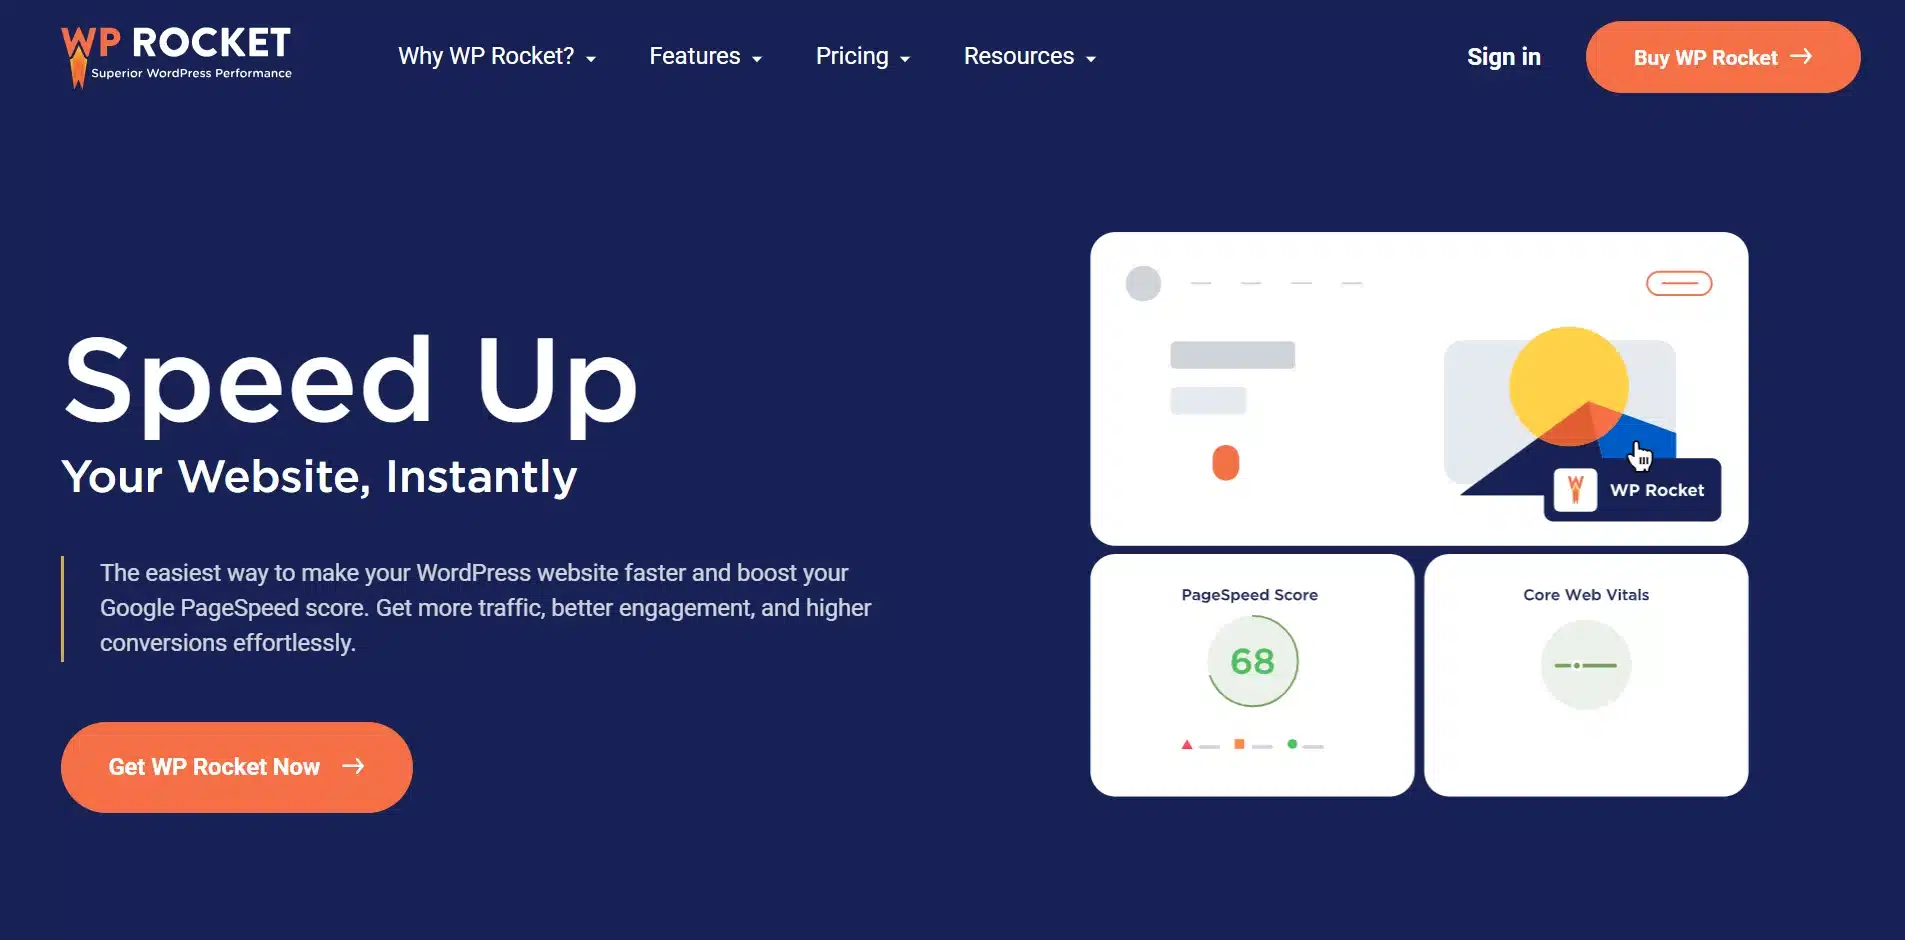
- Install a caching plugin like WP Rocket or W3 Total Cache to reduce repeat server load for returning visitors.
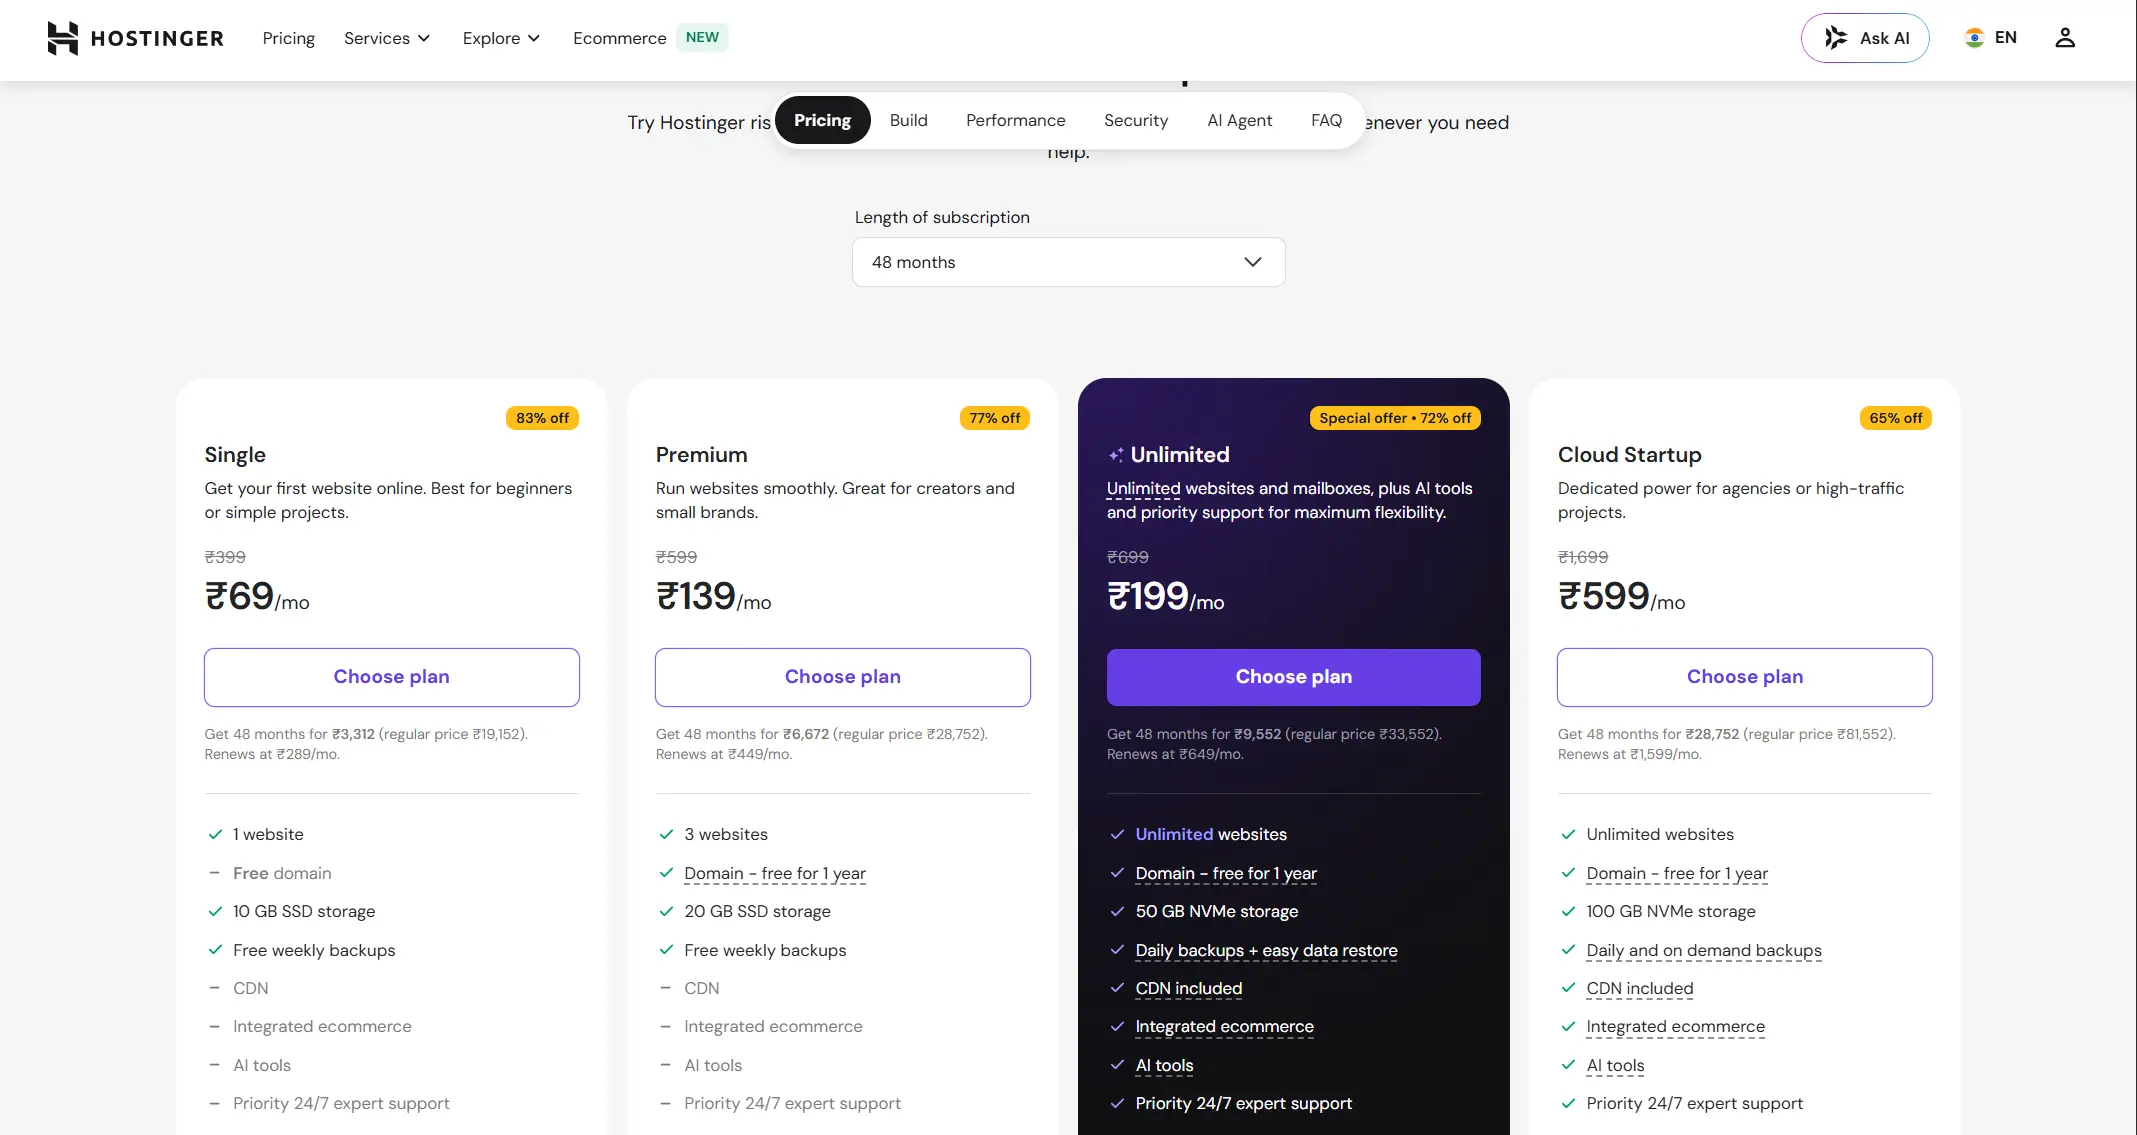
- Upgrade your hosting plan if you are still on shared hosting and your traffic has grown. SSL overhead is far more noticeable on underpowered servers.
According to Google’s own HTTPS documentation, correctly configured HTTPS paired with HTTP/2 should have a negligible performance impact, so a real slowdown almost always traces back to server or caching issues rather than SSL itself.
SSL Issues on WooCommerce Checkout Pages
WooCommerce stores face an extra layer of SSL sensitivity because checkout pages handle payment data directly, and a single overlooked setting here can quietly cost you sales.
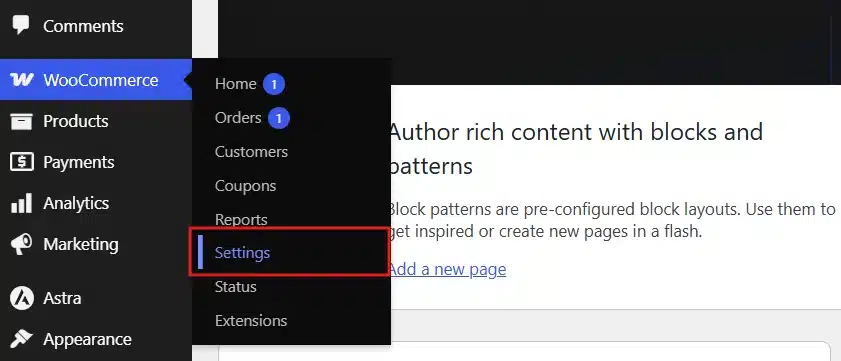
- Go to WooCommerce > Settings inside your WordPress dashboard.
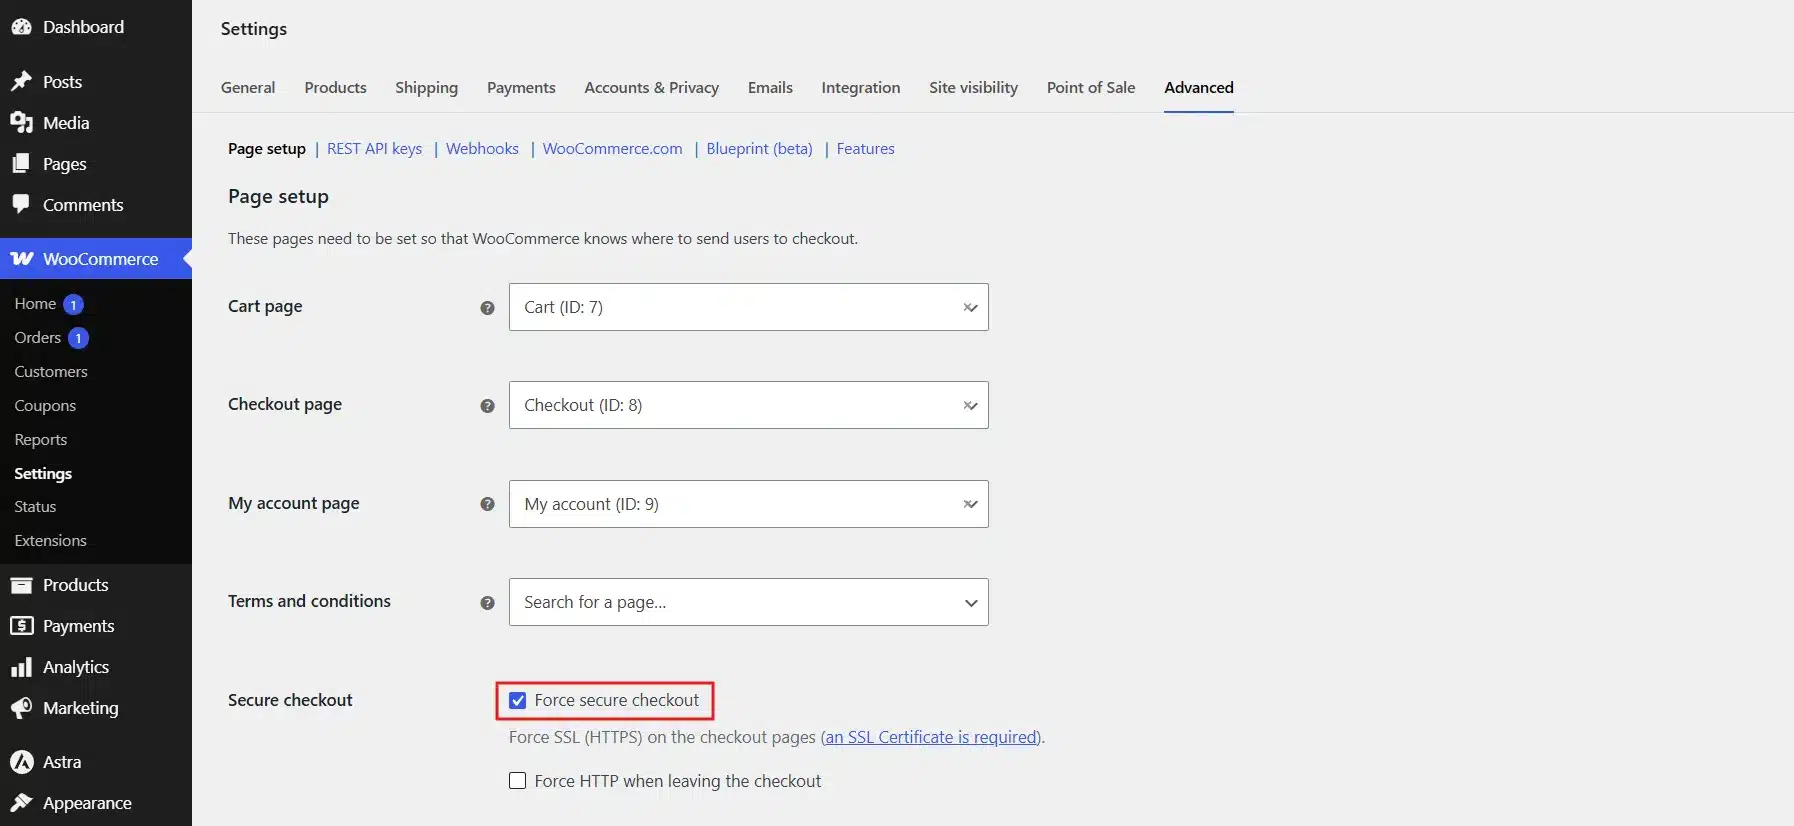
- Click the Advanced tab and confirm Force secure checkout is enabled, since this forces SSL specifically on the checkout page even if the rest of your site is configured correctly.
- Watch for mixed content errors on checkout pages specifically. A single insecure script here can prevent customers from completing payment or trigger an outright browser block.
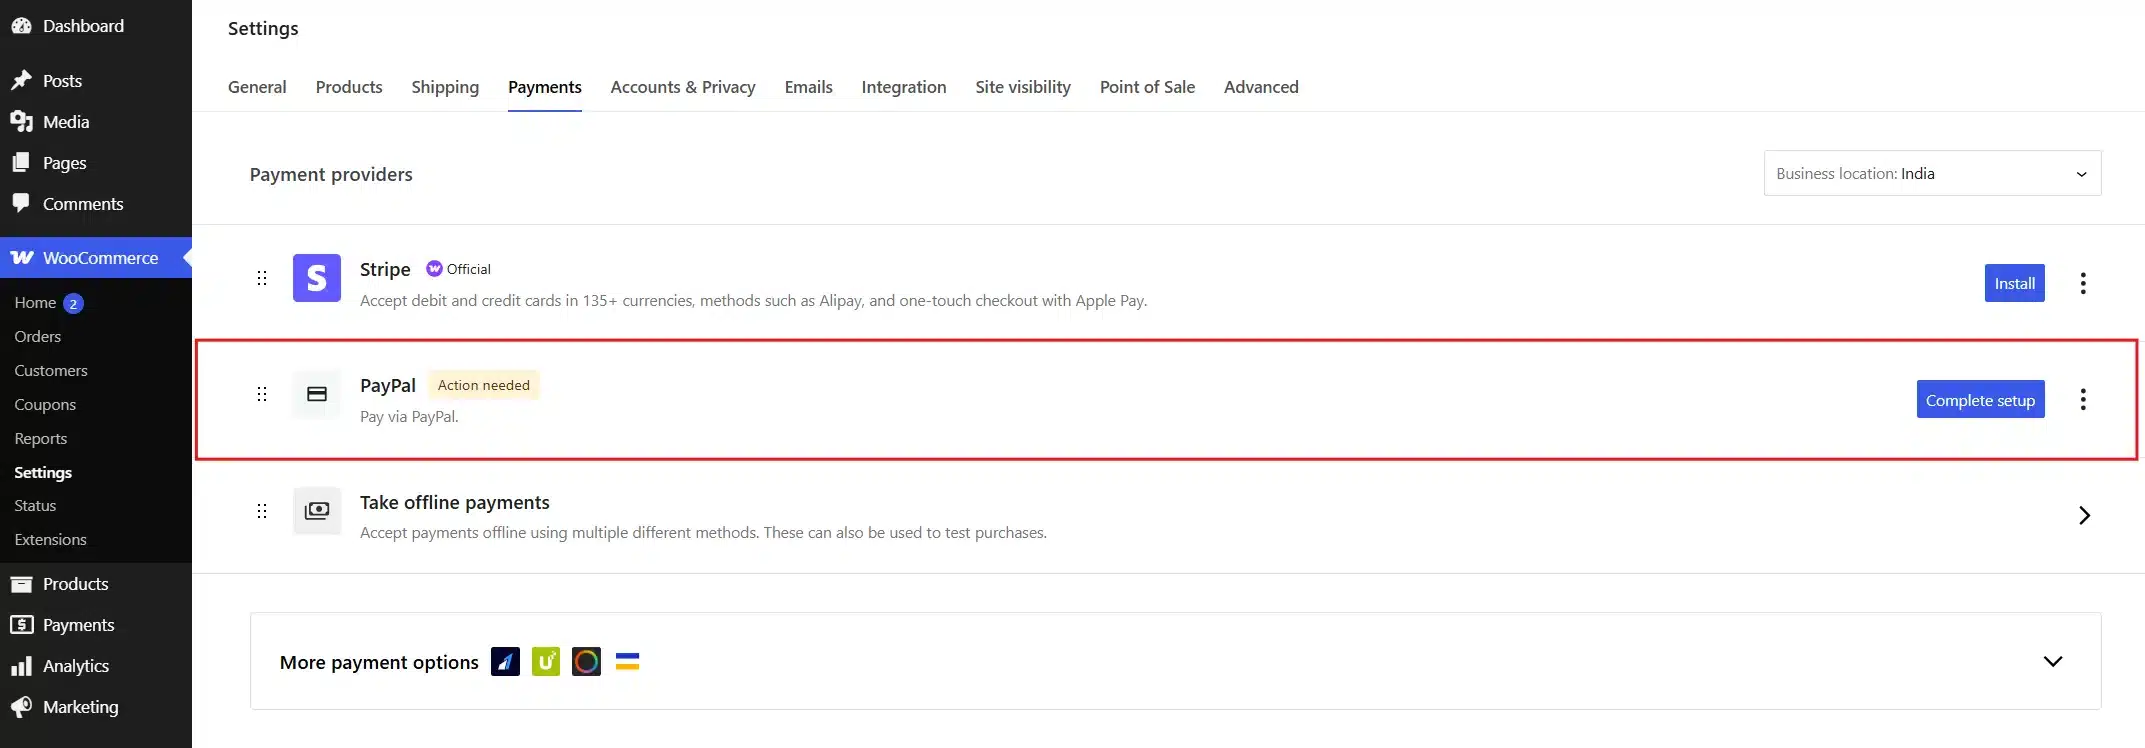
- Confirm that your payment gateway, whether that is Stripe or PayPal, is pointed at a valid, non-expired certificate. Gateways stop processing transactions the moment a certificate expires.
- Open your checkout page directly and click the padlock icon in the address bar to compare the domain listed on the certificate against the actual URL you see. A certificate covering only example.com will still fail on www.example.com, even though a valid certificate technically exists.
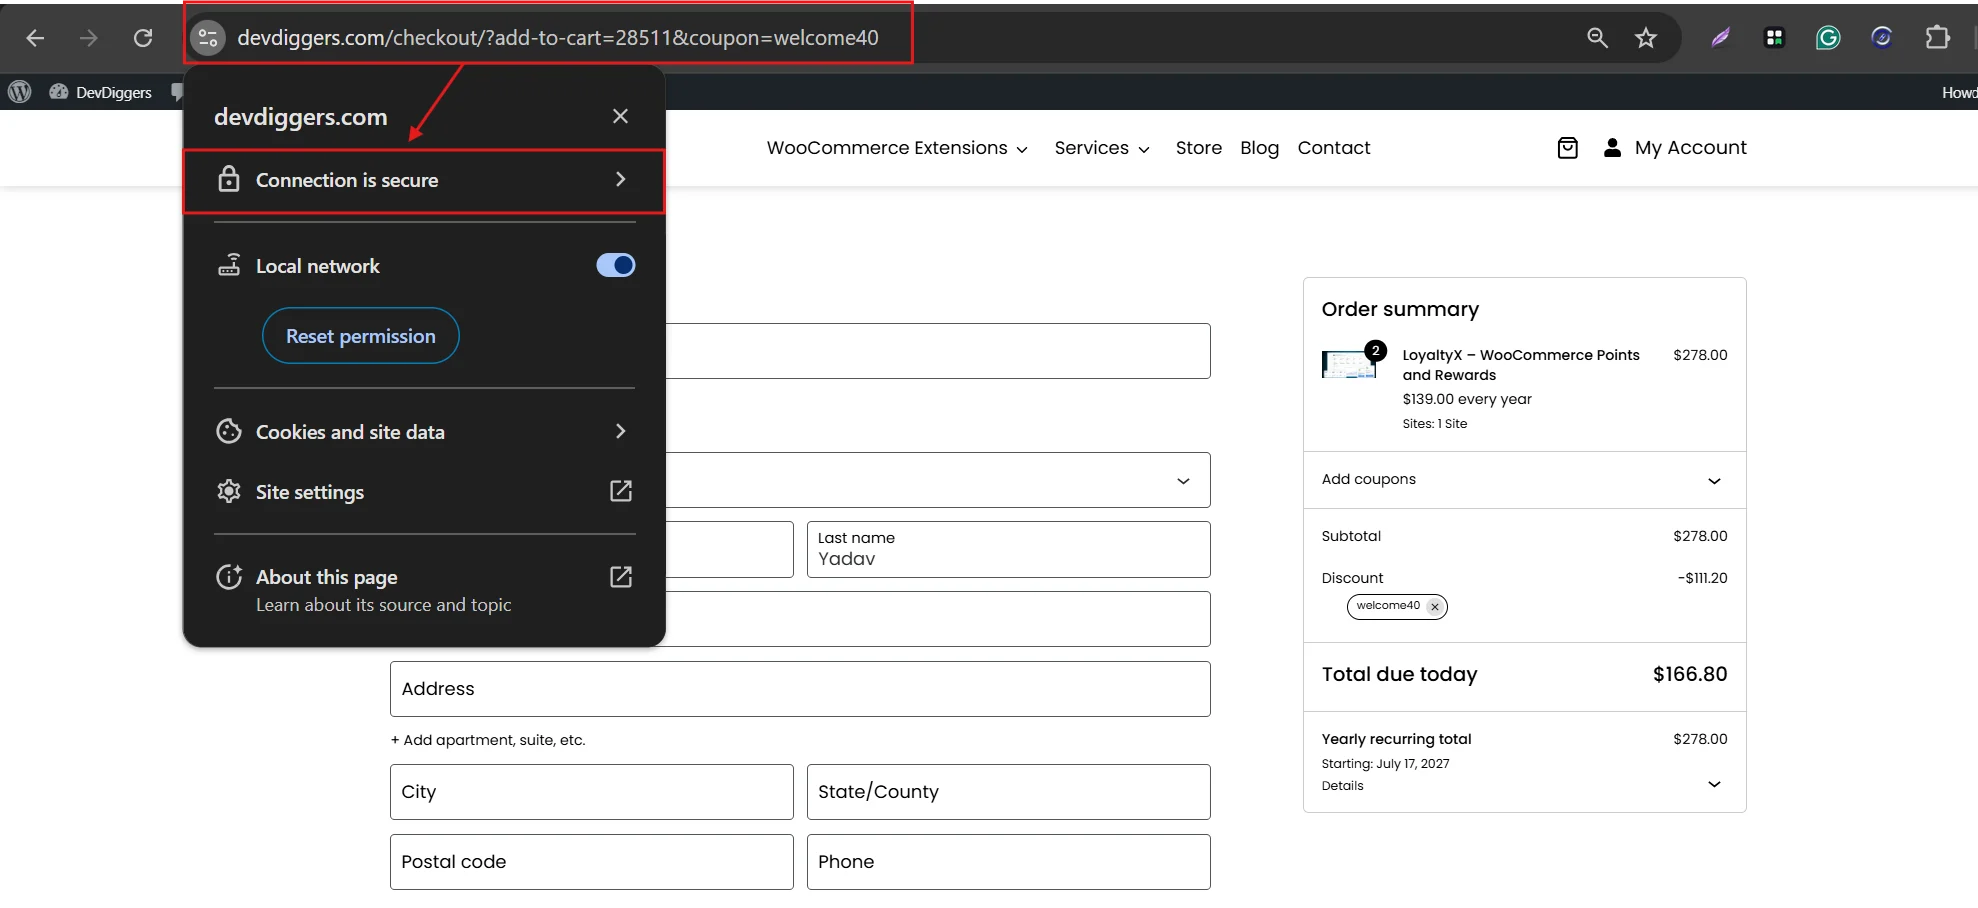
If the domains do not match, ask your host to reissue the certificate to cover both versions. Store owners handling any payment data should also confirm their setup stays PCI compliant, since SSL is only one piece of that broader requirement. If your WooCommerce store needs a deeper security or performance review beyond SSL, DevDiggers offers WordPress development services built specifically around WooCommerce stores.
How to Confirm Your SSL Fix Actually Worked
Once you have applied a fix, do not assume it worked. Run through this checklist to confirm the issue is genuinely resolved, not just temporarily hidden by your browser’s cache.
- Visit your site directly and confirm the padlock icon appears in the address bar.
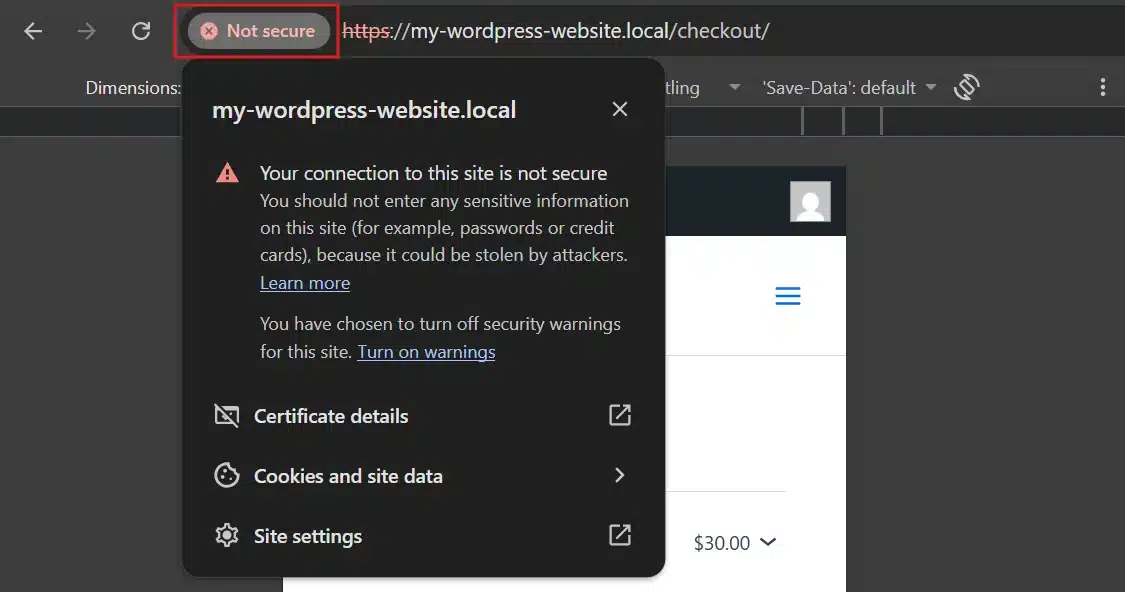
- Open an incognito browser window and repeat the check, since regular windows can hide caching issues that mask a real problem.
- Right-click, select Inspect, and check the Console tab for any leftover mixed content warnings.
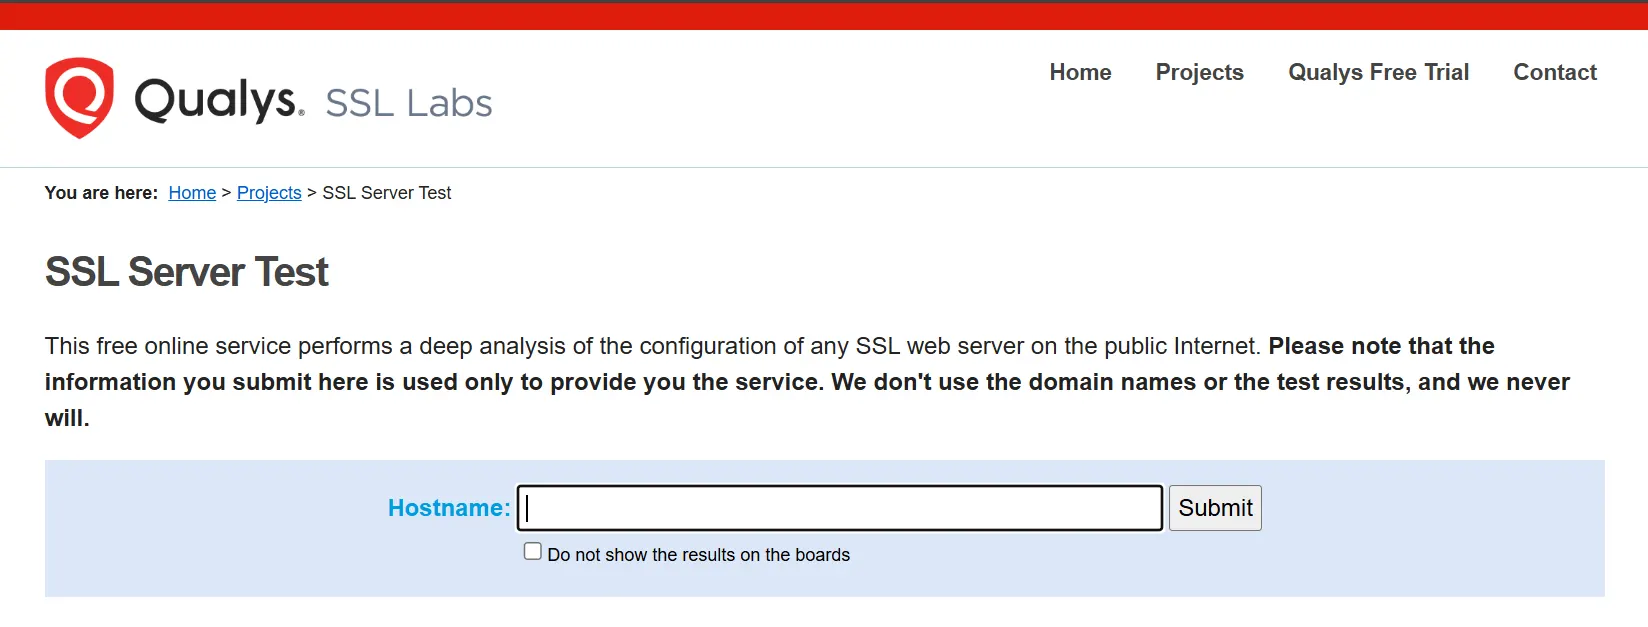
- Run your domain through Qualys SSL Labs for a full certificate and configuration report.
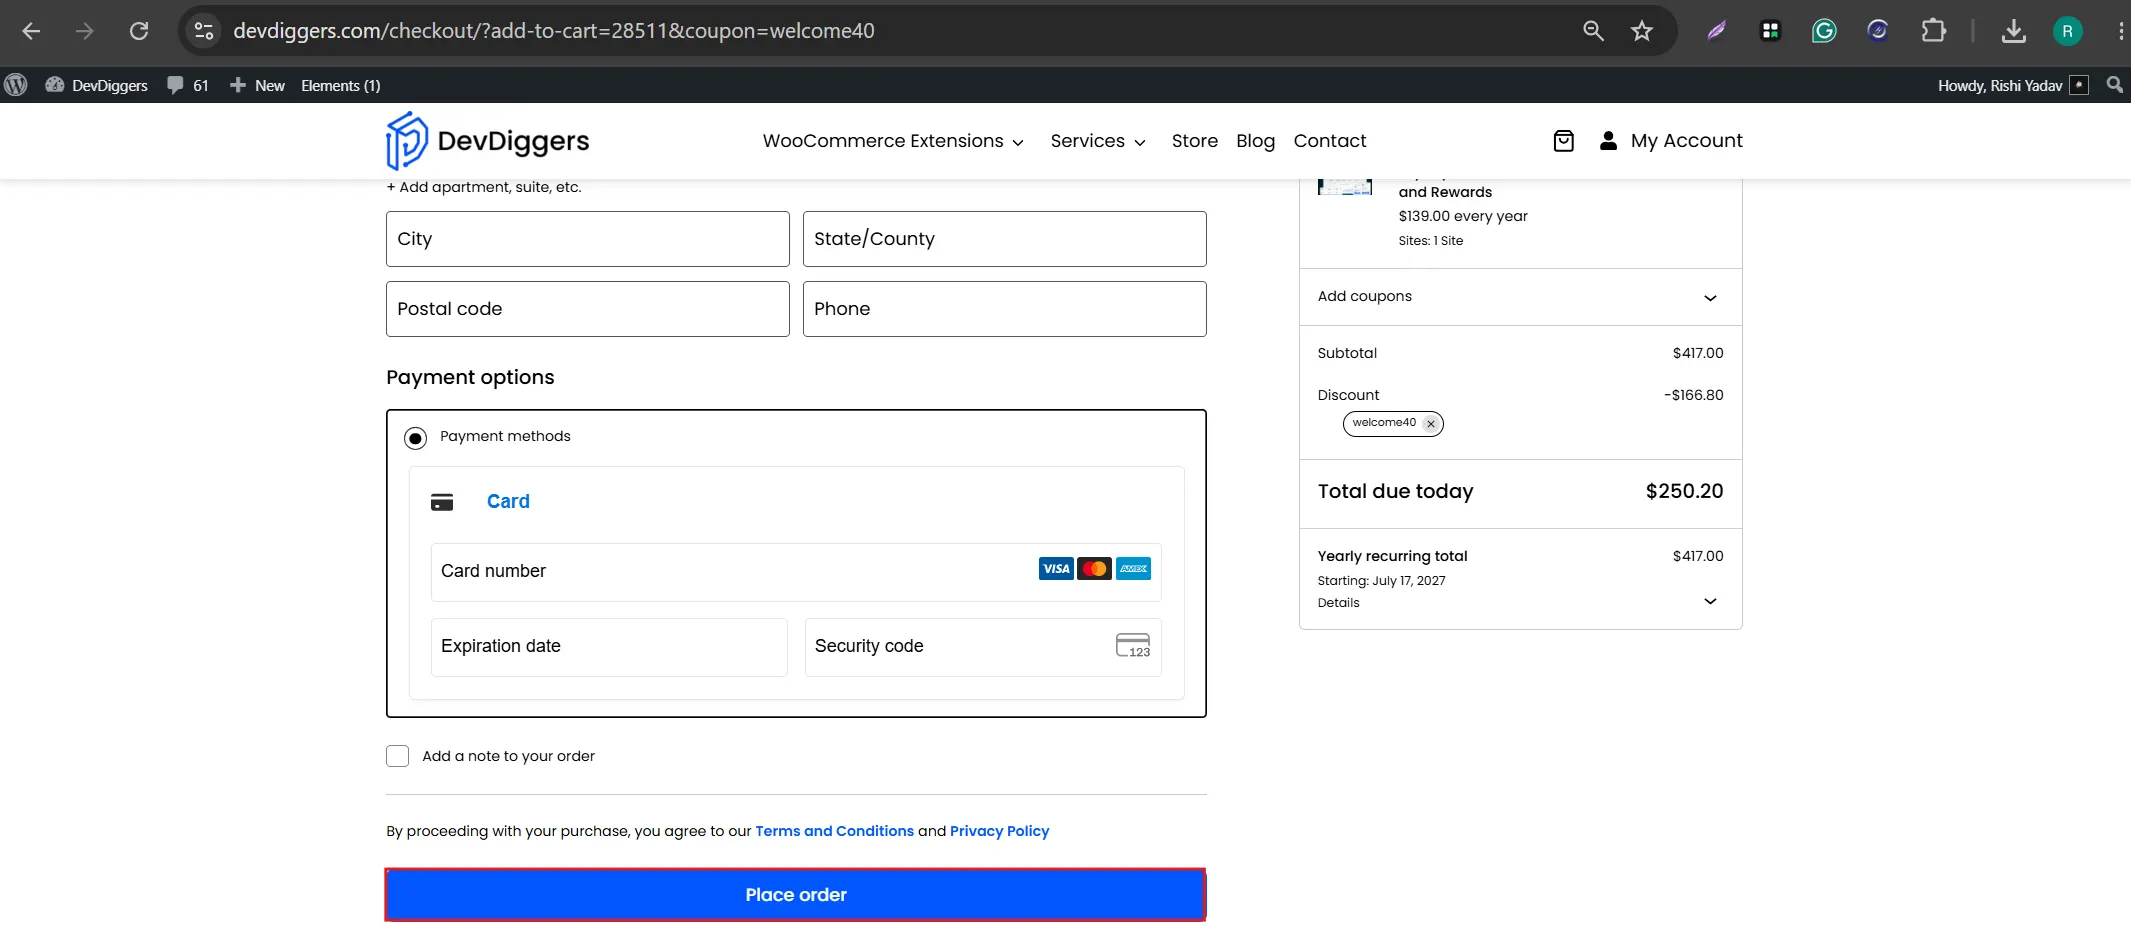
- If you run WooCommerce, complete a full test checkout to confirm the payment page loads securely from start to finish.
Common Mistakes That Cause SSL Problems in WordPress
Most SSL issues are not random. They come from a handful of repeatable mistakes that show up across almost every WordPress site.
- Changing the URL before the certificate is active: Switching your site address to HTTPS in WordPress settings before the SSL certificate is actually installed locks you out of your own site.
- Running two SSL plugins at once: Really Simple SSL and SSL Insecure Content Fixer can conflict with each other if both try to force HTTPS redirects at the same time.
- Ignoring the WordPress database: Old posts and pages often store hardcoded HTTP links from before SSL was added. Skipping the search and replace step leaves these buried and unresolved indefinitely.
- Forgetting third-party embeds: Embedded YouTube videos, fonts, or widgets from other services sometimes still load over HTTP, even after your own site is fully secure.
- Never checking that auto-renewal actually worked: Auto-renewal fails silently more often than most site owners realise. A quick manual check once a quarter, alongside a broader WordPress security checklist, catches this before it becomes downtime.
- Skipping a backup before making changes: Editing the .htaccess file or running a database search and replace without a backup first turns a small SSL fix into a much bigger recovery project if something goes wrong.
Conclusion
Fixing common SSL issues in WordPress almost always comes down to six repeatable causes: a missing certificate, mixed content, redirect loops, page-specific hardcoded links, expired certificates, and server-level performance. Work through the step-by-step fixes above in order, and confirm each one with the verification checklist before moving to the next.
A secure, correctly configured HTTPS setup protects your visitors’ data, builds trust, and keeps your search rankings intact. Once your SSL setup is stable, revisit it quarterly rather than waiting for a browser warning to remind you.
Frequently Asked Questions (FAQs)
Q1. How long does it take to fix an SSL issue in WordPress?
Most single SSL issues, like mixed content warnings or a certificate reinstall, take 15 to 30 minutes to fix once you know the cause. Redirect loops caused by plugin conflicts can take longer if you need to test plugins one by one.
Q2. Can I fix SSL issues without a plugin?
Yes. Every fix in this guide has a manual method alongside the plugin method. Manual fixes take more time but give you more control and avoid adding another plugin to your site.
Q3. Will fixing SSL issues affect my SEO rankings?
Fixing SSL issues protects your rankings rather than hurting them. Google treats HTTPS as a ranking signal, and unresolved mixed content or redirect errors can quietly hurt your site’s ability to be indexed over time.
Q4. What is the difference between SSL and TLS?
TLS is the modern, more secure replacement to SSL, though the term SSL is still used informally to describe the same HTTPS encryption technology. Your WordPress SSL certificate is technically a TLS certificate in almost every case today.
Q6. Why does my SSL certificate keep showing as invalid after I renew it?
This usually happens when the browser or server is still caching the old certificate. Clear your site’s cache, your browser cache, and if you use a CDN, purge its cache separately as well.
Q7. Is a free SSL certificate as secure as a paid one?
Yes, for most WordPress sites. A free certificate from Let’s Encrypt provides the same encryption strength as a paid certificate. Paid certificates mainly add extended validation branding or warranty coverage, which matters more for large financial institutions than for typical WooCommerce stores.