How to Publish a WordPress Site and Make It Live Today

Publishing a WordPress site takes less than an hour when you know the steps, but most guides skip the part that actually trips people up.
Here is the hard truth: you can build a beautiful site, set everything up correctly, and still wonder why Google cannot find it two weeks after launch. The cause is almost always a single checkbox sitting quietly in your WordPress settings.
This guide walks you through the full process from choosing hosting to what to do in the first 48 hours after your site goes live.
What “Publishing a WordPress Site” Actually Means
Publishing a WordPress site means making it accessible to anyone on the internet via your domain name. There is no single “go live” button. Instead, you set up hosting, install WordPress, build your pages, and configure a few key settings, at which point your site is live by default.
Worth knowing before you start: there are two very different versions of WordPress. WordPress.org is the self-hosted version where you own the software, control everything, and pay separately for hosting and a domain. WordPress.com is a hosted platform that handles the server side for you. Most business owners and developers use WordPress.org for the control it gives. This guide covers both, but focuses on the self-hosted path.
According to W3Techs, WordPress powers over 41% of all websites on the internet. The platform’s flexibility is a big part of why.
How to Publish a WordPress Site: 7 Steps
Step 1: Choose Your Hosting and Domain
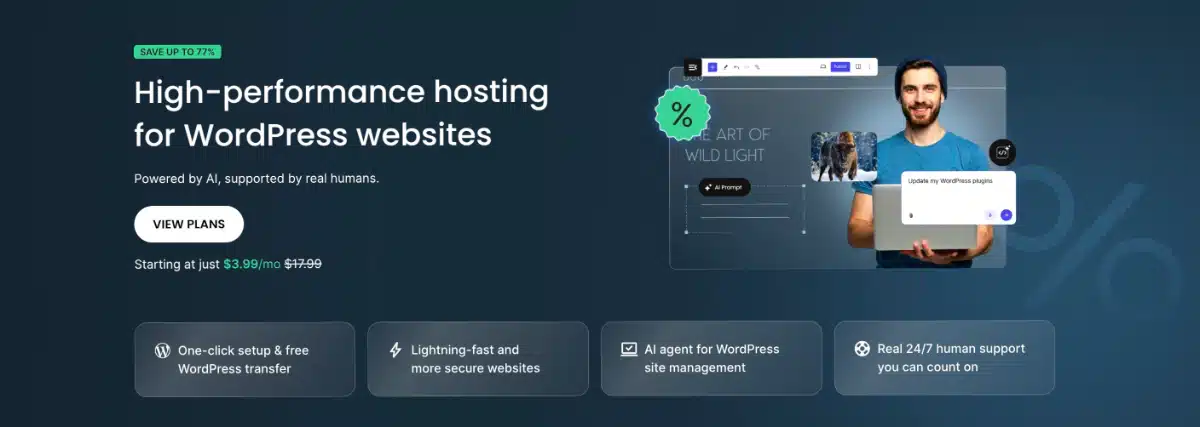
Your hosting is where your site lives. Pick a bad host and your site will be slow, go down at the wrong moments, or attract security problems. Pick a good one, and you barely think about it.
For most people, starting managed WordPress hosting from providers like SiteGround, WP Engine, or Kinsta removes the technical overhead. Your domain name (the URL people type to reach you) can be registered through your host or a separate registrar like Namecheap.
Expect to pay roughly $3 to $15 per month for shared hosting and $25 or more for managed WordPress hosting. Your domain usually runs about $10 to $15 per year.
Step 2: Install WordPress
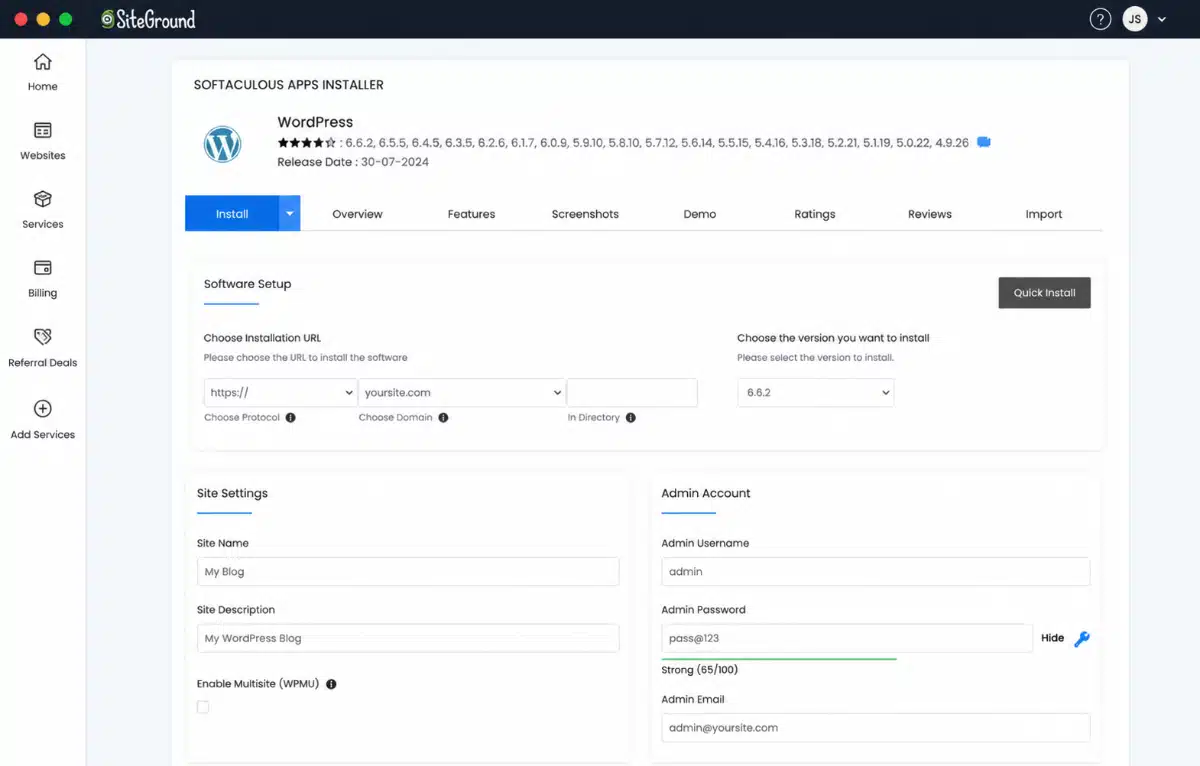
Once you have hosting, log in to your control panel (usually cPanel or a host-specific dashboard) and find the WordPress installer. Most hosts offer a one-click install in which you enter your site name, admin username, and password, and WordPress is running within a few minutes.
If you are using a host with a custom dashboard (like Kinsta or WP Engine), look for a “Create Site” or “Add Site” button. The process is the same: fill in a few fields, click install.
After installation, your login URL will be yourdomain.com/wp-admin. Bookmark it.
Step 3: Install a Theme and Build Your Pages

Your theme controls how your site looks. You can browse free themes directly inside WordPress by going to Appearance > Themes > Add New. Popular free options include Astra, GeneratePress, and Kadence. Premium themes are also available if you need more built-in design options.
Once your theme is active, start building your pages. Go to Pages > Add New in your dashboard to create a blank page. The WordPress block editor (Gutenberg) lets you add text, images, buttons, and other content by clicking the “+” icon and choosing a block type. For a detailed walkthrough, see our guide on how to add pages in WordPress.
Most sites need at least these pages to start: Home, About, Contact, and a Blog or Services page.
Step 4: Configure Your Core Settings
These five settings matter before you publish anything:
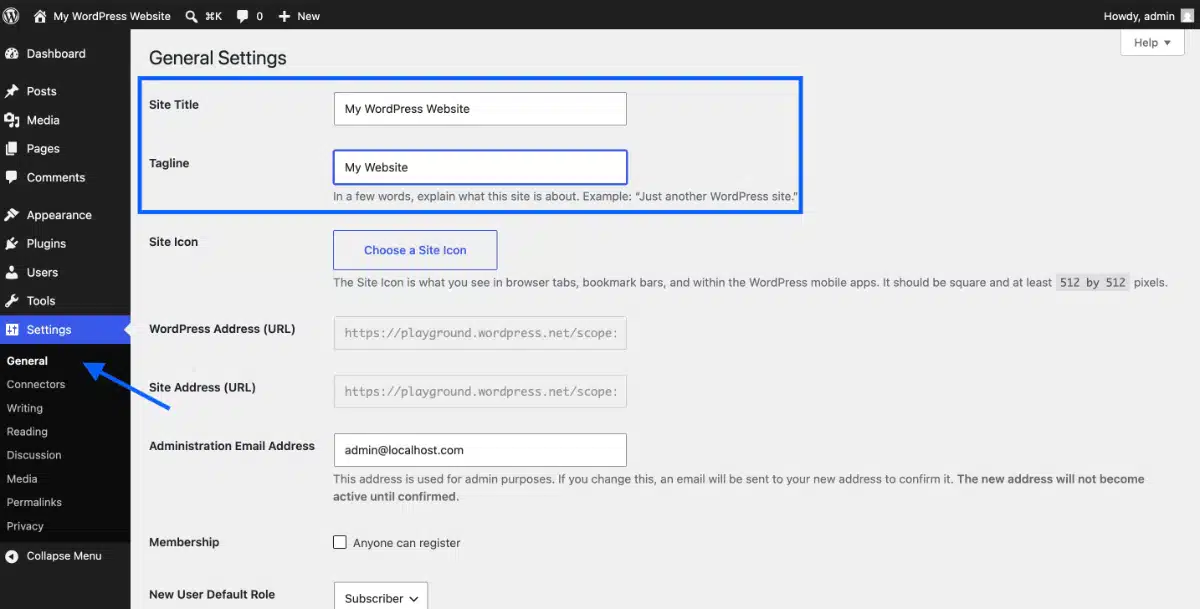
- Site title and tagline: Go to Settings > General. Set your site title and tagline. These show up in browser tabs and sometimes in search results.
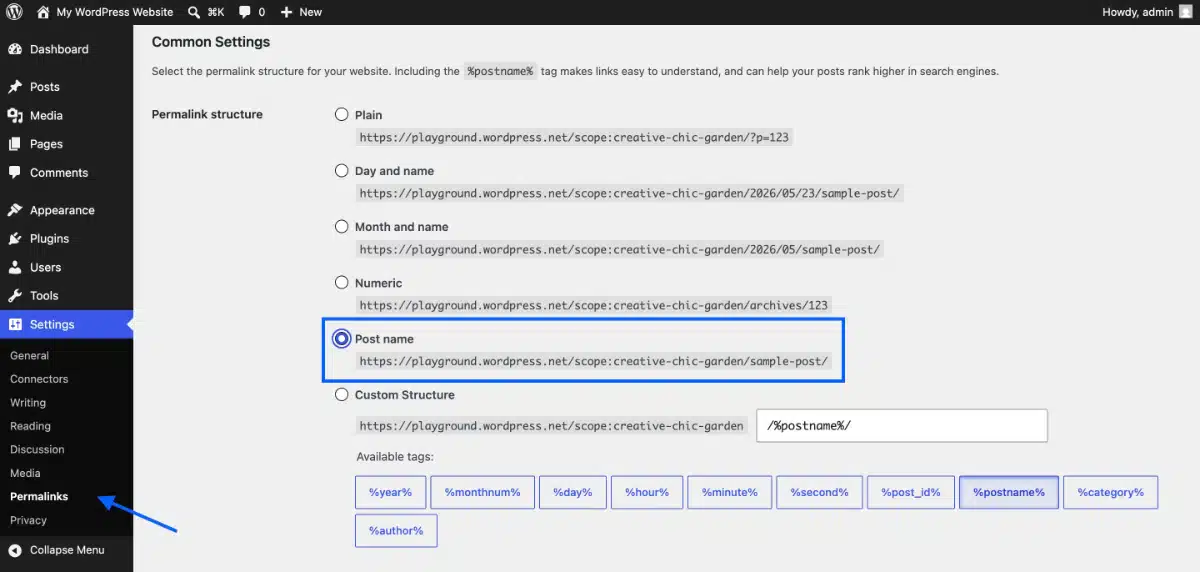
- Permalink structure: Go to Settings > Permalinks. Choose “Post name” as your structure. This gives you clean URLs like yourdomain.com/about rather than yourdomain.com/?p=123. Set this once and do not change it after launch. If you change your permalink structure after pages are indexed, every previously shared or bookmarked URL breaks.
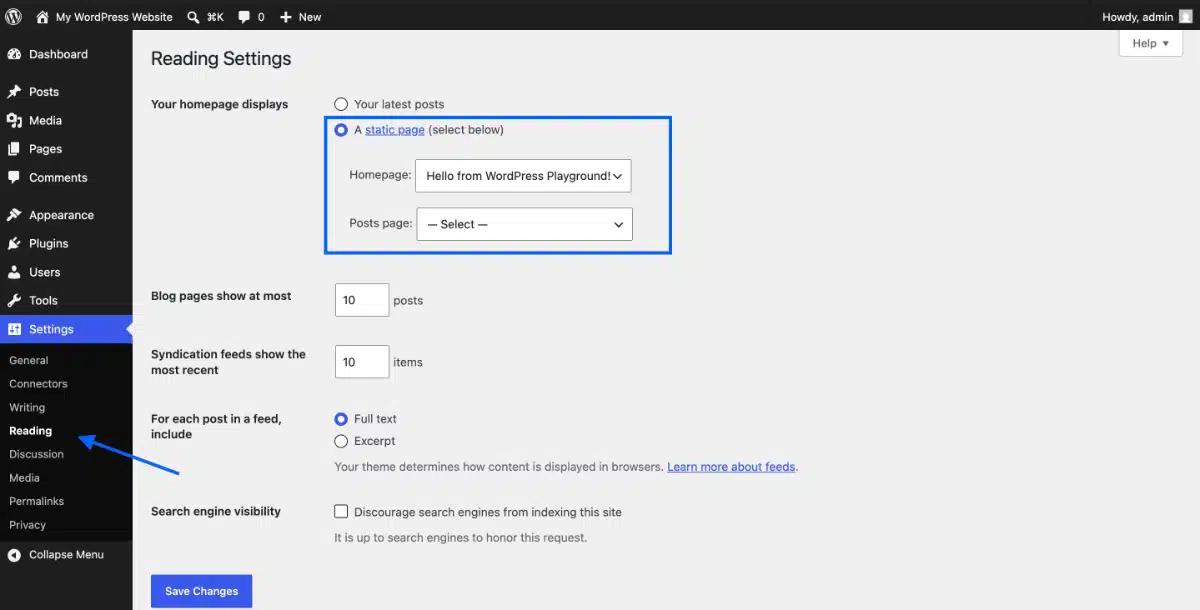
- Static homepage: Go to Settings > Reading. If you want a custom homepage rather than a list of recent blog posts, select “A static page” and choose the page you built in Step 3.
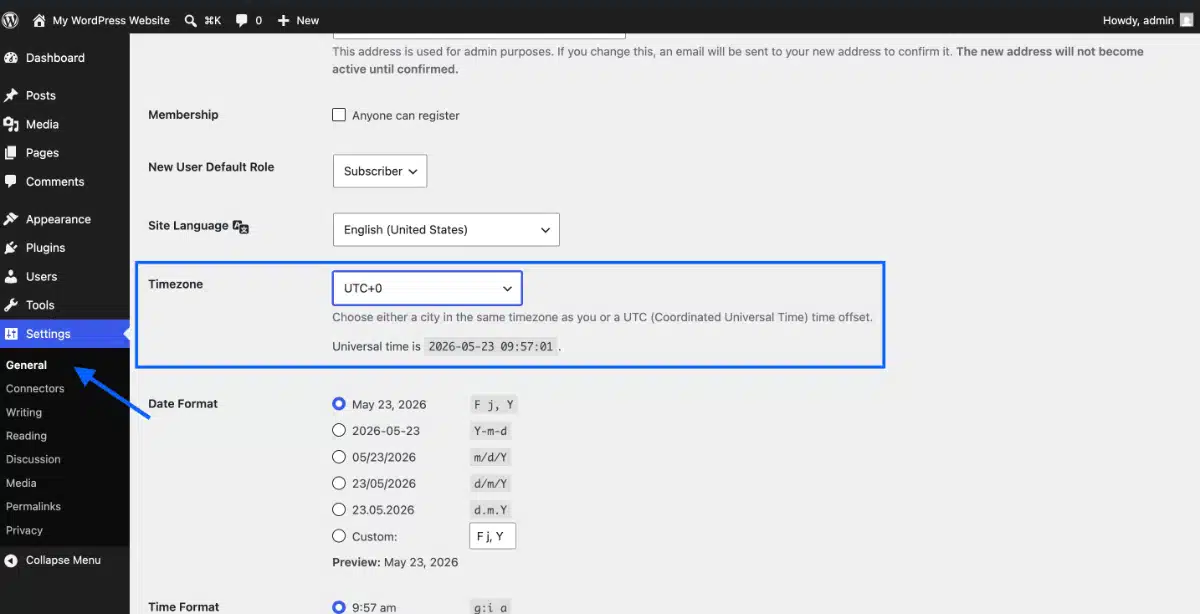
- Time zone: Go to Settings > General and set your time zone. This matters for scheduled posts and plugins that depend on time-based triggers.
- Remove the default content: WordPress installs with a “Hello World” post and a “Sample Page.” Delete both before you go live. They look unprofessional and can confuse search engines.
Step 5: Add and Publish Your Pages and Posts

With your settings configured, head back to each page you built and hit Publish. In the block editor, the Publish button sits in the top-right corner. WordPress will ask you to confirm, so click “Publish” a second time to confirm.
For posts (blog content), go to Posts > Add New, write your content, set a category, add a featured image using the right-hand sidebar, and click Publish.
You can also schedule content ahead of time. Click the “Publish” button in the sidebar, change “Immediately” to a specific date and time, and WordPress will queue it for you.
Each page and post is live as soon as you publish it. That is important to understand: in WordPress, publishing happens at the content level, not at the site level.
Step 6: Turn Off Maintenance Mode and Check Your Search Engine Visibility Setting
This is the step most guides skip. And it is the one that causes real damage.
During development, many people either activate a maintenance mode plugin or tick the “Discourage search engines from indexing this site” box in Settings > Reading. Both make sense while you are building. But if you forget to reverse them before launch, your site is technically live but completely hidden from Google.
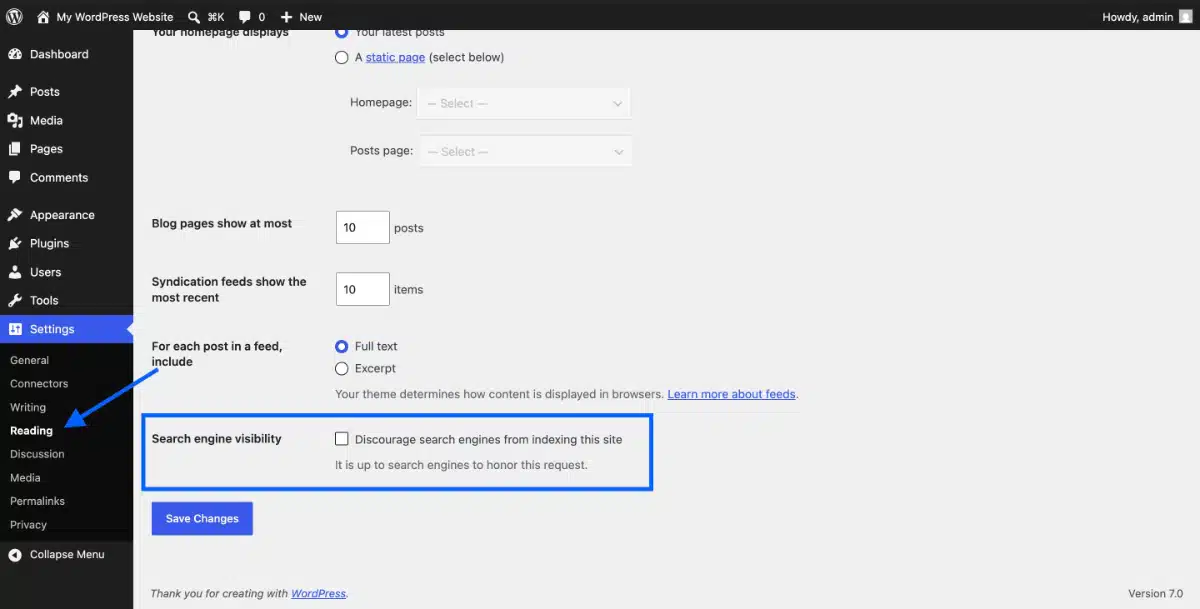
Go to Settings > Reading and look for the “Search Engine Visibility” section. Make sure the box that says “Discourage search engines from indexing this site” is unchecked. If it is checked, Google cannot index your pages even if your site looks perfectly live to anyone with the direct URL.
This is one of the most common issues we see on sites that have “launched” but are not getting any organic traffic. The fix is one click, but you have to know to look for it. This case study from Brinzan documents exactly what happens when a live business site runs for months with this box ticked.
If you were using a maintenance mode plugin during development, deactivate it from Plugins > Installed Plugins.
Step 7: Verify Your SSL Certificate Is Active
SSL is what puts the padlock icon in your browser bar and changes your URL from http:// to https://. Without it, browsers warn visitors that your site is “Not Secure,” which kills trust immediately. It also affects search rankings.
Most hosts activate SSL automatically when you set up your domain. To check: visit your site in a browser and look for the padlock icon in the address bar. If it is missing, log in to your hosting control panel and look for an SSL section. Most hosts let you activate a free Let’s Encrypt certificate in one click.
Do not launch until the padlock is there.
Before You Hit Publish: A Quick Pre-Launch Checklist
Think of this as the final walk-through before you open the doors. Even experienced developers run a version of this list before every WordPress site launch.
Content checks:
- Delete the default “Hello World” post and “Sample Page” (Pages > All Pages, Posts > All Posts)
- Read every page for placeholder text, typos, and unfinished sections
- Check that all images have descriptive alt text
Technical checks:
- SSL certificate is active (padlock visible in browser)
- WordPress permalink structure is set to “Post name” and has not been changed again
- Search engine visibility is unchecked (Settings > Reading)
- All contact forms send and receive emails correctly (test them yourself)
- Site loads on mobile and tablet, use your phone, not just browser developer tools
- No broken links, a free tool like Broken Link Checker can scan your site automatically
- Favicon is set (the small icon that appears in browser tabs)
Plugin checks:
- Install an SEO plugin (Yoast SEO or Rank Math) and run a basic setup
- Set up a backup plugin like UpdraftPlus before you go live, not after. If something breaks on day one, you need a recovery point
- Check for WordPress plugin conflicts if you notice anything odd during testing
Most tutorials put this list at the end or skip it entirely. Running it before launch catches the problems that would otherwise show up in your inbox three days later.
For deeper site cleanup before launch, including removing old drafts and orphaned media, see our guide on how to clean up a WordPress site.
What to Do in the First 48 Hours After Publishing
Your site is live. The checklist is done. Now what?
Most guides stop here. Here is what actually moves the needle in the first two days.
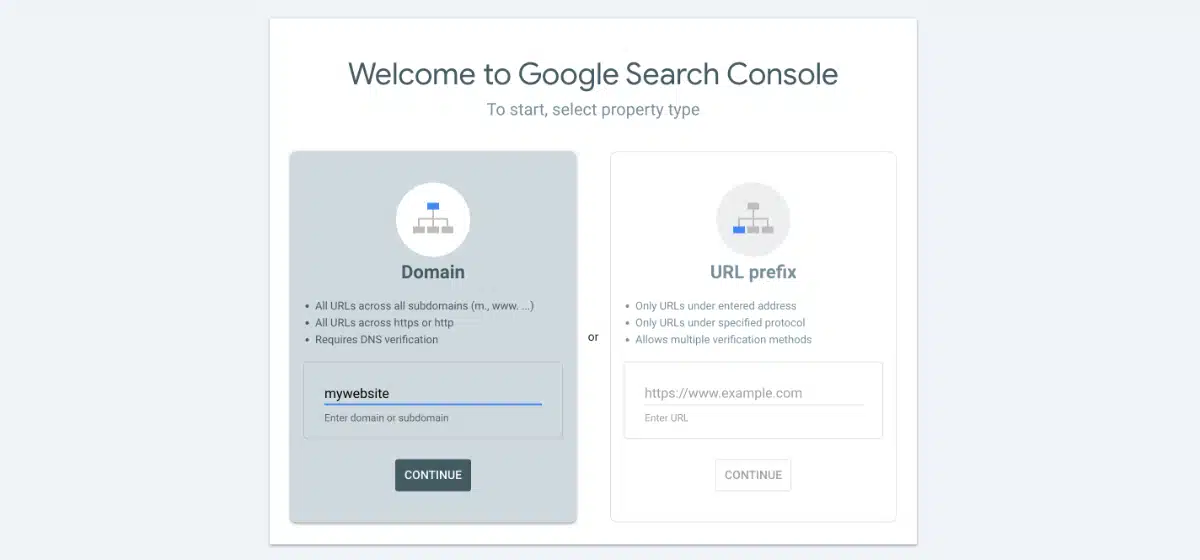
- Submit your sitemap to Google Search Console: Google Search Console is a free tool that shows you how Google sees your site. Go to Google Search Console, add your site, and verify ownership.
Then go to Sitemaps, enter your sitemap URL (usually yourdomain.com/sitemap_index.xml or yourdomain.com/sitemap.xml, depending on your SEO plugin), and click Submit. This tells Google your site exists and gives it a map of your pages to crawl.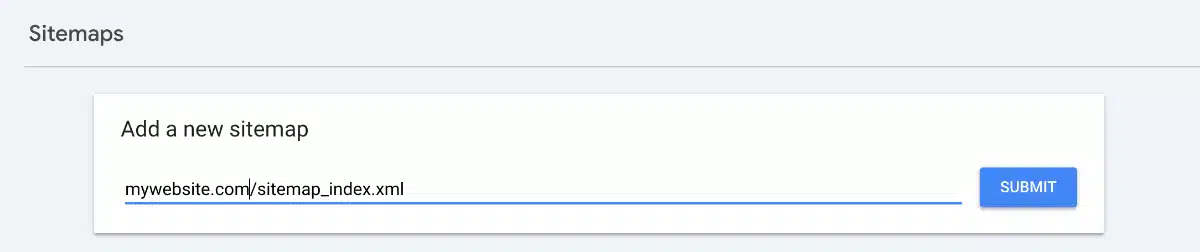
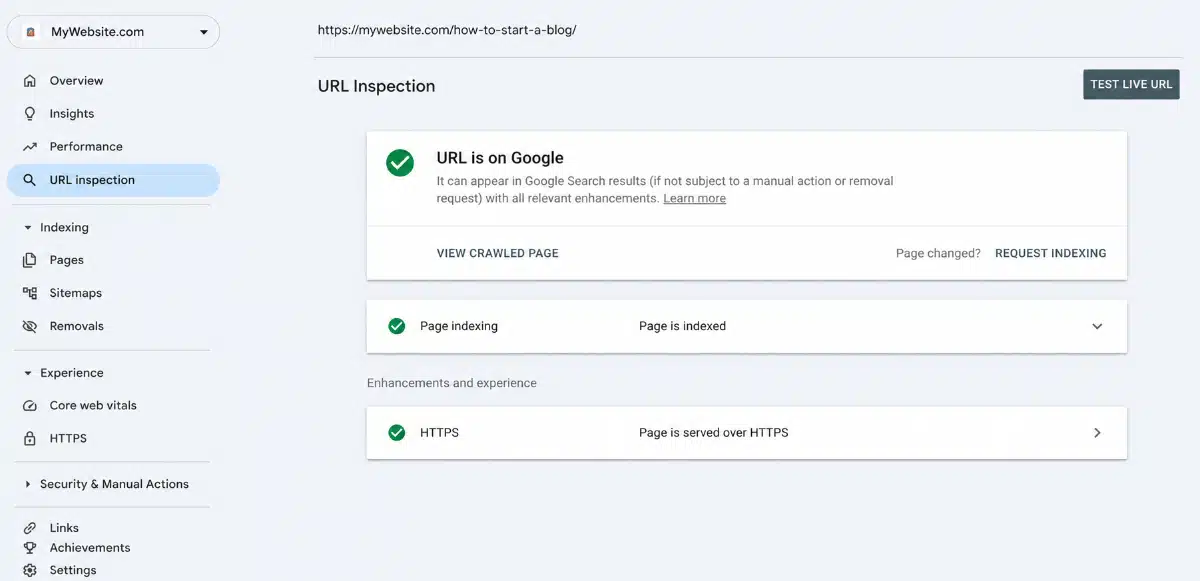
- Request indexing on your most important pages: In Google Search Console, use the URL Inspection tool. Paste in your homepage URL, click “Request Indexing.” Repeat this for your 3 to 5 most important pages. Google does not guarantee a timeline, but this signals that those pages are ready.
- Install Google Analytics or another analytics tool: You need a baseline. Install Google Analytics so you can see where visitors come from and which pages they land on. Without this, you are flying blind.
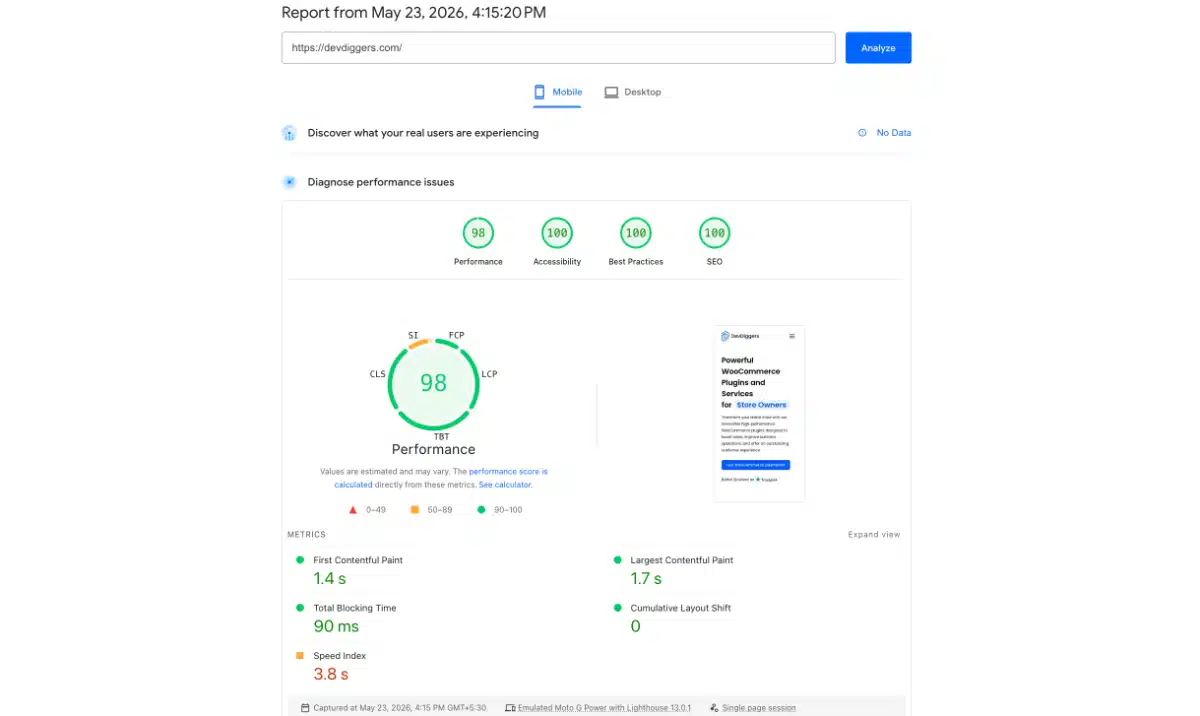
- Speed-test your site: Run your URL through Google PageSpeed Insights. A score below 70 on mobile means there is work to do. Common culprits are unoptimized images and uncached pages. If speed is a concern, our WordPress speed optimization services can get your Core Web Vitals into a good range quickly.
- Share your site: Tell people. Share your URL on LinkedIn, in your email signature, with anyone who said they would check it out. Early traffic, even a handful of real visitors, sends a positive signal.
If you need professional help setting up your site structure, configuring plugins, or building custom functionality, our WordPress development services are built for exactly that.
Conclusion
Publishing a WordPress site is not complicated, but it has more moving parts than most beginner guides admit.
The steps that matter: choose solid hosting, install and configure WordPress correctly, set your permalink structure before anything goes live, turn off that search engine visibility checkbox, and run through a pre-launch checklist before you open the doors.
Then get into Google Search Console within 48 hours and submit your sitemap. Do those things, and your WordPress site will be live, indexed, and ready to grow.
Frequently Asked Questions
Q1. Can I publish a WordPress site for free?
You can use WordPress.com’s free plan to publish a site, but it will include WordPress branding in your URL and limited features. For a fully custom site on your own domain, you need to pay for hosting (about $3 to $15 per month) and a domain name (about $10 to $15 per year). WordPress.org software itself is free to download and use.
Q2. Why is my WordPress site live but not showing up in Google?
The most likely cause is the search engine visibility setting in WordPress. Go to Settings > Reading and check whether “Discourage search engines from indexing this site” is ticked. If it is, uncheck it and save. It can also take Google a few days to several weeks to index a new site, even after you submit your sitemap.
Q3. What is the difference between publishing a page and publishing a site in WordPress?
Publishing a page makes that specific page visible to visitors. There is no separate button to publish your entire site; your site is accessible to the public as soon as your domain is connected to your hosting and WordPress is installed. Publishing individual pages and posts is how you add content to that live site.
Q4. Do I need a plugin to publish a WordPress site?
No. You can publish a WordPress site without any plugins at all. Plugins add features like SEO optimization, backup, contact forms, and security, but none of them are required to get your site live. That said, an SEO plugin and a backup plugin are worth adding before launch.
Q5. What should I do if my site looks broken after publishing?
First, check whether it looks fine in a different browser or in private/incognito mode, because sometimes a cached version causes display issues. Next, deactivate your plugins one by one to check for issues. If the problem started after a recent change, your hosting provider may be able to restore a recent backup.
Q6. Does WordPress automatically create a sitemap?
Not by default. WordPress core includes a basic XML sitemap since version 5.5, located at yourdomain.com/wp-sitemap.xml. However, most SEO plugins like Yoast SEO or Rank Math replace this with a more detailed sitemap that covers posts, pages, categories, and custom post types. Install one of those before submitting to Google Search Console.
Kartika Musle
Kartika Musle is a tech writer at DevDiggers covering WooCommerce features, web design, and development security. Her articles translate technically dense subjects into guides that a non-developer can follow without losing the detail that matters, drawing on a background that touches both design and development.
Join thousands of readers getting smarter every week.
Leave a Reply