
Most SSL issues in WordPress come from five causes, and each one has a short fix. The certificate is wrong or expired, or a page mixes HTTP and HTTPS. A redirect loops, the site URLs disagree with the certificate, or a CDN mode clashes with your server.
We tested the settings and tools below on a WordPress 7.1 test site in October 2026. We checked every other step against the WordPress, Cloudflare and Let’s Encrypt documentation. This guide takes you from the browser error to the fix in six steps.
You will read the error, check the certificate, set both WordPress URLs, fix mixed content, remove redirect loops and match your Cloudflare mode. A short check at the end confirms it worked, and a note covers WooCommerce stores.
What Causes SSL Issues in WordPress?
SSL issues in WordPress happen when the browser cannot trust the connection or when the page loads in a way that breaks the padlock. The cause is almost always one of five things: the certificate, the site URLs, mixed content, a redirect rule or a CDN setting. The error message tells you which.
SSL is the older name for TLS, the encryption that turns http:// into https://. WordPress runs over HTTPS once a certificate is installed on the server, according to the WordPress HTTPS guide. Everything else is configuration around that one fact.
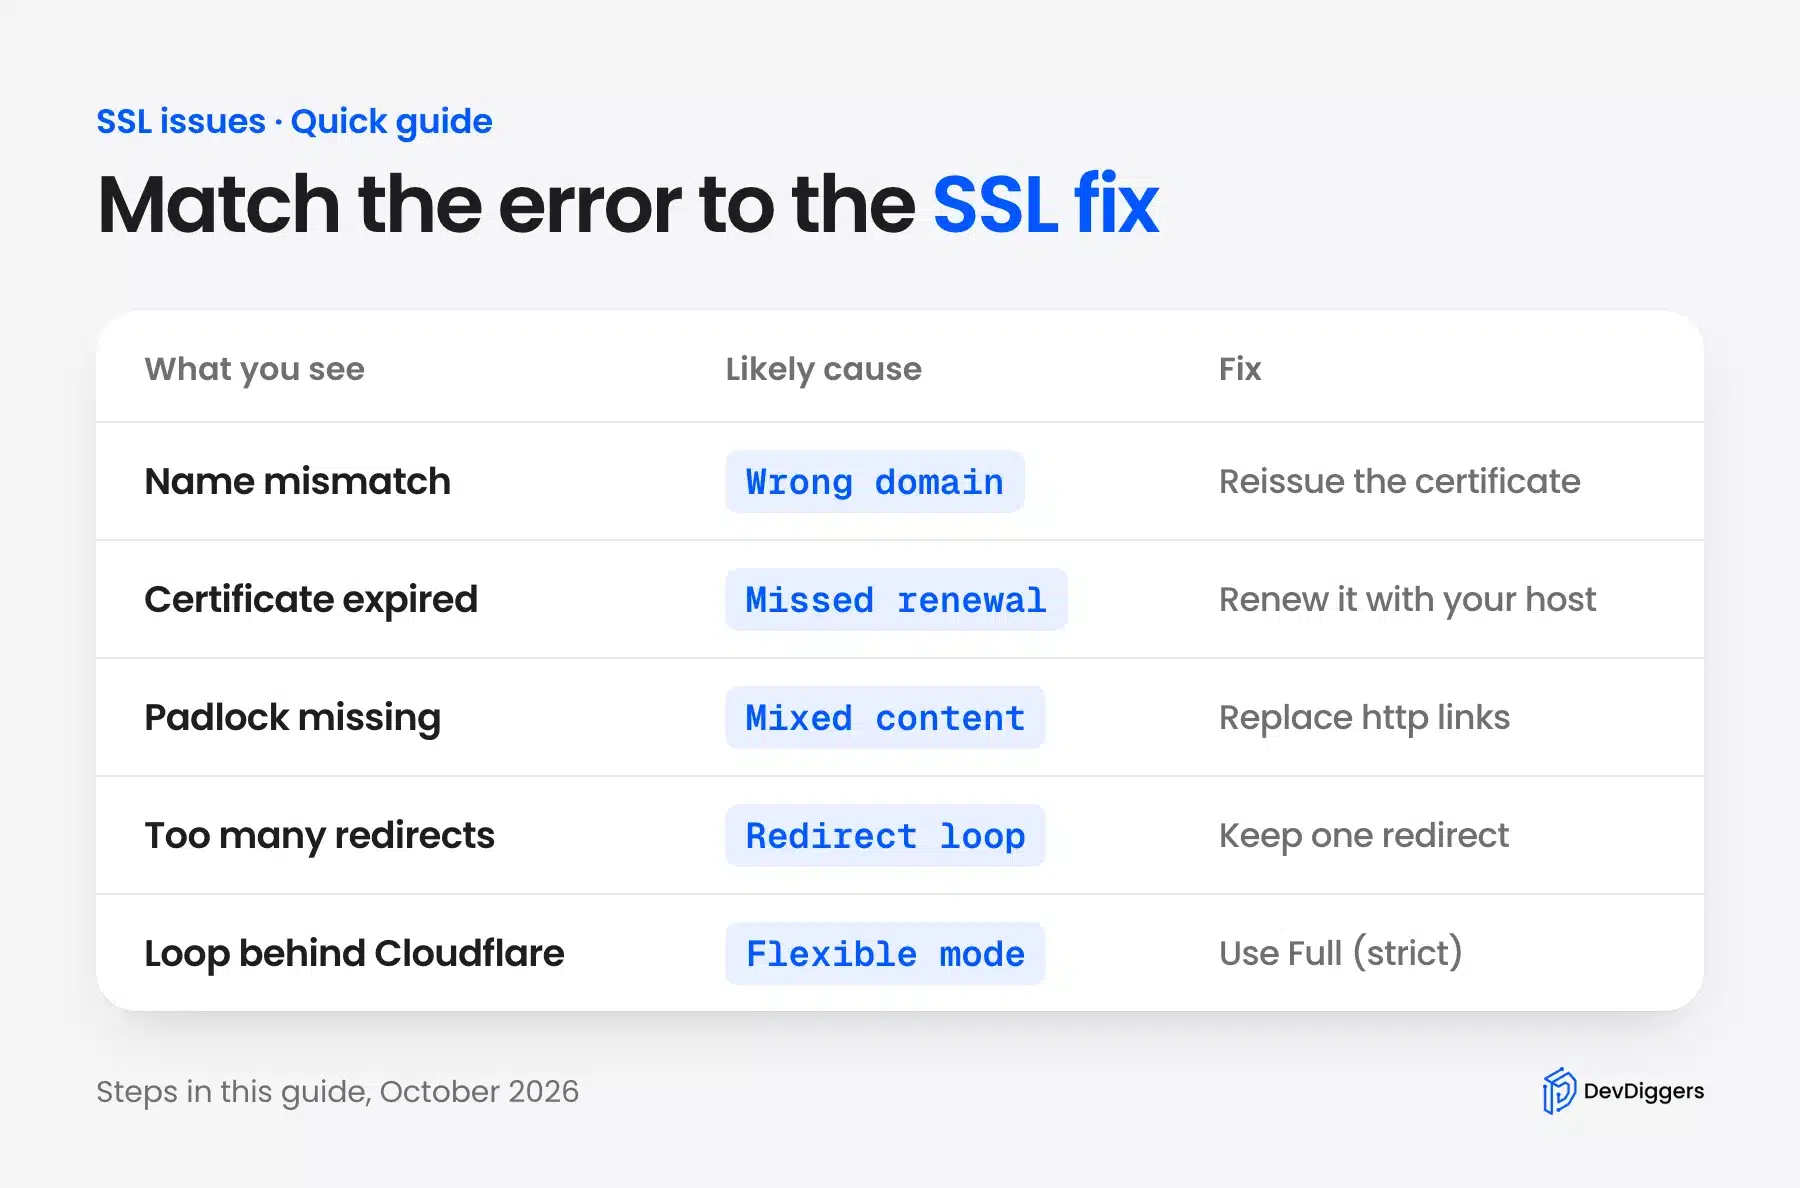
Start with the browser message. Then check the hosting panel, the WordPress settings and last the CDN. That order follows the path a request takes. The first thing that looks wrong is usually the real cause. The next section turns it into steps.
How to Fix SSL Issues in WordPress
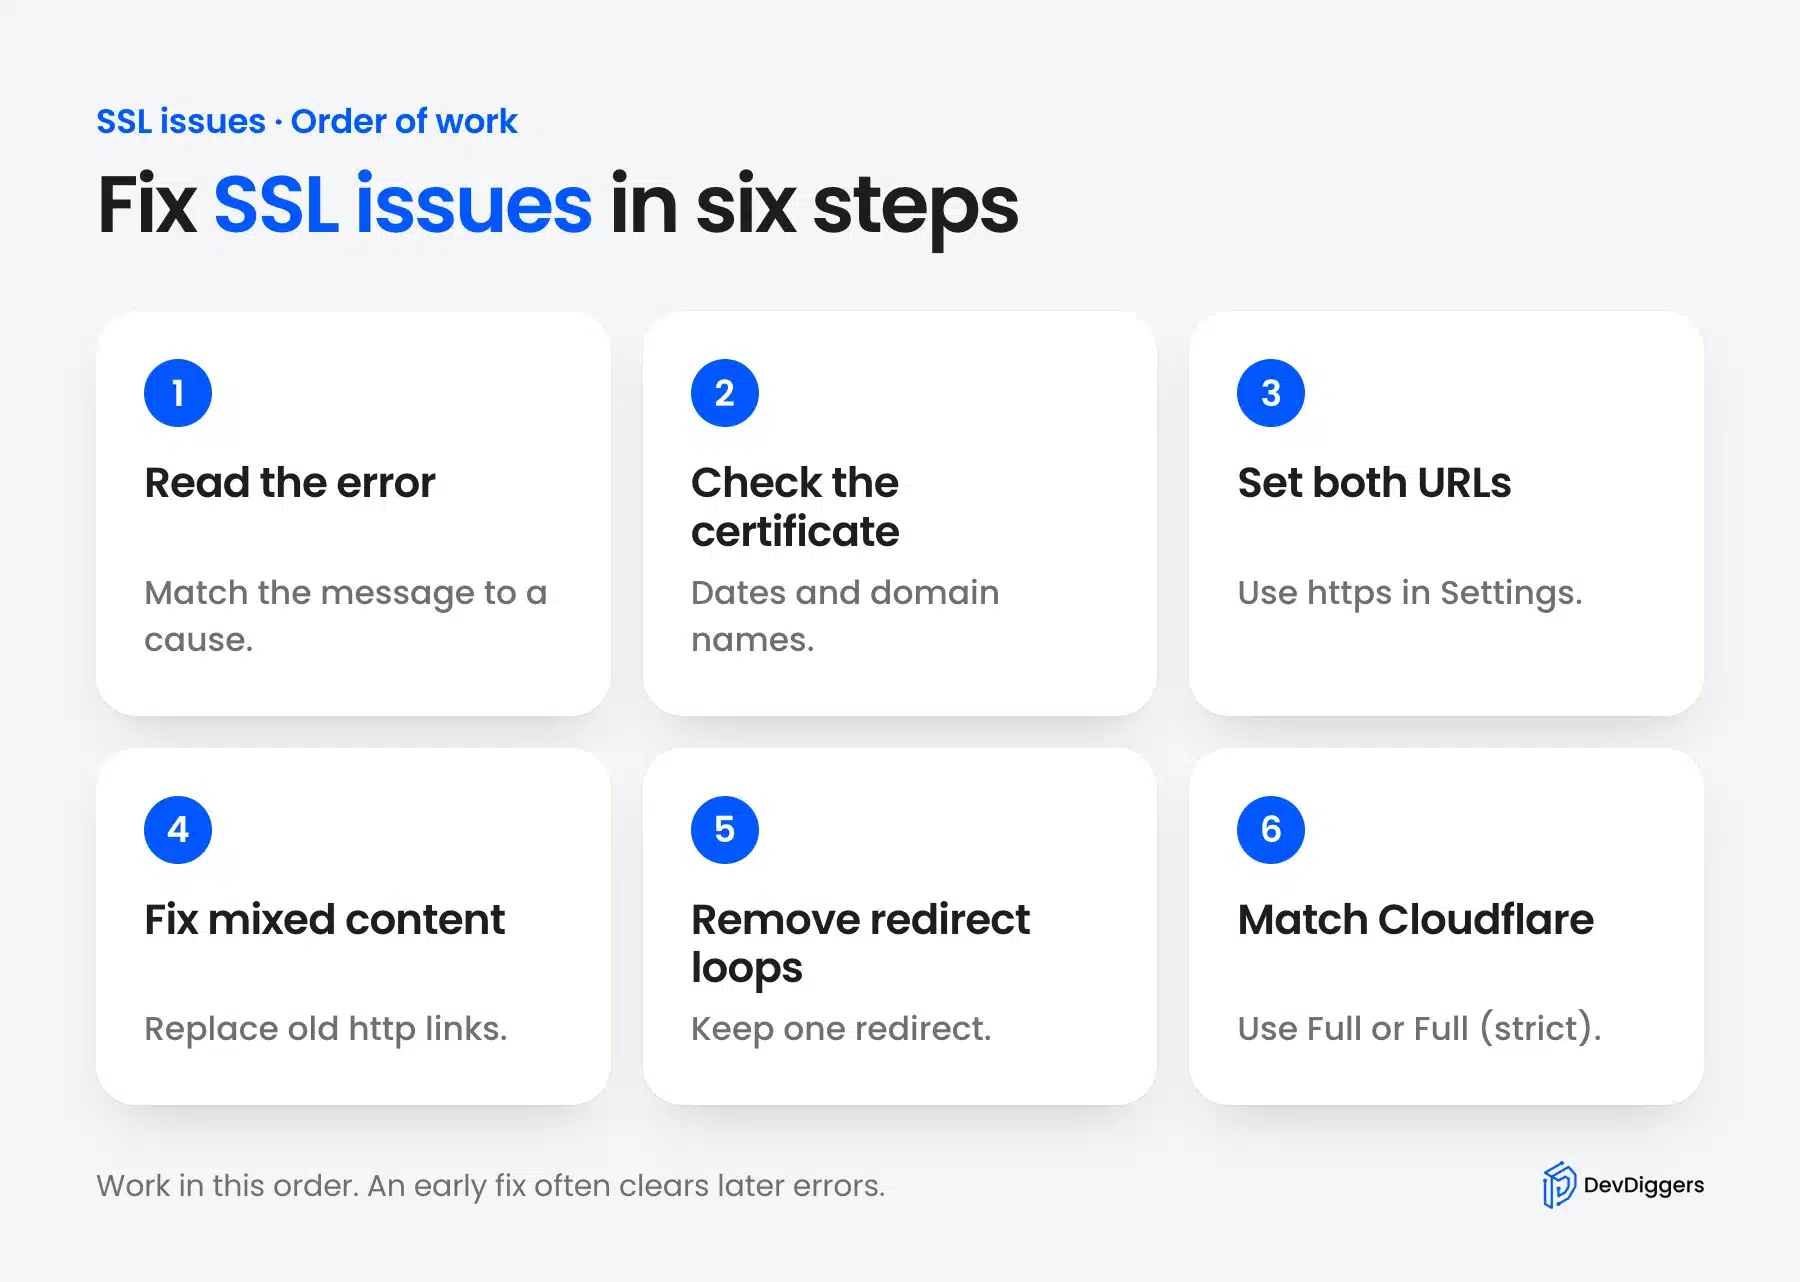
You can fix SSL issues in WordPress in six steps. Read the browser error, check the certificate, set both WordPress URLs to https, fix mixed content, remove redirect loops and match your Cloudflare mode. Work in that order, because an early step often clears the later problems too.
Important: Take a full backup of your files and database. Steps 3 to 5 change settings and stored links, and a backup turns a mistake into a five-minute restore.
Step 1: Read the Browser Error
The error text names the problem. Read it before you change anything. Chrome shows a full-page warning for certificate problems and a separate page for redirect loops. Each message points to a different step in this guide.
A “Your connection is not private” page with NET::ERR_CERT_COMMON_NAME_INVALID means the certificate was issued for a different domain. Our screenshot uses badssl.com, a public test site with deliberately misconfigured HTTPS endpoints.
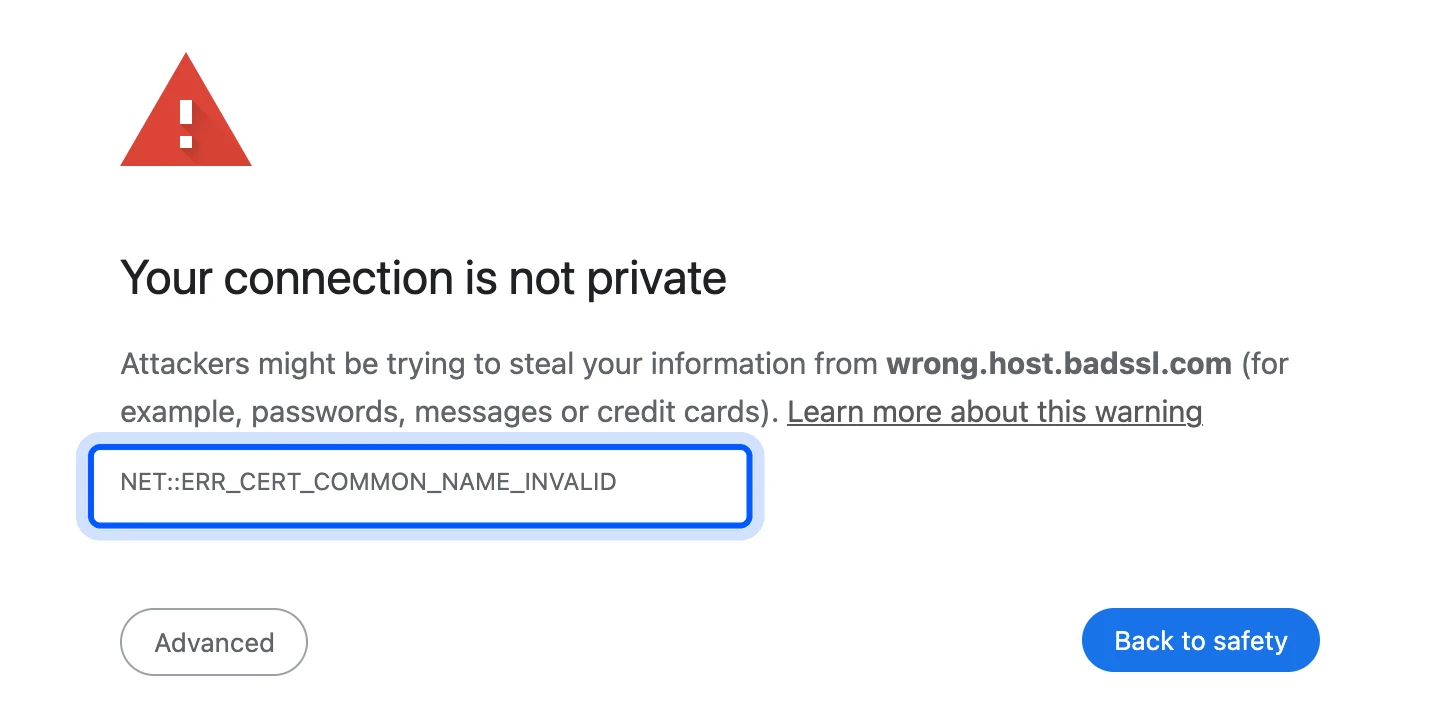
Use this list to match the message to a step:
- NET::ERR_CERT_COMMON_NAME_INVALID: The certificate does not cover this domain. Go to Step 2.
- NET::ERR_CERT_DATE_INVALID: The certificate has expired. Go to Step 2.
- ERR_TOO_MANY_REDIRECTS: HTTP and HTTPS keep sending the browser back and forth. Go to Steps 5 and 6.
- No padlock, no warning page: The page loads but something on it is insecure. Go to Step 4.
Step 2: Fix an SSL Certificate Error
An SSL certificate error means the certificate is expired or does not cover your domain. Check the dates and the names in your hosting panel and then renew or reissue the certificate. Most hosts keep this under an SSL or Security section.
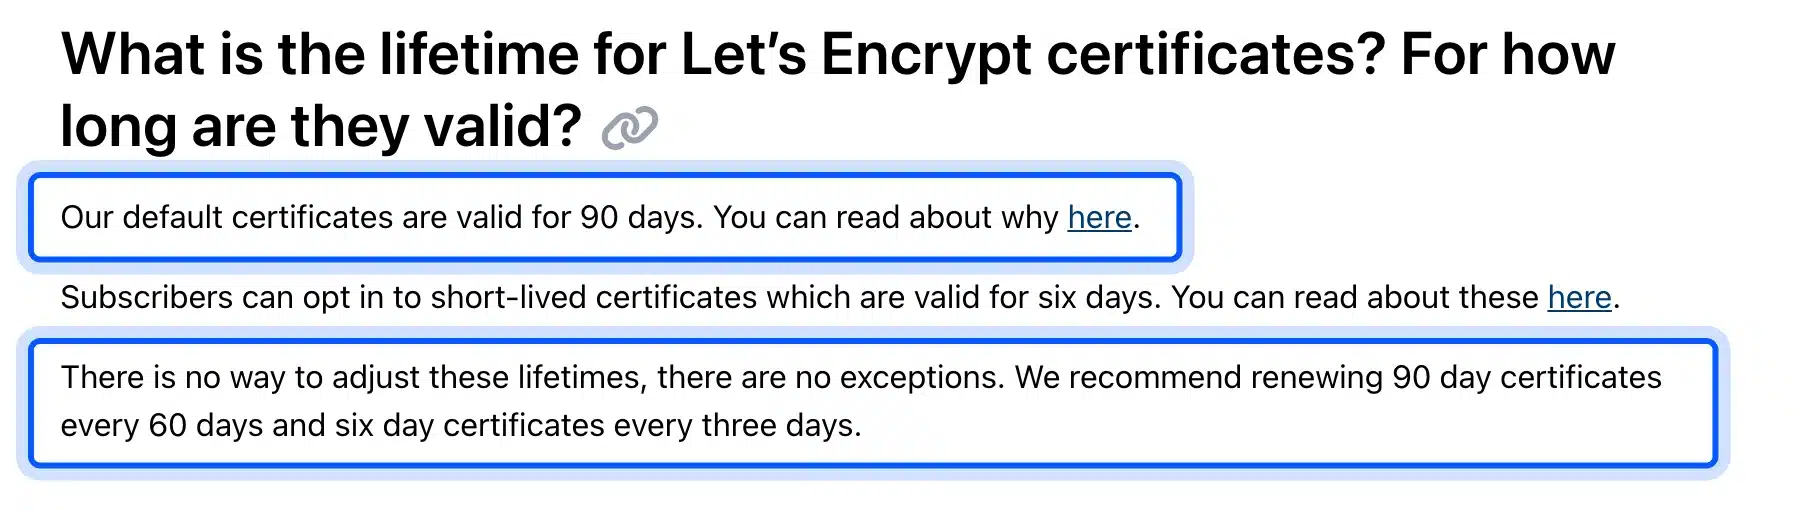
Let’s Encrypt certificates last 90 days, and its documentation recommends renewing them every 60 days. If your host uses Let’s Encrypt, renewal should happen on its own. A certificate that expired means the automatic renewal failed. Ask your host to run it again and to tell you why it failed.
A name mismatch is the other common failure. A certificate for example.com does not cover www.example.com unless the host added both names. Ask the host to reissue it for both versions and then reload your site.
If you want a deeper walkthrough, our guides cover how to renew your SSL certificate and how to fix ERR_SSL_PROTOCOL_ERROR.
Step 3: Set Both WordPress URLs to HTTPS
Your WordPress Address and Site Address must both start with https:// once the certificate works. Go to Settings > General, change both fields and save. WordPress then builds every link, script and stylesheet address with https.
Do this only after the certificate is active. Saving https URLs on a site with no working certificate locks you out of the dashboard. You then have to fix the values in the database or in wp-config.php.

On our test site both fields are greyed out, because we set them in wp-config.php. WordPress documents this: a value defined by the WP_HOME or WP_SITEURL constant shows in the field and cannot be edited there. In that case, change the constants instead:
define( 'WP_HOME', 'https://www.example.com' );
define( 'WP_SITEURL', 'https://www.example.com' );
To send logins and the dashboard over HTTPS as well, the WordPress HTTPS guide says to add this line to wp-config.php:
define( 'FORCE_SSL_ADMIN', true );
The same guide warns that it must be in wp-config.php and not in a plugin file.
Step 4: Fix Mixed Content
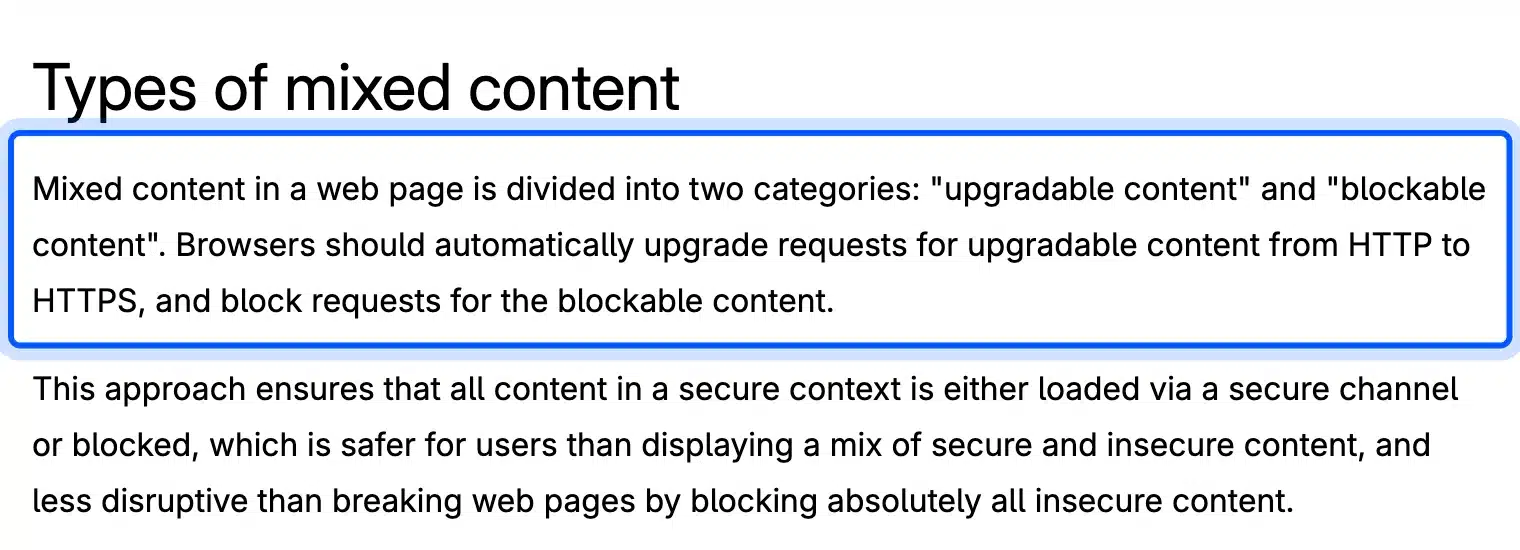
Mixed content is a secure page that still loads something over plain HTTP. Browsers upgrade images, audio and video to HTTPS on their own and block scripts, stylesheets and frames that stay on HTTP, according to MDN. That is why one old link can break the padlock or a whole page layout.
Old posts and widgets keep their http:// addresses in the database. Changing the site URL alone does not fix them. Update them in one pass with the Better Search Replace plugin. It has a dry run option, and its FAQ advises a database backup before you use it.
- Open the tool: Go to Tools > Better Search Replace.
- Enter both addresses: Put your http:// address in Search for and your https:// address in Replace with.
- Pick the tables: Select wp_posts first and then add wp_postmeta and wp_options when you are ready.
- Run a dry run: Keep Run as dry run checked and click Run Search/Replace.
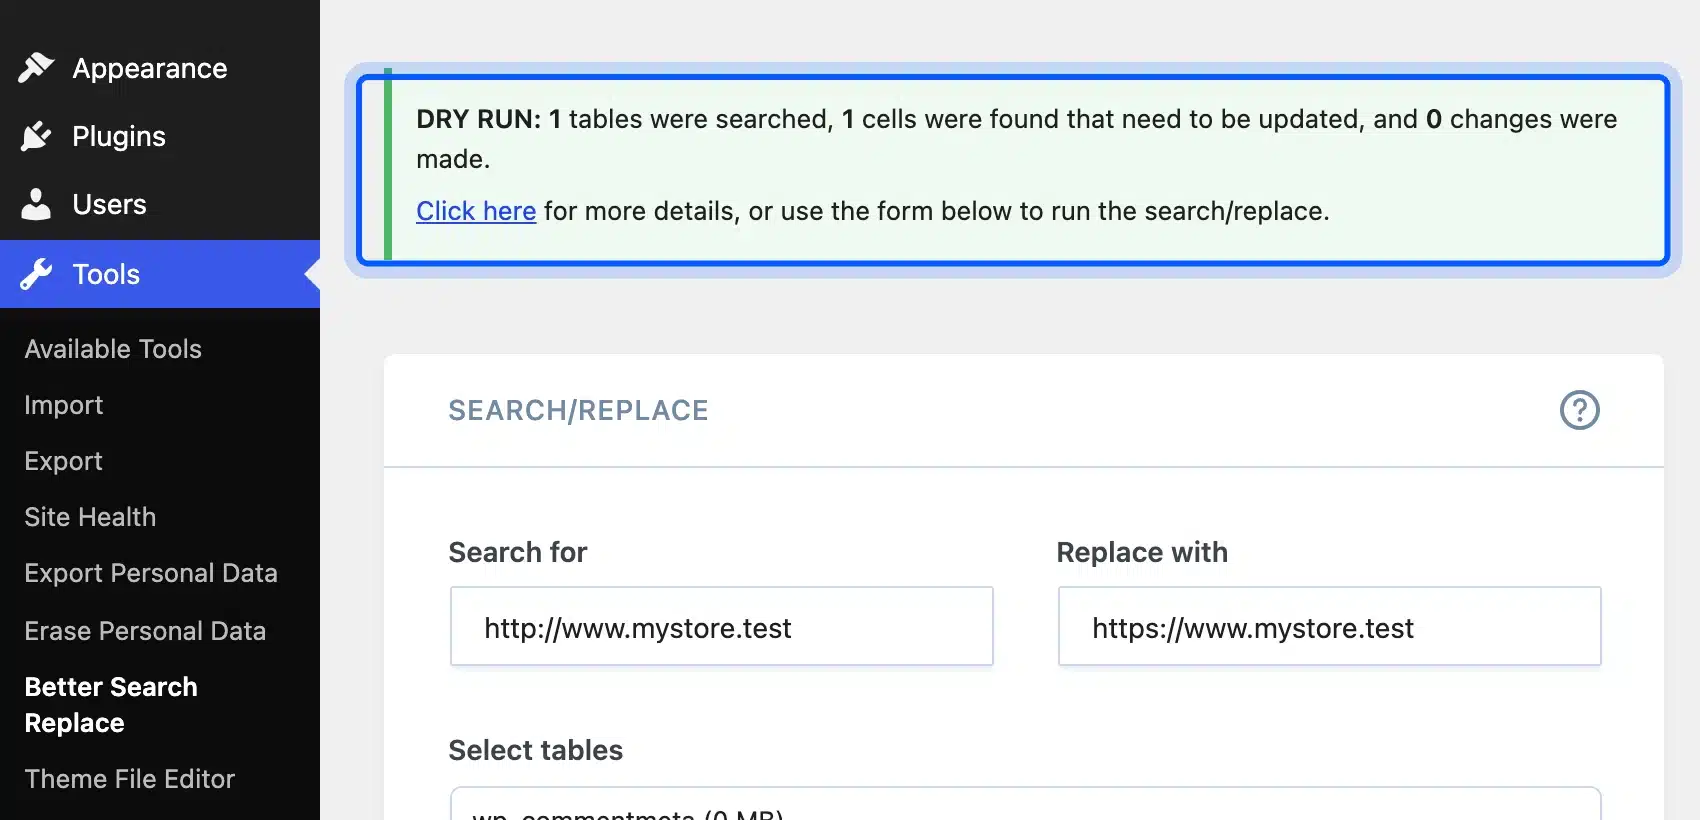
- Run it for real: Untick the dry run box and repeat the same search only when the count looks right.
On our test site we added one post with an http:// image and link. The dry run reported 1 cell that needed updating and 0 changes made, which matched what we had added.
Treat your own count the same way, and stop if it looks far too large. If you prefer the command line, wp search-replace has a --dry-run flag that works the same way.
Warning: Skip the tables you do not understand and never run the real replace without a backup. A search and replace edits stored data directly.
Step 5: Remove Redirect Loops
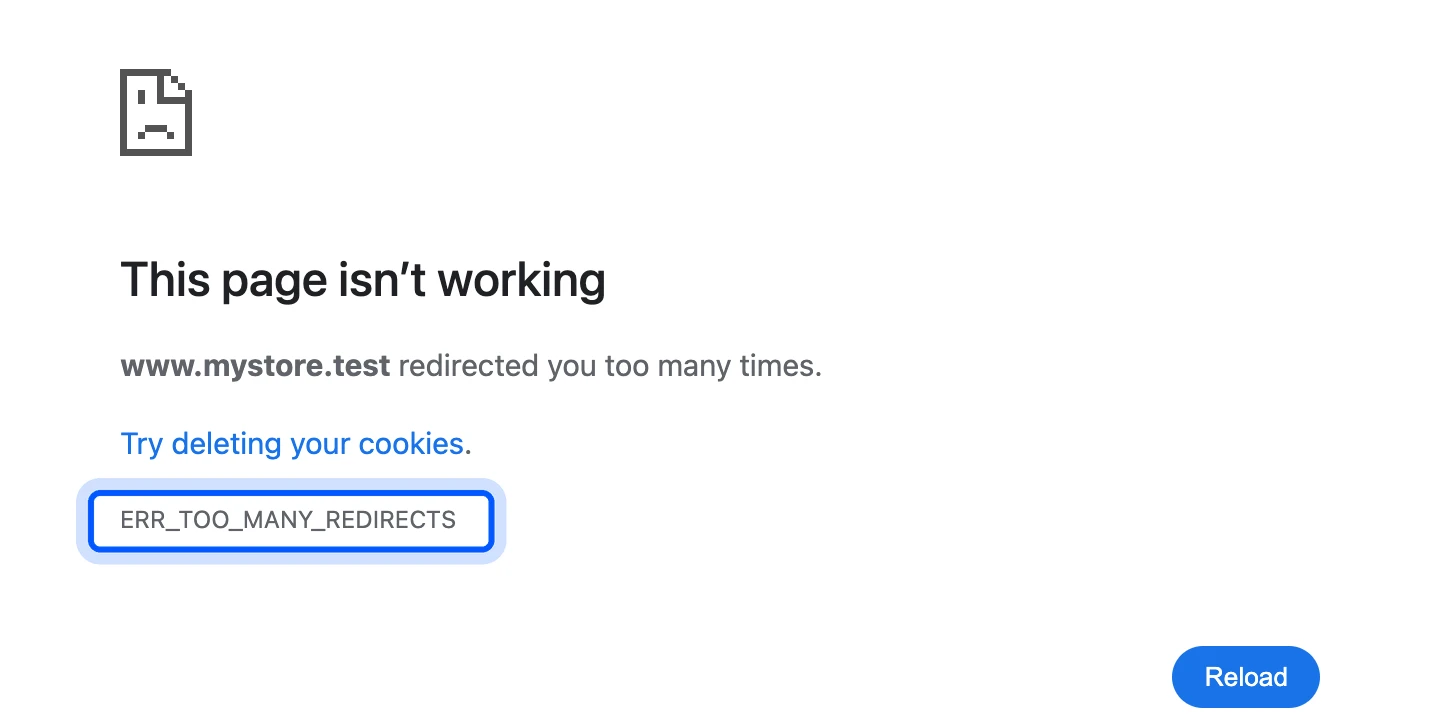
A redirect loop means two rules send the visitor back and forth, often one in WordPress or a plugin and one on the server. Chrome gives up after too many jumps and shows ERR_TOO_MANY_REDIRECTS. You need exactly one HTTP to HTTPS redirect, in one place.
The screenshot below is a loop we built on purpose, with one server redirecting to https and another redirecting back to http.
Look for duplicate redirects in three places: your hosting panel, a redirect or SSL plugin, and the .htaccess file. Keep one and remove the others. If you keep the redirect in .htaccess, the Apache documentation gives this rule for sites that cannot edit the main server configuration:
RewriteEngine On
RewriteCond "%{HTTPS}" !=on
RewriteRule "^(.*)" "https://%{SERVER_NAME}$1" [R=301,L]
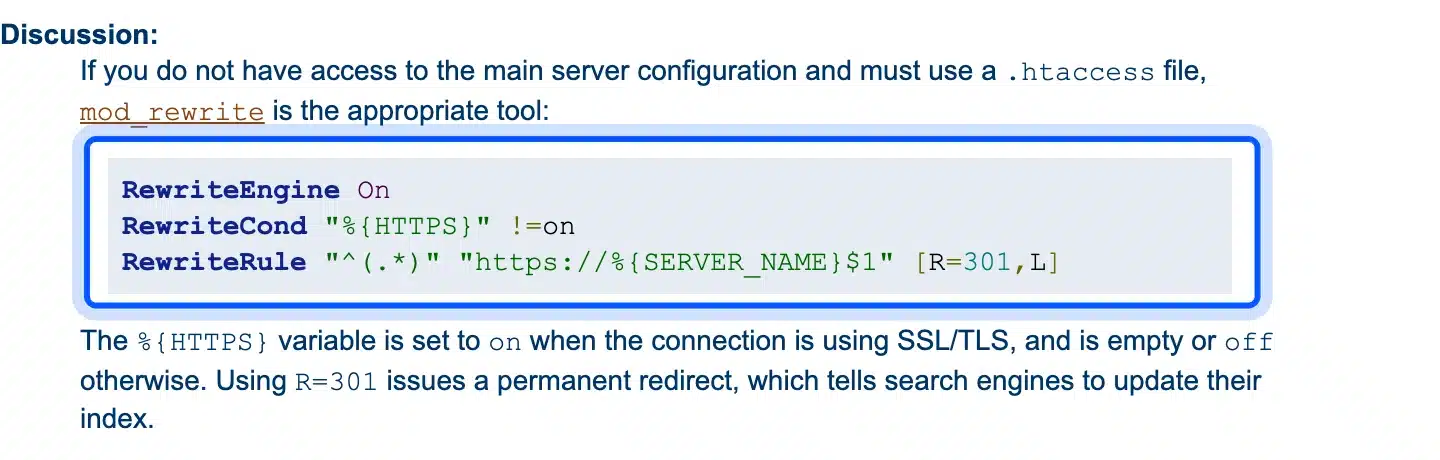
Put it above the # BEGIN WordPress line, because WordPress manages the block between its own markers. Save and then load your site in a private window to avoid cached redirects.
A reverse proxy or load balancer adds a second cause. If the proxy handles SSL but WordPress sees plain HTTP, WordPress keeps redirecting to https.
The WordPress HTTPS guide suggests checking the HTTP_X_FORWARDED_PROTO header in wp-config.php, and the Apache documentation has a matching rule for this setup. Ask your host which one applies before you copy either.
The same Host header and redirect checks matter when you mask a URL for a subdomain behind an nginx or Apache proxy.
Step 6: Match Cloudflare’s SSL Mode
Cloudflare’s encryption mode must match what your origin server supports, as the Cloudflare SSL modes documentation explains. In Flexible mode, Cloudflare talks to your server over plain HTTP. If your server also redirects HTTP to HTTPS, the two sides loop forever.
According to its SSL modes documentation, Cloudflare strongly recommends Full or Full (strict) when possible. Full (strict) also checks the origin certificate. It needs a valid one.
Set the mode under SSL/TLS in the Cloudflare dashboard and then test again. We checked this step against Cloudflare’s documentation rather than a live Cloudflare account.
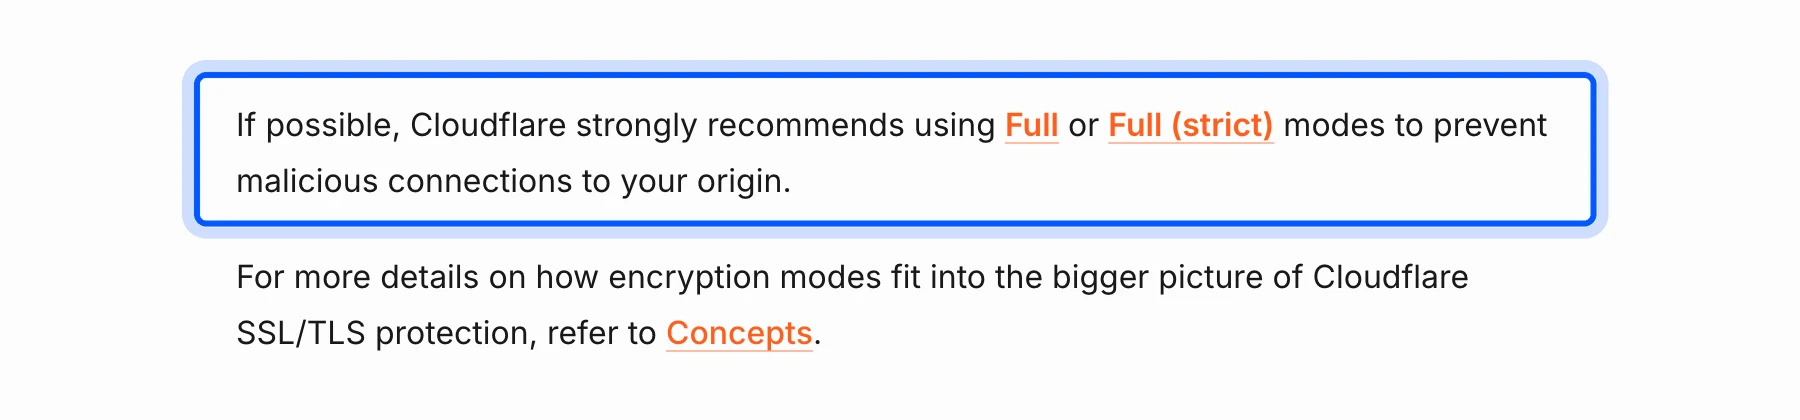
Cloudflare lists two fixes for a loop on its too many redirects page. Remove the HTTPS redirect on your origin, or switch to Full or higher. The second option needs a certificate on the origin, which is why Step 2 comes first.
How to Check That the Fix Worked
After a fix, confirm it in a clean browser session before you call it done. Open your site in a private window, check for the padlock and test the redirect from the command line. Both checks bypass the caches that hide real problems.
Test more than the homepage. Open a post with images, a page with an embedded video or widget, and your contact form. Mixed content often hides on older pages that nobody has opened in months.
Clear your caching plugin and, if you use a CDN, purge its cache too. Then run this command from a terminal, with your own domain in place of example.com:
curl -I http://www.example.com/
The reply should show a 301 status and a Location header that starts with https://. More than one redirect before the final page is a sign of a leftover rule from Step 5. A free scan at Qualys SSL Labs also reports the certificate chain and its expiry date.
SSL Issues on WooCommerce Stores
A WooCommerce store needs HTTPS on every page and not only on checkout. The WooCommerce documentation says most payment gateways require SSL and recommends running the whole store on https. Fix the six steps above first, and the checkout follows.
One change matters for older tutorials. WooCommerce has a Force secure checkout option under WooCommerce, Settings, Advanced, but it disappears once your site address uses https.
We confirmed this in the WooCommerce 11.2 plugin code, which removes the option when the site is already HTTPS. If you cannot find it, that is expected, and nothing needs enabling.
Test a full checkout after the fix, because a single insecure script can block the payment form. Our WordPress security checklist covers the rest of the hardening. Our WordPress security services page lists what we handle for stores that want it done for them.
Common SSL Mistakes in WordPress
Most SSL problems come from the same few mistakes, and each one is easy to avoid once you know it. They waste the most time because the symptom looks like a certificate fault when the cause is a setting. Check this list before you ask your host for help:
- Changing the URLs too early: Saving https URLs before the certificate works locks you out of the dashboard.
- Two redirect sources: A plugin and a server rule that both force https create the loop in Step 5.
- No backup before a replace: A search and replace edits stored data. Take a backup first.
- Only one hostname covered: A certificate for example.com may not cover www.example.com.
- Trusting automatic renewal: Check the expiry date once a quarter, because renewal can fail without a warning.
- Constants in a plugin file: The WordPress HTTPS guide says
FORCE_SSL_ADMINset in a plugin file is not enough. Keep it in wp-config.php. - Redirect inside the WordPress block: WordPress manages the lines between its markers in .htaccess. Keep your own rule above them.
Conclusion
SSL issues in WordPress are fixable in an afternoon once you read the error and follow the steps in order. Check the certificate first. Then check the URLs, mixed content and redirects and finish with your CDN mode.
Revisit the certificate date every few months, since a Let’s Encrypt certificate lasts only 90 days. If you want an expert to handle it, our WordPress maintenance services include checks like these.
Frequently Asked Questions (FAQs)
Q1. Why does WordPress say Not secure after I installed SSL?
The page is probably loading something over HTTP. That is mixed content. Set both WordPress URLs to https and then update old http:// links in the database with a search and replace. Check the console in your browser for the files still on HTTP.
Q2. How long does a Let’s Encrypt certificate last?
A default Let’s Encrypt certificate is valid for 90 days, and Let’s Encrypt recommends renewing it every 60 days. Most hosts renew it automatically. If yours does not, set a reminder.
Q3. Do I need a plugin to fix SSL issues in WordPress?
No. You can change the site URLs in Settings, edit .htaccess for the redirect and run a database search and replace with WP-CLI. A plugin such as Better Search Replace only makes the database step easier.
Q4. What is the difference between SSL and TLS?
TLS is the newer protocol that replaced SSL. People still say SSL for the same HTTPS encryption, and the certificate on your WordPress site uses TLS.
Q5. Why does my site show Too many redirects after enabling HTTPS?
Two rules are redirecting each other, often a server redirect and a plugin, or Cloudflare Flexible mode with an origin that redirects to https. Keep one redirect and set Cloudflare to Full or Full (strict).
Q6. Will fixing SSL issues hurt my site’s search rankings?
Fixing the problem should help rather than hurt, since broken HTTPS can stop pages from loading for visitors. Use 301 redirects from http to https so the old addresses point to the new ones.