
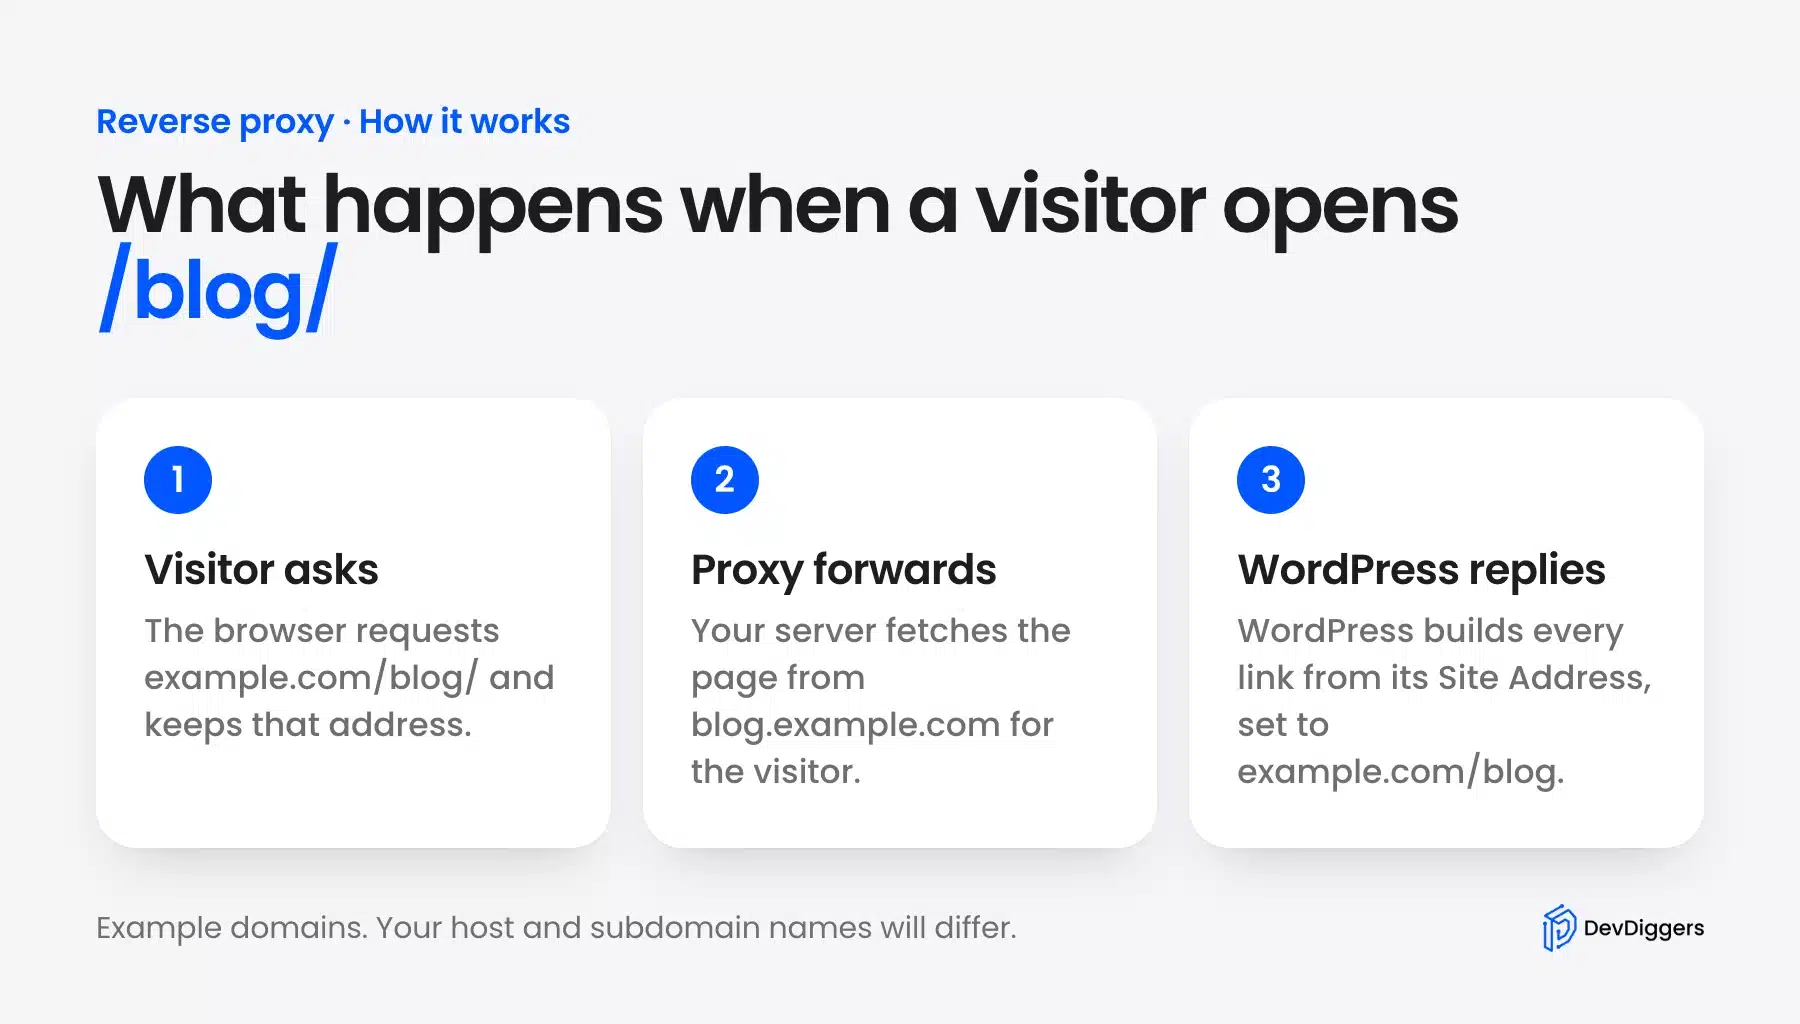
To mask URL addresses for a subdomain, put a reverse proxy in front of it so visitors see example.com/blog/ instead of blog.example.com. A reverse proxy is a server rule that fetches the subdomain’s page for the visitor and keeps your main address in the browser.
We tested every step on a WordPress 7.1.3 test site in October 2026. We also checked each claim against the vendor documentation linked in each section. Where a method could not be tested, the post says so.
This guide explains what URL masking really is and how to mask a URL with nginx, Apache or a Cloudflare Worker. It also covers why frame-based forwarding is a poor choice, how masking affects SEO, and the fixes for problems we hit.
What Is URL Masking for a Subdomain?
URL masking shows visitors one web address while the page comes from another. For a subdomain, a visitor sees example.com/blog/ while WordPress still runs at blog.example.com. Hosts and plugins use the phrase for three different techniques, which is why advice online conflicts.
The first technique is a reverse proxy, which fetches the page on the server. The second is frame-based forwarding, which loads the other site inside an HTML frame. The third is link cloaking, which only shortens an affiliate link and is covered later.
Domain masking is the same idea applied to a whole domain instead of one subdomain. People search for it as “domain masking”, “URL masking” and “domain forwarding with masking”, and the three phrases overlap heavily.
A plain redirect is not masking. After a redirect the address bar changes to the new address. The visitor sees the subdomain again.
Which Way to Mask a URL Works Best?
A reverse proxy works best when you want to mask a URL for a subdomain and still rank. It keeps one address in the browser and lets search engines index that address. Frame-based forwarding is the weakest option, and a 301 redirect is the simplest when you accept a visible address change.
| Method | Address bar | Where you set it | Search effect |
|---|---|---|---|
| Reverse proxy | Shows example.com/blog/ | nginx, Apache or Cloudflare Worker | Indexed under the address you choose |
| Frame-based forwarding (domain forwarding with masking) | Never changes | Registrar or host panel | Indexing is not guaranteed |
| 301 redirect | Shows the destination | One server rule or plugin | Strong signal to index the target |
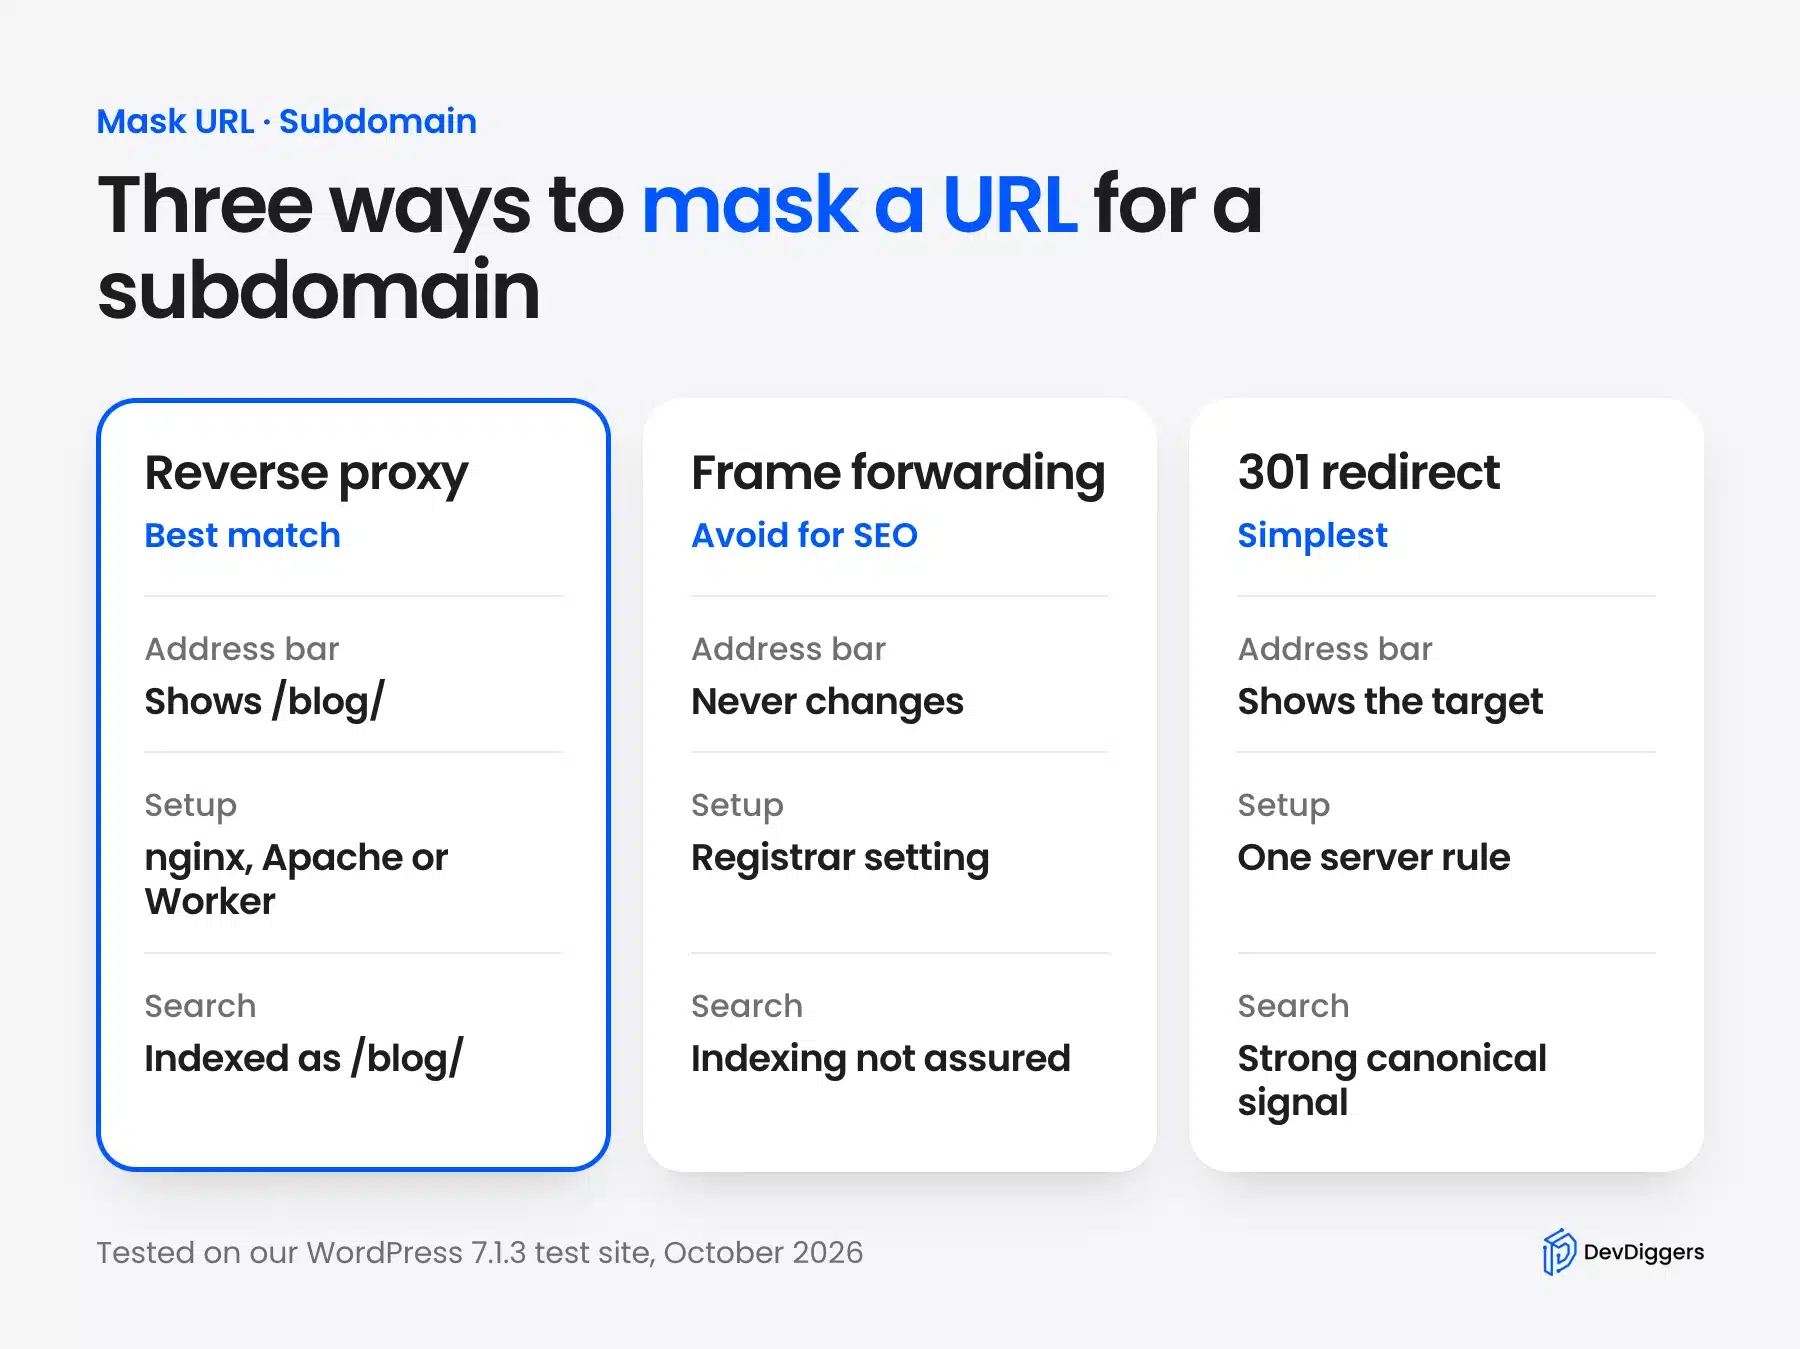
The table shows why we recommend the proxy. Google’s documentation calls redirects a strong signal that the target should become the canonical page. A redirect is a fair fallback.
If you only want a short, clean link to one page, you do not need any of this. Our guide to a vanity URL in WordPress covers that case.
How to Mask URL for a Subdomain With nginx
You can mask URL requests for a subdomain with nginx in four steps. First, point a location block at the subdomain’s server. Then let that server answer under /blog/, set both WordPress addresses in the dashboard, and pass the public Host header to the proxy.
We tested this method end to end with WordPress 7.1.3 running as the subdomain site. It assumes you can edit the nginx configuration on both servers, the one for your main domain and the one for the subdomain.
Step 1: Point the Location at the Subdomain
Add a location /blog/ block to the server block of your main domain. Its proxy_pass line sends each request to the machine that runs the subdomain. The trailing part of that line decides whether /blog/ is kept or removed on the way.
The nginx documentation says a proxy_pass with a URI replaces the part of the request URI that matches the location. Without a URI, the request URI passes to the server in the same form the client sent it.
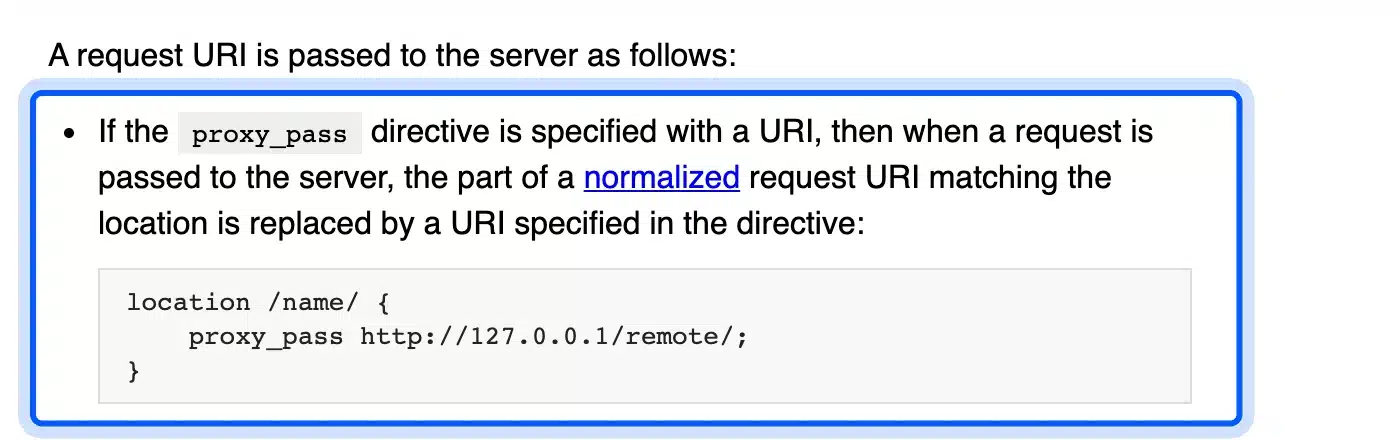
Here is the block we used. Replace the address with the server that runs your subdomain site:
server {
    listen 443 ssl;
    server_name example.com;

    location /blog/ {
        proxy_pass http://203.0.113.10;
        proxy_set_header Host $host;
        proxy_set_header X-Forwarded-Host $host;
        proxy_set_header X-Forwarded-Proto $scheme;
        proxy_redirect http://blog.example.com/ /blog/;
    }
}
With no trailing slash after the address, /blog/ is kept. On our test setup the backend received /blog/hello/ for that request. With a trailing slash it received only /hello/ and WordPress then dropped /blog from its login and trailing-slash redirects.
Note: Your subdomain’s web server must answer for the host name you pass. The next step adds example.com as an alias for that site.
Step 2: Let the Subdomain Server Answer Under /blog/
The subdomain’s own web server must answer requests that start with /blog/, or the proxy has nothing to fetch. A rewrite removes /blog/ when nginx looks for files but leaves the original request URI alone. WordPress then sees the public path it expects.
Add this to the server block of the subdomain site, which is the second server in the chain:
server {
    server_name blog.example.com example.com;
    root /var/www/blog;
    index index.php;

    location ^~ /blog/ {
        rewrite ^/blog/(.*)$ /$1 last;
    }

    location / {
        try_files $uri $uri/ /index.php?$args;
    }

    location ~ \.php$ {
        include fastcgi_params;
        fastcgi_param SCRIPT_FILENAME $document_root$fastcgi_script_name;
        fastcgi_pass 127.0.0.1:9000;
    }
}
The ^~ modifier matters. The nginx location documentation says a prefix location with it stops the regular expression check.
On our first try we left it out, and /blog/wp-login.php returned a 404 because the PHP rule matched first. With ^~ the login page loaded.

Set fastcgi_pass to the PHP-FPM address your host uses. Static files such as /blog/wp-includes/css/dashicons.min.css also loaded through the rewrite on our setup.
Step 3: Set the WordPress Address and Site Address
WordPress builds every link from two stored values. When we left both on the subdomain and proxied it, the page loaded with a 200 status. Every link, the canonical tag and the login redirect still pointed to the subdomain.
Open Settings > General on the subdomain site. Set both WordPress Address (URL) and Site Address (URL) to the masked address (for example https://example.com/blog). Save and log in again because the login cookie follows the new address.

If you cannot reach the settings screen, set the same values in wp-config.php. The WordPress documentation shows the WP_HOME and WP_SITEURL constants and notes you can no longer edit them on the General settings page afterward.
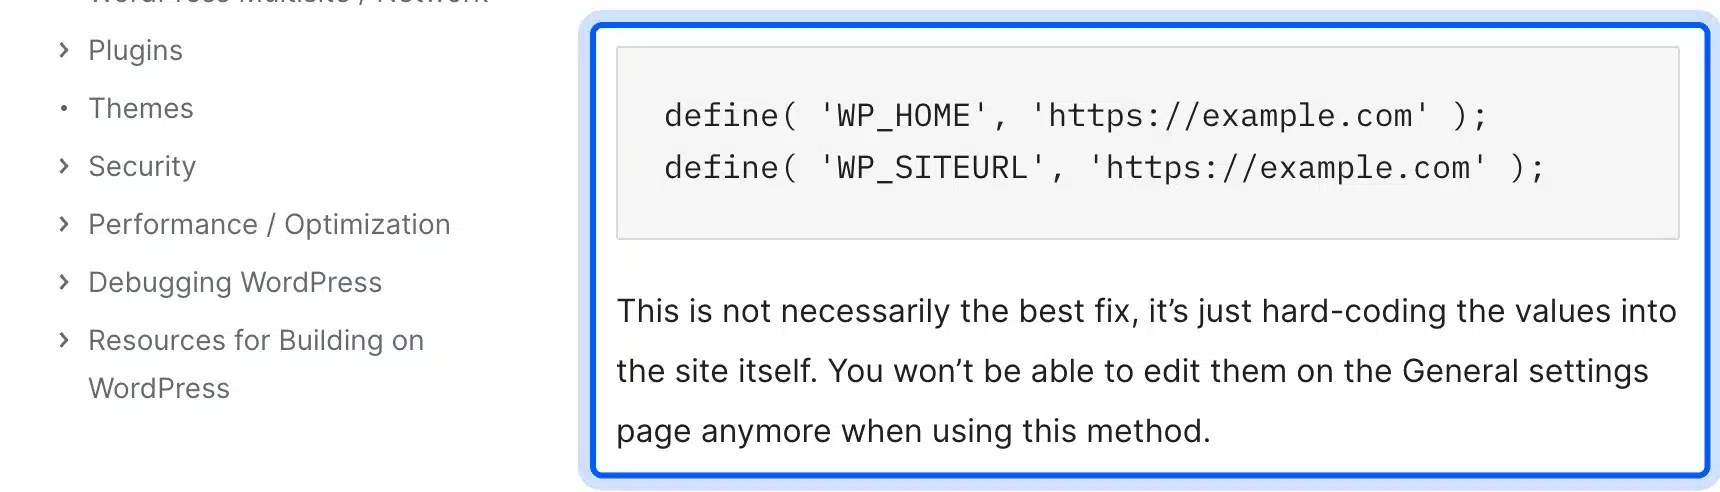
After the change, the canonical tag on our test post read example.com/blog/hello-from-the-blog/ (test host renamed) instead of the subdomain. Links, the feed address and the REST API address all moved with it.
Step 4: Pass the Public Host and Test the Redirects
The Host header decides which address WordPress treats as its own. When our proxy sent the subdomain name as Host, WordPress redirected logins and trailing-slash fixes back to the subdomain. Sending the public name with proxy_set_header Host $host fixed both.
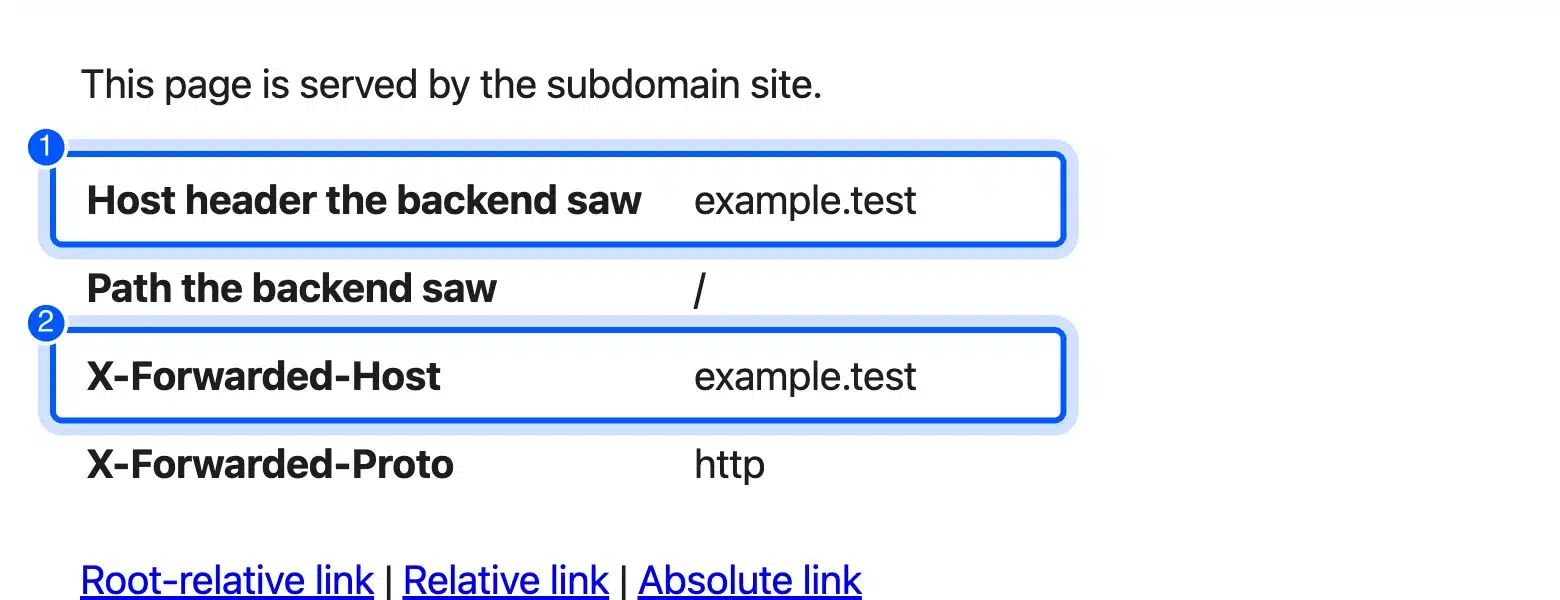
Run these four checks after you reload nginx:
- Open the masked address: Visit
https://example.com/blog/and confirm the address bar keeps that URL. - Request the path without a slash:
/blogshould redirect to/blog/, and it did on our setup with a 301 status. - Open the login page:
/blog/wp-login.phpshould load, and the redirect after login should keep/blog. - Check the old subdomain: It should redirect to the new path, covered in the SEO section below.
Worth checking: If the proxy strips /blog/ before WordPress sees it, the login redirect on our test site dropped /blog and sent a visitor to /wp-admin/. Keep the prefix, as in Steps 1 and 2.
If your host does not give you access to the nginx configuration, the work is a job for a developer. Our WordPress development services team can set the proxy and the address change for you.
Apache Version: ProxyPass and ProxyPassReverse
The Apache version of the nginx block uses two directives from the mod_proxy module. The directive ProxyPass maps the remote server into a path on your site. The directive ProxyPassReverse rewrites the redirect headers the backend sends back. Visitors then never land on the subdomain.
Load mod_proxy and mod_proxy_http first. On our Apache 2.4.67 test server, the block below served the WordPress subdomain at /blog/. Pages, static files, the login page and the slash redirect all worked.
ProxyPass "/blog/" "http://blog.example.com/blog/"
ProxyPassReverse "/blog/" "http://blog.example.com/blog/"
ProxyPreserveHost On
The Apache documentation adds a warning that matches what we saw in WordPress. It says Apache will not rewrite absolute URL references inside HTML pages by default. Such links bypass the proxy. That is why Step 3 matters.
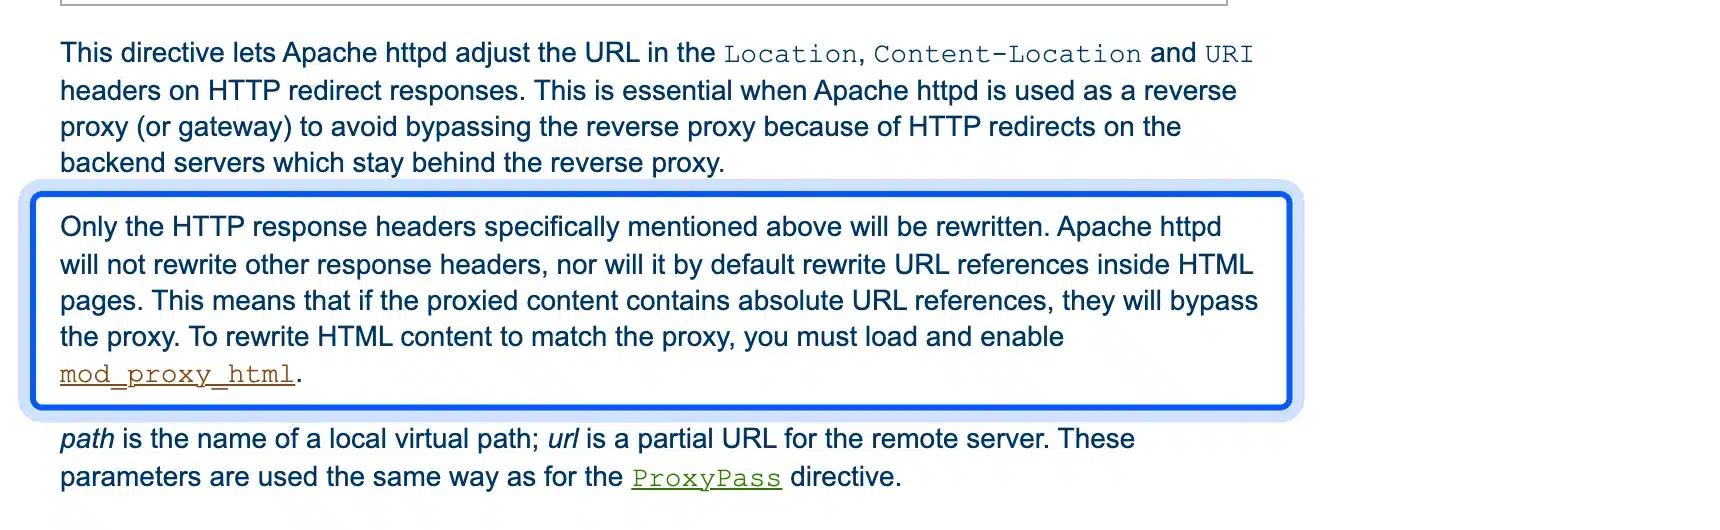
The same page says ProxyPreserveHost is Off by default. With it on, WordPress saw the public name, as it did in our nginx test.
Note: Many old guides use a RewriteRule with the [P] flag in .htaccess. On our Apache 2.4.67 test server without mod_proxy loaded, that rule returned a 403 error and logged that it could not make a remote request. With mod_proxy enabled it worked, but shared hosts often do not enable it. Ask your host first.
Cloudflare Worker Version
A Cloudflare Worker can mask URL requests without touching a server. You route example.com/blog* to a Worker that fetches the same path from the subdomain. The Worker runs on Cloudflare’s network. It suits sites whose DNS already sits behind Cloudflare.
Cloudflare’s routes documentation says routes map a URL pattern to a Worker. It also says the DNS record must be proxied by Cloudflare, shown as the orange cloud.
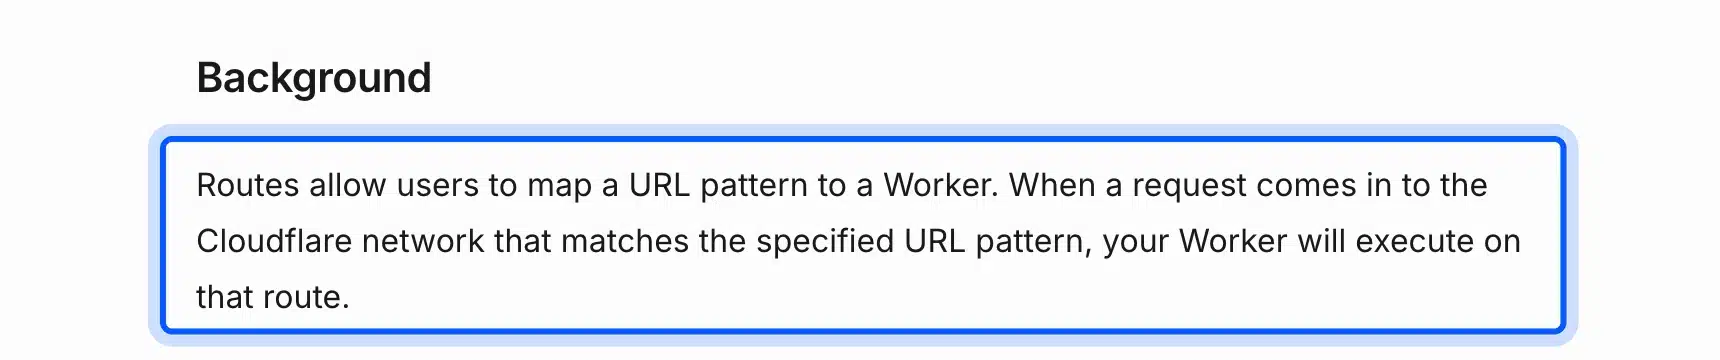
This Worker sends only /blog and /blog/... paths to the subdomain and passes everything else through:
export default {
  async fetch(request) {
    const url = new URL(request.url);
    if (url.pathname === "/blog" || url.pathname.startsWith("/blog/")) {
      url.hostname = "blog.example.com";
      return fetch(new Request(url, request));
    }
    return fetch(request);
  },
};
We ran this handler in Node.js against test requests. A GET with a query string and a POST to the login page kept their path and method. The path /blogger/ was not matched. We did not deploy it to a Cloudflare account. Test the route on a staging hostname first.
There is one limit to plan for. This Worker sends the subdomain’s name as the Host header.
In our nginx test, that made WordPress build login and trailing-slash redirects on the subdomain host. Check /blog/wp-login.php after you deploy, and fall back to nginx or Apache if the redirect leaves your main domain.
How Do You Test a Masked URL?
Test a masked URL by requesting four addresses and reading the status codes. The masked path should answer with 200 and the version without a slash should redirect to it. The login page should load, and the old subdomain should redirect.
Run these from any terminal with your own domain in place of example.com:
curl -sI https://example.com/blog/ | head -1
curl -sI https://example.com/blog | grep -i '^location'
curl -sI https://example.com/blog/wp-login.php | head -1
curl -sI https://blog.example.com/hello-world/ | grep -i '^location'
We ran the same four requests on our test setup. This table shows what came back, with the test host renamed to example.com:
| Request | Expected | What we got |
|---|---|---|
/blog/ | 200 | 200 |
/blog | 301 to /blog/ | 301 to /blog/ |
/blog/wp-login.php | 200 | 200 |
| Old subdomain URL | 301 to /blog/... | 301 to /blog/... |
A 302 where the table expects a 301 means a temporary redirect. Search engines treat it as a weaker signal. Switch it to 301 once the setup is stable. A 200 on the old subdomain means the redirect rule is missing or the backend answers before it.
Tip: Also open the page in a browser and view the page source. Search for the subdomain name. Any hit is a link that still bypasses the proxy.
Domain Forwarding With Masking at Your Registrar
Domain forwarding with masking loads your subdomain inside a frame on another page. The address bar never changes. Registrars sell it as a simple option. It is the easiest method to set up and the one we advise against for any site you want to rank.
Namecheap’s redirect guide lists the type as “Masked (URL Frame)” beside 301 and 302 redirects. It adds that an HTTPS redirect works only to a different destination domain. That rule alone rules out masking a subdomain of the same domain over HTTPS.
We built a frame test to see what visitors get. Three problems showed up in Chrome:
- Blocked frames: A page that sends
X-Frame-Options: SAMEORIGINshowed a blank frame. WordPress sends that header on its login screen, as the function reference describes. - One address for everything: Clicking a link inside our test frame changed only the frame. The top address stayed the same. Nobody could share or bookmark an inner page.
- Doubled pages: The framed site is still reachable at its own address, which gives search engines two versions to choose from.
If your goal is a clean address for one page, a redirect does the job without those problems. Use a frame only for a throwaway page you do not need indexed.
Does URL Masking Hurt SEO?
Masking with a frame can hurt SEO, and a reverse proxy does not when you set one canonical address. Google says its systems try to treat embedded content as part of the primary page, but that is not guaranteed. A proxy serves real pages at the address you choose.
Google’s December 2023 office hours answered an iframe question this way. It said the outcome is not guaranteed because both pages also exist on their own. For a frame, you cannot count on the content ranking under the masked address.
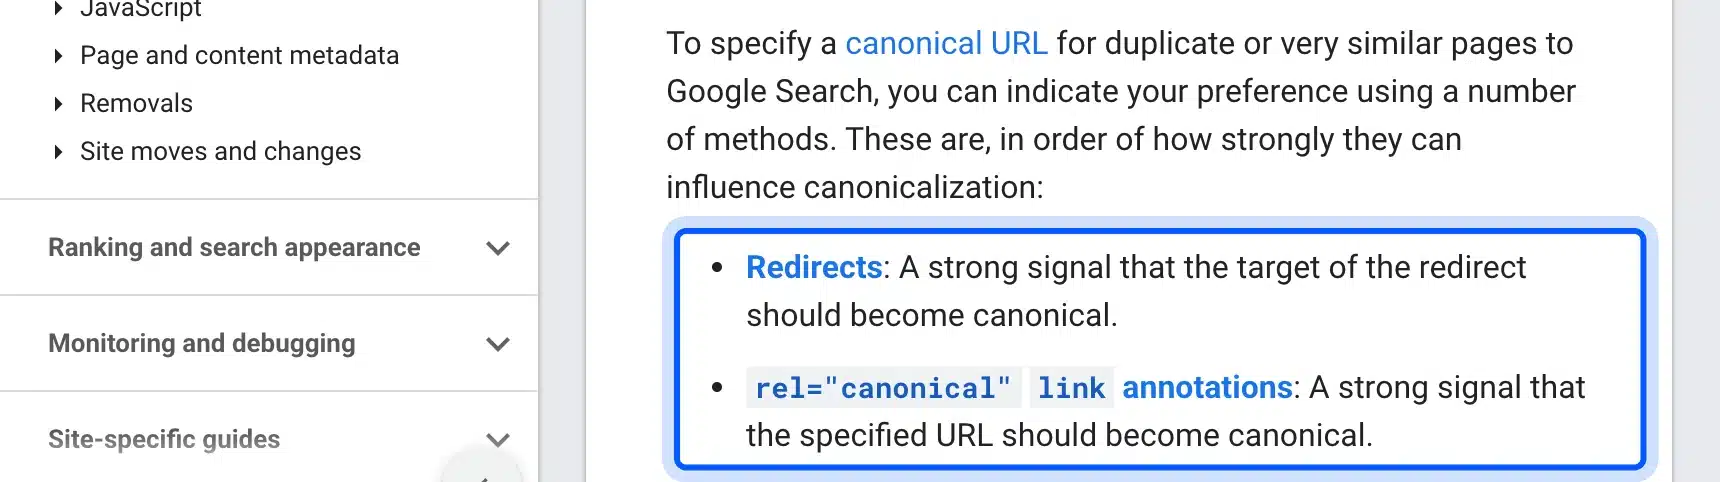
With a proxy the risk is duplicate content because the subdomain still answers. Google’s canonicalization page lists redirects and the canonical link as strong signals. Use both: set the Site Address as in Step 3 and then redirect the old subdomain.
This nginx block redirected our test subdomain to the masked path with a 301 status:
server {
    listen 80;
    server_name blog.example.com;
    return 301 https://example.com/blog$request_uri;
}
Google’s own redirect guidance says to use a permanent server-side redirect whenever possible. Keep the proxy’s backend reachable by IP address, or the redirect will loop.
Once WordPress uses the masked Site Address, its canonical tag follows. On our test post it changed from the subdomain to example.com/blog/hello-from-the-blog/ (test host renamed). For a walkthrough of the tag itself, see our guide to adding a canonical tag in WordPress.
Is Link Masking the Same as URL Masking?
Link masking is not the same as URL masking. Also called link cloaking, it hides a long destination behind a short link on your own domain. It does not move a subdomain into a path, and a plugin simply creates a redirect such as example.com/go/offer.
PrettyLinks describes itself as turning a long, ugly URL into a short, branded link. That helps with affiliate links. It will not serve your blog from a different address.
The difference is easy to remember. Link masking changes what a visitor clicks in a page. URL masking changes which address the visitor sees for content that lives somewhere else.
Searches such as “mask link url” and “mask a link” usually mean this second job. If that is your goal, a link plugin or a plain redirect is the right tool, and none of the proxy steps above apply.
To send a single page elsewhere, see our guide to redirecting a page or URL in WordPress. It covers the plugin and server options.
Fixes for Common Masking Problems
Most masking failures come from three causes: the WordPress addresses, the Host header, or links that bypass the proxy. Each one shows a clear symptom. Check the address settings first, because they caused the most trouble on our test setup.
- Links still show the subdomain: WordPress still has the subdomain as its Site Address. On our test site that left 19 links, the canonical tag and the login redirect pointing at the subdomain. Change both addresses as in Step 3.
- Login sends you to the wrong host: The proxy is sending the subdomain as Host. Pass the public name instead, as in Step 4.
- A redirect loop appears: The subdomain redirects to the path while the path proxies back to the subdomain. Our guide to fixing the too many redirects error walks through the causes.
- Pages show without styles: Theme and plugin files are requested from a path the proxy does not forward. Forward every path under
/blog/, and check the rewrite in Step 2. - A backend page links to
/about/: A root-relative link resolves to your main site instead of the blog. Rebuild those links from the Site Address, or prefix them with/blog/.
Conclusion
You can mask URL requests for a WordPress subdomain with a reverse proxy, as long as you also change the WordPress addresses. Keep the public Host header too. Frame-based masking looks easier, but it loads unreliably and cannot promise rankings under one address.
Pick nginx or Apache if you control the server, or a Cloudflare Worker if your DNS is already there. Then redirect the old subdomain with a 301 status. If you only need a clean link to one page, use a redirect instead.
Frequently Asked Questions (FAQs)
Q1. How do I point a subdomain to a WordPress page?
Create a redirect from the subdomain to the page, or proxy the subdomain to the page’s path. A redirect changes the address bar and is simplest. A proxy keeps the subdomain visible while serving the page.
Q2. Can I mask a URL without a plugin?
Yes. A reverse proxy rule in nginx, Apache or a Cloudflare Worker needs no WordPress plugin. You still change the WordPress Address and Site Address, which are core settings.
Q3. What is the difference between domain masking and domain forwarding?
Domain forwarding sends the visitor to another address and the address bar changes. Domain masking keeps the original address visible by loading the target in a frame or through a proxy. Frame-based masking is the version registrars call forwarding with masking.
Q4. Does URL masking work with HTTPS?
A reverse proxy works with HTTPS when your main domain has a valid certificate. Namecheap’s guide says its HTTPS redirects work only to a different destination domain. Check your registrar before relying on frame masking.
Q5. Why does my masked URL redirect back to the subdomain?
WordPress or the backend still believes the subdomain is its address. Set the Site Address to the masked path, pass the public Host header and add a proxy_redirect rule for backend redirects.
Q6. How do I edit a subdomain in WordPress?
The subdomain itself lives in DNS and in your server settings. Change it at your host or DNS provider and then update the WordPress Address and Site Address under Settings > General.