
This WordPress security checklist covers 17 checks for logins, updates, files, the server and backups. Each check names the exact setting and the result we saw when we tried it.
We ran the login, file and header checks on a WordPress 7.1.3 test site in October 2026. The CAPTCHA check used our own WooCommerce Advanced CAPTCHA plugin. Every other claim comes from an official source, and each one links to it.
The sections follow the order we would fix a site. Logins come first and software updates second. The server and backups follow, and a short audit routine closes the guide.
What a WordPress Security Checklist Covers
A WordPress security checklist is a short list of settings that shut the most common doors into a site. It covers logins, software updates, file rules, response headers and backups on the server side. You work through it once and then repeat it on a schedule.
Most WordPress security best practices come back to the same few weak points. Weak passwords, unlimited login tries, outdated plugins and writable files top the lists we read. A checklist turns that advice into settings you can see and verify.
The official WordPress hardening guide uses the same building blocks. It was last updated on 14 October 2026 and covers file editing, permissions, plugins and backups. We follow it where it speaks and add tests where it does not.
This guide is about WordPress itself and the server under it. If you run a store, the WooCommerce security checklist covers payments, customer accounts and checkout. Use both together.
How to Secure a WordPress Site: The Order to Work In
You can secure a WordPress site in four passes. Lock the logins first, patch the software second and harden the files and the server third. HTTPS, a firewall and tested backups come last and add the layers that catch what the first three passes miss.
Order matters because the cheap fixes remove the most common attacks. A strong password with two-factor codes is worth more than a hidden login address. A patched plugin is worth more than a firewall rule written for the bug it replaced.
Do not try to finish all 17 checks in one sitting. Take a backup and change one setting. Load the site and check that it works before you move to the next check.
Note: Every code snippet in this guide goes into wp-config.php or an .htaccess file. Copy the file to a safe place before you edit it. A typo in either file can take the whole site offline.
Lock Down WordPress Logins
The login screen is the front door of every WordPress site. Attackers guess passwords there and reuse passwords leaked from other sites. Five checks harden it: passwords, two-factor codes, a CAPTCHA with a login limit, the admin account and XML-RPC.
1. Use Strong Unique Passwords
A strong WordPress password is long, unique to your site and stored in a password manager. WordPress rates every new password as you type it. You do not need a rule to change it every few months, because current NIST guidance says verifiers must not force periodic changes.
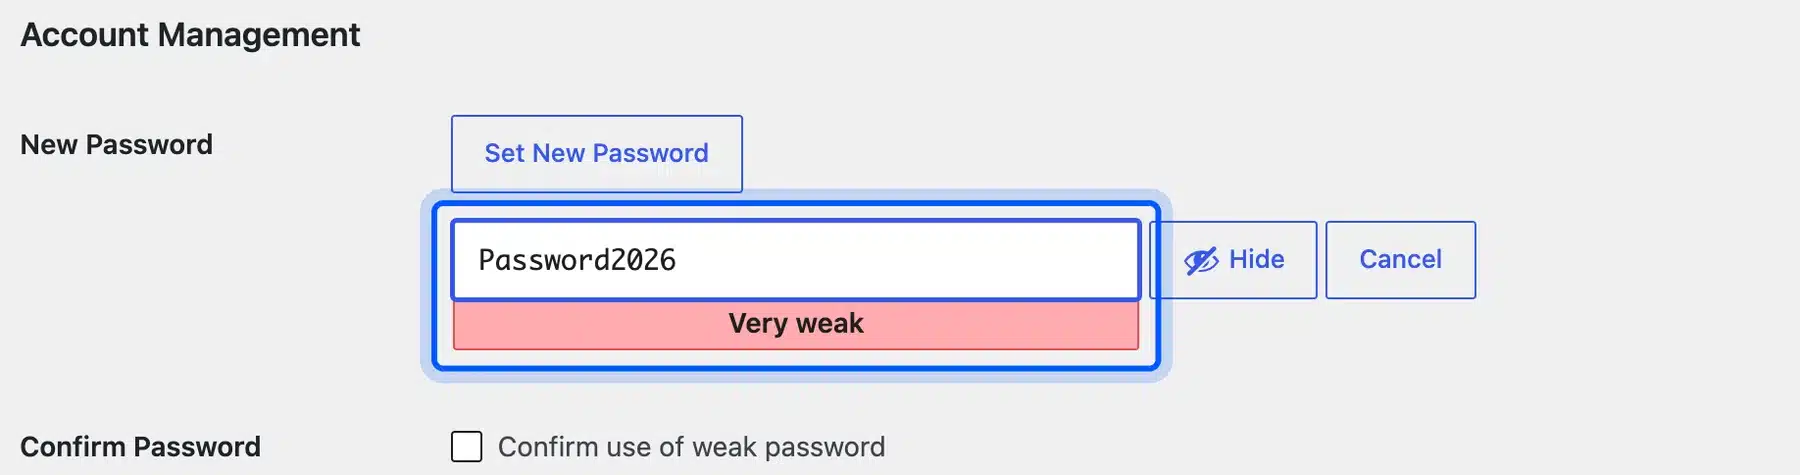
WordPress shows a strength meter on Users > Profile. Click Set New Password and type a candidate. On our test site the password Password2026 showed as Very weak.
WordPress asked us to tick Confirm use of weak password before it would save.
The old advice to change passwords regularly is out of date. NIST SP 800-63B-4 says in section 3.1.1.2 that verifiers and credential service providers shall not require subscribers to change passwords periodically. It also lists composition rules that force mixed character types among the things to avoid.
Change a password when you have a reason. A leaked password, a lost laptop or a departed contractor is a reason. The calendar is not.
The WordPress brute force guide says to encourage unique, long passwords or passphrases and the use of password managers.
Give each person their own account. A shared administrator login hides who changed what, and it forces you to rotate the password for everyone when one person leaves. Separate logins cost nothing and make every other check in this guide easier to audit.
2. Turn On WordPress Two-Factor Authentication
WordPress two factor authentication adds a second proof after the password, usually a six digit code from an authenticator app. A stolen password then fails without the phone. Install the Two Factor plugin from WordPress.org and each user enables a method on their own profile.
The Two Factor plugin is version 0.17.0 and lists WordPress 7.1.3 as the tested version. It has more than 100,000 active installations. We activated it on our test site and found its options under Users > Profile > Two-Factor Options.
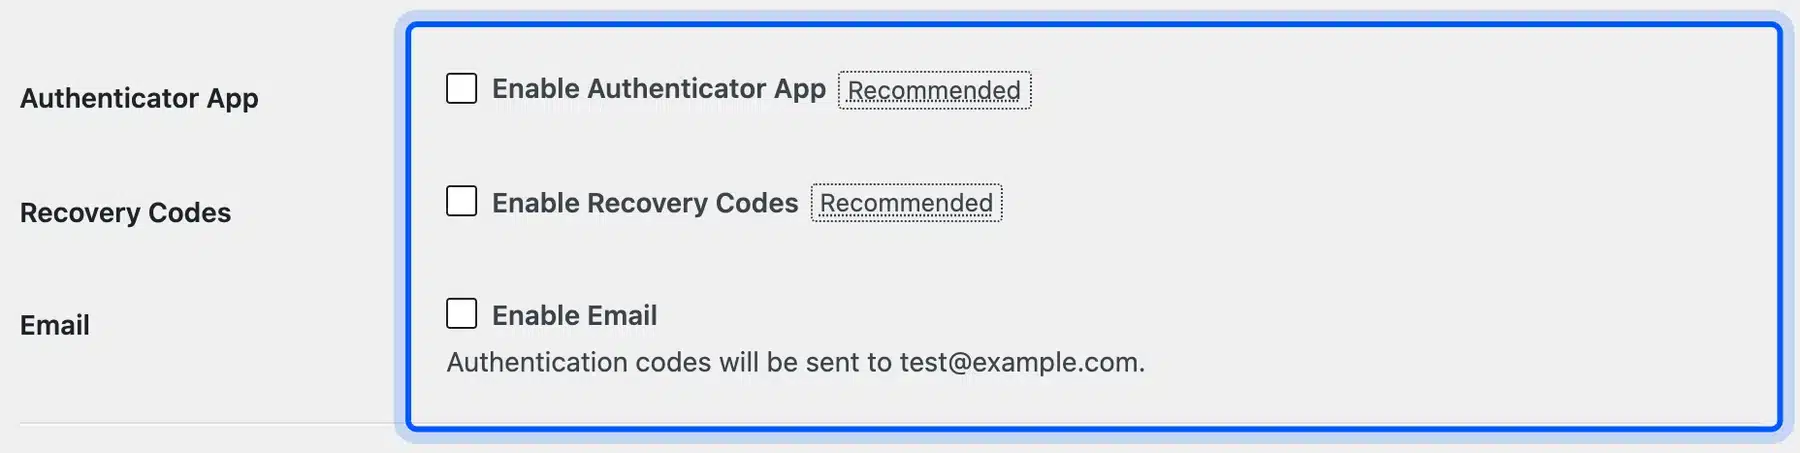
The screen offers three methods: Authenticator App, Recovery Codes and Email. The plugin marks the authenticator app and recovery codes as recommended. Turn on both.
A lost phone then does not lock you out of your own site.
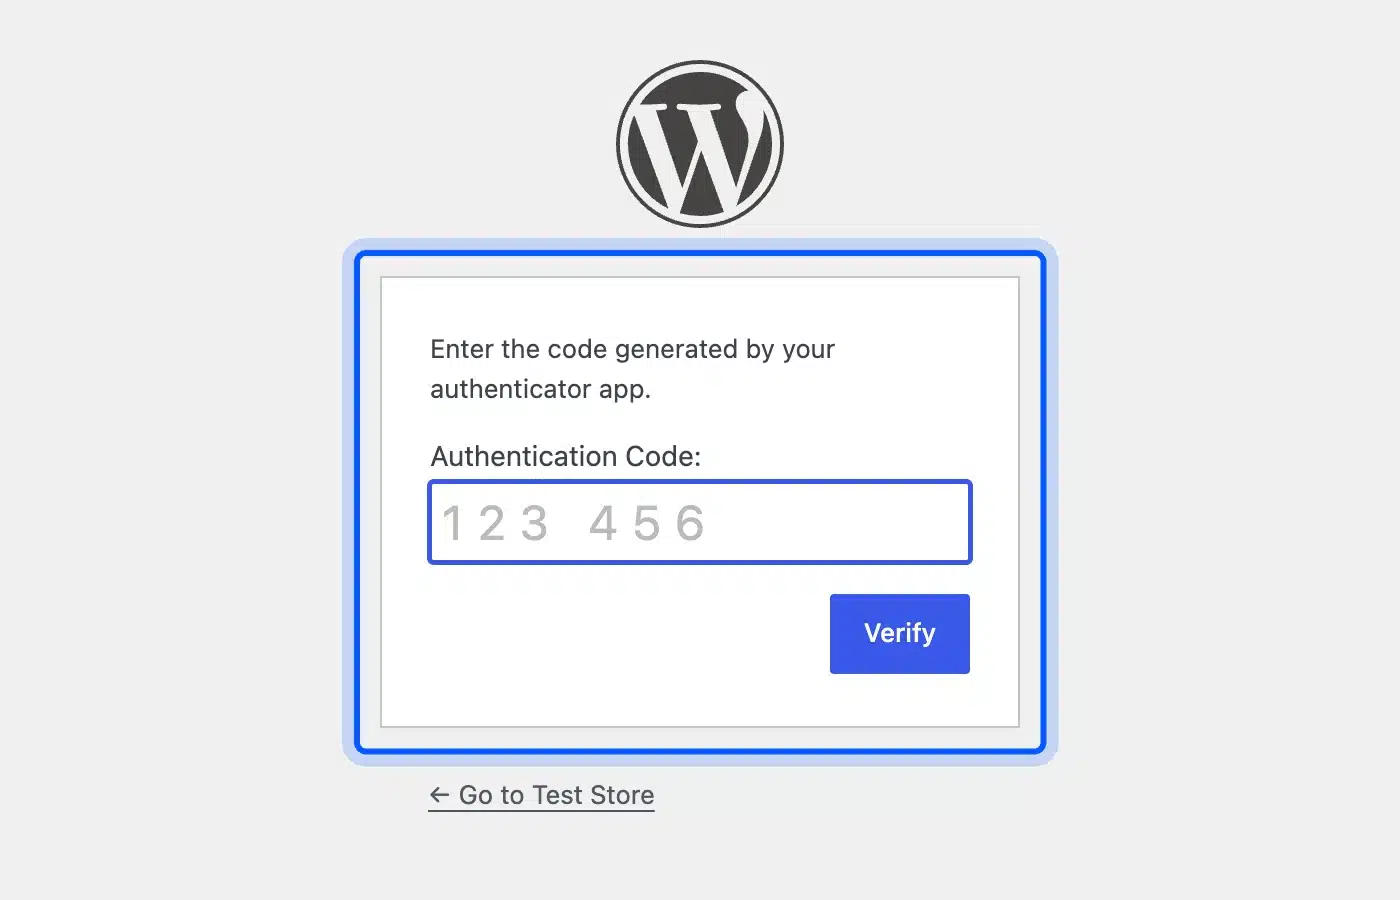
We ran the whole flow on our test site. We ticked Enable Authenticator App, copied the secret key shown below the QR code and entered the six digit code it produced. Then we signed out and signed in again with the password.
WordPress stopped at a second screen that asked for the authentication code, and the correct code opened the dashboard.
Stores have a second login to protect. To compare options for customer accounts, see our guide to the best WooCommerce two-factor authentication plugins.
3. Add a CAPTCHA and Limit Login Attempts
WordPress accepts unlimited login attempts by default. A CAPTCHA makes scripts prove they are human before a login counts.
A login limit locks an address out after a few wrong guesses. Use both because they stop different guessing.
Our own WooCommerce Advanced CAPTCHA plugin comes first here because we build and support it. It puts Cloudflare Turnstile, Google reCAPTCHA or hCaptcha on the WordPress login, registration and lost password forms. It also covers WooCommerce login, registration and guest checkout, and it needs WooCommerce active.
The WooCommerce Advanced CAPTCHA page lists license tiers from $29 to $199 as of October 2026.
We tested the Pro build 1.1.0 on WordPress 7.1.3 with WooCommerce 11.2. We used Cloudflare’s published Turnstile test keys. No live keys were involved.
- Install and activate the plugin. Go to Plugins > Add Plugin > Upload Plugin. Choose the plugin zip from your DevDiggers account and click Install Now. Then click Activate Plugin.
- Activate the license. Open DevDiggers Plugins > Advanced CAPTCHA > Configuration > License. Paste your license key and purchase email. Then click Activate License. The screenshot shows the empty form because our test site has no purchased key.
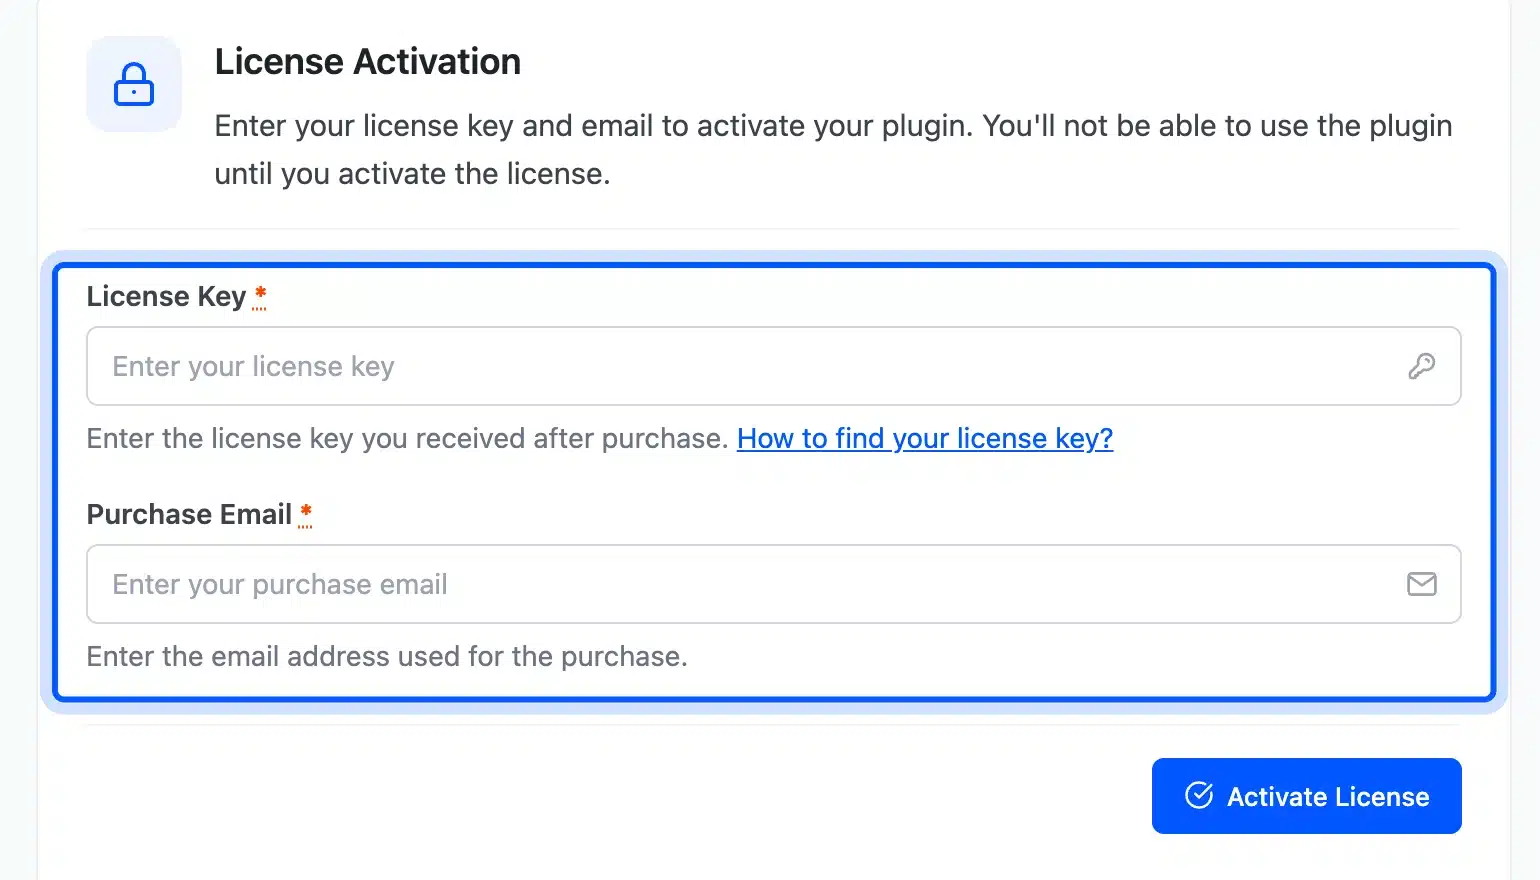
- Create a Turnstile widget in your Cloudflare dashboard under Turnstile. Copy the site key and the secret key.
- Open Configuration > General. Switch on Enable Advanced CAPTCHA. Set CAPTCHA provider to Cloudflare Turnstile and click Save Changes.
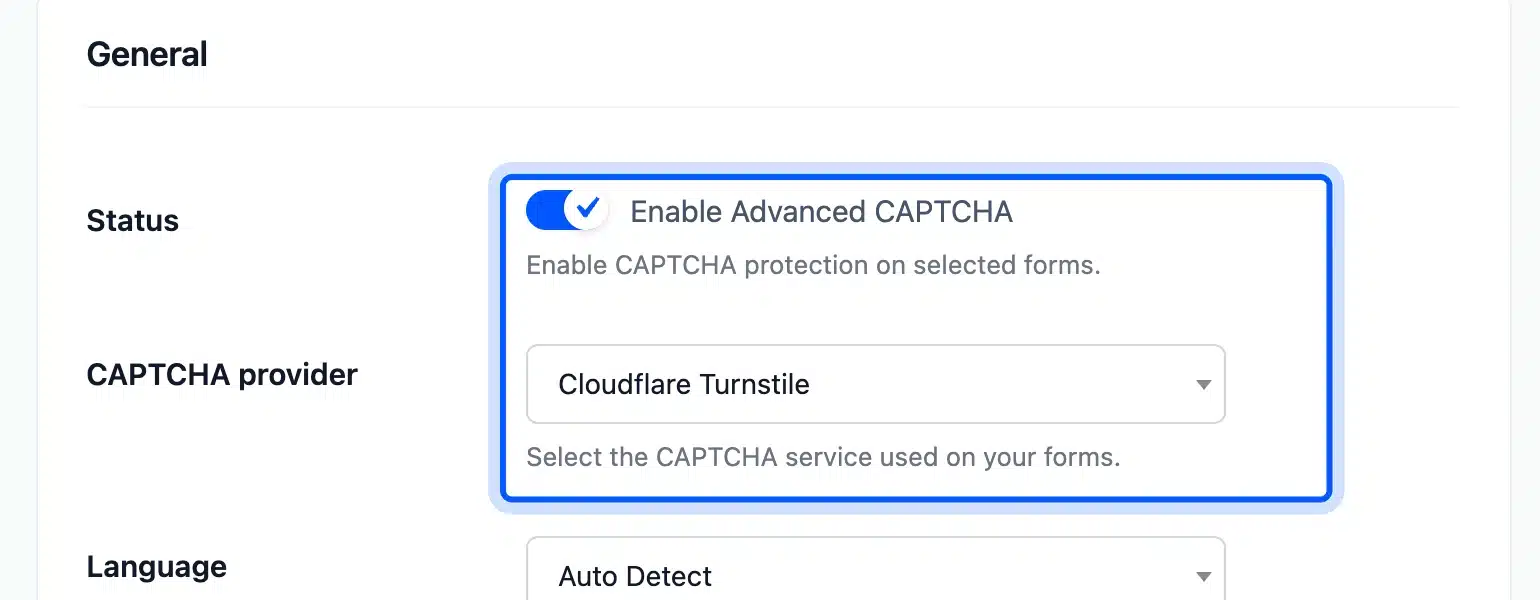
- Open Configuration > Cloudflare Turnstile. Paste the site key and the site secret. Then click Save Changes.
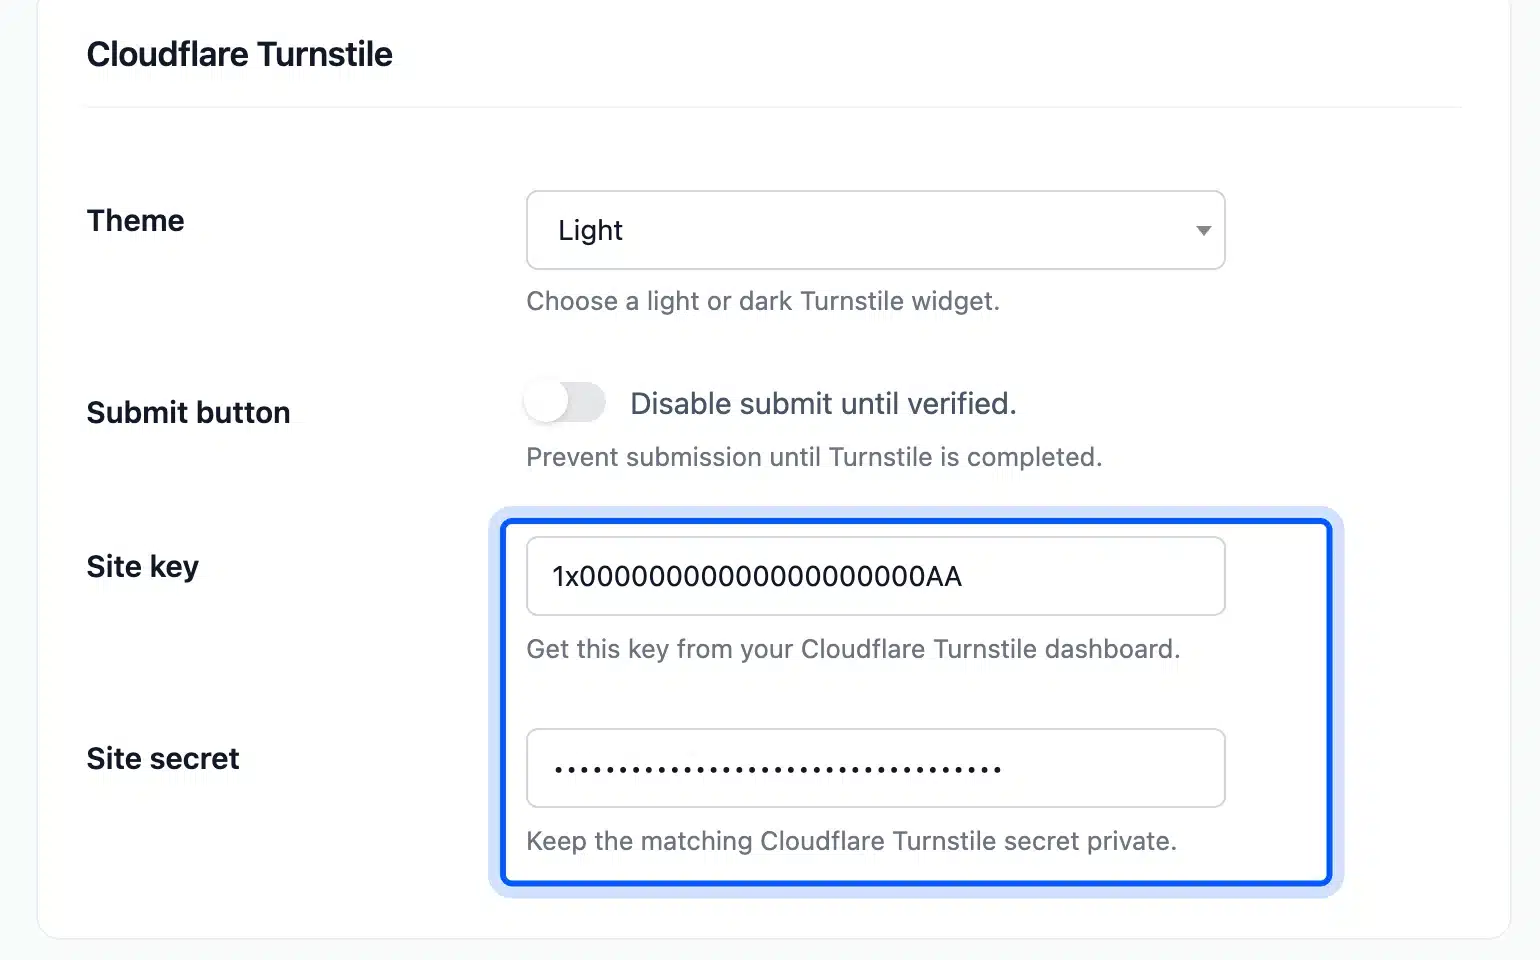
- Open Configuration > Forms. Under WordPress forms pick Login, Registration and Lost/Reset Password. Under WooCommerce forms pick the same three and Guest Checkout Only. Click Save Changes.
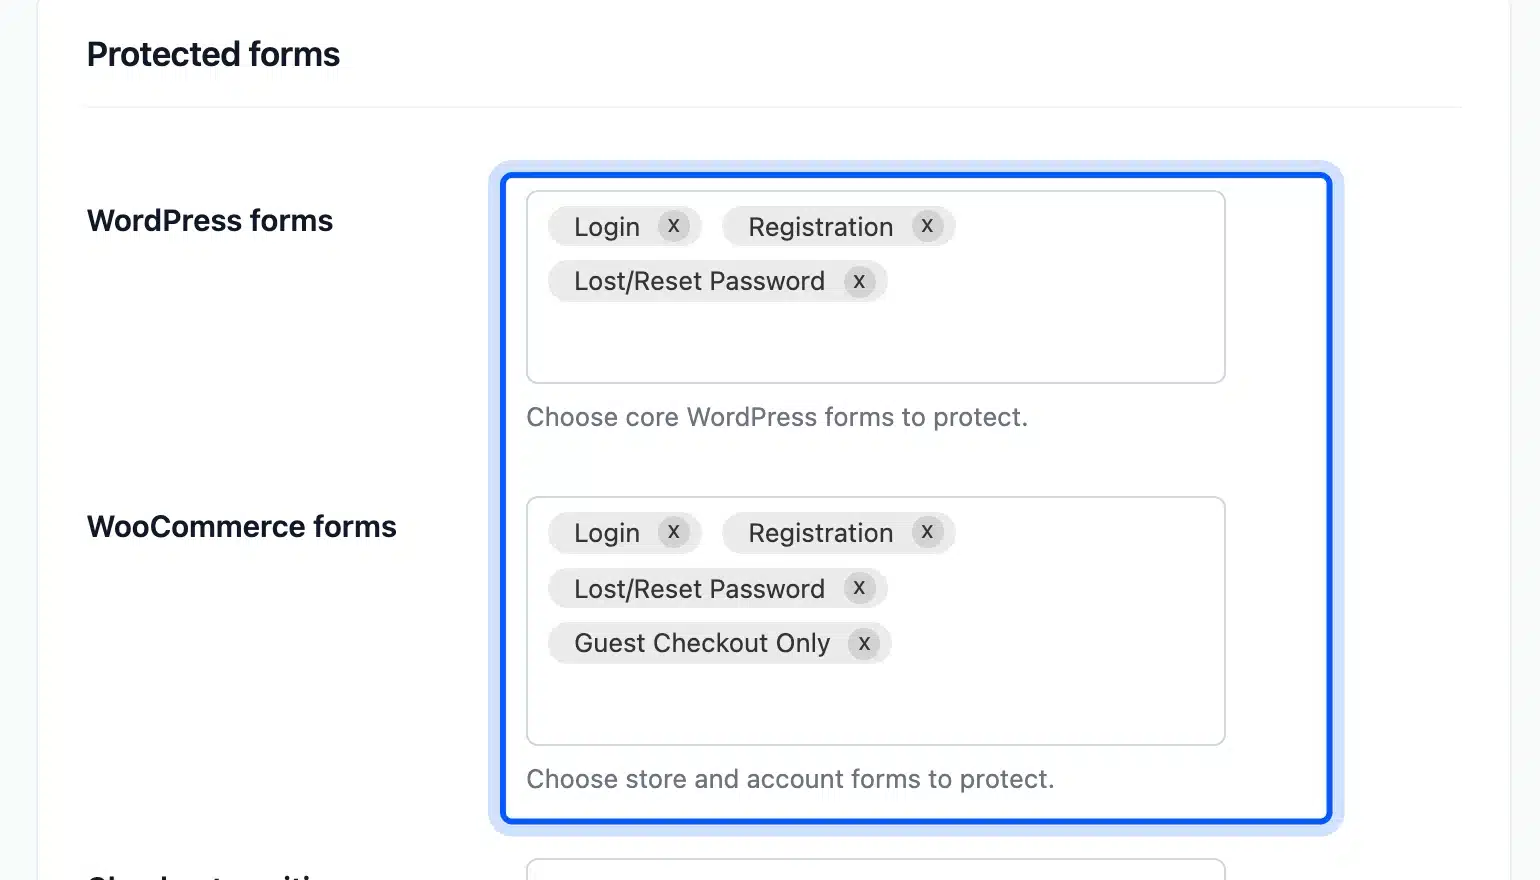
- Open
/wp-login.phpin a private window. The Turnstile widget sits between the password field and the Log In button. It shows Success once it passes.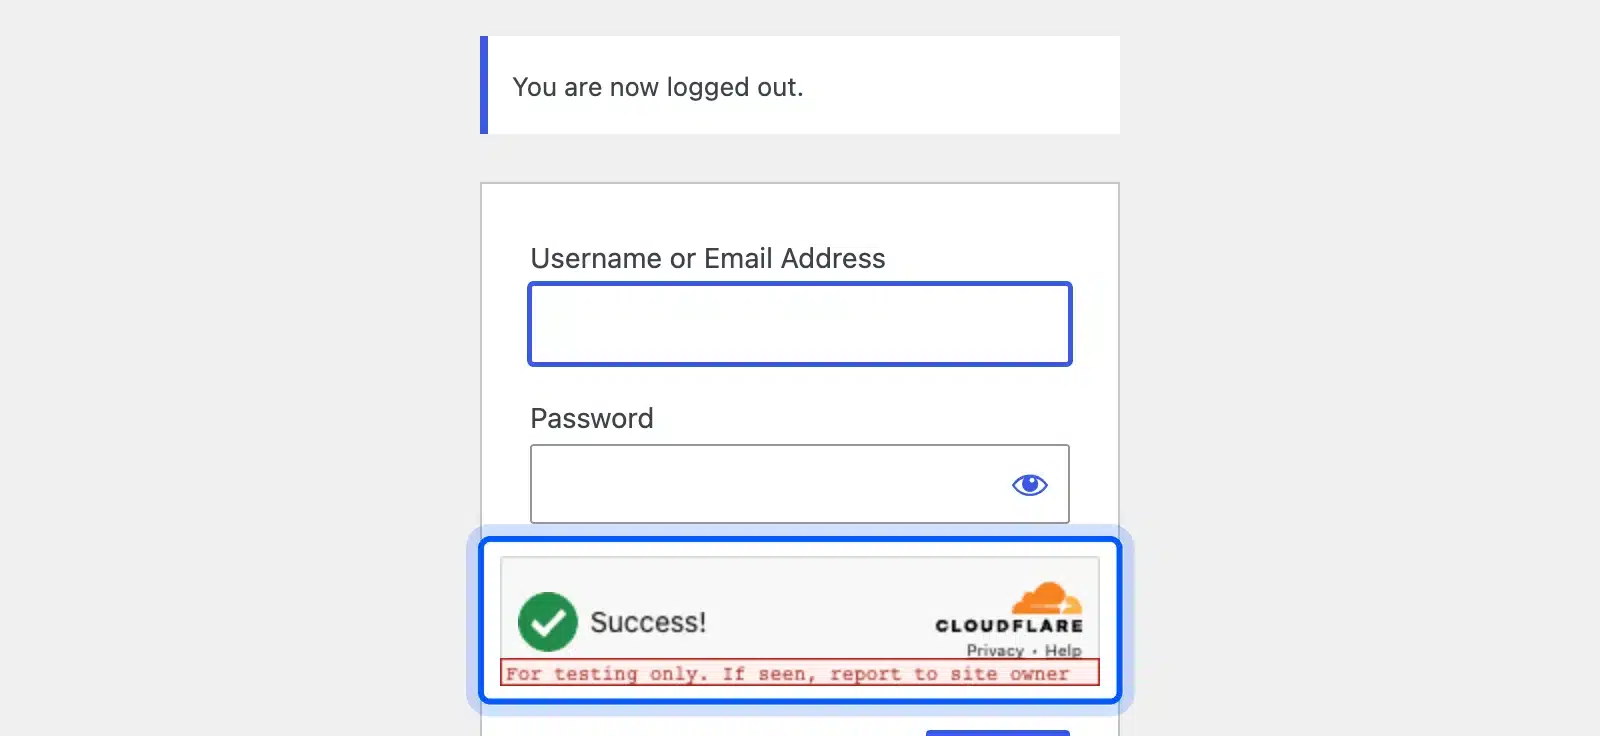
Warning: Save both keys before you log out. With the secret key empty, every protected form refused logins on our test site, and that includes the administrator login. Keep one logged-in session open while you test.
Here is what we saw on the test site:
- Solved widget: The login worked and opened the dashboard.
- No token: A login request that carried no CAPTCHA token was refused with “Please complete the CAPTCHA to verify that you are not a robot.”
- Wrong key pair: With Cloudflare’s always-fail secret, every login was refused.
- Other forms: The lost password form refused a request with no token and accepted one with a token. The WooCommerce My Account login and guest checkout acted the same way.
- Other providers: Google reCAPTCHA v2 and hCaptcha, both with their published test keys, let a login through after the checkbox.
- XML-RPC: With login CAPTCHA on, an XML-RPC login with the right password returned a 403 error. With it off, the same call listed the site. So the CAPTCHA also shuts password guessing through
xmlrpc.php, and it breaks any app that signs in that way.
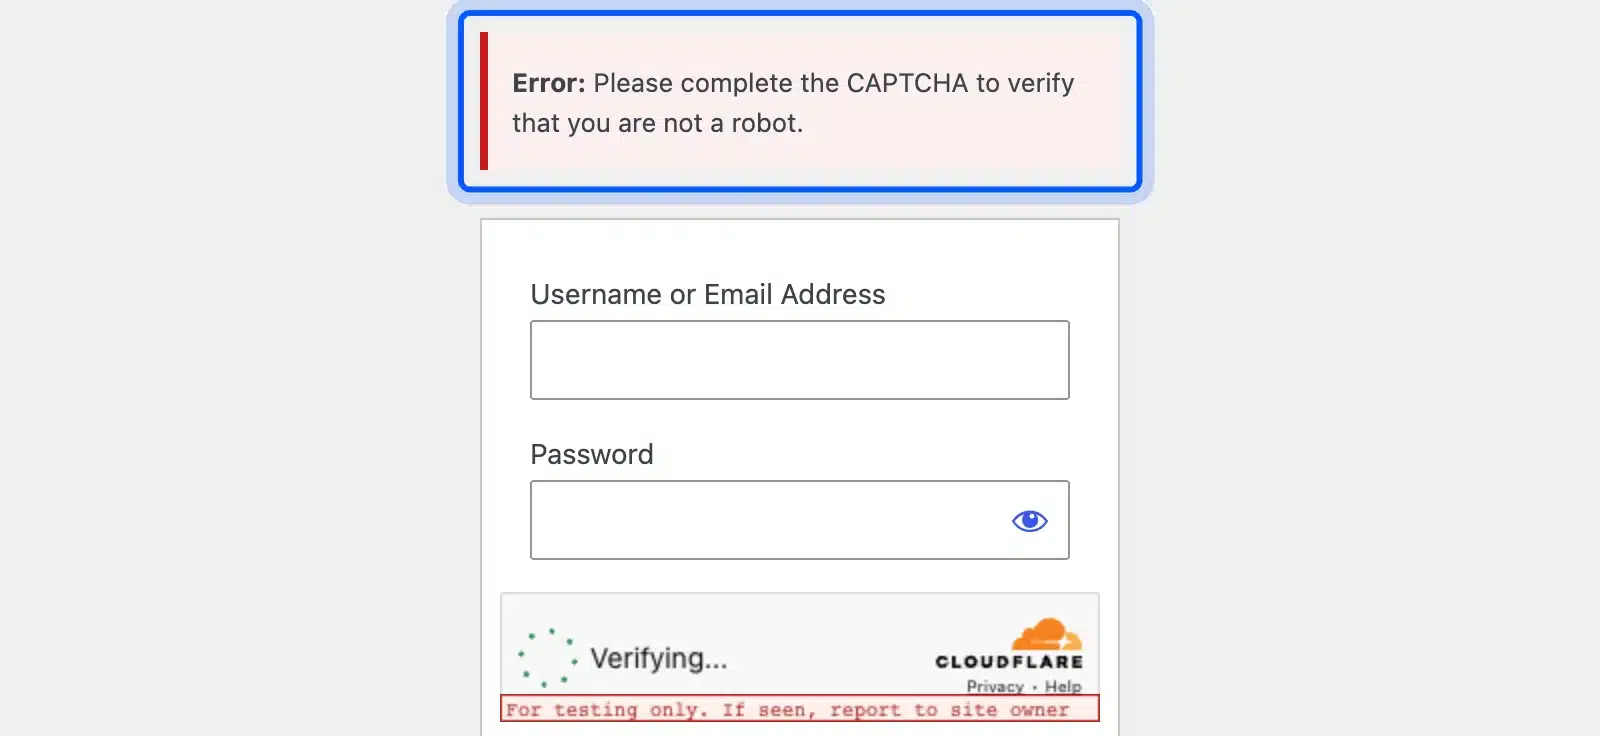
The Whitelisted IPs box on the General tab skips the CAPTCHA for the addresses you list. On our test site, listing our own address removed the widget and let a login through with no token. List only addresses you trust.
Note: On version 1.1.0 the login page printed three error lines on its first load, before we typed anything. The form still worked.
A CAPTCHA does not count attempts. A person or a paid solving service can still guess passwords one at a time. That gap is why the second method follows.
The second method limits attempts with a free plugin.
A limit locks an address out after a few wrong guesses and makes password guessing slow. On our test site 12 wrong passwords in a row were all accepted for retry. After we activated a limiting plugin, the fourth wrong try was blocked.
The Limit Login Attempts Reloaded listing says that by default WordPress allows unlimited login attempts. We confirmed that with 12 failed logins in a row. Every one returned the same incorrect password message and none was blocked.
With version 3.3.10 active, the first three wrong tries returned a generic error. The fourth returned “Too many failed login attempts. Please try again in 20 minutes.”
The settings screen shows the defaults behind that: 4 allowed retries and a 20 minute lockout.
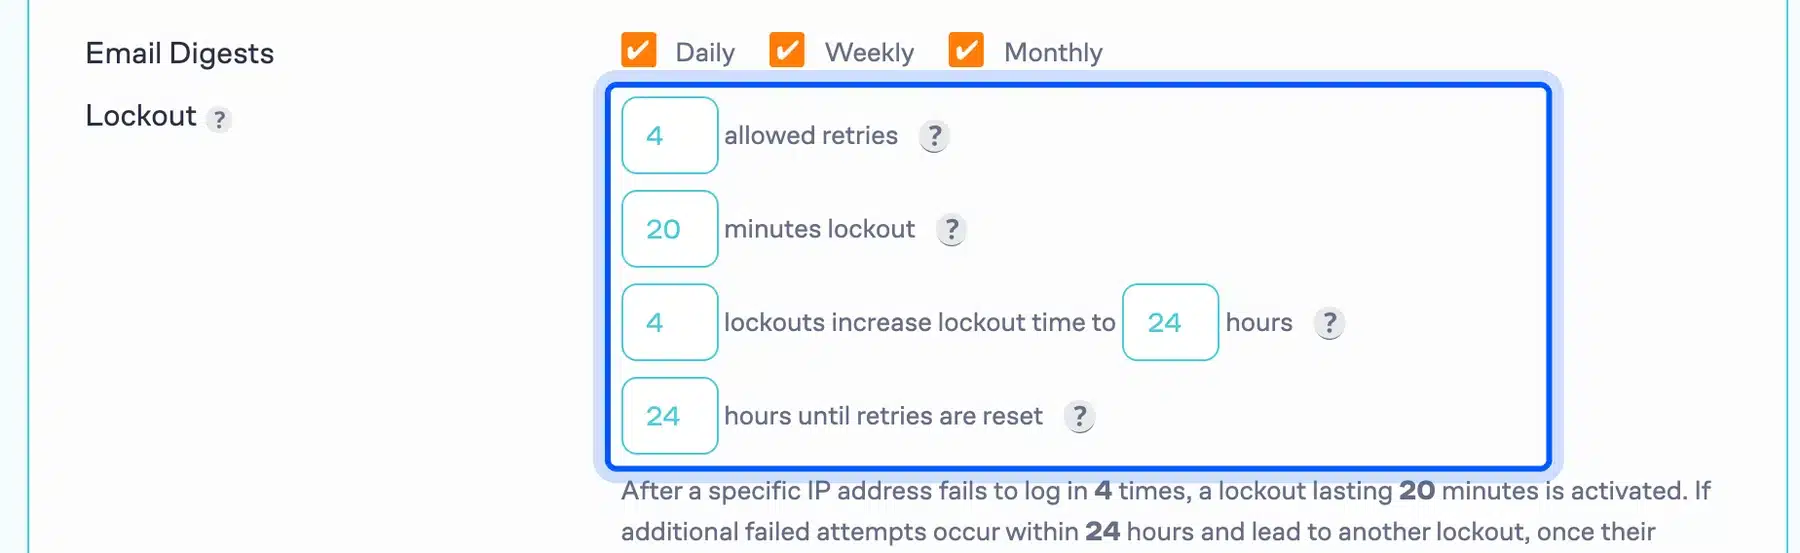
After 4 lockouts the plugin raises the lockout time to 24 hours. You can change every number on that screen. Keep the retry count low, because real users rarely need more than three or four tries.
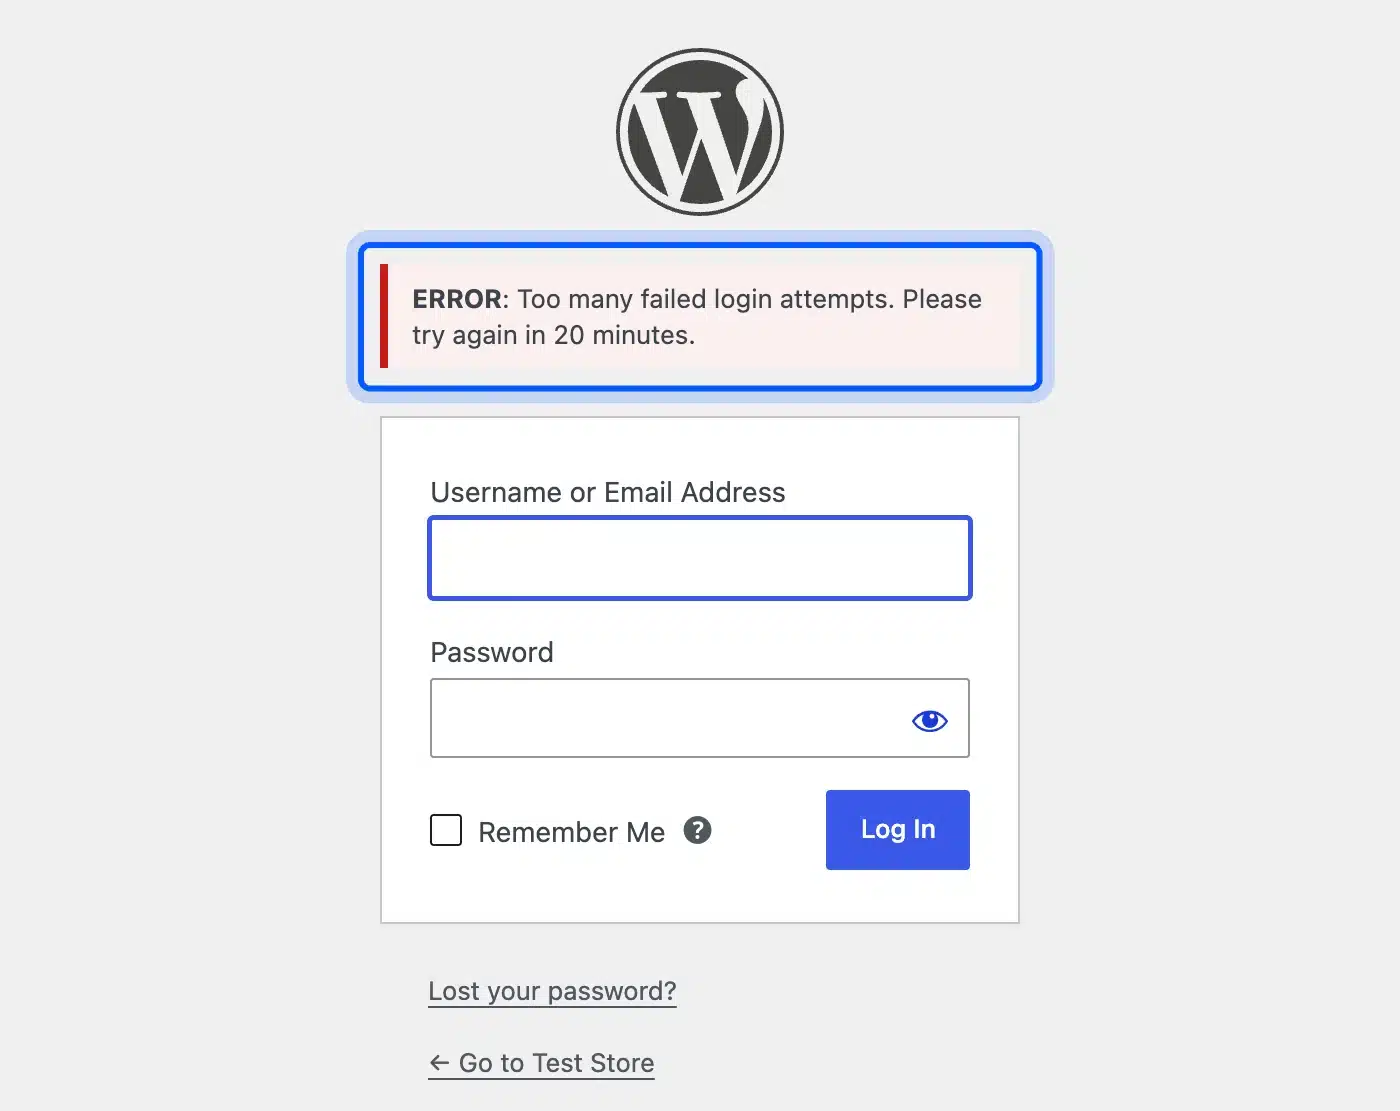
The plugin asked us to finish an onboarding screen and showed upgrade prompts. The free lockout rules worked without any of that. For a wider look at login defenses, read our guides to limit login attempts in WordPress and WordPress brute force protection.
4. Replace the Default Admin Username and Trim Roles
Retire any account named admin and give every person the smallest role that does the job. WordPress will not rename a username. You create a new administrator, move the content across and delete the old account.
Do this on a backup first.
The profile screen on our test site shows the username field greyed out with the note “Usernames cannot be changed.” The hardening guide advises that you avoid easily guessed terms such as admin or webmaster as usernames. WordPress hardening starts with that point.

WordPress also gives guessers a hint. On our test site a wrong password for a real username said the password was incorrect. An unknown username said it was not registered.
That difference tells an attacker which names exist. A limit on tries matters more than the name alone.
Use Users > Add User for new accounts. Pick the Role from the dropdown and choose Editor or Author for writers rather than Administrator. If you ever need to change an existing user, our guide to making a subscriber an admin on WordPress shows where the role field lives.

Review the Users list once a month. Delete accounts for people who left and demote anyone who no longer needs the role they hold. Fewer administrators means fewer logins worth stealing.
5. Close the XML-RPC Door If You Do Not Use It
XML-RPC is an older remote access file at xmlrpc.php that some apps and services still call. If nothing on your side needs it, turn off its login methods. One line in a small plugin or functions.php does it.
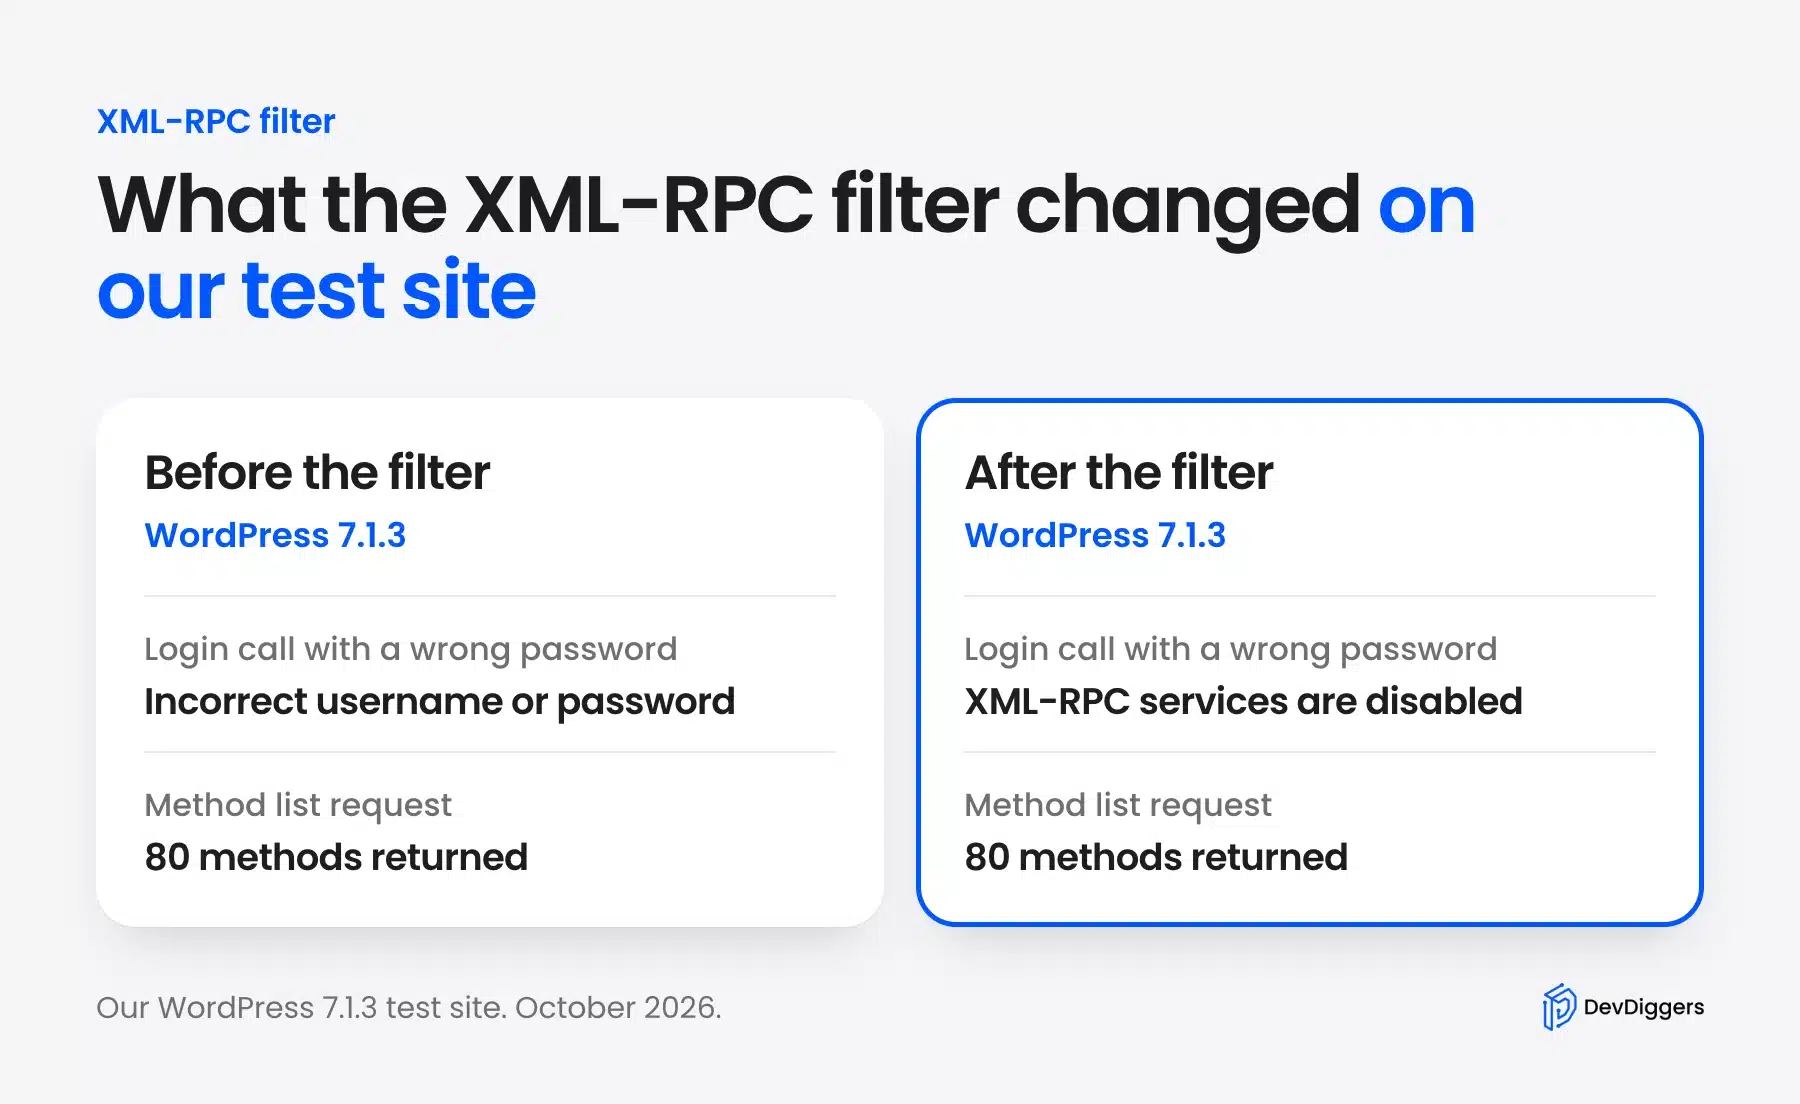
We tested the result and found the filter has a narrower effect than many guides suggest.
We sent two requests to the file on our test site. A login call with a wrong password returned “Incorrect username or password.” A request for the method list returned 80 methods.
Then we added the filter below and repeated both calls.
add_filter( 'xmlrpc_enabled', '__return_false' );
The login call now returned “XML-RPC services are disabled on this site.” The method list request still answered with 80 methods.
The filter shuts the login methods but leaves the file reachable. Blocking the file at the server needs a separate rule.
Check before you switch it off. Some mobile apps, publishing tools and plugins talk to your site through this file. Test each one after the change, and turn the filter off again if something stops working.
Keep WordPress Software Current
Outdated software is the easiest way into a site because the flaws are public. Every update screen shows what is waiting. Three checks keep the code current: apply updates, remove what you do not use and run a supported PHP version.
6. Apply Updates and Turn On Auto-Updates
Apply core, plugin and theme updates from Dashboard > Updates, and switch on auto-updates for plugins you trust. WordPress already installs minor core releases on its own, and those releases carry security fixes. Plugins and themes need you to opt in one by one.
Our test site showed the problem right away. The Updates screen listed WooCommerce 11.2.0 as installed and 11.2.1 as available. Site Health also flagged “You have plugins waiting to be updated” and tagged it as a Security issue.
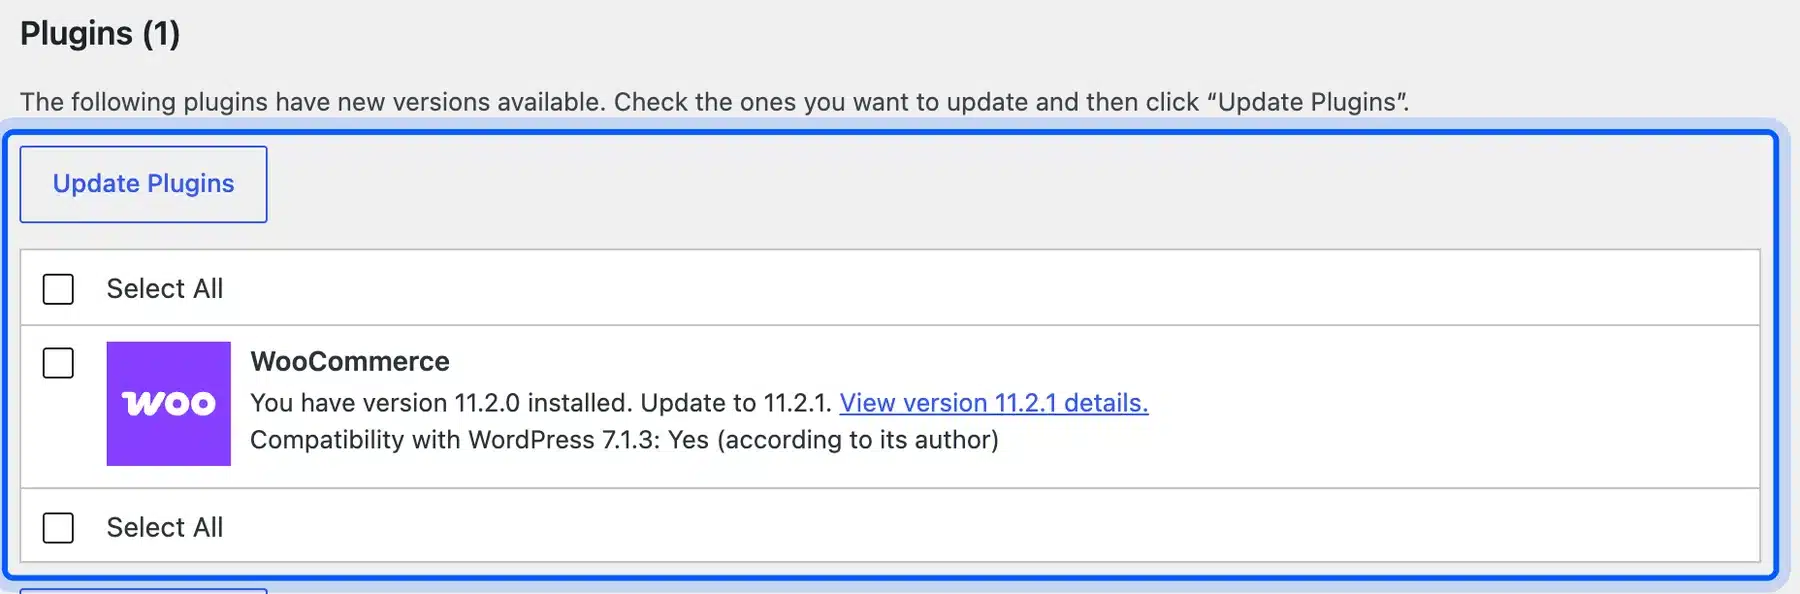
The WordPress upgrade documentation says WordPress turns on automatic updates for minor releases and translation files out of the box. Plugin and theme updates happen only in special cases unless you change the setting.
On Plugins > Installed Plugins, every plugin has an Enable auto-updates link in the Automatic Updates column. Our test site showed it for all three plugins. Turn it on for plugins from developers who release small and frequent fixes.
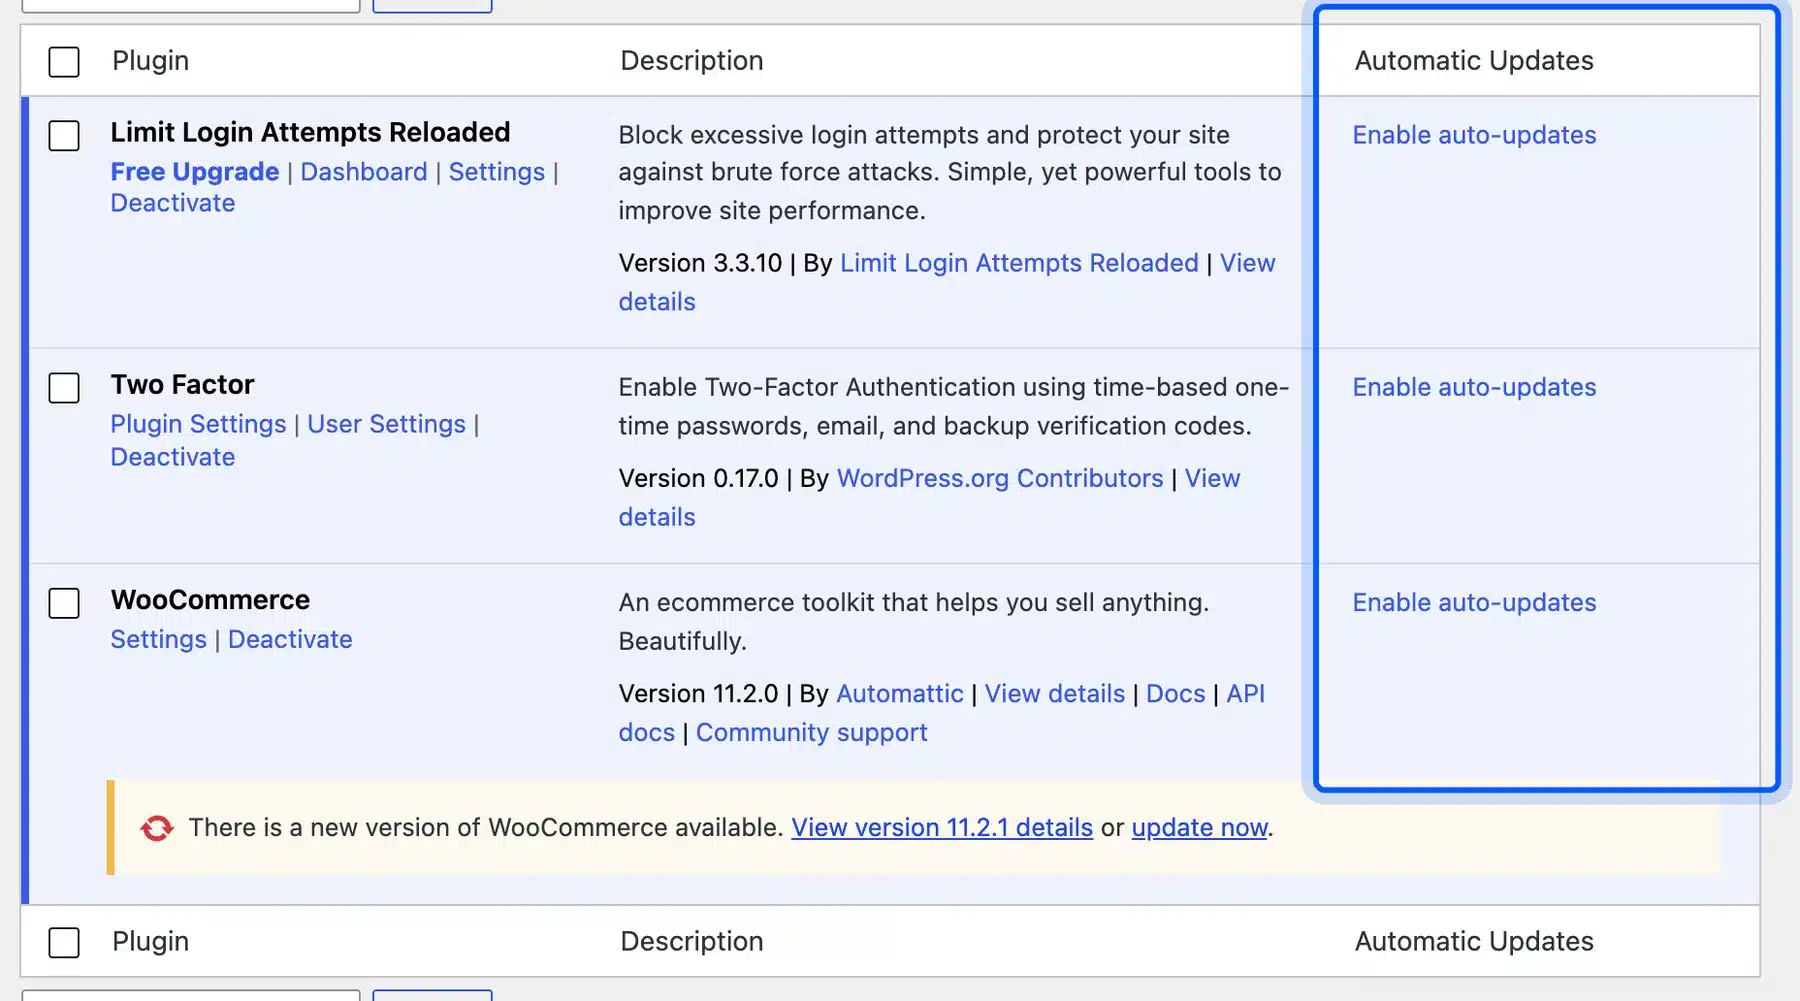
Auto-updates can break a site now and then. Take a backup before a major update and test the change on a copy when the site earns money. If a single plugin keeps breaking, you can disable automatic updates in WordPress for that plugin and update it by hand.
7. Delete Unused Plugins and Themes
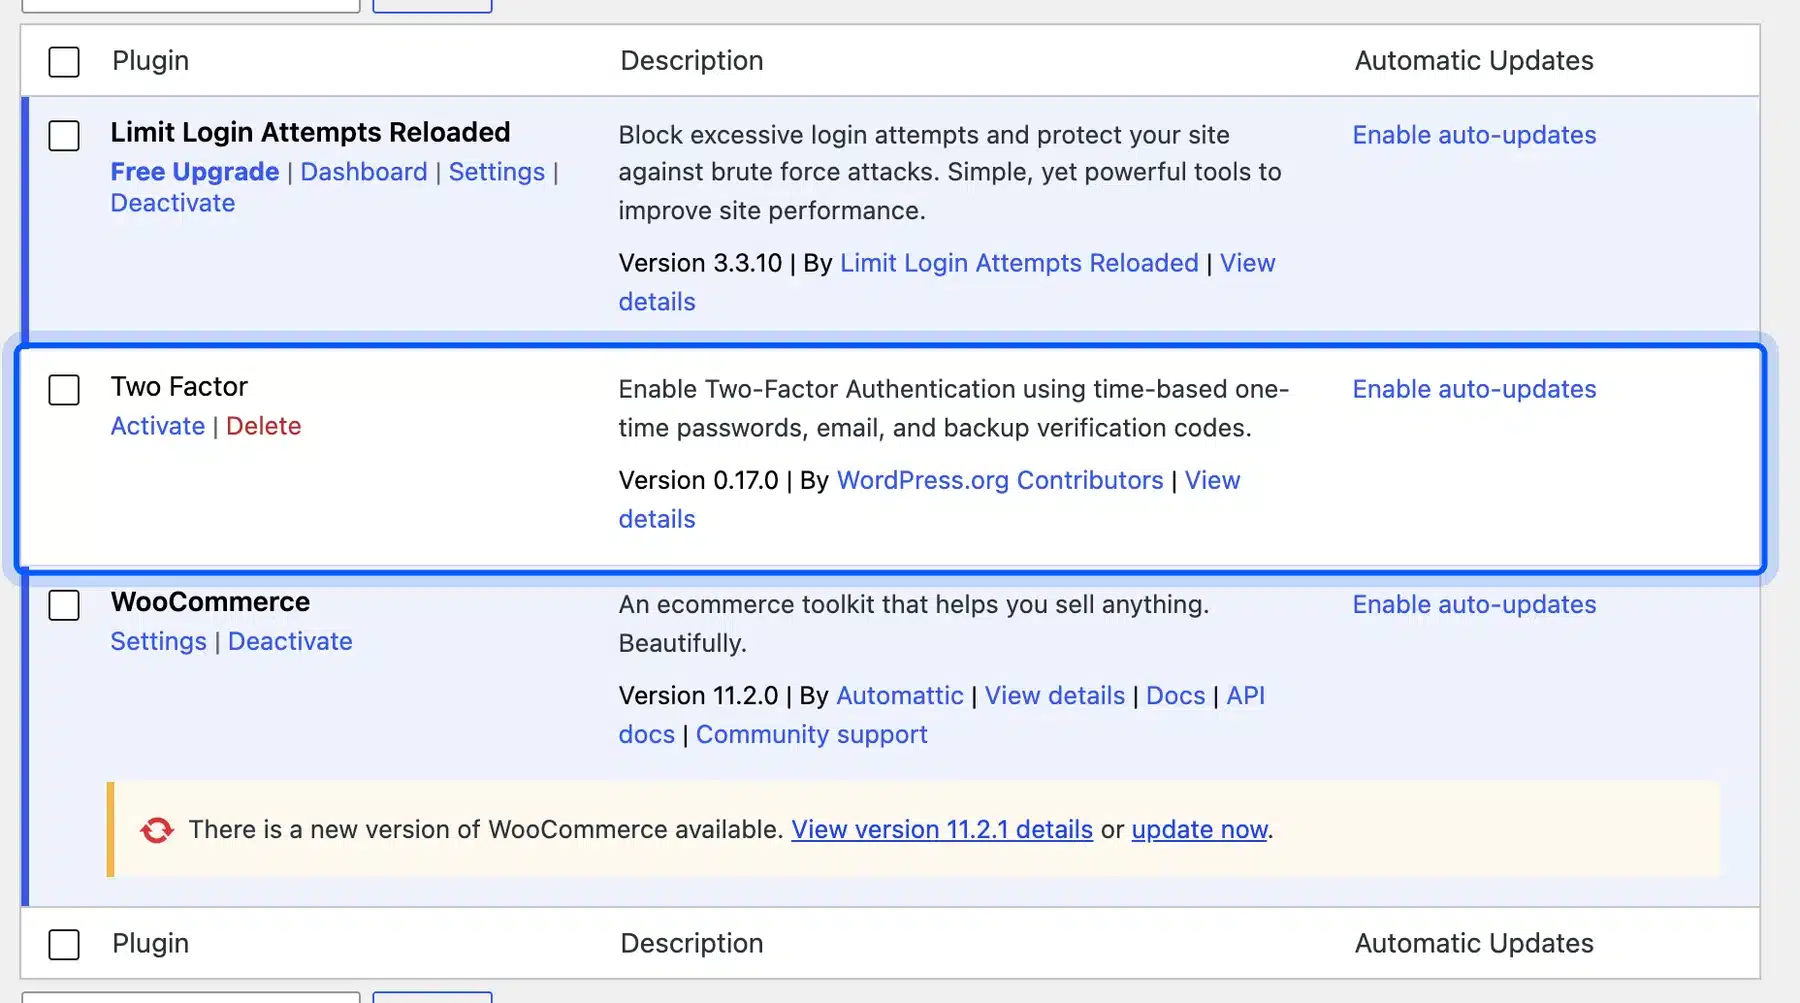
Deactivating a plugin stops it running but leaves its files on the server. Delete every plugin and theme you do not use. The hardening guide says that if you are not using a specific plugin, you should delete it from the system.
On the Plugins screen a deactivated plugin shows an Activate and a Delete link. We deactivated Two Factor on our test site to capture it. Clicking Delete removes the folder from wp-content/plugins.
Do the same for themes under Appearance > Themes. Keep one active theme and one default theme as a fallback. Remove the rest.
Our guide to clean up a WordPress site covers the database leftovers that deleted plugins sometimes leave behind.
Check the source of anything you keep. Install plugins from WordPress.org or from the developer’s own site. Never install a pirated copy of a paid plugin.
8. Run a Supported PHP Version
Run a PHP version that still receives security fixes. As of 14 October 2026, php.net lists PHP 8.2 with security support until 31 December 2026 and PHP 8.3 until 31 December 2027. PHP 8.4 is covered until 31 December 2028 and PHP 8.5 until 31 December 2029.
Check your version under Tools > Site Health > Info > Server. Our test site reported PHP 8.5.5 there. The WordPress requirements page recommends PHP 8.3 or greater, with MariaDB 10.11 or MySQL 8.0 or greater.
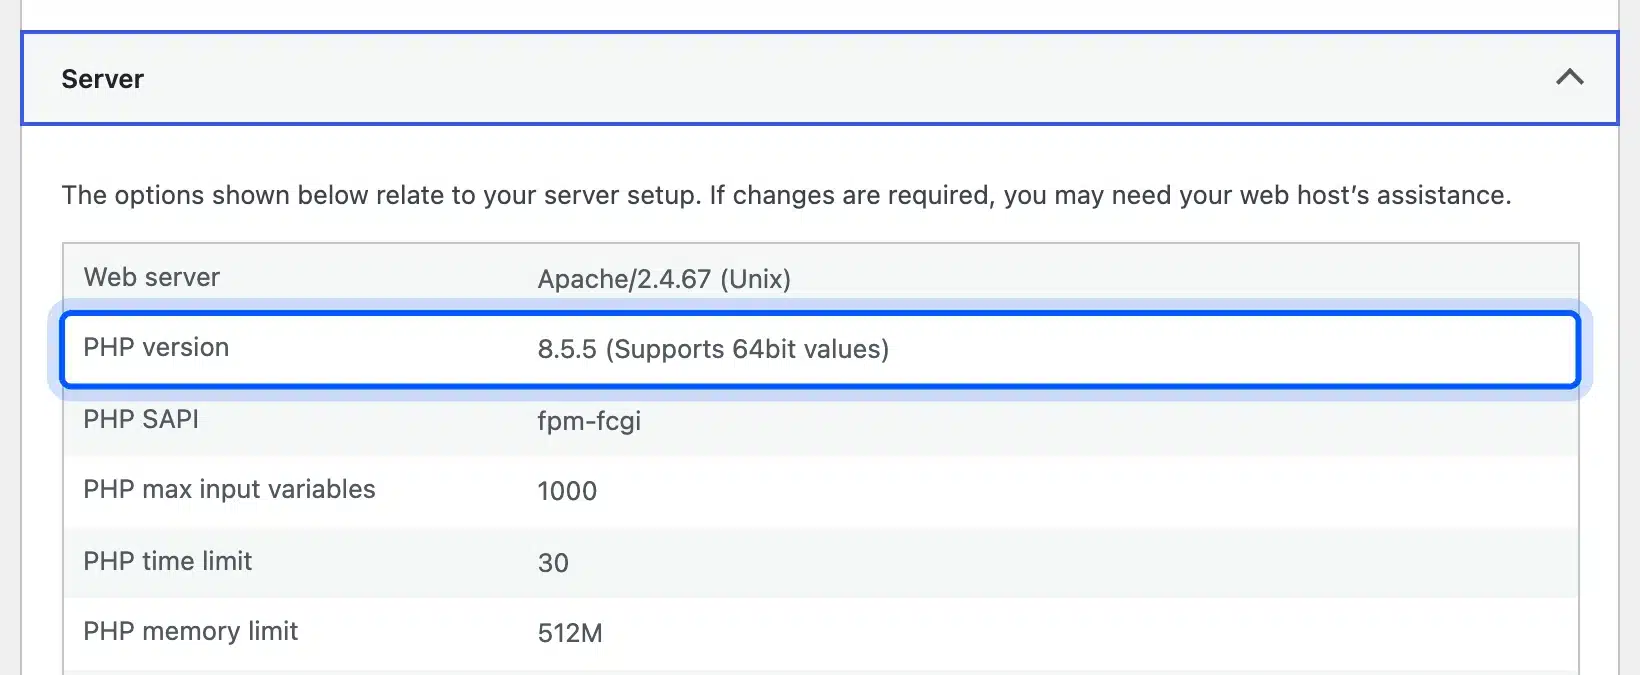
Change the PHP version in your hosting panel rather than in WordPress. Pick PHP 8.3 or newer and load the front page, the login and a plugin screen. Roll back if something breaks.
If a plugin only works on an old PHP version, treat that plugin as a risk and replace it.
Harden Files and the Server
WordPress hardening means closing places where code can be changed or run that normal use never needs. Five file-level checks cover most of it: the file editor, permissions, secret keys, PHP in uploads and directory listings. Each one takes a few lines or one setting.
9. Disable the Dashboard File Editor
Add define( 'DISALLOW_FILE_EDIT', true ); to wp-config.php to remove the theme and plugin file editors from the dashboard. A stolen administrator login then cannot be used to paste code into a theme. The hardening guide names this constant under Disable File Editing.
Put the line above the comment that says “That’s all, stop editing!”:
define( 'DISALLOW_FILE_EDIT', true );
We tested it. Before the change, Tools > Theme File Editor opened an editor with a “Heads up!” warning that direct edits are not recommended. After the change, both editor URLs returned a 403 page that says “Sorry, you are not allowed to access this page.”
The editor menu entries also vanished from the Tools menu. That is the result you want to see on your own site.
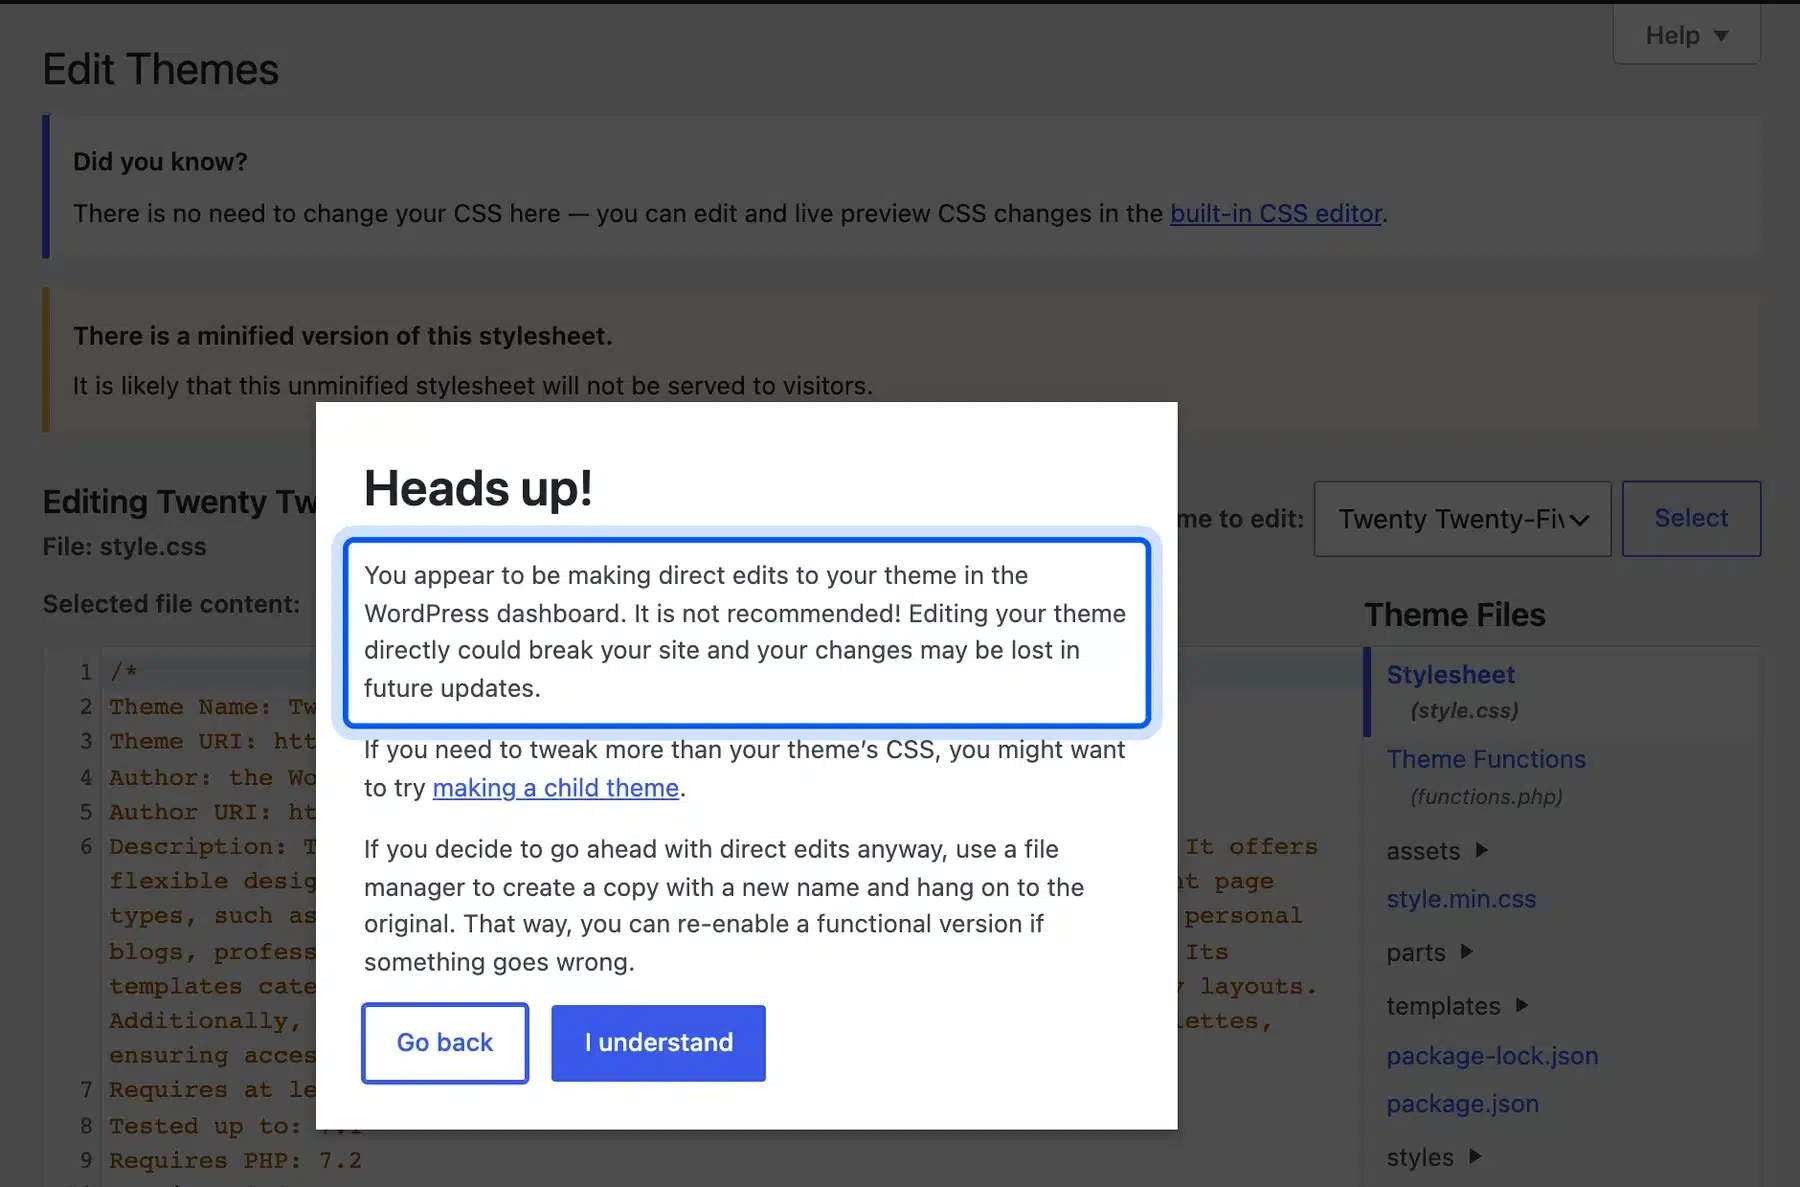
The constant only hides the editors. It does not stop someone with file access from changing files, and it does not block plugin or theme installs. Pair it with the next four checks.
A developer who needs to change code should use SFTP or Git.
10. Set Safe File Permissions and Protect wp-config.php
Set directories to 755 and files to 644, and make wp-config.php readable only by you and the web server. The hardening guide says all directories should be 0755 and all files 0644. It says a 400 or 440 permission on wp-config.php means that only you and the web server can read it.
On our test site we set wp-config.php to 440 and the front page still returned a 200 response.
That works because PHP runs as the same user. On shared hosting the PHP user can differ. Test the front page after any change.
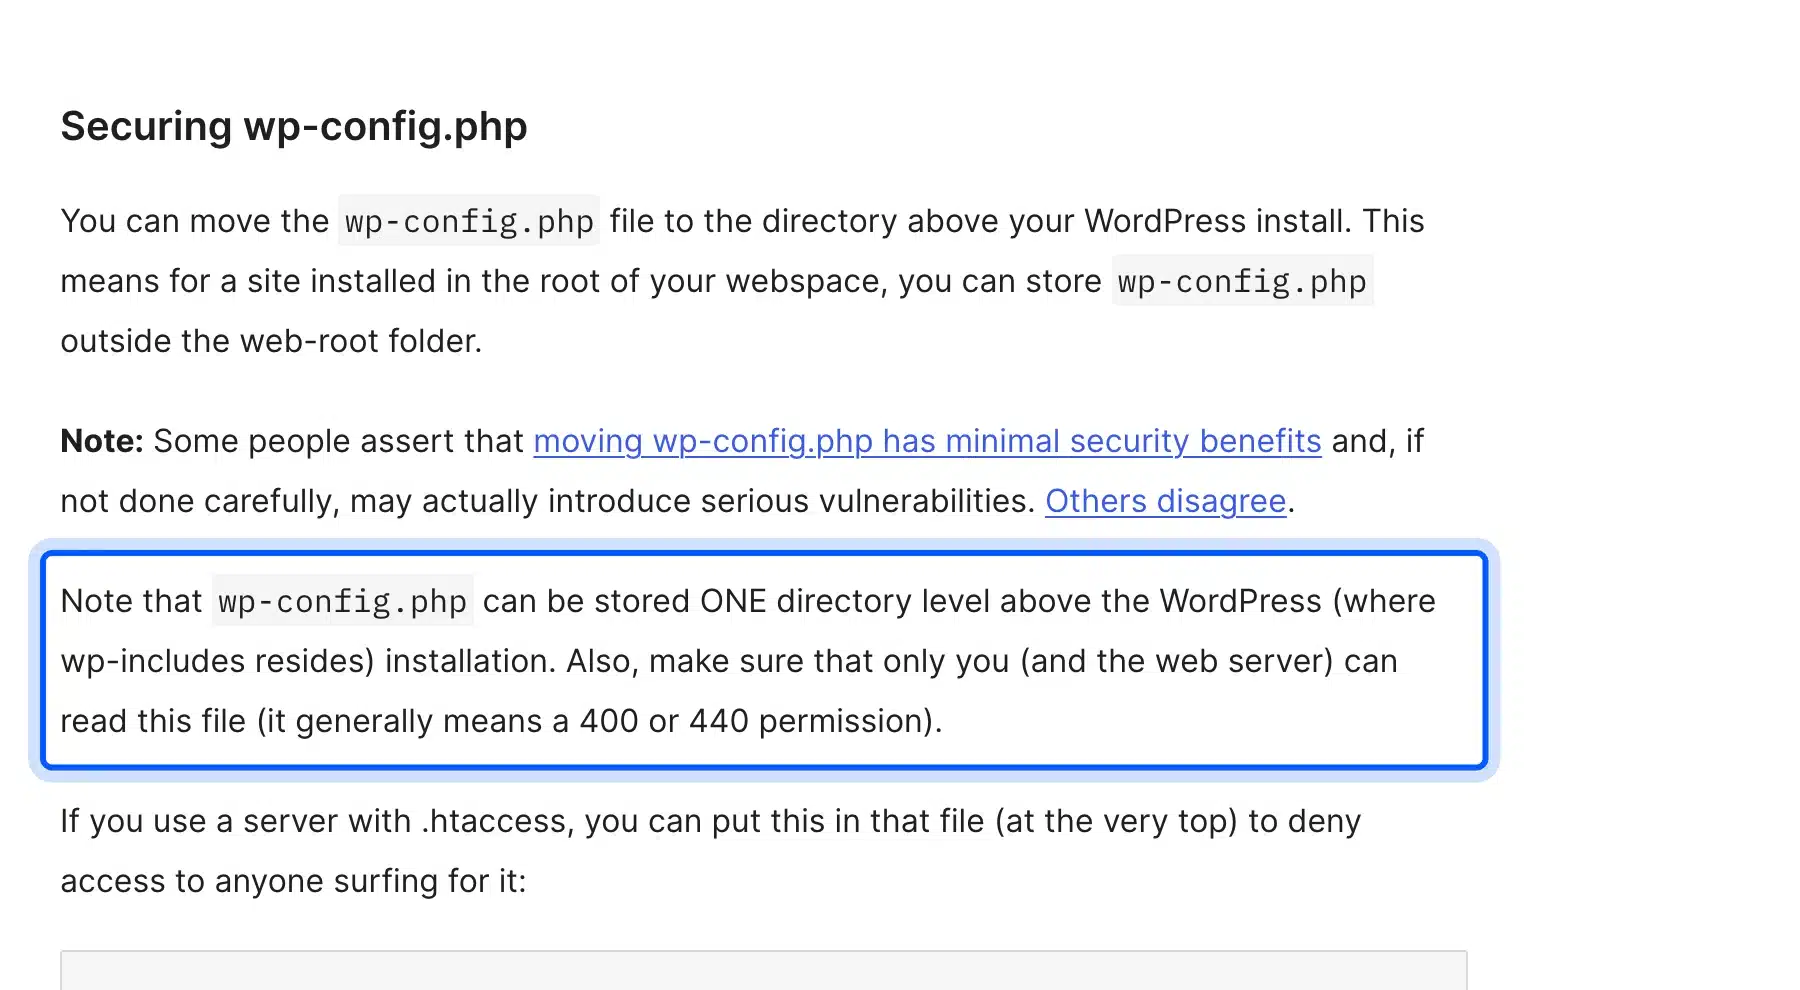
The guide also lets you move wp-config.php one directory above the WordPress install. It adds a caution that some people think the benefit is minimal and that careless moves can add risk. If your host runs Apache, the guide gives a rule that denies web access to the file:
<Files "wp-config.php">
Require all denied
</Files>
Use Require all denied on Apache 2.4. The old deny from all form belongs to Apache 2.2. The Apache access control guide says the Allow, Deny and Order directives are deprecated and will go away in a future version.
11. Replace the Security Keys After a Breach
The eight keys and salts in wp-config.php sign your login cookies. Generate fresh values after a breach, a staff change or a leaked config file. WordPress.org offers a free generator that returns all eight lines ready to paste.
We tested what a change does. On our test site we signed in and replaced all eight values with a key shuffle. The next request to the dashboard sent us back to the login screen with a reauthentication flag.
Changing the keys signs everyone out at once.
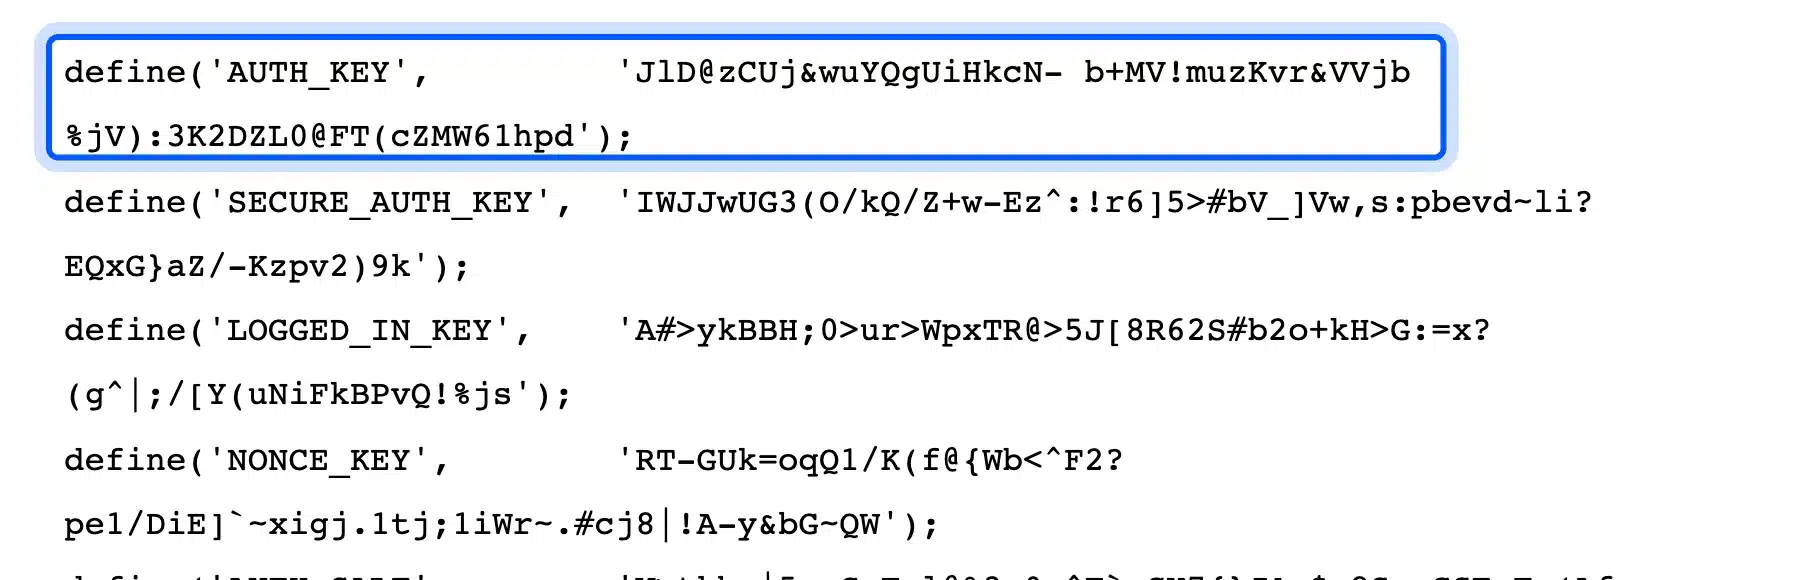
That makes the change a tool for the moment you need it and a bad habit on a schedule. Do it when you suspect a stolen cookie or a departed administrator. Tell your team first, because everyone signs in again.
Open the generator at api.wordpress.org/secret-key/1.1/salt/, copy the block and replace the eight define lines in wp-config.php. Never reuse keys from a tutorial. Anyone who knows your keys can forge a login cookie.
12. Block PHP Execution in the Uploads Folder
Stop the server from running PHP files in wp-content/uploads. Visitors and plugins write files there.
A PHP file that lands in that folder should never run. A rule in an .htaccess file inside uploads blocks it on Apache.
We tested this on Apache 2.4. First we saved a one-line PHP file named test.php in the uploads folder. A request for it returned 200 and the code ran.
Then we added a rule file and requested it again.
Create wp-content/uploads/.htaccess with these lines:
Options -Indexes
<FilesMatch "\.php$">
	Require all denied
</FilesMatch>
After the rule, the PHP file returned 403 Forbidden. A plain text file in the same folder still returned 200. Images and downloads kept working.
The first line also turns off directory listings. The next check explains that part.
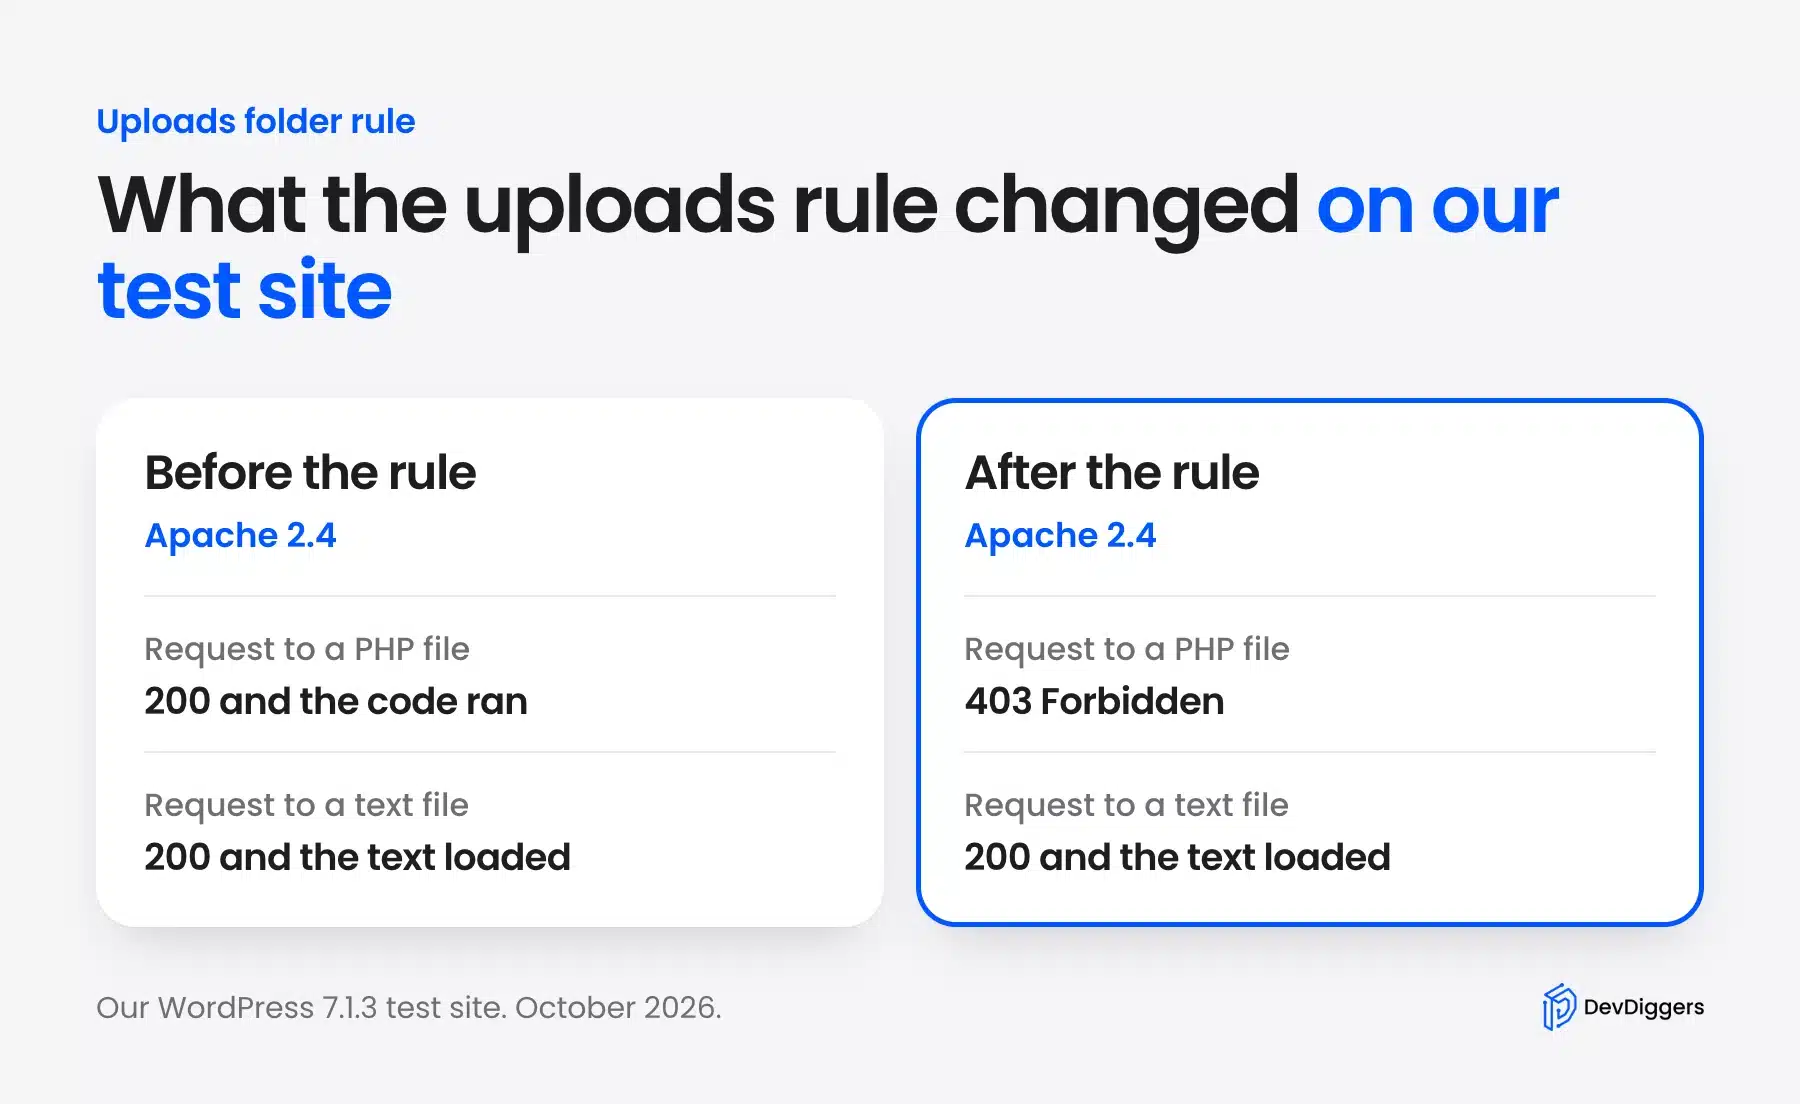
This rule is for Apache. Nginx ignores .htaccess files and needs an equivalent block in the server configuration.
We did not test that block. Ask your host for that block if you run Nginx.
13. Turn Off Directory Browsing
Directory browsing shows a list of files when someone opens a folder URL that has no index page. Turn it off so visitors cannot browse your uploads or plugin folders. On Apache the option is Options -Indexes.
We forced the opposite on our test site by setting Options +Indexes in the uploads folder. Opening the folder URL then returned a plain page titled “Index of /wp-content/uploads/2026/10” with every file as a link. That list shows an attacker which files exist.
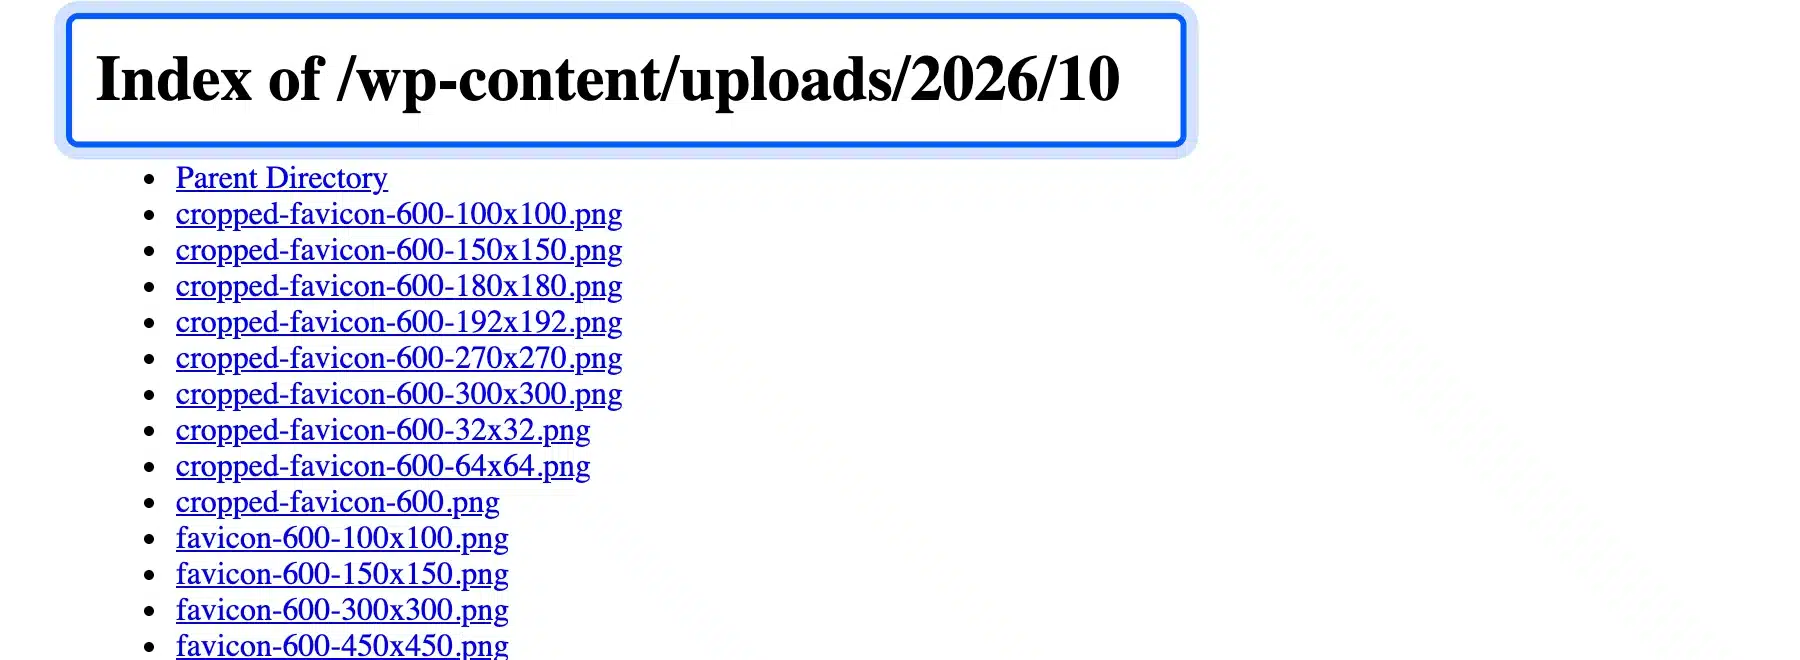
Our test server returned 403 for the same folder before we changed anything. Listings were already off there.
Hosts differ. Open yoursite.com/wp-content/uploads/ in a private window and look at the answer.
A blank page, a 403 or a redirect is fine. A list of files is not.
Protect the Connection and Plan for Recovery
The last layer sits between your site and the visitor and behind it when something fails. Headers tell browsers how strict to be and HTTPS protects the connection. A firewall filters traffic before WordPress sees it, and backups let you recover when every other check fails.
14. Send WordPress Security Headers
Security headers are response lines that tell browsers to apply extra protections. Send X-Content-Type-Options, a frame rule and a referrer rule from the server, and hide the PHP version. We set four headers and removed the PHP version header on our test site, and we confirmed each change in the response.
Before the change, a request for the front page returned an X-Powered-By: PHP/8.5.5 header and no security headers. We then added this block to the .htaccess file above the WordPress rules:
<IfModule mod_headers.c>
Header always set X-Content-Type-Options "nosniff"
Header always set X-Frame-Options "SAMEORIGIN"
Header always set Referrer-Policy "strict-origin-when-cross-origin"
Header always set Permissions-Policy "camera=(), microphone=(), geolocation=()"
Header always unset X-Powered-By
</IfModule>
All five lines took effect in the next response, and the PHP version disappeared. WordPress already sends X-Frame-Options and a frame-ancestors rule on the login page. The front page had neither until we added them.
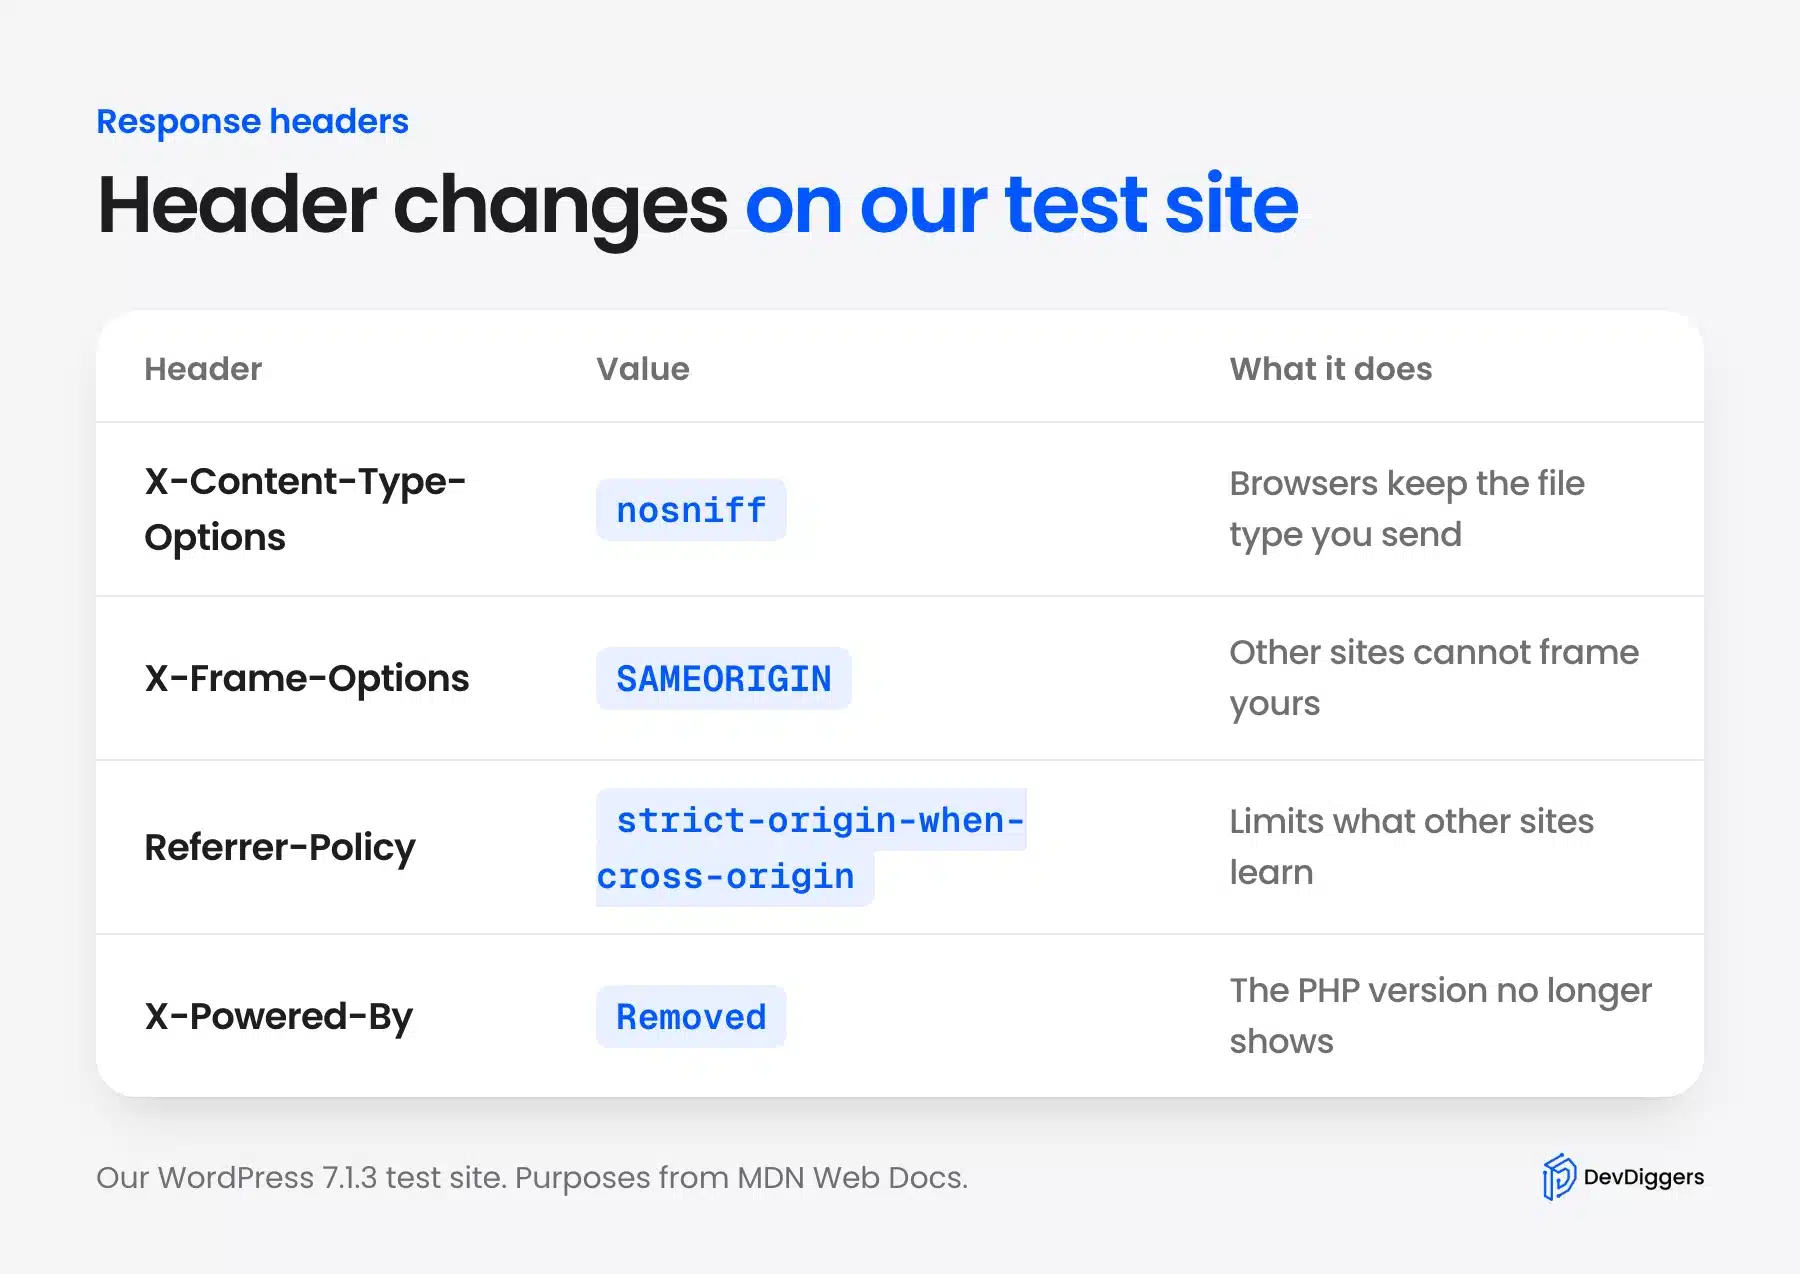
MDN says nosniff means the MIME types advertised in Content-Type headers should be respected and not changed. MDN also notes that the Referrer-Policy header defaults to strict-origin-when-cross-origin when you set no policy. That line states the default and costs nothing.
Two older habits need care. MDN marks X-XSS-Protection as deprecated and says to avoid it in new projects. Do not add it.
MDN also says the frame-ancestors directive of Content-Security-Policy should be used in place of X-Frame-Options.
Add Strict-Transport-Security only after HTTPS works everywhere on the site and you know how to renew your SSL certificate automatically. MDN describes it as telling browsers the host should only be accessed over HTTPS. Its own example uses max-age=63072000, and preloading needs a max-age of at least 31536000 and includeSubDomains.
We did not test this header because our test site runs on plain HTTP.
A full Content-Security-Policy is the strongest header and the easiest to get wrong. MDN’s CSP guide describes a report-only mode that sends violations without blocking anything. Start there and read the reports before you enforce a policy on a live site.
15. Use HTTPS Everywhere
Serve the whole site over HTTPS and send admin and login traffic only through it. HTTPS stops people on the same network from reading passwords and session cookies. The WordPress HTTPS guide says support for HTTPS is strongly recommended to help maintain the security of both logins and visitors.
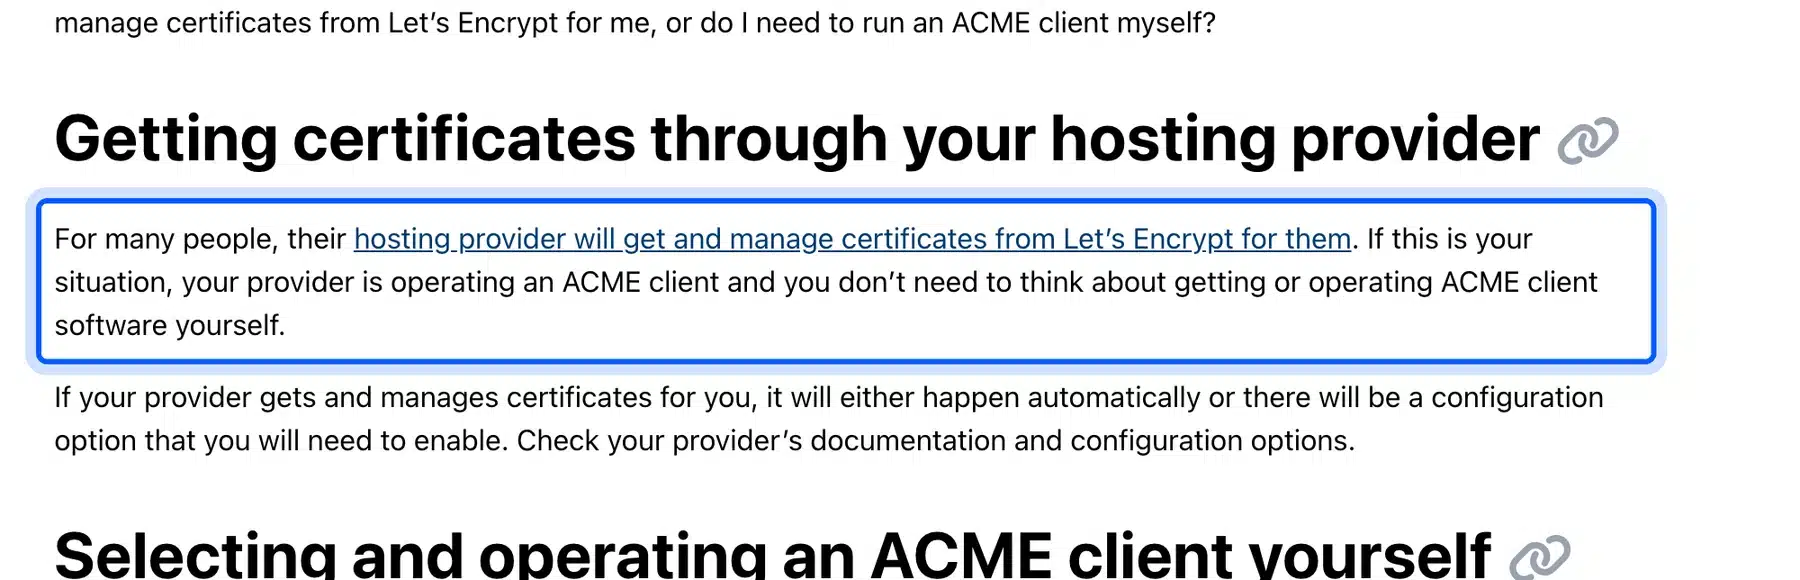
Most hosts include a free certificate. Let’s Encrypt says that for many people the hosting provider will get and manage certificates for them. Check your hosting panel for an SSL or HTTPS switch before you install anything yourself.
Once the certificate works, set both URLs under Settings > General to start with https://. Then add the admin constant to wp-config.php:
define( 'FORCE_SSL_ADMIN', true );
The WordPress HTTPS guide says this constant forces all logins and admin sessions over SSL. It only works after SSL is set up on the server. Our test site runs on plain HTTP.
Its profile screen says “The application password feature requires HTTPS, which is not enabled on this site.” If you see that note on your own site, you have found a gap.
For certificate errors, see how to fix common SSL issues in WordPress.
16. Put a Firewall in Front of the Site
A web application firewall checks each request before it reaches WordPress and drops the ones that look hostile. Run it at the network edge through a CDN or DNS service, or inside WordPress as a plugin. The edge option keeps bad traffic off your server entirely.
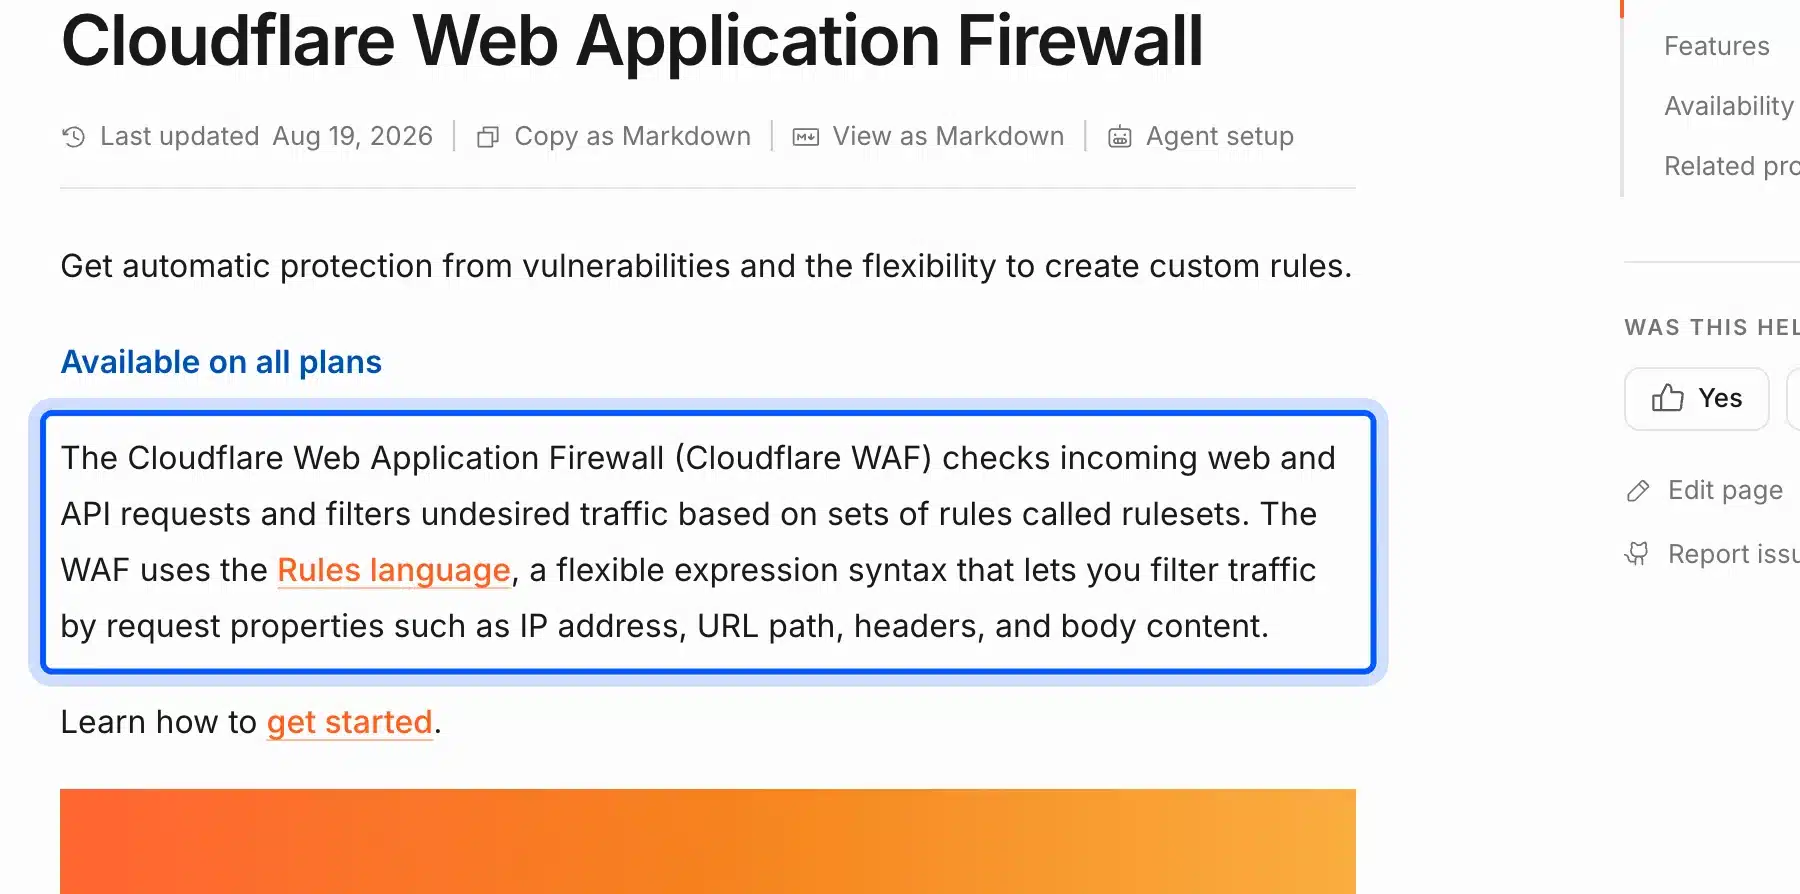
Cloudflare’s documentation says its WAF checks incoming web and API requests and filters undesired traffic based on sets of rules. It lists the product as available on all plans. On the Free plan, managed rules are limited to the Free Managed Ruleset.
A firewall also helps with login floods. The WordPress brute force guide lists limiting login attempts at the edge or the web server as a key defense. Pair it with the lockout from check 3.
Our guide to WordPress DDoS protection covers the traffic flood side.
A firewall rule is not a patch. It can hide an attack for a while, but the flaw stays in the plugin until you update it. Treat the firewall as a second layer after check 6 and never a replacement for it.
17. Back Up Your WordPress Site and Test a Restore
A WordPress backup is a copy of your files and database that you can restore. Back up on a schedule, store a copy away from the server and test a restore. A backup you have never restored is a guess.
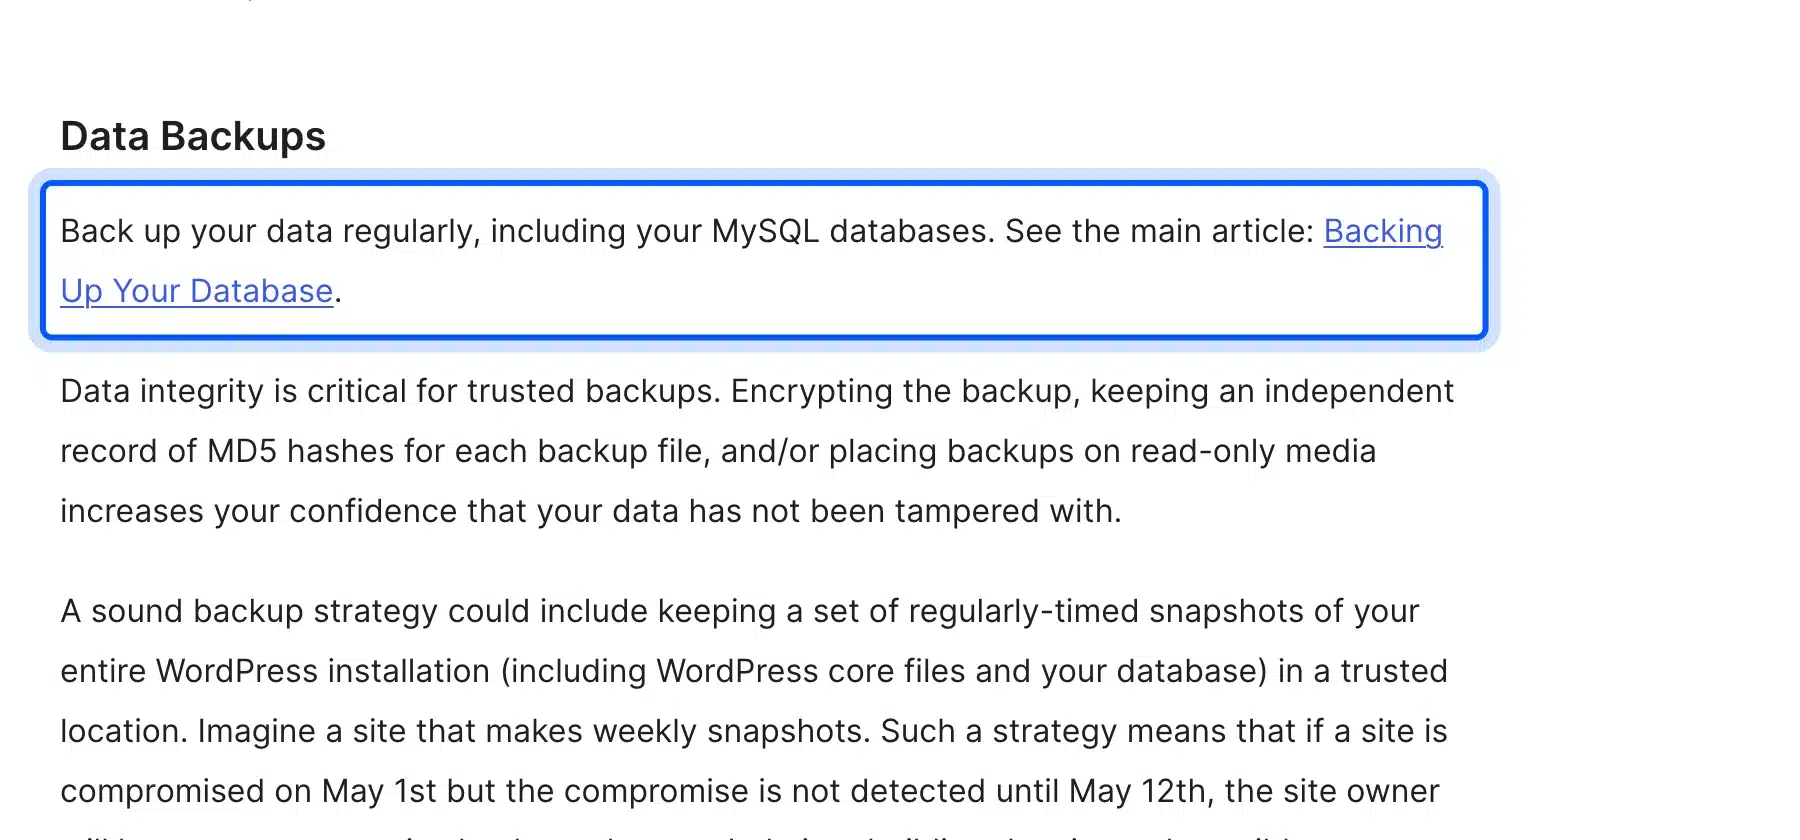
The hardening guide says to back up your data regularly, including your MySQL databases. It adds three integrity steps: encrypt the backup, keep MD5 hashes of each file and use read-only media. Each one raises your confidence that nothing was tampered with.
Pick a backup plugin or your host’s backup tool and send copies to remote storage. The UpdraftPlus listing on WordPress.org names Dropbox, Google Drive, Amazon S3 and FTP among its remote options. Keep at least one copy somewhere your server login cannot reach.
Run a test restore every quarter on a staging copy. You only learn whether a backup works when you restore it. If you run a store, our guide to back up the WooCommerce database covers orders and customer data.
Mistakes That Undo a Good Checklist
Most security fixes fail because of how they are applied. A correct setting on the wrong file or an untested change can do more harm than the attack it was meant to stop. These five mistakes show up again and again when you work through a list like this one.
- Editing without a copy: A typo in
wp-config.phpor.htaccesscan take the site offline, and the fix is slow without the original. - Testing only the front page: Load the login, an admin screen and the checkout after every change, because a rule can break one and leave the others fine.
- Changing five settings at once: When the site breaks you will not know which change did it. Change one thing and check it.
- Leaving the old admin account active: A new administrator does nothing for security while the account named admin still exists.
- Skipping the restore test: A backup that has never been restored is a guess, and you learn the answer at the worst time.
What We Tested and What We Did Not
We ran 10 of the 17 checks hands-on on a WordPress 7.1.3 test site in October 2026. We read the real settings screens on the same site for four more checks. We took the last three from the sources linked above, and the table shows which is which.
| Check | How we verified it | Result |
|---|---|---|
| Password strength | Typed a weak password on the profile screen | Very weak with a confirm box |
| Two-factor codes | Enrolled an authenticator code and signed in again | Code screen after the password |
| CAPTCHA | Cloudflare test keys on login, lost password, My Account login and guest checkout | Request with no token refused and a solved widget accepted |
| Login limits | 12 wrong tries with no plugin and 7 more with one | No block at first and a lockout on try 4 later |
| XML-RPC filter | Sent a login call and a method list request | Login call refused and method list still answered |
| File editor | Added the constant and opened both editors | 403 on both URLs |
| File permissions | Set wp-config.php to 440 | Front page still loaded |
| Security keys | Replaced all eight values while signed in | Session sent back to login |
| Uploads rule | Requested a PHP file before and after | 200 then 403 |
| Directory listing | Forced a listing and read the page | File list shown |
| Headers | Read the response before and after | Four headers set and one removed |
| Admin username | Opened the profile screen and tried a wrong login | Username locked and name hint seen |
| Updates and plugins | Read the Updates and Plugins screens | Update waiting and Delete link shown |
| PHP version | Read Site Health Info | PHP 8.5.5 shown |
We did not test HSTS, an Nginx version of the uploads rule, a firewall or a backup restore.
We also skipped an HTTPS certificate and live CAPTCHA keys. Those need a live server, a paid plan or a domain. For those checks we link the vendor page that states the behavior.
How to Run a WordPress Security Audit With This Checklist
A WordPress security audit is a repeat of these checks on a schedule, with a note of what changed. Run the fast checks weekly and the slow ones monthly. Write down the result so you can see drift between audits.
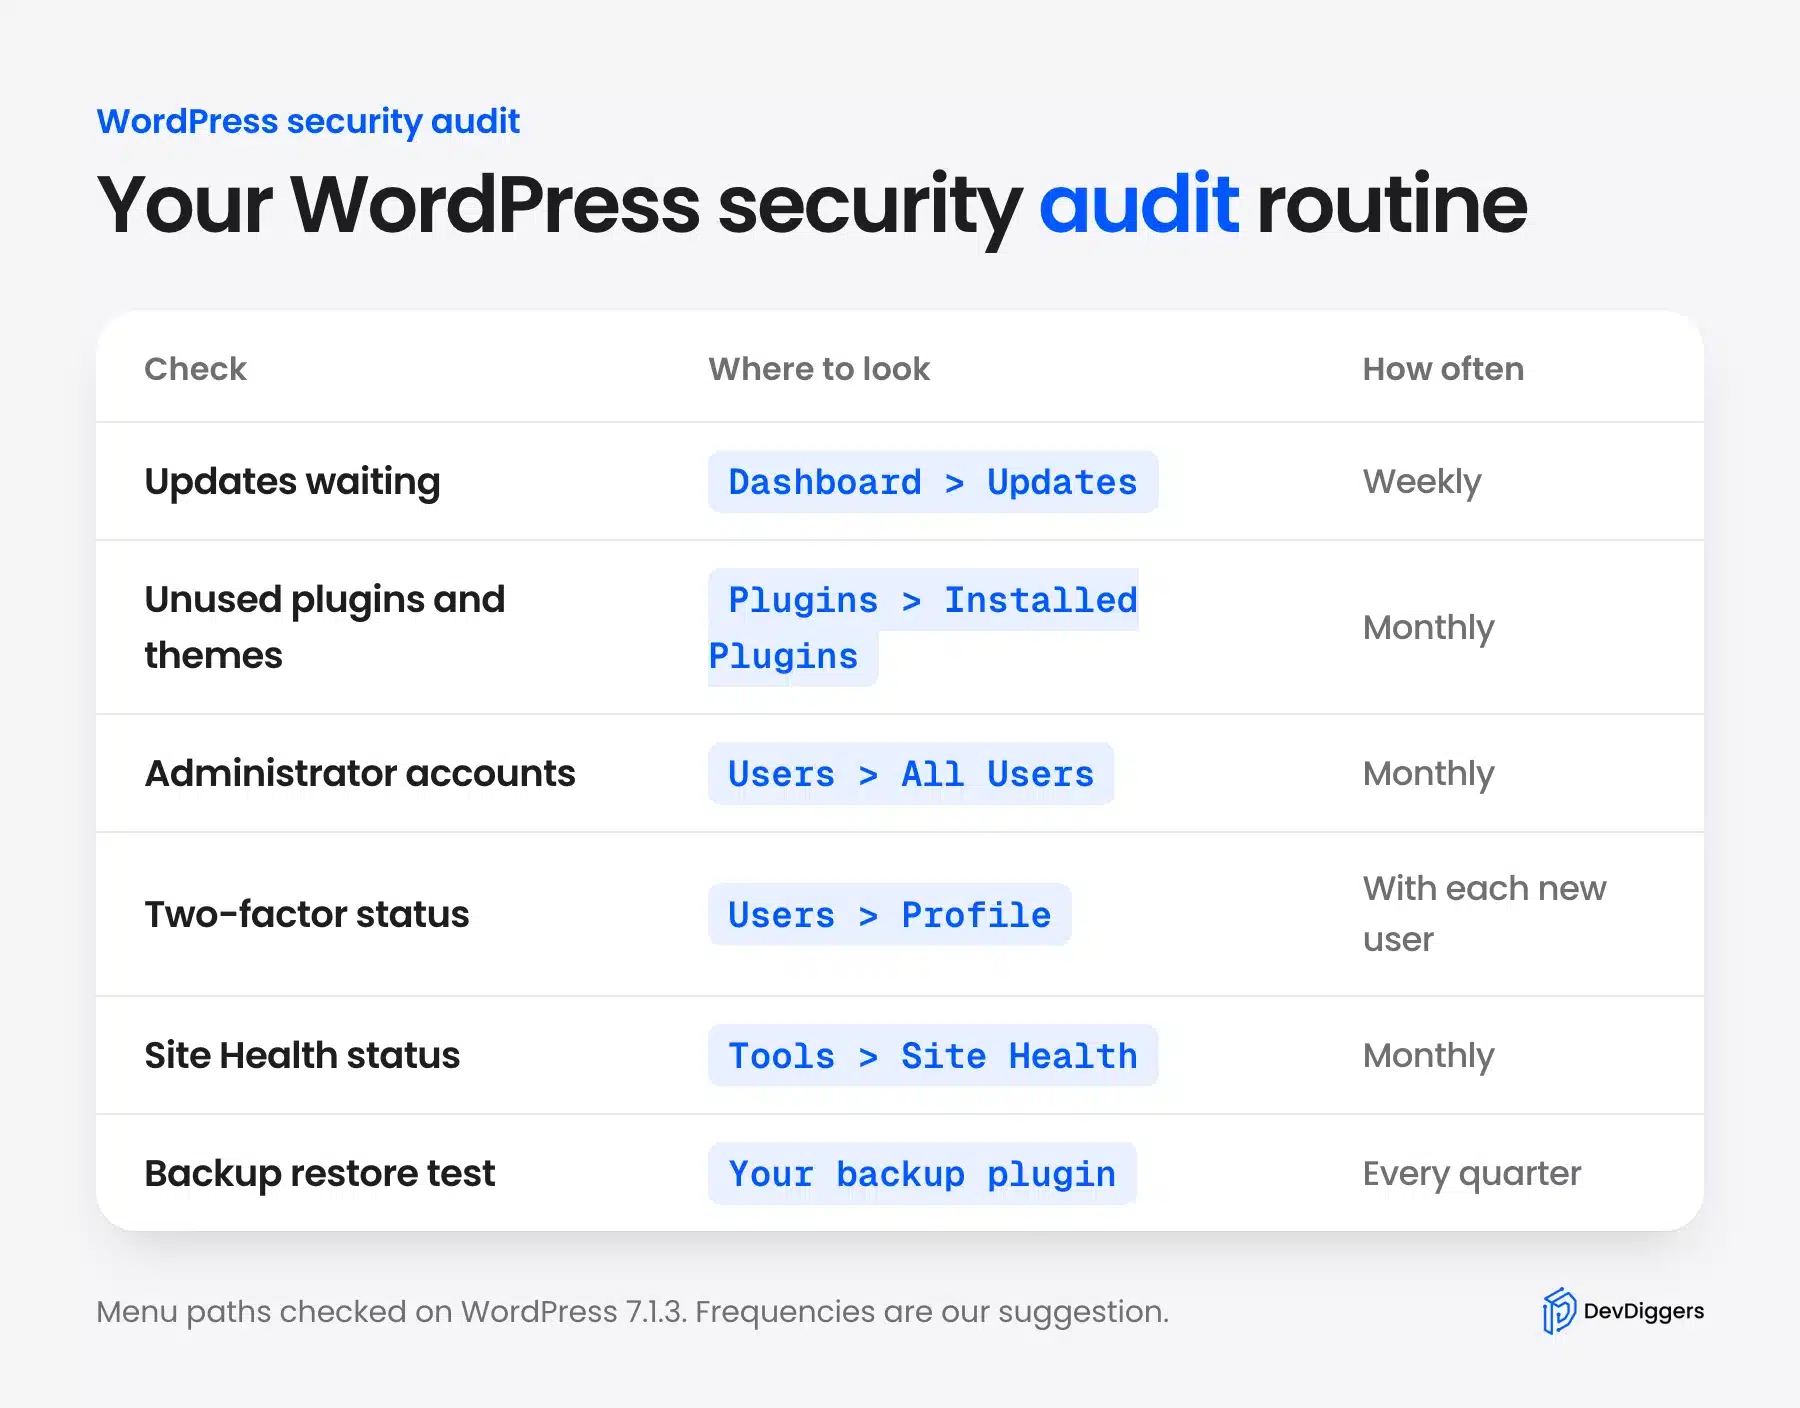
The table gives the screen for each check. The frequencies are our suggestion and not a rule from WordPress. Weekly suits updates because plugin fixes arrive all the time.
Monthly suits accounts and plugins because they change slowly.
Add a scan when you have time. A WordPress vulnerability scanner checks installed plugins against known flaws and catches what a manual look misses.
Audits cost time every month. If you manage client sites or a store, a WordPress care plan hands that routine to someone else. Our WordPress security services run the audit and fix what it finds.
WordPress Security Checklist for Stores
A WooCommerce store needs everything above plus protection for customers and payments. Customer accounts hold order history and saved addresses and need their own two-factor option. Forms need bot protection, and the checkout needs its own review before you take real orders.
Read the WooCommerce security checklist after you finish the 17 checks here. It starts where this guide stops.
Conclusion
A WordPress security checklist works when you run it on a schedule. The 17 checks here lock logins, patch software, harden files, add HTTPS and headers, and keep a restorable backup. Start with passwords, two-factor codes and the login limit.
We ran 10 of the checks on a WordPress 7.1.3 test site. The rest come from the official sources linked above.
Our WooCommerce Advanced CAPTCHA plugin adds a CAPTCHA that stops scripts at the form. Pick one check today and finish it before you open the next.
Frequently Asked Questions (FAQs)
Q1. What is the easiest way to secure a WordPress site?
Start with a long unique password in a password manager, two-factor codes and a limit on login attempts. Then update every plugin and delete the ones you do not use. Those steps close the doors that attackers try first.
Q2. Should I change my WordPress password every 90 days?
No. NIST SP 800-63B-4 says verifiers and credential service providers shall not require subscribers to change passwords periodically. Change a password after a leak, a lost device or a staff change.
Use a different password on every site.
Q3. Do I need a security plugin for WordPress?
A plugin adds features WordPress lacks, such as login limits and two-factor codes. You can add them one at a time with small plugins. A suite is optional, and it never replaces updates, backups and server rules.
Q4. How do I secure my WordPress login page?
Use a strong password, enable two-factor codes, add a CAPTCHA and limit login attempts. WooCommerce Advanced CAPTCHA refused logins that carried no token, and Limit Login Attempts Reloaded locked out wrong guesses after four tries. Serve the login over HTTPS too.
Q5. How often should I update WordPress plugins?
Check weekly and apply updates once you have a backup. WordPress installs minor core releases on its own, but plugins and themes need auto-updates turned on per plugin. Read the update note for any major release first.
Q6. Does WordPress have built-in security?
Partly. WordPress rates password strength, installs minor core updates and ships Site Health checks. It does not limit login attempts, add security headers or run backups on its own.
Those jobs belong to you, your host or a plugin.