Your customers don’t think in “points”; they think in rewards that are meaningful to them. Generic point terminology disengages customers. If your loyalty program uses dull, technical words like “Points” and “You have 100 points,” customers will mentally disconnect from your loyalty program. LoyaltyX – WooCommerce Points and Rewards plugin addresses this by allowing you to change every customer-facing label and message for your program.
This guide teaches you how to brand your points program and customize point labels, display messages, and call-to-action text that your audience will relate to.
Why Do Custom Labels Influence Engagement? #
Branded point labels will increase participation in your program by as much as 40%. Instead of “earning points”, customers will earn “Stars”, “Gems”, “Credits” or whichever celebratory grand narrative best fits your brand character.
Custom messaging also communicates perceived value. If a customer “earns 50 stars on this purchase”, the message has significantly more value than stating the customer “earns 50 points.”
Accessing Your Display Message Configuration Settings #
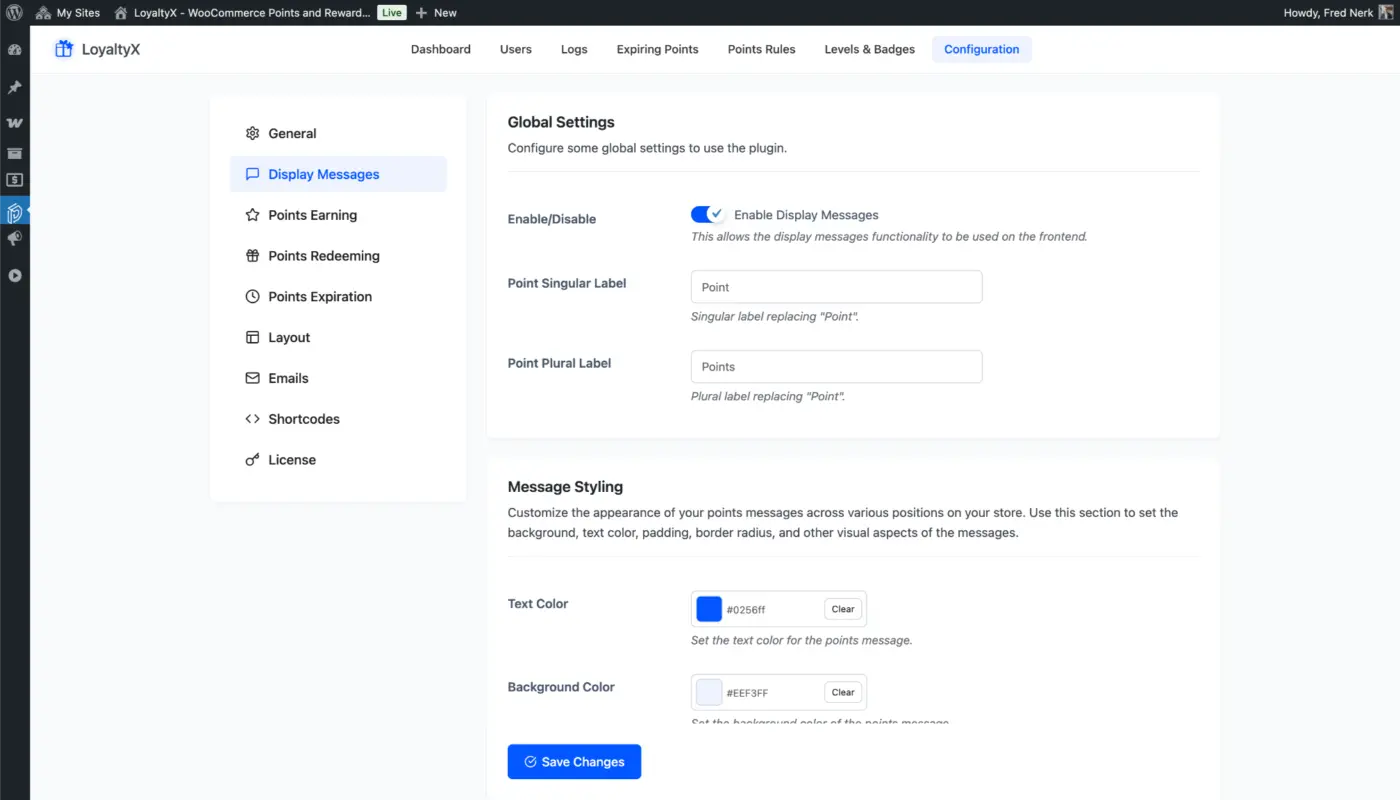
Go to the display message customization area:
- Log in to your WordPress admin dashboard
- Navigate to DevDiggers Plugins → LoyaltyX → Configuration.
- Click the “Display Messages” tab
- Your customization panel will load and you will see all of the label and message fields
Here you will see dozens of fields to customize representing the different display contexts (cart, checkout, account, product pages, etc.).
Customizing Your Points Label #
The points label will be seen in each instance a loyalty customer interacts with your loyalty program.
Configure Singular and Plural Forms:
Singular Label: What a single unit is referred to as.
- Example: “Star,” “Gem,” “Credit,” or “Token”
- Appears when a customer has 1 point.
- Default: “Point”
Plural Label: What more than one unit is referred as.
- Example: “Stars,” “Gems,” “Credits,” or “Tokens”
- Appears when the customer has 2 or more points.
- Default: “Points”
Message Styling #
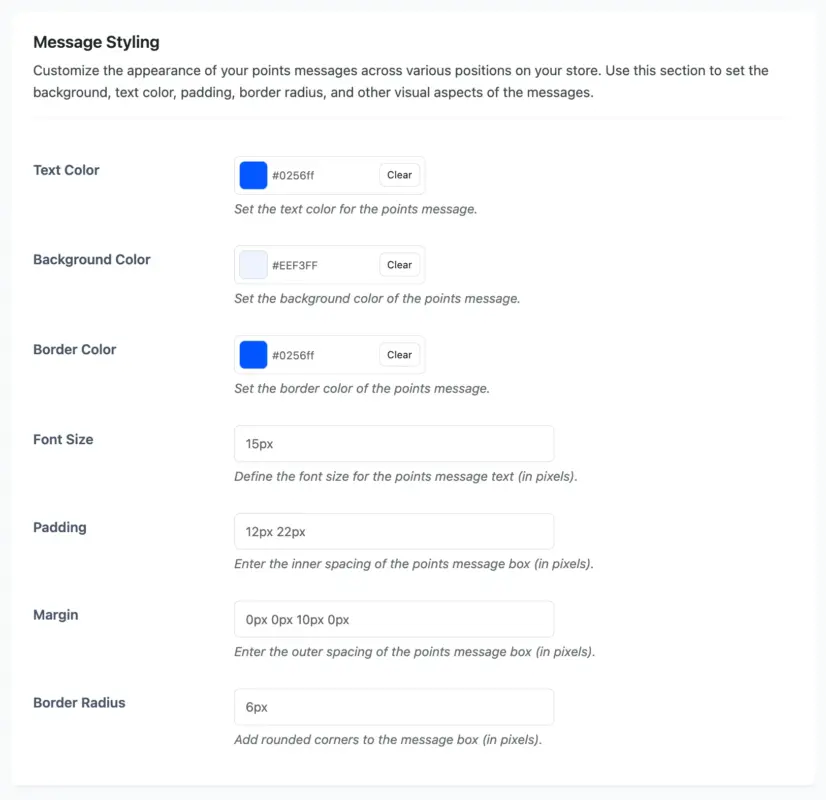
Personalize what your points messages look like in various positions on your store! In this section, you can define the background, text color/padding/border radius and more for your messages.
Configuring Message for the My Accounts Page #
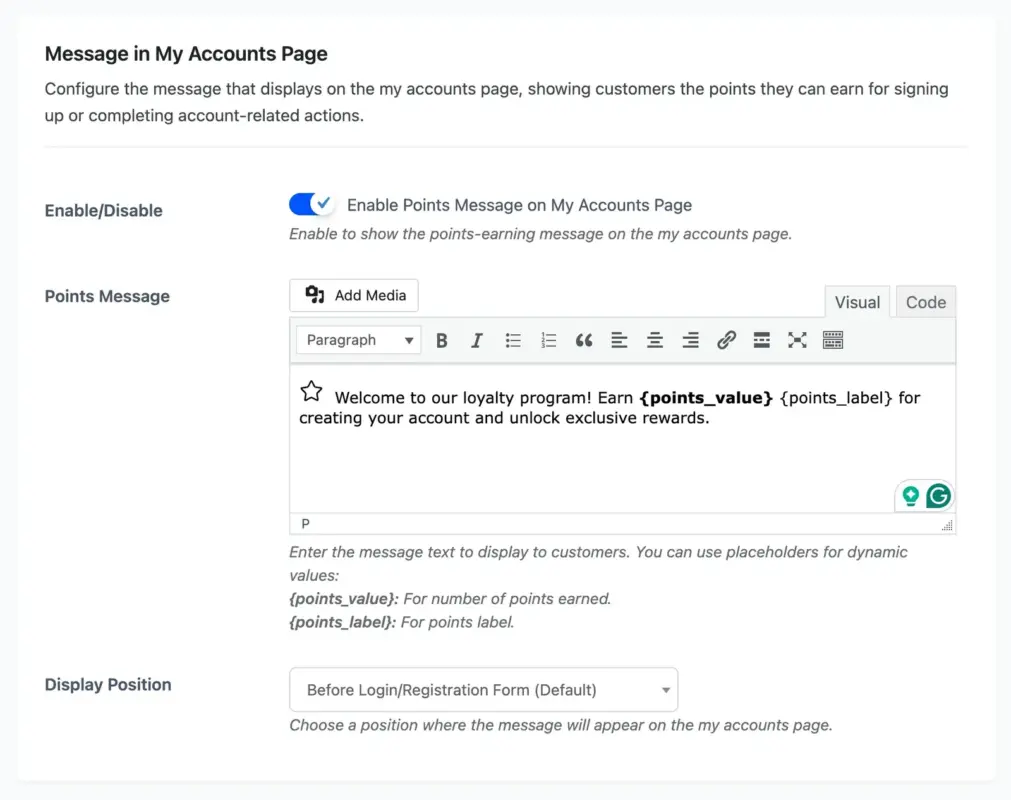
Configure the message that will show on the my accounts page explaining to customers the points that they can earn when they create an account or when a customer completes any account related activity. You can also choose a position for where the message will appear.
Default: “Welcome to our loyalty program! Earn {points_value} {points_label} for creating your account and unlock exclusive rewards.”
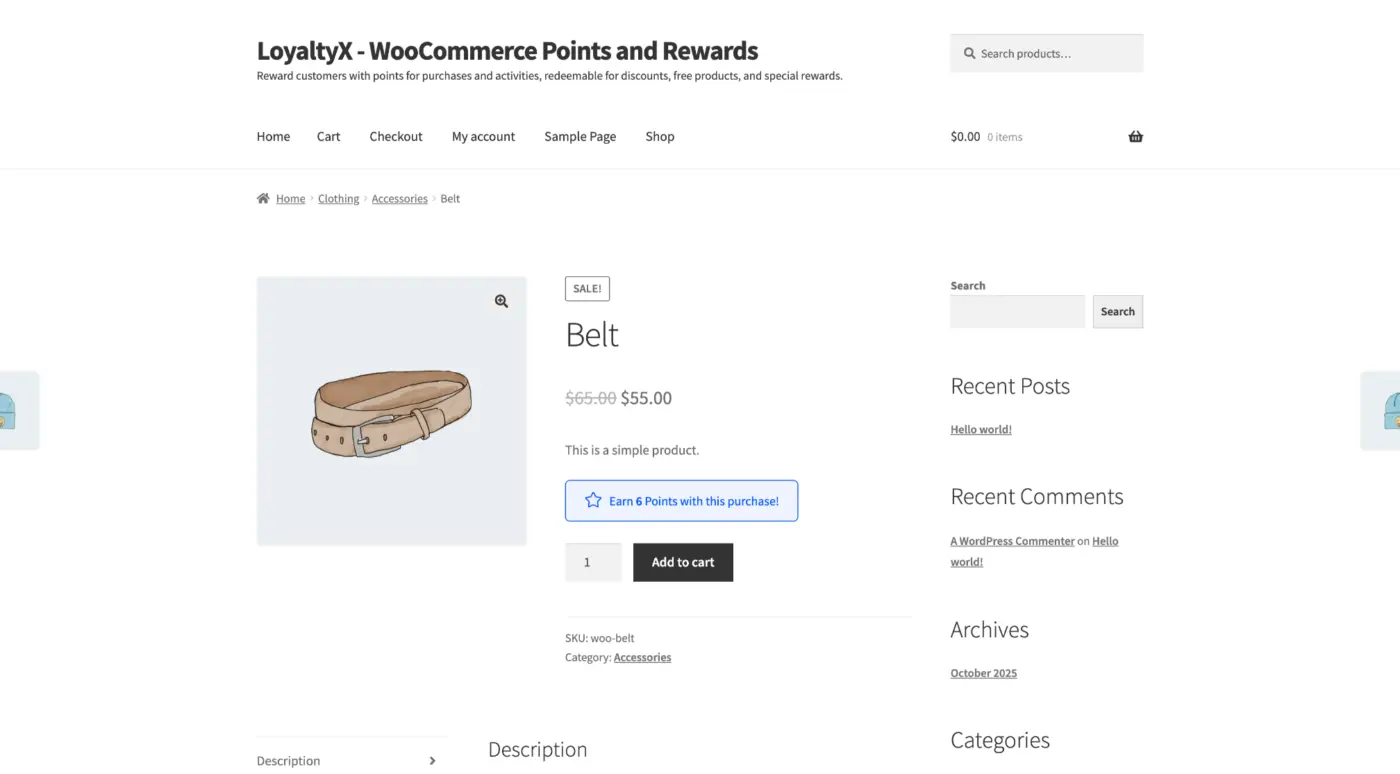
Configuring Message for the Product Page #
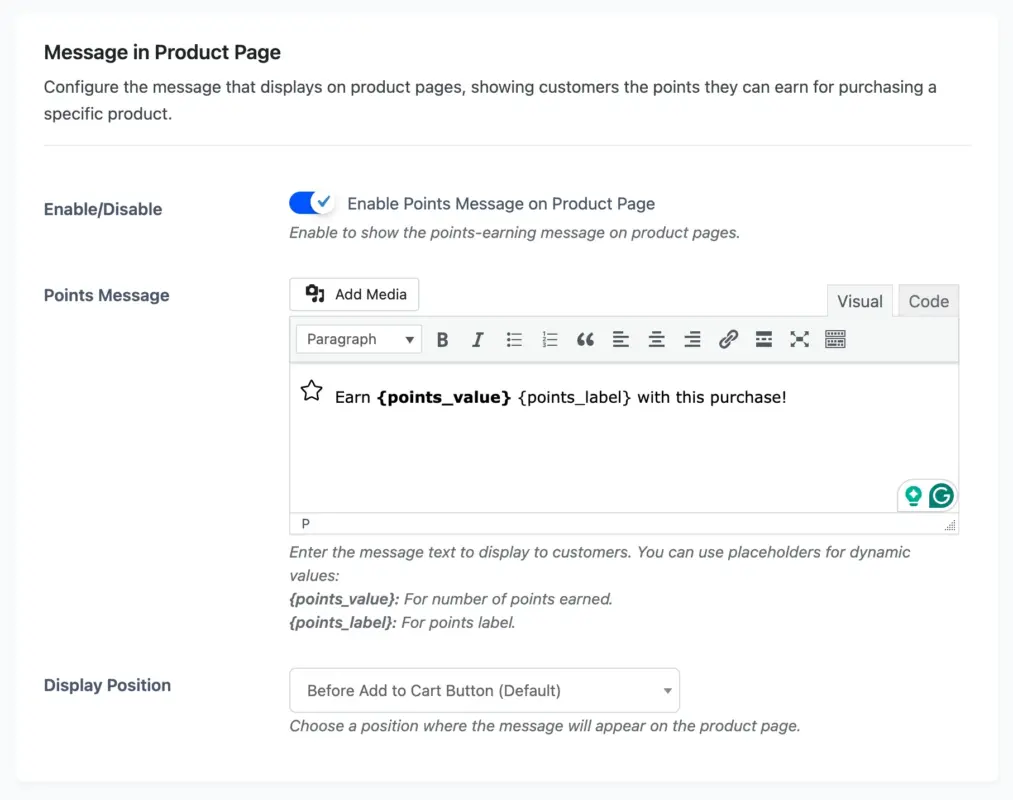
Update the message shown on product pages to inform customers of the total possible points they can receive for purchasing a product.
Default: “Earn {points_value} {points_label} with this purchase!”
Examples of messages:
- “Get {points_value} {points_label} with this purchase.”
- “Earn {points_value} {points_label} when you buy.”
- “+{points_value} {points_label} on this item.”
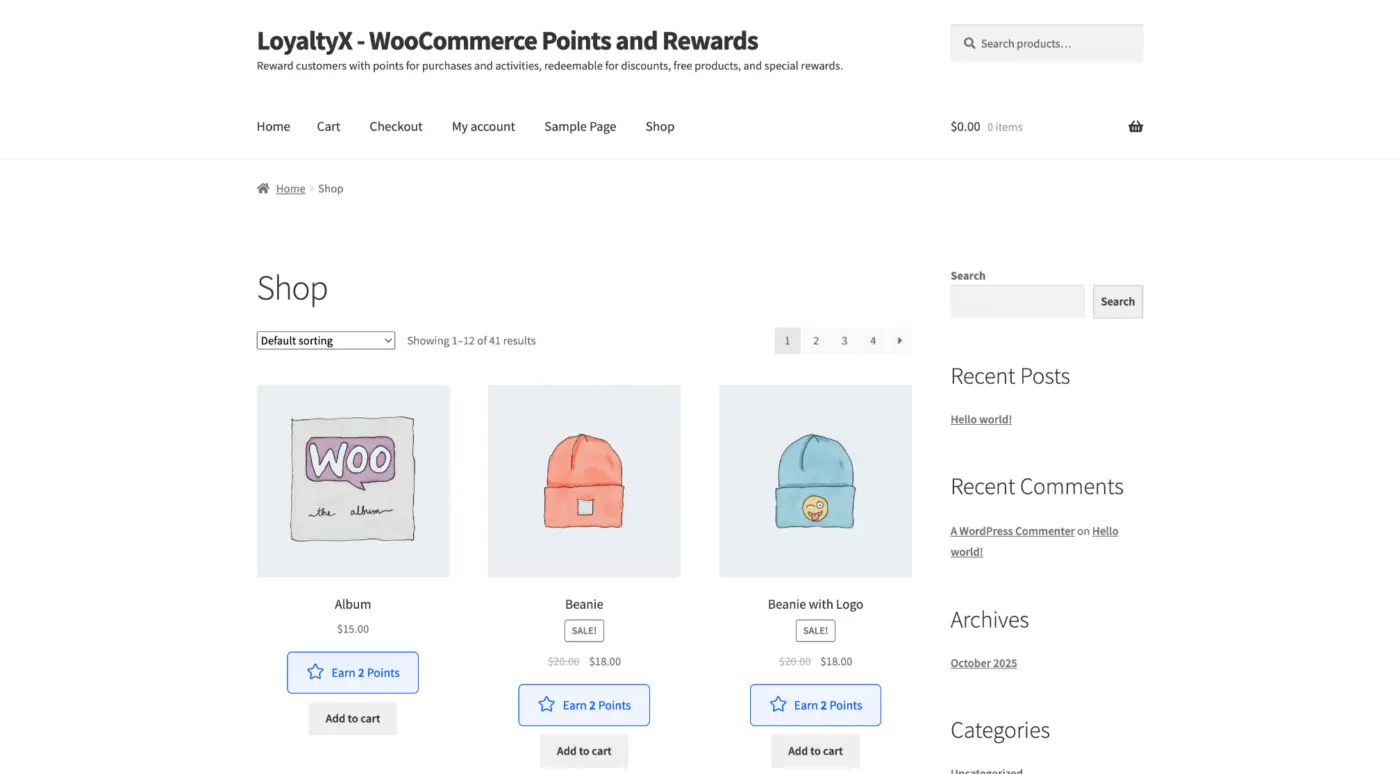
Configuring Message for the Shop Page #
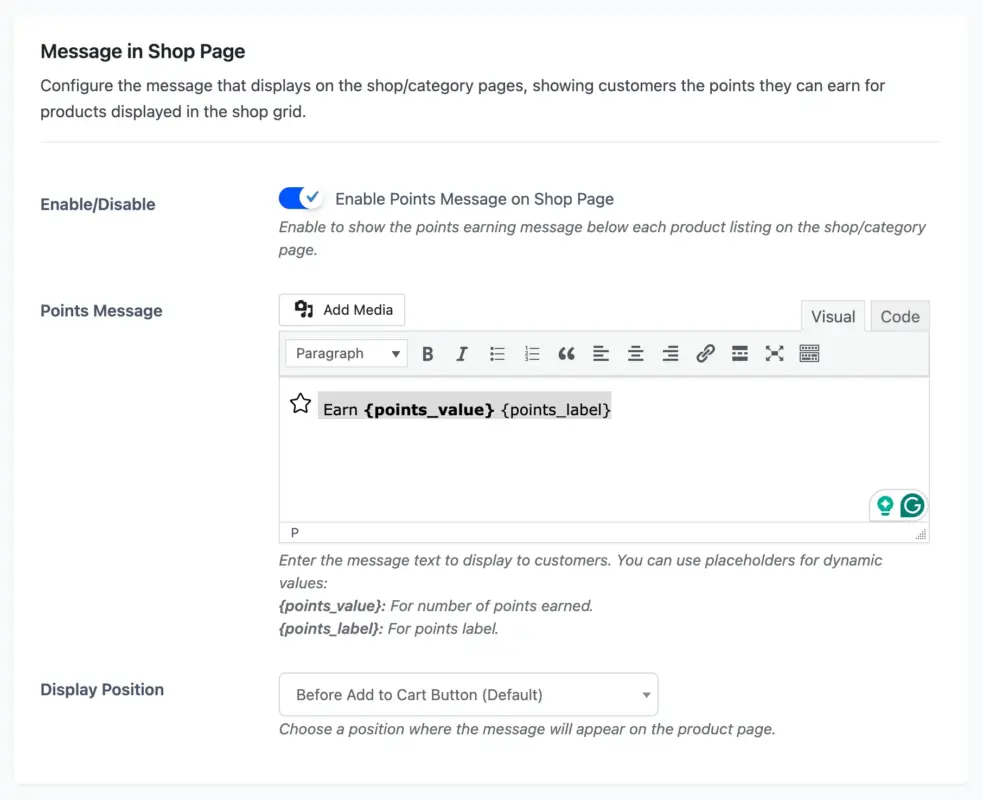
Update the message on shop/category pages to inform customers of the earned points on the products seen on the shop grid.
Default: “Earn {points_value} {points_label}”
Configuring Message for the Cart Page #
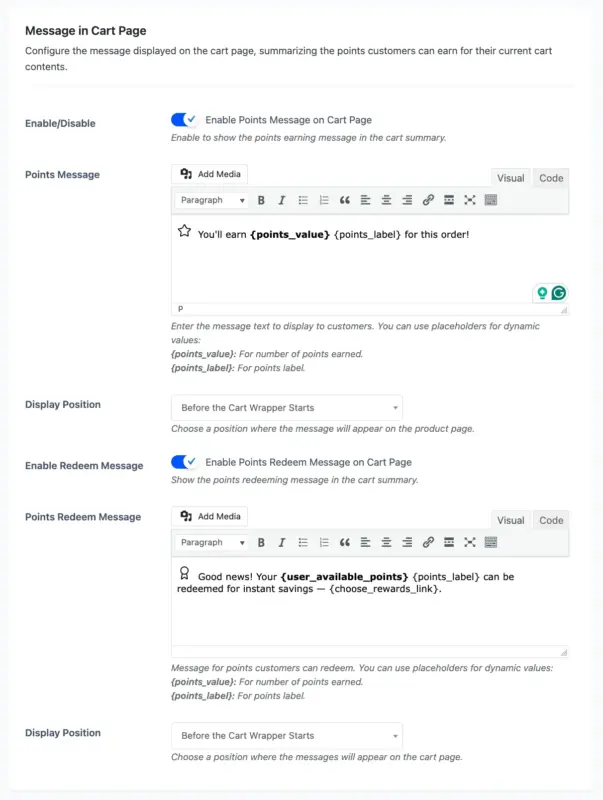
You can then customize the message to be displayed at checkout summarizing the points for a customer’s successful cart.
Default Earning Message: “You’ll earn {points_value} {points_label} for this order!”
Default Redeem Message: “Good news! Your {user_available_points} {points_label} can be redeemed for instant savings — {choose_rewards_link}.”

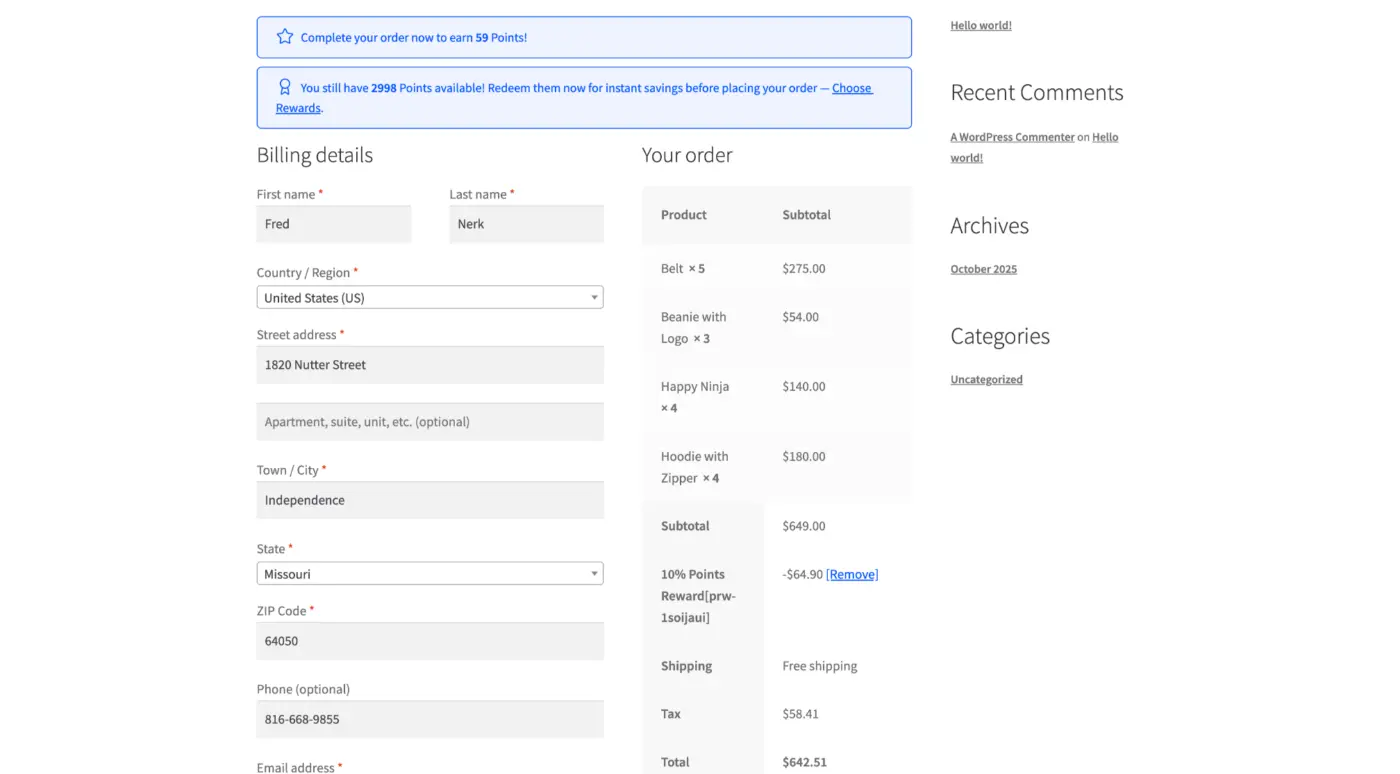
Configuring Message for the Checkout Page #
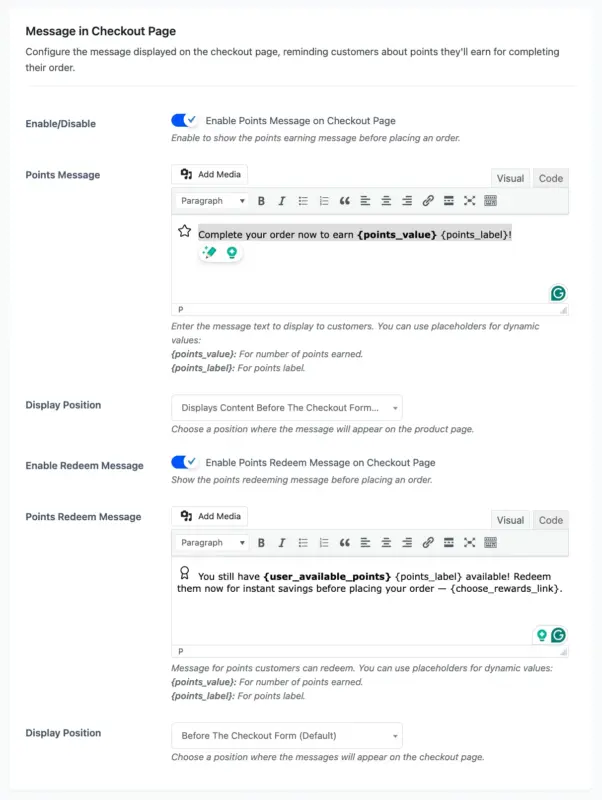
You can set the message to display on the checkout page as a reminder of the points you will receive for simply checking out.
Default Earning Message: “Complete your order now to earn {points_value} {points_label}!”
Default Redeem Message: “You still have {user_available_points} {points_label} available! Redeem them now for instant savings before placing your order — {choose_rewards_link}.”
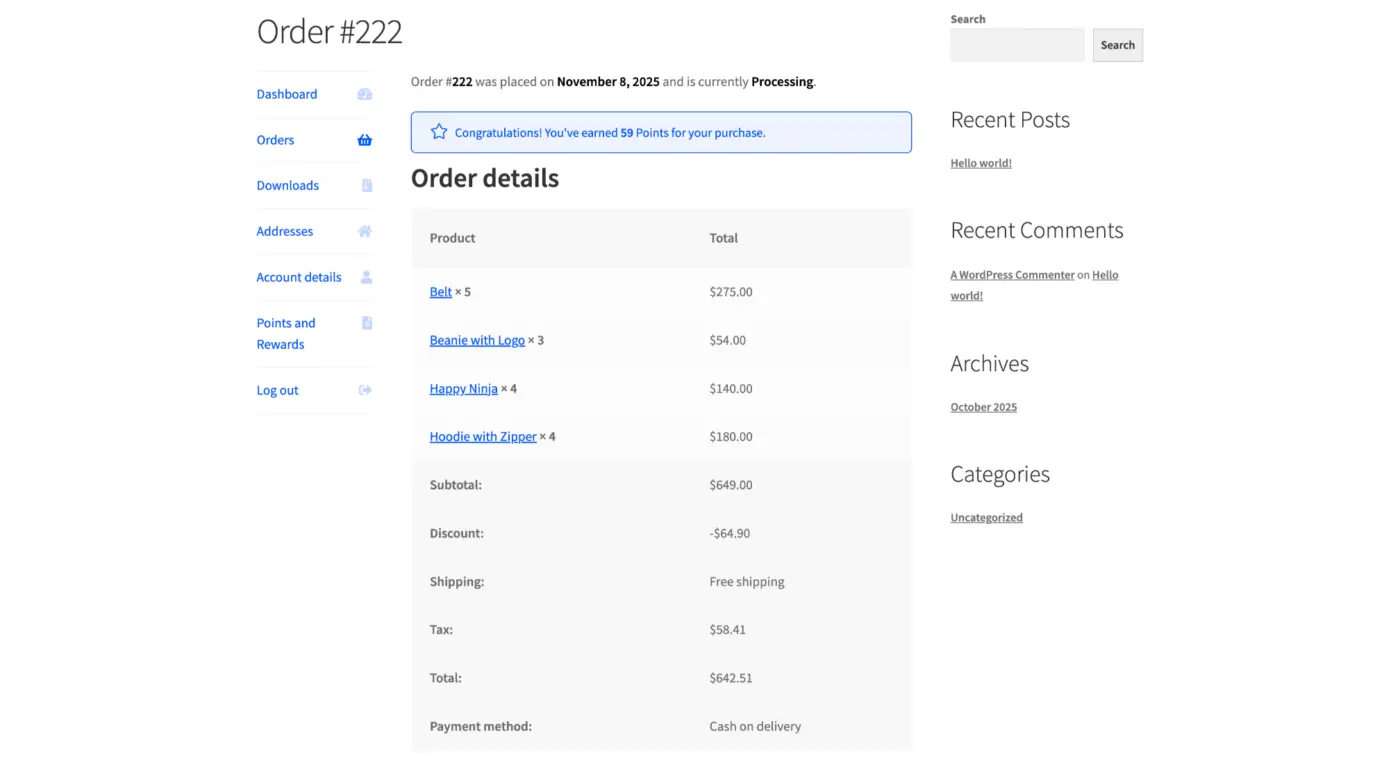
Configuring Order View and Received Messaging #
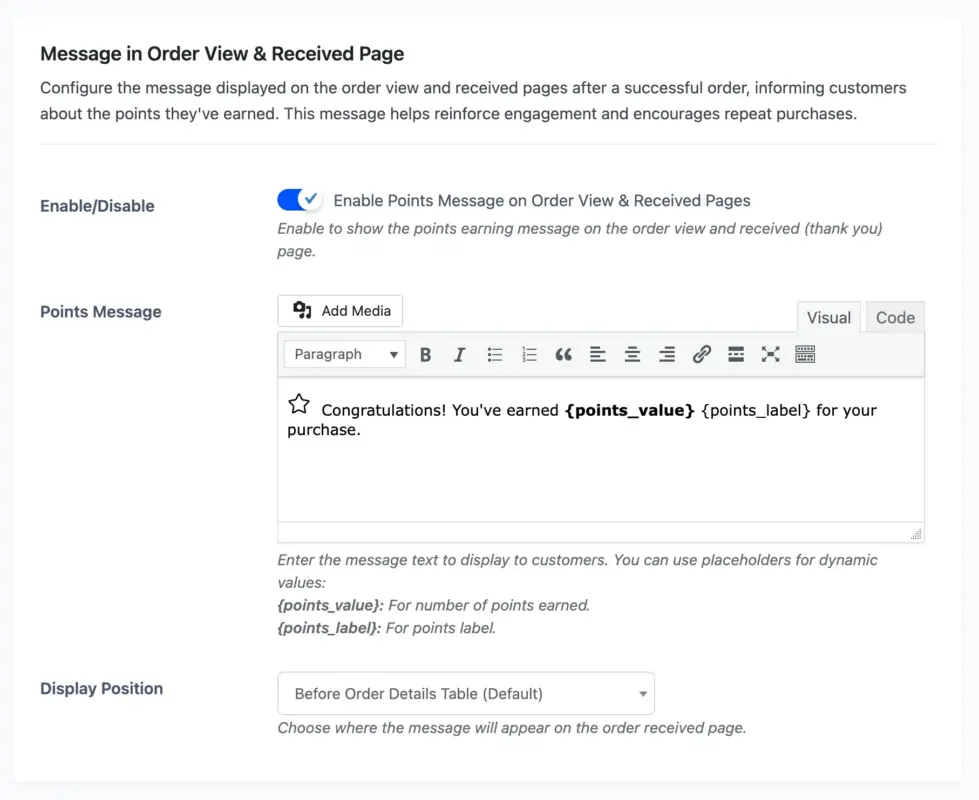
Set the message that will display on the order view and order received pages after placing an order. The intention is to inform customers of the points they earned in order to increase engagement and potentially encourage customers to make a purchase again.
Default: “Congratulations! You’ve earned {points_value} {points_label} for your purchase.”
Dynamic Placeholders for Use #
- {points_value} = The number of points being calculated to be earned for that product or order
- {points_label} = Your customized singular/plural label
- {user_available_points} = The current available points of the user
- {choose_rewards_link} = This is the rewards text link
Next Steps #
Now that you have customized the UX Messages and branded labels, your loyalty program will look professional and seamless, and be true to your brand
Then you will move to Frontend Customer Dashboard Overview to see the customer interaction with their loyalty account and use their {points_label} system.
When you add messaging, the generic system is branded.