Email automation can ensure that customers remain engaged with your loyalty program. If there are no emails or notifications sent out, customers will completely forget that they have points to use or worry about them expiring. Customers ignore email when rewards are available.
LoyaltyX – WooCommerce Points and Rewards plugin will automatically send tailored emails for all actions related to points. These targeted emails guarantee that customers make repeat purchases, do not abandon points, and understand the value they have accumulated.
In this guide, we’ll discuss how to configure, customize and optimize each of the loyalty-related emails, while referring to the different configurations you can find in the LoyaltyX dashboard.
Types of Emails Sent #
LoyaltyX will send 6 types of automated emails.
- The Points Earned Email – Confirms points awarded again to the customer
- Manual Adjustment by Admin Email – Emails customers when the admin manually adjusts a customer’s points based on whatever reason there is (Good or bad)
- Points Redeemed Email – Confirms points spent again to the customer
- Points Expiration Reminder Email – Automate a reminder when points are expiring soon
- Points Expired Email – Emails customers’ points, prior to reminding the customer that they have expired
- Automatic Level Up Email – Congrats someone when they go up a tier in the loyalty program
Each one of those emails is completely customizable based on the heading, subject line and the content in the body of the email.
Email Type 1: Points Earned Email #
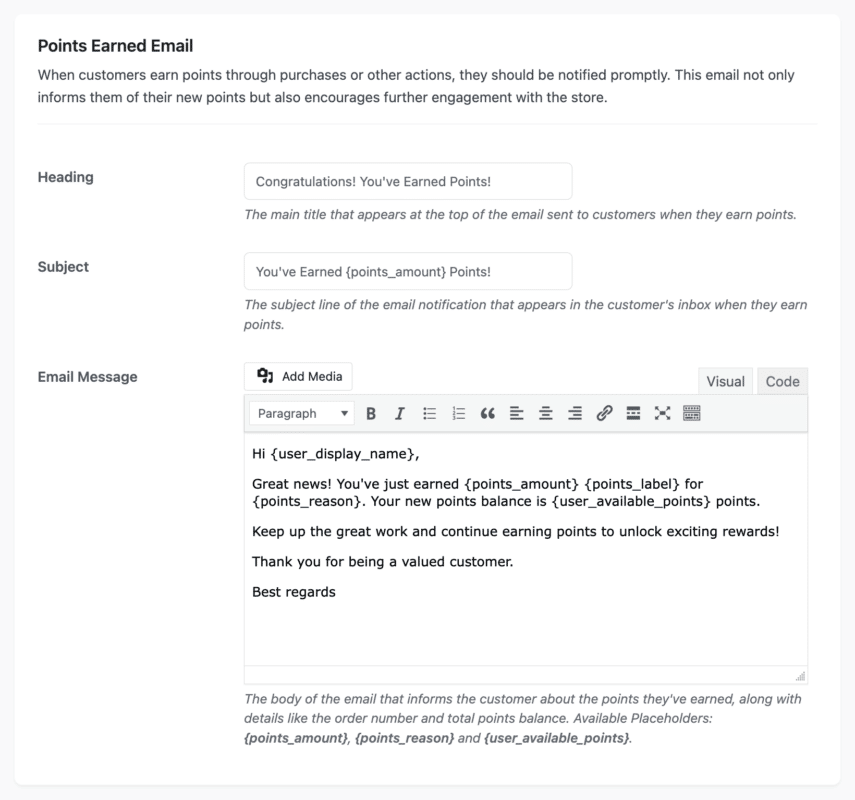
Customers will be notified of points earned through purchases or other activities in a timely manner.
Purpose of the Email:
- To confirm points earned
- To explain the reason for earning points (order placement, referral, birthday, etc.)
- To promote repeat activity
- To inform the customer of their current balance of points
When it will be sent:
- After the order has been placed
- After a referral has been signed up for
- On a birthday (if birthday points are enabled)
- After a product review has been submitted
- After a user signs up for an account
- After a level-up is received
- After a daily login
Email Configuration Fields:
- Heading: The main title that will be at the top of the email.
- Subject Line: The email subject line the customer will see in their email inbox.
- Email Message Body: The Email Message
Placeholders Available:
- {user_display_name} – The customer display name.
- {points_amount} – Amount of points earned in this transaction.
- {points_label} – The wording you use to describe your points system (example: “Stars”, “Rewards”)
- {points_reason} – Reason for earning points (dynamic)
- {user_available_points} – Amount available on the customer’s current points balance.
Text for Reason of Earning:

The {points_reason} placeholder is filled with context-related reasoning text for the way points were earned based on the earning context. You can customize any of the individual reasons below:
- Order Completion
Default: “placing an order on our store”
When Used: Customer completes an order - Referral
Default: “referring a friend to our store”
When Used: When the referred friend makes their first purchase - Birthday
Default: “celebrating your birthday”
When Used: On the user’s birthday, if that is enabled - Product Review
Default: “writing a product review”
When Used: When a customer submits a review for a product - Sign Up
Default: “signing up on our store”
When Used: When someone registers for a new account - Level-Up
Default: “leveling up to a new loyalty level”
When Used: When a customer levels up from 1 tier to the next tier - Daily Login
Default: “logging in today”
When Used: When the customer logs in for the first time that day if that is enabled
Advice on Customization: Make them feel like a conversational message and be on brand. Instead of “placing an order” you could say, “shopping with us or being an awesome customer”.
Email Type 2: Manual Adjustment by Admin Email #
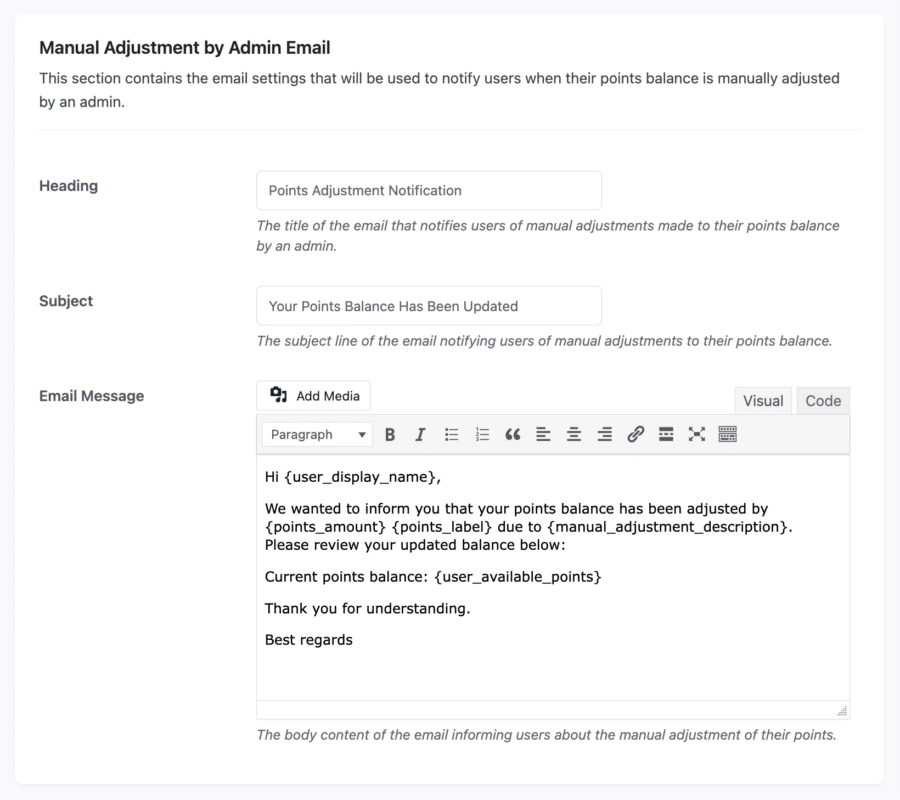
Whenever a store administrator manually adds or subtracts points on behalf of the customer, you will automatically send this notification.
Purpose:
- Let the customer know that their balance has been manually adjusted in some way.
- Provide transparency to the customer regarding the admin’s actions
- Inform the customer of the admin’s reason/note for the adjustment
- Build trust by communicating with customers
When should you send this email:
- The admin has manually added points to the customer account
- The admin has manually deducted points from the customer account
- Points were adjusted through the Points Rules or other bulk actions
Configurable Fields:
- Heading: The primary title that will appear at the top of the email.
- Subject Line: The subject line that the customers will see in their inbox.
- Email Message Body: This is the body of the email message that the customers will see in their inbox.
Placeholders available:
- {user_display_name} – The customer’s display name
- {points_amount} – The number of points added or deducted
- {points_label} – Your custom points label
- {manual_adjustment_description} – The note provided by the admin about the adjustment that they made
- {user_available_points} – The new total number of points available to the customer after the adjustment.
Best Practices:
- Always include a clear description explaining the adjustments made by an admin, whether points were added or deducted.
- Use positive phrasing even when points are deducted from a customer’s account.
- Include contact information for the customer to reach out if they have a question or concern.
- Consider adding a “Review Dashboard” call to action link.
Email Type 3: Points Redeemed Email #
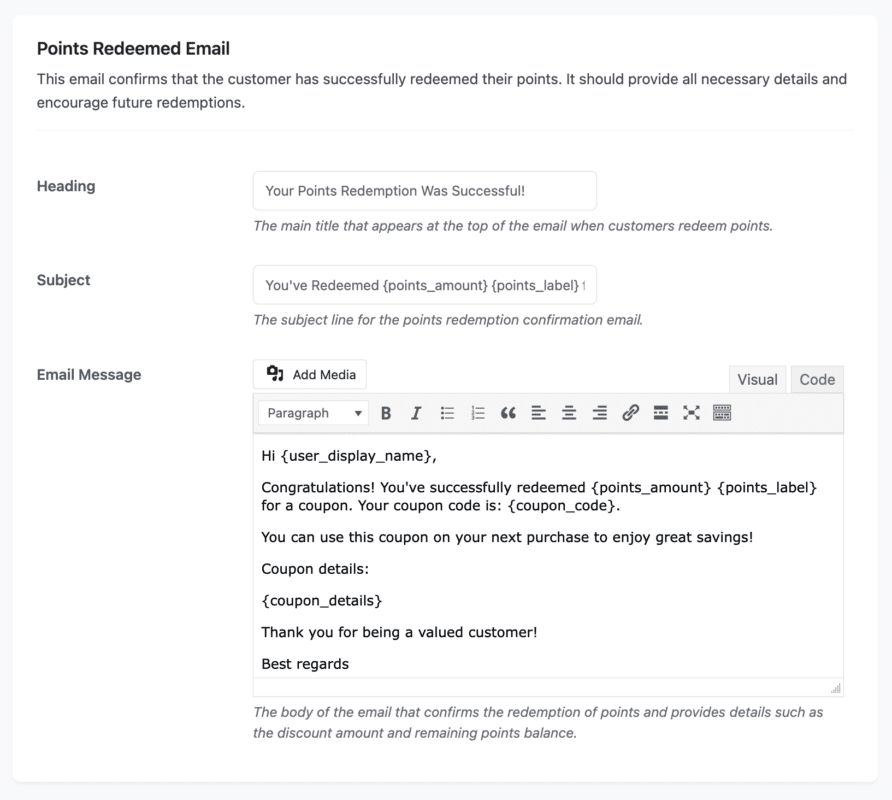
When customers redeem their points to get a discount/enjoy rewards, this email will automatically trigger.
Purpose:
- Confirm points have been redeemed successfully
- Shows the coupon code generated
- Tallies up what their points balance is after redemption
- Provides coupon usage and expiration information
When Sent:
- The customer redeems their points for a discount coupon
- The moment the redemption has been completed
- Before the customer applies the coupon code at checkout
Customizable fields:
- Heading: The primary title that is going to appear in the email body, at the top of the email.
- Subject Line: What the actual subject of the email will be seen from their inbox.
- Email Message Body: This is the email message seen and opened in the inbox.
Available Placeholders:
- {user_display_name}: Customer’s display name
- {points_amount}: Amount of points redeemed
- {points_label}: The points label is customized by you
- {coupon_code}: The discount coupon code generated
- {coupon_details}: The value, expiration, and usage restrictions
Best Practices:
- Make the coupon visually identifiable (bold, bigger font, etc.).
- Provide expiration dates, as urgency can create value.
- Provide hot links to shop or apply coupons
- Show points balance after redemption
- Show any restrictions on how was coupon can be redeemed.
Email Type 4: Points Expiration Warning Email #
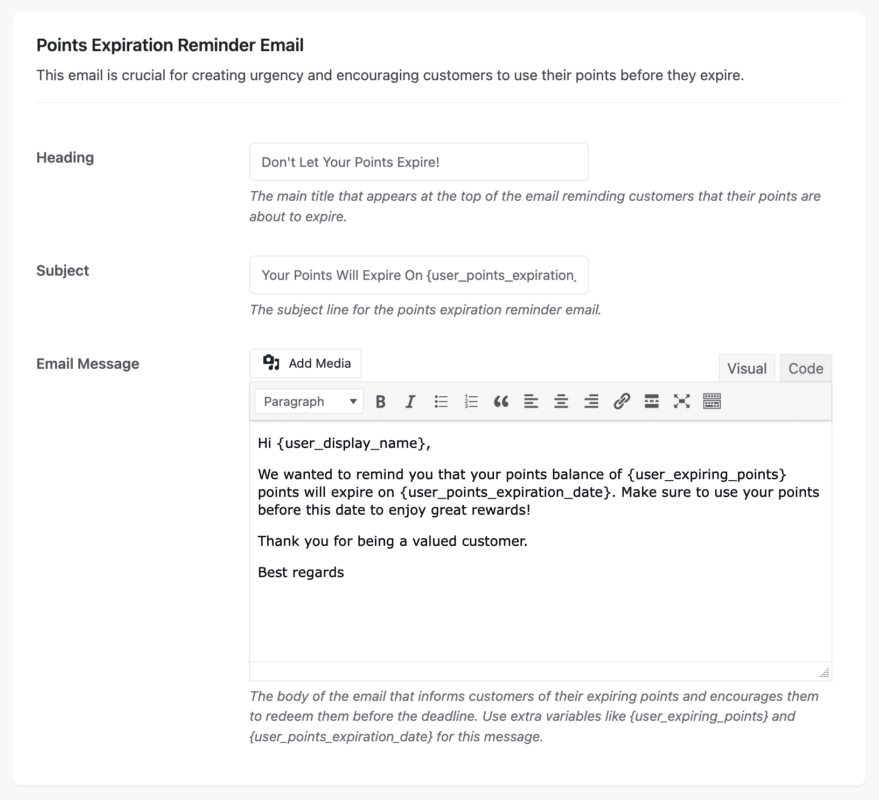
This is an email that generates urgency for the customer to redeem or shop with points that are close to the expiration date.
Purpose:
- To warn the customer, the points will be expiring.
- To create urgency for the customer to shop or redeem.
- To avoid customer frustration of finding their points have expired.
- To drive repeat purchases.
When to Send:
- Based on your configured warning periods (30 days or 7 days before expiration).
- Only if Points Expiration is enabled in Configuration.
- Scheduled automatically based on the date of points being earned.
Configurable Fields:
- Heading: The big title at the top of the email.
- Subject Line: The subject line that the customers will see in their inbox.
- Email Message Body: The email message that the customers will see in their inbox.
Available Placeholders:
- {user_display_name} – the customer’s display name
- {user_points_expiration} – the number of points that are going to expire
- {user_points_expiration_date} – the exact expiration date
Best Practices:
- Use urgency but friendly tone language (“Don’t miss out!” vs. “Act now!”).
- Include a direct “Redeem Now” call-to-action button.
- Include the dollar amount for expiring points to increase urgency.
- Send reminder emails (30 days, 7 days, and 1 day before expiration).
- Link to the redemption page for customers, NOT the homepage.
- You might consider providing bonus points for any purchase made before the points expire.
Email Type 5: Points Expired Email #
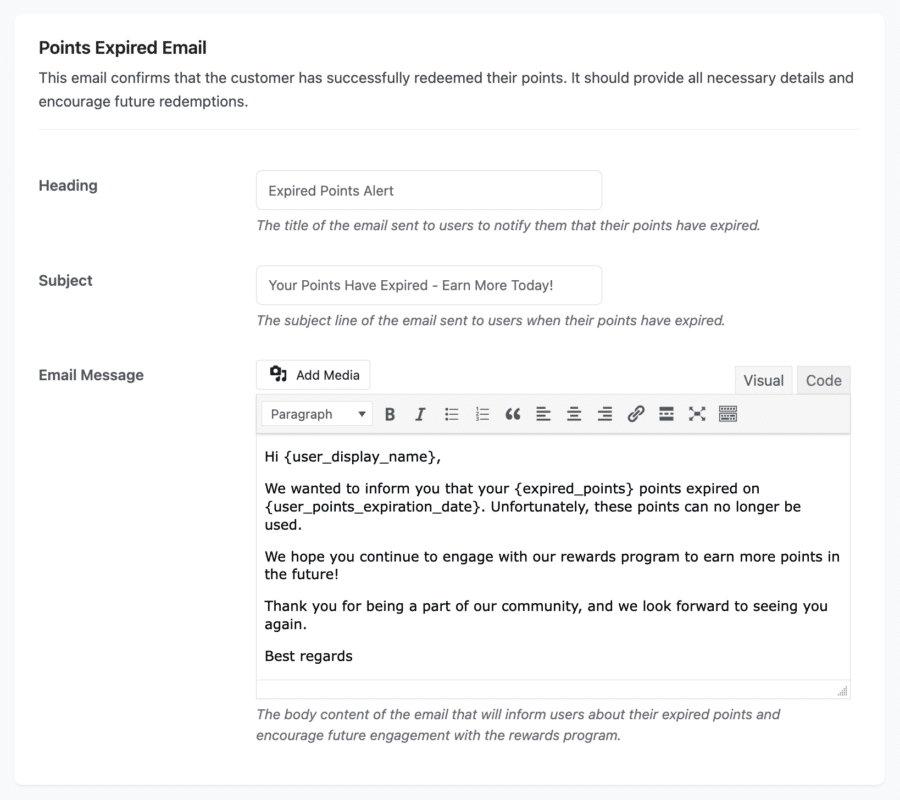
This email serves to notify customers that their points have expired, while still engaging the customer with the motivation to earn more points.
Actions:
- Notifies customers that their points have expired.
- Provides a courtesy reminder that they have a points expiration policy.
- Encourages customer re-engagement and earning in the future.
- Makes the program feel more transparent for customers.
When to Send:
- After the points have already expired (meaning past the expiration date).
- Only when you have Points Expiration enabled within Configuration.
- Sent once for each point expiration event.
Configurable Fields:
- Heading: What will be displayed at the top of the email.
- Subject Line: The subject line of the email the customers will see in the inbox.
- Email Message Body: This is the email message the customers will view in the inbox.
Available Placeholders:
- {user_display_name} – Customers display name
- {expired_points} – number of points that expired.
- {user_points_expiration_date} – the date of expiration.
Best Practices:
- Use more empathetic language instead of punitive.
- Focus on the fact that they can earn points in the future; do not focus on points expiring.
- Use an “Earn Points Now” call to action.
- Highlight ways to easily earn new points.
- Provide a link to earning opportunities.
- You may also want to consider providing a small incentive/bonus for coming back and spending on their next purchase.
- Try to limit how often you send these emails so the customer does not develop burnout when they receive your emails.
Email Type 6: Level Up Email #
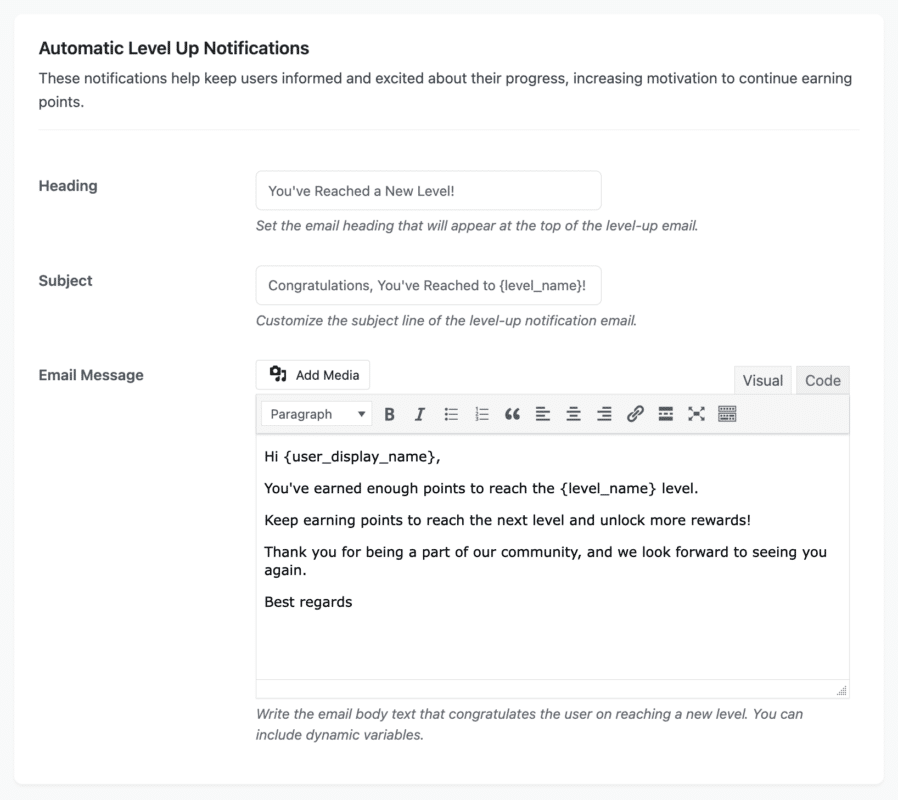
This email congratulates customers when they reach a new level, creating excitement and motivation to continue earning.
Purpose:
- Celebrates customers’ level-up achievement.
- Increases customer motivation, engagement, and enthusiasm.
- Showcases new benefits and rewards unlocked.
- Reinforces the value of your program and progression.
When Do You Send:
- Automatically, when the customer earns enough points to qualify for the next level.
- Only if the Levels & Badges feature is enabled and configured.
- Can be sent once per level-up event, but not for ongoing promotions.
Configurable Fields:
- Heading: The main title that appears at the very top of the email.
- Subject Line: The email subject line customers see in their inbox.
- Email Message Body: The body of the email that customers see in their inbox.
Placeholders Available:
- {user_display_name} – The Customer’s display name
- {level_name} – The name of the new level the customer has achieved
Best Practices:
- Make it celebratory and exciting (“Congratulations!” “Amazing job!”).
- Clearly state the name of the level the customer has achieved.
- Share new benefits and perks the customer has identified at this level.
- Offer visibility toward the customer’s progress to the next level (Examples: “Only 500 more points to Gold!”).
- Include a badge or some other visual signifier of the level.
- Include exclusive offers that are tied to reaching this goal.
- Create shareable achievement images for social.
- Add a link to this level’s benefits and rewards page.
Next Steps #
Once email automation has been set up, make your design look its best.
Go to Configuration Layout Settings, and set your colors, styling, and design.
Or skip to How to Create Points Earning Rules to establish rules for point-earning behavior.
Automated emails act as reminders to keep customers involved and engaged between purchases, supporting open and repeat purchases based on your communication process.