
You can create and control WooCommerce variable products directly from your product editor, with no coding needed, and have a working multi-option product live in under 15 minutes.
Most store owners hit problems not because the process is hard, but because they set up attributes without marking them for variations or skip configuring prices per variation, which causes options to disappear from the online store entirely.
This guide covers everything: what variable products are, how to build them from scratch, how to manage pricing and stock per variation, how to bulk edit when your catalogue grows, what the 30-variation limit means for your store, and the most common mistakes to avoid.
What Are WooCommerce Variable Products?
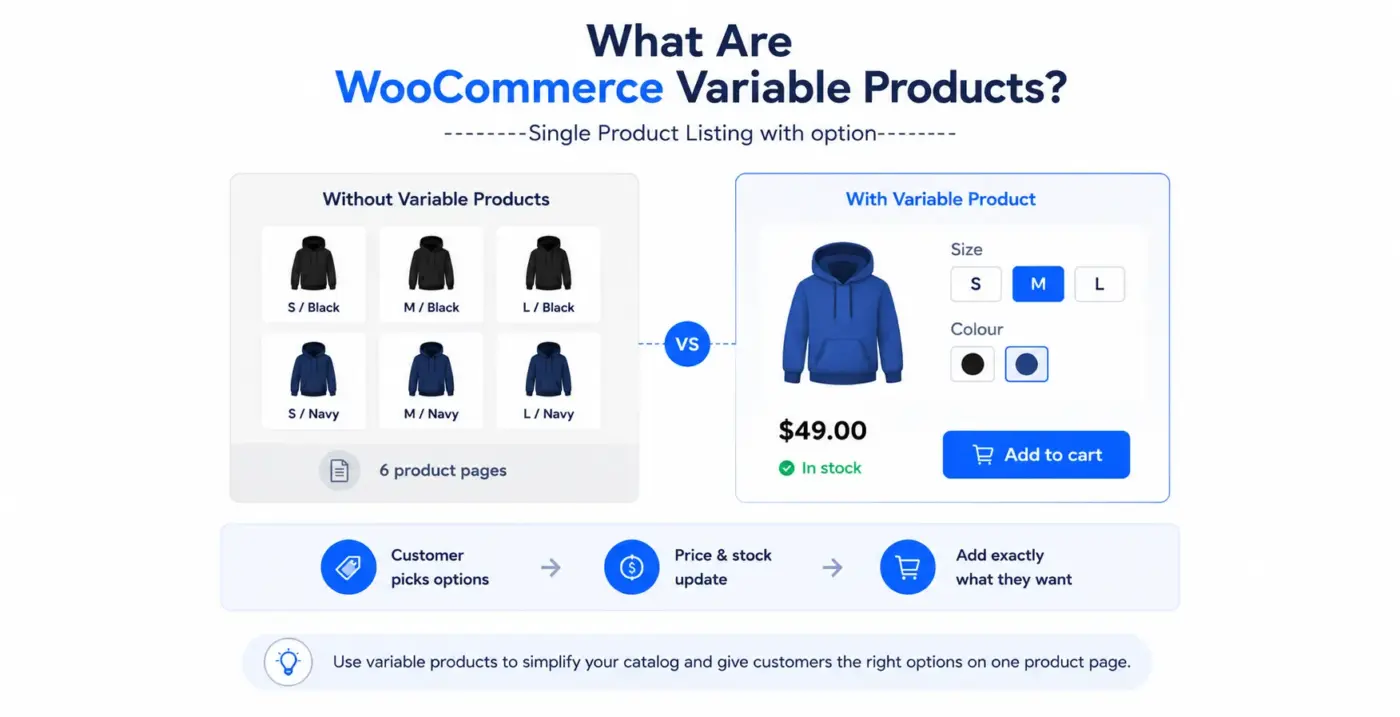
A WooCommerce variable product is a single product listing that lets customers choose between different options, such as size, colour, or material, before adding it to their cart.
Think of a hoodie that comes in Small, Medium, and Large, each in Black or Navy. Without variable products, you would need six separate product pages. With variable products, all six combinations live under one listing. The customer picks their options, the price and stock update on the page, and they add exactly what they want to the cart.
Attributes vs. Variations: The Difference Matters
These two terms confuse a lot of store owners, so let’s make it clear before building anything.
- An attribute defines a category of options. Size is an attribute. Colour is an attribute. An attribute alone does not create anything a customer can buy.
- A variation is a specific, purchasable combination built from those attributes. Size: Medium, combined with Colour: Black, is a variation. Each variation has its own price, stock, SKU, and image.
If you create attributes but never generate variations from them, customers see nothing selectable on the product page. That is the single most common setup mistake.
When to Use Variable Products vs. Simple Products
Use a variable product any time the same item comes in options that affect what the customer receives. Clothing sizes, paint colours, bundle configurations, and storage capacities are all good candidates.
Use a simple product when there are no meaningful options, or when the options are cosmetic and do not affect pricing or inventory. A downloadable PDF with no variants is a simple product. A T-shirt in three sizes and four colours is not.
According to WooCommerce’s own documentation, variable products support individual price, stock, weight, dimensions, image, SKU, and shipping class control per variation. That gives you real flexibility without multiplying your catalogue.
How to Create WooCommerce Variable Products: Step by Step
Creating a variable product takes five main steps. Work through them in order. Skipping ahead, especially generating variations before saving attributes, breaks things every time.
Step 1: Create a New Product and Set the Type
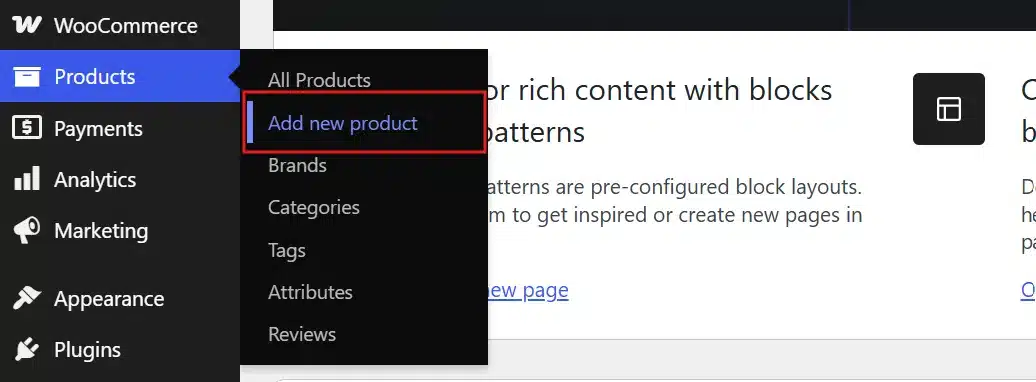
- Go to Products > Add New in your WordPress dashboard.
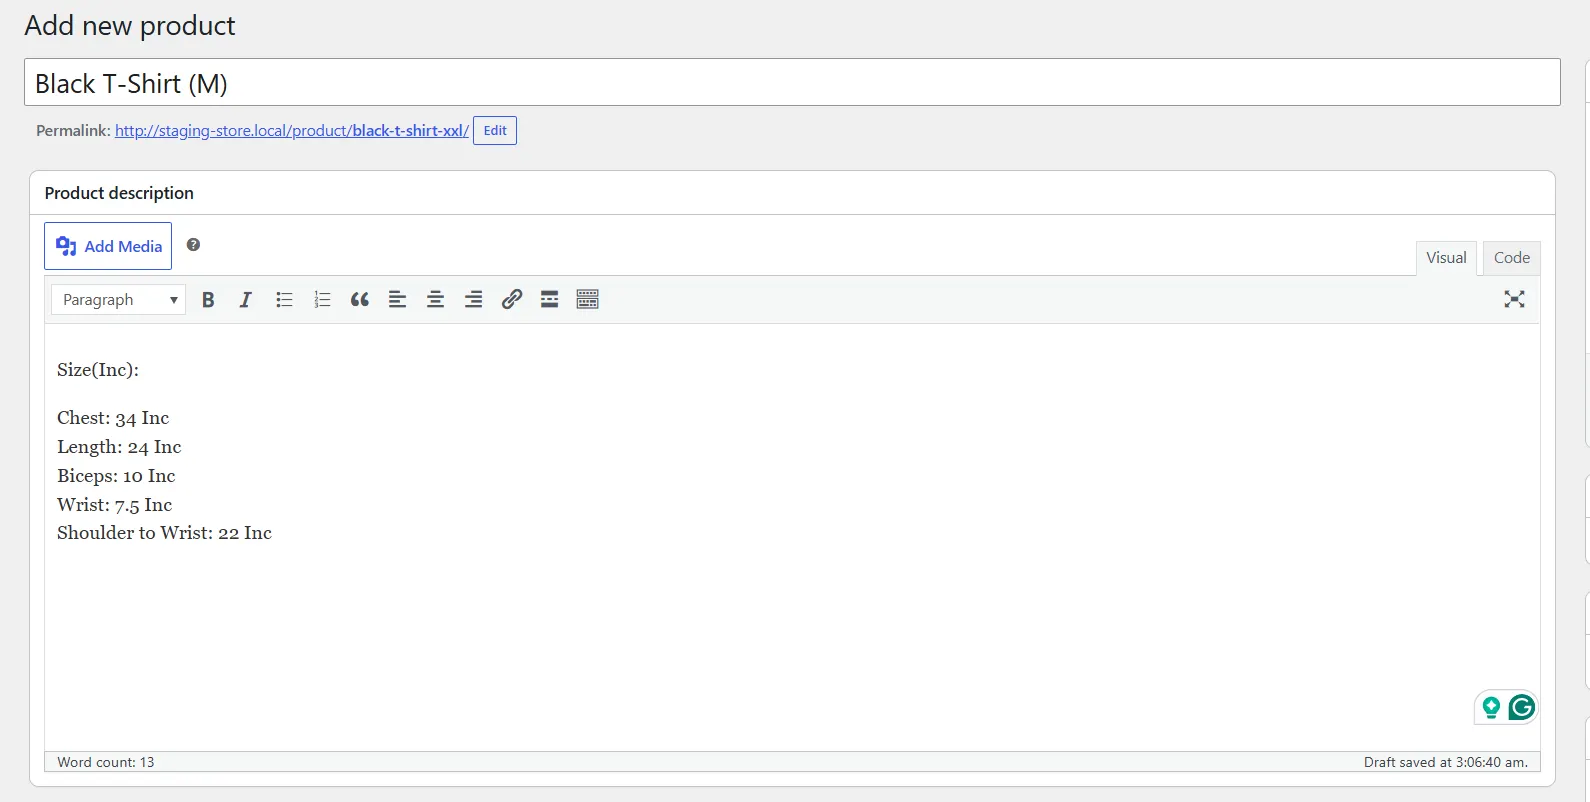
- Give the product a name and add a description.
- Then scroll down to the Product Data panel.
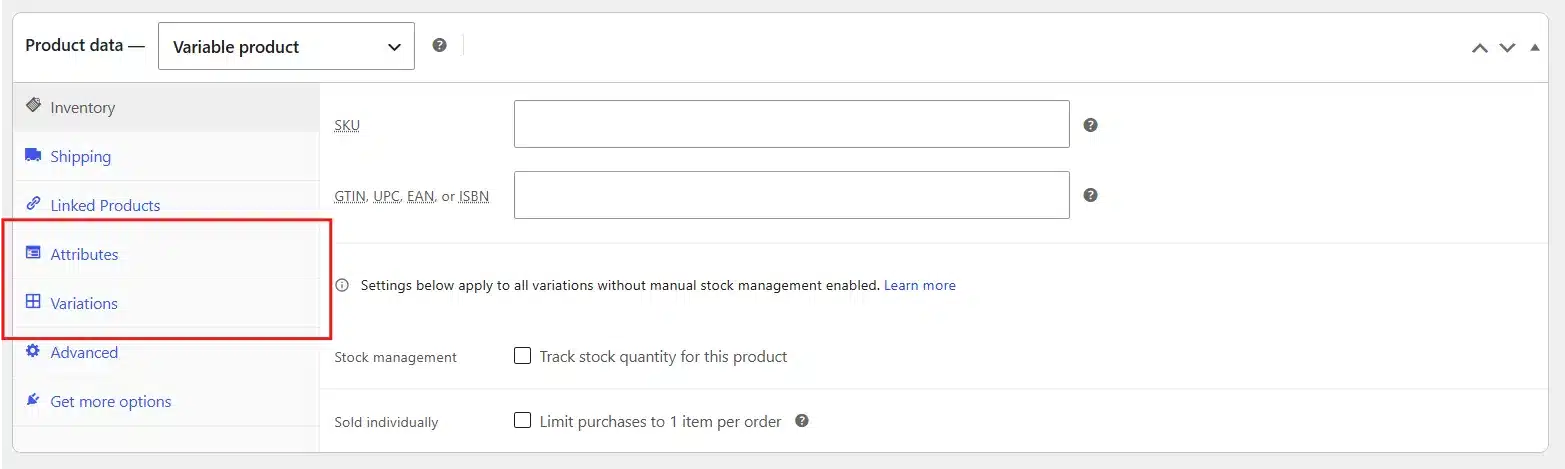
- From the dropdown, select Variable product.
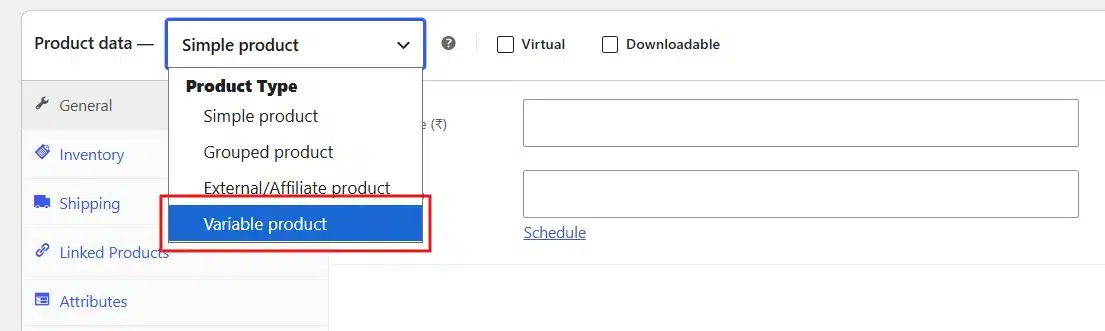
- The panel updates immediately to show the Attributes and Variations tabs.
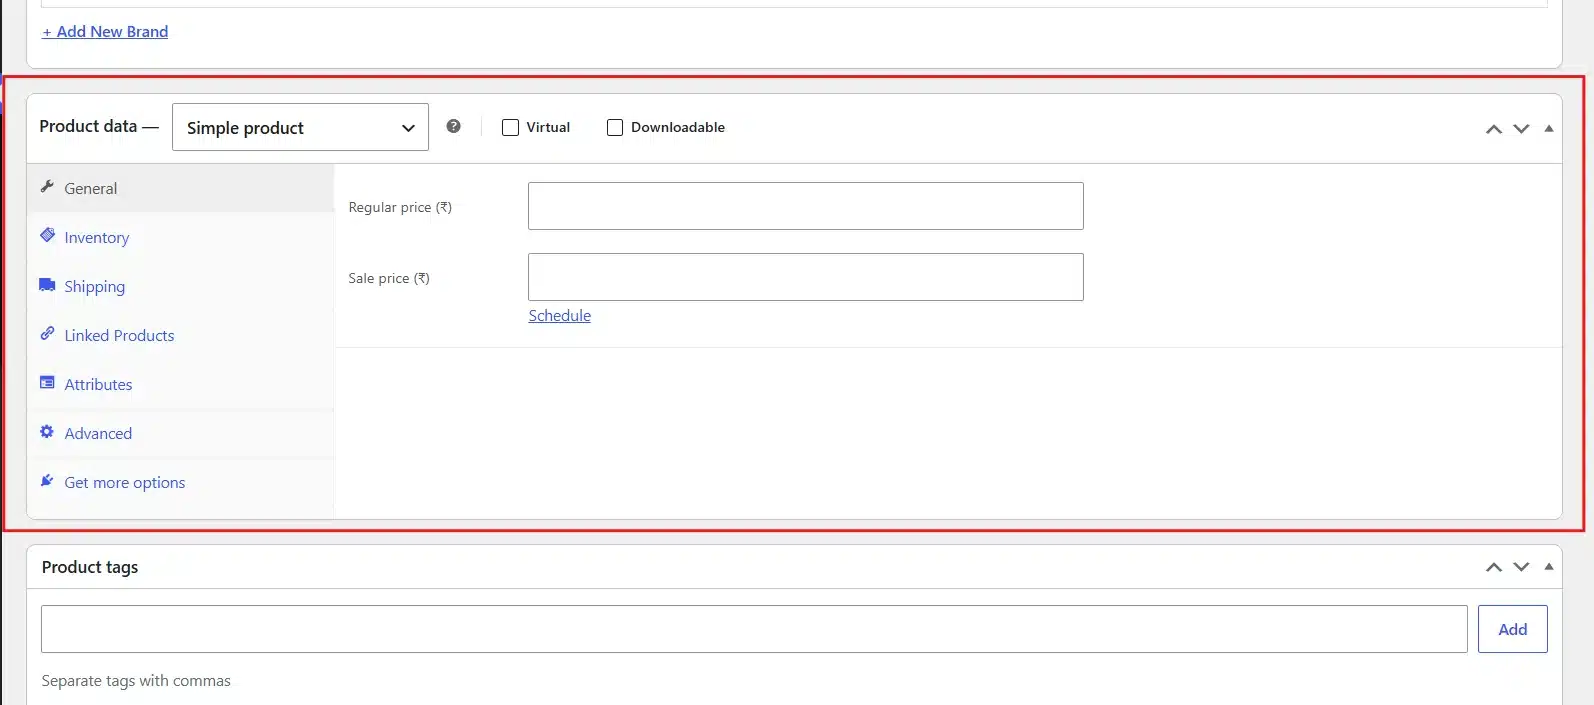
Note: You will not see the standard Price field here. That is correct. Prices live at the variation level, not the product level.
Step 2: Add Attributes and Mark Them for Variations
Custom Attributes are created directly on the product. Use these for options that only apply to one item, like a specific configuration for a custom-built product.
To add a custom attribute:
- Click Add New(or choose from the existing dropdown if using global attributes).
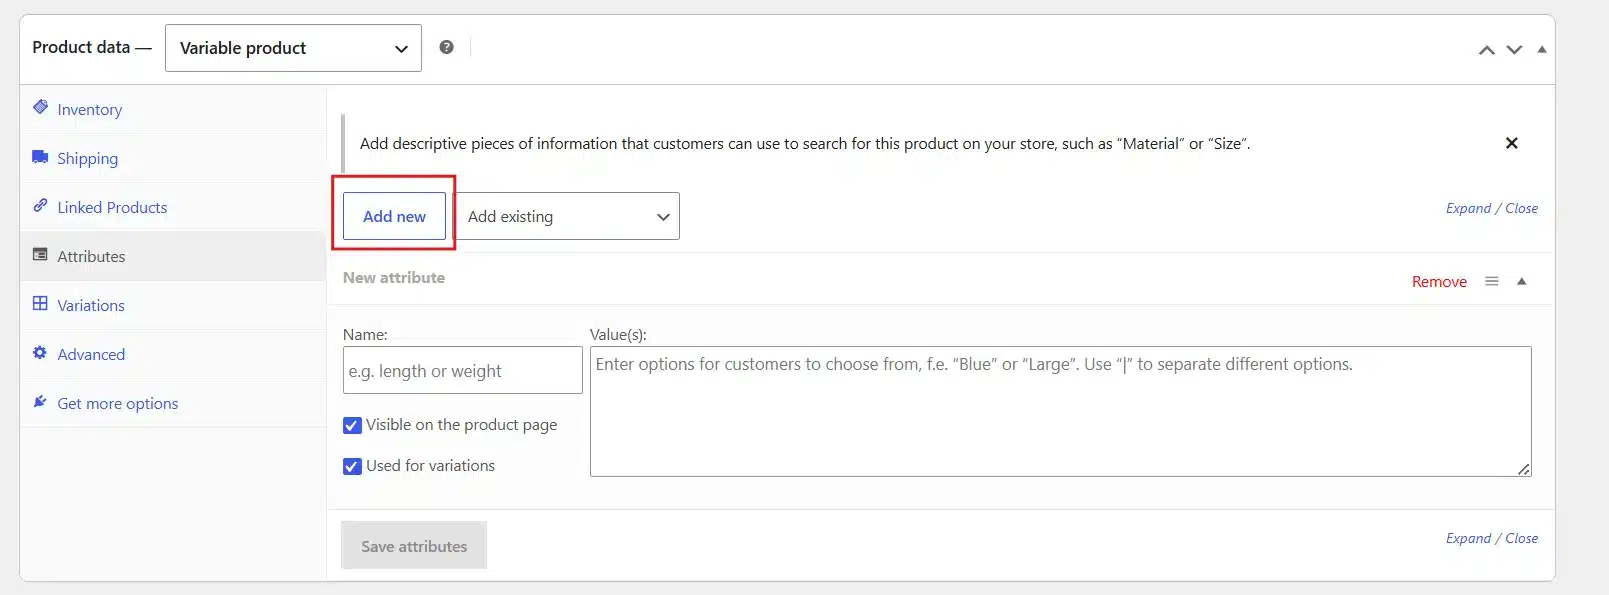
- Enter the attribute name, such as “Size.”
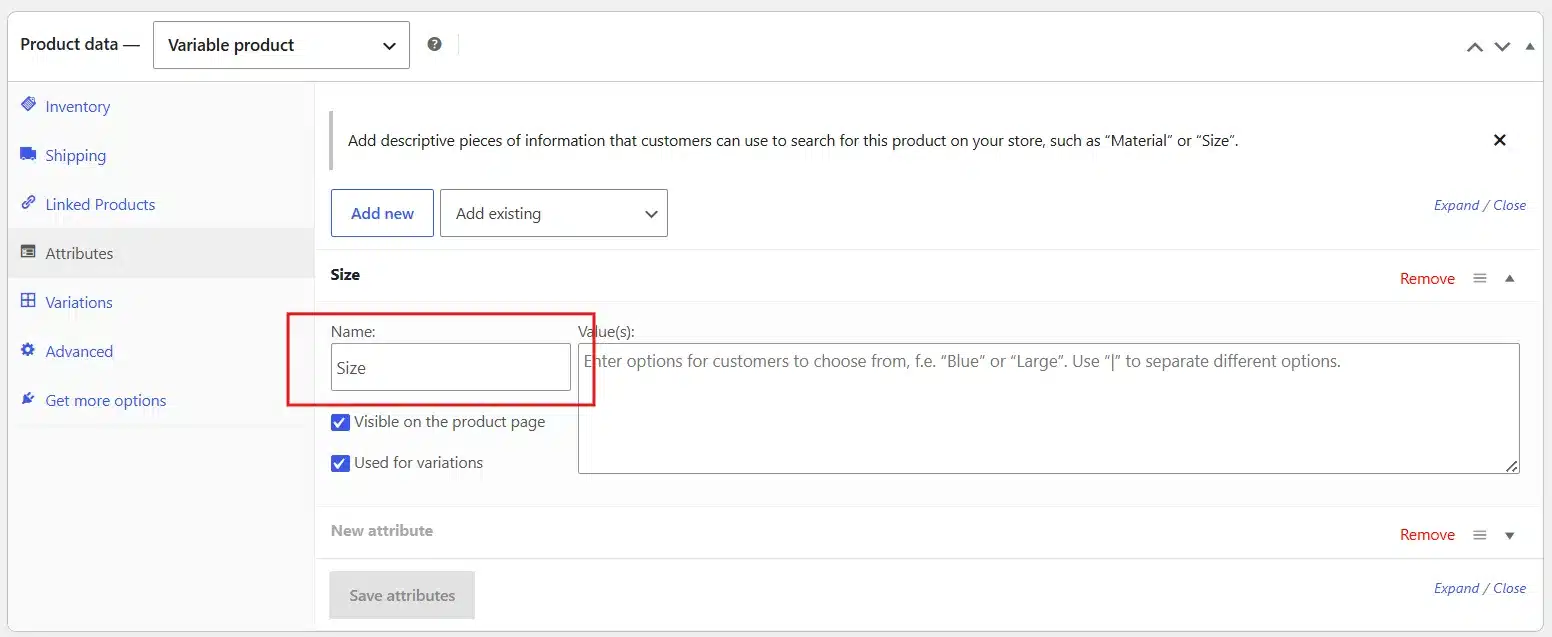
- Add the values separated by a pipe character.
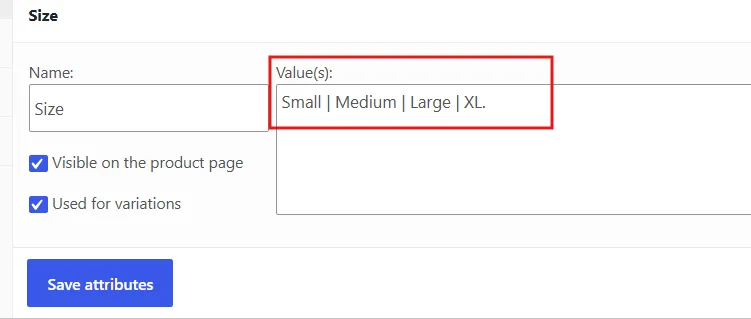
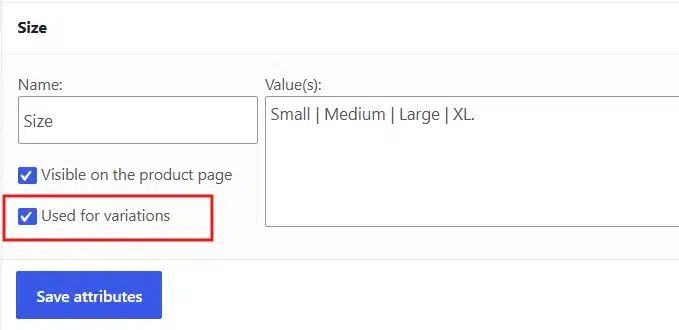
- Check the box labelled Used for variations. This step is mandatory. If you skip it, WooCommerce will not include this attribute when generating variations.
- Click Save attributes.
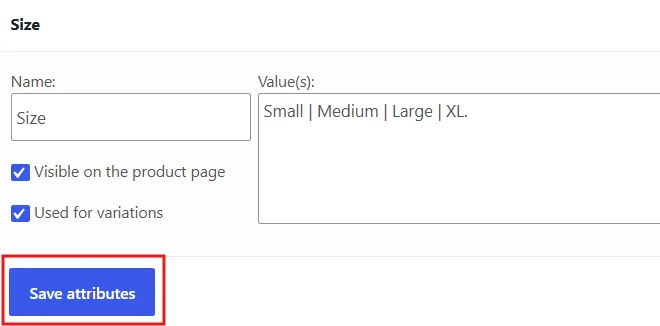
Repeat for each attribute. A product with two attributes, Size and Colour, will generate all size-and-colour combinations in the next step.
On the Other Hand, Global attributes are created once and shared across your whole store. If you sell clothing and use Size and Colour on dozens of products, set these up as global attributes first. That way, you manage the values in one place, and they stay consistent across your catalogue.
To add a Global attribute:
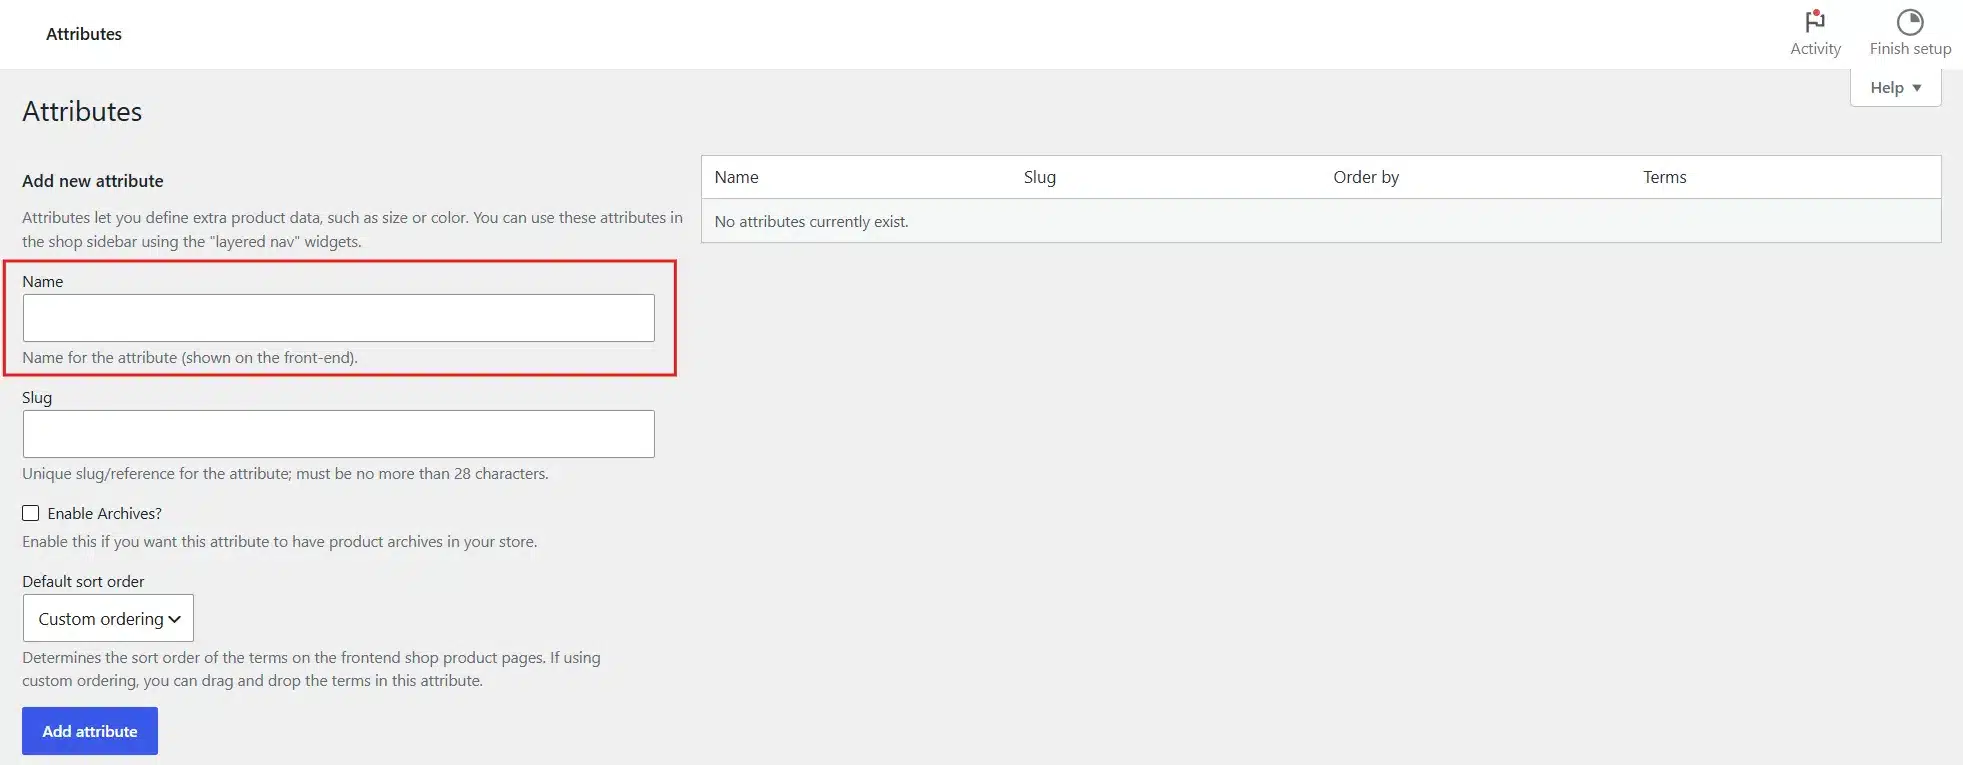
- Go to Products > Attributes in your WordPress dashboard.
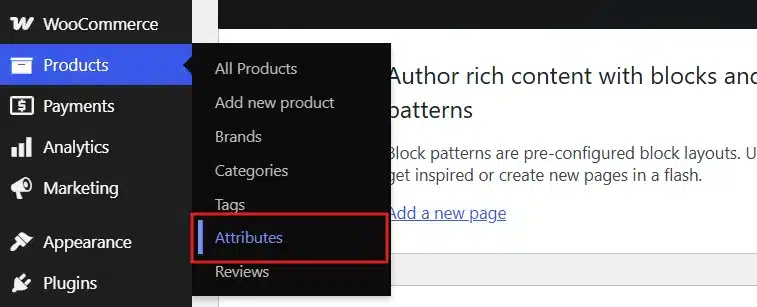
- Enter the Attribute name for the whole store.
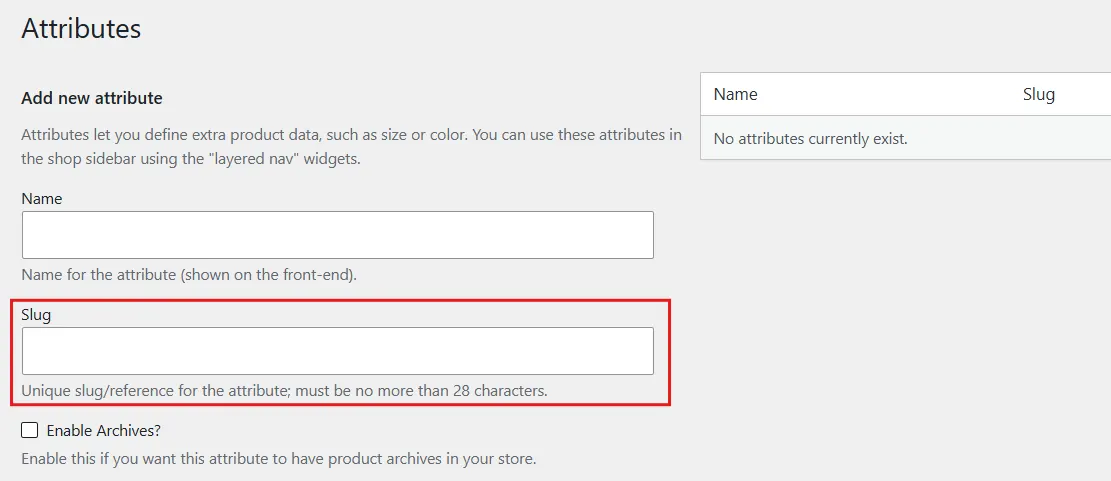
- Enter the Slug as a reference for the attribute.
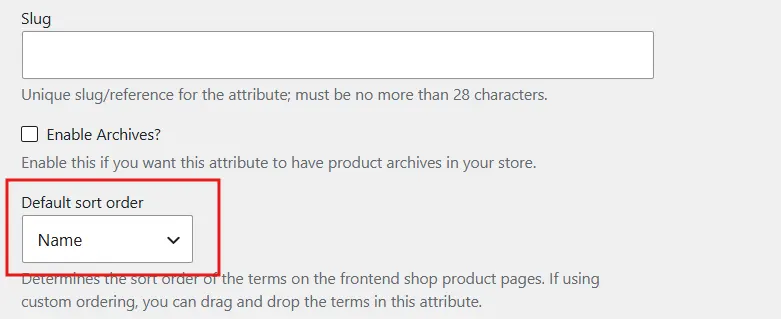
- Select the desired sort order from the dropdown.
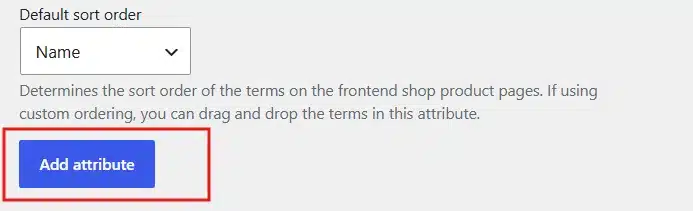
- Click Add attribute.
Worth knowing: If you need to change the display order of attributes on the product page, that is handled separately. The WooCommerce product attributes reorder guide covers exactly how to do it using drag-and-drop without touching code.
Step 3: Generate Variations
- Click the Variations tab in the dropdown.
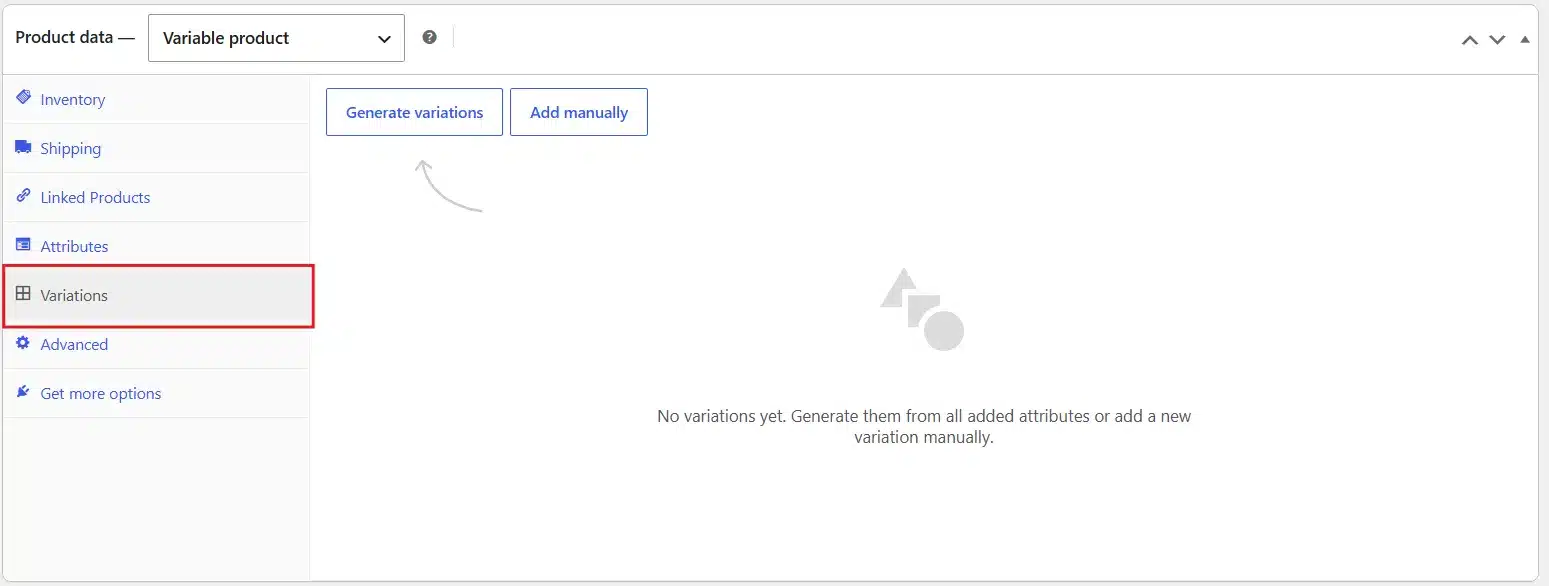
- Select the Generate variations Option.
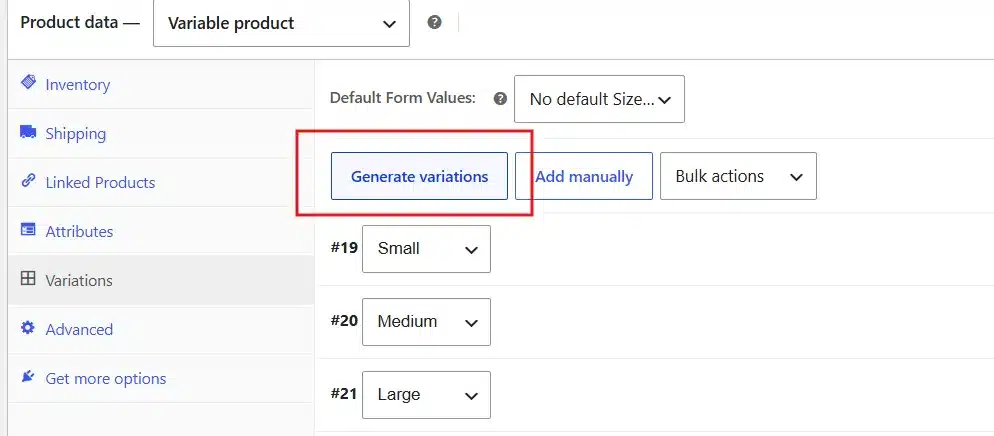
- Then, generate variations and click Save Changes.
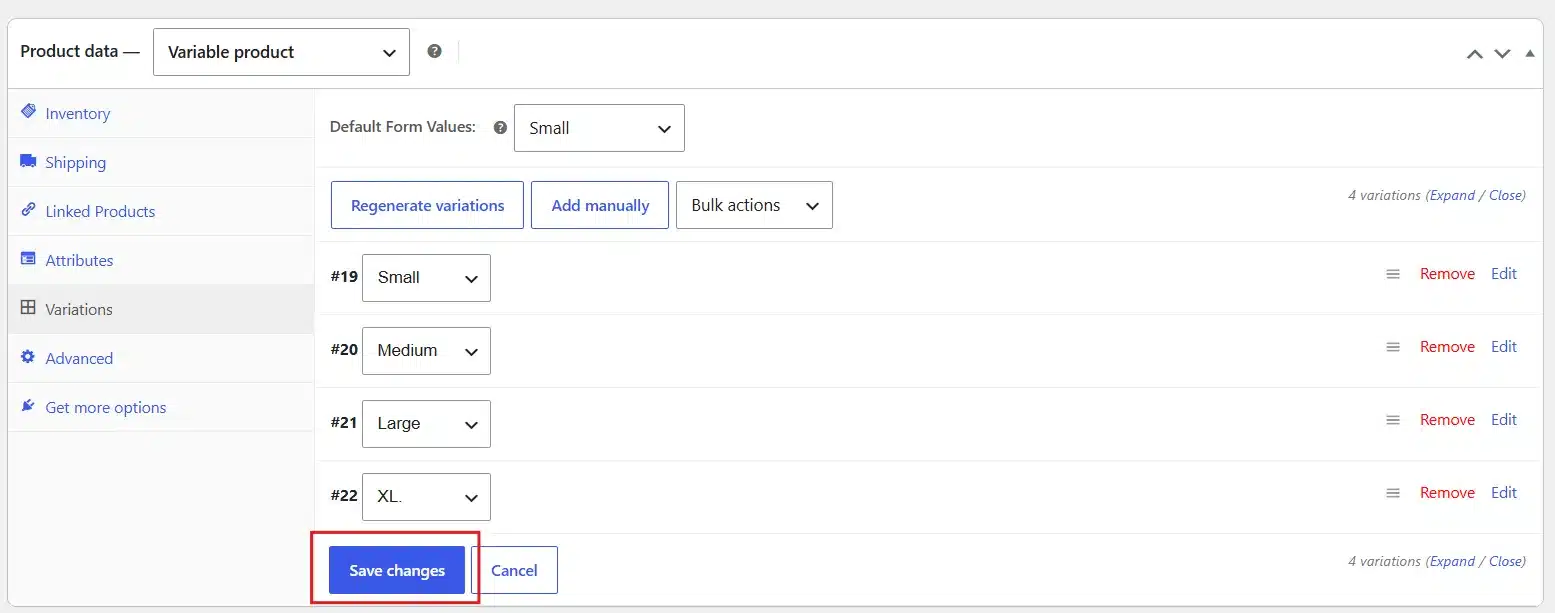
WooCommerce builds every possible combination automatically. Two attributes with three values each give you nine variations. Three attributes with three values each give you twenty-seven.
You can also create variations manually if you only want to offer specific combinations. Use Add variation to build them one at a time. This is useful when certain combinations do not exist as real products, and you do not want customers selecting an unavailable option.
Step 4: Configure Each Variation
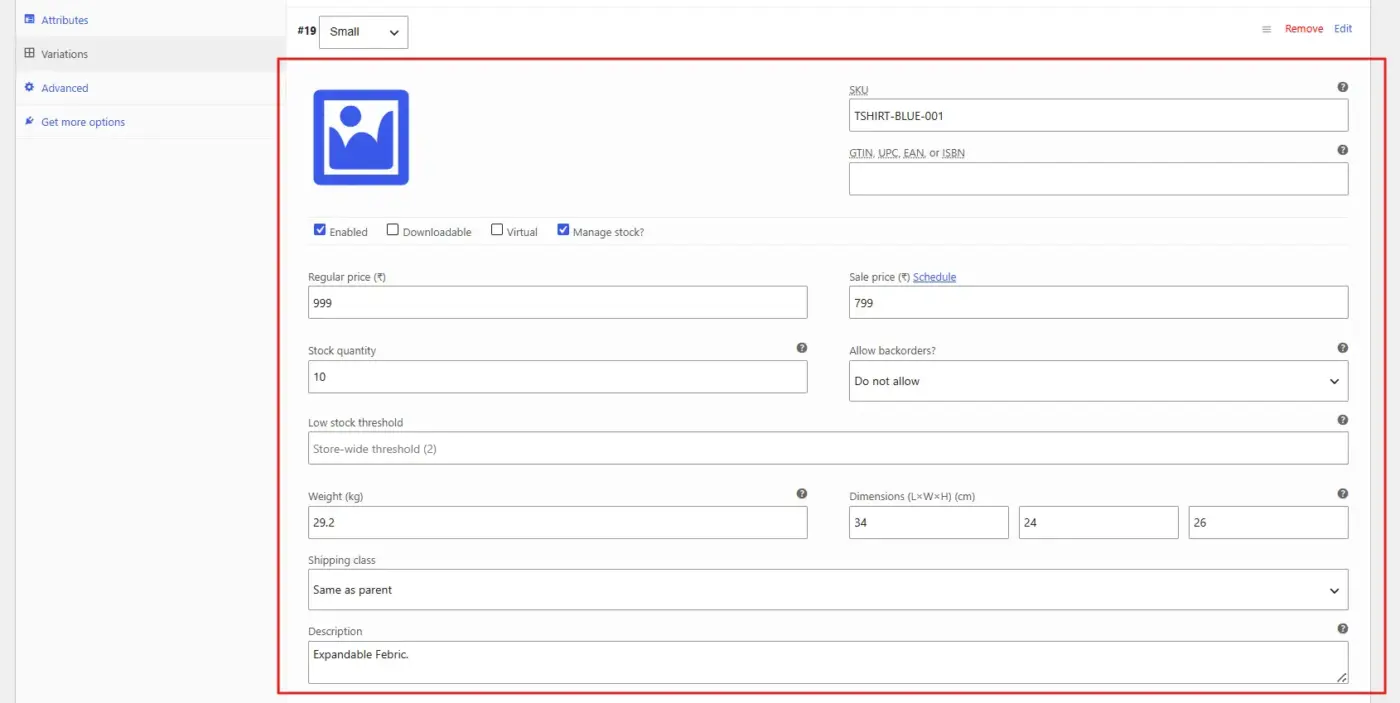
Each variation starts closed. Click the arrow to expand it, and you will see the fields you need to fill in.
Required:
- Regular Price: variations without a price do not appear in your store, full stop.
- Sale Price: Set a discounted price for this variation.
- SKU: Assign a unique identifier for inventory tracking. If you leave it blank, WooCommerce falls back to the product-level SKU.
- Manage stock: enable this and enter a quantity to track inventory per variation independently.
- Image: upload a specific image for this variation. When a customer picks “Blue,” the gallery switches to show the blue version. This is one of the most underused features of variable products, and it directly reduces return rates.
For the stock setting specifically, if you want out-of-stock variations to disappear from the dropdown rather than show as unavailable, you need two things in place. First, stock must be managed at the variation level, not the product level. Second, backorders must be disabled for that variation. Go to WooCommerce > Settings > Products > Inventory and enable “Hide out of stock items from the catalogue” to complete the setup.
Step 5: Set a Default Variation and Publish
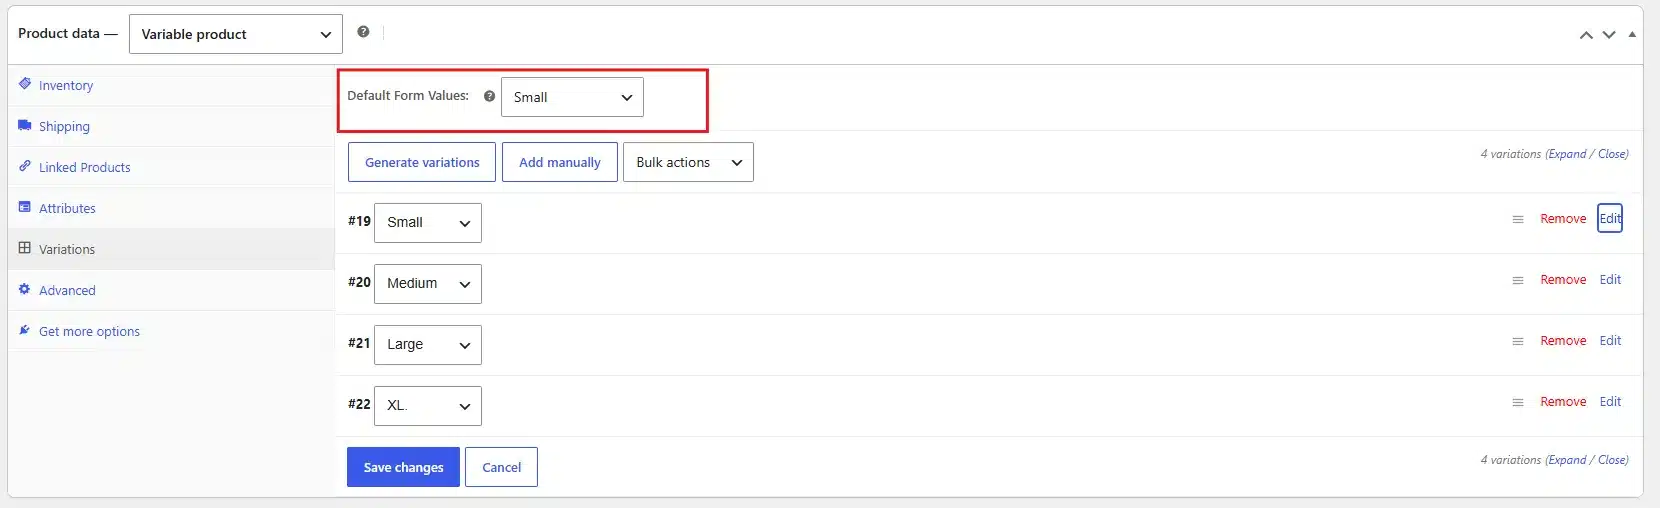
The small thing that most guides skip, but it matters. A product page that loads with “Select an option” selected and no price showing looks broken to a first-time visitor. Set a sensible default, and the page immediately looks more polished and trustworthy.
- At the top of the Variations tab, set a default variation.
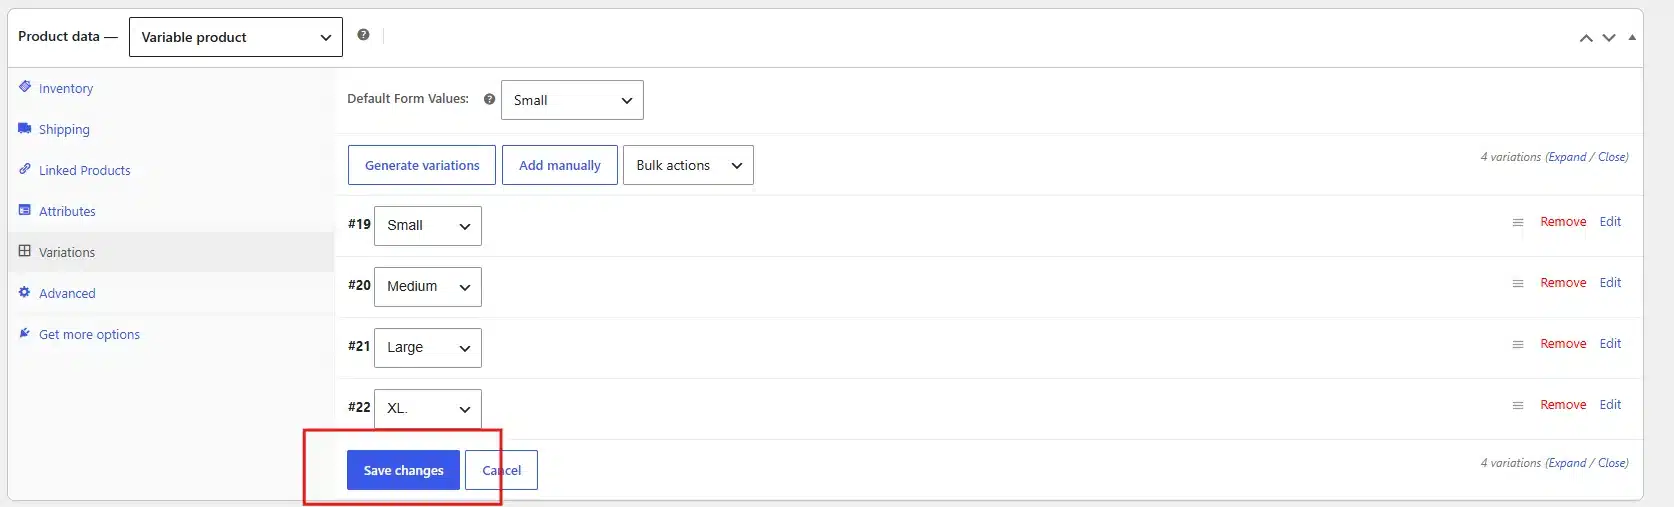
- Click Save changes in the Variations tab.
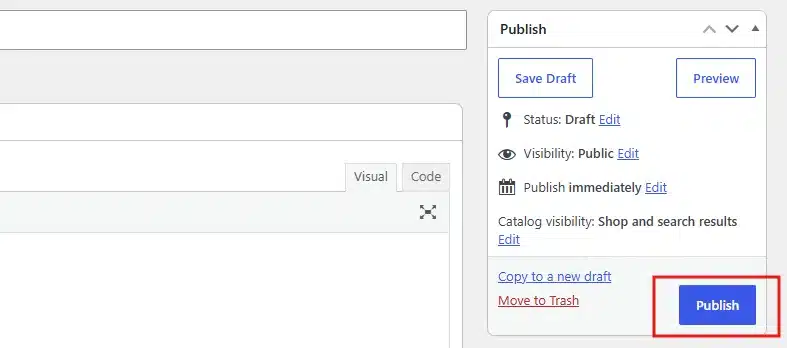
- Then click Publish.
Test the product page yourself: select each variation, check that the price updates, and confirm the add-to-cart button appears.
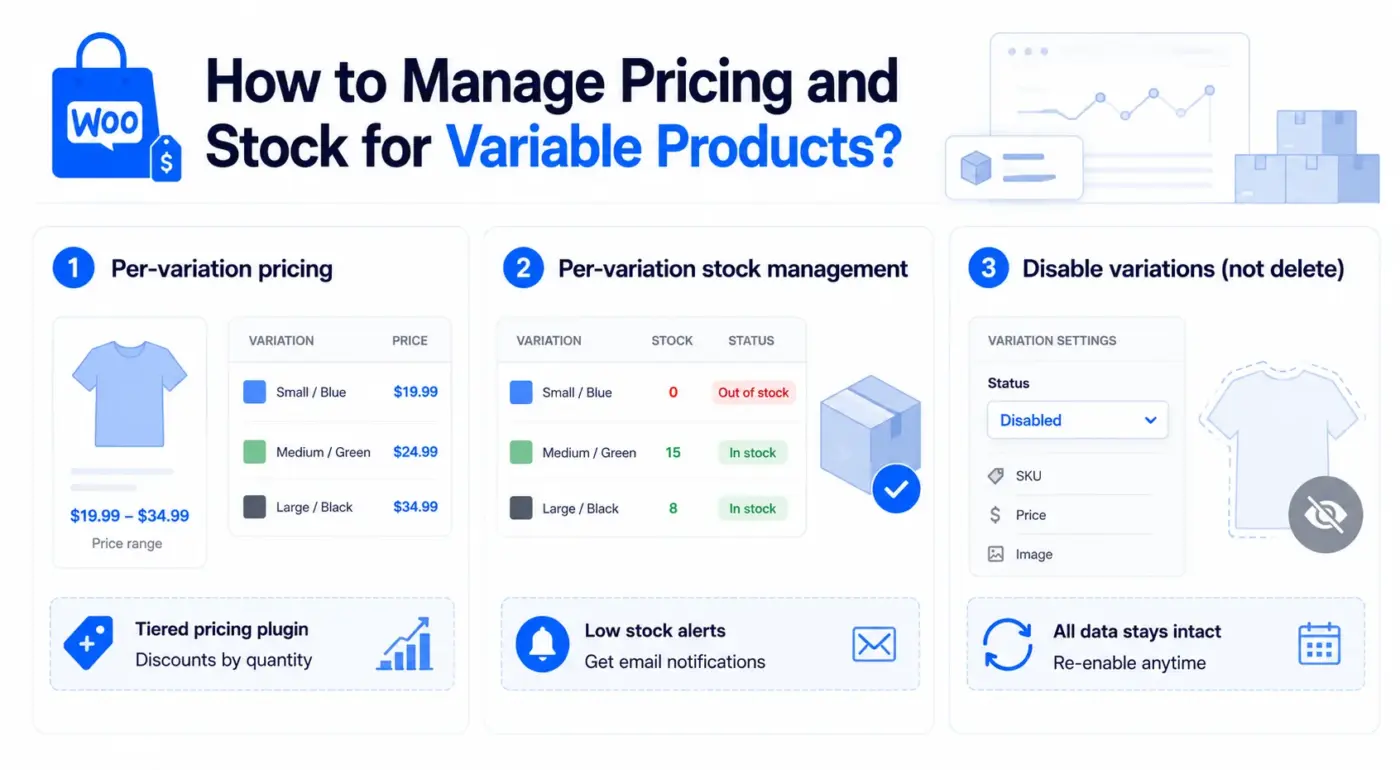
How to Manage Pricing and Stock for Variable Products?
Once your variations are live, controlling them well is what separates a clean store from a messy one.
Per-Variation Pricing
Each variation can carry a different price. You can charge more for larger sizes, premium colours, or higher-capacity options without creating separate product pages. WooCommerce shows visitors the price range (for example, $19.99 to $34.99) on the shop page, which sets accurate expectations before they click through.
If you sell in volume and want to reward customers who buy more units of a specific variation, a WooCommerce tiered pricing plugin handles per-quantity discounts at the variation level without manual coupon management.
Per-Variation Stock Management
Enable stock management at the variation level, not just the product level. Here is why it matters: if you only manage stock at the product level, WooCommerce tracks the total inventory across all variations but has no way to know when a specific size runs out.
The result: a customer selects Small and adds it to their cart, even though you sold your last Small three days ago.
When managed at the variation level, each size and colour combination tracks independently. Small goes to zero, Small becomes unavailable. Medium still shows in stock. That is the correct behaviour.
You can set a low-stock threshold per variation, too. When stock hits that number, WooCommerce sends you an email so you can reorder before selling out.
Disabling Variations Without Deleting Them
This is a feature most tutorials skip. You can set a variation to “Disabled” in its settings without removing it. The customer cannot select or purchase it, but all its data, including price, SKU, and image, stays intact.
This is useful for seasonal products, limited-edition colourways, or sizes temporarily out of production. Re-enable the variation when stock comes back, and everything is exactly where you left it.
Bulk Editing Variations: The Faster Way to Manage a Large Catalogue
Setting up ten variations one by one is manageable. Setting up forty is not. WooCommerce includes a bulk editing tool that most store owners never find.
At the top of the Variations tab, there is a dropdown labelled Bulk actions. Click it, and you will see options to set a regular price, a sale price, stock quantity, shipping class, and more across all variations at once.
Common uses:
- Run a sitewide sale. Select all variations, choose “Set regular prices,” and enter the new price. Done in seconds instead of minutes.
- Apply the same shipping class to every variation of a heavy item.
- Set all variations to “In stock” after a restock shipment arrives.
- Apply a percentage increase to all prices when costs go up.
One thing to know from a technical standpoint: bulk actions in the Variations tab use JavaScript on the front end and fire update requests per variation in the background. On a product with 40 or more variations, this can take a few seconds longer than expected. Do not navigate away until you see the “Variations saved” confirmation, or you risk losing changes.
For reordering how options display to customers on the product page, see the guide to reordering product options in WooCommerce for a step-by-step walkthrough.
The 30-Variation Limit: What It Means for Your Store?
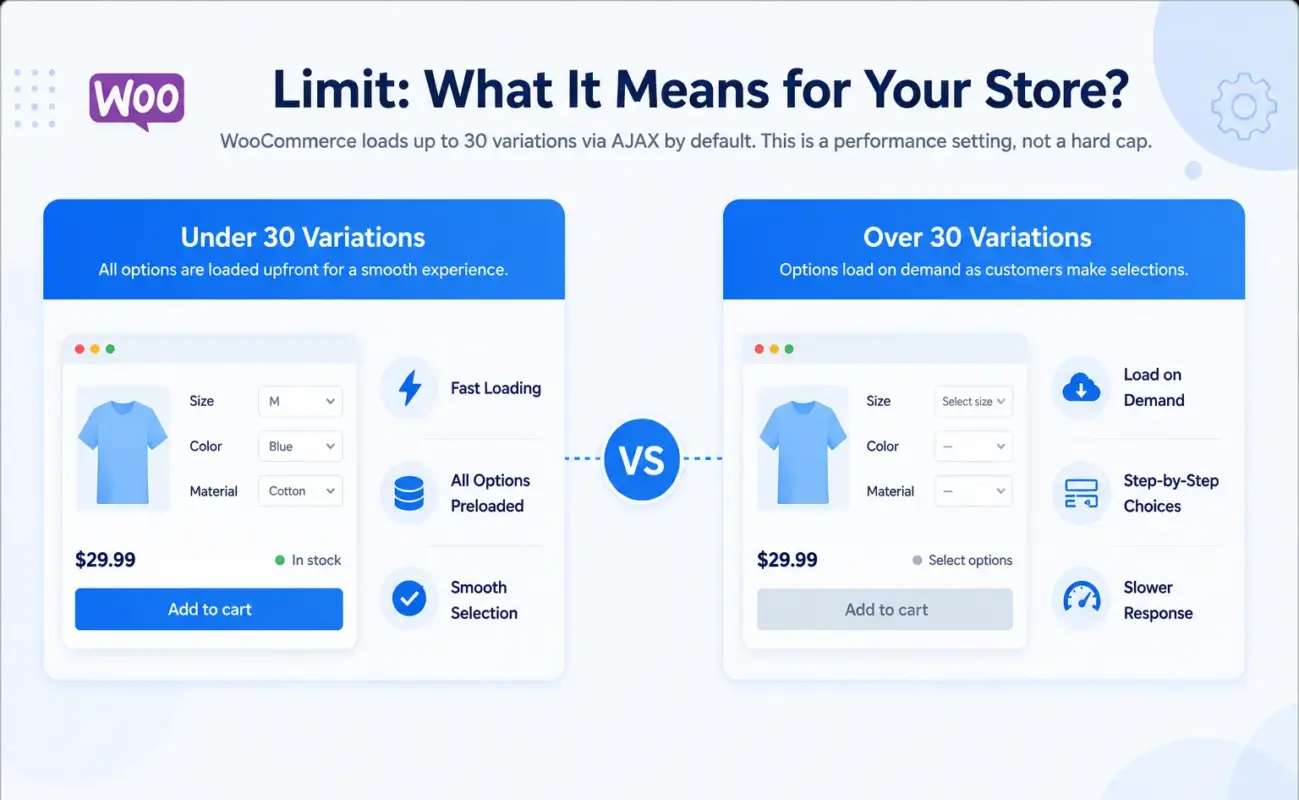
WooCommerce loads up to 30 variations via AJAX by default. This is a performance setting, not a hard cap on how many variations you can create.
When a product has more than 30 variations, WooCommerce switches from loading all options on page load to loading them on demand as the customer makes selections. The dropdown still works. The price still updates. But customers need to select an option before they see availability for the next dropdown.
For most stores, this causes no real problem. Most products with sensible attribute structures stay comfortably under 30.
Where it becomes an issue is with products that combine three or more attributes with many values each. A T-shirt in 5 sizes, 8 colours, and 3 fabric weights produces 120 variations. Customers hit a slower, less smooth experience.
The practical fix is to split overly complex products into separate variable products. Keep colours as attributes, but if fabric weight changes the product in a real way, consider making it a separate listing with its own size and colour variations. Your catalogue stays manageable, and performance stays clean.
The 30-variation threshold can be raised using a filter in your theme’s functions.php or a custom plugin, but doing so on shared hosting often causes slow page loads. Test on staging before changing anything in production.
Letting Customers Switch Variations in the Cart
One thing most variable product guides skip entirely: what happens when a customer adds a variation to their cart and then changes their mind?
By default, WooCommerce does not allow variation switching in the cart. A customer who added Size: Medium / Colour: Black and then wants Size: Large instead has to remove the item, go back to the product page, select the new options, and add it again. On mobile, this is a real friction point.
A WooCommerce Cart Variation Switcher solves this directly. It adds a variation selector inside the cart itself, so customers can change size or colour without leaving the checkout flow. Stores that reduce this friction consistently see fewer abandoned carts at the cart and checkout stage.
If your store carries products with many sizes and colour options, this is worth testing. The setup takes under five minutes and requires no code changes.
Common Mistakes during the Setup of the Product
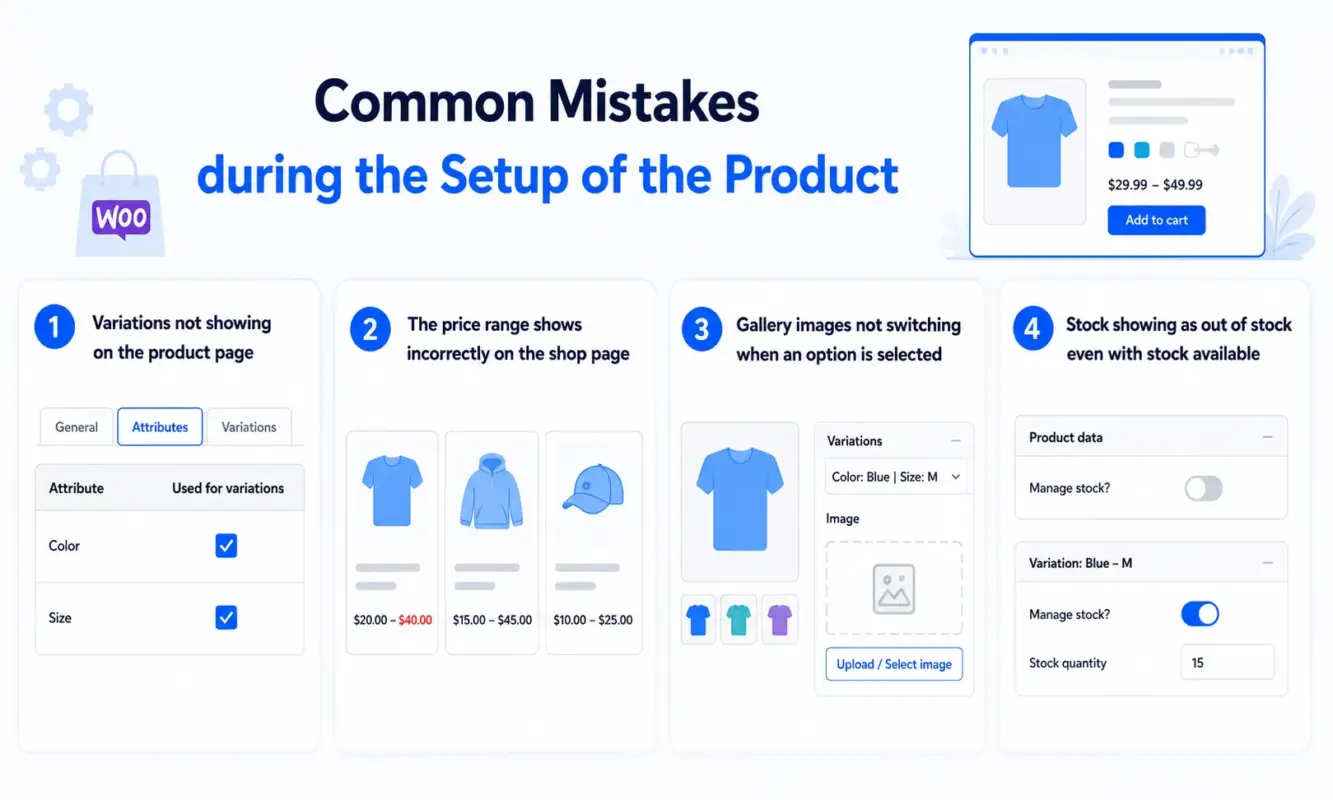
- Variations not showing on the product page: You created attributes, but did not check “Used for variations” before saving. Go back to the Attributes tab, check that box for every attribute, save, then go to Variations and generate again.
- The price range shows incorrectly on the shop page: WooCommerce calculates the price range displayed on the shop page from the lowest and highest variation prices. If you see a price range that looks wrong, check for variations with unusually low or high prices you may have set accidentally during bulk editing.
- Gallery images do not switch when an option is selected: If you upload images only to the main product gallery, they do not automatically associate with individual variations. Open each variation, click the image placeholder, and upload or select the correct image for that combination.
- Stock showing as out of stock even with stock available: This usually means stock is managed at the product level, and the overall quantity is zero. Enable “Manage stock?” at the variation level for each variation and enter the correct quantity. Then set the product-level stock management to off.
To get WooCommerce set up correctly from the start, see the complete how to set up WooCommerce on WordPress guide for the foundational configuration steps.
SEO Considerations for Variable Products
Search engines index your product pages, and how you structure variable products affects what they scan and rank.
WooCommerce generates a URL for each variation when a customer selects options (for example, ?attribute_pa_color=blue). These are typically parameter-based URLs that do not get their own indexed pages, which is the correct behaviour. You want one product URL ranking, not dozens of thin variation URLs competing with each other.
Make sure your product-level title, description, and meta description describe the product accurately across all its variations. Mentioning size and colour options in your product description helps, but avoid listing every variation combination by name. That creates thin, repetitive content.
For structured data, WooCommerce automatically adds product schema to your variable product pages, including price range and availability. This helps your product appear in Google Shopping results and Enhanced search results. Check that your theme does not strip this structured data, which some lightweight themes do to reduce page weight.
High-quality variation images also contribute to product search performance. Product images that clearly show the options customers care about, colour differences especially, reduce the visitors’ leaving rate on landing pages coming from image search.
Conclusion
Creating and controlling WooCommerce variable products comes down to three things done correctly: attributes marked for variations, prices set per variation, and stock managed at the variation level rather than the product level. Get those three right and your variable products work cleanly from day one.
As your catalogue grows, the bulk editing tools in the Variations tab save real time. The 30-variation AJAX limit is not a problem for most stores, but knowing about it means you can plan your attribute structure before it becomes one. And allowing customers to switch variations in the cart is one of those small UX improvements that consistently pays back in fewer abandoned orders.
If you need to create and control WooCommerce variable products at scale, start with a clean attribute structure, set sensible defaults per product, and test every variation on the actual product page before publishing.
Frequently Asked Questions (FAQs)
Q1. Can a WooCommerce variable product have different weights and shipping classes per variation?
Yes. Each variation has its own weight, dimensions, and shipping class fields. This is useful when a larger size or heavier configuration ships differently. Enable these fields by unchecking the “Virtual” option for the variation and filling in the shipping details directly inside the variation settings.
Q2. How many attributes can a single WooCommerce variable product have?
WooCommerce does not impose a hard limit on the number of attributes per product. In practice, most stores use two to four. Beyond four attributes, the number of possible combinations grows quickly, and the product page experience becomes harder for customers to navigate. More than 30 total variations also trigger the AJAX-loading behaviour described in this guide.
Q3. What happens to existing orders if I change variation prices?
Changing variation prices does not affect orders already placed. WooCommerce records the price at the time of purchase inside the order data. Historical orders keep their original pricing. Only new orders placed after the price change use the updated price.
Q4. Can I add a variation to a product that was originally created as a simple product?
Yes. Open the product, change the Product Data type from “Simple product” to “Variable product,” and proceed with the attribute and variation setup. The product description, images, and other data carry over. You will need to add attributes and generate variations from scratch.
Q5. Is it possible to export and import variable product variations in bulk?
Yes. WooCommerce includes a built-in CSV importer and exporter under Products > All Products > Export. Variable products export with each variation on a separate row. You can edit the CSV in a spreadsheet application and re-import it to update prices, stock, and SKUs across many variations at once. Back up your database before running a large import.
Q6. Do variable products work with WooCommerce’s REST API?
Yes. The WooCommerce REST API supports creating, reading, updating, and deleting variable products and their individual variations through code. Each variation is exposed as a sub-resource of the product endpoint. This is how headless online stores and third-party inventory systems typically sync variation data.