How to Set Up WordPress Using Local WP
Creating a WordPress website can seem daunting, especially if you’re starting. However, by learning how to set up WordPress using Local WP, you can streamline the process and develop your site locally before making it live.
Local WP, formerly known as Local by Flywheel, is a powerful tool that allows you to create a local development environment for WordPress.
This guide will walk you through the process of setting up WordPress using Local WP, ensuring you can confidently set up your WordPress site using Local WP.
Introduction to Local WP
One of the first decisions you will make when creating a WordPress website is where you want to develop your site. How to set up WordPress using Local WP is one of the essential abilities that enables creating and managing the website in a local environment while offering many benefits over the traditional live server setups.
Installing WordPress on the local machine with Local WP makes development easy because all the needed components- PHP, MySQL, and a web server- are bundled into one easy-to-use application.
Learning how to set up WordPress using Local WP is for the beginner and the experienced developer to provide an easy way, whether you’re building your first blog or managing multiple client projects.
Know how to get WordPress up and running on Local WP so that the development workflow works smoothly, downtime is minimized, and new things can be tried out without the fear of breaking a live site.
Benefits of Setting up WordPress Locally using Local WP

Understanding how to setup WordPress using Local WP offers several key benefits that enhance your website development process:
- Efficiency and Speed: Work speed is no longer throttled by internet speed or server response times. This means you can iterate quickly on your WordPress site when it is loaded during development.
- Improved Security: Your work is private until you decide it is public when built on a local machine, as opposed to an exposed server that may allow unauthorized access and be open to probable security weaknesses while under development.
- Safe Testing Environment: The local WP offers you a sandboxed environment, which allows you to try new themes, plugins, and custom code without disrupting a live site. You then test everything extremely well before you deploy it.
- Offline Accessibility: This is ready to allow you to work on your WordPress site irrespective of Internet access. It is amazing for developers in any setting but especially helpful when traveling.
- Version Control and Backup: WP Local makes it easier to manage different versions of your site and maintain its backups. It can easily create snapshots before a major change in case an earlier state is needed, or the new one is not acceptable.
By mastering how to set up WordPress using Local WP, you unlock these advantages, making your development process more efficient, secure, and flexible.
System Requirements for Local WP
Before we discuss how to set up WordPress using Local WP, it’s essential to ensure that your system meets the requirements. Local WP is compatible with both Windows and macOS, but having the right hardware and software specifications will ensure a smooth installation and operation.
Minimum System Requirements:
- Operating System:
- Windows 10 (64-bit) or higher
- macOS 10.13 (High Sierra) or higher
- RAM: At least 4GB (8GB or more recommended for optimal performance)
- Disk Space: Minimum of 1GB free space for Local WP; additional space required for WordPress sites and associated files
- Processor: Intel Core i3 or equivalent
- Internet Connection: Required for downloading Local WP and updates
Recommended System Specifications:
- Operating System:
- Windows 11 (64-bit)
- macOS 12 (Monterey) or higher
- RAM: 8GB or more
- Disk Space: SSD with at least 10GB free space for better performance
- Processor: Intel Core i5 or higher, or AMD equivalent
- Graphics: Integrated graphics are sufficient, but a dedicated GPU can enhance performance for more intensive tasks
Ensuring your computer meets these requirements will help you effectively learn how to set up WordPress using Local WP without encountering performance issues or installation problems.
Downloading and Installing Local WP
Now that you’ve confirmed that your system meets the requirements, it’s time to download and install Local WP. Follow these steps to learn how to set up WordPress using Local WP.
Step 1: Download Local WP
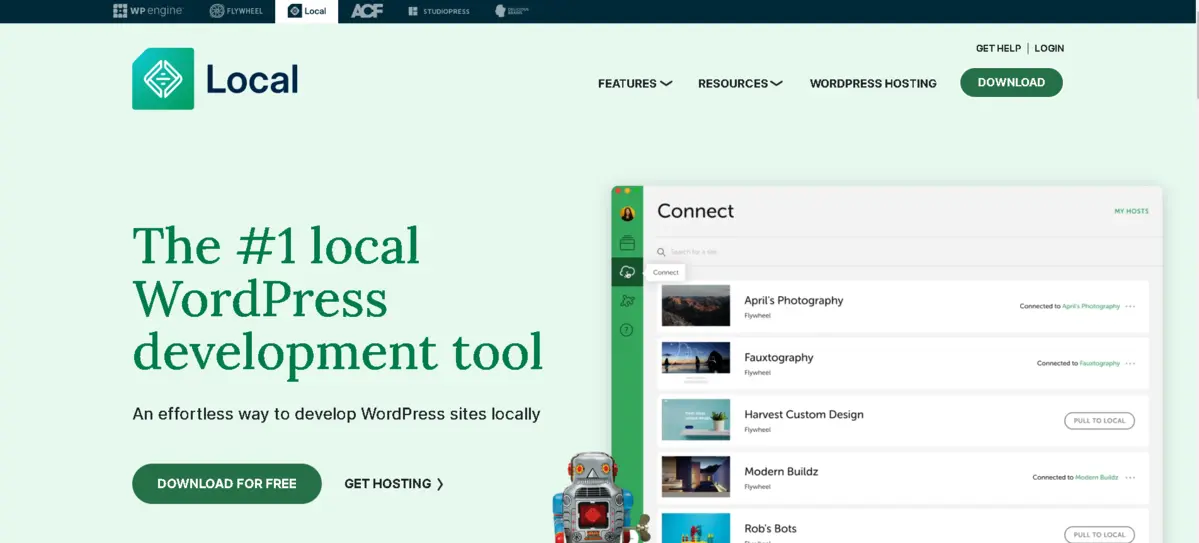
- Visit the Official Website: Navigate to the Local WP website.
- Initiate Download: Click on the Free Download button prominently displayed on the homepage.
- Select Your Operating System: Choose the appropriate version for your operating system (Windows or macOS). The download should begin automatically.
Step 2: Install Local WP
For Windows Users:
- Run the Installer: Locate the downloaded
.exefile and double-click it to start the installation process. - Follow Installation Prompts: Proceed through the installation wizard by accepting the terms and choosing the installation directory.
- Complete Installation: Once the installation is complete, you can launch Local WP from the Start menu or by using the desktop shortcut.
For macOS Users:
- Open the Installer: Locate the downloaded
.dmgfile and double-click it to open. - Drag to Applications: Drag the Local WP icon into the Applications folder as prompted.
- Launch the Application: Navigate to the Applications folder and double-click Local WP to open it.
Step 3: Initial Setup
Upon launching Local WP for the first time:
- Welcome Screen: You may receive a welcome screen or a brief tutorial. You can go through it or skip it to start learning how to set up WordPress using Local WP immediately.
- Sign In or Create an Account: While not mandatory for basic usage, creating a free account can unlock additional features like Live Links. Follow the prompts to sign in, or skip this step.
With Local WP successfully installed, you’re ready to proceed to the core part of this guide: setting up WordPress using Local WP.
How to Set Up WordPress Using Local WP
Understanding how to set up WordPress using Local WP is crucial for efficient local development. This section provides a detailed, step-by-step process for getting your WordPress site up and running locally.
1. Launching Local WP
- Open Local WP: Locate the Local WP application on your computer and launch it.
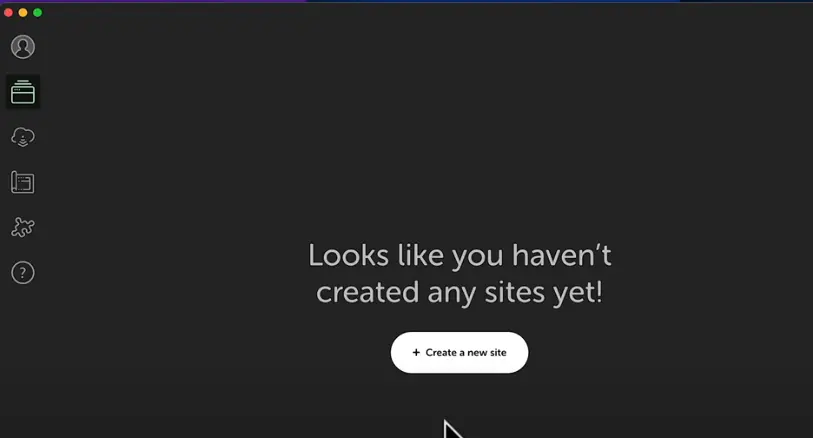
- Dashboard Overview: Upon opening, you’ll see the Local WP dashboard, which displays any existing local sites, recent activity, and options to create new sites.
2. Creating a New WordPress Site
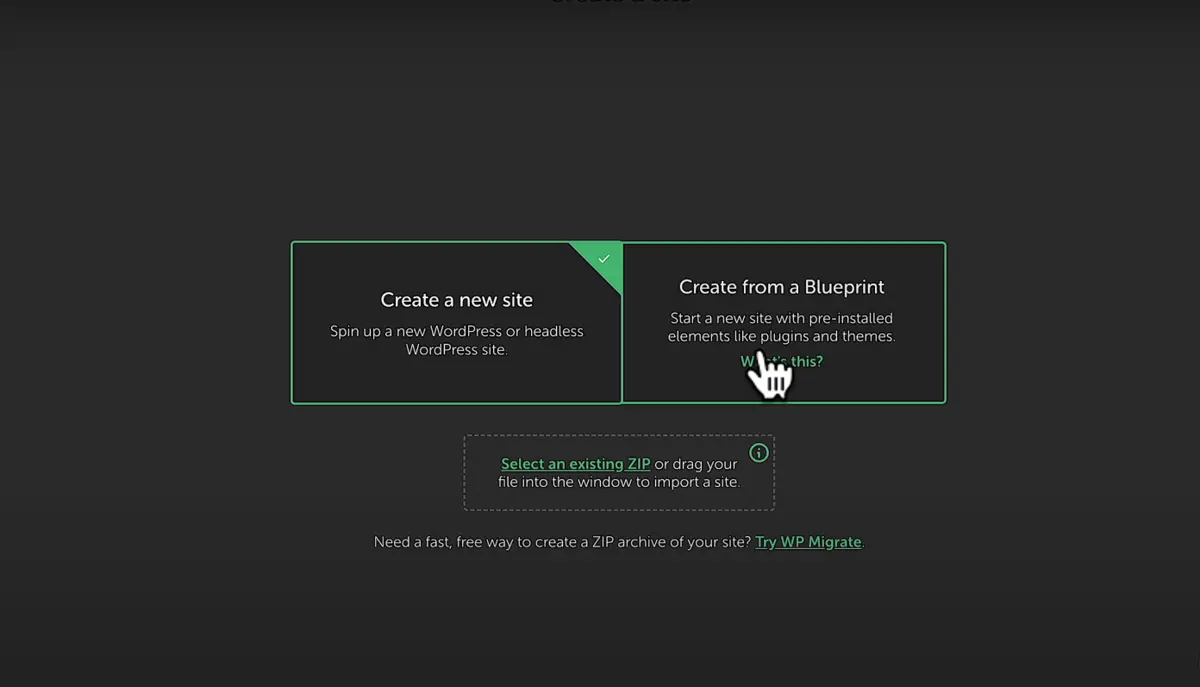
- Add a New Site: Click the “+” button or the “Create a New Site” option on the dashboard.
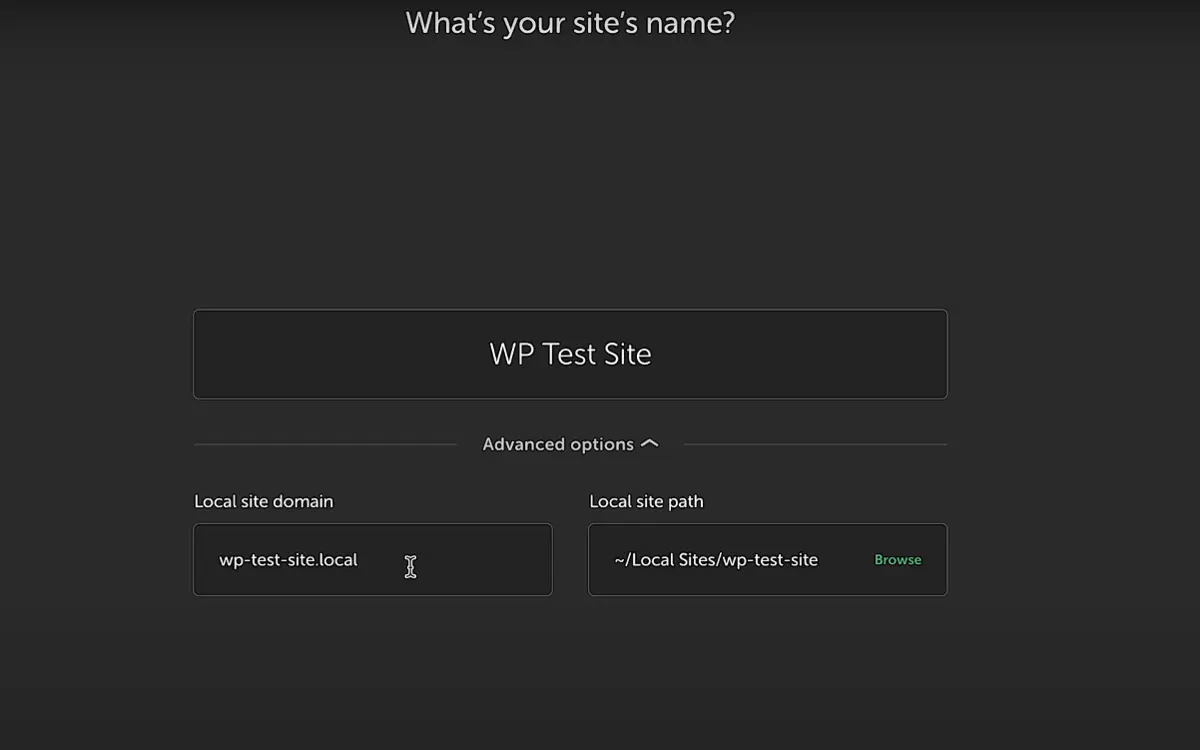
- Site Setup Wizard: A setup wizard will guide you through creating your new WordPress site.
- Site Name: Enter a name for your site. This will generate a local domain name (e.g.,
yoursite.local). You can customize this if desired.
3. Choose Environment:
- Preferred: Ideal for most users, this option comes with pre-configured settings for PHP, MySQL, and the web server.
- Custom: Allows you to select specific versions of PHP, MySQL, and the web server (NGINX or Apache) based on your project’s requirements.

4. WordPress Setup:
- Username: Create an admin username for your local WordPress installation.
- Password: Set a secure password.
- Email: Enter an email address for the admin account.
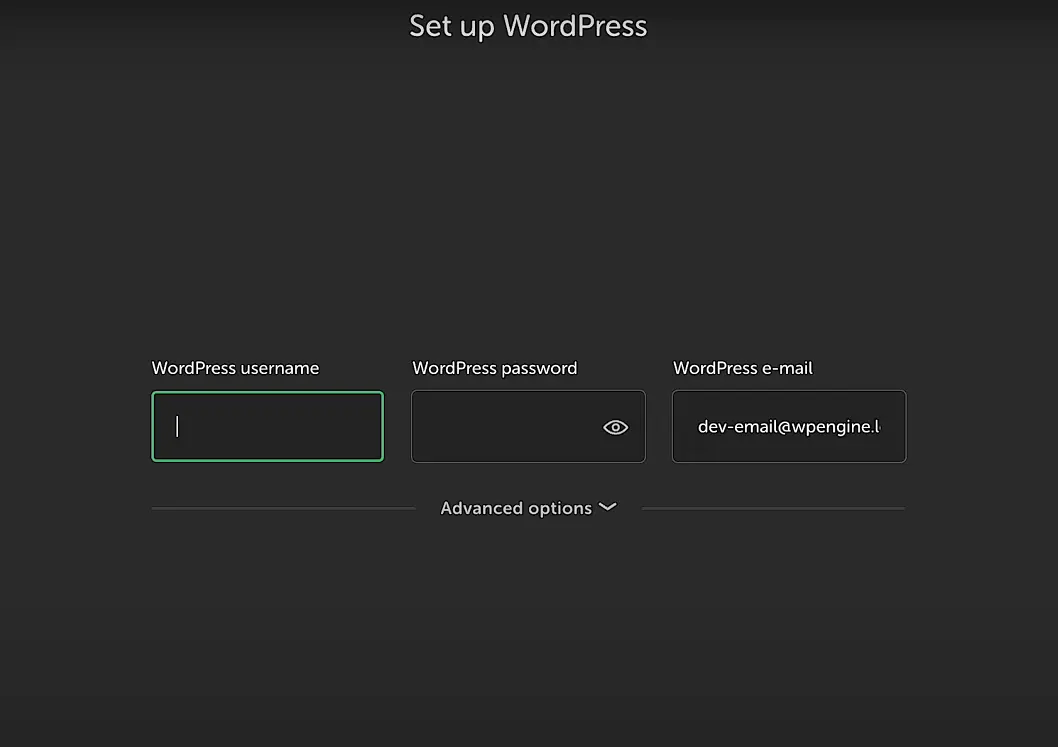
- Advanced Options (if you chose Custom Environment): You can configure additional settings such as the PHP version, web server type, and MySQL version.
- Complete Site Creation: After configuring the settings, click Add Site. Local WP will now create the local WordPress environment, which may take a few moments.
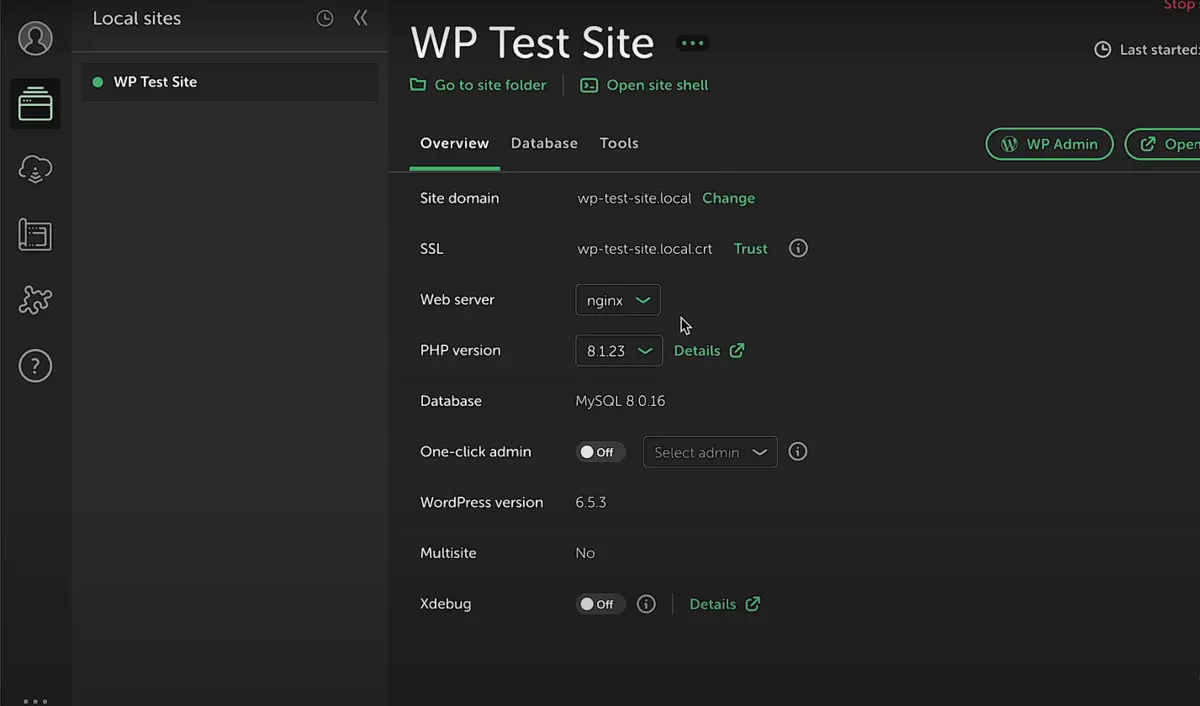
5. Configuring WordPress Settings
Once the site is created, you can further configure your WordPress settings:
- Site Settings: Access site-specific settings such as the local domain, site path, and environment details.
- Tools and Utilities: Utilize built-in tools for managing the database, viewing logs, and accessing advanced configurations.
6. Accessing Your Local WordPress Site
- Start the Site: In the Local WP dashboard, locate your newly created site and click Start Site if it’s not already running.
- Access the Admin Dashboard: Click the Admin button to open the WordPress admin dashboard in your default browser.
- Begin Development: You’re now ready to customize your WordPress site—install themes, add plugins, create content, and more—all within your local environment.
Congratulations! You’ve successfully learned how to set up WordPress using Local WP. Now, let’s explore some advanced features that make Local WP an indispensable tool for WordPress developers.
Exploring Advanced Features of Local WP
Now, once you’ve got WordPress set up thanks to Local WP, it’s time to dig into some of those more advanced capabilities that can take your workflow to the next level when it comes to development.
Tools in Local WP abound and are geared to help you get those final efficiencies up to their full power.
1. Live Links

The best feature of Local WP is sharing your local site with clients, colleagues, or any collaborators without deploying it onto a live server.
- How it works: Local WP allows you to create a temporary and publicly accessible URL that refers to your local site.
- Use Cases: These are perfect for client reviews, feedback sessions, or even showing progress without touching the live environment.
- Security: Live Links are temporary and secure, so only the link to your site will reach its intended audience.
2. One-Click SSL
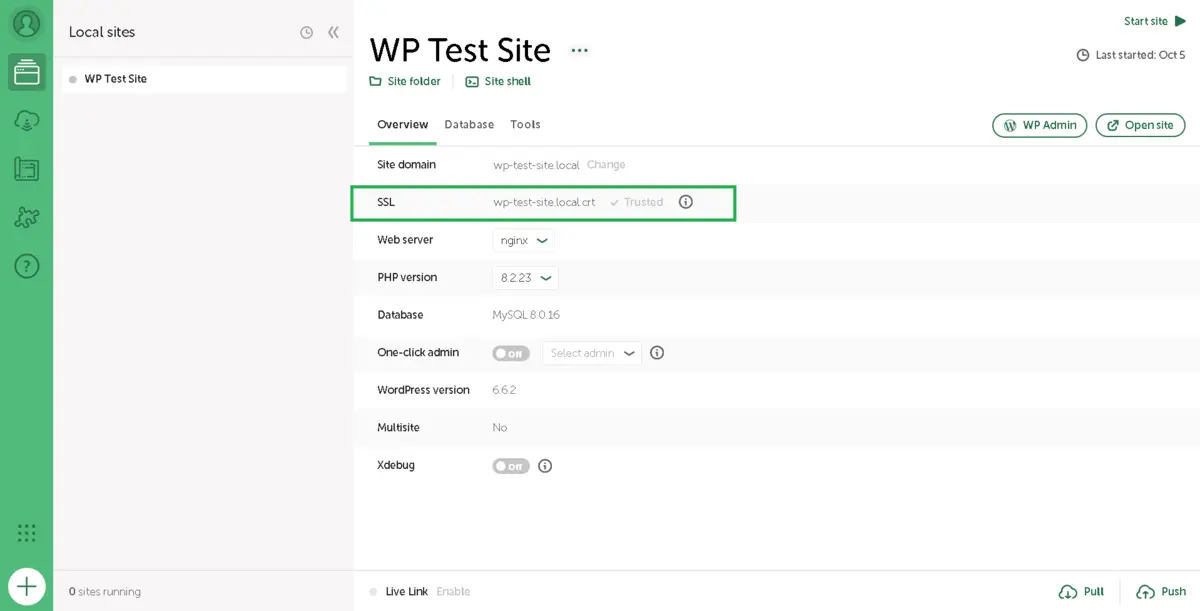
- Security and SEO: Make Sure Your site is running over HTTPS. Implementing HTTPS on your site will save you both security and SEO headaches. They now allow One-Click SSL to add SSL certificates to your Local WP, making it easier.
- Easy Installation: Self-Signed Single-Click SSL Certificate Generation and Installation.
- Testing HTTPS: Check how your site works under HTTPS and whether plugins and themes are configured to work on secure connections.
- SSL certificate auto-enable: This feature manages SSL certificates, hence curbing maintenance functions.
3. Database Management
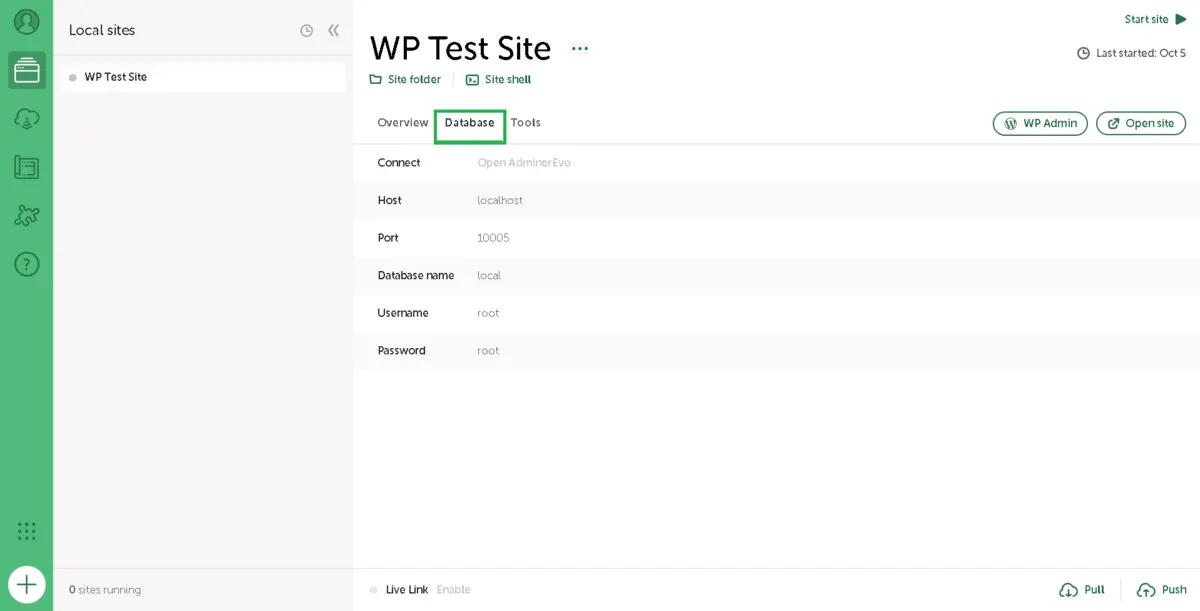
Management of your WordPress database is vital for development and troubleshooting. Fortunately, tools in Local WP make this easy.
- Adminer: This lightweight tool is included with Local WP for direct access to and management of your database.
- TablePlus: This is another more advanced database management tool available in Local WP.
- Import/Export: You can easily import and export your database for migration and backups.
4. Local Connect
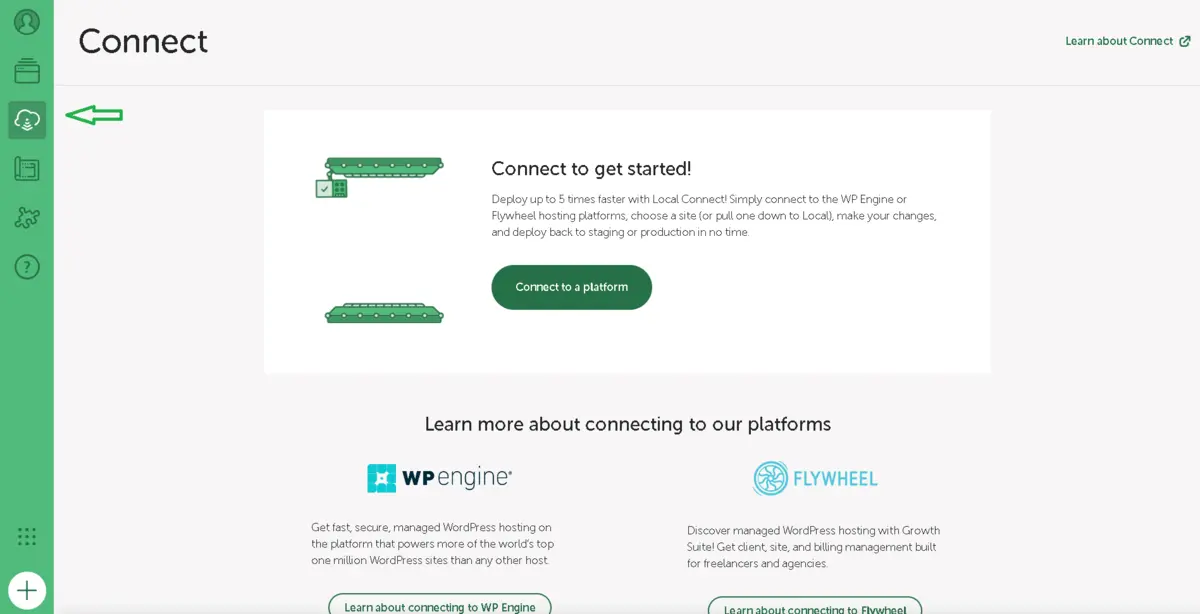
Integrate your Local WP with very popular managed WordPress hosting providers like Flywheel and WP Engine.
- Push to Live: You can easily push a local site to a live server hosted on Flywheel or WP Engine.
- Pull from Live: Import a live site from your managed host to Local WP for local development.
- Synchronization: The local and live environments sync, making it easy to manage updates and changes.
5. Additional Features
- Snapshots: Create snapshots of your site at any point in time, allowing you to revert to previous states if needed.
- Command Line Interface (CLI): Advanced users can utilize the Local WP-CLI for automation and scripting.
- Integration with Version Control: Easily integrate your local site with Git or other version control systems for better project management.
By using these advanced features, you can enhance your workflow and make the most out of how to set up WordPress using Local WP.
Migrating Your Local WordPress Site to a Live Server
After developing your WordPress site locally using Local WP, the next step is to migrate it to a live server. Understanding how to set up WordPress using Local WP includes knowing how to transition your site seamlessly from a local environment to a live server.
1. Choosing a Hosting Provider
Selecting the right hosting provider is crucial for the performance and reliability of your live site. Here are some popular options:
- SiteGround: Known for excellent customer support and performance.
- Bluehost: Recommended by WordPress.org, offering easy setup and affordable plans.
- Flywheel: Managed WordPress hosting with features tailored for developers.
- WP Engine: Premium-managed WordPress hosting with robust performance and security features.
Consider factors like pricing, customer support, scalability, and specific features when choosing a host.
2. Using Migration Plugins
1. All-in-One WP Migration
Migration plugins simplify the process of transferring your local WordPress site to a live server, making how to set up WordPress using Local WP an even smoother experience. Two of the most popular plugins that assist with this are All-in-One WP Migration and Duplicator.
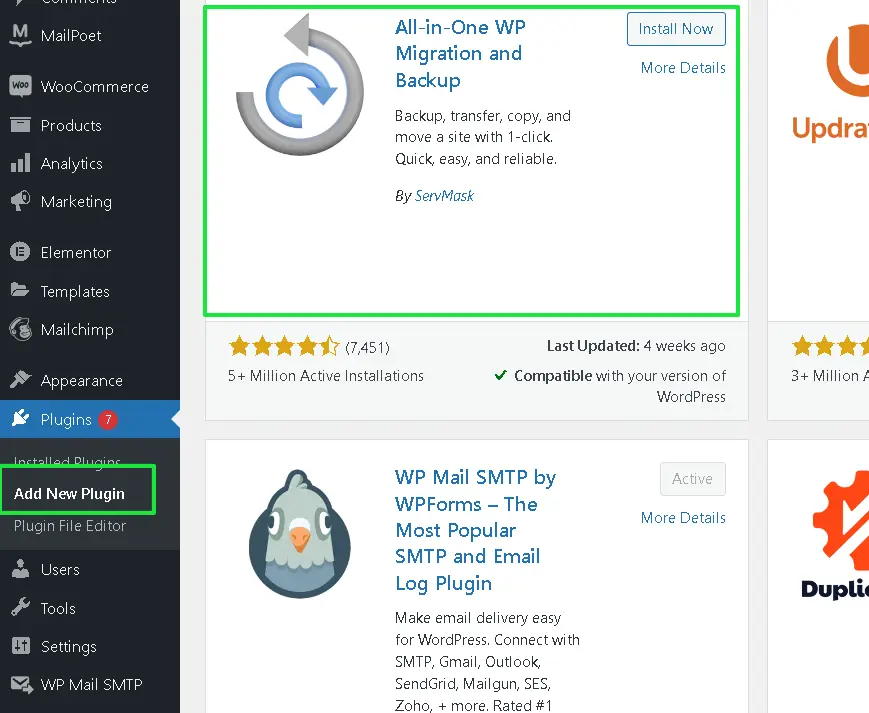
- Install the Plugin: On your local WordPress site, navigate to
Plugins>Add New, search for All-in-One WP Migration, and install it. - Export Your Site: Go to the plugin’s menu and select Export. Choose the export settings and generate the export file.
- Import to Live Server: On your live WordPress installation, install the same plugin. Use the Import feature to upload the export file from your local site.
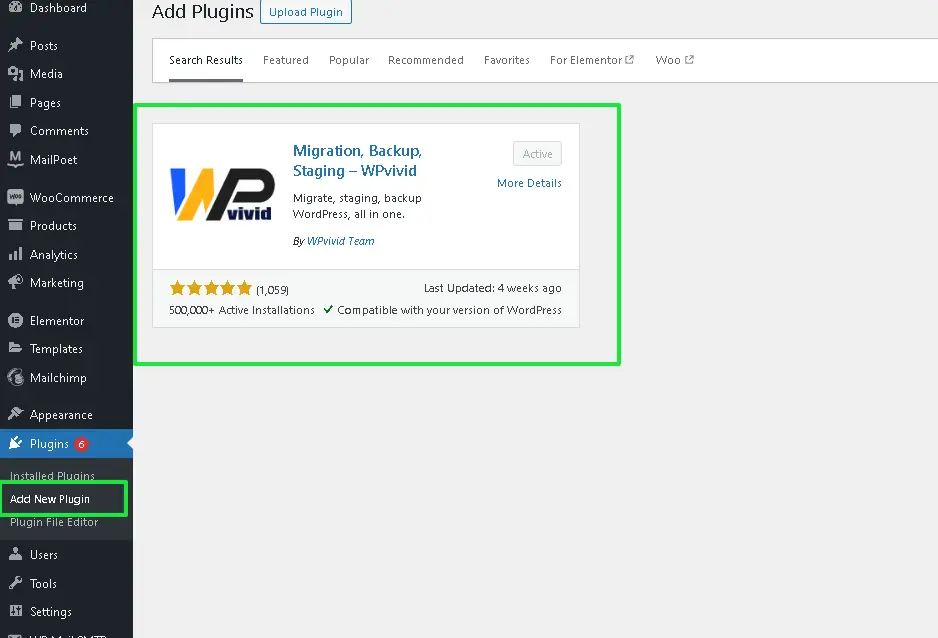
2. Migration Backup Plugin by WPvivid Team
- Staging: Create a staging site to test changes before going live using the Push to Live feature.
- Install WPvivid: Search for Migration Backup Plugin by WPvivid Team and install it on both your local and live WordPress sites.
- Backup & Export: Create a backup of your local site, then use the export feature to generate the backup file.
- Migrate: On the live site, import the backup file to migrate the site.

3. Finalizing the Migration
After migrating your site, ensure that everything functions correctly:
- Update Domain Settings: Adjust the site URL and home URL in the WordPress settings to match your live domain.
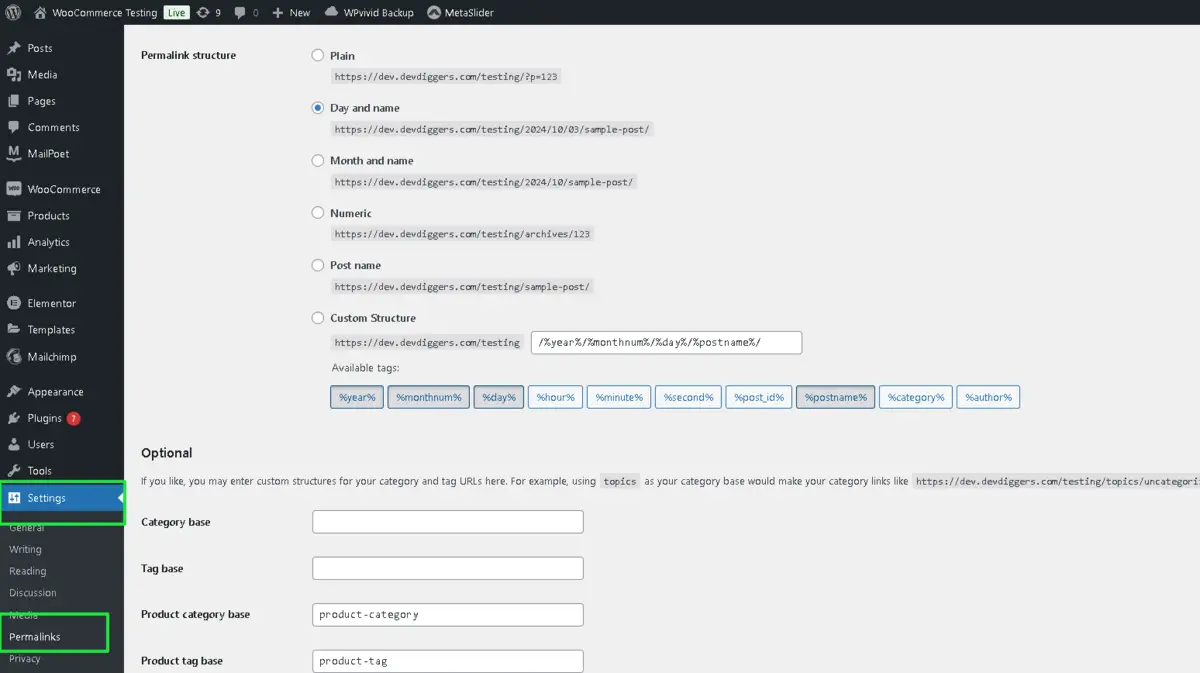
- Permalinks: Navigate to Settings > Permalinks and resave the permalink structure to ensure all links work correctly.
- Test Functionality: Check all pages, posts, plugins, and themes to confirm that everything operates as expected on the live server.
- Enable SSL: If you used SSL locally, ensure that your live site also has a valid SSL certificate installed.
By following these steps, you can effectively migrate your site, making the most of your knowledge of how to set up WordPress using Local WP.
Troubleshooting Common Issues
Even with a reliable tool like Local WP, you may encounter issues while learning how to set up WordPress using Local WP. This section addresses some common problems and provides solutions to help you overcome them.
1. Site Not Loading

Symptoms:
- The local site fails to load in your browser.
- Error messages indicating server issues.
Solutions:
- Restart Local WP: Sometimes, restarting your Local WP app fixes loading issues and allows you to continue with WordPress setup without disruptions.
- Look out for Server Status: You must check if all the local server components (PHP, MySQL, and web server) are running. You can restart them from the Local WP dashboard.
- Clear Cache in Browsers: Clear your browser’s cache and cookies to remove any cached data that may be causing conflicts.
- Check Host File: Make sure that your system’s host file maps the local domain. Local WP usually does this automatically, but sometimes, it’s useful to check it as part of setting up WordPress using Local WP.
2. SSL Certificate Problems
Symptoms:
- HTTPS is not working on your local site.
- Browser warnings about insecure connections.
Solutions:
- Reinstall the SSL Certificate: Use the One-Click SSL of the Local WP. This automatically regenerates and reinstalls the SSL certificate.
- Trust the Certificate: On the Mac, you may need to add the self-signed certificate to your computer’s trusted certificates.
- Configuration check: Make sure your website’s site settings on Local WP are configured to use HTTPS.
3. PHP Errors
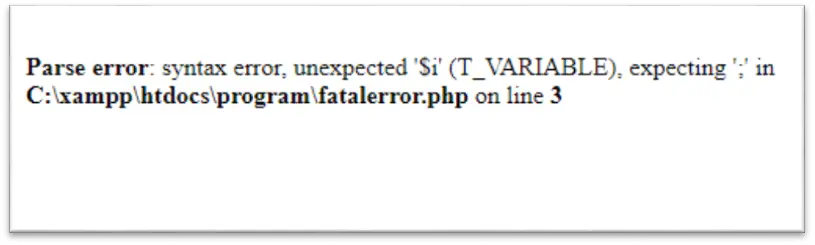
Symptoms:
- White screen of death (WSOD) or specific PHP error messages.
- Plugins or themes causing conflicts.
Solutions:
1. Enable Debugging: Edit the wp-config.php file to enable WordPress debugging. Add the following lines:
define( 'WP_DEBUG', true );
define( 'WP_DEBUG_LOG', true );
define( 'WP_DEBUG_DISPLAY', false );
Check the debug.log file in the wp-content directory for error details.
2. Check PHP Version: Ensure that the PHP version selected in Local WP is compatible with your WordPress version and the themes/plugins you’re using. Switch to a different PHP version if necessary.
3. Disable Conflicting Plugins/Themes: Temporarily disable all plugins and switch to a default theme to identify if a specific plugin or theme is causing the issue.
4. Database Connection Issues
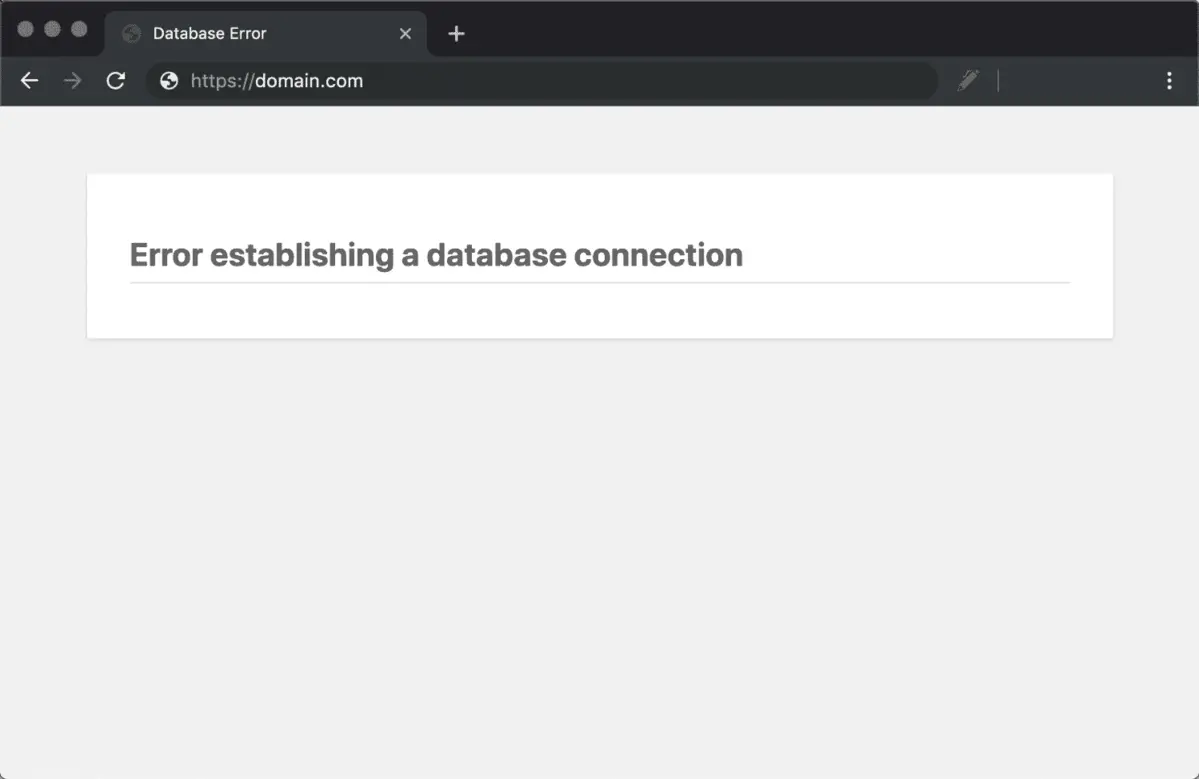
Symptoms:
- Error messages indicating problems connecting to the database.
- Inability to access the WordPress admin dashboard.
Solutions:
- Verify Database Credentials: Ensure that the database name, username, and password in the
wp-config.phpfile match those configured in Local WP. - Restart Database Server: Restart the MySQL server from the Local WP dashboard.
- Repair Database: Use Local WP’s database management tools like Adminer or TablePlus to repair any corrupted tables.
By addressing these common issues, you can maintain a smooth experience while learning how to set up WordPress using Local WP and ensure your development environment remains stable and functional.
Final Thoughts
Mastering how to set up WordPress using Local WP is a fundamental skill for anyone involved in WordPress development, whether you’re a beginner building your first blog or a seasoned developer managing multiple client projects.
Local WP simplifies the process of creating a local development environment, offering a range of features that enhance efficiency, security, and flexibility.
We’ve covered everything from downloading and installing Local WP to Live Links and even migration into live servers within this guide. The following are the steps to develop your WordPress sites locally with confidence, test changes safely, and deploy work seamlessly to live environments.
Accept the power of Local WP to boost your WordPress development workflow. Learn how to set up WordPress using Local WP; this is the most important knowledge you may have about making WordPress sites effective and professional, as well as creating and managing them.
FAQs
Is Local WP Free to Use?
Yes, Local WP offers a free version that provides all the essential features needed for local WordPress development.
Can I Use Local WP for Client Projects?
Absolutely! Local WP is an excellent tool for developing client projects locally. It allows you to build and test sites without affecting the live environment, ensuring that you can deliver high-quality work. Additionally, features like Live Links make it easy to share progress with clients for feedback.
Does Local WP Support Multiple WordPress Sites?
Yes, you can manage multiple WordPress sites simultaneously within Local WP. Each site operates independently, allowing you to work on different projects without conflicts.
Can I Share My Local WP Setup with Team Members?
Yes, you can share your Local WP setup by exporting the site and sharing the necessary files with team members.
Can I Customize the Server Environment in Local WP?
Yes, Local WP allows you to customize the server environment by choosing specific versions of PHP, MySQL, and web servers (NGINX or Apache).

Abhijit Sarkar
Hi, I’m Abhijit Sarkar. I am deeply passionate about creating engaging content and exploring. My journey includes gaining valuable experience in content writing and creating useful resources for my readers.
Leave a Reply