
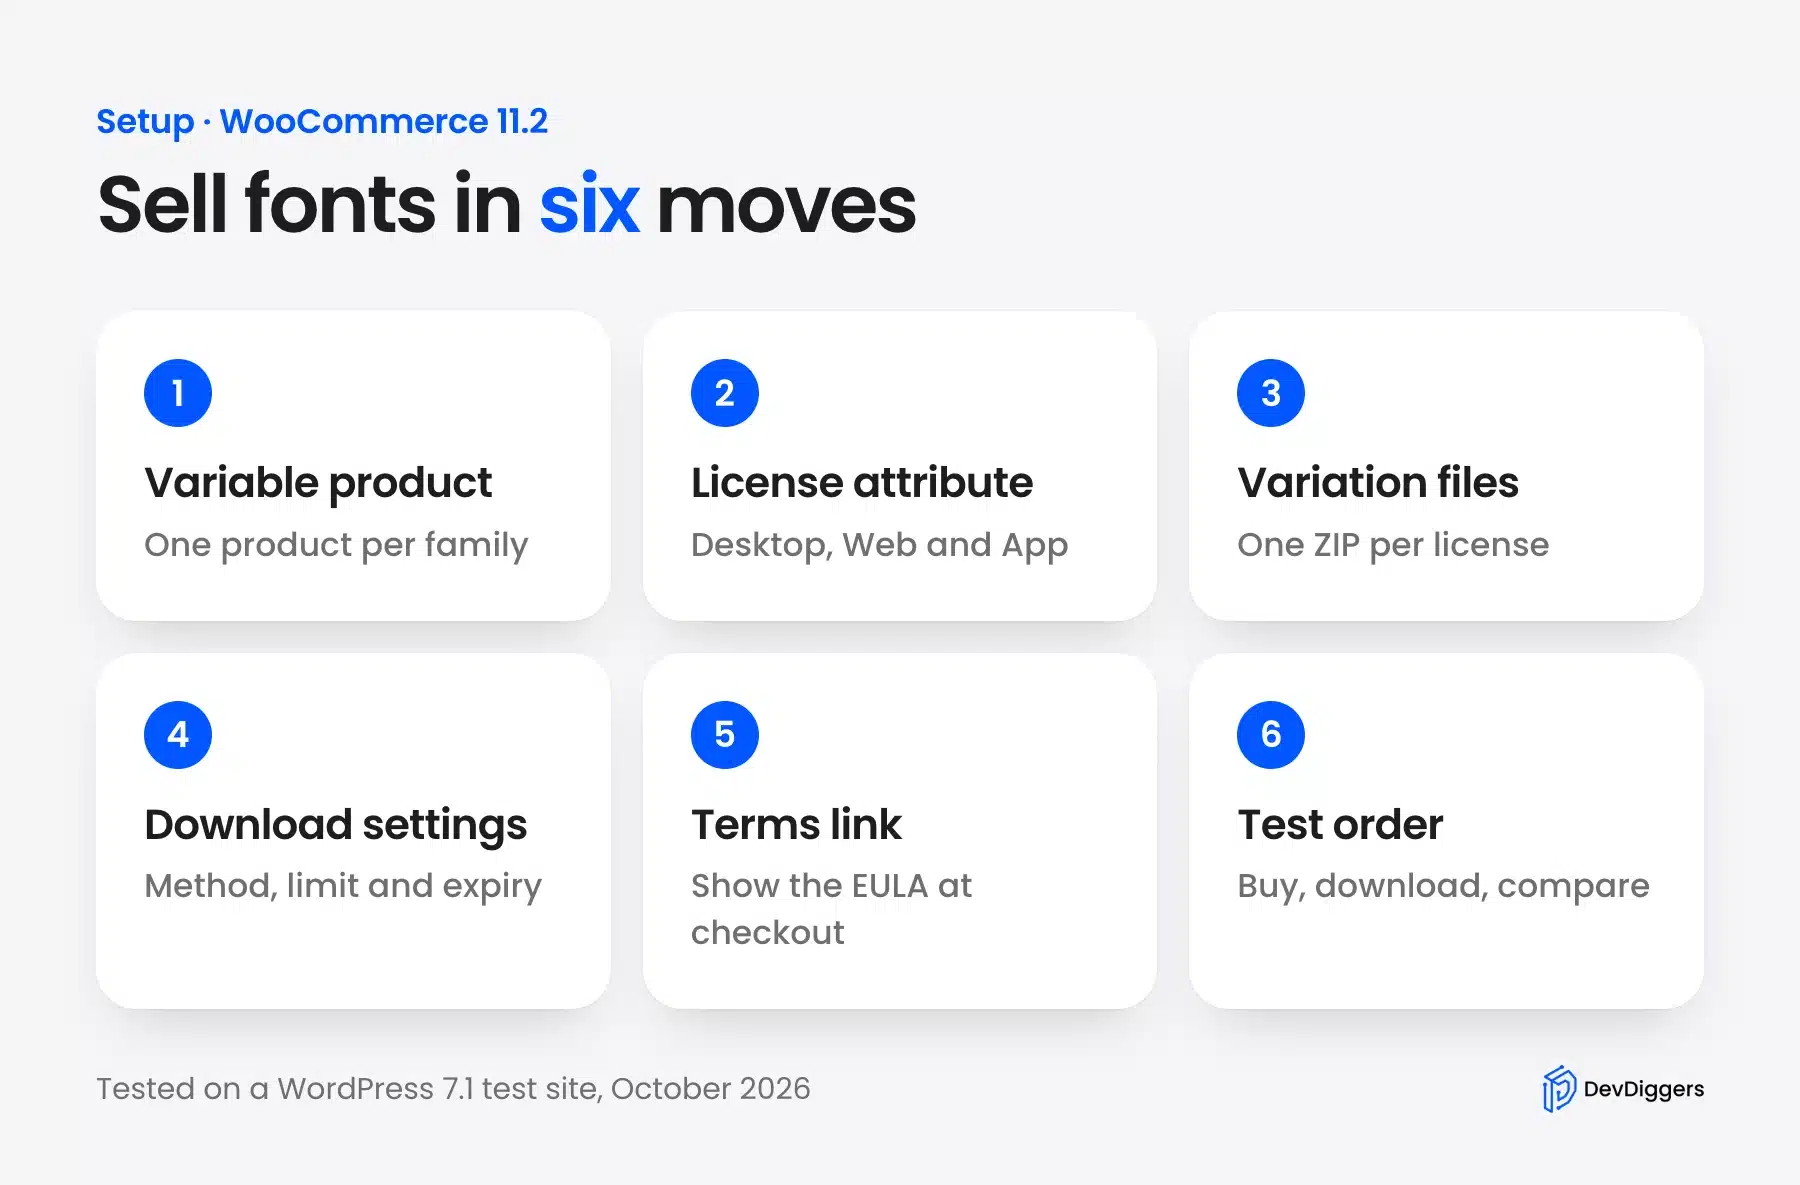
How to sell fonts online with WordPress is a short job: one WooCommerce product per font family and one downloadable variation per license. The shop handles payment, delivery and a download link that expires.
We built this on a WordPress 7.1 test site with WooCommerce 11.2 in October 2026. It has a three-license font product, a test order and a real download we checked against the original file. We also read the licensing pages from Monotype and Fontfabric and WooCommerce’s download documentation.
You get the license types buyers expect, eight tested setup steps, the file formats to ship and the limits of download protection. The setup also lets you sell digital downloads on WordPress beyond fonts, because the same product type sells music, templates and PDFs.
Font Licensing for Commercial Use: Desktop, Web and App
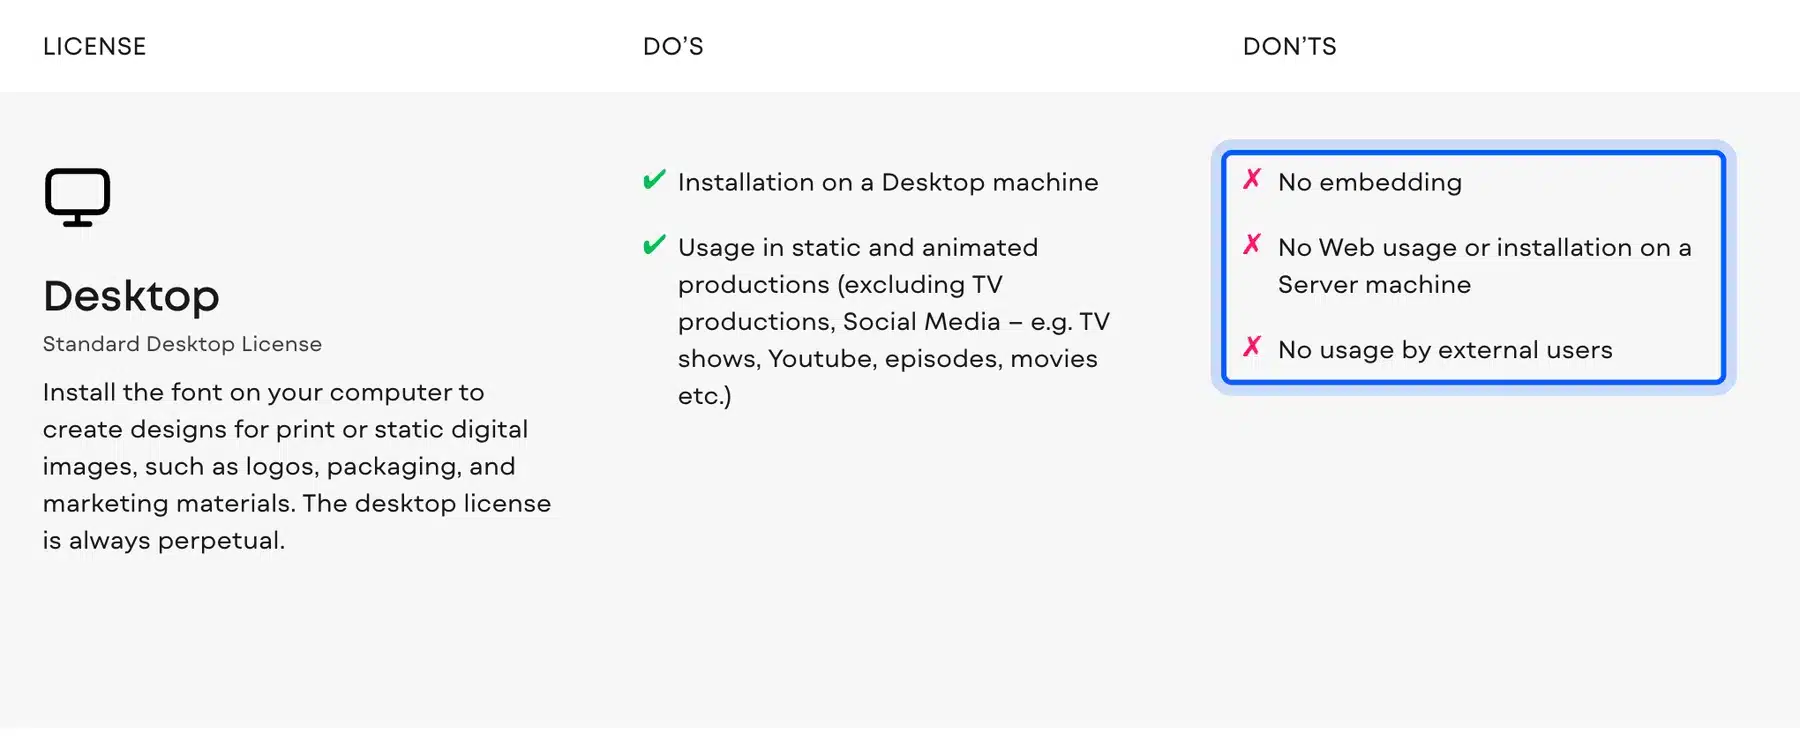
Font license types differ by where the buyer will use the font. A desktop license covers installing it on computers for design work. A web license covers embedding it on a site, and an app license covers shipping it inside software.
Monotype’s licensing hub defines the main types. Desktop lets you install a font on your own computer for print or static-image work. Web lets you embed the font in a site’s code, and app lets you embed it in phone or tablet apps and software products.
The same page notes that each font file is a separate piece of software that needs a proper license. That matters for your own store, because the license is the product you sell, and the file is only how it is delivered.
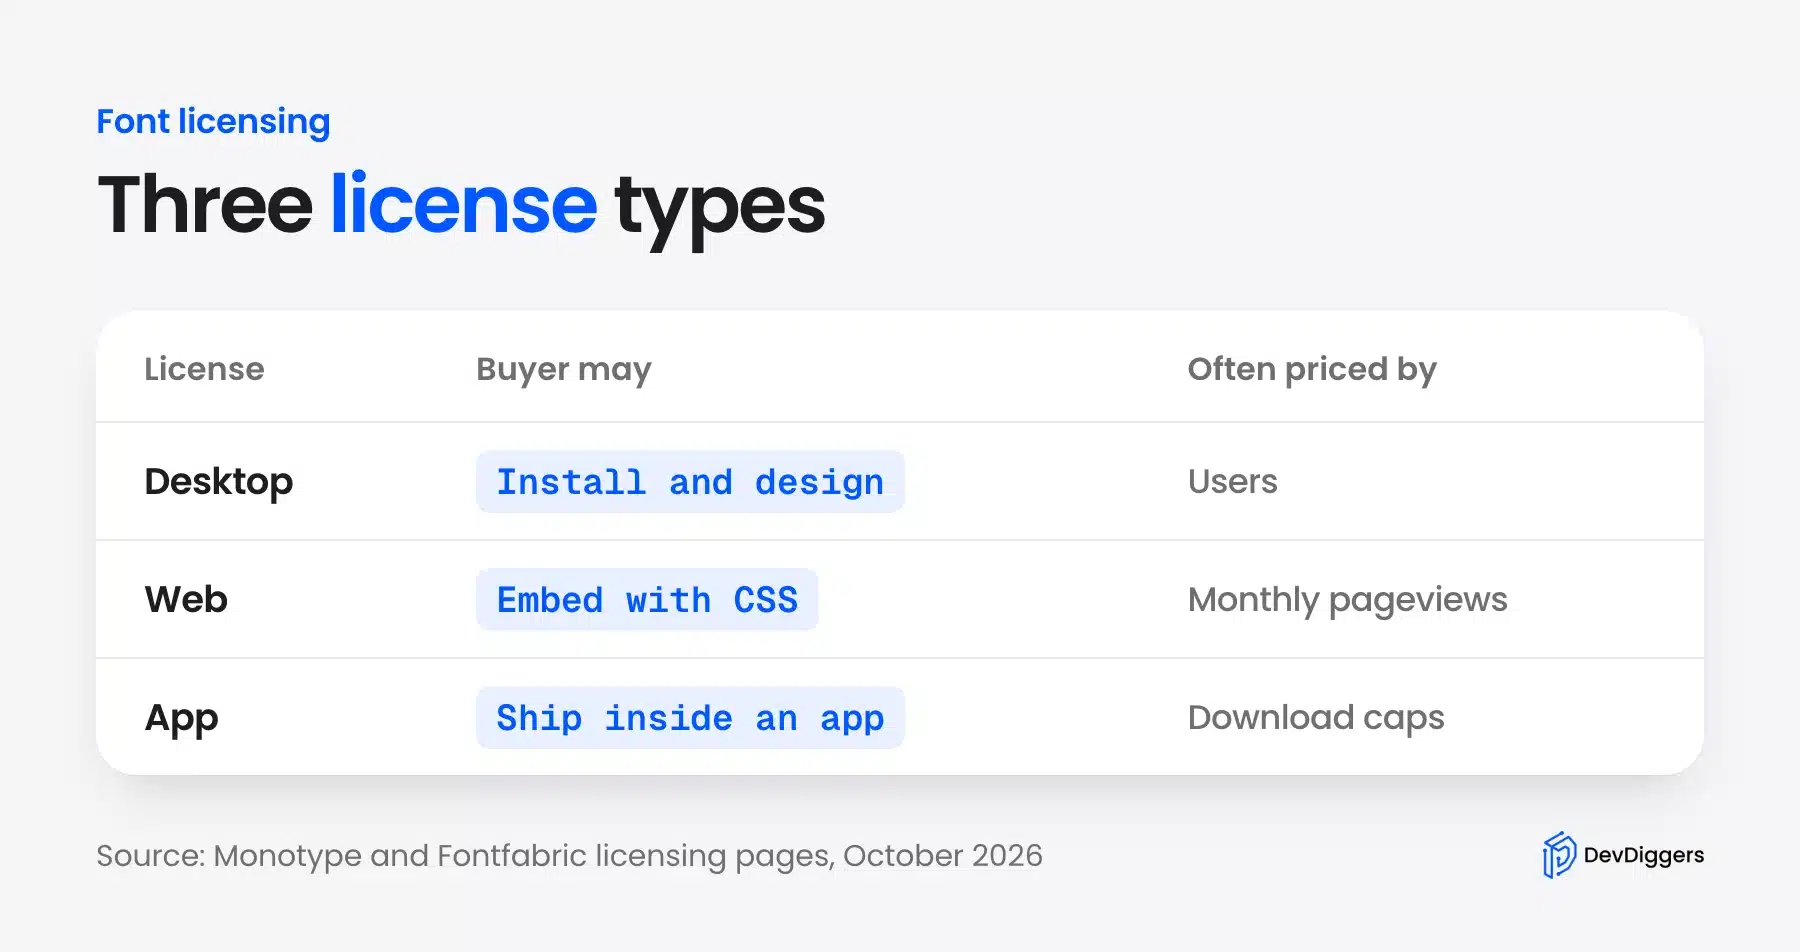
Pricing bases vary by foundry. Fontfabric’s licensing page bases desktop tiers on the number of users and web tiers on monthly pageviews. Its app tiers use download caps.
The same page states that a desktop license is always perpetual. It also rules out embedding, web use and server installation.
Note: This post shows the store setup and is not legal advice. Have a lawyer review your license text, because a sentence in a license can decide a dispute over a logo or an app.
What You Need Before You Sell Fonts Online
You need a font you have the right to sell, a WordPress site with WooCommerce, and a license text for each tier. The font can be one you designed or one whose license lets you resell it. Everything else is setup.
A WordPress host that meets WordPress’s requirements is enough to start. The WordPress requirements page recommends PHP 8.3 or newer and MariaDB 10.11 or newer. Our guide to creating a WordPress site from scratch covers the install.
Prepare these files per font family before you open the dashboard:
- Desktop ZIP: TTF or OTF files plus the desktop license text.
- Web ZIP: WOFF2 files plus the web license text.
- App ZIP: The files an app needs plus the app license text.
- Specimen image: A picture showing the alphabet, numbers and a sample line.
Name the files so you can tell them apart later. In our test the ZIPs were SampleDisplay-Desktop.zip, SampleDisplay-Web.zip and SampleDisplay-App.zip, and each variation pointed at its own file.
This is the same product pattern as our guide to selling music online with WooCommerce. Fonts add the license choice and the file formats.
How to Sell Fonts Online with WooCommerce Step by Step
How to sell fonts online with WooCommerce starts with a variable product for the font family. You add a License attribute and make each license a downloadable variation with its own ZIP file. Then you set the download method, show your terms at checkout and test one purchase yourself.
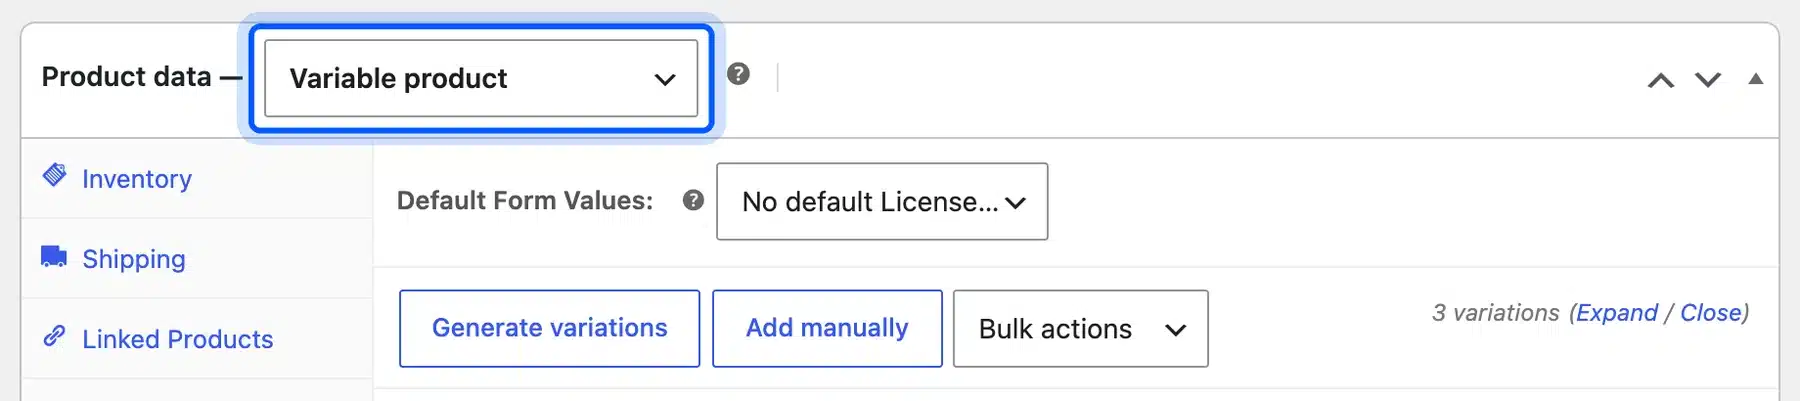
Step 1: Create a Variable Product for the Font Family
Go to Products > Add new product and name it after the font family. In the Product data box, change the dropdown from Simple product to Variable product. One product per family keeps the shop tidy, and each license becomes a variation of it.
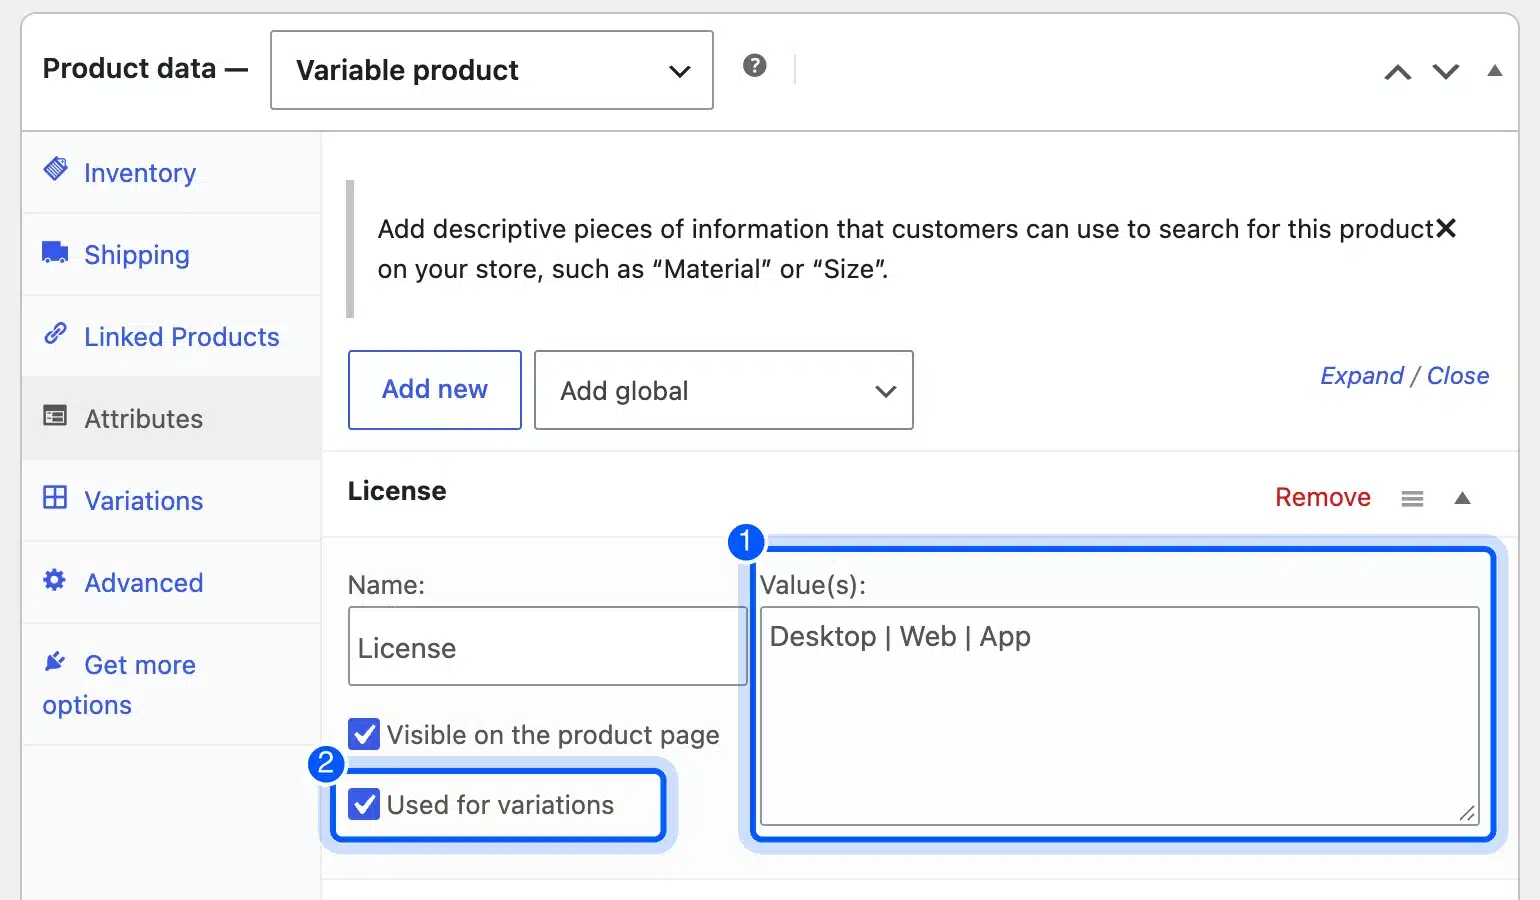
Step 2: Add a License Attribute
Open the Attributes tab and add an attribute named License with the values Desktop, Web and App. Tick Used for variations before you save. Without that tick, WooCommerce cannot turn the values into purchasable options.
Our test product also carries a Formats attribute, set to TTF and WOFF2, with Used for variations off. It shows on the product page as plain information.
Step 3: Make Each License a Downloadable Variation
Open the Variations tab and click Generate variations. Then confirm the prompt. On our test product WooCommerce created three variations that match each License value. You can also use Add manually to create them one at a time.
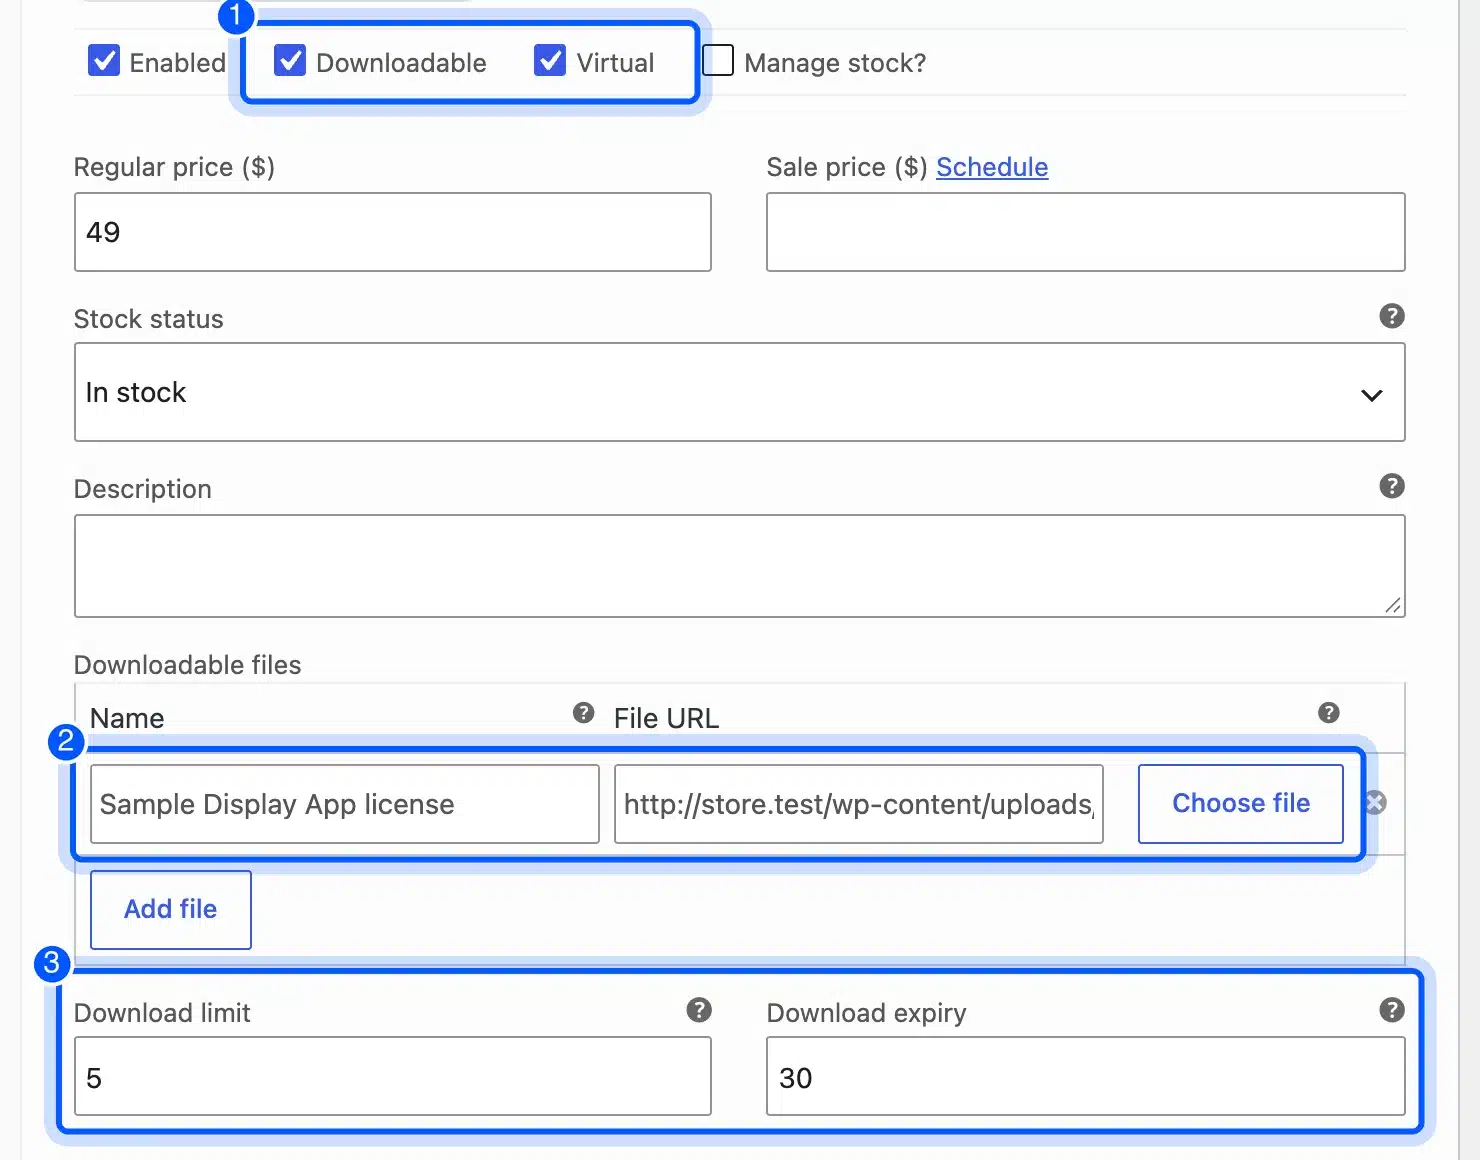
Expand each variation and tick Downloadable and Virtual. Virtual removes shipping, and WooCommerce’s documentation says an order for a product that is both virtual and downloadable completes on its own.
Enter the price, the file name and the ZIP file for that license. If you tick only Downloadable, the same page says you must mark each order Complete by hand.
WooCommerce downloadable products also take a download limit and an expiry in days. In our test we set 5 downloads and 30 days on every license. Those numbers are our example. Pick your own.
Step 4: Upload the Font Files as ZIP Archives
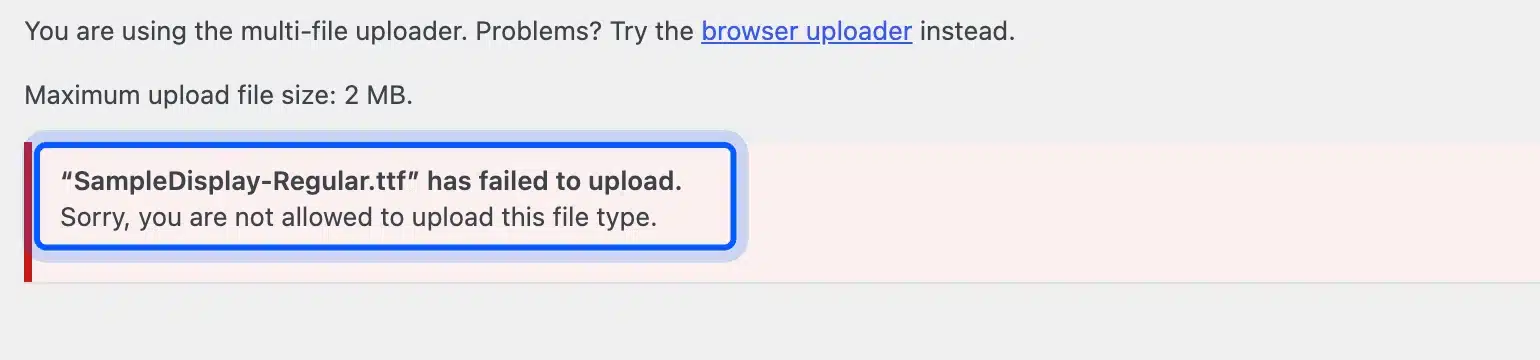
Put every license in a ZIP file, because the WordPress Media Library refuses font files. When we uploaded a TTF to Media, WordPress answered that we were not allowed to upload that file type. WordPress does accept ZIP files.
Add the ZIP from the variation’s Choose file button on the Edit product page and not from the Media Library. WooCommerce’s documentation says files added there land in the protected woocommerce_uploads folder. The ZIP in our test held the TTF and a short license text.
We also tried pointing a variation at a file URL that sat outside an approved download directory. WooCommerce refused to save it and said the file was not in an approved directory. Use the Choose file button and you avoid that.
Step 5: Set the File Download Method
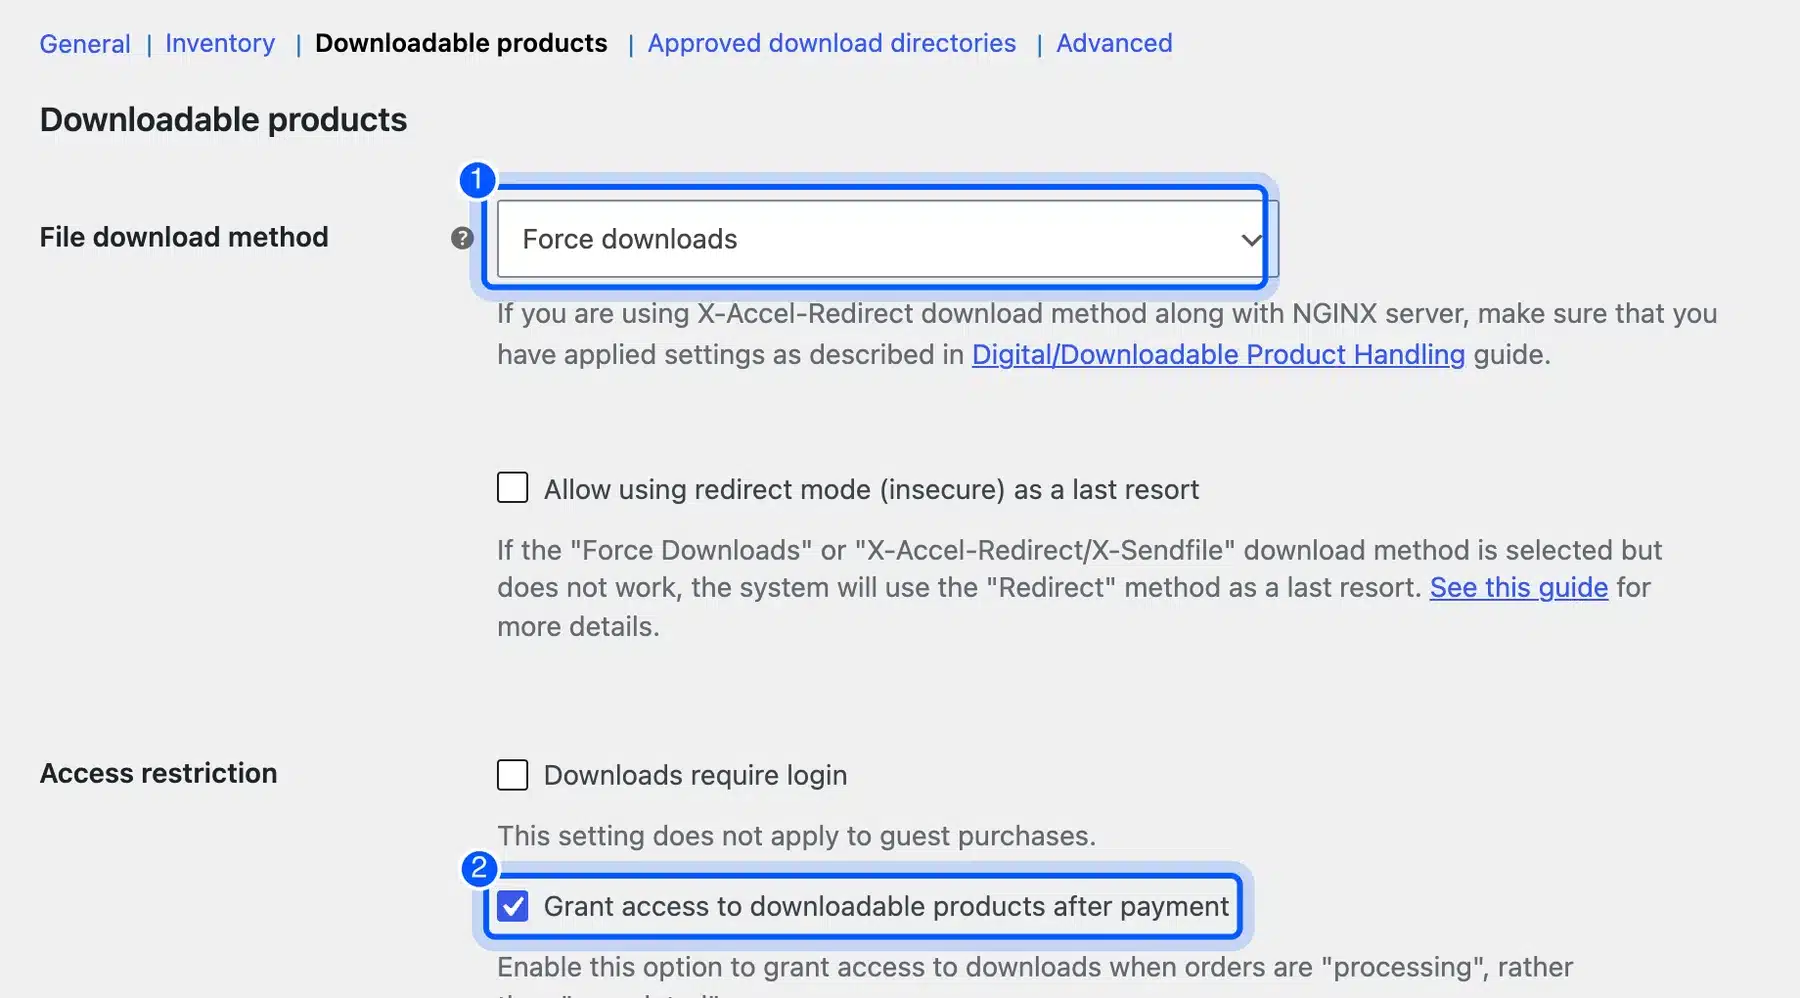
Go to WooCommerce > Settings > Products > Downloadable products. Keep File download method on Force downloads. That way PHP delivers the file and the real file location stays hidden. The same screen has Access restriction options such as Downloads require login.
The documentation lists three methods. Force downloads, X-Accel-Redirect or X-Sendfile, and Redirect only, where the last one is labeled insecure. We cover what we saw with Redirect only in the protection section below.
Step 6: Add a Specimen and a Type Tester
Buyers want to see the font before they pay. Add the specimen image as the product image and add a type tester to the description so visitors can type their own words.
Create a preview file that holds only the characters the tester needs. In our test, the full WOFF2 was 8,008 bytes and a preview with letters, digits and basic punctuation was 3,360 bytes. The preview file is public. A small subset gives away less than the full font.
Use the tester code below in the product description. MDN says WOFF2 compresses more efficiently than other web font formats, which is why the preview uses it.
<style>
@font-face {
  font-family: "Sample Display Preview";
  src: url("/wp-content/uploads/2026/10/SampleDisplay-Preview.woff2") format("woff2");
  font-display: swap;
}
.dd-tester { font-family: "Sample Display Preview", sans-serif; font-size: 44px; }
</style>
<div class="dd-tester" contenteditable="true">Type here to test the font</div>
We tested this as an administrator. Our product page shows the License dropdown and the price for each choice, as in the screenshot below.
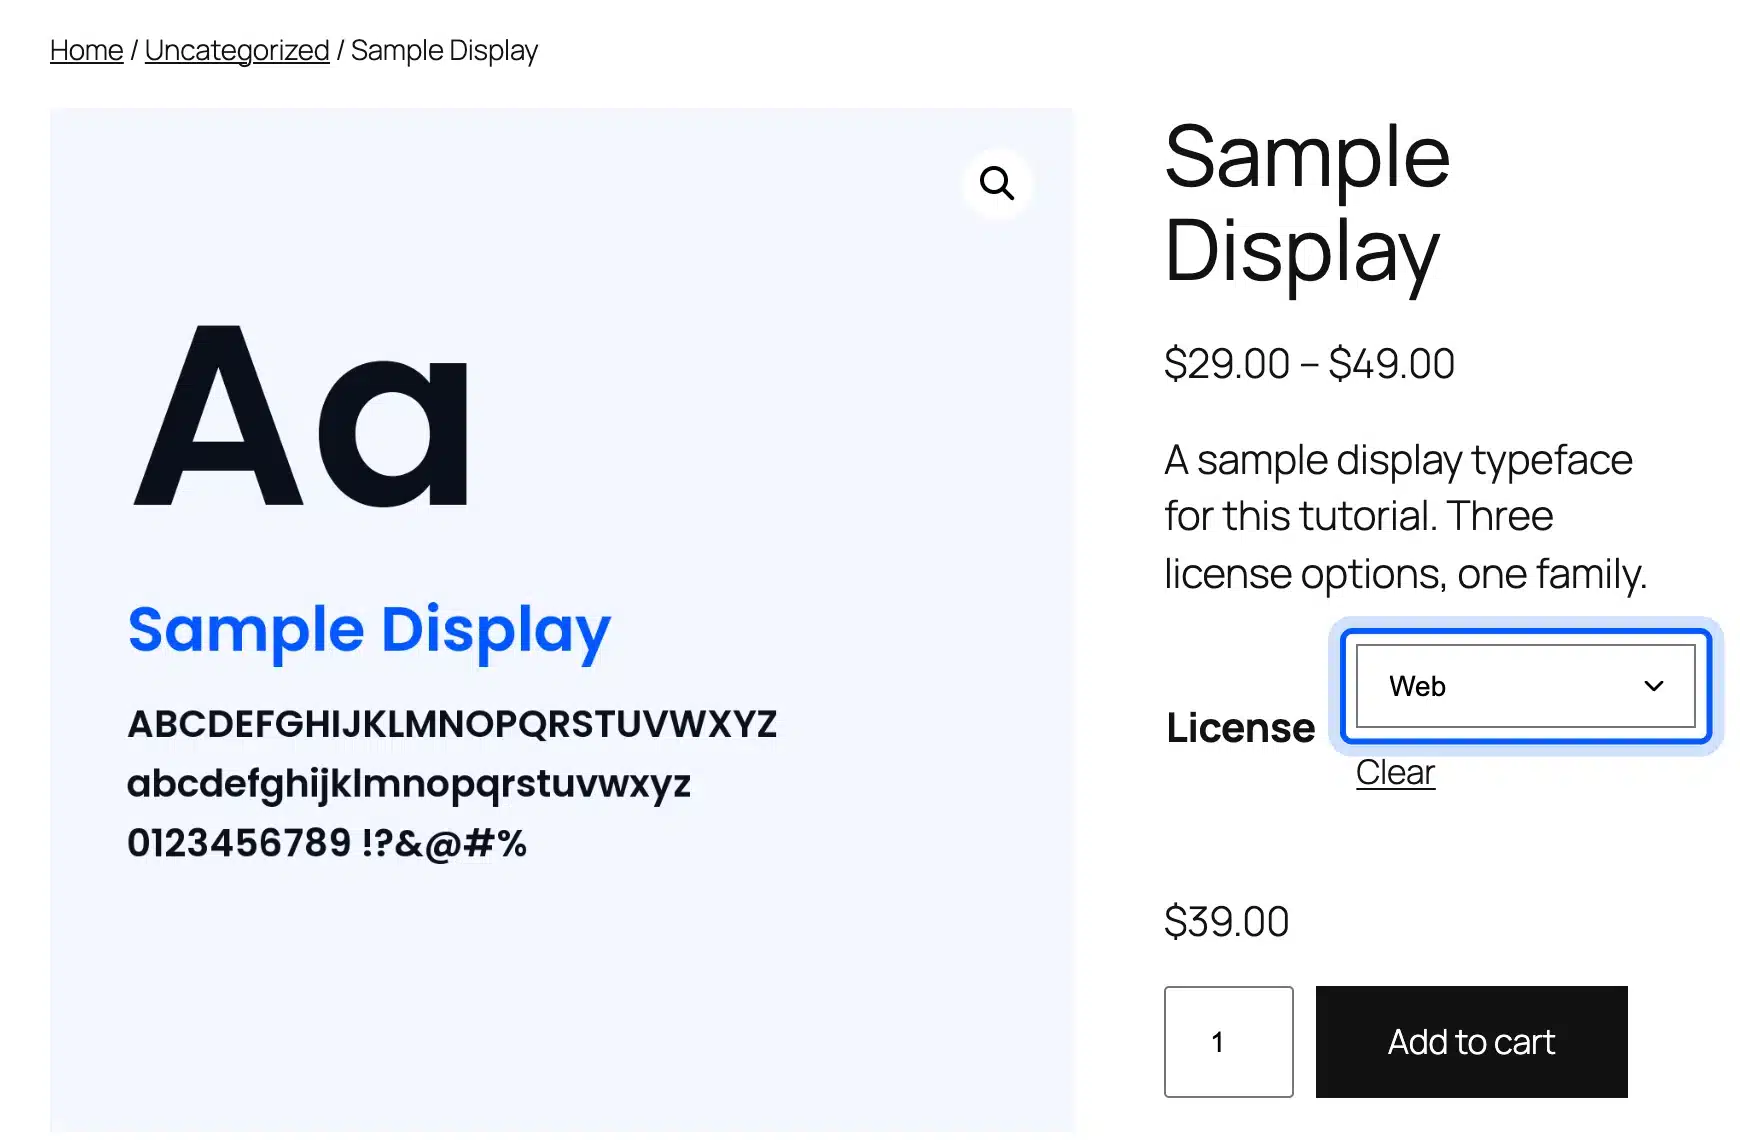
Typing in the box shows the font on the page.

Step 7: Show Your License Terms at Checkout
Create a page with your license agreement and select it under WooCommerce > Settings > Advanced > Page setup in the Terms and conditions field. On our test store the checkout then showed a Terms and Conditions link that points to that page.
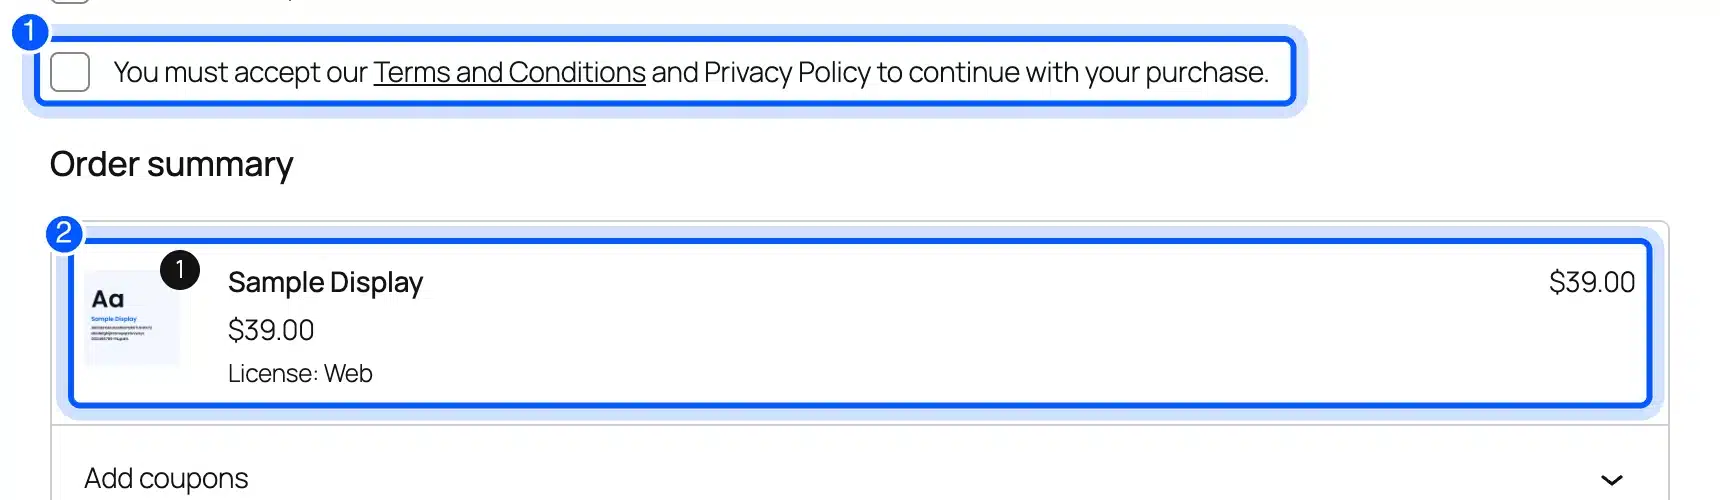
The Checkout block’s terms block also has a Require checkbox toggle under Display options. With it on, our test checkout showed an empty tick box. The sentence beside it read “You must accept our Terms and Conditions and Privacy Policy.”
The order summary listed the license as License: Web. The buyer sees which tier they are paying for. When we tried to place an order with the box empty, checkout stopped with the message “Please read and accept the terms and conditions.” No order was created.
Step 8: Test a Purchase and the Download
Place a test order for each license before you launch. We bought the Desktop license on our test store and then opened the download link and compared the file with the original ZIP. The two matched byte for byte.
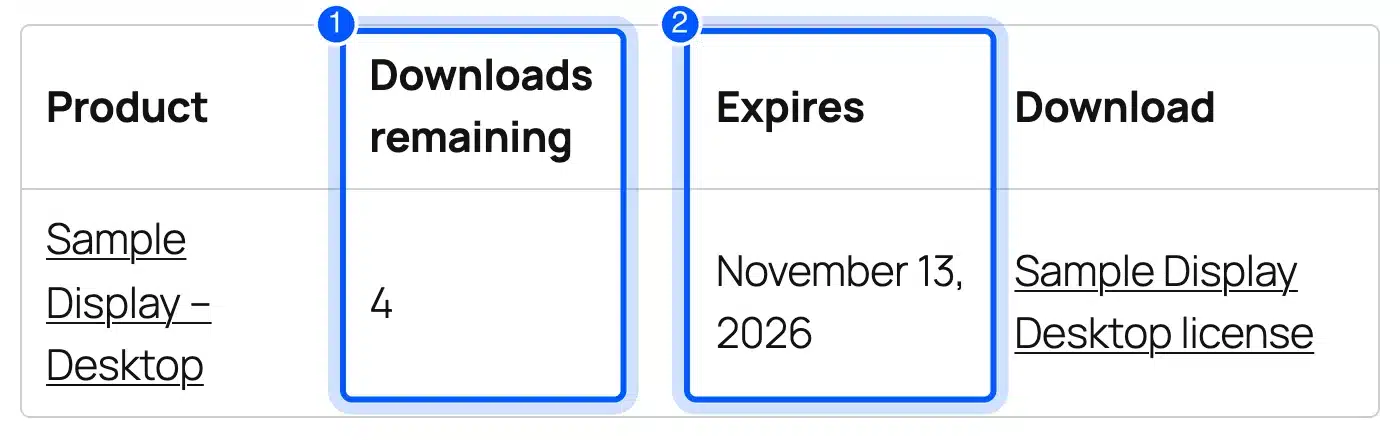
The buyer’s My account page lists the download with the downloads remaining and the expiry date. After one download, our 5-download limit showed 4 remaining.
What to Put on a Font Product Page
A font product page has one job: show the buyer what they get and which license fits. Put the specimen first. Then add the formats, the license summary and the price for each tier. A buyer who cannot tell the tiers apart will not check out.
Use this checklist for each family:
- Specimen image: Show the alphabet, numbers and one real sample line.
- Type tester: Let visitors type their own words as shown in step 6.
- Formats: List TTF, OTF or WOFF2 per license so buyers know what the ZIP holds.
- Weights and styles: Name each style in the family, such as Regular or Bold.
- License summary: Give one plain sentence per tier before the full terms link.
In our test the Formats attribute showed on the product page as information, while the License attribute drove the dropdown and the price. That split keeps the page readable.
Add alt text that describes the specimen image, such as the font name and a sample line. Our guide to changing fonts in WordPress helps buyers who need to apply the font once they own it.
What File Formats Should You Put in Each License ZIP?
Ship TTF or OTF files in the desktop ZIP and WOFF2 files in the web ZIP. Desktop apps install TTF and OTF, and websites load WOFF2 through the CSS @font-face rule. Keeping them in separate ZIPs matches the license each buyer paid for.
MDN calls WOFF2 the best format for web delivery because it compresses fonts more efficiently than WOFF or OpenType. It also notes that browsers try font sources in the order you list them. Put the most specific source first.
If a customer wants one family for a desktop team and a website, they buy two variations. That is why the formats stay in separate ZIPs: each purchase carries only the files its license covers.
Add the license text to every ZIP. In our test each ZIP held one font file and one short text file.
The text file named the license, the allowed use and what was not allowed. A buyer who loses the order email still has the terms inside the download.
How to Protect Font Files From Sharing
You can stop strangers from guessing your file URLs, but you cannot stop a paying buyer from sharing the file. WooCommerce keeps files in a protected folder, hands them out through a signed link and caps the number of downloads. The license does the rest.
We tested the protection on our test site. A direct request for the ZIP file returned 403, and the download link with a changed key returned 404. The valid link delivered the file and used one of the five downloads.
The Redirect only method behaved differently. WooCommerce’s documentation labels it insecure because anyone with the URL can reach the file. On our test site it ended in 403 for the buyer, because the protected folder refuses direct requests.
Each of those failed redirect requests also counted as a download. Our remaining count dropped from 4 to 2 after two attempts that delivered nothing. Keep Force downloads on, and test the real download before launch.
Worth knowing: A 5-download limit and a 30-day expiry are a policy. They are not a lock. They limit casual link sharing. A buyer can still pass the file to a friend. Your license text must forbid it.
If you need per-seat checks, activation keys or a custom acceptance step, that is custom work. Our WooCommerce development services team builds that kind of store logic.
Where to Sell Fonts: Your Own Store or a Marketplace
Sell on your own store when you want to keep the customer list, the license terms and the pricing. A marketplace brings traffic, but the buyer belongs to the marketplace. You can do both, as long as each marketplace’s terms allow it.
An own store takes work to promote, because nobody lands on it by default. Pair it with a good specimen page and clear license tiers.
On your own store you also choose how a license reads. You can write the desktop, web and app terms in plain language and show them next to the price. A marketplace page seldom lets you do that.
Selling in both places also widens your reach. The marketplace finds new buyers, and your own store keeps the ones who come back.
Check each marketplace’s terms before you list the same font in two places. Look for exclusivity wording first, because a clash between two licenses is hard to fix after a sale.
Pricing Your License Tiers
Price each tier by what the buyer can do with it, and keep the gaps simple. Fontfabric scales desktop prices with users, web prices with pageviews and app prices with download caps. You can copy that logic at a smaller scale with variations.
Say you set Desktop at $29, Web at $39 and App at $49 for one family. If ten buyers take each license, the family earns 10 × ($29 + $39 + $49) = $1,170 before payment fees. That is an example and not a forecast.
Payment processors charge a fee per sale. Check your processor’s current rate before you finalize the numbers.
Start with the three tiers shown here and add a bundle or a sale price later. Each change is one more variation or one more field on a variation. Too many tiers at launch make the license choice harder for the buyer.
Conclusion
Knowing how to sell fonts online comes down to treating the license as the product. Make one variable product per family, one downloadable variation per license and one ZIP per variation. Then let WooCommerce deliver the file.
Test the whole path as a buyer before you launch, from the checkout terms link to the download count. If you want a simpler path to more digital products later, our guide to adding a downloadable PDF to WordPress uses the same product type.
Frequently Asked Questions (FAQs)
Q1. Can I sell fonts on WordPress without coding?
Yes. WooCommerce handles products, payment and downloads from its dashboard. Code only comes in if you add a type tester, as in step 6, and that part is optional.
Q2. Do I need a license to sell fonts online?
You need the right to sell the font. That means you made it or your license allows resale. Monotype says each font file is a separate piece of software that needs a proper license.
You also need your own license text for buyers. Ask a lawyer to review it.
Q3. What file formats should I sell?
Sell TTF or OTF for desktop use and WOFF2 for websites. MDN says WOFF2 is the best choice for web delivery because it compresses more efficiently. Put each format in the ZIP that matches its license.
Q4. How do I protect my fonts from unauthorized use?
Keep the files in WooCommerce’s protected folder and use the Force downloads method. Add a download limit and an expiry. These steps stop public links, and your license text covers sharing by a paying buyer.
Q5. Can I sell fonts on WordPress and a marketplace at the same time?
Often yes, but read each marketplace’s terms first and look for exclusivity wording. Selling the same font under two different licenses can also confuse buyers.
Q6. How much does it cost to start a font store?
The WooCommerce plugin is free to install. The main costs are hosting and a domain. As one example, Hostinger lists its Premium WordPress plan at $2.99 a month on a 48-month term and renews at $10.99 a month. Payment processors add a fee per sale.
Q7. How do I make fonts to sell?
You draw the glyphs in a font editor and export TTF or OTF files. Then you make a WOFF2 version for your web license. This post starts after that step and covers the store.