If you want to change a logo in WordPress, you can do it in under 10 minutes. That’s true even if you have never touched the platform before. WordPress builds logo uploading right into the dashboard, so there is no coding and no guesswork involved.
This guide breaks the process into small, numbered steps. Each one is tested properly so you can do it directly from your own WordPress dashboard and follow along at your own pace.
You will learn how to update your logo through the Customizer, through the newer block-based Site Editor, and even on your login page. We will also cover logo sizes that hold up across most themes, plus what to do when your new logo refuses to show up.
Most tutorials only cover one theme type and leave you stuck if your dashboard looks different. This guide walks through both paths side by side, so it works no matter which version of WordPress you’re running.
Why Your WordPress Logo Matters
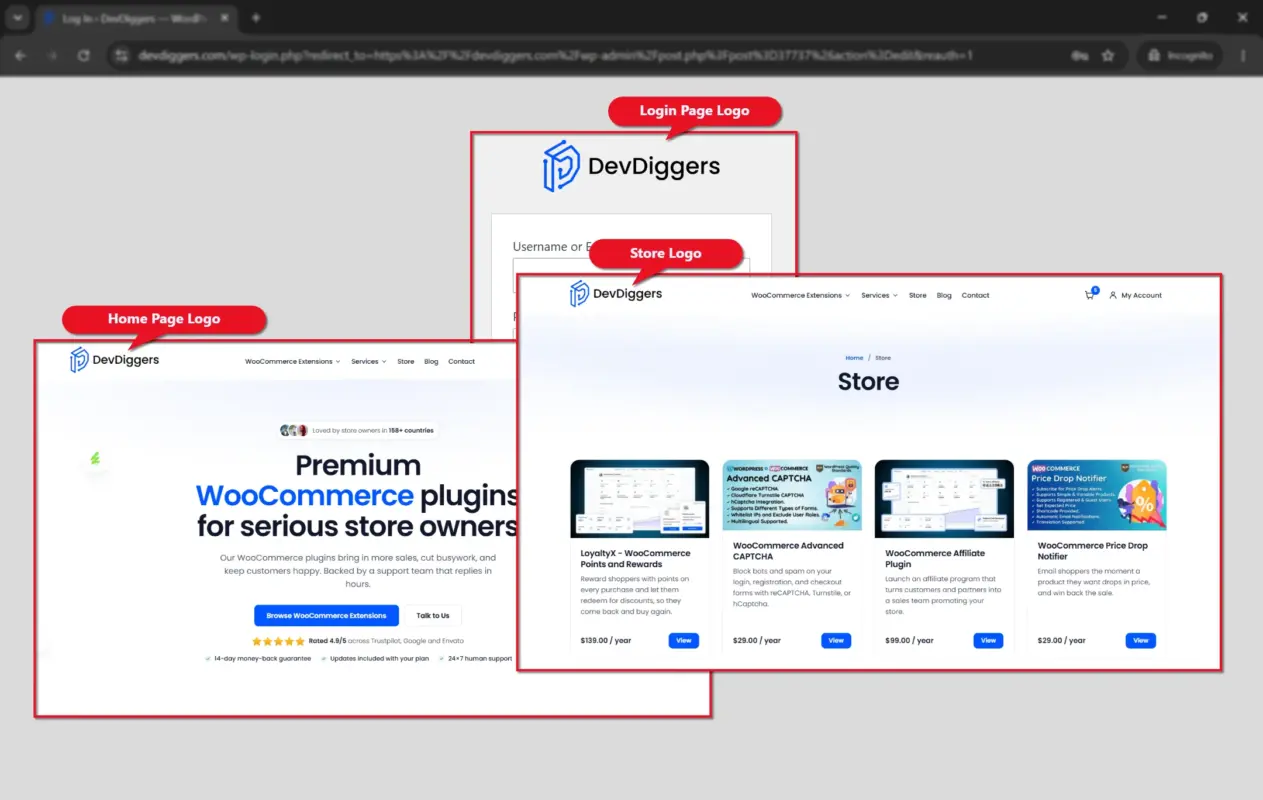
Your logo is the first thing most visitors notice. It sits at the top of every page, so it works harder than almost any other single image on your site.
A clear, well-placed logo builds trust instantly. Visitors connect a familiar mark with your business the same way they connect the golden arches with McDonald’s, only at a much smaller scale.
An outdated or mismatched logo does the opposite. It quietly tells visitors that the site has not been touched in a while. That’s exactly why so many WordPress owners search for how to change a logo in WordPress the moment they rebrand or refresh their design.
A fresh logo is also a signal to your existing audience. Returning visitors notice a rebrand fast, even a small one. Pair a new logo with matching colors on your eCommerce brand identity if you run a store, so the update feels intentional, not accidental.
How to Change a Logo in WordPress: Step-by-Step Guide
Follow these seven steps in order. Each one is small enough to screenshot on its own, so you can build a quick internal walkthrough for your team if you need one.
Step 1: Log In to Your WordPress Dashboard
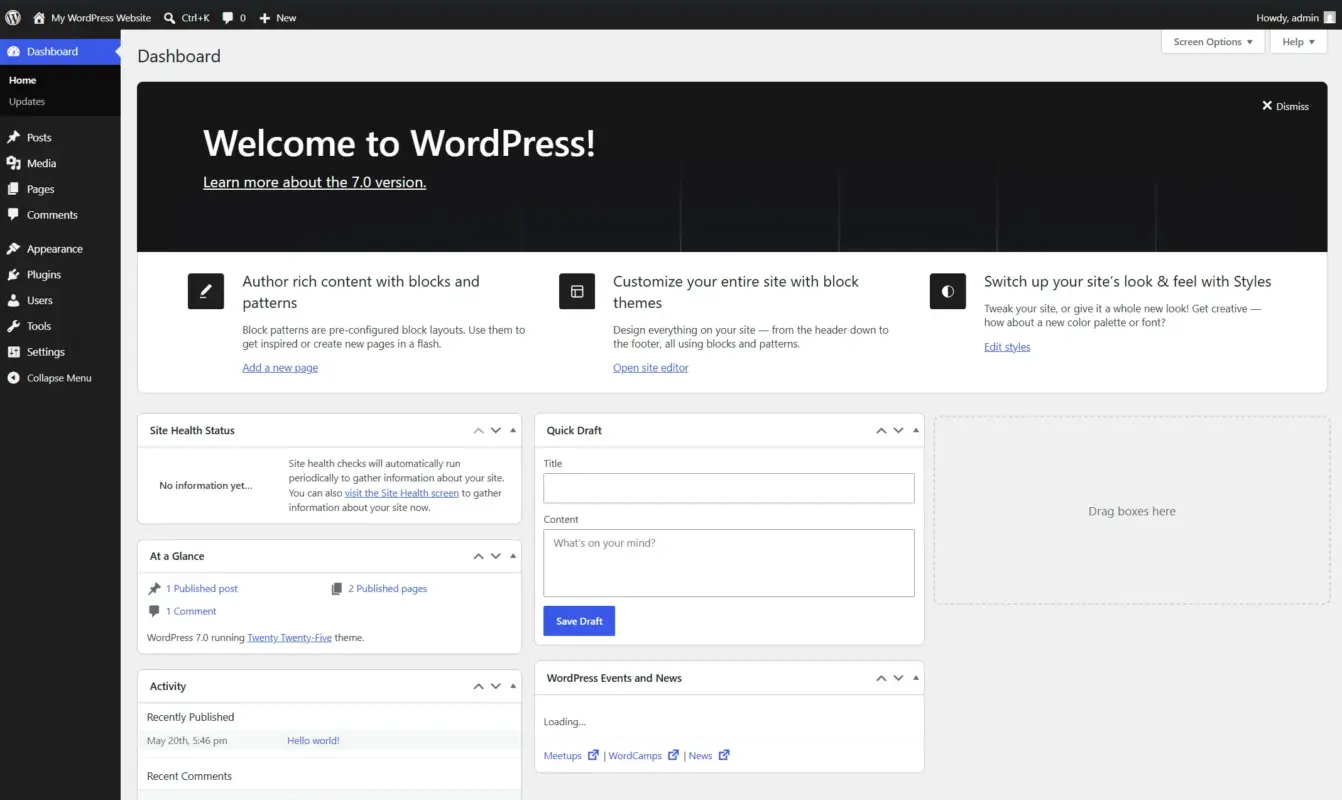
Open your browser and go to your login page. This is usually your domain followed by /wp-admin, such as yourwebsite.com/wp-admin.
Enter your username and password, then click Log In.
Once you’re inside, you’ll land on the main dashboard screen. That’s your home base for every step that follows.
Step 2: Find Your Logo Settings
This step splits depending on your theme. Check which menu option you see under Appearance in your left sidebar, then follow the matching path below.
Method A: Classic Themes (Customizer)
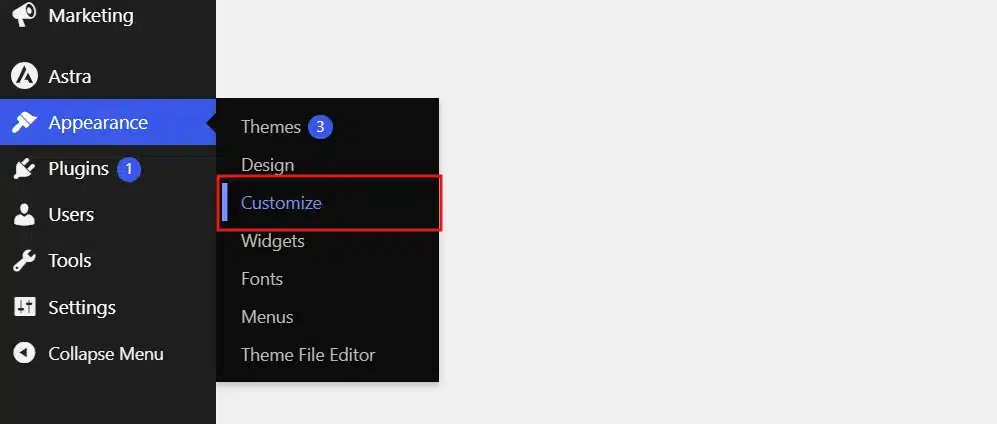
- From the dashboard sidebar, click Appearance → Customize.
- This opens the WordPress Customizer, a live preview tool that shows changes on the right side of your screen as you make them.
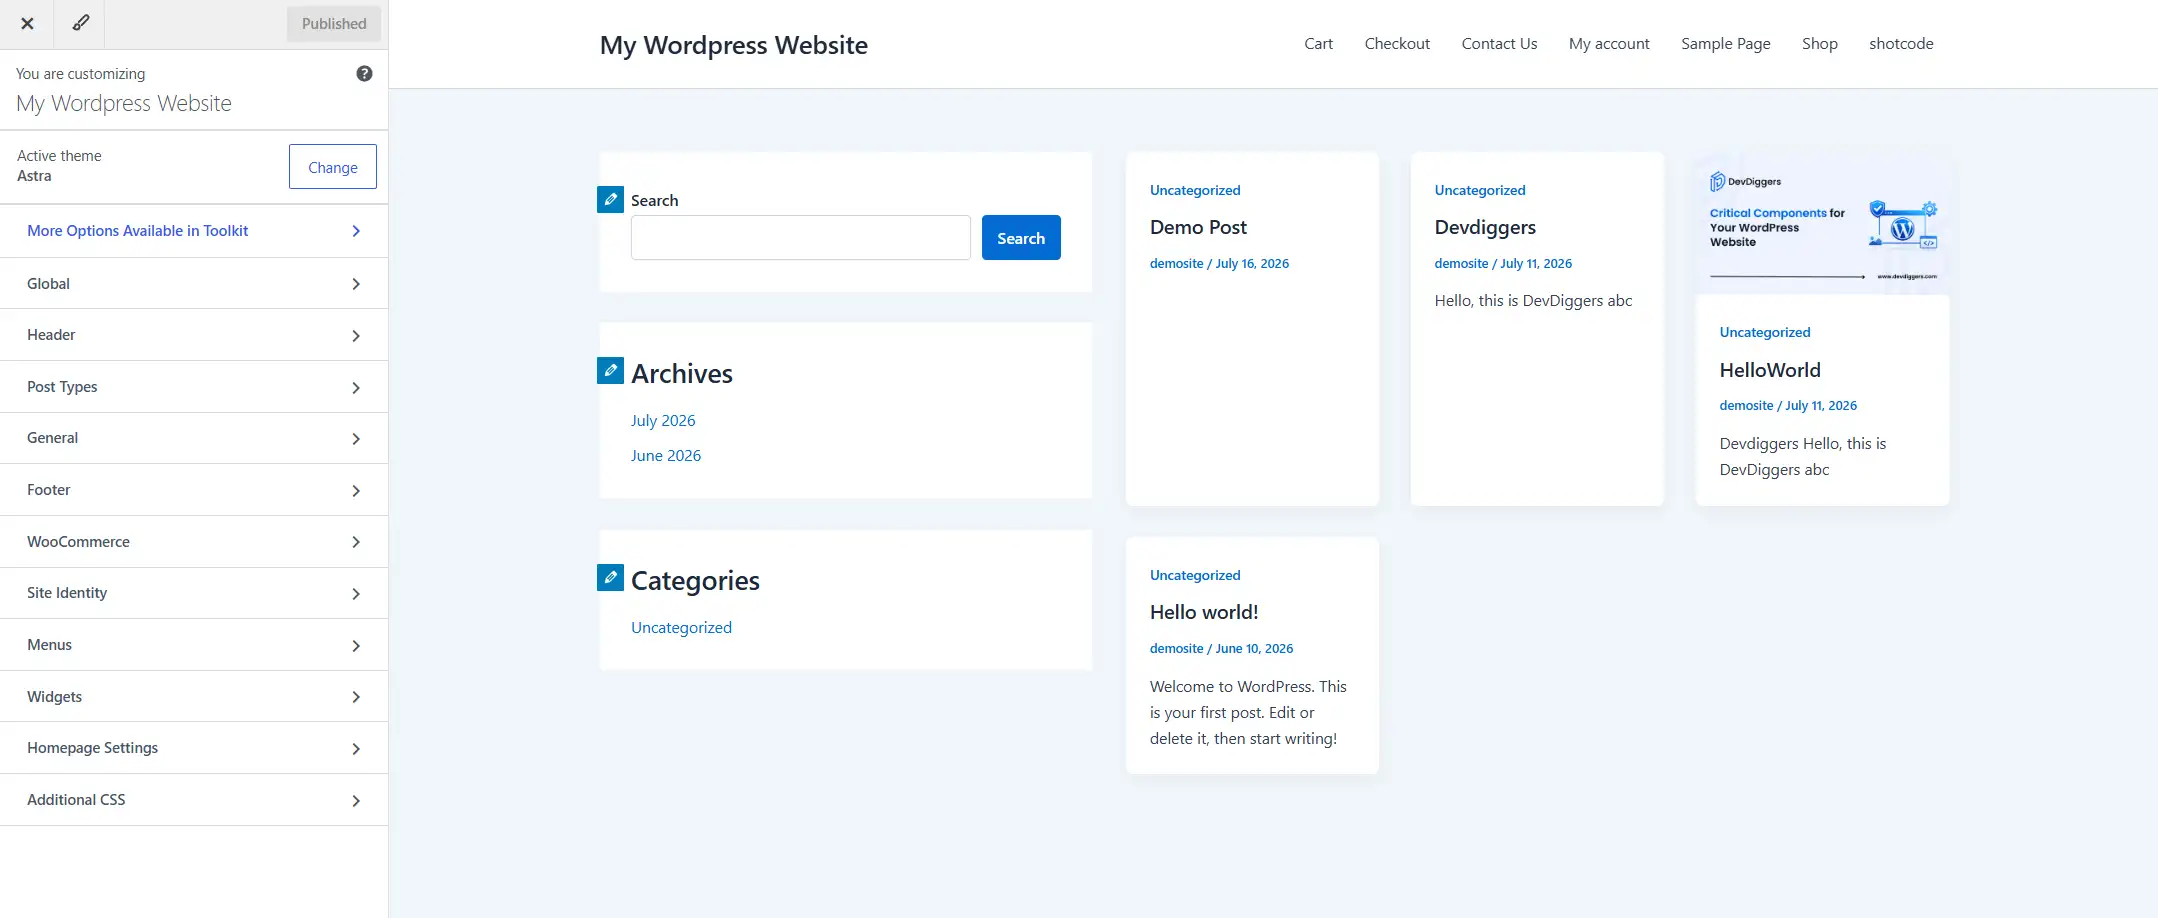
- Look for Site Identity in the left-hand menu. Most classic themes keep the logo option here.
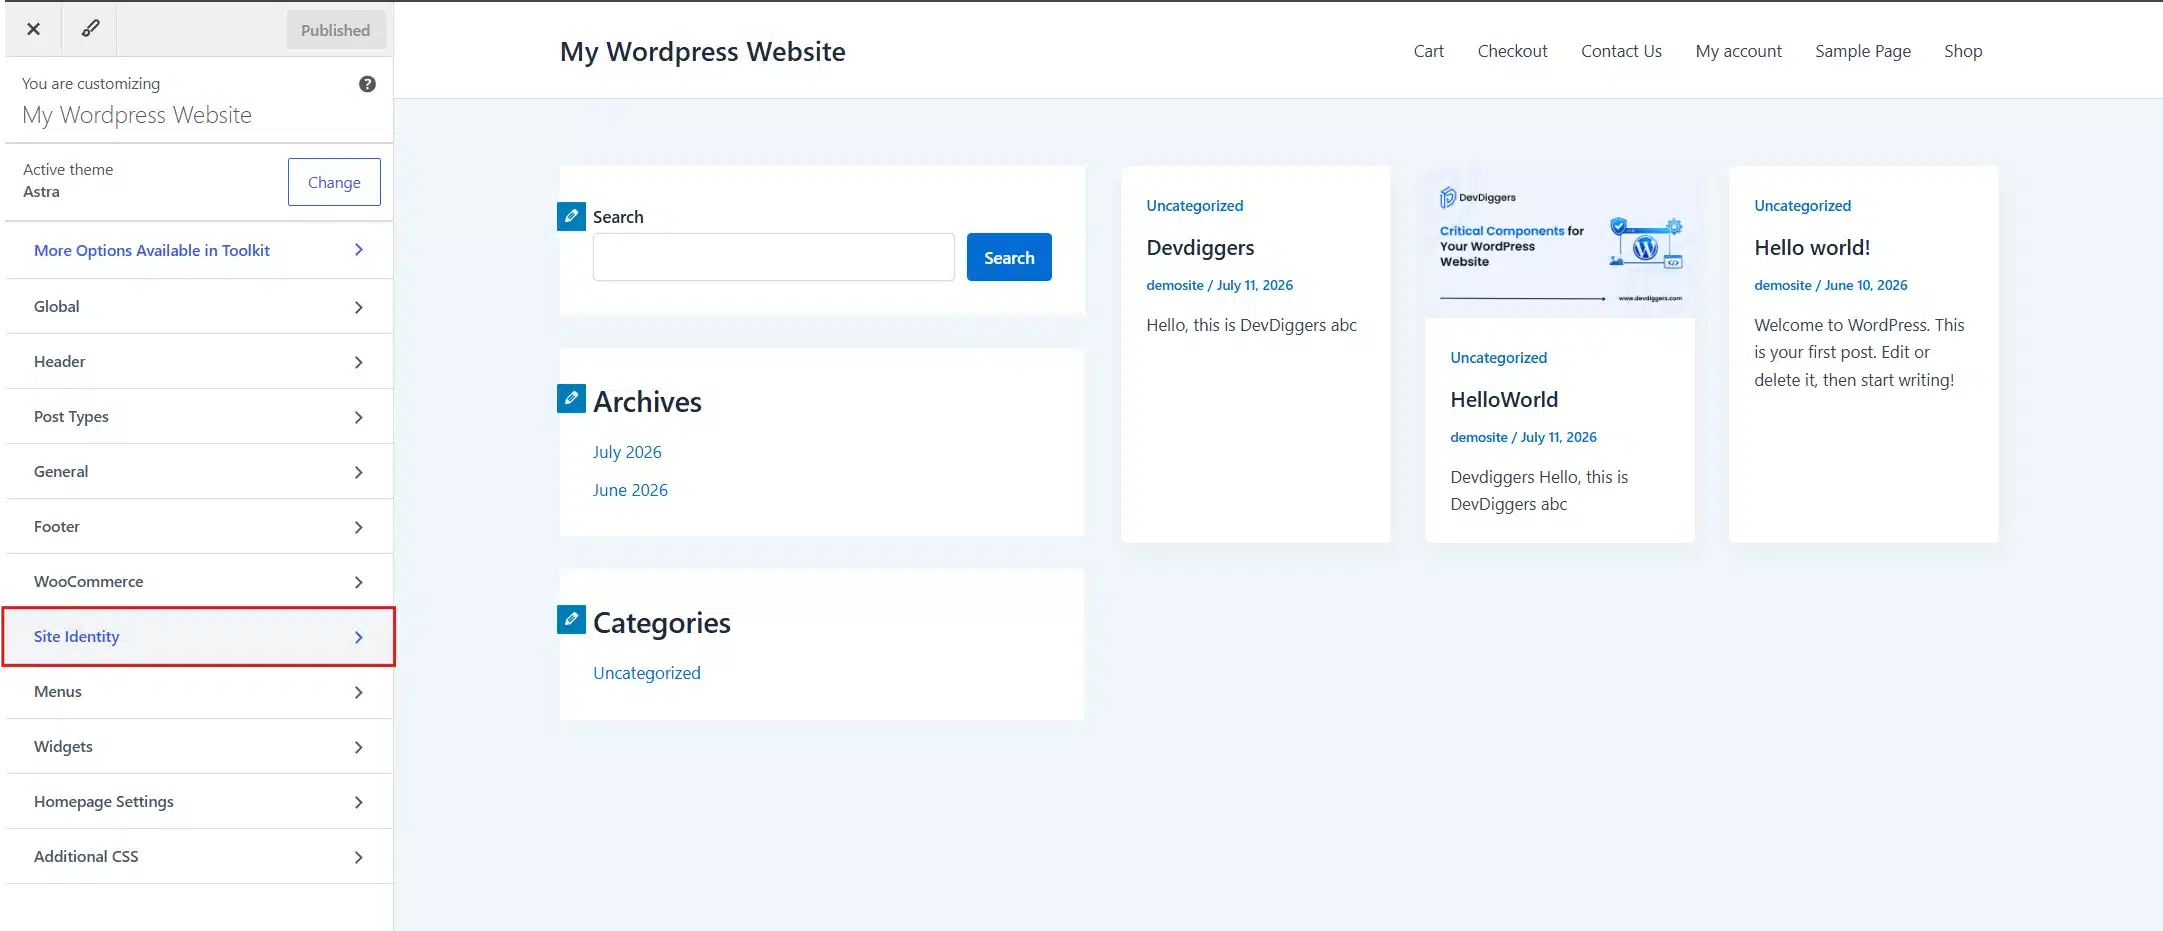
If your theme is a premium one, the label might read Header or Logo instead of Site Identity. The location shifts slightly, but the idea stays the same.
Method B: Block Themes (Site Editor)
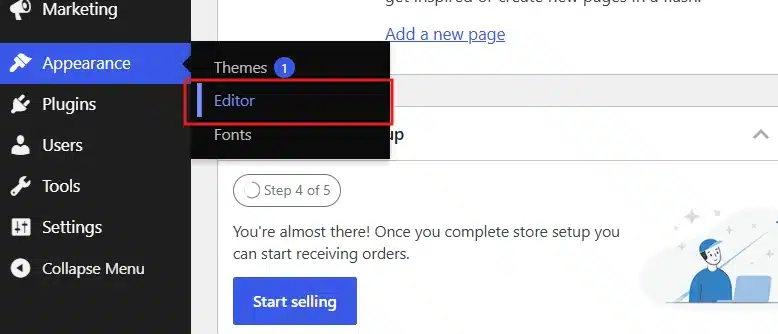
- From the dashboard sidebar, click Appearance → Editor.
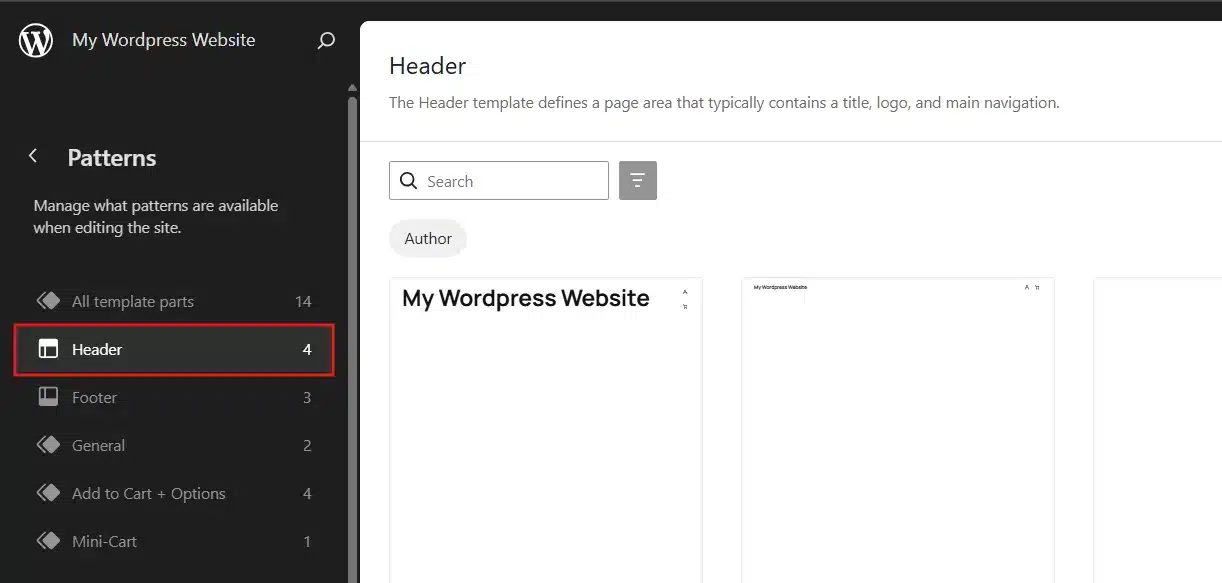
- Inside the editor, click Patterns → Header.
- Click on your current logo or site title inside the header preview.
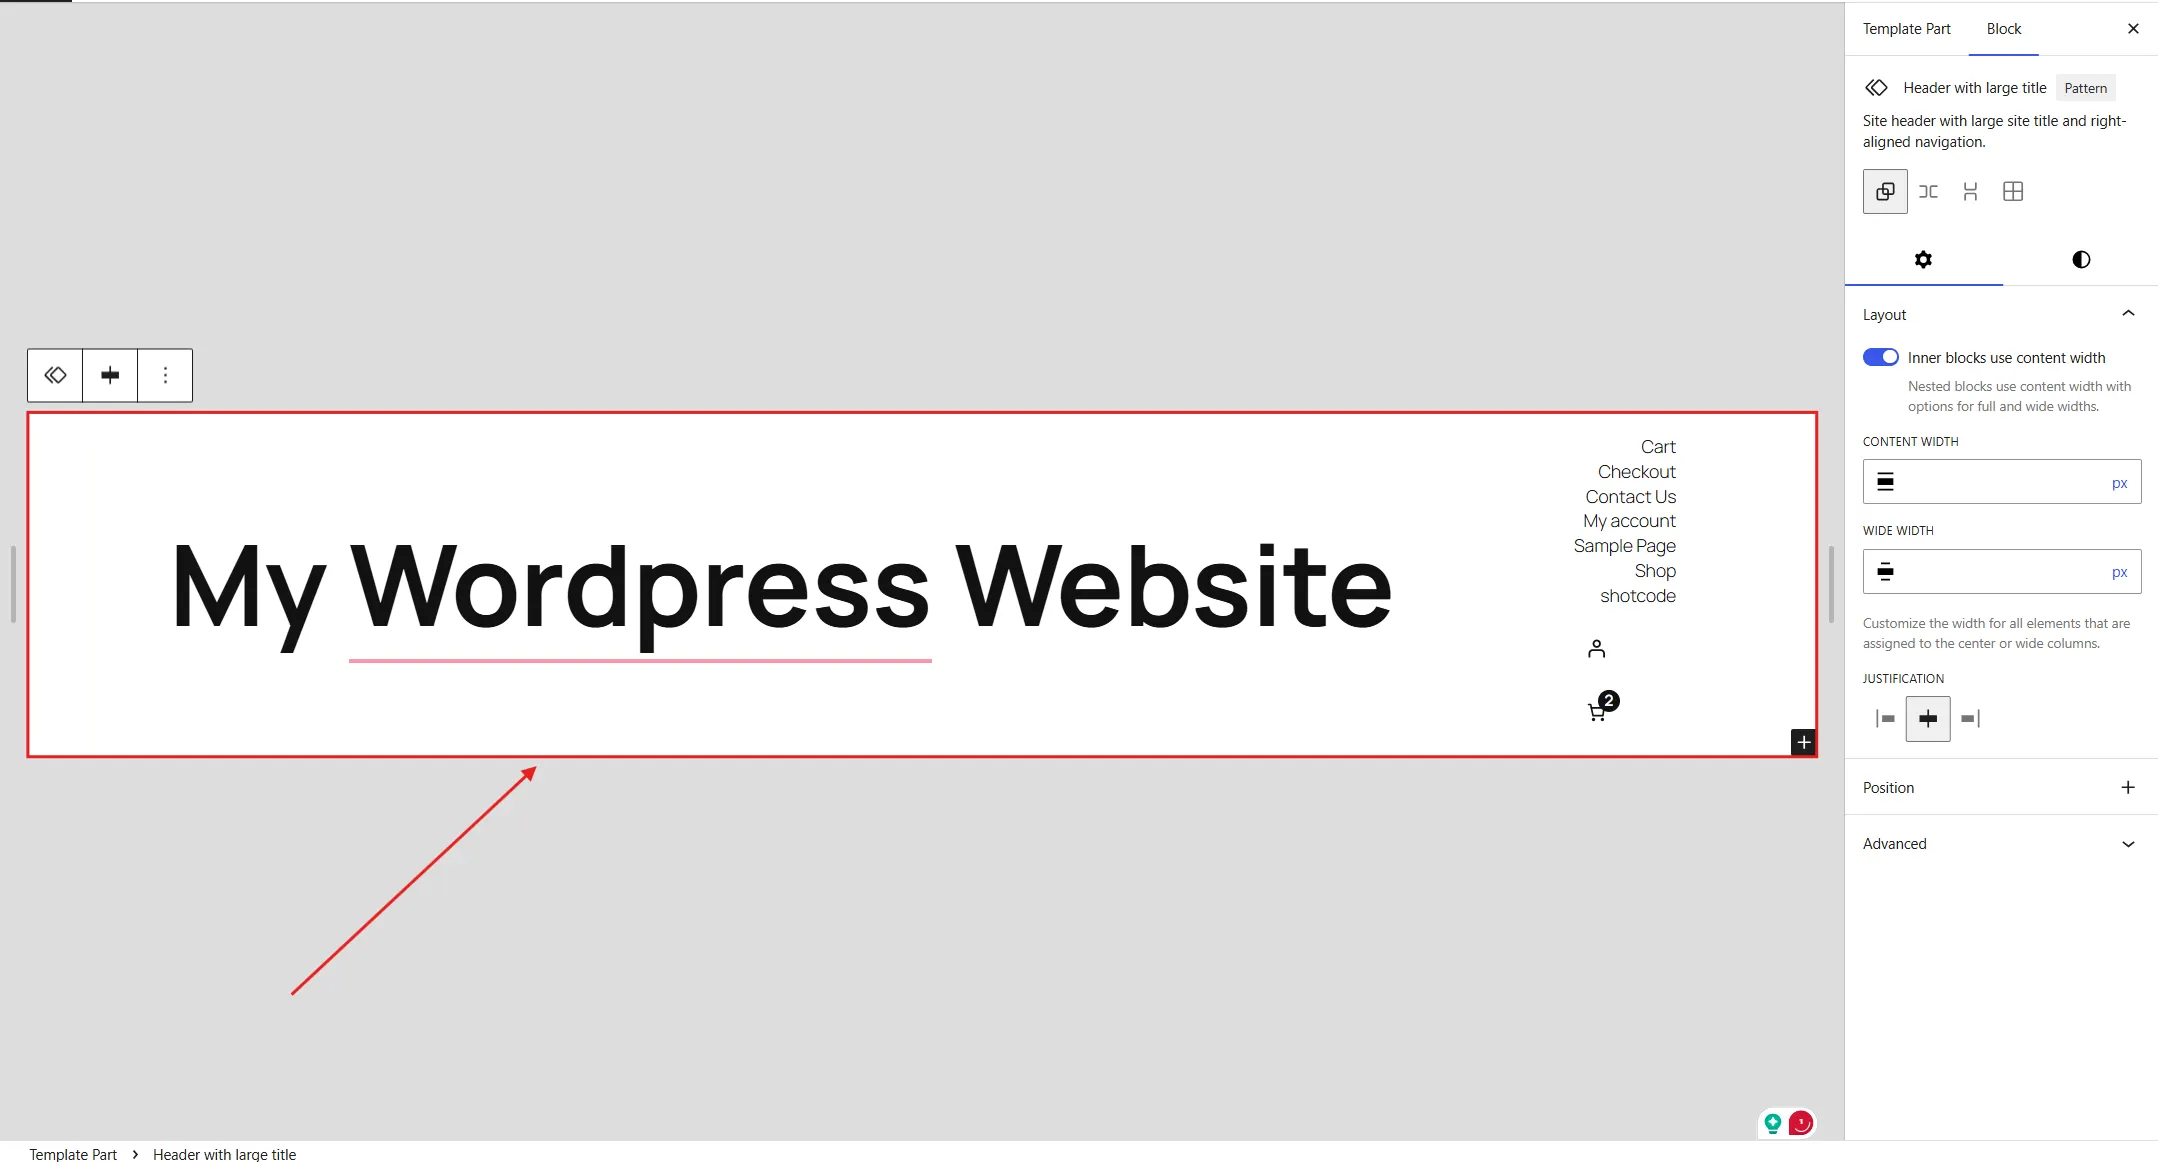
- Select the Site Logo block from the toolbar that appears.
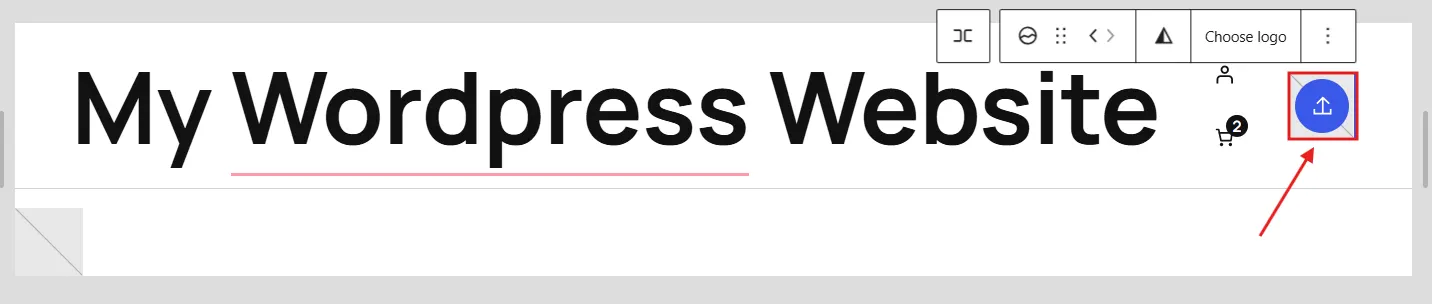
Block themes handle logos differently than classic themes because everything lives inside reusable template parts. Once you find the Site Logo block, the rest of the process feels almost identical.
Quick note: Astra and OceanWP keep logo settings under Site Identity, exactly as described above. GeneratePress adds a separate Logo tab under Customizer instead of nesting it inside Site Identity. Divi runs its own Divi Theme Customizer, which lives under the Divi menu, not the standard Appearance menu. If your steps don’t match exactly, check your theme’s own documentation for the exact label it uses.
Step 3: Upload and Crop Your New Logo
With your logo settings open, click Select Logo (Customizer) or the upload icon on the Site Logo block (Site Editor).
- Choose an image from your WordPress Media Library.
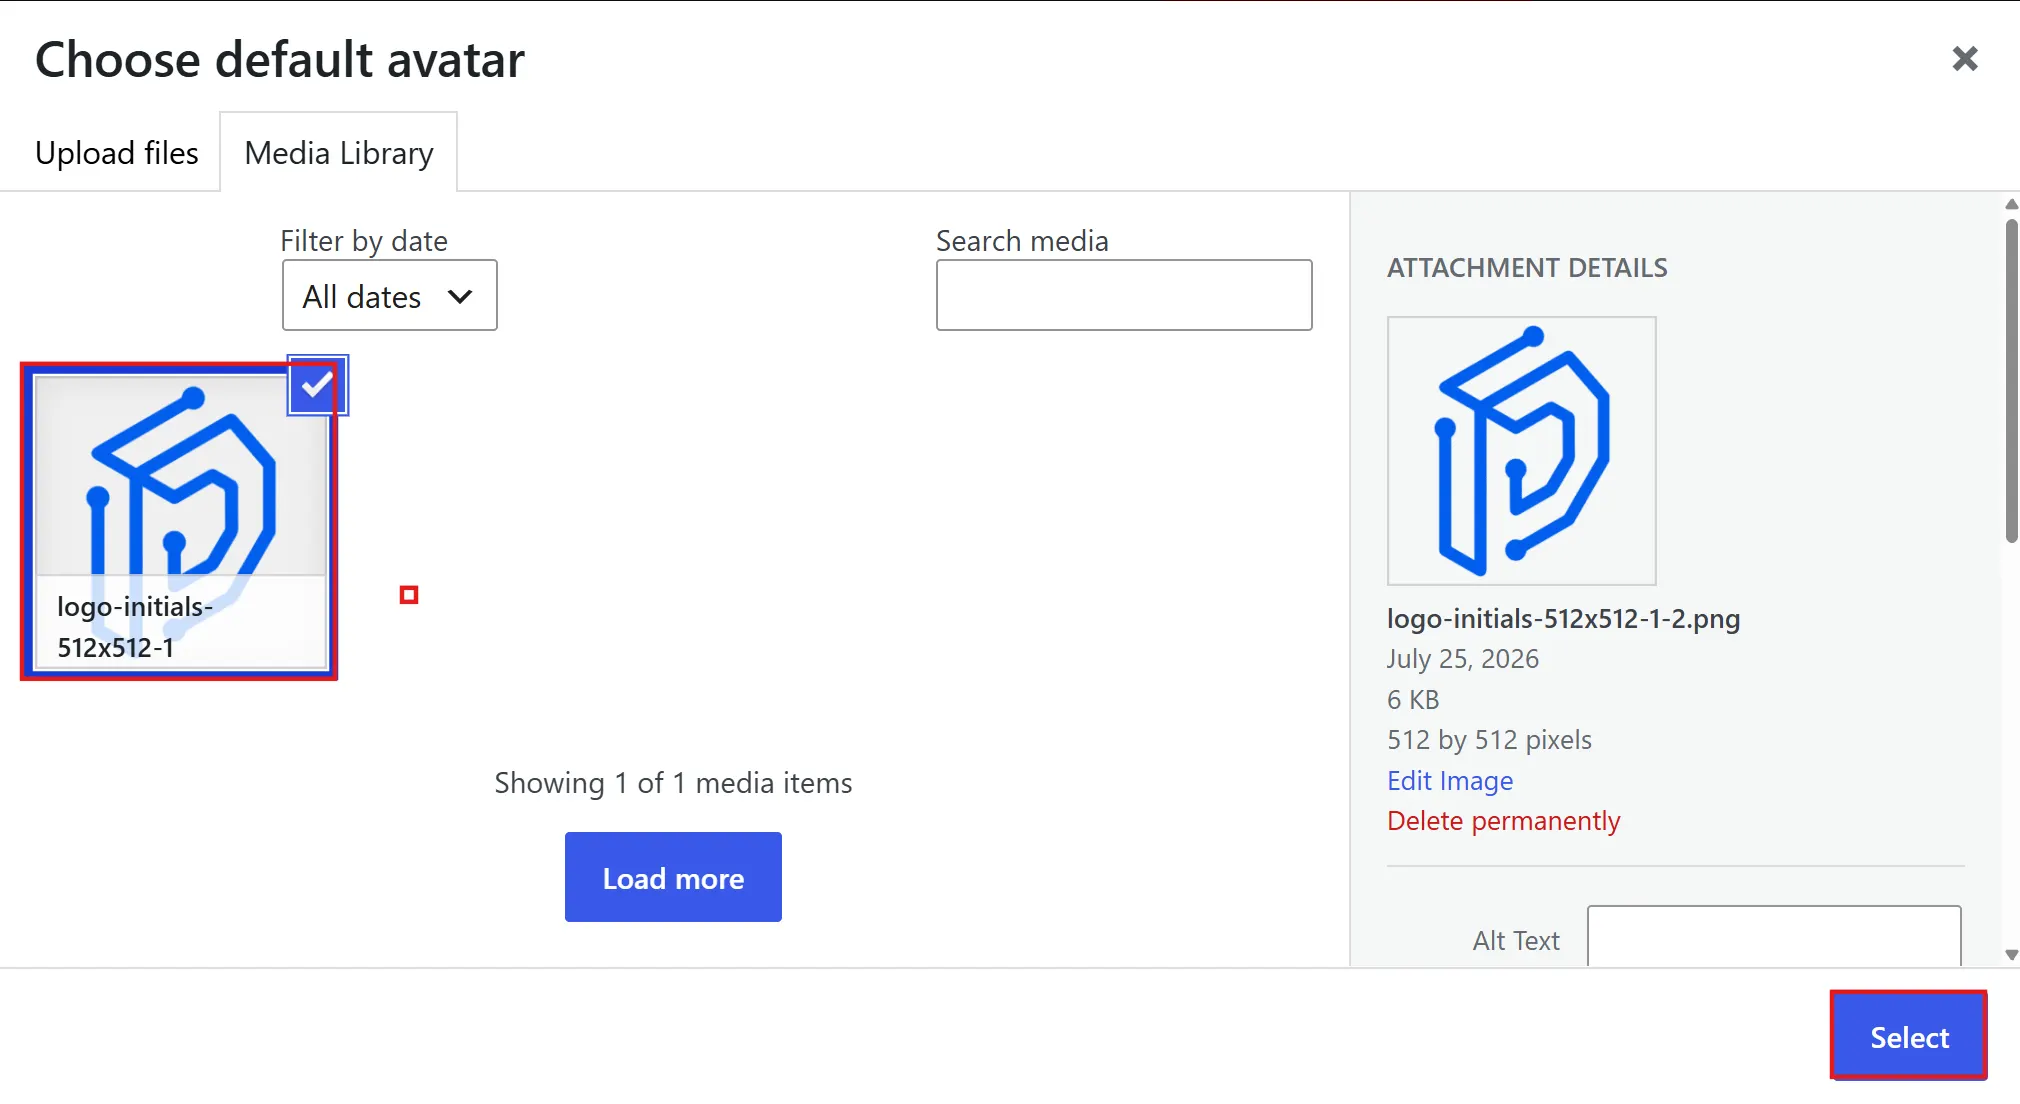
- WordPress may prompt you to crop the image. Adjust the crop box until your logo looks balanced, then click Edit Image to access the crop image option.
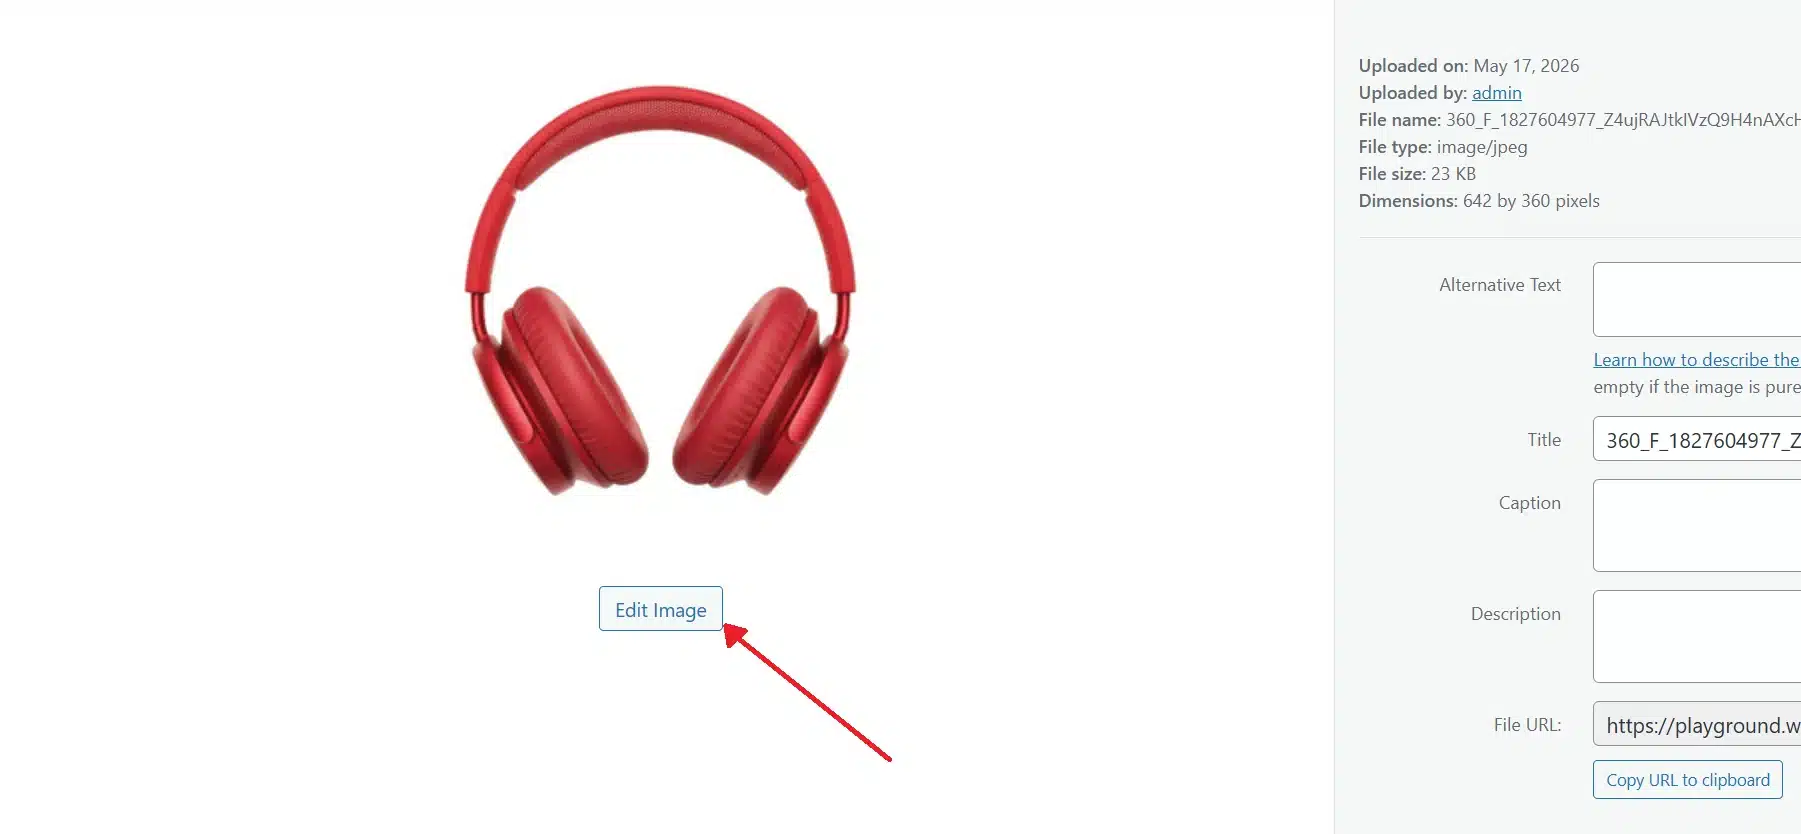
If your file is already the right size, look for a Skip Cropping option instead. There’s no need to force a crop that your logo doesn’t need.
Quick Tip: Stick to PNG or SVG files. JPEGs work, but they don’t support transparent backgrounds, so your logo will show a visible box around it on colored headers.
Step 4: Adjust Logo Size and Position
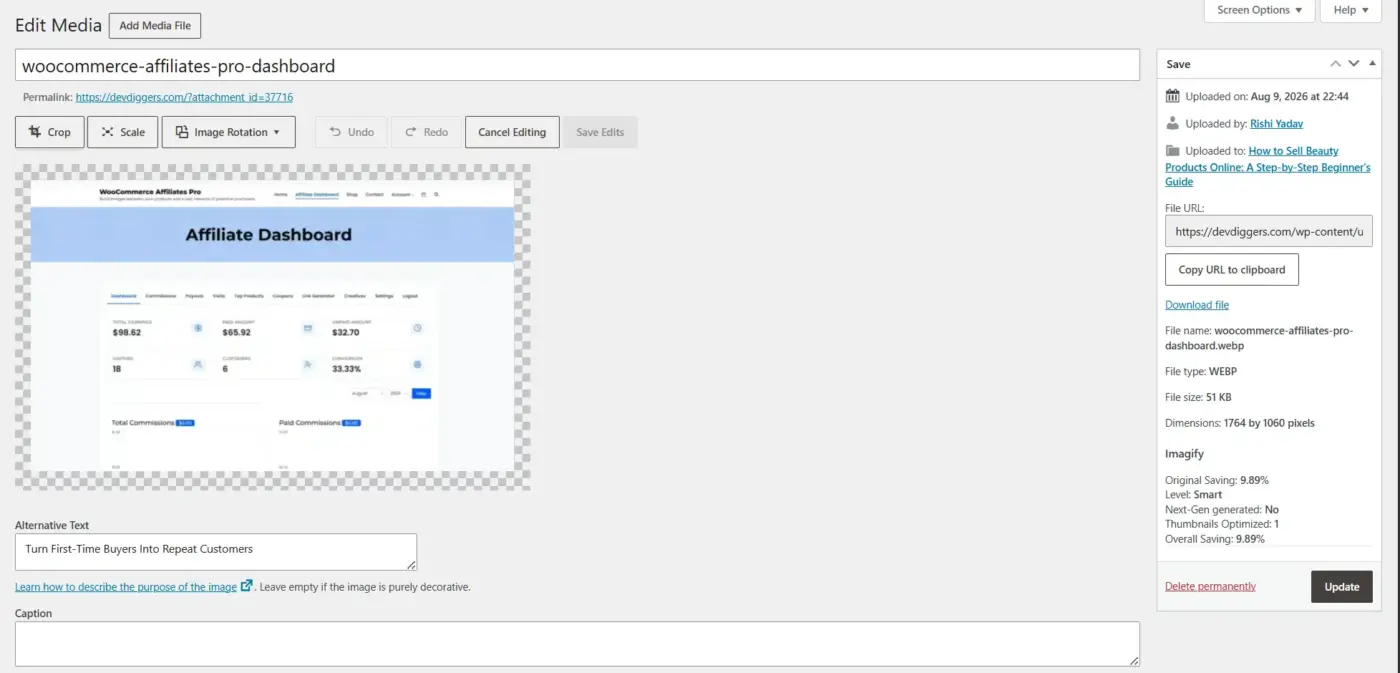
After the upload finishes, most themes give you a few display options right in the same panel.
- Resize the logo: Drag the slider or type an exact pixel width.
- Adjust spacing: Fine-tune the padding around the logo so it fits your header cleanly.
- Change position: Some themes let you move the logo left, right, or center.
Not every theme offers all three. If yours only shows a size slider, that’s normal. You can always fall back to custom CSS later if you want tighter control, which we’ll touch on near the end of this guide.
Practitioner Tip: Resist the urge to max out the size slider just because a bigger logo feels more confident. A header that’s mostly logo pushes your navigation menu down and often looks worse on mobile, where screen space is already tight.
Step 5: Preview Across Devices
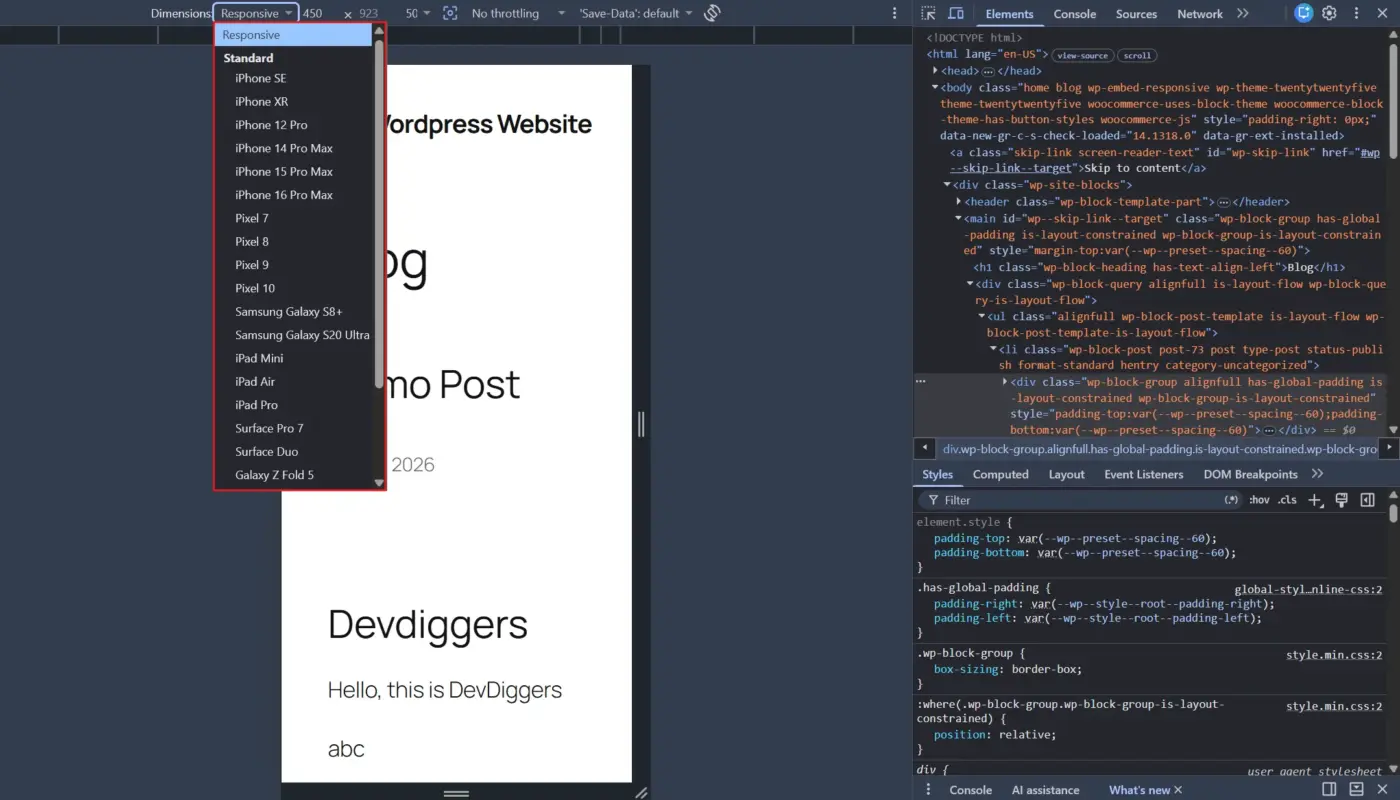
Before you publish anything, check how the logo looks on different screen sizes. Most themes and the Customizer include small device icons near the bottom of the preview panel.
Click through desktop, tablet, and mobile views one at a time. A logo that looks great on a laptop can crowd the header or shrink into an unreadable smudge on a phone.
Or, use Chrome Tools for a preview of various devices inside a single desktop by Your Website → Inspect → Dimensions.
This step takes thirty seconds. Skipping it is the single most common reason people end up back in the Customizer a second time.
Step 6: Publish or Save Your Changes
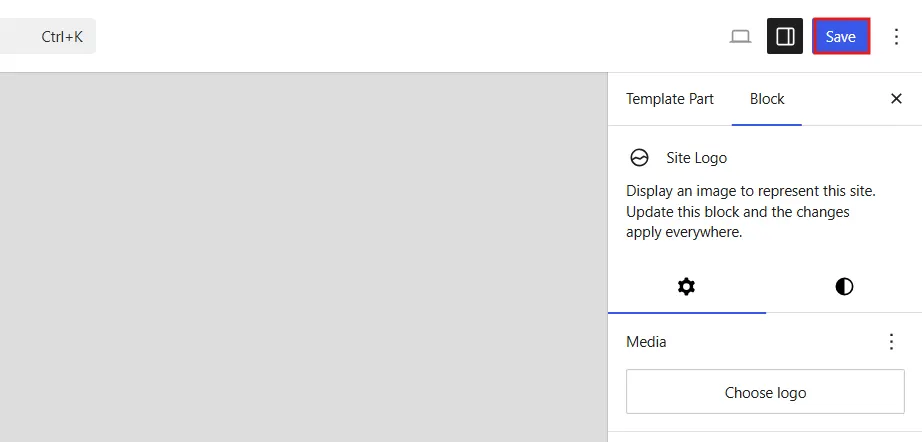
Once the preview looks right, it’s time to make it official.
In the Customizer, click the blue Publish button near the top of the screen. In the Site Editor, click Save, then confirm when WordPress asks whether the change should apply site-wide.
Your new logo is now live. Visit your homepage in a new browser tab to see it in action.
Step 7: Clear Your Cache
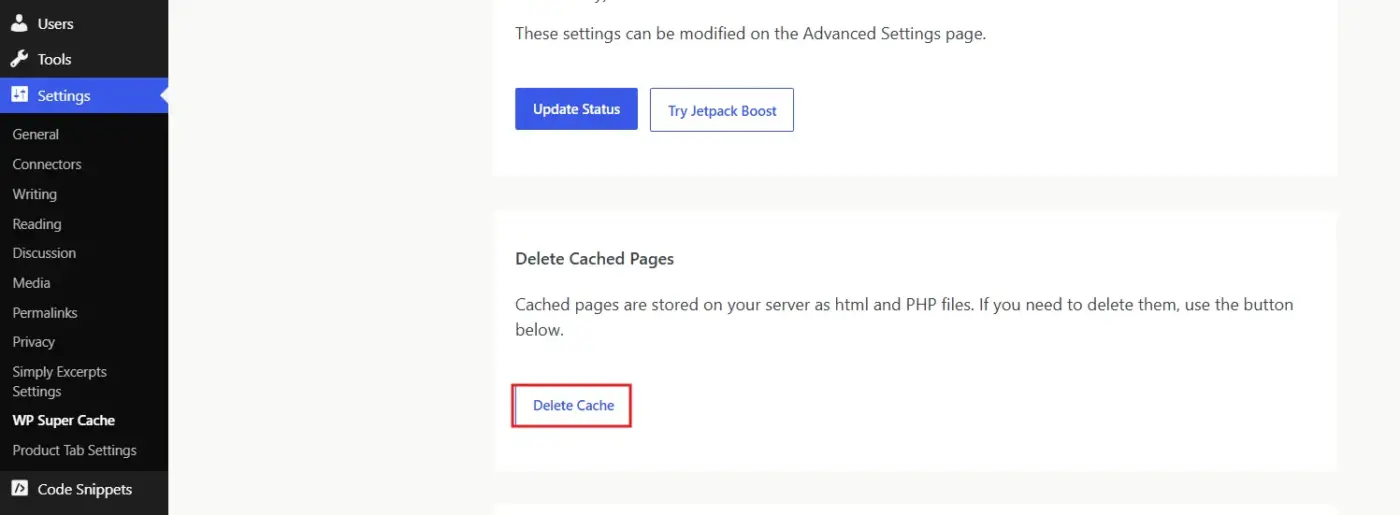
If the old logo still shows up after you publish, don’t panic. This almost always comes down to caching, not a failed upload.
- If you use a caching plugin such as WP Super Cache, open its settings and click Delete Cache.
- If you don’t run a caching plugin, clear your browser cache instead through your browser’s privacy settings.
- Reload your site with a hard refresh, usually Ctrl+Shift+R on Windows or Cmd+Shift+R on Mac.
We’ll cover a few more causes of a stuck logo in the troubleshooting section further down, in case a cache clear alone doesn’t fix it.
How to Change Your Logo on the Login Page: Simplest Method
Your site header isn’t the only place your logo shows up. WordPress also displays a logo above the login form, and by default, that’s the WordPress logo itself, not yours.
Swapping it takes a small code snippet instead of a dashboard toggle. If editing theme files sounds difficult, a plugin works just as well and skips the code entirely.
- Go to Plugins → Add New from your dashboard.
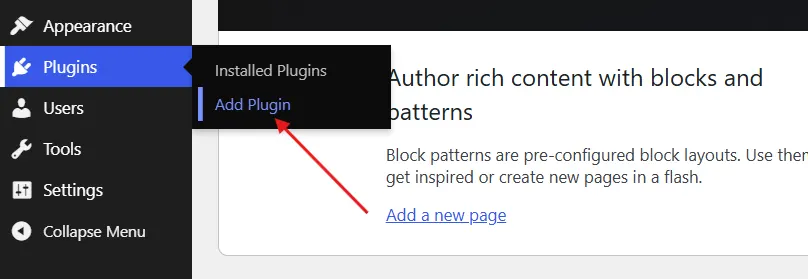
- Install and activate the Custom Logo Login Plugin from the WordPress Plugin Directory.
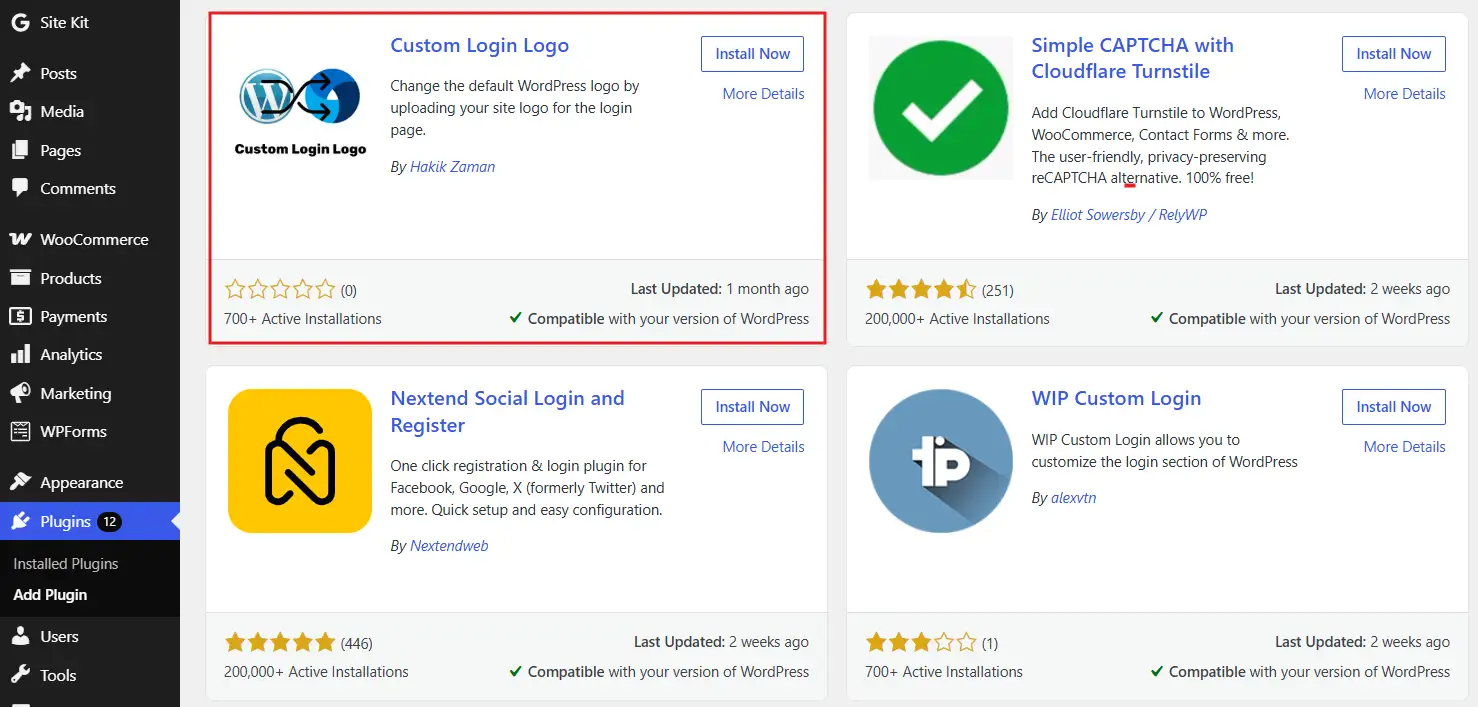
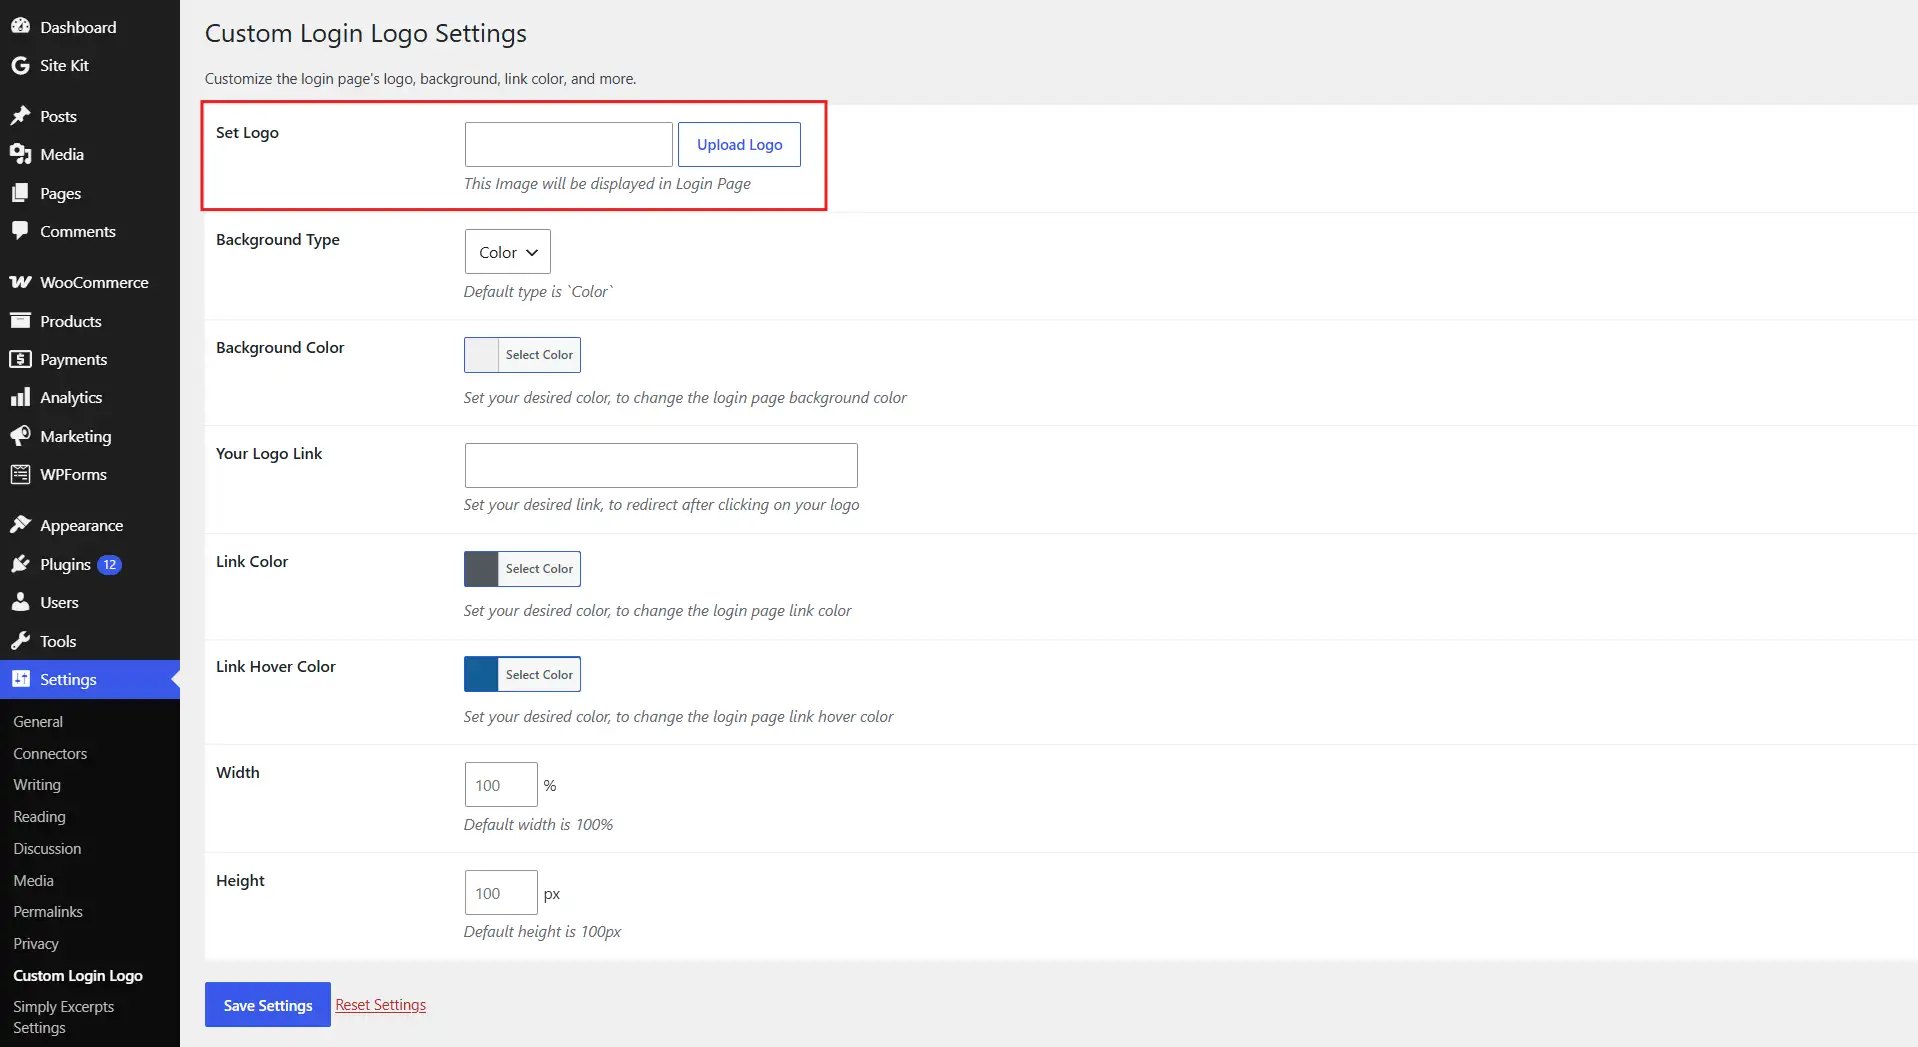
- Follow its settings screen to upload your logo. Most plugins handle this in a single upload field.
Recommended WordPress Logo Sizes and File Formats
Every theme has its own opinion on logo size, but a few numbers work reliably across almost all of them. Here’s a quick reference so you’re not guessing.
| Logo Type | Recommended Size | Best Format |
|---|---|---|
| Horizontal header logo | 250 x 100 px | SVG or PNG |
| Square logo | 160 x 160 px | SVG or PNG |
| Site icon (favicon) | 512 x 512 px minimum | PNG |
| Login page logo | 320 x 80 px | PNG |
A few notes worth keeping in mind:
- SVG stays sharp at any size because it’s a vector format. Search engines can also read the text inside it, which is a small but real SEO bonus.
- PNG is the safer default if your theme blocks SVG uploads, which WordPress does by default for security reasons.
- Avoid uploading an oversized file just because it looks fine on your screen. A 2000-pixel-wide logo squeezed into a 250-pixel header slows your page down for no visual benefit.
- Keep a transparent background on any logo that sits over a colored or image-based header. A white box around your logo is one of the fastest ways to make a header look unfinished.
- Test your logo against both a light header and a dark header if your theme supports mode switching. A logo built only for a white background can disappear entirely on a dark one.
Once your logo is sized correctly, it’s worth doing the same for your favicon in WordPress. Visitors see that tiny icon in every open browser tab.
Why Your New Logo Might Not Be Showing Up (Troubleshooting)
Most logo problems trace back to one of five causes. Work through them in order before assuming something is broken.
- Caching (the most common cause): We covered this in Step 7, but it’s worth repeating: clear both your caching plugin and your browser cache. If your host runs server-level caching or a CDN, that layer needs a separate clear too. Your hosting panel usually handles this under a “purge cache” button.
- Wrong file format: Some themes silently reject SVG uploads because WordPress blocks them by default. If your upload seems to vanish or throws an error, switch to PNG and try again.
- Theme doesn’t support a custom logo: Older or highly stripped-down themes sometimes skip logo support entirely. If Site Identity or the Site Logo block never appears no matter where you look, your theme is the problem, not your process. Switching to a theme that supports custom logos and child themes solves this permanently.
- You edited the wrong template: On block themes, logos can live in more than one header pattern. This happens if your site uses different headers for different page types. Double-check that you edited the specific header template assigned to your homepage.
- A plugin is overriding your header: Page builder plugins and some security plugins inject their own header markup. That markup can quietly override the logo set through the Customizer. Deactivate page builder plugins one at a time to see if one of them is the culprit, then reactivate the ones you keep using.
If you’ve worked through all five and the old logo still won’t budge, try one more thing. A full page reload in an incognito or private browser window rules out any local caching quirks on your end.
Conclusion
Changing your logo in WordPress is one of the fastest ways to freshen up your site. That holds true whether you’re rebranding completely or just tightening up an old design.
The steps stay the same whether you’re on a classic theme or a modern block theme. Find your logo settings, upload the file, check the preview, and publish. The only real variable is which menu path your theme uses to get there.
Once your new logo is live, glance over your login page and your favicon too. A logo that changes everywhere except one forgotten corner looks more unfinished than no update at all.
Bookmark this guide if you manage more than one WordPress site. The Customizer steps stay the same across most classic themes, so the second and third rebrand go a lot faster than the first.
Frequently Asked Questions (FAQs)
Q1. How do I change a logo in WordPress without coding?
Use the built-in Customizer or Site Editor, both covered in Step 2 above. Neither requires a single line of code. Coding only comes into play for optional extras, like the login-page logo method.
Q2. What is the best image format for a WordPress logo?
SVG is the strongest choice because it stays sharp at any size and keeps file sizes small. If your theme blocks SVG uploads, PNG with a transparent background is the reliable second choice.
Q3. Why is my new logo still showing the old one?
This is almost always a caching issue. Clear your caching plugin, clear your browser cache, and do a hard refresh. If your host uses a CDN, purge that cache too.
Q4. Can I use the same image for my logo and my favicon?
Yes, but size it separately. Your header logo can be wide and rectangular. Your favicon needs to be square and at least 512 x 512 pixels for WordPress to produce clean icon variants.
Q5. My theme doesn’t show a Site Identity or Site Logo option. What now?
Your theme likely doesn’t support custom logos. Switching to a theme that does, or building a small child theme on top of your current one, is the most permanent fix.
Q6. Do I need a plugin to change my logo in WordPress?
No. The Customizer and Site Editor both handle logo uploads natively. A plugin only becomes useful for extras like changing the login-page logo without touching code.
Q7. Why won’t WordPress let me upload an SVG logo?
WordPress blocks SVG uploads by default as a security precaution, since SVG files can carry embedded scripts. If you need SVG support, a small, trusted plugin can safely enable it, or you can convert your logo to a high-resolution PNG instead.
Q8. Will changing my logo affect my site’s SEO?
No, a logo swap alone has no direct effect on rankings. What does matter is keeping the image’s alt text descriptive. Also, make sure the new file isn’t so large that it slows down your page load time.