How to change favicon in WordPress takes about two minutes: go to Settings, General, choose a square image and press Save Changes. WordPress then adds the icon to your browser tab and mobile bookmarks.
I tested four ways on a fresh WordPress 7.1.3 site in October 2026, with a block theme and a classic theme. I also read Google’s favicon guidelines so the file you pick works in search results.
This guide covers what a favicon is, the size it needs and four step-by-step methods. You also get a fix list for a favicon that will not show up, plus a short design checklist.
What Is a WordPress Favicon, and Why Does It Matter?
A WordPress favicon is the small square image that shows in the browser tab, in bookmarks and on a phone’s home screen. WordPress calls it the Site Icon. It helps visitors find your tab among many, and it can appear next to your listing in Google Search.
The admin screen puts it simply: the Site Icon is what you see in “browser tabs, bookmark bars, and within the WordPress mobile apps”.
Visitors scan tabs and bookmark lists by icon before they read a title. A site with no icon shows a blank page symbol, which looks unfinished next to branded tabs.
Google can show your favicon in search results on mobile and desktop. It sets a few rules for the file, which the next section covers.
People type “change favicon WordPress” and “WordPress change favicon” into search, and both lead to the same Site Icon setting. WordPress prints the matching tags for you, through the wp_site_icon function.
A favicon is not your logo. The logo sits in your header, and the favicon is a small mark that must stay readable at 16 pixels. If you need to swap the header image, read our guide on how to change a logo in WordPress.
Favicon Size and Format Requirements
Upload a square image of at least 512 by 512 pixels in PNG format. WordPress’s own Site Icon screen asks for that size. Google needs only 8 by 8 pixels but recommends a file larger than 48 by 48 pixels, so a 512 pixel square meets both.
Here is what each source asks for, taken from the WordPress admin screen and Google’s guidelines:
| Rule | Value |
|---|---|
| WordPress Site Icon | Square, at least 512 by 512 pixels |
| Google minimum | 8 by 8 pixels |
| Google recommendation | Larger than 48 by 48 pixels |
| Google file formats | BMP, GIF, ICO, PNG, JPEG, PPM and TIFF |
| Google URL rule | The favicon URL must stay stable |
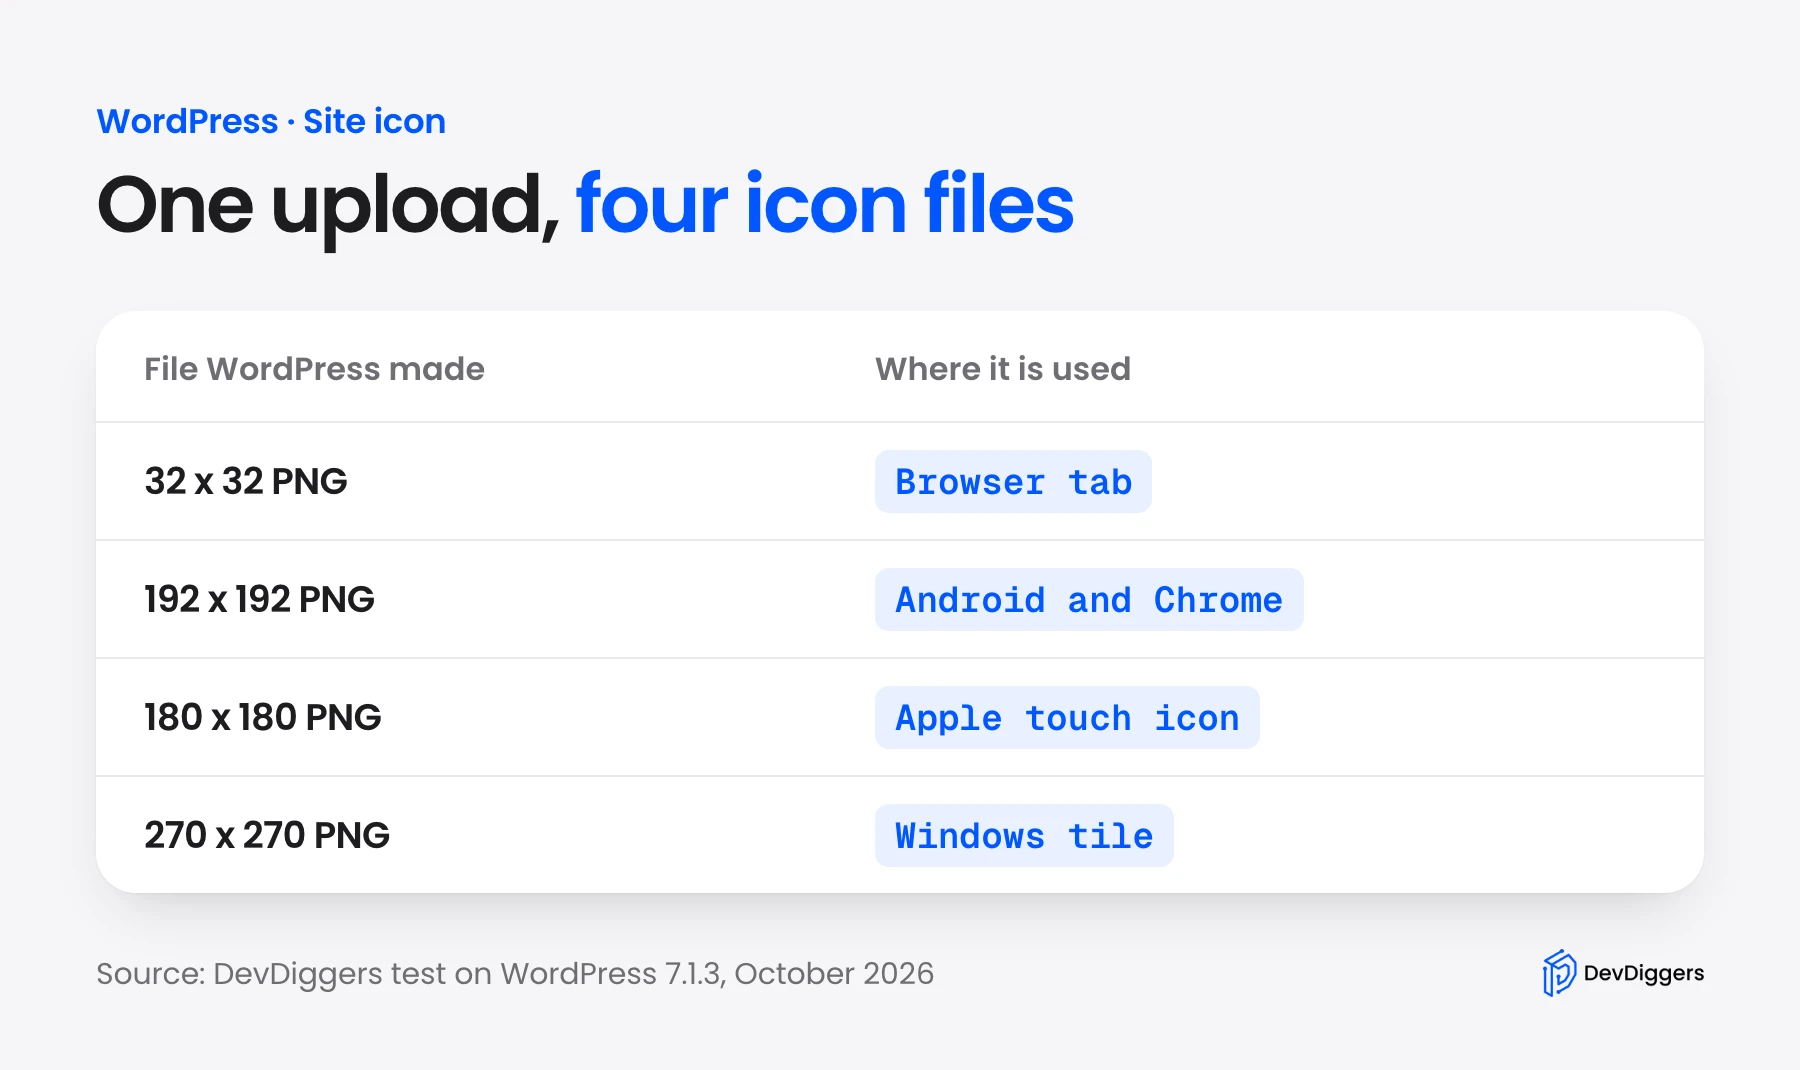
In my test, WordPress did not use the file as it was. It made four copies from one 600 by 600 upload, and printed them as tags in the page head.
An old .ico file is on Google’s supported list, but export a fresh 512 pixel PNG from your design file for WordPress. If your image is not square, crop it before you upload, or use the crop step in WordPress. Our guide on how to resize WordPress images shows the safe way to do it.
How to Change Favicon in WordPress From Settings
How to change favicon in WordPress is easiest from Settings, then General. The Site Icon row opens the Media Library. A crop screen then shows how the icon will look in a browser tab, and the route works with any theme.
Follow these steps:
- Open Settings, General: From the dashboard, go to Settings, then General. The Site Icon row sits under the Tagline field.
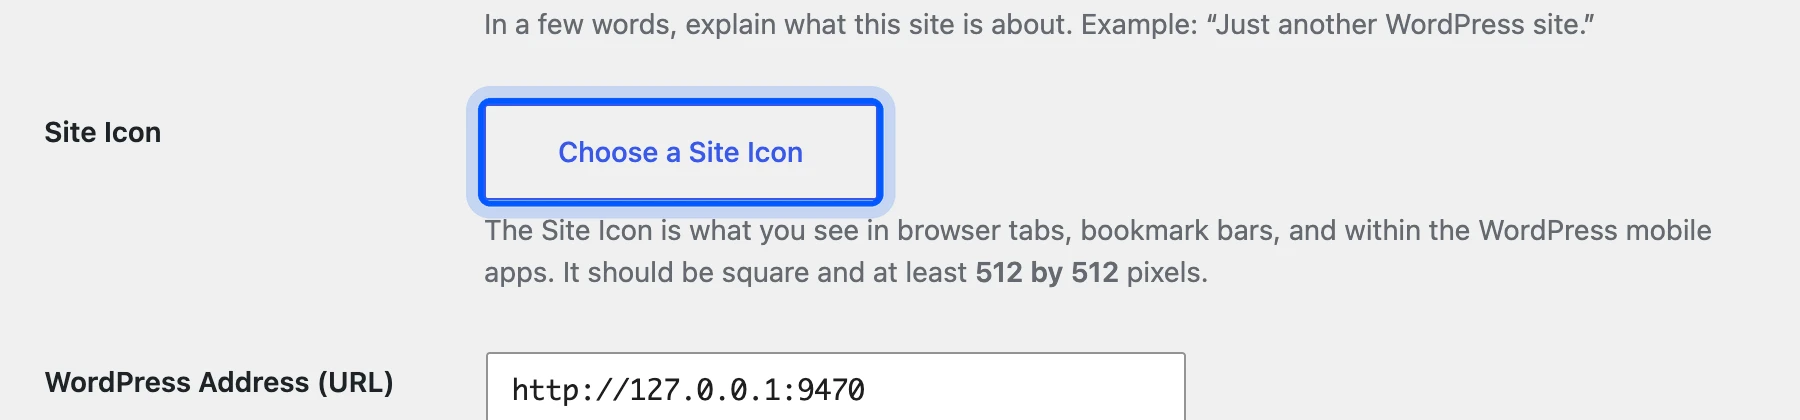
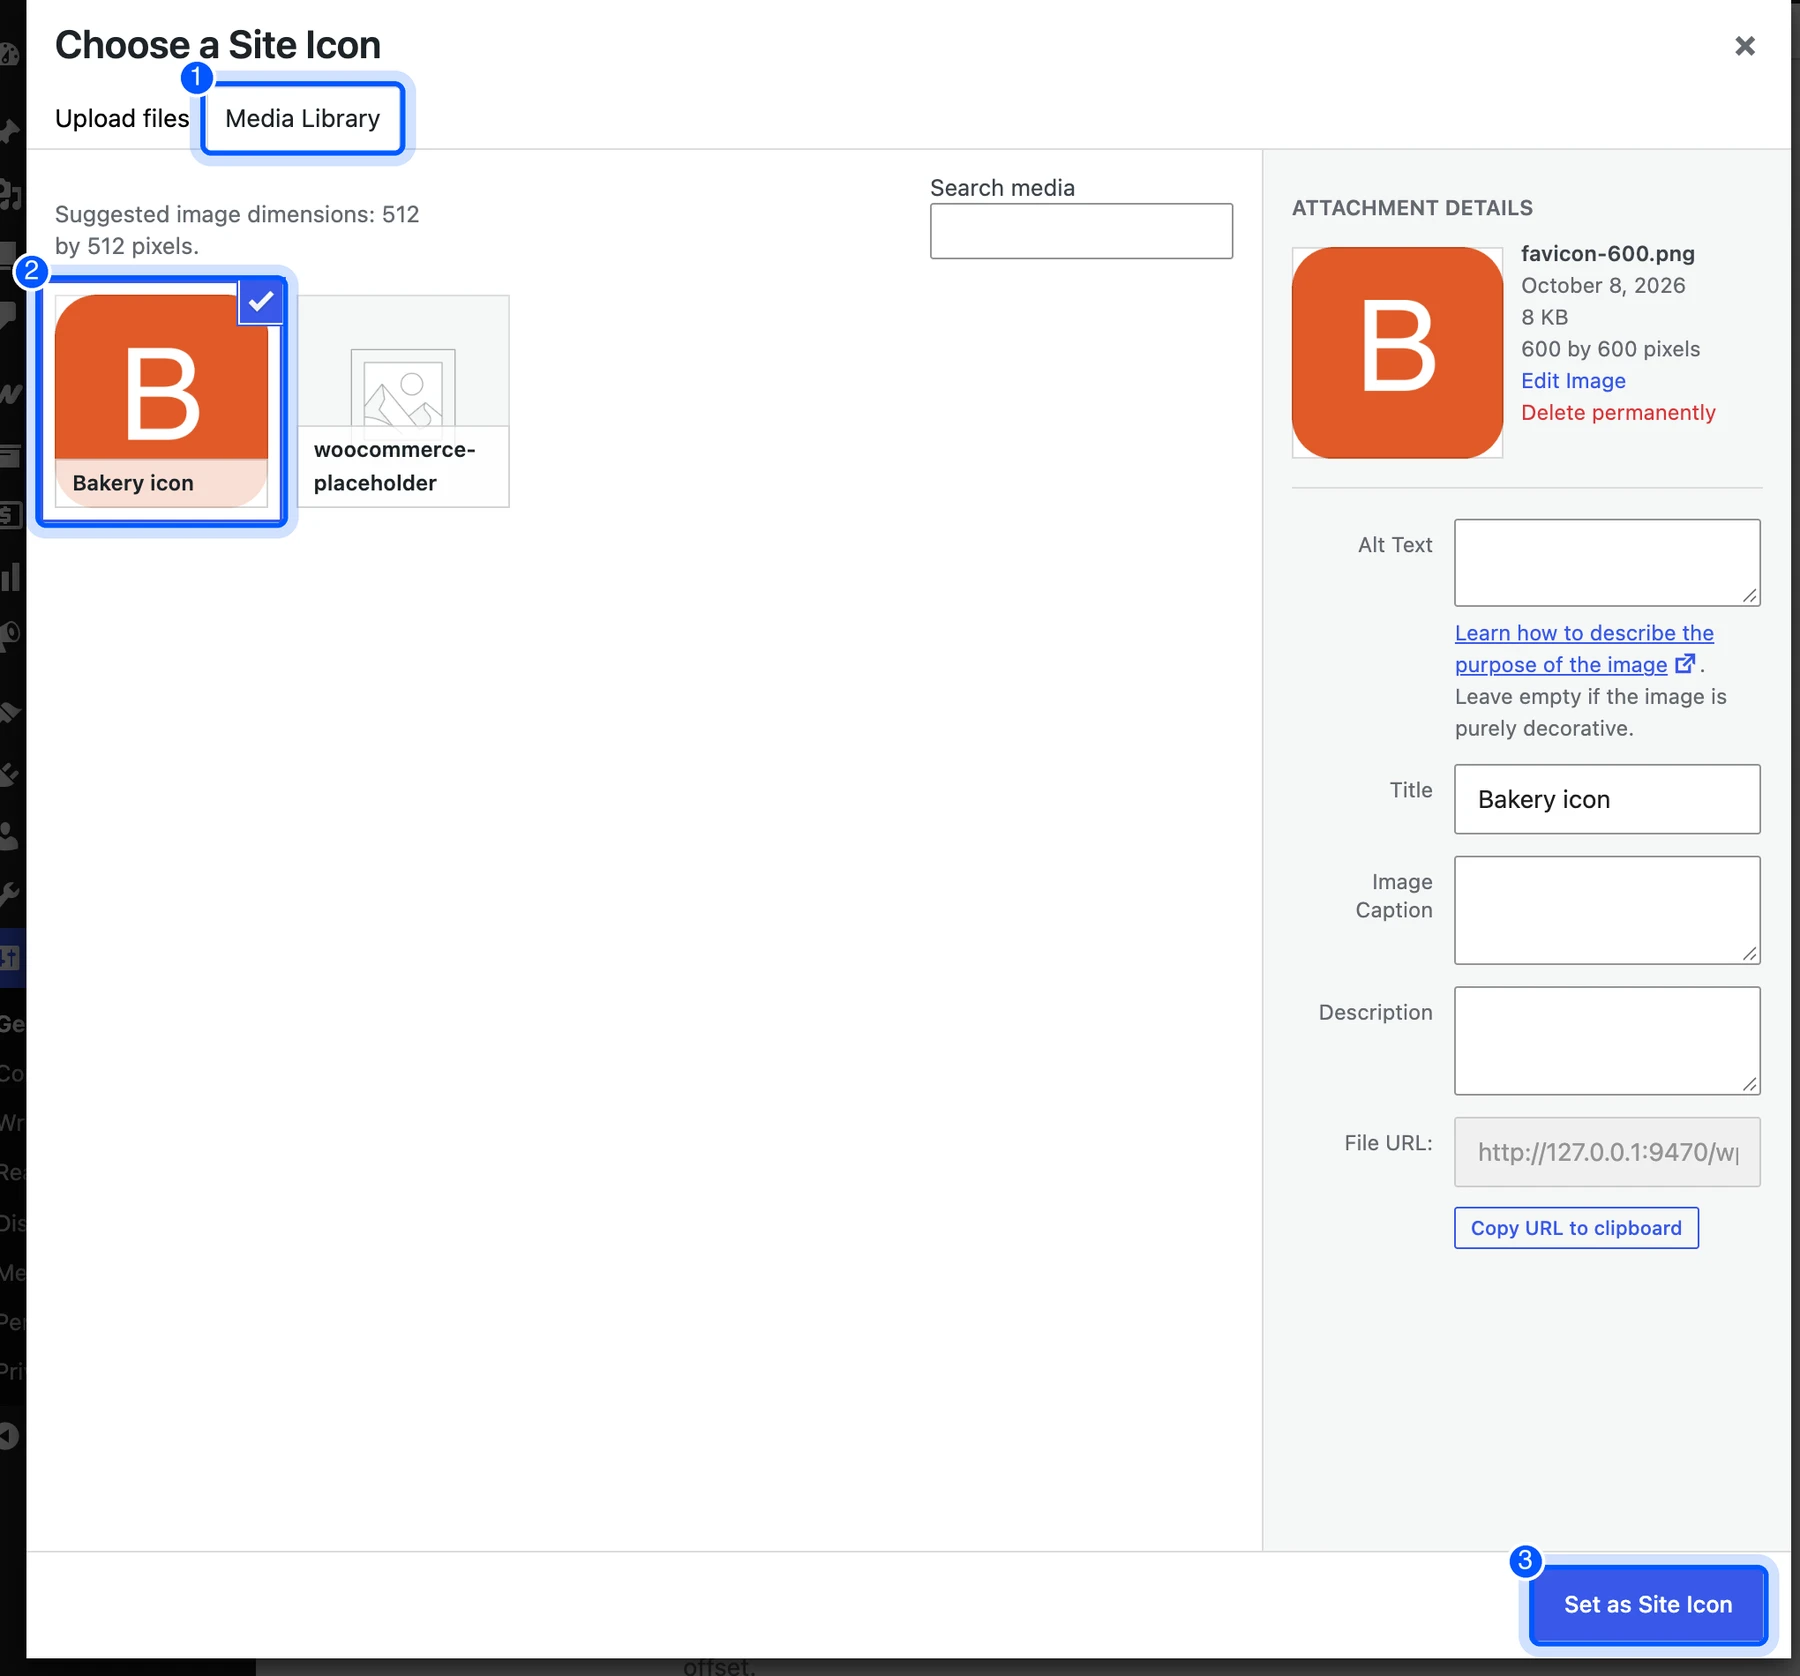
- Pick your image: Click Choose a Site Icon. Upload a file, or open the Media Library tab, select your image and click Set as Site Icon.
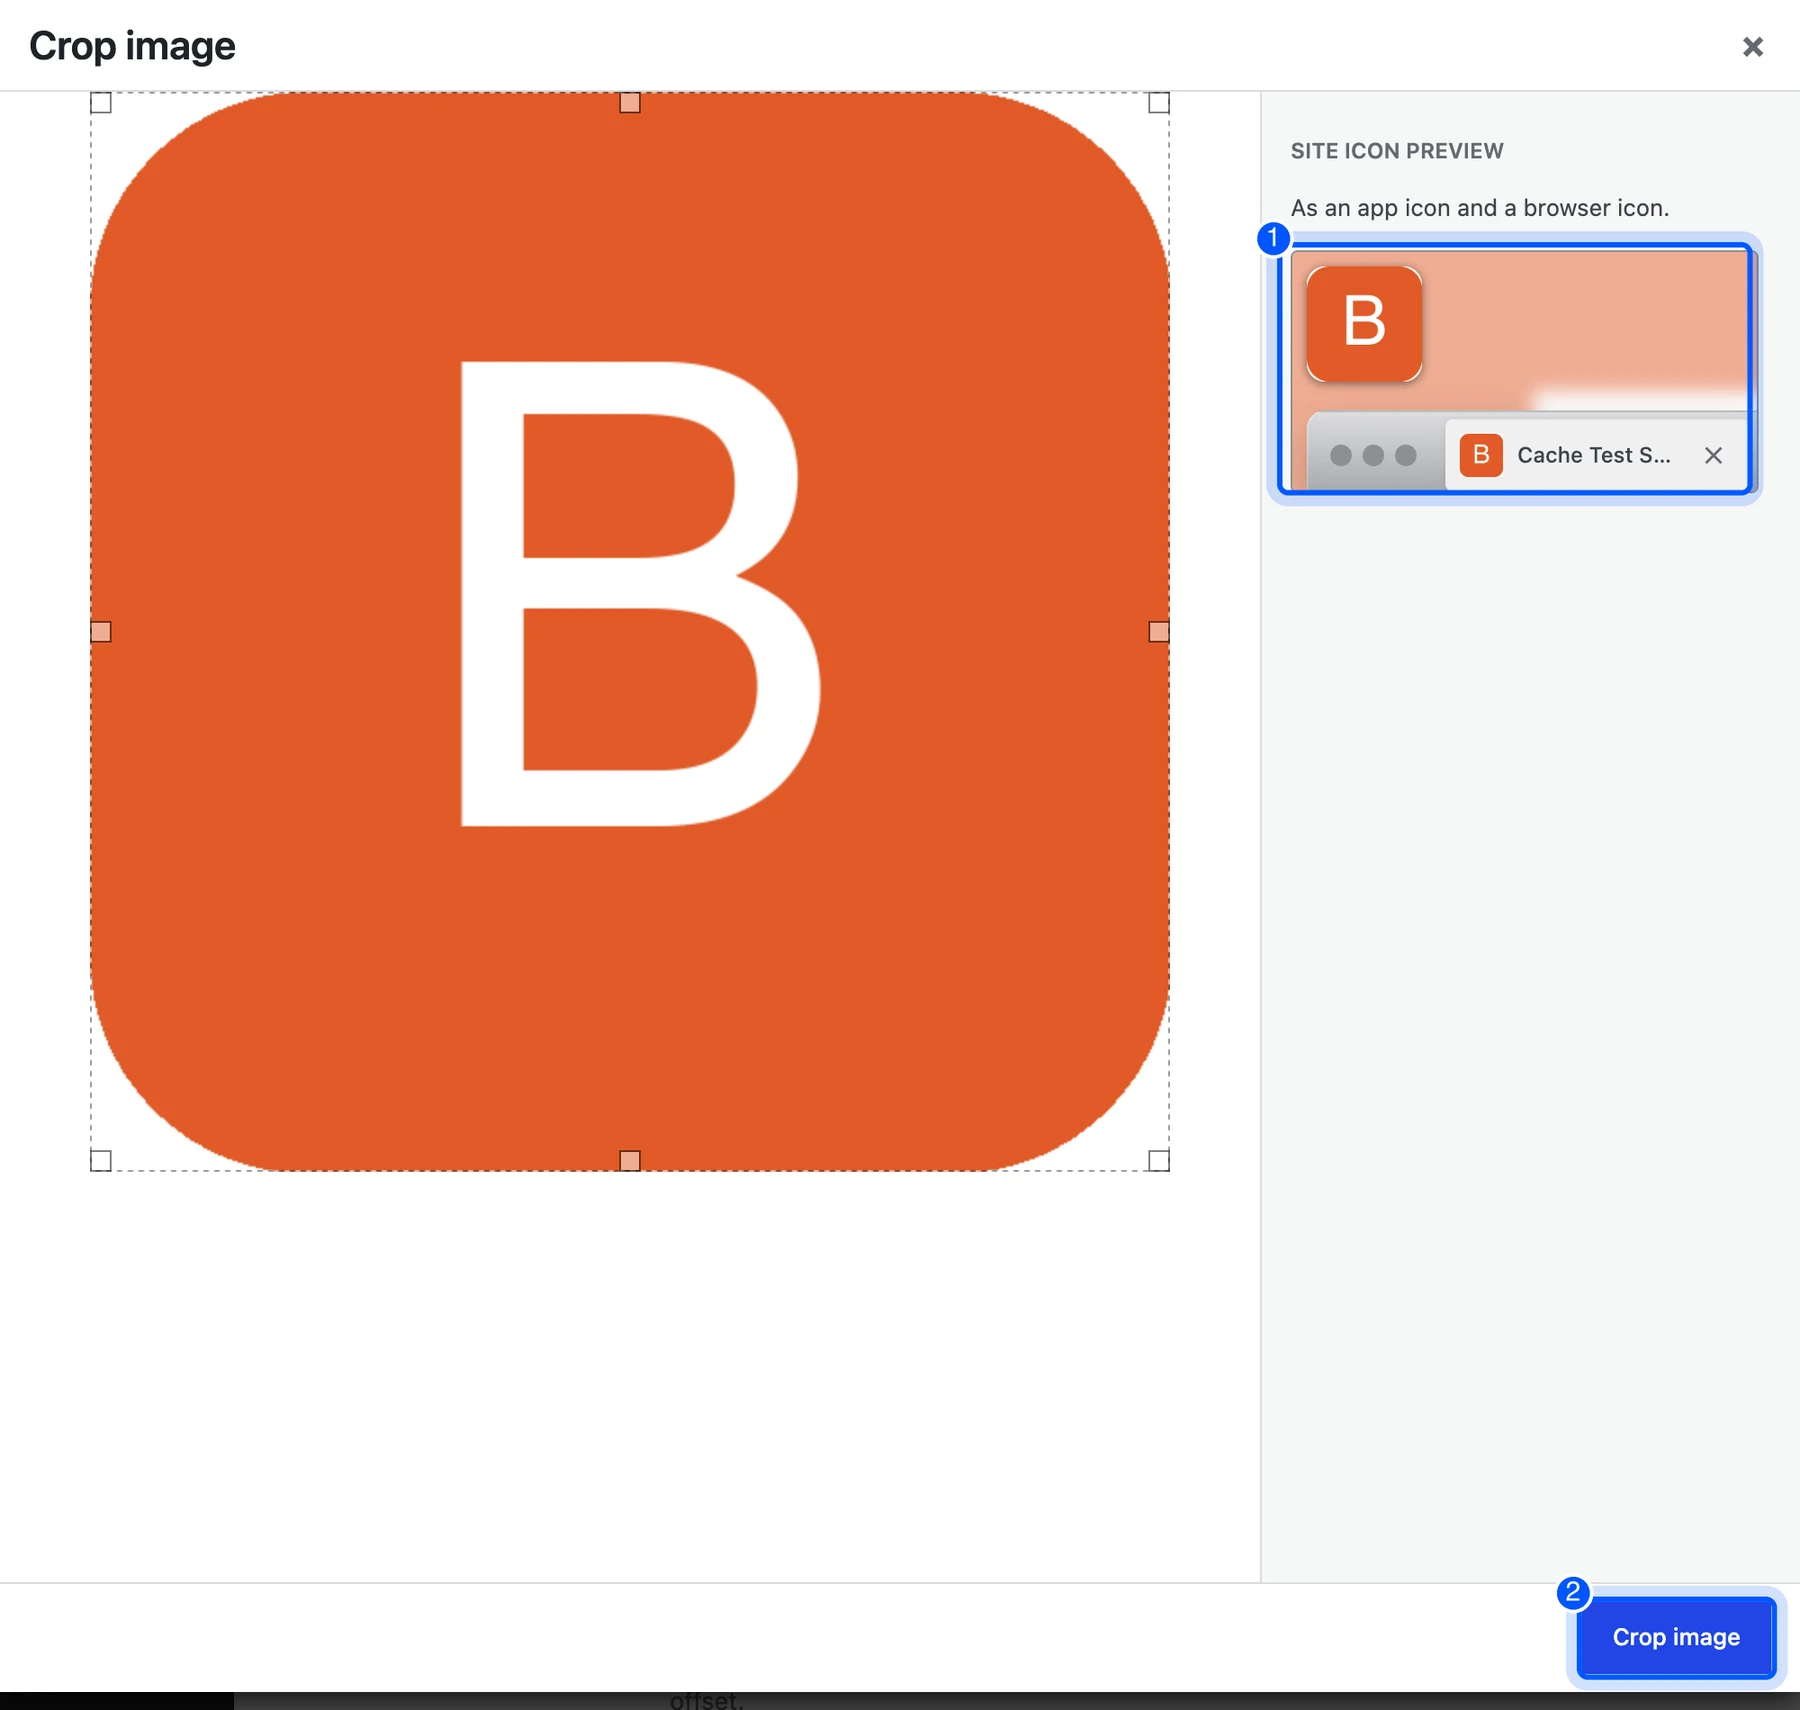
- Crop the image: WordPress opens a crop screen with a Site Icon Preview at the right. The preview shows the icon as an app icon and in a browser tab. Click Crop image.
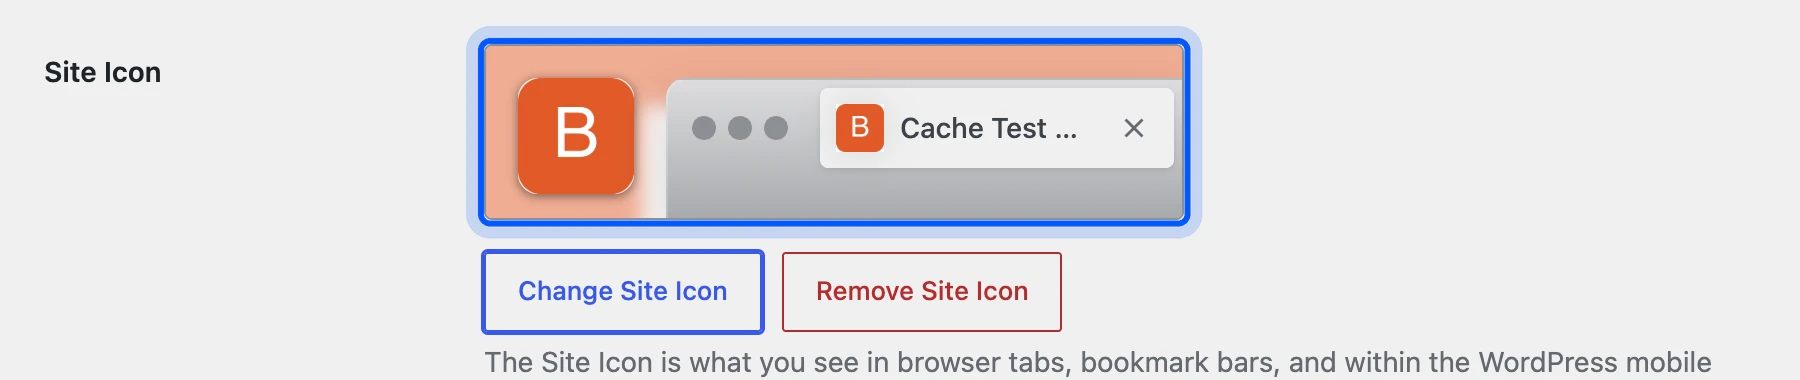
- Check the preview: Back on the General screen you see the preview. Use Change Site Icon to try another file, or Remove Site Icon to start over.
- Save Changes: Scroll to the bottom and click Save Changes.

Do not skip the last step. On my test site the admin bar already showed the new icon after the crop. The site_icon option still stayed at 0 until I pressed Save Changes, and then it held the ID of the cropped image.
WordPress also prints the tags for you. After I saved, the page head held these four lines, which come from one upload:
<link rel="icon" href="/wp-content/uploads/2026/10/cropped-favicon-600-32x32.png" sizes="32x32" />
<link rel="icon" href="/wp-content/uploads/2026/10/cropped-favicon-600-192x192.png" sizes="192x192" />
<link rel="apple-touch-icon" href="/wp-content/uploads/2026/10/cropped-favicon-600-180x180.png" />
<meta name="msapplication-TileImage" content="/wp-content/uploads/2026/10/cropped-favicon-600-270x270.png" />
Open your site, view the source with Ctrl+U (Cmd+Option+U on a Mac) and search for the word icon to confirm the tags are there.
How to Change the Favicon in WordPress With the Customizer
On a classic theme, you can change the favicon in the Customizer under Appearance, Customize, Site Identity. It uses the same Media Library and crop screens as Settings. Choose it if the Customizer is already open for your title, tagline or logo.
Follow these steps:
- Open the Customizer: Go to Appearance, then Customize. Block themes hide this screen, so it needs a classic theme such as Twenty Twenty-One.
- Open Site Identity: Click Site Identity. The Site Icon control sits under the title and tagline.
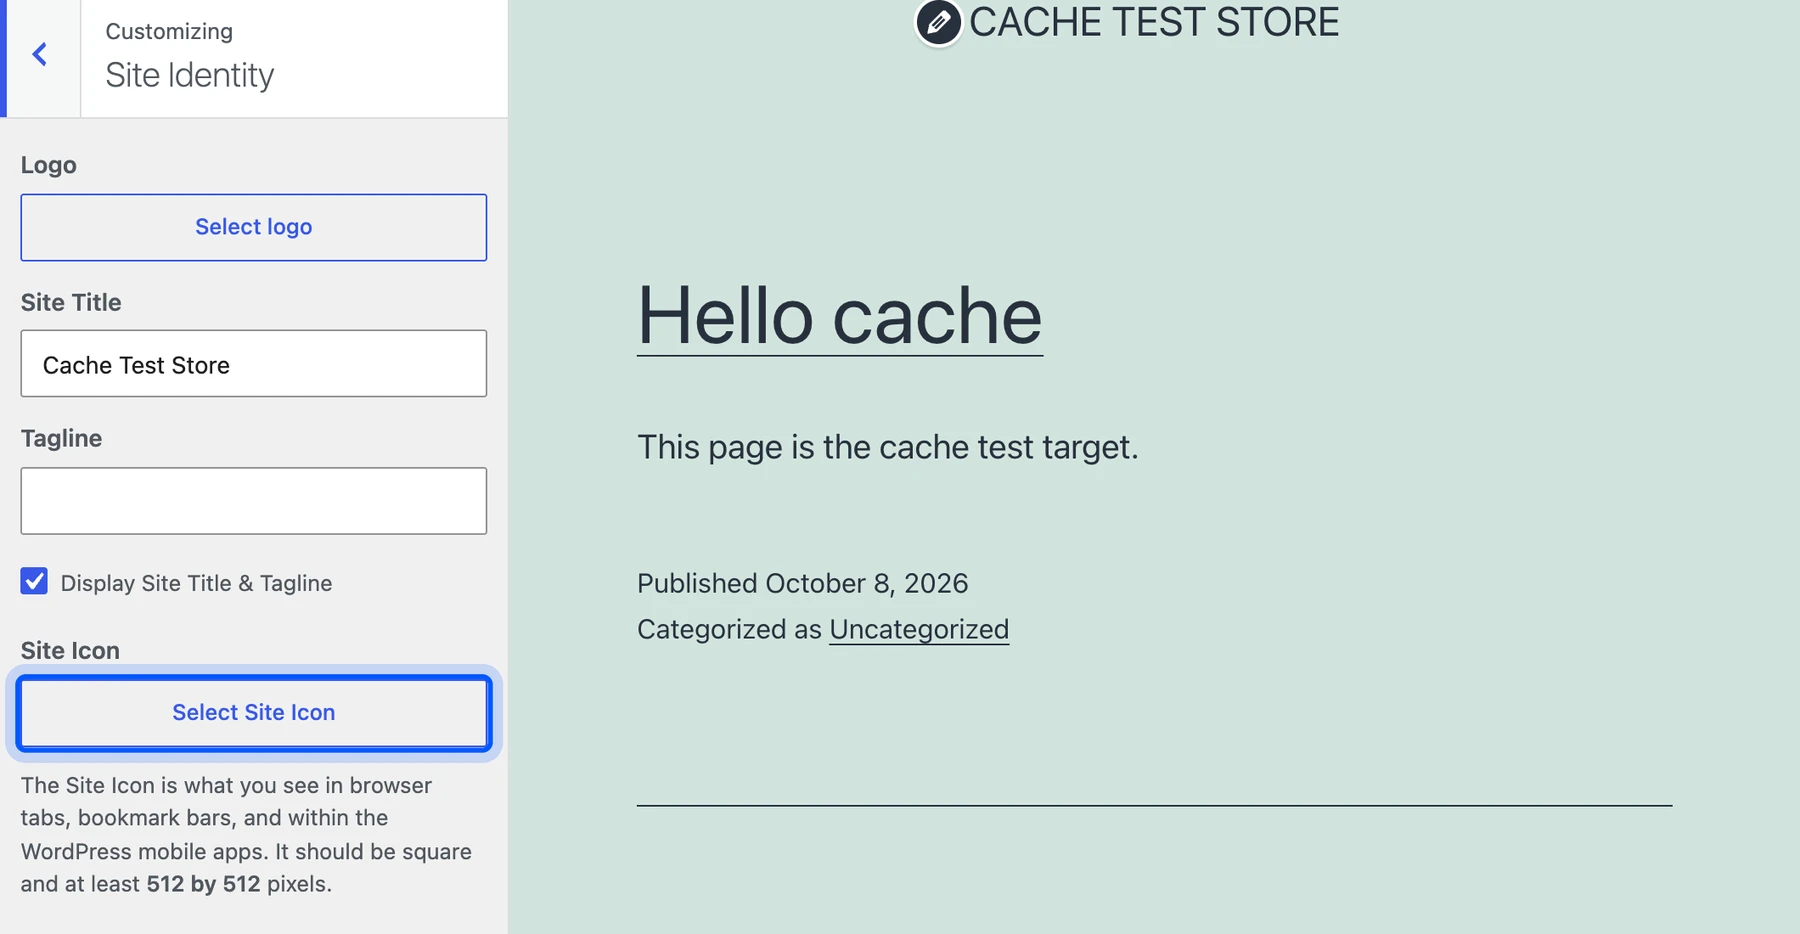
- Select the image: Click Select Site Icon, choose or upload your file and crop it.
- Publish: Click Publish at the top of the panel. Until then the change is a preview.
The panel repeats the same rule: the icon “should be square and at least 512 by 512 pixels”. The Customizer needs no new file format, so the Settings method and this one give the same result.
The Customizer also lets you preview the page beside the controls. That helps if you are changing the logo and the icon in one session, since both sit in the same panel.
How to Change Favicon in WordPress With the Site Editor
Block themes use the Site Editor, and the Site Logo block has a switch called Use as Site Icon. Turn it on and your logo becomes the favicon. This is the quickest path when your logo is already a square mark, and it avoids a second upload.
Follow these steps:
- Open the header: Go to Appearance, then Editor, and open the Header template part.
- Select the Site Logo block: Add one if the header has none, then choose your logo.
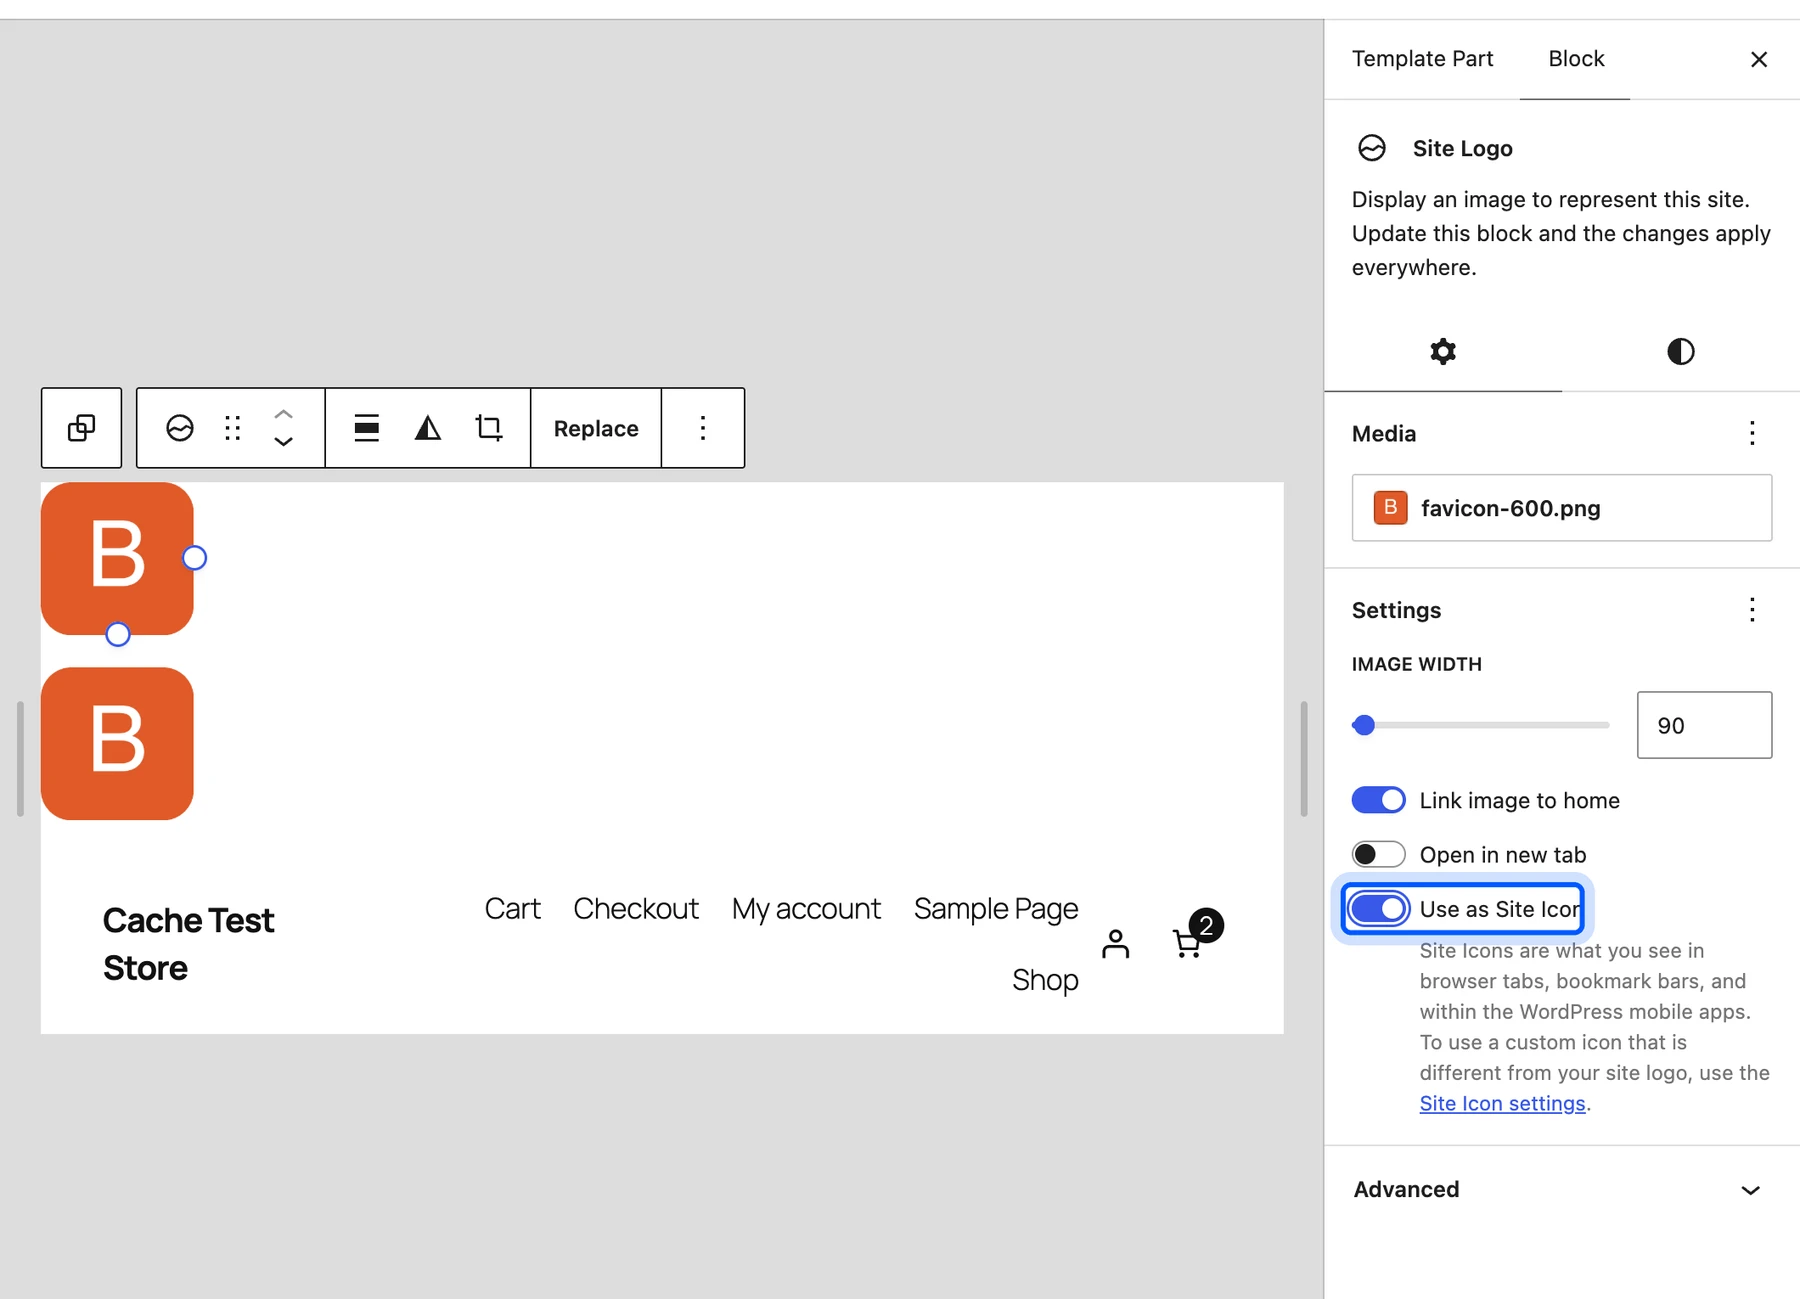
- Switch on Use as Site Icon: Open the block settings and turn on Use as Site Icon.
- Save: Click Save in the top right corner.
On my test site this worked as described. After I saved, the site_icon option held the logo’s image ID. The block settings also link to the Site Icon settings for people who want an icon that is different from the logo.
Use this method with care. A wide logo gets cropped to a square and may be unreadable in a tab, so a separate square icon is safer.
If you want a different icon from your logo, the block settings point you to the Site Icon settings. That is the Settings, General screen from the first method.
How to Change Favicon in WordPress With a Plugin
A plugin helps when you want a full favicon set or your theme blocks the built-in setting. The Favicon by RealFaviconGenerator plugin adds an Appearance, Favicon screen. As of October 2026 it has more than 200,000 active installs, a 4.9 rating from 801 reviews and was updated on September 20, 2026.
Follow these steps:
- Install the plugin: Go to Plugins, Add Plugin, search for Favicon by RealFaviconGenerator, then install and activate it.
- Open Appearance, Favicon: The screen says “No favicon has been configured yet” until you add one.
- Choose a master picture: Click Select from the Media Library under Master picture URL.
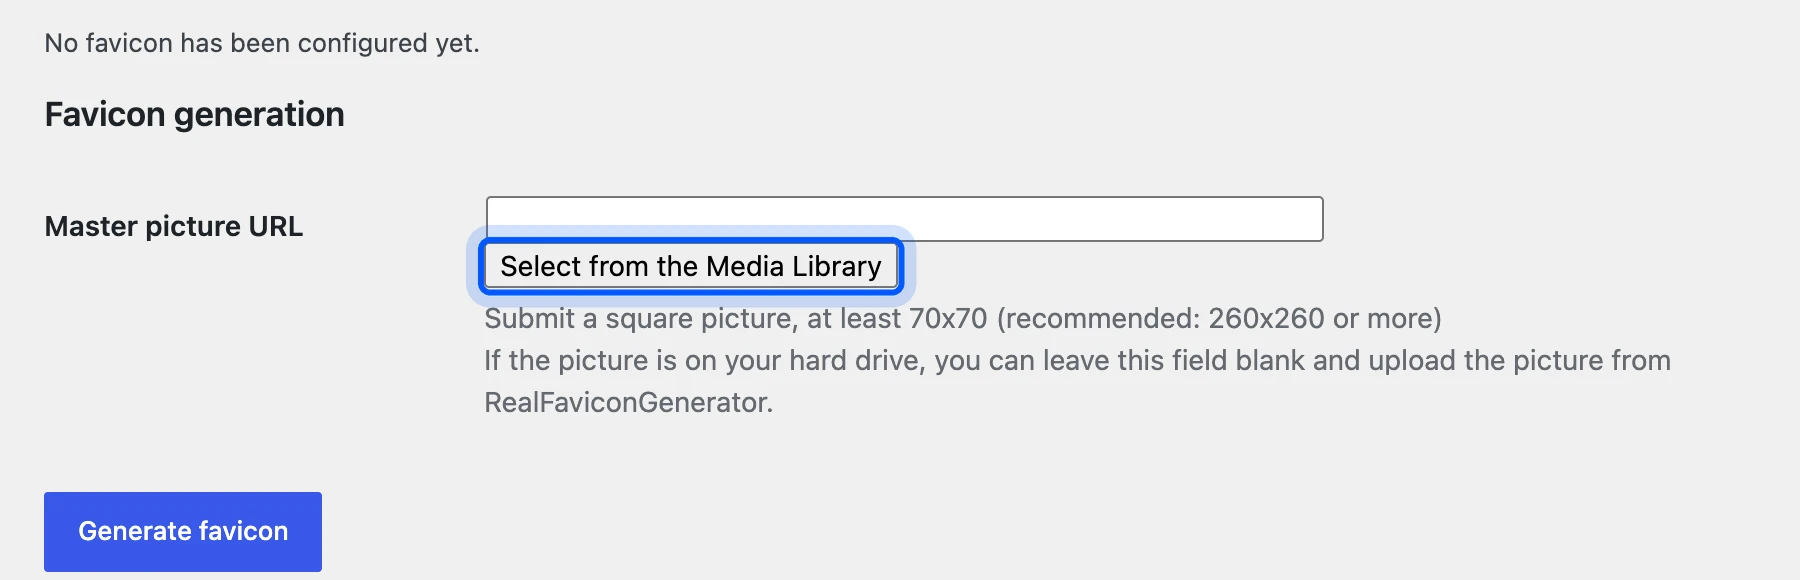
- Generate the favicon: Click Generate favicon and follow the steps on screen.
The plugin asks for a square picture of at least 70 by 70 pixels and recommends 260 by 260 or more. Its screen also says you can upload the picture from RealFaviconGenerator instead. I did not run the generation step, because it hands the work to that outside service.
A plugin adds one more thing to update and keep secure. Use the built-in settings unless you need something they cannot do.
Which Method Should You Use?
Use Settings, General for most sites, because it works on every theme and takes one screen. Choose the Customizer on a classic theme you already edit there. The Site Editor fits when your logo is a square mark, and a plugin fits when you need a full icon set.
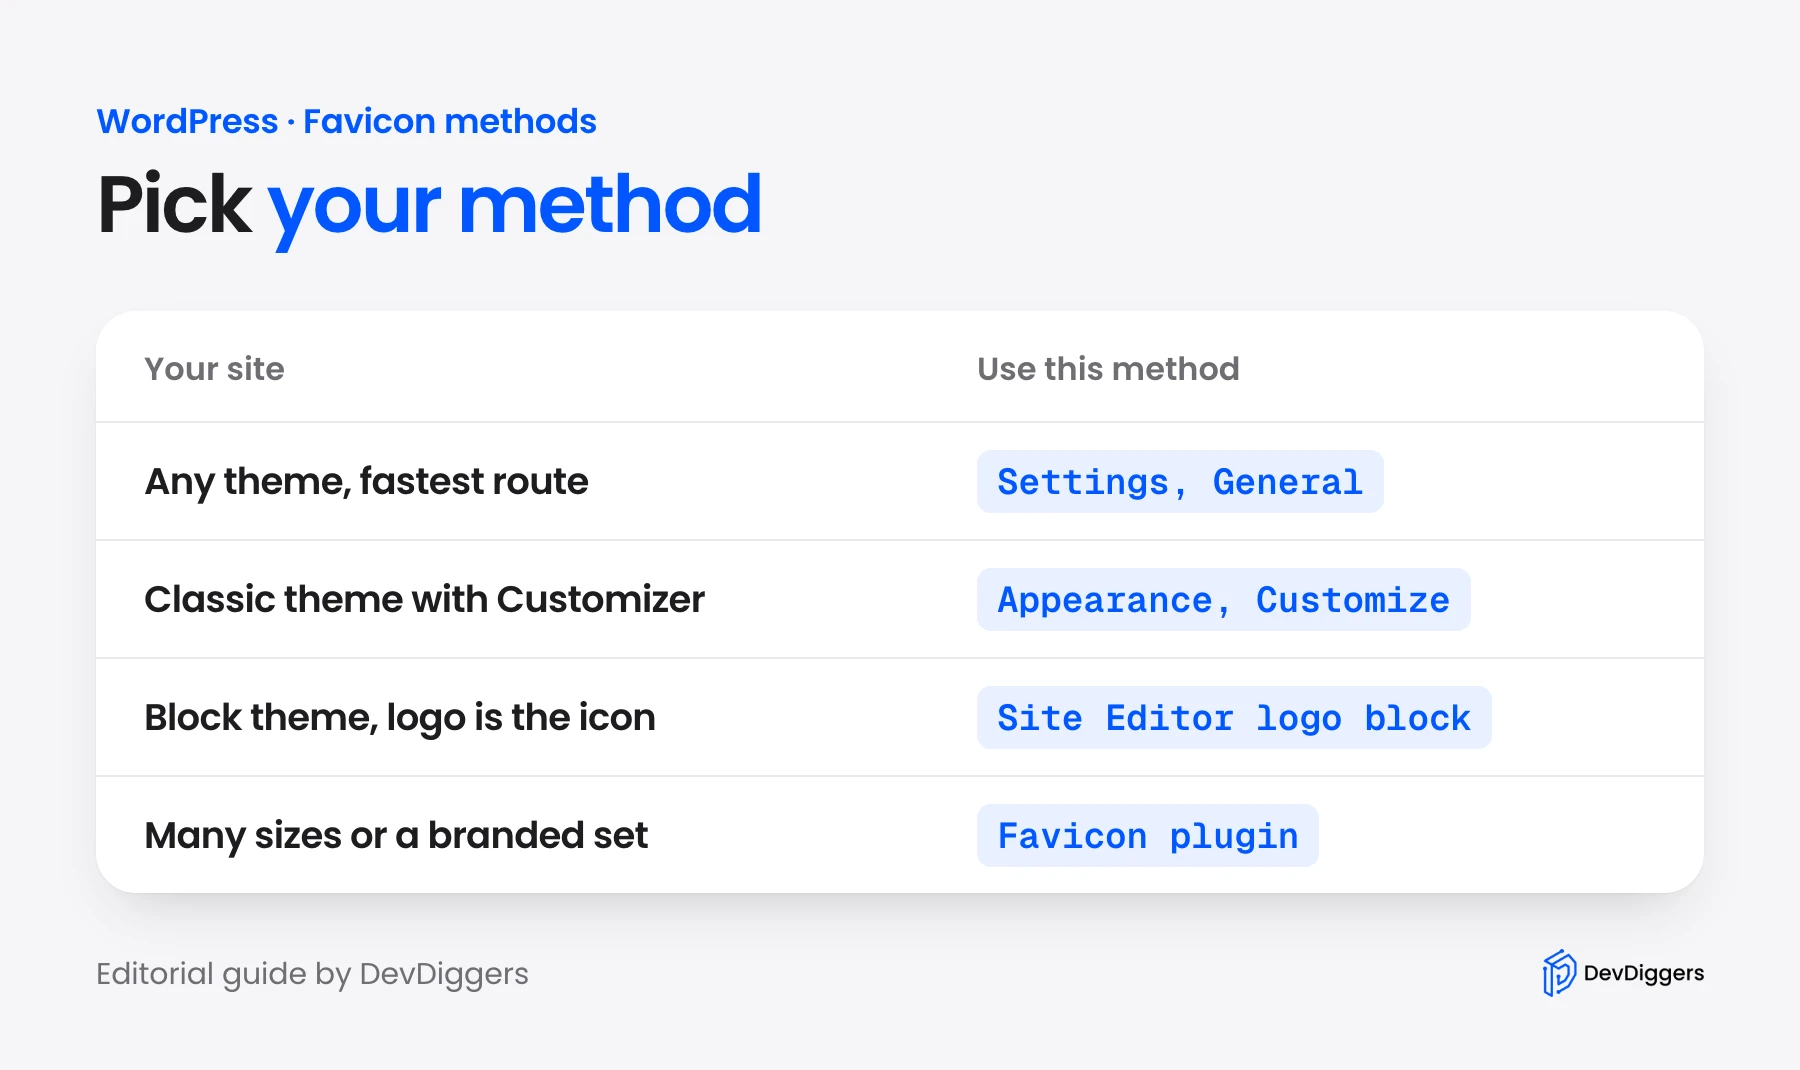
| Method | Works on | Needs a new upload | Best for |
|---|---|---|---|
| Settings, General | Any theme | Yes | Most sites |
| Customizer | Classic themes | Yes | Sites that already edit there |
| Site Editor logo block | Block themes | No, it reuses the logo | Square logos |
| Favicon plugin | Any theme | Yes | Full icon sets |
If you are wondering how to change WordPress favicon on a block theme, start with Settings, General. It needs no template edit and gives you the crop preview.
Pick one method and stay with it. If you set an icon in two places, the one saved last wins, and it is easy to forget which that was.
Why Your Favicon Isn’t Showing and How to Fix It
A new favicon often fails to show for four reasons. The browser or a cache plugin kept the old copy, the theme prints its own icon, or Google has not crawled the change yet. Check them in that order, because the first two take under a minute.
Work through this list:
- Local copy: Visit the site in a private window to load it with no saved files.
- Site cache: Clear your cache plugin and any CDN. Our guide to WordPress caching plugins shows how to purge each one.
- Theme override: Some themes print their own icon tag in the header. View the source and look for a second icon line.
- Wrong file: Use a square PNG that meets the size rules above. A tiny or stretched file can fail to load.
- Changed URL: Google says the favicon URL must be stable. Do not rename or move the file after you set it.
Google also needs time. Its guidelines say crawling “can take anywhere from several days to several weeks”. The old icon may stay in search results after the tab is fixed.
If the theme prints its own icon, edit it in a child theme and not in the parent. Our guide on how to create a WordPress child theme shows the safe setup.
Best Practices for Designing Your Favicon
A good favicon is a simple mark that stays readable at 16 pixels. Use one shape or one letter on a solid background, and keep strong contrast between them. Test it at tab size before you upload it, and simplify anything that blurs.
Avoid fine detail and thin lines, because both vanish when the icon shrinks.
These rules cover most brands:
- One idea: A single letter or symbol that stands for your brand.
- High contrast: A dark mark on a light square, or the reverse, reads best on both light and dark tabs.
- Square canvas: Leave a small margin so the corners do not clip the mark.
- PNG at 512 pixels: Export once at 512 by 512 pixels and let WordPress make the smaller sizes.
- Light file: Keep it small, as our guide to WordPress image optimization explains.
View your icon at the actual tab size before you commit. If the shape turns to a blur at 16 pixels, simplify it.
Check it on a dark browser theme as well. A dark mark on a see-through background can disappear there, so a solid square behind the mark is the safer choice. Keep your brand color in the background, and let the mark be white or near white.
How to Check That Your New Favicon Works
You can check a new favicon in under two minutes with a private window and the page source. Open the site, read the icon tags in the head and confirm the tab shows your image. If the tags are right but the tab is old, the cause is a cache and your settings are fine.
Follow these steps:
- Open a private window: Visit your home page there, so no old cached icon can appear.
- Look at the tab: Your icon should show next to the page title within a few seconds.
- View the page source: Press Ctrl+U (Cmd+Option+U on a Mac) and search for the word icon in the head.
- Match the file names: The icon lines should point to files named after your upload, such as
cropped-followed by your file name.
If a second icon line points to a theme file, the theme is overriding your choice. Remove that line in a child theme, then test again.
Check a few other pages too. A theme or plugin can print a different icon on a landing page, a shop page or the checkout.
Conclusion
Now you know how to change favicon in WordPress with four methods, and how to check the result. Settings, General is the fastest, the Customizer suits classic themes, the Site Editor reuses your logo and a plugin builds a full set.
Upload a square 512 pixel PNG, press Save Changes and check the page source for the icon tags. If the old icon lingers, clear your browser and cache first, then give Google a few weeks.
Frequently Asked Questions (FAQs)
Q1. Do I need a plugin to change my favicon in WordPress?
No. WordPress has a built-in Site Icon setting under Settings, General, and another in the Customizer and the Site Editor. A plugin helps only when you want a full set of icon files or your theme blocks the built-in field.
Q2. What image format works best for a WordPress favicon?
A square PNG of at least 512 by 512 pixels works best. WordPress asks for that size, and Google’s guidelines list PNG among supported formats. WordPress then makes the smaller copies for you.
Q3. Can I use different favicons on different pages?
Not with the built-in setting, because WordPress holds one site icon for the whole site. A plugin or custom code can change the icon tag per page. Google asks for a stable favicon URL, so most sites should keep one.
Q4. Does changing my favicon affect SEO rankings?
A favicon is not a ranking factor that Google documents. It can show in search results, so a clear one may help people recognize your listing. Google also asks that the favicon URL stay stable, so avoid changing it often.
Q5. How long does it take for a new favicon to show everywhere?
Your own browser may update after a hard refresh. Google says crawling can take several days to several weeks. Expect a delay in search results even when your tab looks right.
Q6. Can I remove my favicon and go back to the default?
Yes. In Settings, General, click Remove Site Icon under the preview, then Save Changes. Your site then prints no icon tags, and browsers fall back to their own default symbol.