

A Webflow to WordPress migration moves your CMS content with a CSV file and rebuilds your pages by hand. Your old URLs need a plan too. Keep them the same where you can and redirect the rest.
We tested the WordPress side of this guide on a WordPress 7.1.3 test site with WP All Import 4.1.3 in October 2026. The Webflow side comes from Webflow’s own help pages, which we read the same month. The sample CSV in our screenshots holds example posts and no real client data.
This guide shows how to migrate from Webflow to WordPress in order. It covers what can move, how to match your URLs and how to import the CSV. It also covers images, redirects, the domain switch and a final check.
What Moves in a Webflow to WordPress Migration
In a Webflow to WordPress move you export each CMS collection as a CSV file from Webflow. WordPress can import that file with a plugin. Static pages, eCommerce data and user accounts do not travel in that CSV and need another route.
Webflow’s code export does not solve this. Webflow’s help center says exported code leaves out CMS content, User Accounts and Ecommerce content. You get static HTML, CSS and JavaScript only.
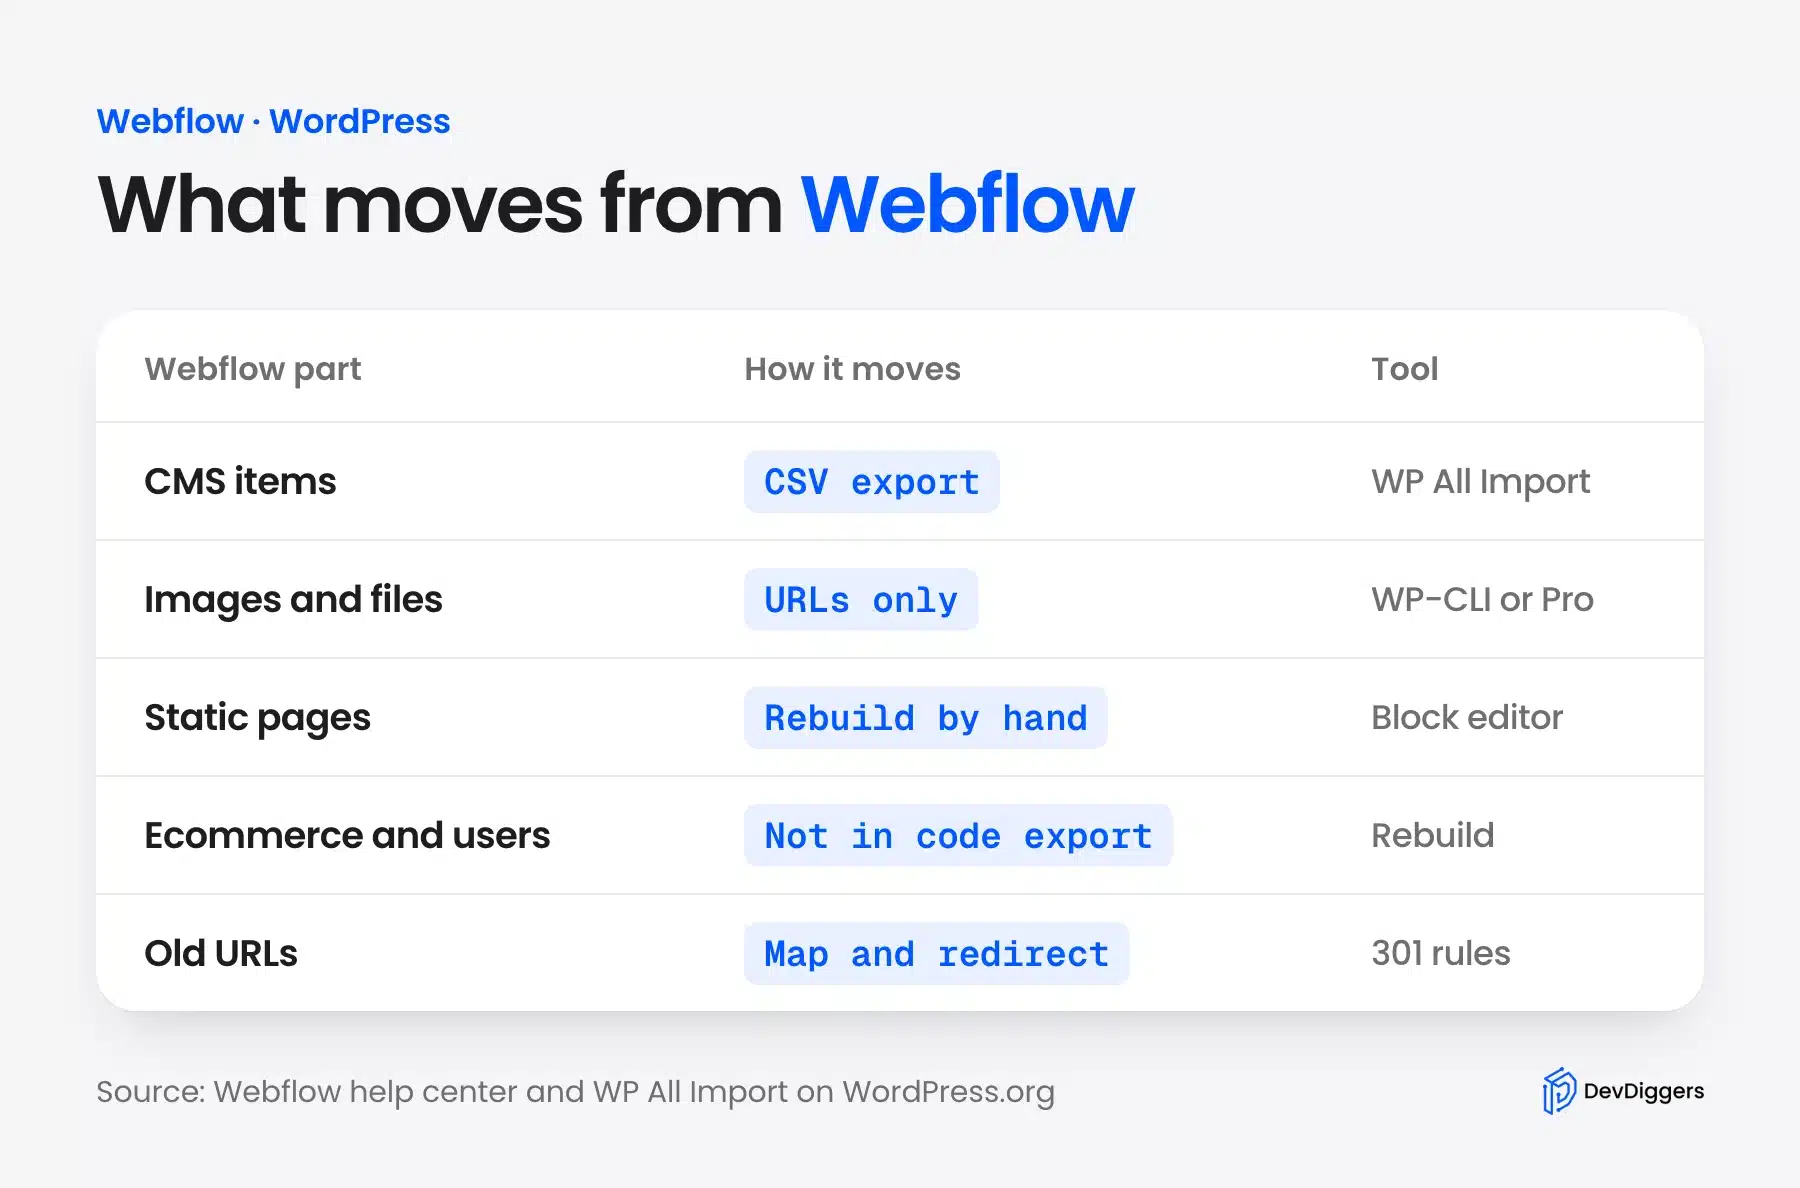
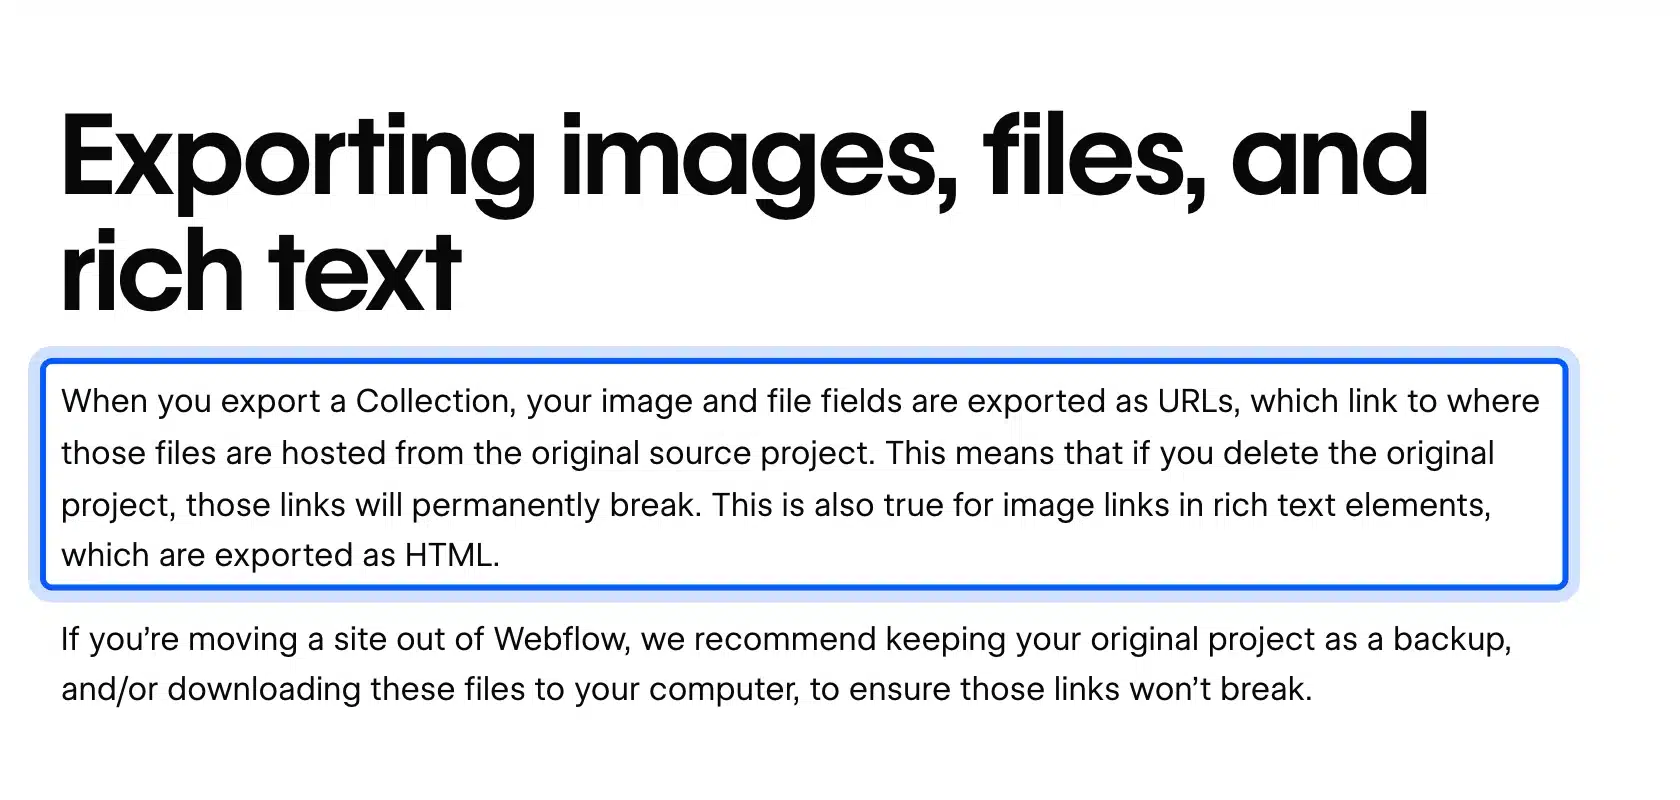
The CSV export has one more catch. Webflow’s own CSV export announcement says image and file fields come out as URLs that point to the original project. Those links break for good if you delete that project.
How to Migrate Webflow CMS Content to WordPress
You migrate Webflow CMS content to WordPress in three steps. Export each collection as a CSV file, set WordPress permalinks that match your Webflow paths, and import the CSV with a plugin. Do all three on a staging site first and leave your live Webflow site untouched.
Your pages and design come after that. Do the CMS content first because it carries the URLs and the text that search engines already know.
Step 1: Export Each CMS Collection From Webflow
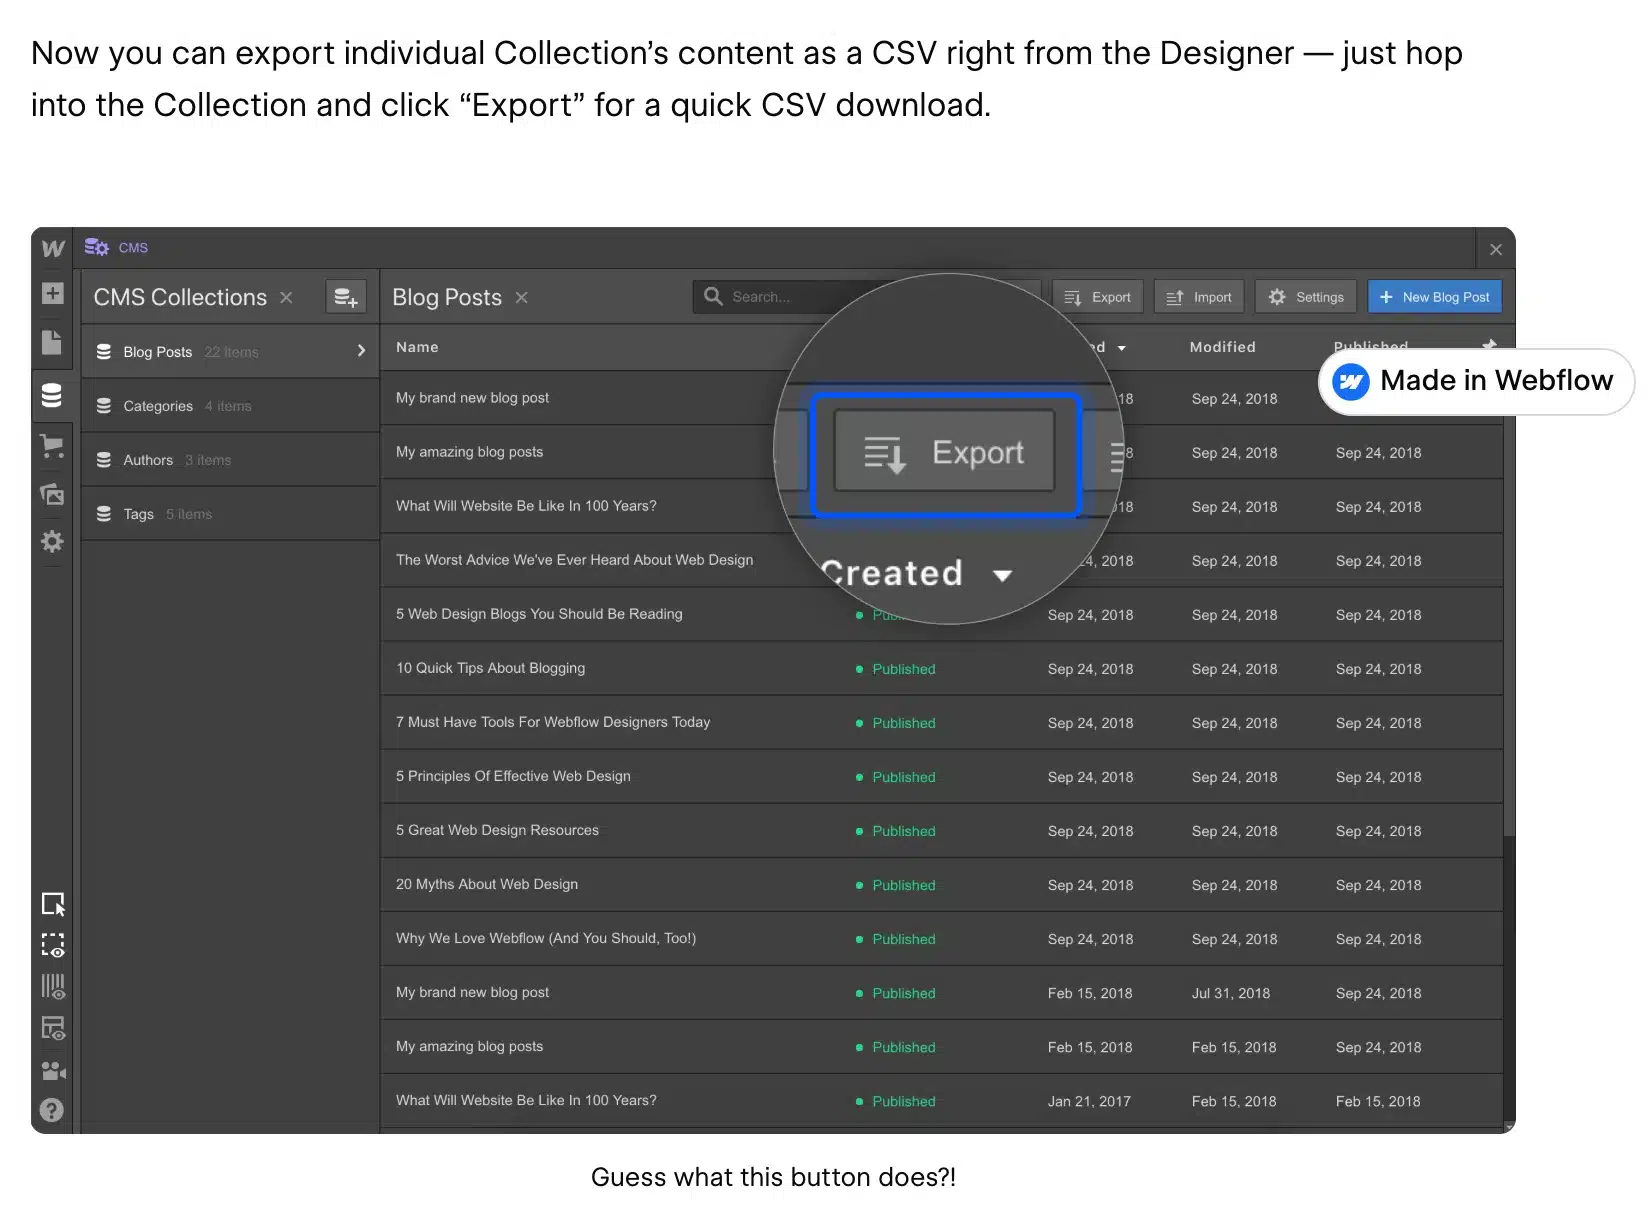
Open the CMS panel in the Webflow Designer and click the name of the collection you want to move. Click Export to download a CSV file of the whole collection, as the Webflow help center describes. Repeat this for all your CMS collections, such as blog posts, authors and categories.
You can also search or filter a collection first, select items and export only those. The same help page says rich text fields export as HTML.
It also says the CSV only holds items from the current locale view. Export each language on its own.
If your Webflow site runs several locales, you can rebuild each language when you create a multilingual WordPress site.
Step 2: Install WordPress and Match Your URL Structure
Install WordPress on your new host or on a staging copy. Next set a permalink structure that copies your Webflow paths. Webflow puts each CMS item at the collection slug plus the item slug, and a matching structure keeps those URLs the same.
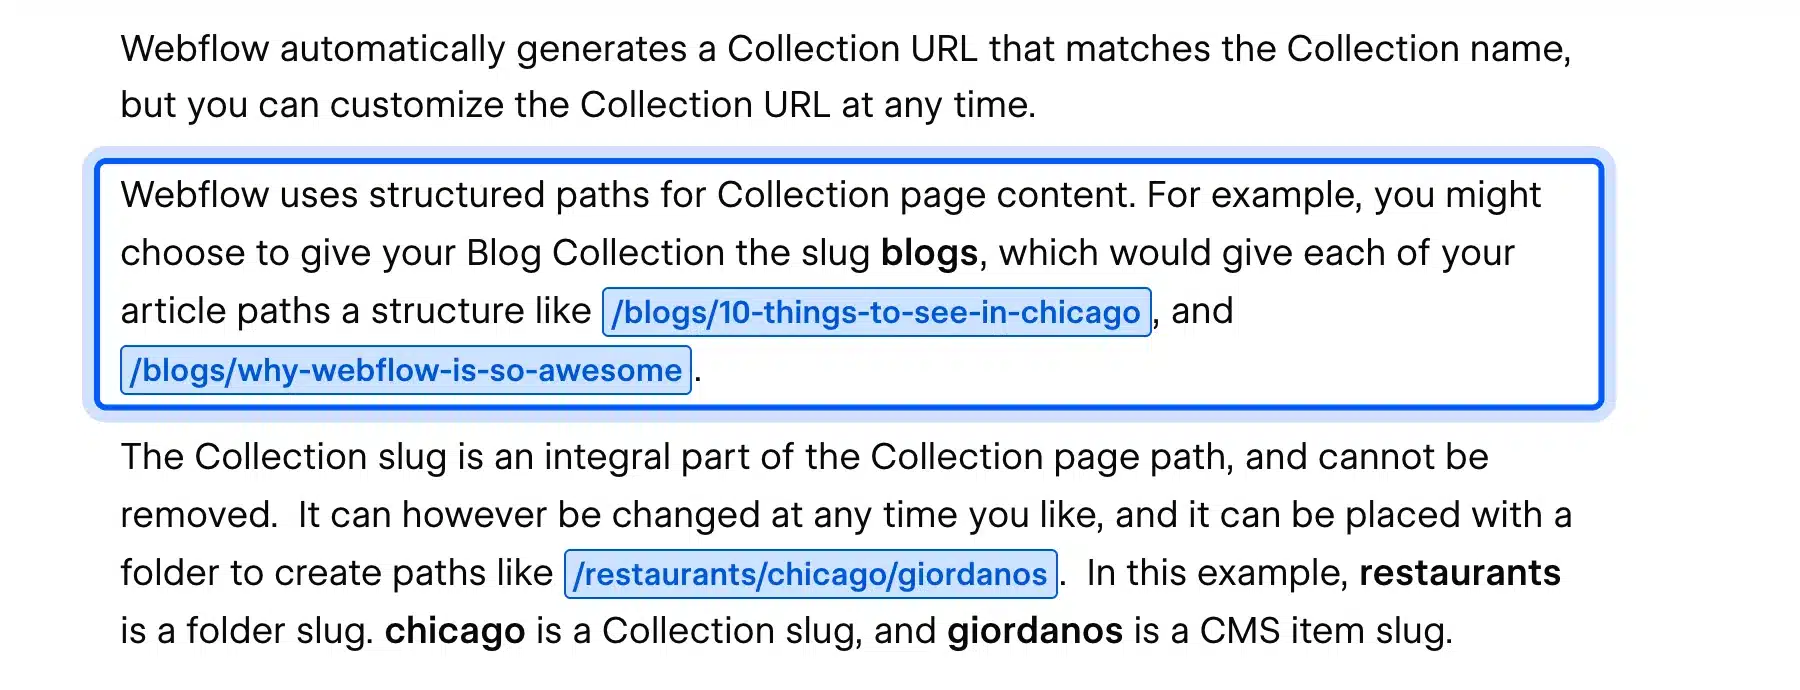
Webflow’s Webflow Way guide says the collection slug is part of the page path and cannot be removed. A collection with the slug blogs gives paths like /blogs/10-things-to-see-in-chicago. Check your own collection slug in Webflow before you choose a structure.
Now open Settings > Permalinks in WordPress. Pick Custom Structure and type the collection slug plus the post name tag. For a Webflow collection with the slug post, that is /post/%postname%/.
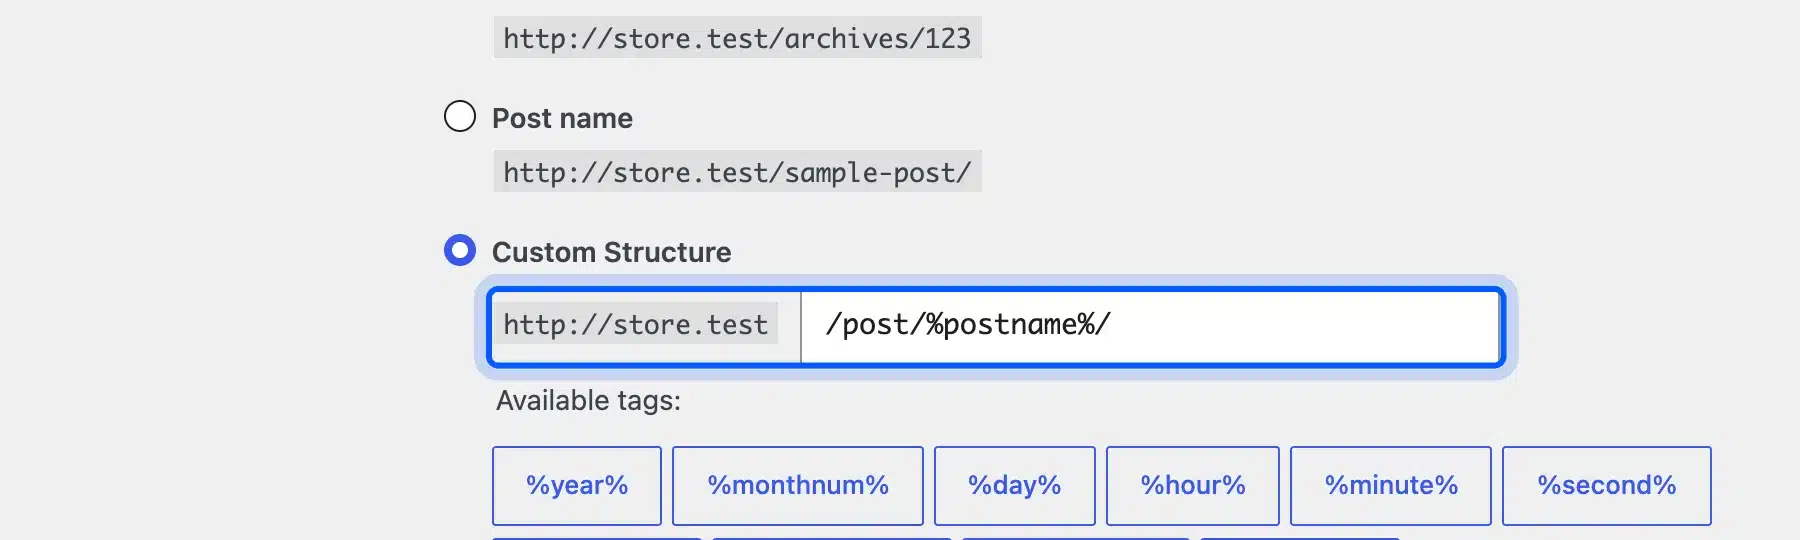
We tested this on our test site. After the import, the URL /post/how-to-choose-a-hosting-plan/ returned 200 and the same address without the final slash returned a 301 to the slash version. Our guide on pretty permalinks in WordPress covers the other structures.
Step 3: Import the CSV With WP All Import
WP All Import is a WordPress plugin that reads a CSV file and creates posts from its rows. Its WordPress.org page says it can import any XML, CSV, Excel or Google Sheets file. The free edition handles titles, content, slugs and dates.
Our test CSV used Name, Slug, Item ID, Published On and Post Body columns. Your column names follow your own collection fields. Follow these steps with your file:
- Install and activate WP All Import and open All Import > New Import.
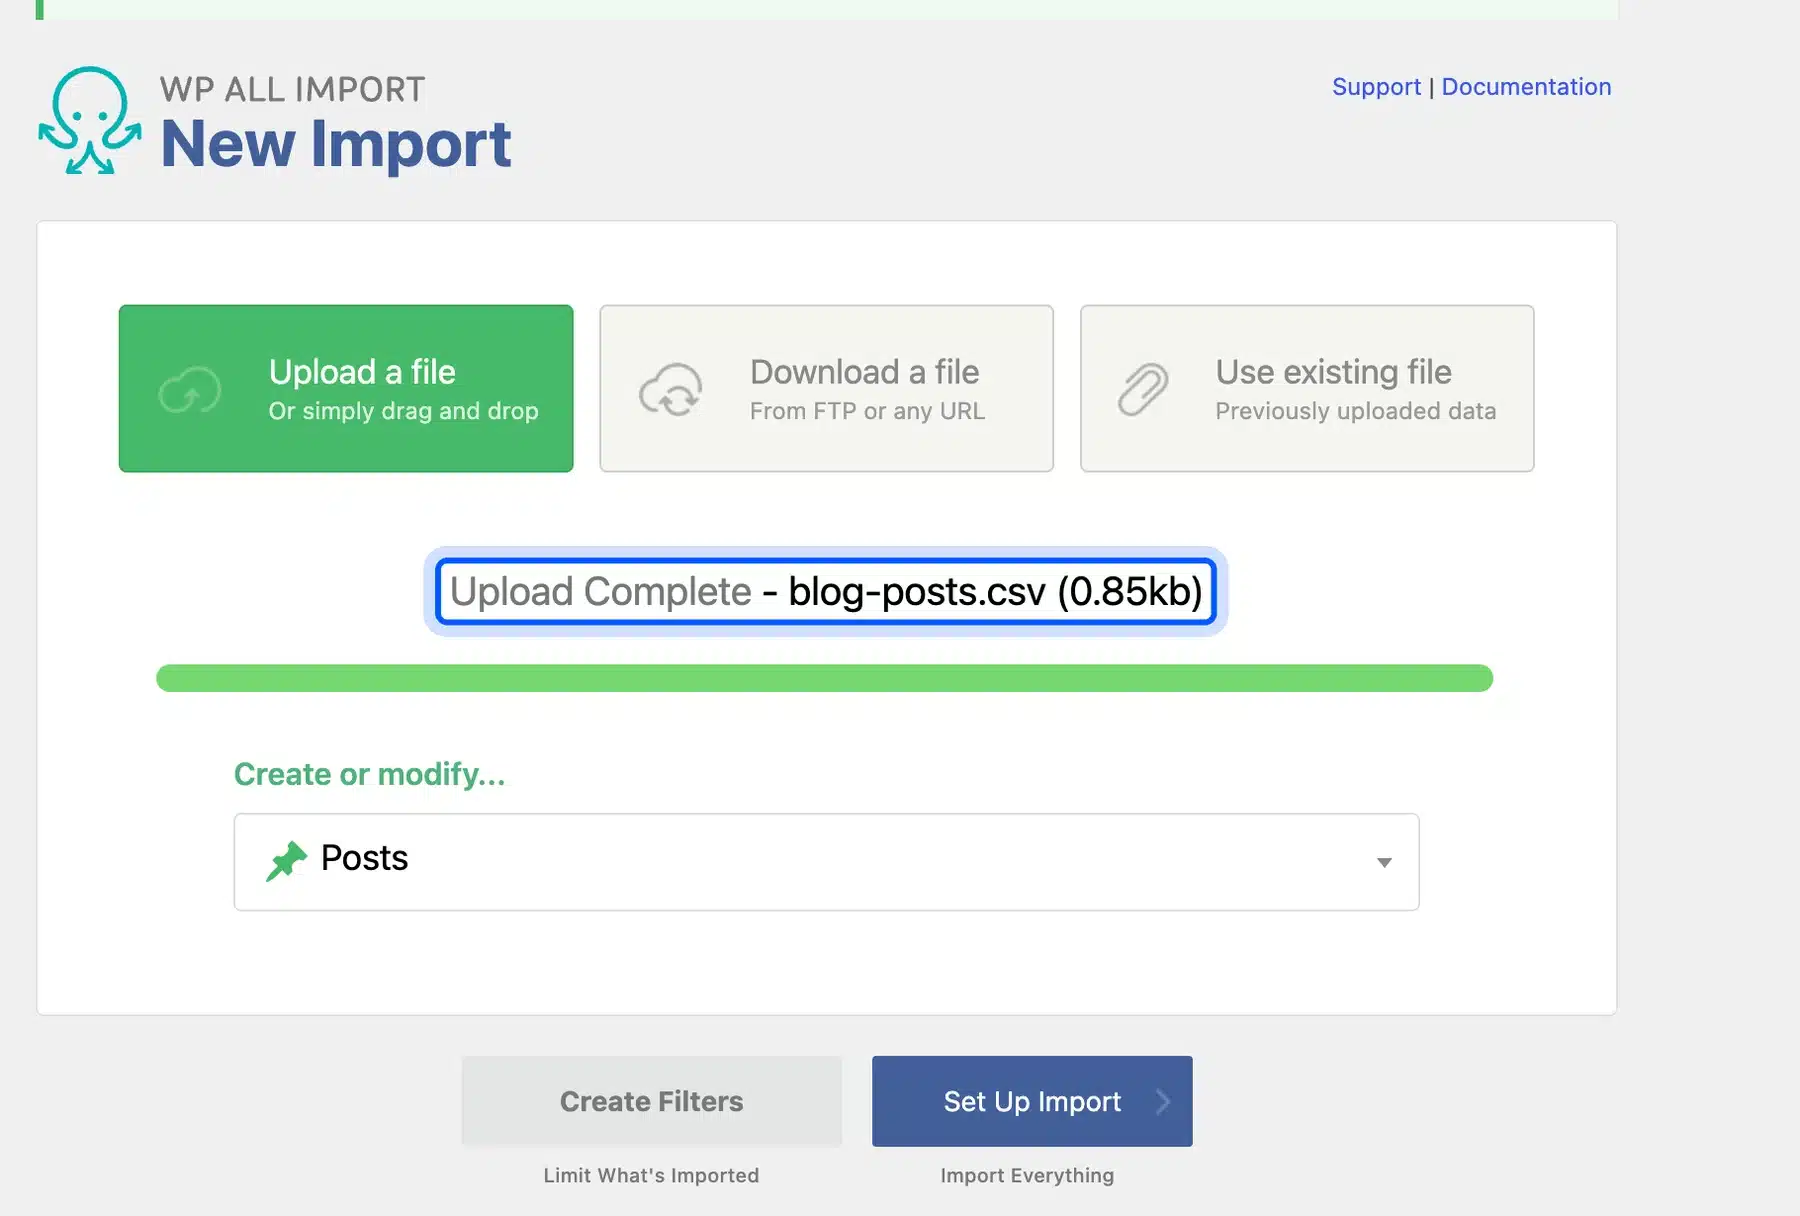
- Choose Upload a file and pick your CSV. Leave the type on Posts and click Set Up Import.
- Type
{name[1]}in the title field and{postbody[1]}in the content box. The right panel shows the real values of the first record so you can check each column.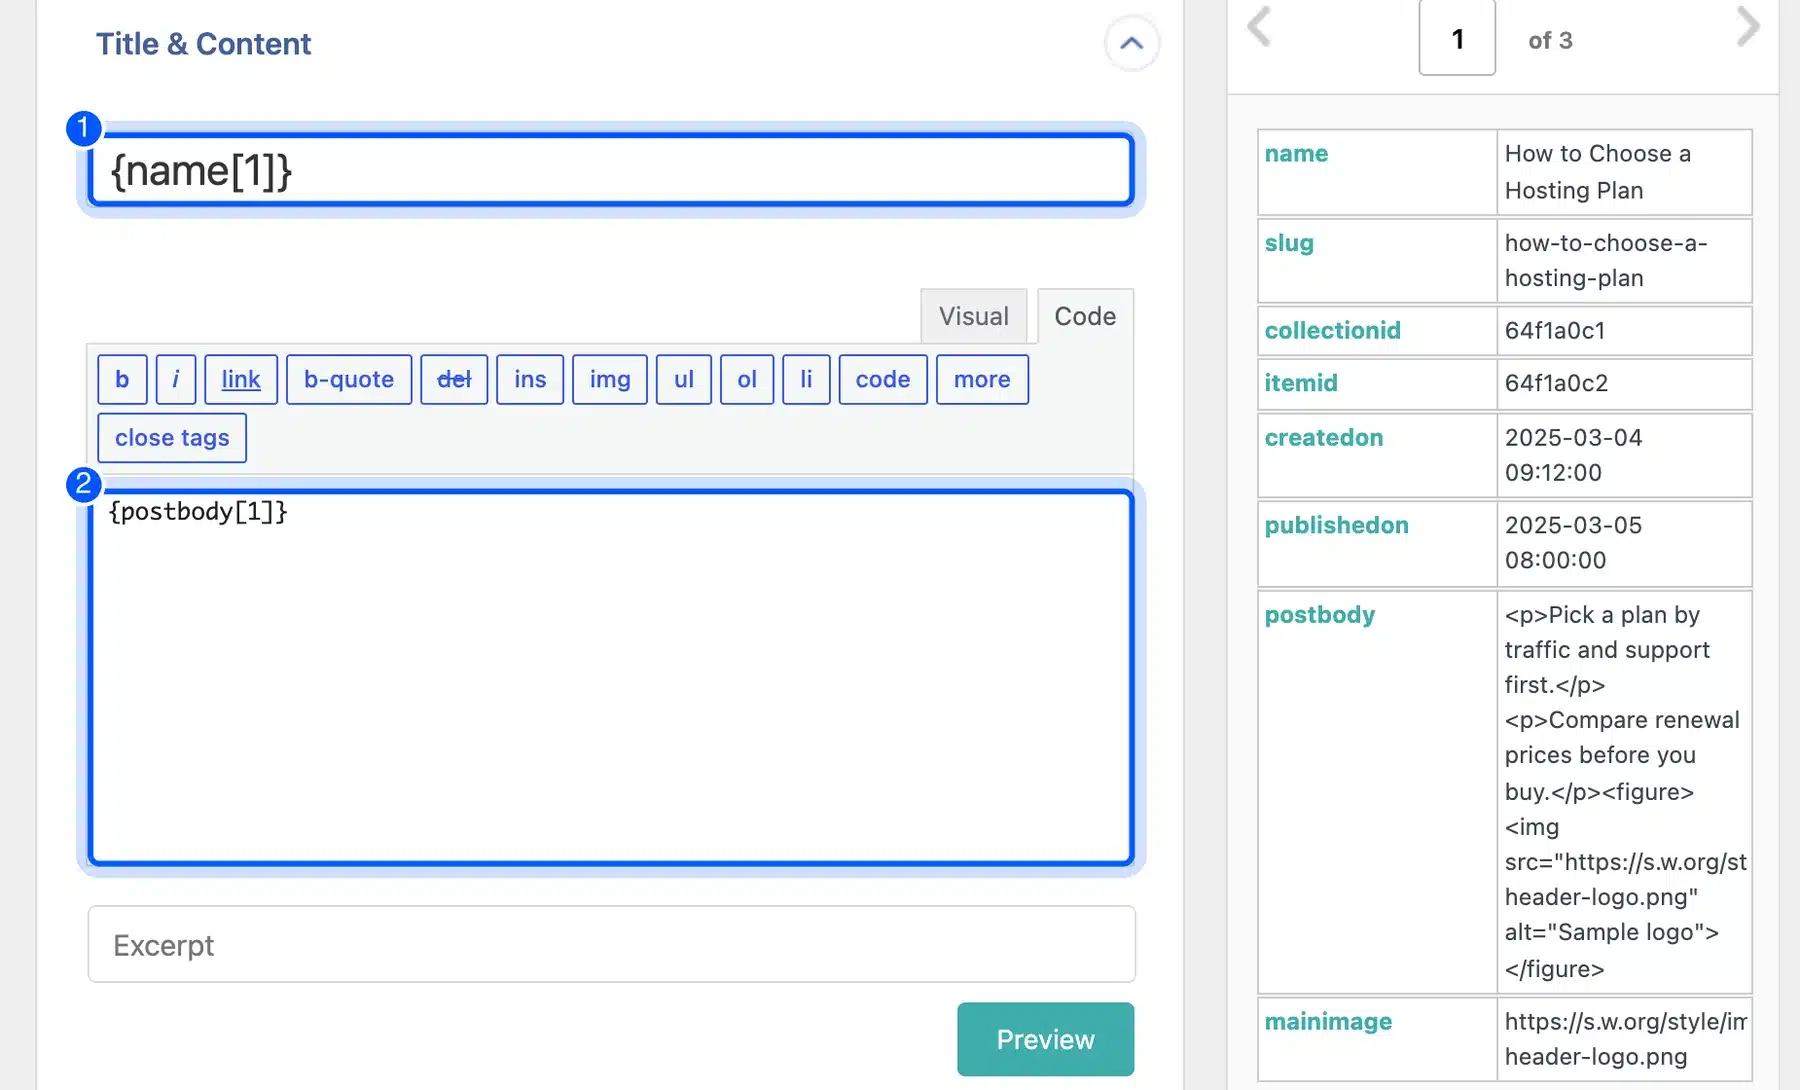
- Open Other Post Options. Put
{publishedon[1]}in Post Dates and{slug[1]}in Post Slug so each post keeps its old date and address.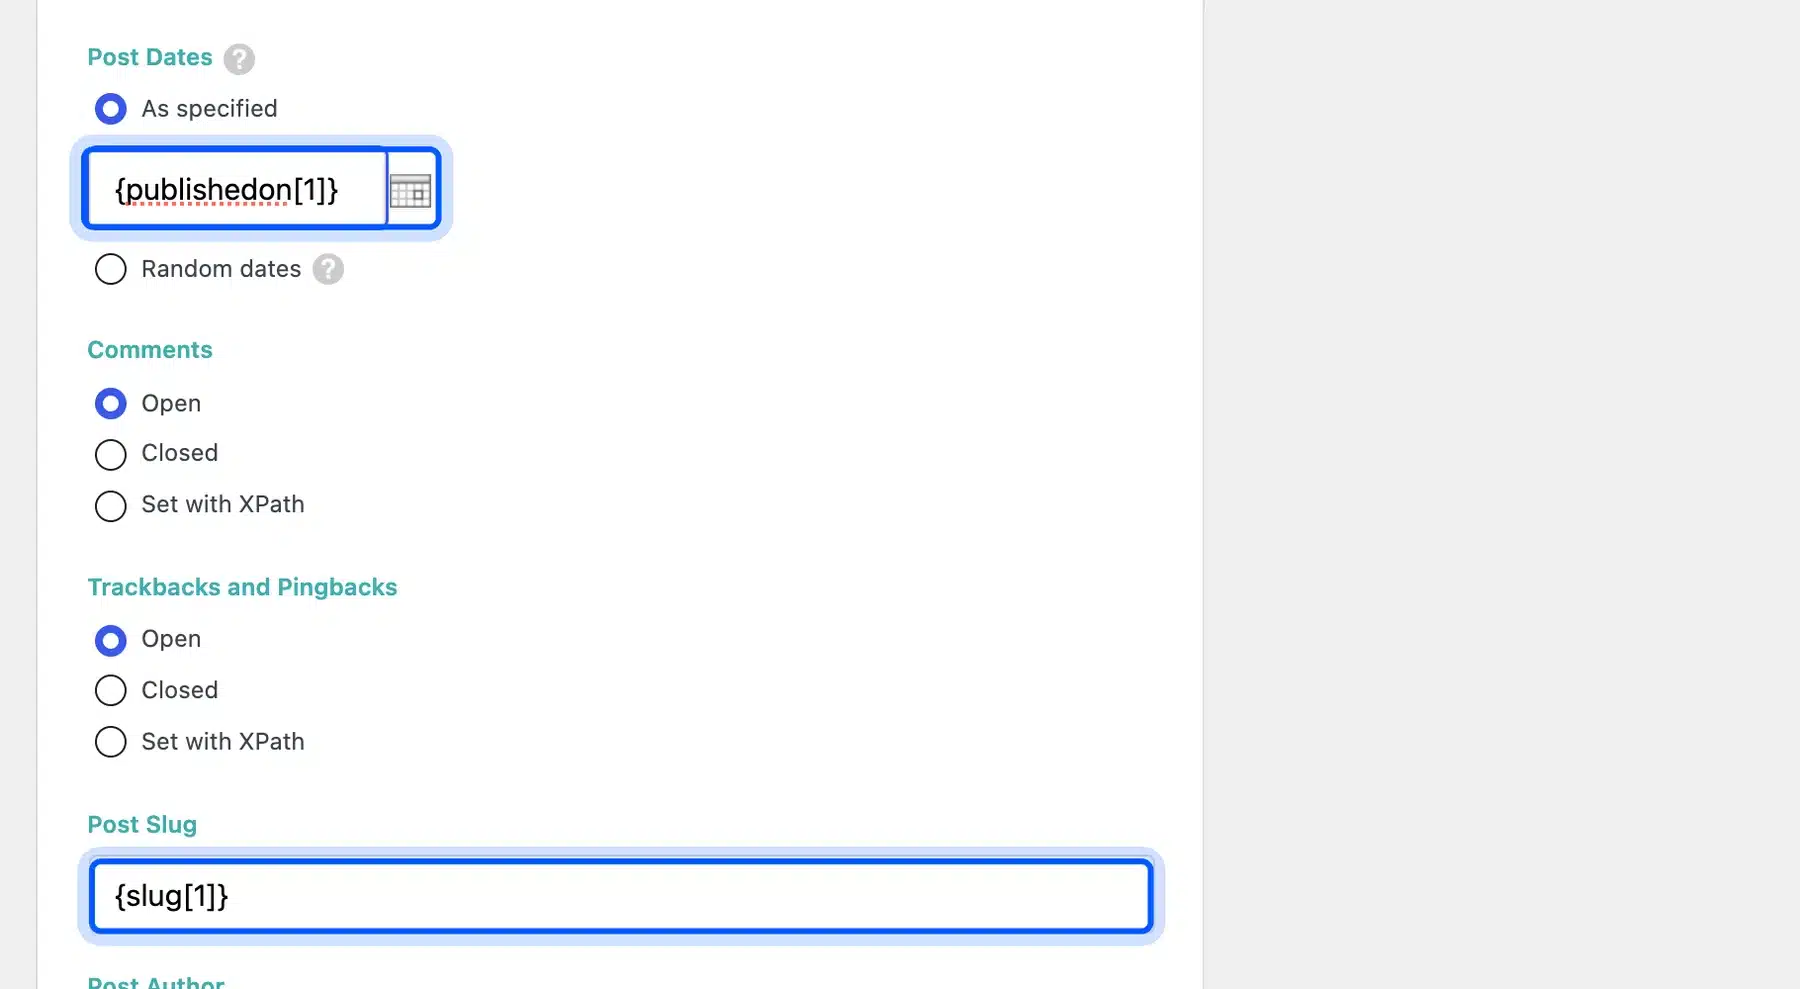
- Click Continue to Import Settings and set the Unique Identifier to
{itemid[1]}. The plugin guessed the name plus the collection ID. The Webflow item ID is safer because no two items share it.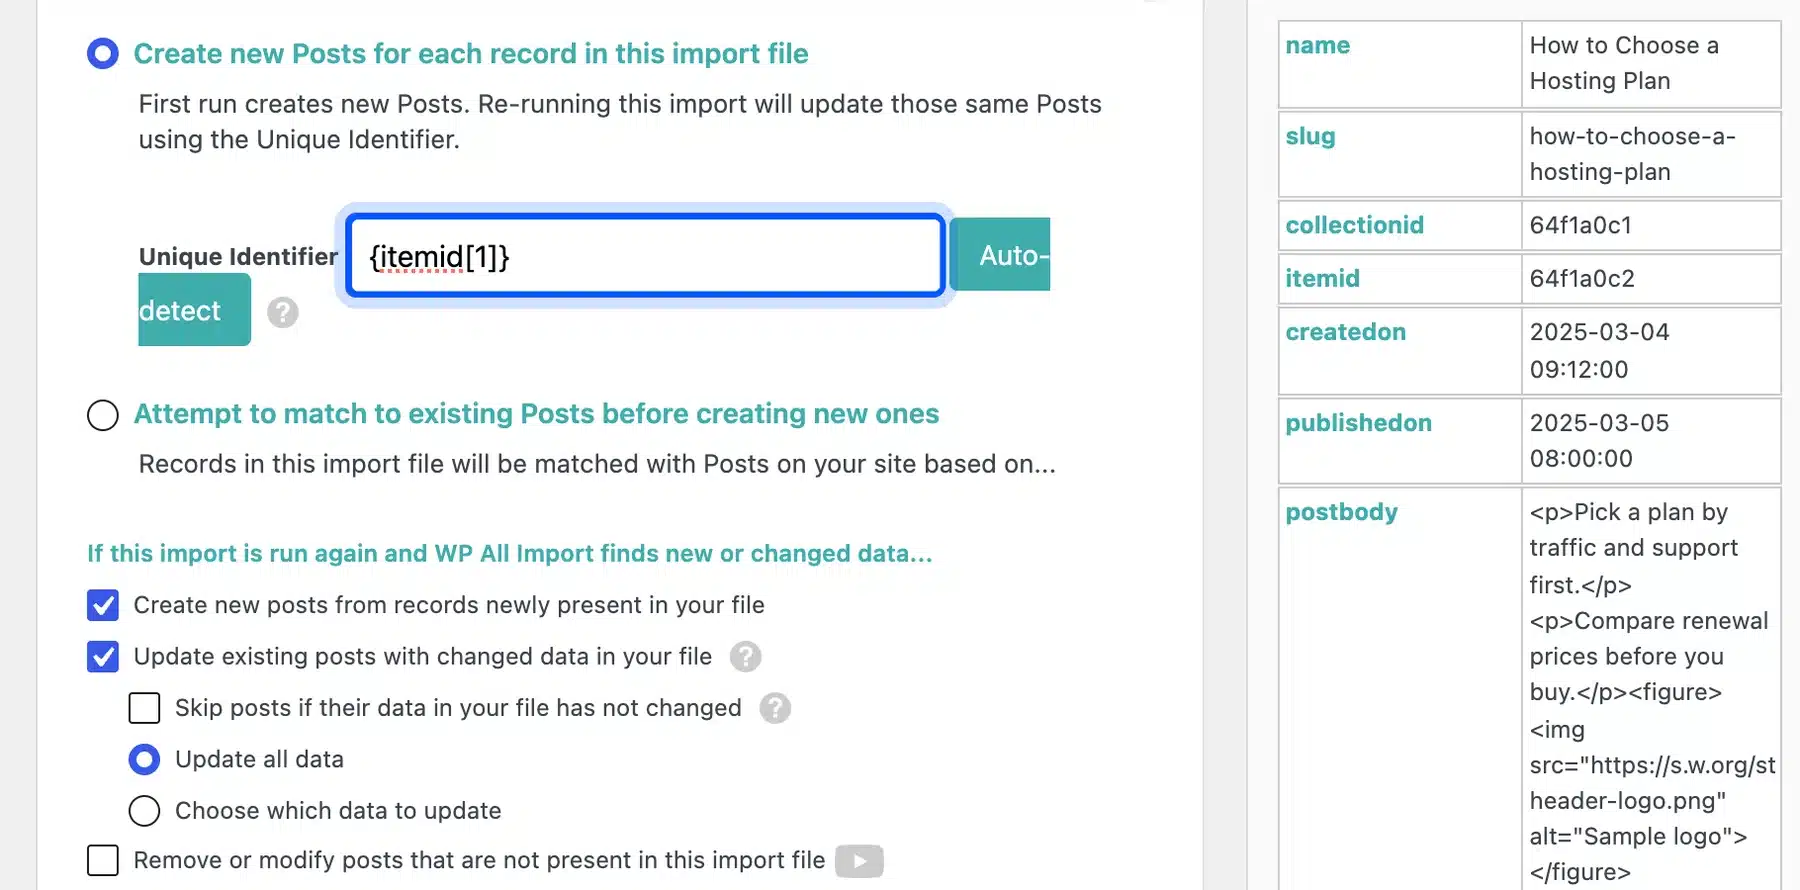
- Click Continue and then Confirm & Run Import. Open Posts to check the result.
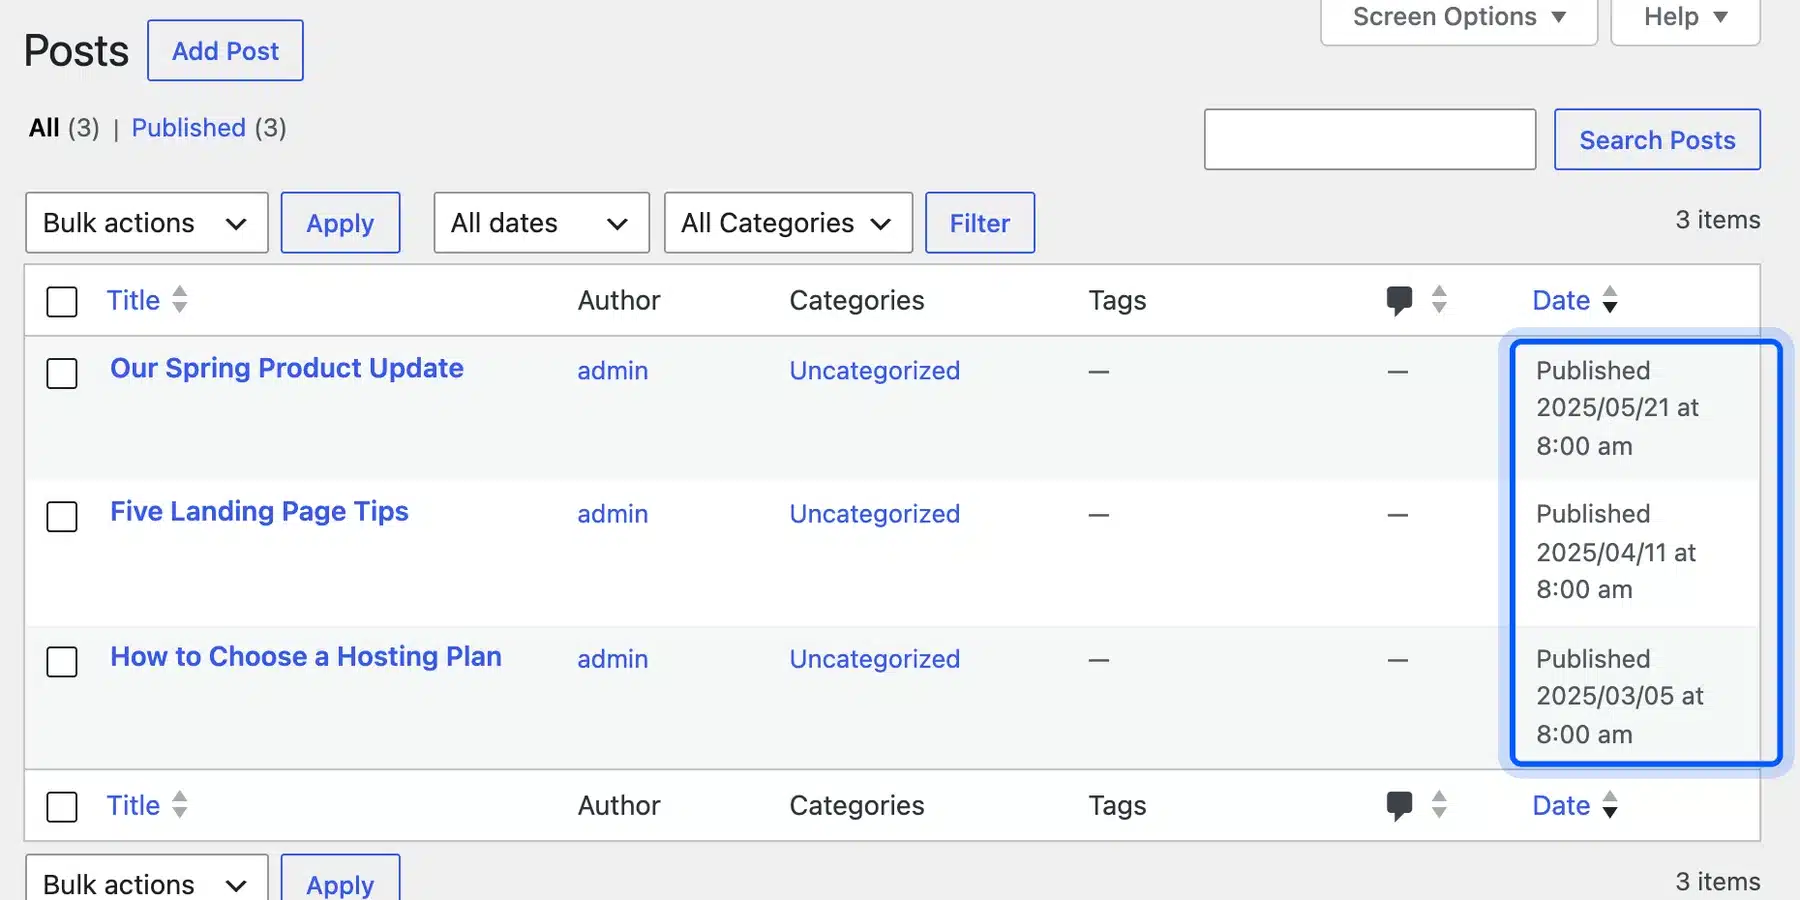
Our three example rows became three published posts with the right titles, slugs and dates. Run a count on your real site to confirm that the number of posts matches the number of CSV rows.
Move Your Images Out of Webflow
The free edition of WP All Import cannot import images. Its Images panel on our test site showed a notice to upgrade to the Pro edition. The plugin’s own page lists importing images to the media library as a Pro feature.
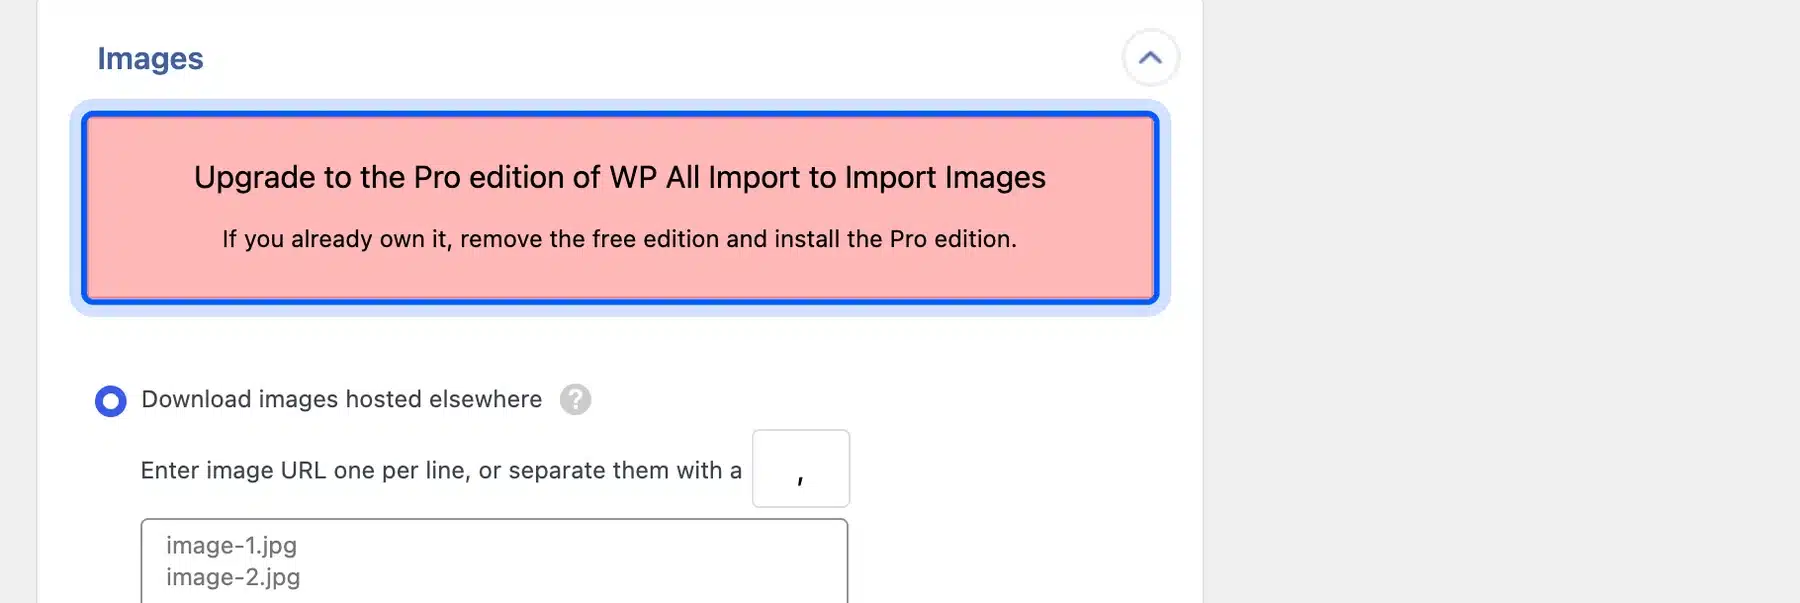
Your images stay as links to Webflow until you move them. You have two ways forward.
Buy WP All Import Pro and map the image column, or download the images and move them with WP-CLI. The wp media import command takes local files or URLs, according to the WP-CLI documentation.
Import one image from its URL and attach it to a post. The command prints the new attachment ID:
wp media import https://example.com/old-image.png --post_id=36 --title="Sample logo" --porcelain
Look up the new address of that attachment with wp post get 39 --field=guid. Then replace the old link in your post content. Run the dry run first to see how many replacements WP-CLI would make:
wp search-replace 'https://example.com/old-image.png' 'https://yoursite.com/wp-content/uploads/old-image.png' wp_posts --dry-run
On our test site the dry run reported one replacement and the real run changed the image link in the post content. Do not delete your Webflow project until every image works from your own media library.
Fix Common Problems After the Import
Most import problems come from three settings that you can check before the real run. Re-running an import updates the same posts only when the unique identifier matches them. Set the options below once and you can repeat the import safely.
- Post status: The plugin publishes posts by default. Choose Draft under Post Status in Other Post Options if you want to review each post first.
- Unique identifier: The screen says re-running an import updates the same posts through the unique identifier. Set it to the item ID before the first run.
- Image links: Posts still point at Webflow for images after a free import. Move the files and replace the links as shown above.
Fix a mapping mistake by editing the import and running it again. Do not delete the posts and start over unless the slugs are wrong.
Rebuild Pages and Forms in WordPress
The CSV export covers CMS collection items only. Your home, about, contact and landing pages are static pages that you rebuild in the block editor or with a theme. Webflow’s code export gives you static files to look at but not a ready WordPress theme.
Start with the pages that earn the most traffic. Copy the text from your live site, match each page address to the old one and build the layout with blocks. Forms need a WordPress form plugin, and each form must send mail to the same inbox as before.
Skip features you do not use. A Webflow interaction that nobody notices is not worth a custom script. Keep the first version simple and polish the design after launch.
Set Up 301 Redirects for Old Webflow URLs
A 301 redirect sends visitors and search engines from an old address to its new one. Build a table of every old Webflow URL and its WordPress address and add a rule for each row that does not match. The old host stops answering once your DNS points to WordPress.
If you matched your permalinks in Step 2, most posts need no redirect at all. Our test post kept the same path and our site added the final slash with its own 301.
A mismatch is where redirects come in. Here is an example table:
| Old Webflow URL | New WordPress URL | Needs a rule |
|---|---|---|
| /post/how-to-choose-a-hosting-plan | /post/how-to-choose-a-hosting-plan/ | No (WordPress adds the slash) |
| /blog/five-landing-page-tips | /post/five-landing-page-tips/ | Yes |
| /about | /about-us/ | Yes |
On an Apache host you can add rules to the .htaccess file above the WordPress block. We tested these two lines on our test site. The first redirects one page and the second redirects a whole folder:
Redirect 301 /blog/how-to-choose-a-hosting-plan /post/how-to-choose-a-hosting-plan/
RedirectMatch 301 ^/blog/(.*)$ /post/$1/
Before the rules, the old /blog/ address returned 404. After them, it returned one 301 and then a 200. That is a single hop with no chain.
A redirect plugin works on any host, and our guide on redirecting a page or URL in WordPress shows it. Our separate guide on handling Webflow redirects during a migration goes deeper on URL maps and large sites.
Switch Your Domain and Keep Webflow Until You Check
Point your domain to the new host only after the staging site passes your checks. Change the nameservers or the DNS records at your registrar and copy any email records first. Keep your Webflow plan active until the new site is live and every image loads from WordPress.
Webflow’s own advice supports that wait. Its CSV export announcement recommends keeping the original project as a backup or downloading the files before you leave. Cancel the Webflow plan last.
How to Check the Migration Worked
A finished migration should pass four quick checks before you tell anyone it is live. Compare the post count with the CSV row count and open ten old URLs to confirm each ends on the right page. Then check that images load from your own domain.
After launch, watch Google Search Console for new 404 errors.
Use these commands for the technical checks. The first counts imported posts and the second shows the redirect chain for one old URL:
wp post list --post_type=post --format=count
curl -sIL https://yoursite.com/blog/five-landing-page-tips | grep HTTP
On our test site the second command printed a 301 and then a 200. If you see a second 301 or a 404, fix that rule before launch.
When a Migration Needs Extra Help
Webflow’s help page says code export leaves out Ecommerce content and User Accounts. The WP All Import WordPress.org page says WooCommerce imports need a separate add-on. A store with orders, customers and member accounts is a bigger job than a blog.
If your site sells products or has members, plan for a WooCommerce setup and a data move beyond the CSV. Our WordPress migration services page explains the help we offer for those sites. A blog or brochure site is a job you can do yourself with the steps above.
Conclusion
A Webflow to WordPress move works best when you export collections as CSV files, keep your URLs the same and import with a plugin. Move your images before you cancel Webflow and add 301 redirects for every path that changes.
Test the whole flow on a staging copy first. If you move from a different builder, our guide on how to migrate from Squarespace to WordPress follows the same plan. A Blogger blog moves a different way, as in how to migrate Blogger to WordPress.
Frequently Asked Questions (FAQs)
Q1. Can I export Webflow to WordPress without a plugin?
Webflow only exports CSV files and static code. WordPress needs an import plugin to turn a CSV into posts. Webflow’s code export leaves out CMS content and cannot fill a WordPress blog.
Q2. Can I convert my Webflow design to a WordPress theme?
If you want to convert Webflow to WordPress, expect to rebuild the design. Webflow’s code export gives you HTML, CSS and JavaScript files and leaves out CMS content and Ecommerce data. You build the WordPress theme or the block layouts yourself and check each one against your live site.
Q3. Will I lose search rankings when I switch from Webflow to WordPress?
Rankings can drop when URLs change without redirects. Keep your paths the same where you can and add a 301 rule for every path that changes. Our test shows that a matching permalink structure keeps the same address and cuts the number of rules.
Q4. How do I move a multilingual Webflow site?
Webflow’s help page says the CSV only holds items from the current locale view. Export each language on its own. Then import each file into WordPress and add a translation plugin to connect the versions.
Q5. What happens to Webflow Ecommerce products?
Webflow’s code export leaves out Ecommerce content. Products need their own move.
WP All Import’s WordPress.org page says WooCommerce imports need a separate add-on. Plan the product data and checkout setup as their own part of the project.
Q6. Do I need to keep my Webflow plan after the migration?
Keep it until you have moved every image and checked the new site. Webflow’s update note says exported file links break if you delete the original project. Cancel the plan only after the checks pass.