


A heatmap for WordPress shows where visitors click and how far they scroll on each page. You add one with a plugin or a short tracking script.
We checked every tool in this guide in October 2026. We installed the plugins on a WordPress 7.1.3 test site and read the vendor documentation for each claim.
This guide covers four ways to add a heatmap and how to read the result. It also explains the consent rules and what to do with the data.
What Is a Heatmap for WordPress?
A heatmap for WordPress is a color layer over a real page that shows where visitors click, scroll and stop. Red areas get the most activity and cool areas get the least. WordPress has no heatmap screen of its own and needs a plugin or a script for one.
The most common type is the click heatmap. It marks the buttons, links and plain text that visitors click, including elements that look clickable but are not.
The scroll heatmap shows how far down the page people get. An attention map shows how long people spend on each part of the page.
Microsoft Clarity supports five map types: click, scroll, area, conversion and attention maps. Its documentation says there is no minimum traffic needed to generate a map.
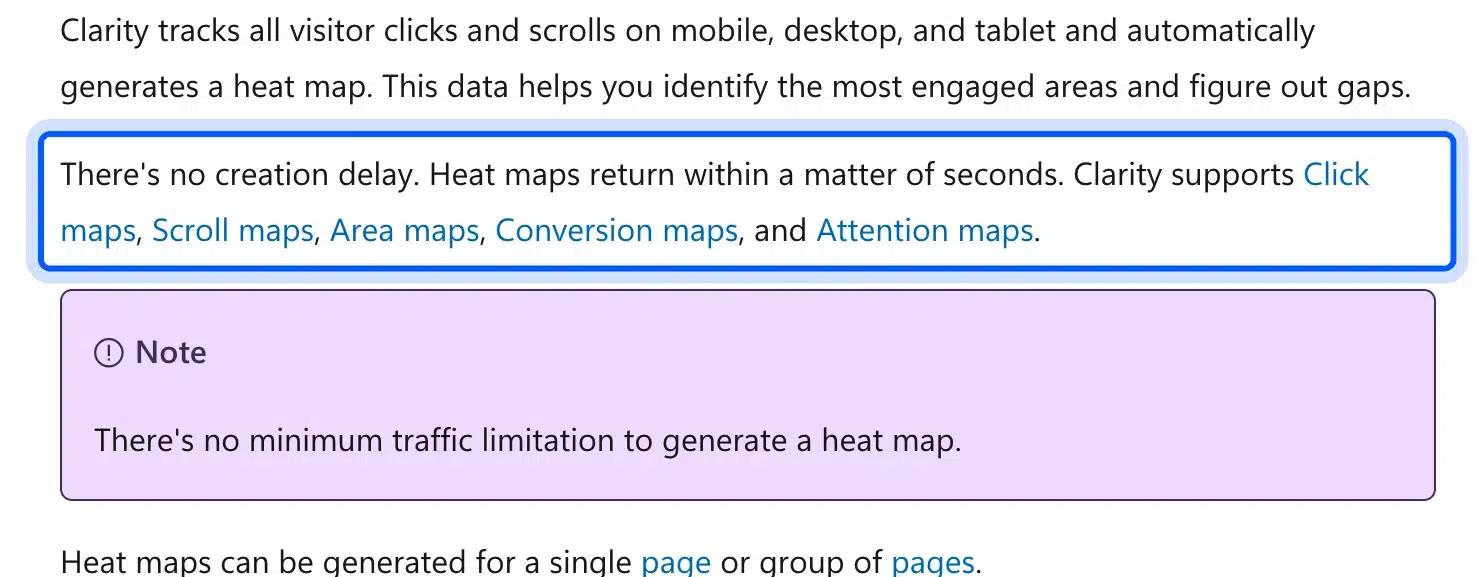
Clarity’s overview says it tracks clicks and scrolls on mobile, desktop and tablet. That matters because a button that sits high on a desktop screen can sit far down a phone screen.
Google Analytics tells you what happened on a page. A heatmap shows where on the page it happened.
The two tools answer different questions. Our guide to Google Analytics on WordPress covers the first half.
Which Heatmap Option Should You Pick?
The best heatmap for WordPress is Microsoft Clarity for most sites, because the tool is free and the plugin needs only a sign-in. Pick Aurora Heatmap when you want no outside account. Pick Hotjar when your team already uses it.
| Option | Account | Cost | Where data lives | Best for |
|---|---|---|---|---|
| Microsoft Clarity plugin | Microsoft sign-in | Free | Clarity dashboard | Most sites |
| Hotjar plugin | Hotjar account | Free account available | Hotjar dashboard | Teams already on Hotjar |
| Aurora Heatmap | None | Free version available | Your own site | Sites that avoid outside accounts |
| Header script | Depends on the tool | Depends on the tool | The tool’s dashboard | Sites with no plugin budget |
The Clarity row comes from its WordPress.org listing, and it says the tool is free and lists 200,000+ active installations. The Hotjar row comes from the Hotjar plugin page, and it says a free account includes heatmaps.
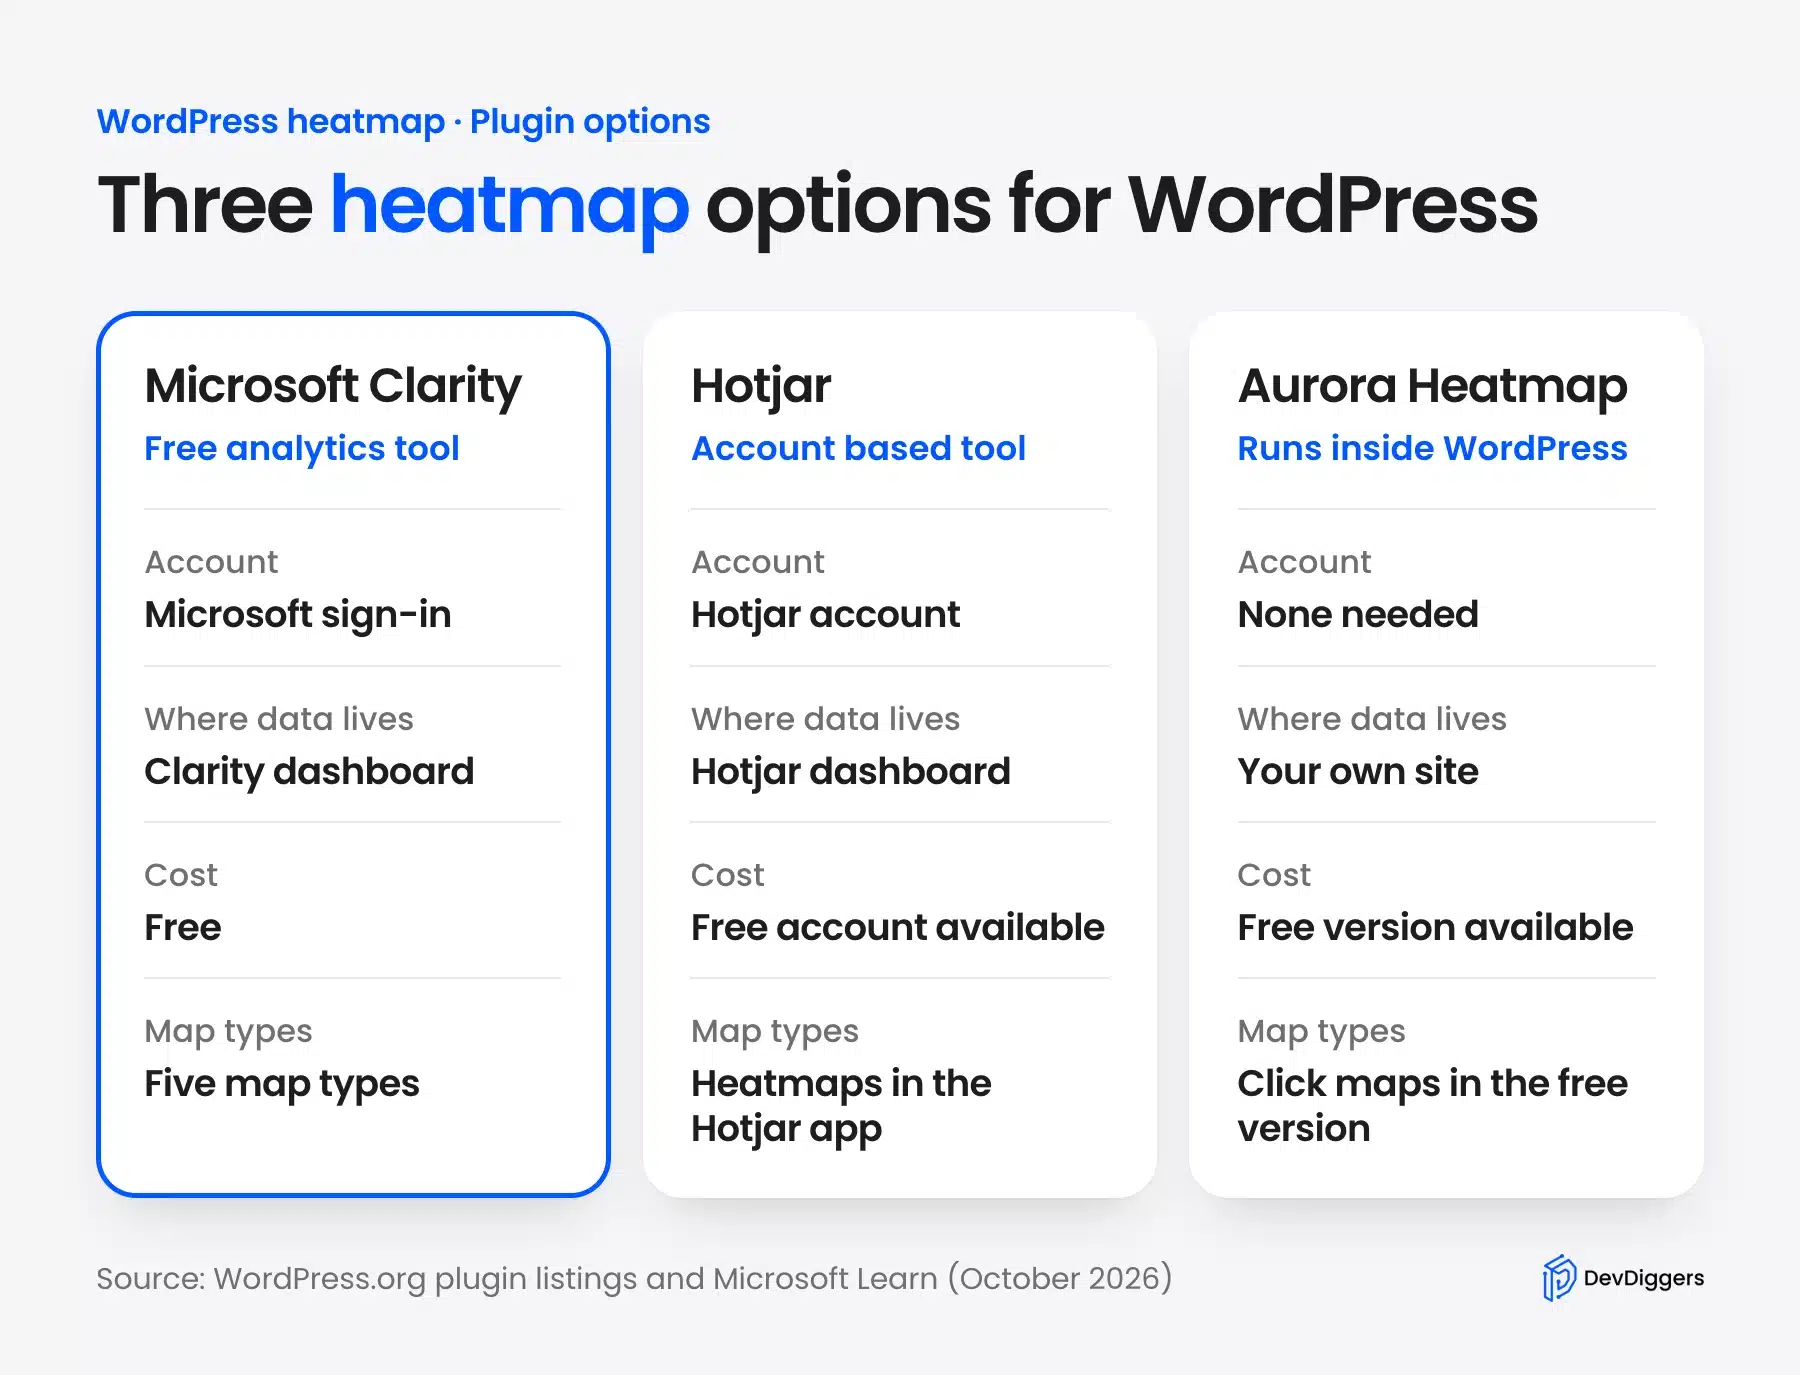
Aurora Heatmap’s listing says no account or contract is needed for the free version. It records click maps only in that version.
Any free heatmap tool comes with a trade-off. Clarity and Hotjar send visitor data to an outside service, while Aurora keeps its data on your own site.
Method 1: Add Microsoft Clarity With Its Plugin
The Microsoft Clarity plugin connects your WordPress site to a free Clarity project through a sign-in. You do not paste any code. The plugin needs WordPress 4.0 or later, and it lists tests up to WordPress 7.0.7, as of October 2026.
Microsoft’s WordPress guide gives the same five steps. It also says the steps apply to WooCommerce sites that run on WordPress.
Follow these steps on your own dashboard:
- Open Plugins > Add Plugin: Type “Microsoft Clarity” into the search box.
- Install and activate it: Click Install Now on the Clarity card and then click Activate.

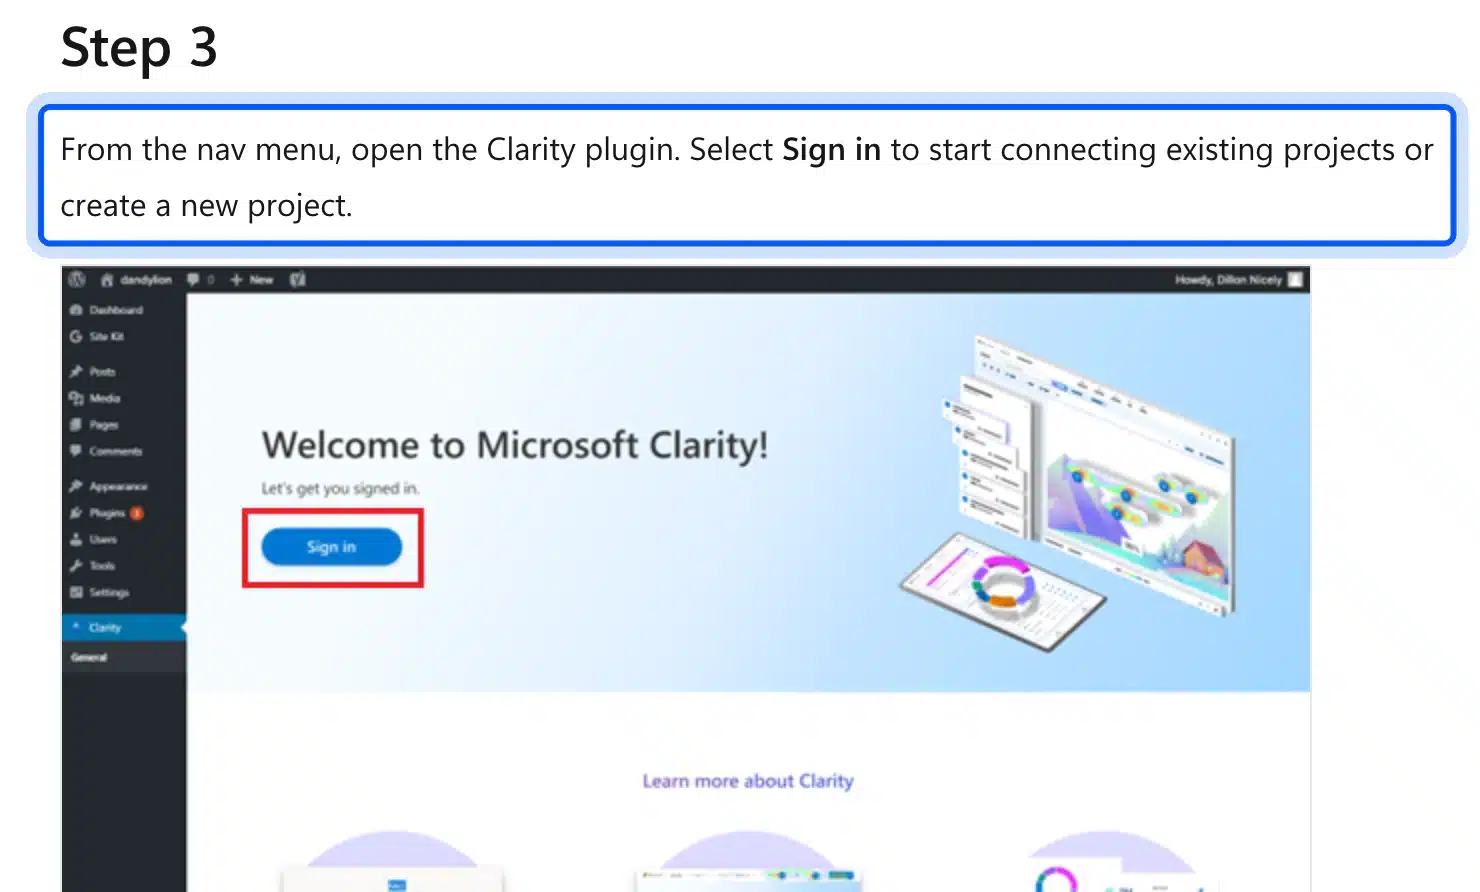
- Open the Clarity menu: The plugin adds a Clarity item to the admin sidebar. Its first screen asks you to sign in.
- Sign in and pick a project: Choose an existing project or create a new one. Microsoft’s guide shows the Sign in button on its welcome screen.
- Open the Heatmaps tab: After the project connects, the guide says you can view the Dashboard, Recordings, Heatmaps and Insights.
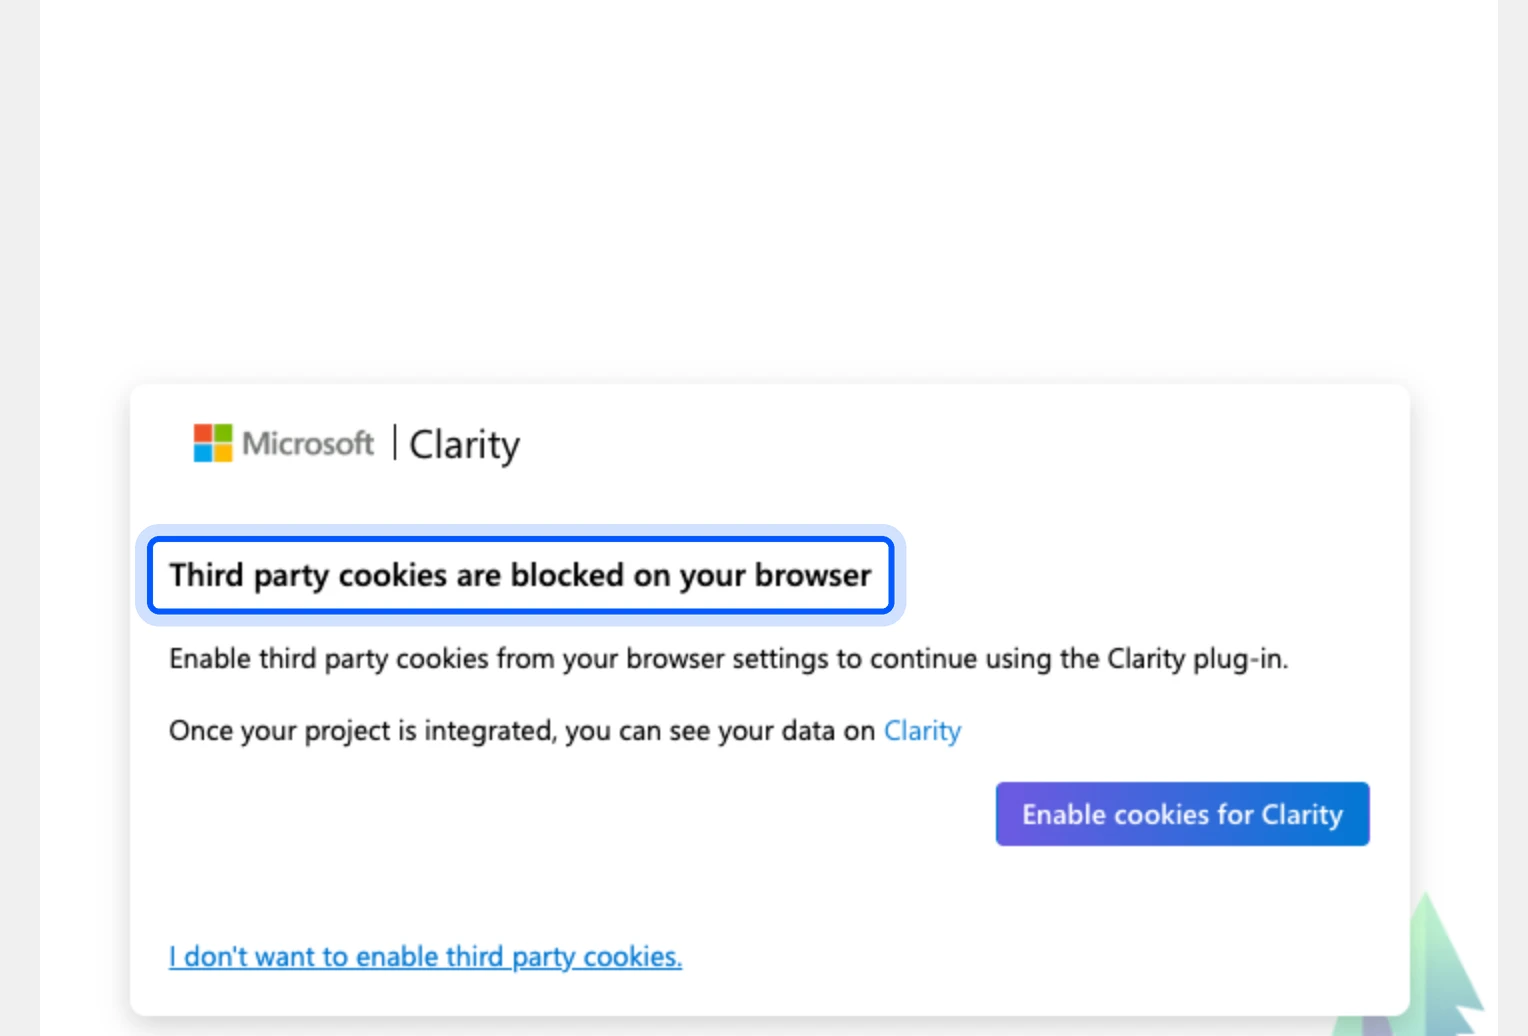
Note: On our test site the Clarity screen first said third-party cookies were blocked in our browser. That message appears because the sign-in panel loads from Clarity’s own domain.
Allow third-party cookies for your site or use the manual route in Method 4. We stopped at this screen and did not connect a Clarity account.
Clarity also has limits. Its setup guide says it should not run on sites that target users under 18. It also cannot capture content inside a canvas element or a third-party iframe.
Method 2: Add Hotjar to WordPress With Its Plugin
The Hotjar plugin only places your Hotjar tracking script on the site. You paste one number, your Hotjar ID, and Hotjar itself shows the maps. The listing says a Hotjar account is required, and that a free account includes heatmaps.
Inside Hotjar, the plugin listing groups the tools into Observe, Ask and Engage. Observe holds heatmaps and session recordings, and Ask holds surveys and on-page feedback. The plugin on your site only supplies the script that feeds them.
Check the plugin’s age before you rely on it. Its WordPress.org page shows version 1.0.16, 70,000+ active installations and a last update about three years ago.
- Find the plugin: Search for “Hotjar” under Plugins > Add Plugin. Several look-alikes appear. Pick the one published by Hotjar.
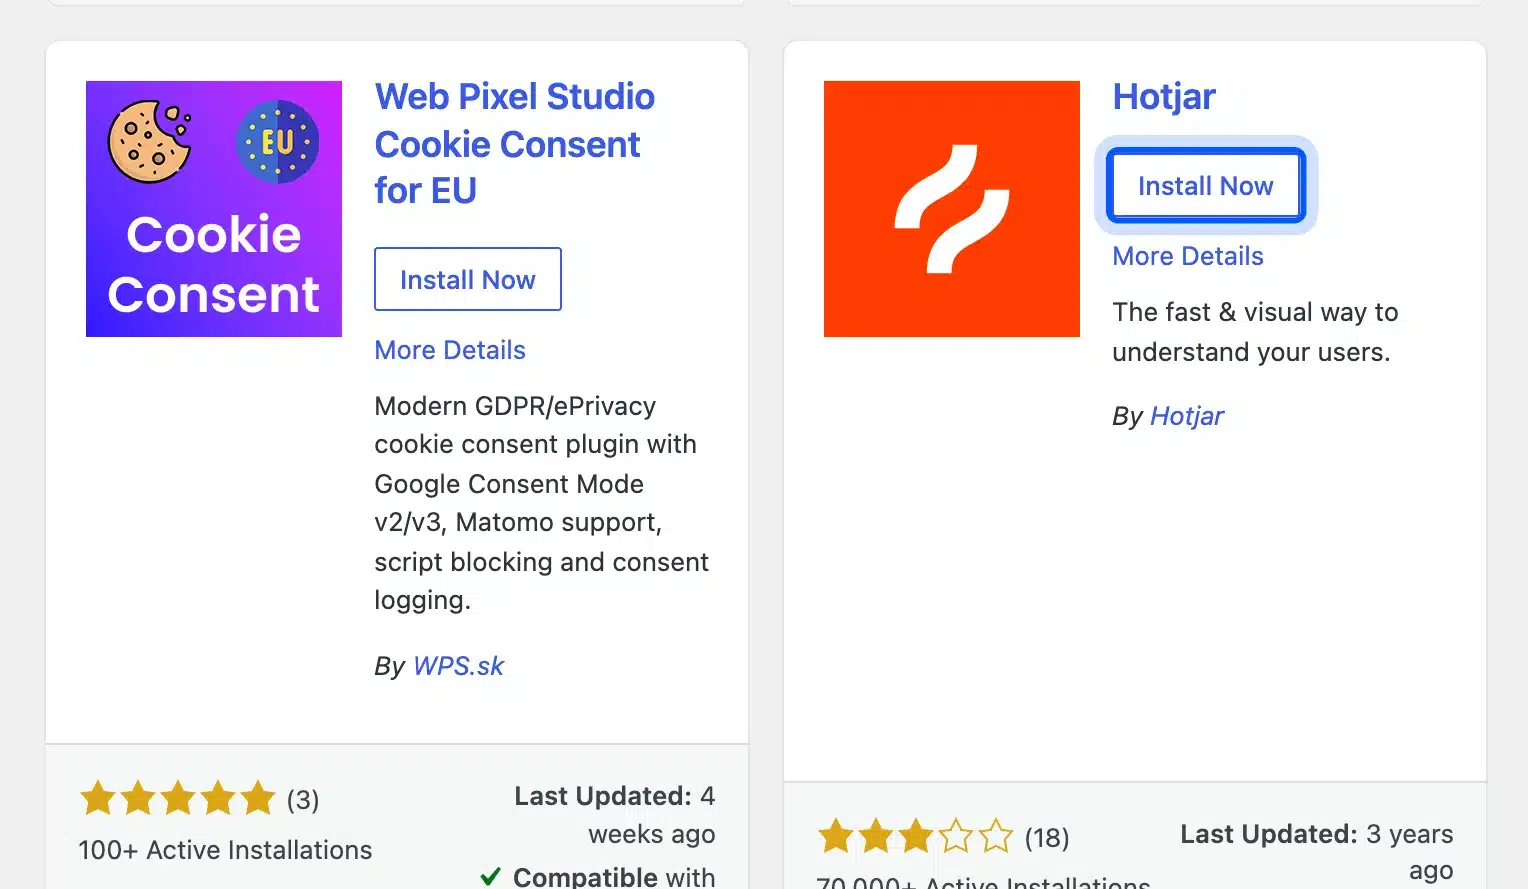
- Install and activate it: The plugin adds a Hotjar page under Settings.
- Paste your Hotjar ID: Open Settings > Hotjar and type the ID from your Hotjar site list. Click Save Changes.
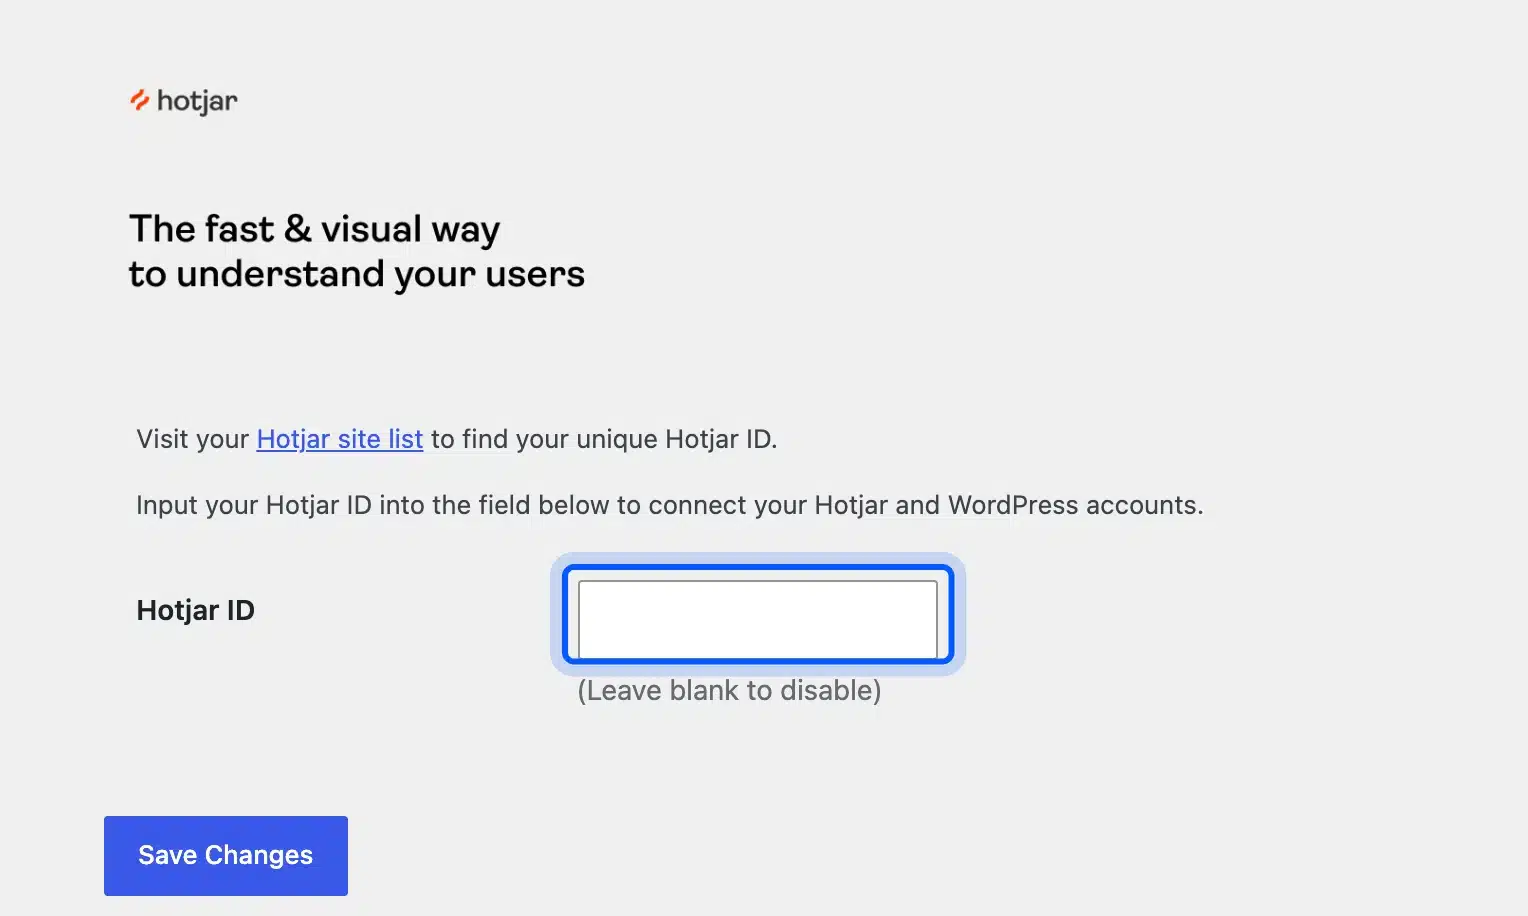
We tested this on WordPress 7.1.3 with a made-up ID, because we did not connect a Hotjar account. After we saved the ID, the front page loaded Hotjar’s script. Your own ID will connect your real site.
If you would rather skip the plugin, Hotjar’s help center says to paste the tracking code between the head tags. Method 4 shows a safe way to do that.
Method 3: Use Aurora Heatmap Without an Outside Account
Aurora Heatmap is a WordPress heatmap plugin that runs inside your site and needs no account. You install it, activate it and wait for visits. The developer’s listing says heatmap data is not sent to outside servers, and the plugin supports click maps in the free version.
That claim comes from the developer’s own plugin page. We did not audit its network traffic. Treat the privacy wording as the developer’s statement.
- Install the plugin: Search for “Aurora Heatmap” under Plugins > Add Plugin and click Install Now.
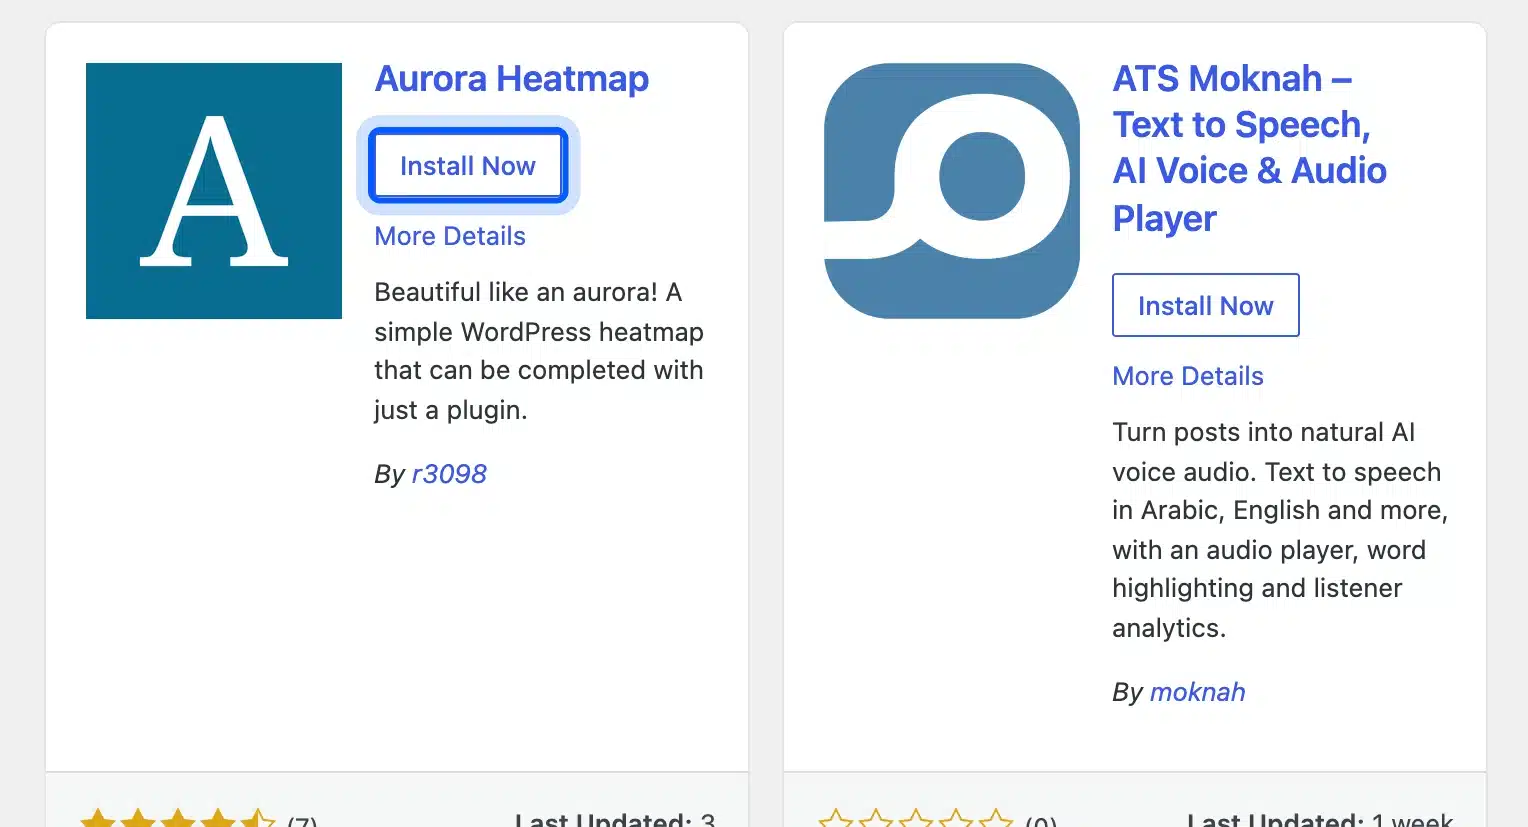
- Activate it: The plugin adds an Aurora Heatmap page under Settings. No setup is needed.
- Let visitors arrive: The list stays empty until pages get visits. Cache plugins can interfere, and the listing names WP Rocket, W3 Total Cache and WP Super Cache as compatible.
- Open the Heatmap List: Each recorded page shows its click count. Click the count to open the page with the heatmap drawn on it.
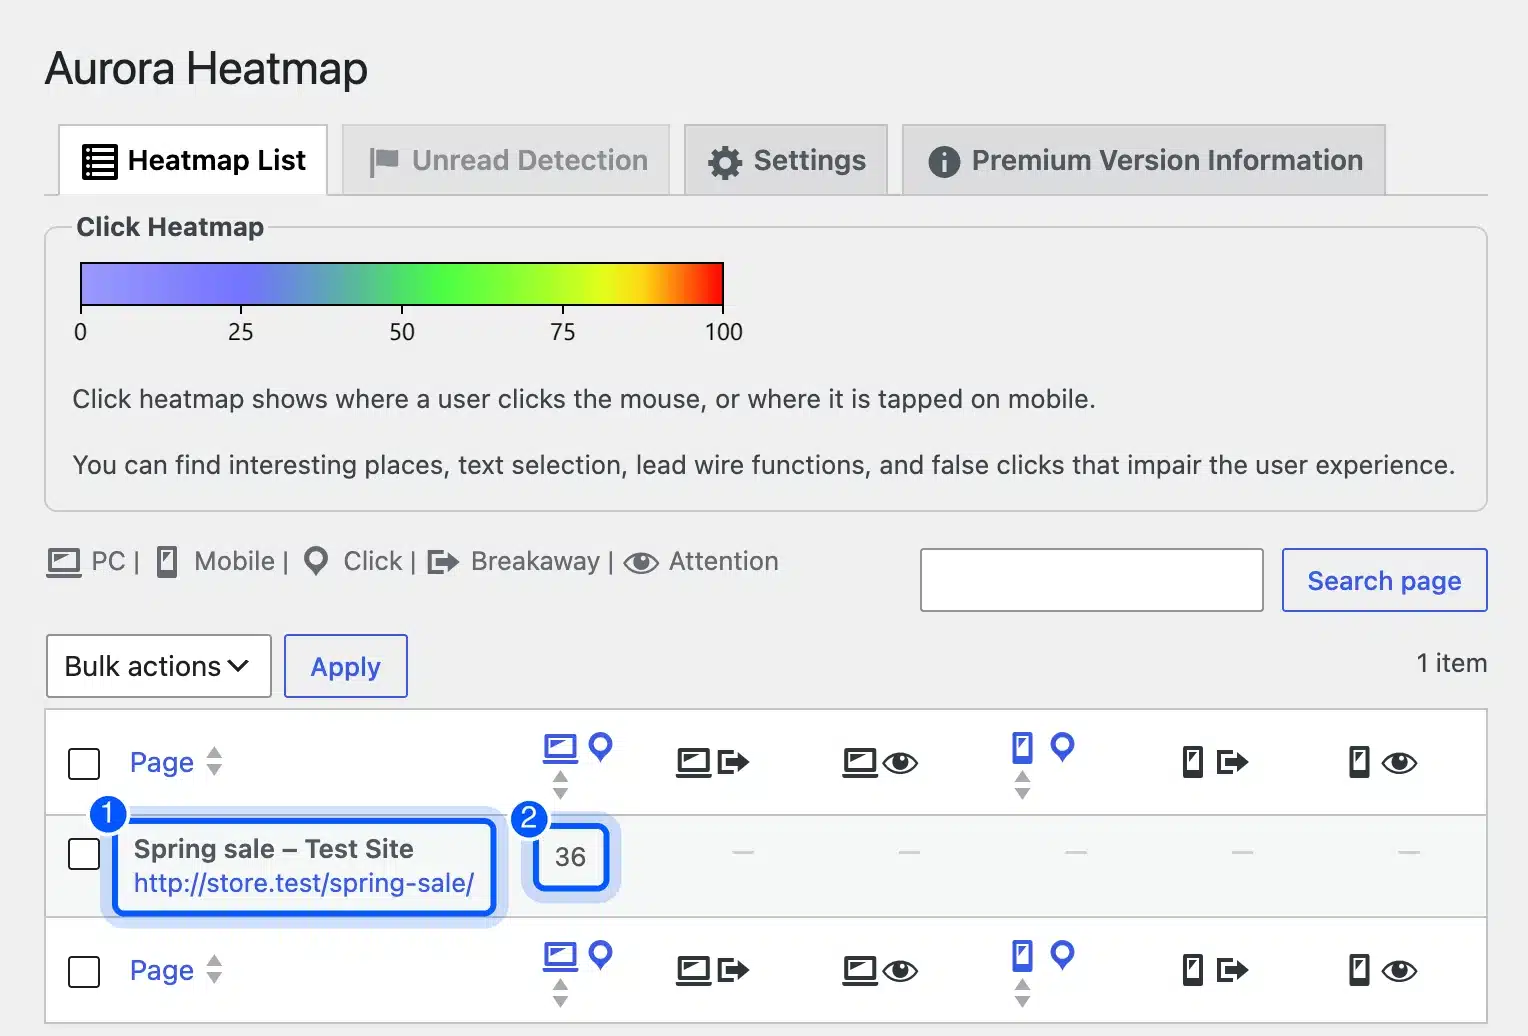
- Read the map: Cool blue marks a few clicks and red marks the most.
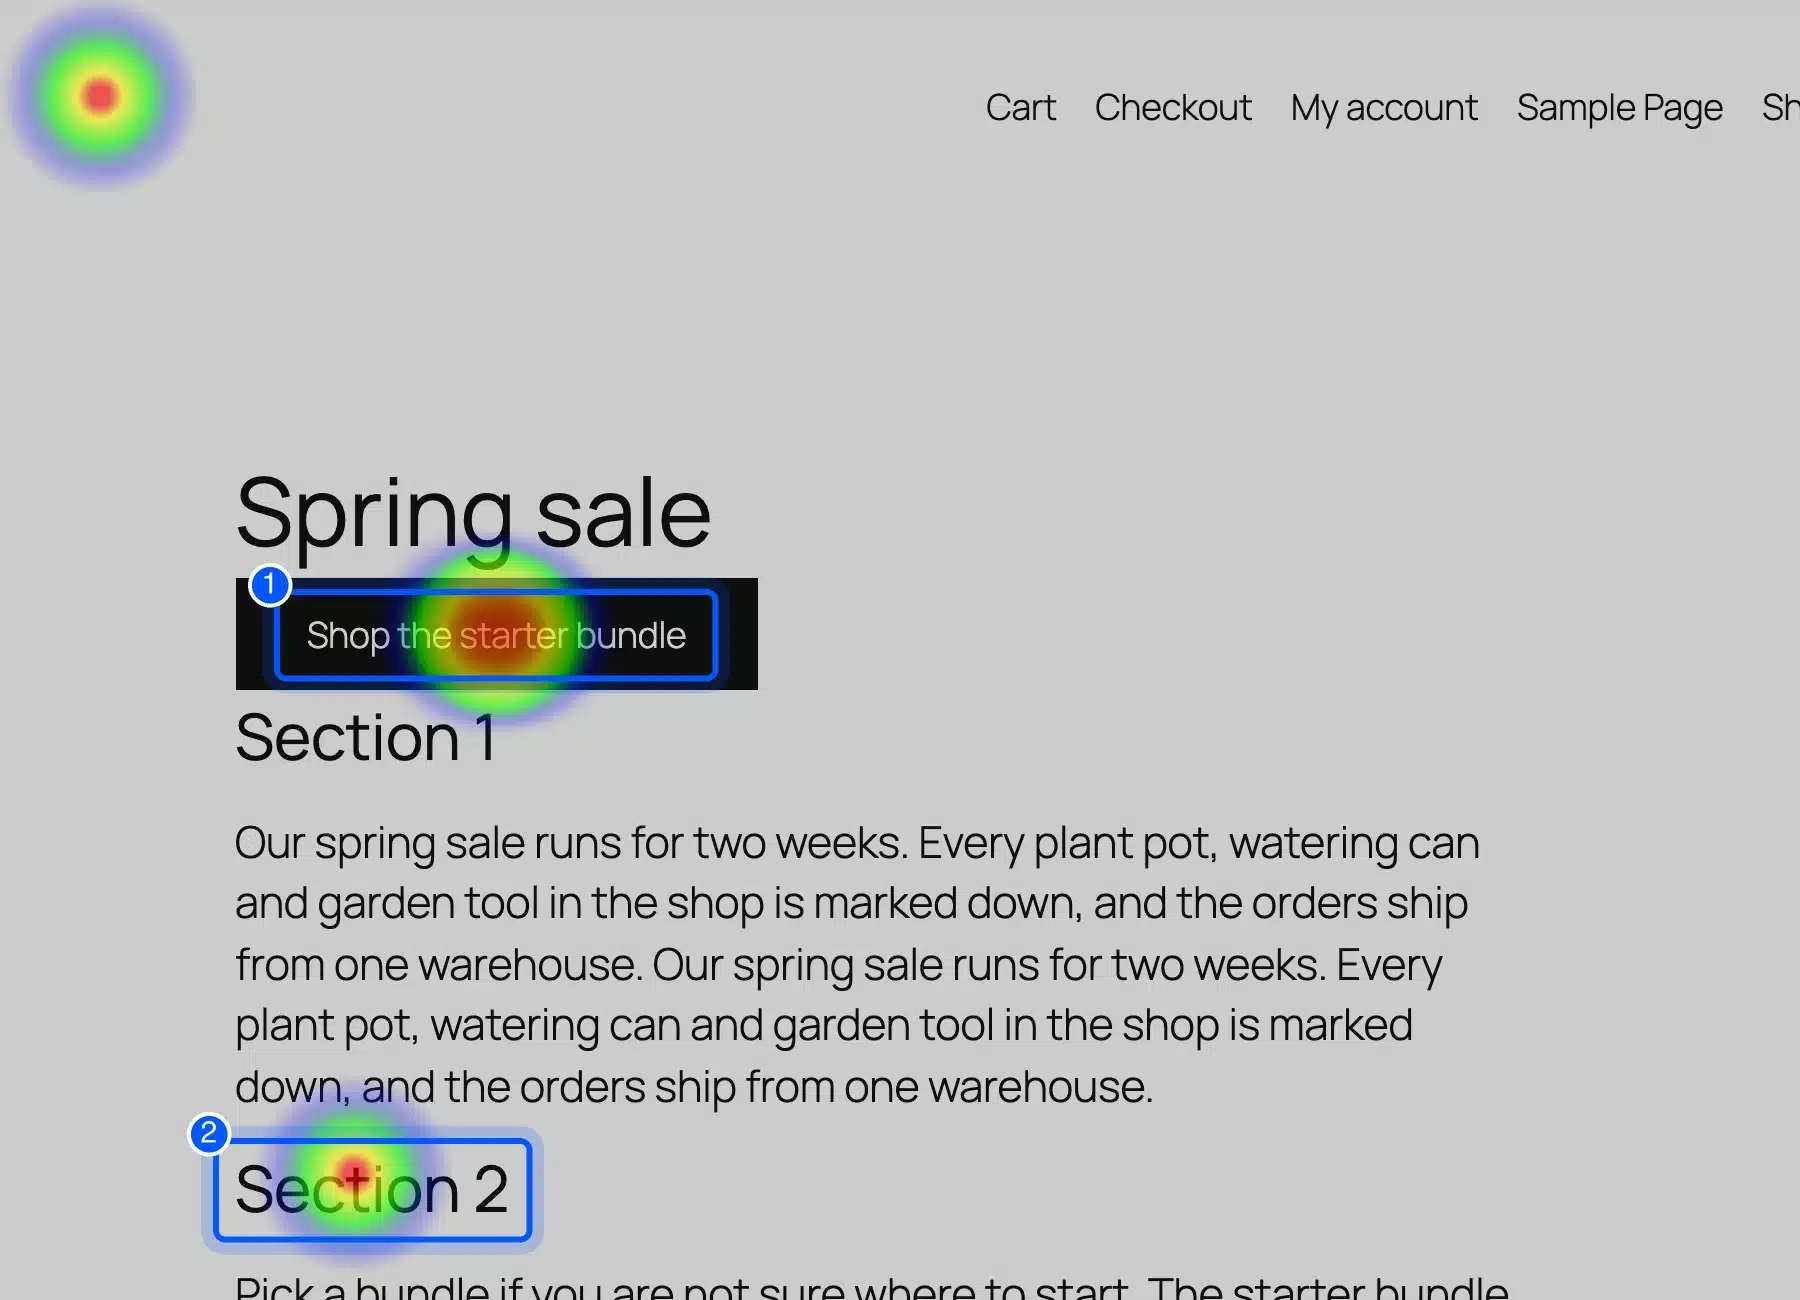
We made 36 test visits to a sample sale page. We clicked the main button in half of them and clicked a plain heading in a few. The heatmap drew a red spot on the button and a smaller spot on the heading.
Here is a limit we found in the plugin’s page settings. Aurora waits 3 seconds before it records. A click in the first moments of a visit leaves no mark.
The plugin also sends its data when a visitor leaves the page.
The free version has other limits. Its listing says heatmap data is tied to the page URL. Changing a permalink starts a new record.
It also lists attention maps and unread detection as premium features.
Method 4: Paste a Tracking Script Into the Header
Any heatmap tool that gives you a tracking script works on WordPress when you paste that script into the head of every page. A header and footer plugin does this without editing theme files. It is the safest way to add a free heatmap tool such as Clarity without its plugin.
Microsoft’s manual setup guide says to open your project, go to Settings > Setup and select Get tracking code. You then paste the code into the head section of your site.
- Copy the tracking code: Take it from your heatmap tool’s setup screen.
- Install a header plugin: WPCode Lite adds a Code Snippets > Header & Footer page.
- Paste the code into the Header box: The box shows an example Google Tag Manager snippet that you replace with your own code. Click Save Changes.
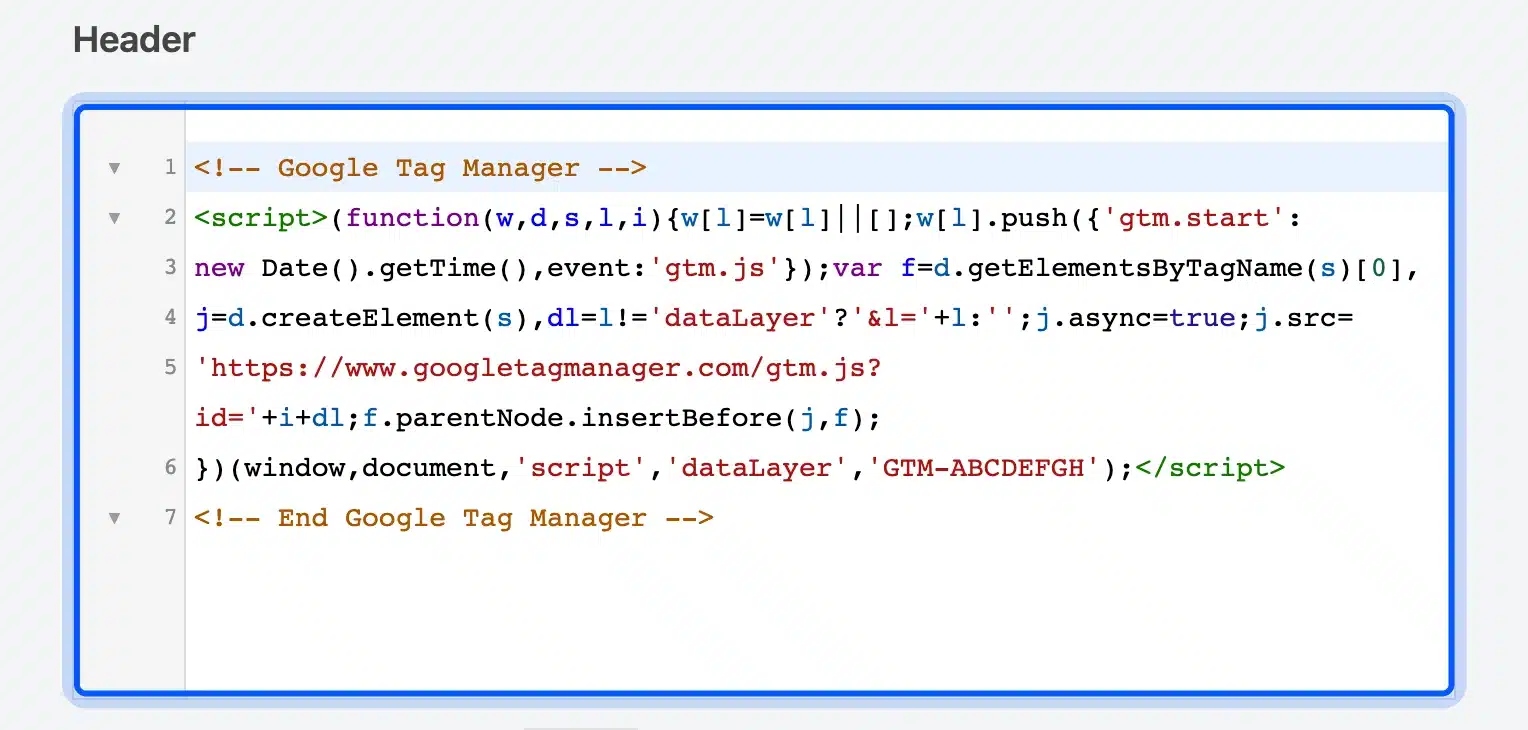
- Check the page source: View the source of your home page and search for the script.
We checked step 4 on our test site with a harmless one-line script. WPCode printed it inside the head, before the closing head tag, on the home page.
Microsoft’s setup page also says to open the browser’s Network tab and look for POST requests to clarity.ms/collect while you use your site. If you edit theme files instead, use a WordPress child theme so a theme update does not erase your change.
How to Read a Click Heatmap and a Scroll Heatmap
A click heatmap shows what visitors click, and a scroll heatmap shows how far they read. Read the click map for buttons that get ignored and for plain text that gets clicked. Read the scroll map for the point where most visitors stop.
Clarity’s documentation lists six kinds of click map: all clicks, dead clicks, rage clicks, error clicks, first clicks and last clicks. A dead click lands on something that does nothing. In our Aurora test, the spot on a plain heading is the same pattern.
Clarity’s scroll map also marks an average fold. That is the part of the page visitors see before they scroll. The heatmaps overview says a hot area is popular and a cold area is not.
Here is a worked example with round numbers. Say 100 visitors open a page and the scroll map shows 40 of them reach your pricing table. Moving the table higher is a fair test, and you can compare the maps after the change.
Tip: One heatmap is a clue, never a verdict. Look at a page on mobile and on desktop, because layouts differ. Change one thing at a time so you know which change moved the map.
Privacy and Consent Rules for a WordPress Heatmap
A heatmap tool records what visitors do on your pages, and that puts it under your site’s privacy and cookie rules. Check the consent settings of the tool you pick before you launch it. Clarity requires a consent signal for visitors from some regions.
Microsoft’s consent documentation says Clarity began enforcing consent signal requirements on October 31, 2025. That covers visits from the European Economic Area, the United Kingdom and Switzerland. Consent Mode is on by default for those visitors.
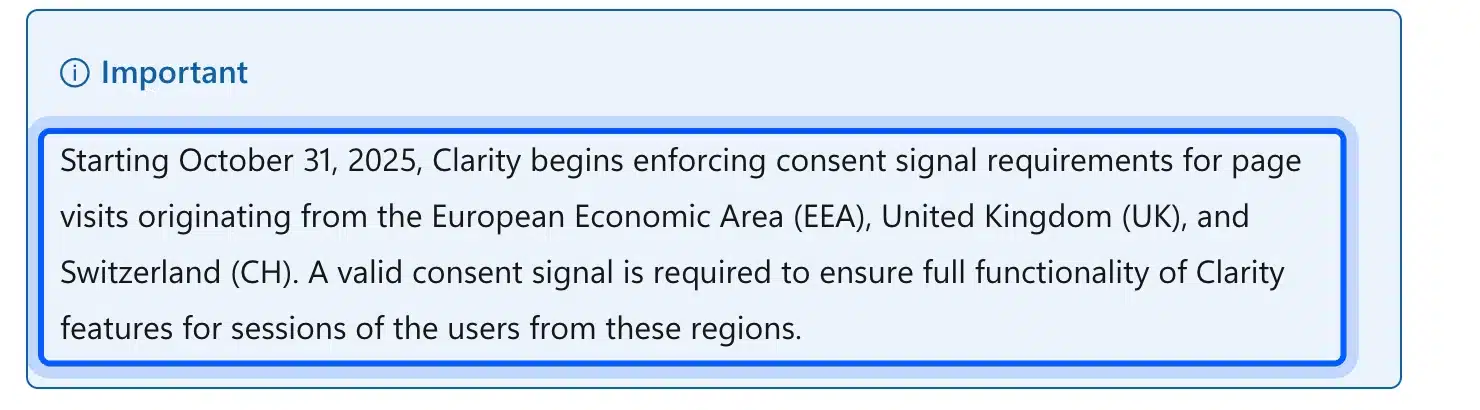
The same page says Clarity sets its cookies only after valid consent when Consent Mode is on. It names the cookies _clck and _clsk, and it gives a test for confirming that they are not written after a visitor declines.
Hotjar and Aurora have their own privacy pages, and we did not review them for this guide. Read each tool’s documentation and match it to your cookie banner. Our guide to a GDPR compliant WooCommerce store covers banners in more depth.
Every extra script is also one more thing a page loads. We did not measure page speed in this guide. If your site feels slow after you add a script, our WordPress speed optimization services can look at it.
What to Do With Heatmap Data
Use heatmap data to pick one page problem to fix and then check the map again after the change. The data is a clue about where visitors lose interest and never a full explanation. Start with your busiest pages so the maps fill in fast.
Here are three fixes that heatmaps point to:
- Move a buried button: If a scroll map shows most visitors stop before your button, move it higher.
- Fix dead clicks: If visitors click a heading or an image that is not a link, add the link or restyle the element.
- Cut clutter: If a click map shows clicks scattered across a menu, simplify the menu.
Clarity’s heatmap guide also describes a compare feature for judging whether a site change moved the maps. If your tool has no compare view, write down the date of each change yourself.
Pair heatmaps with your other numbers. Our guide to reducing bounce rate in eCommerce and our notes on eCommerce user experience show what to change once you know where visitors stop.
Can You Add a Heatmap to a WooCommerce Store?
A heatmap for WordPress also works on a WooCommerce store, because the shop pages are WordPress pages. Microsoft’s Clarity guide says its plugin steps apply to WooCommerce sites that run on WordPress. Product, cart and checkout pages then show up in the page list.
Product pages are the first place to look. A click map shows whether visitors reach the add to cart button or click the product image instead.
Clarity also lists a conversion map for online stores. Its heatmaps overview says conversion maps show which clicks lead to purchases. We did not test that map because we did not connect a Clarity account.
Conclusion
A heatmap for WordPress is simple to add and gives you a picture that analytics tables cannot. Start with Microsoft Clarity if you want a free tool and do not mind an outside account.
Pick Aurora Heatmap when you want the data kept on your own site. Use the header method when a plugin will not work for you.
Whichever tool you choose, give it time to collect visits and change one thing at a time. Then you will know which fix helped.
Frequently Asked Questions (FAQs)
Q1. What is the best WordPress heatmap plugin?
It depends on what you value. Microsoft Clarity is free and connects through a sign-in, Aurora Heatmap keeps data on your site, and Hotjar suits teams that already use it. The comparison table above sets out the account and cost for each.
Q2. Does WordPress have a built-in heatmap?
No. A fresh WordPress 7.1.3 install on our test site had no heatmap screen. You add one through a plugin such as Clarity or Aurora Heatmap, or through a tracking script in the header.
Q3. Can I add a heatmap without a plugin?
You can. Copy the tracking script from your heatmap tool and paste it into the head of your site. Hotjar’s help center and Microsoft’s Clarity guide both describe this manual route.
A header plugin keeps the change safe.
Q4. How long does a heatmap take to show data?
It depends on the tool. Microsoft’s heatmaps overview says Clarity has no minimum traffic limit and returns maps within seconds. Aurora Heatmap needs recorded visits and stays empty until visitors reach your pages.
Q5. Is Microsoft Clarity really free?
Its WordPress.org listing says it is free. We did not connect a Clarity account and cannot report on the dashboard. Read its terms before you launch.
Q6. Does the Hotjar plugin work on a current WordPress version?
On our WordPress 7.1.3 test site the plugin installed and saved a Hotjar ID, and the front page then loaded the script. Its listing shows tests only up to WordPress 6.0.17. If you want to avoid an old plugin, paste the tracking code into the header instead.