You can set up one-click checkout in WooCommerce in under 30 minutes, using a free plugin, paid plugin, or a shortcode snippet.
Most stores lose customers not because the product was wrong, but because checkout took too long. A one-click button fixes that specific problem directly.
Amazon proved this model back in 1999, patenting the idea before most online stores even had a checkout page. It still works today, on nearly any store.
This guide walks through three setup methods: a free plugin, an express checkout plugin with digital wallets, and custom code for full control.
You’ll also learn how to check plugin compatibility with WooCommerce’s block-based checkout, plus a wallet-based option built specifically for repeat buyers.
What Is One-Click Checkout in WooCommerce?
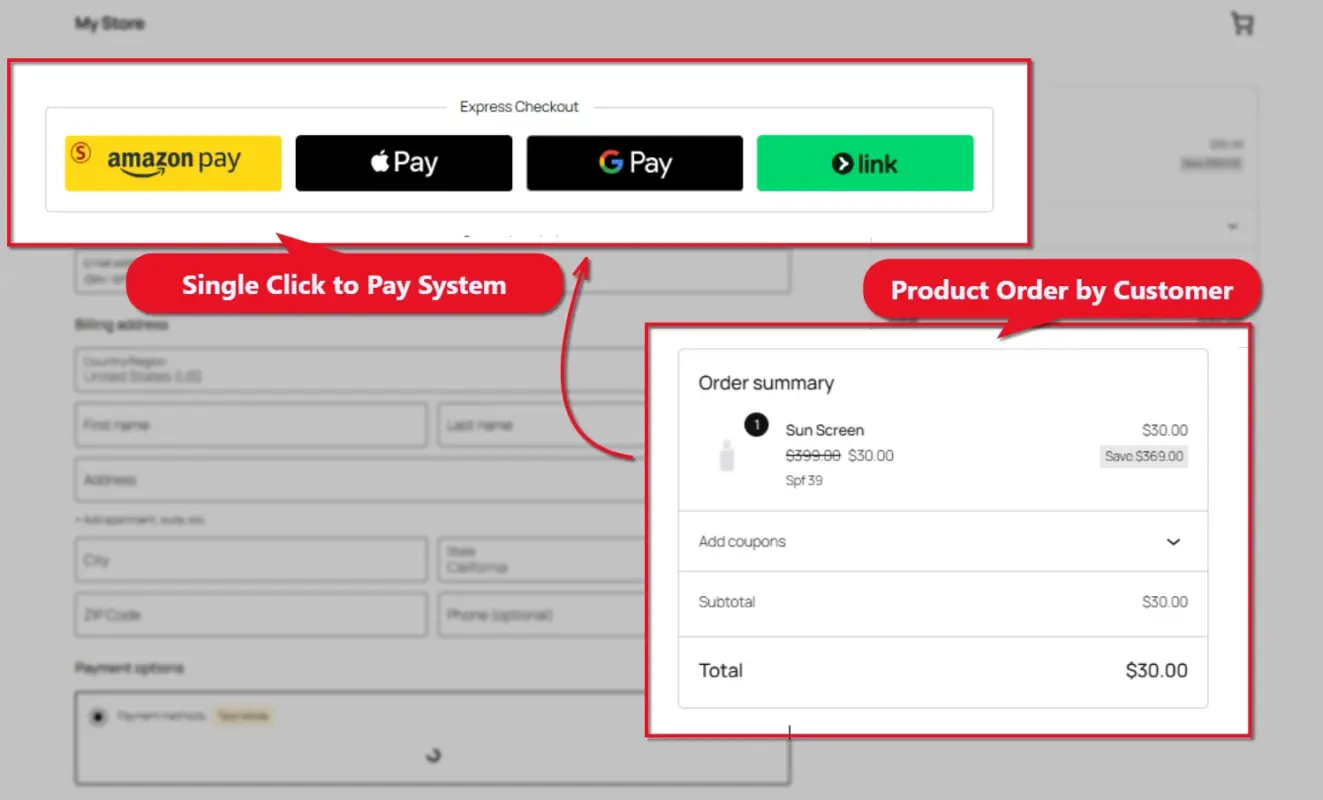
One-click checkout replaces the usual four-step buying process (cart, review, checkout form, payment) with a single button. A shopper clicks “Buy Now,” and the order goes through right away, using saved shipping and payment details.
It differs from a faster checkout form. A one-click checkout skips the form entirely for returning customers with details on file. New or guest visitors still land on a short checkout page, just without the cart step in front of it.
Baymard Institute’s checkout research draws on a decade of large-scale usability testing. It found that stores can gain a 35.26% average increase in conversion rate through better checkout design alone. A one-click button is one of the more direct ways to apply that finding.
Why Add One-Click Checkout to Your Store?
A one-click button removes the exact Extra effort points shoppers name most: fewer pages to click through and no repeated data entry for returning buyers. It also means a faster path to purchase on mobile, where typing is slower, and abandonment runs higher than on desktop.
Cart abandonment is the core problem here. Baymard’s meta-analysis of 50 studies puts the average rate at just over 70%. Roughly 18% of those shoppers leave specifically because checkout felt too long.
Not every product fits this format. A $30 candle is a good match, since the buyer already knows what they want. A custom-quoted order usually isn’t, since the buyer needs time and detail before committing to a purchase.
Before You Start: What You’ll Need
You’ll need three things before starting:
- A live payment gateway; Stripe works best for express checkout methods
- An active SSL certificate on your domain
- Admin access to install plugins or edit theme files
Running WooCommerce’s newer checkout blocks? Check compatibility below before installing anything.
How to Set Up One-Click Checkout in WooCommerce (Step by Step)
Pick the method that fits your budget and how much control you want over the button’s behavior.
Method 1: Free Buy Now Button Plugin
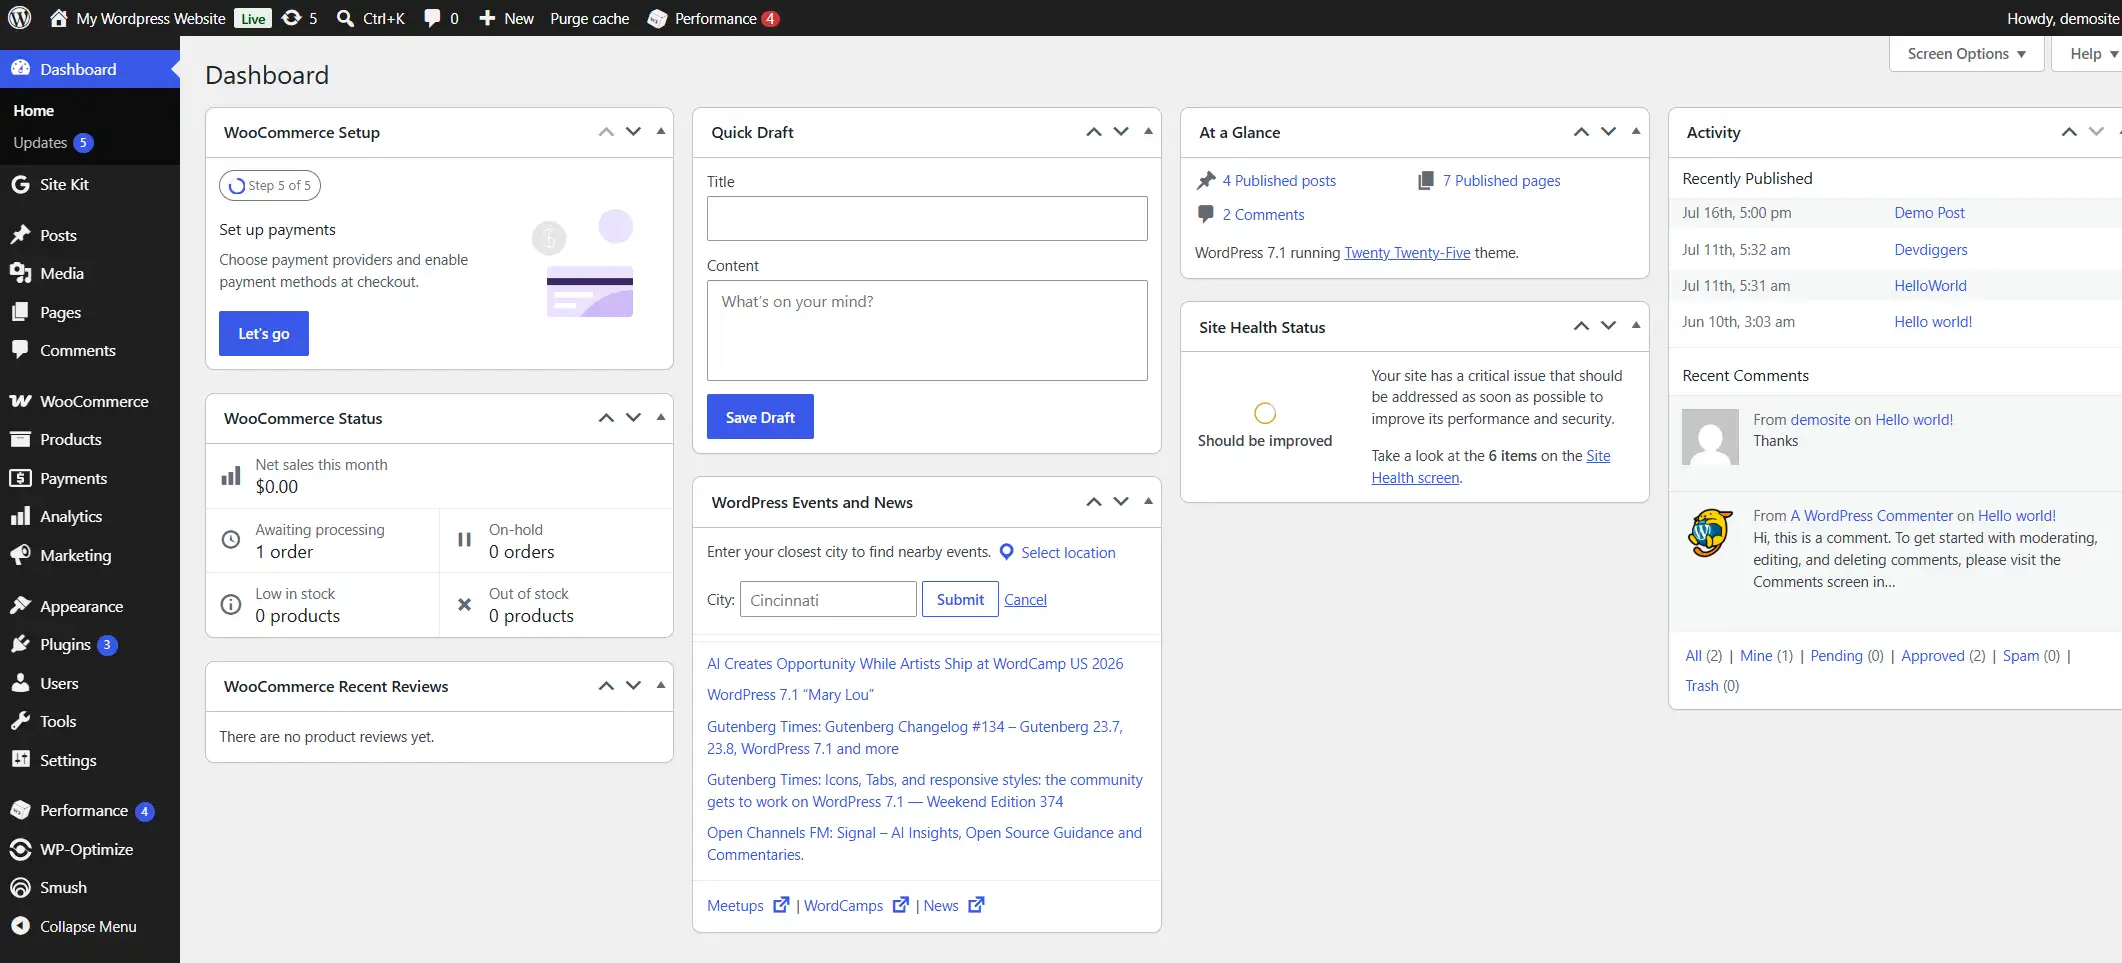
- Log in to Your WordPress Dashboard.
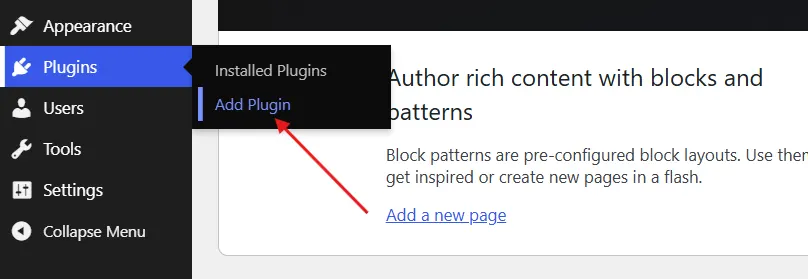
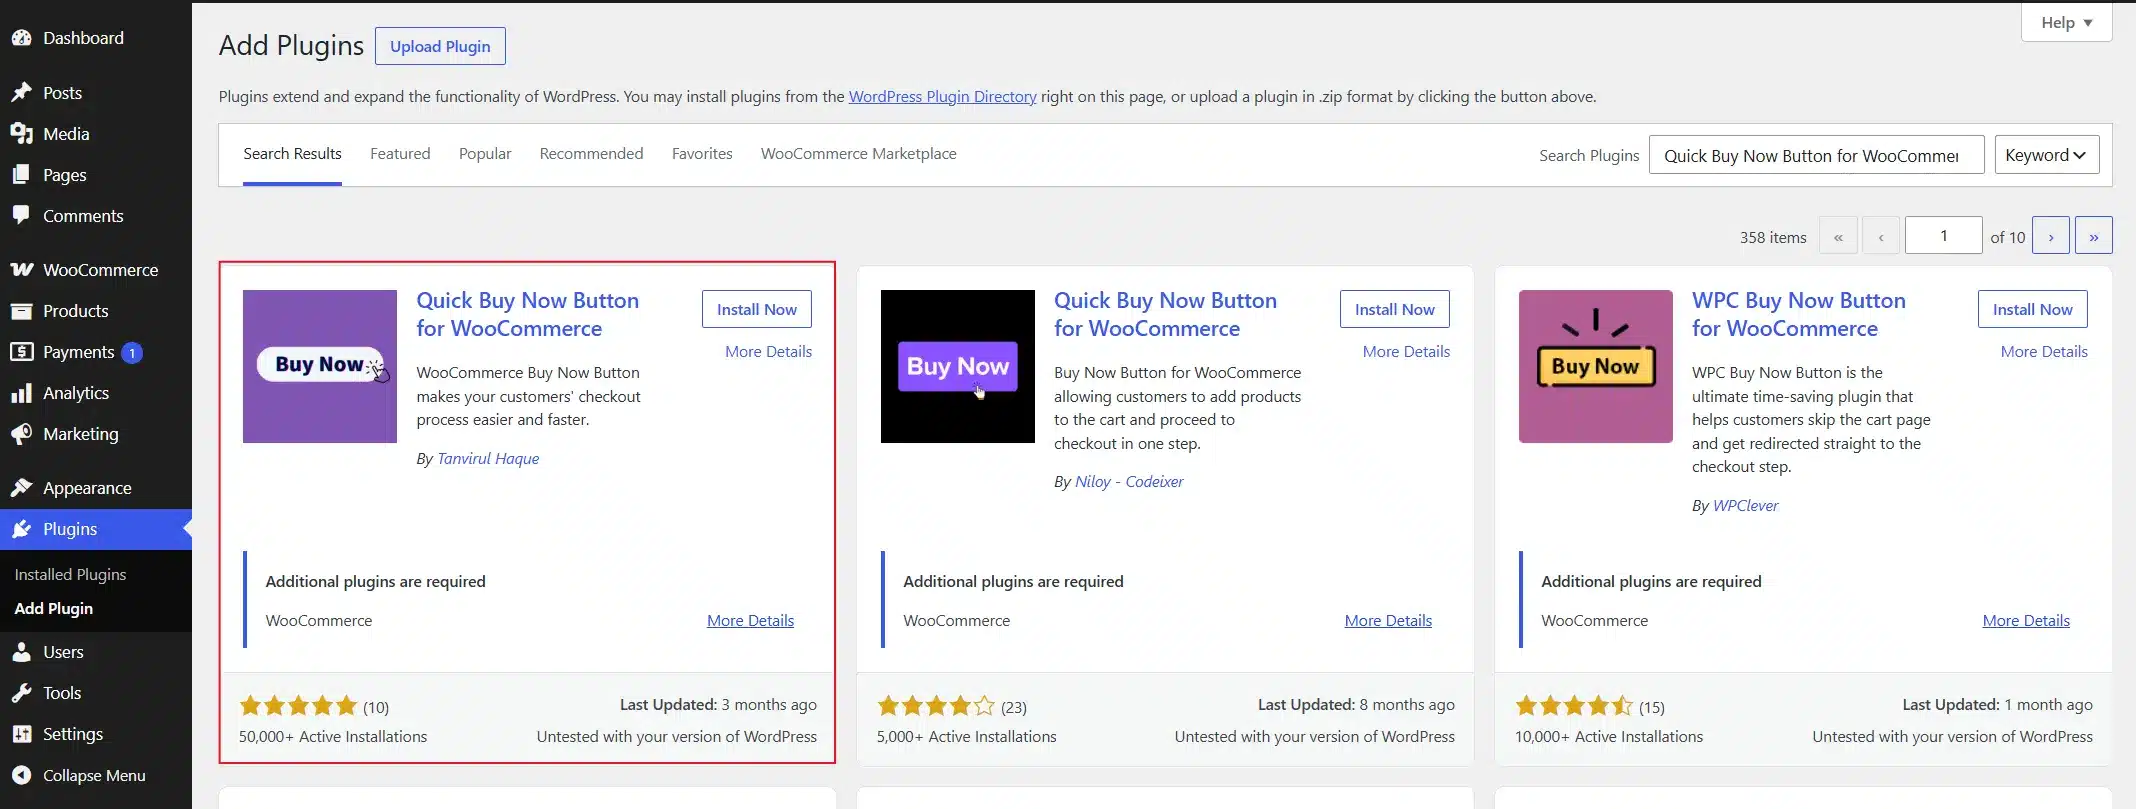
- From the dashboard, go to Plugins → Add Plugin.
- Install and activate the Quick Buy Now Button for WooCommerce plugin from the WordPress Plugin Directory.
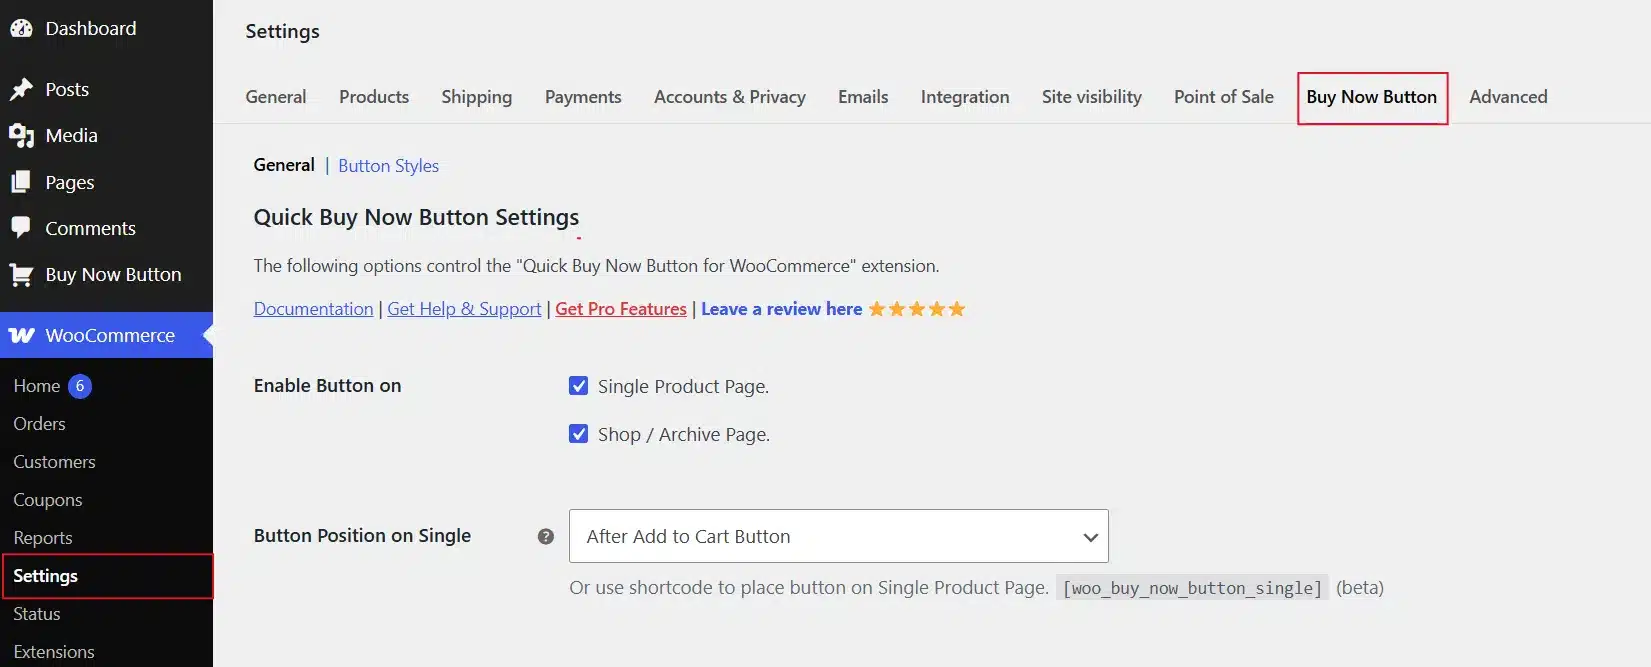
- Go to WooCommerce → Settings → Buy Now Button, then enable it for product pages.
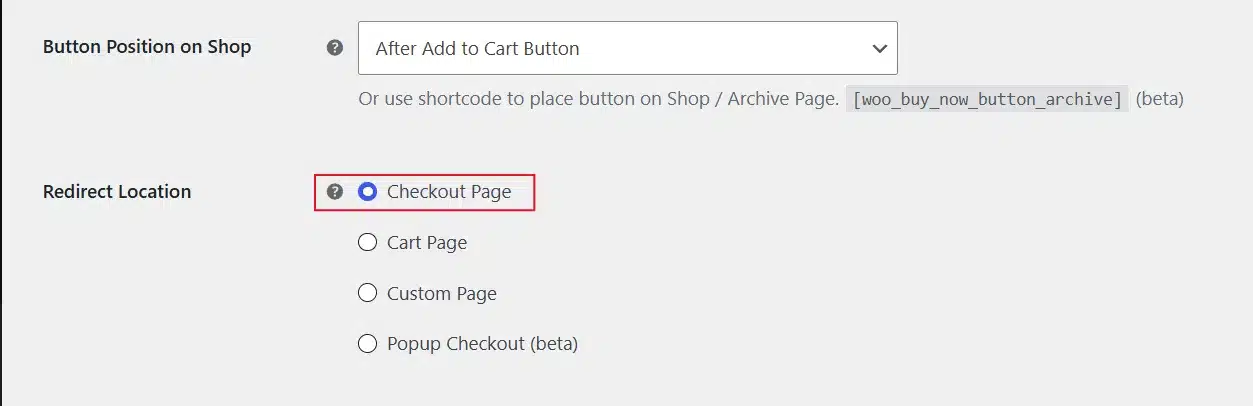
- Now Select, Redirect Location → checkout page as the target, so the button skips the cart page entirely.
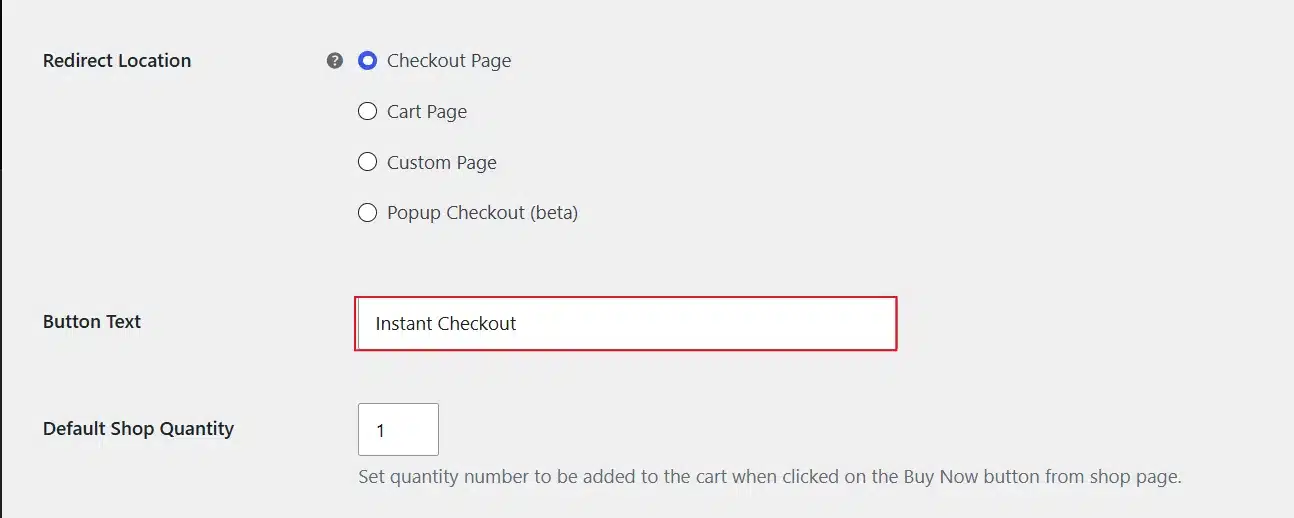
- Change the Button Text to something specific, like “Instant Checkout,” if the default text doesn’t fit your brand.
- Click Save Changes, then buy a product yourself to confirm the button jumps straight to checkout.
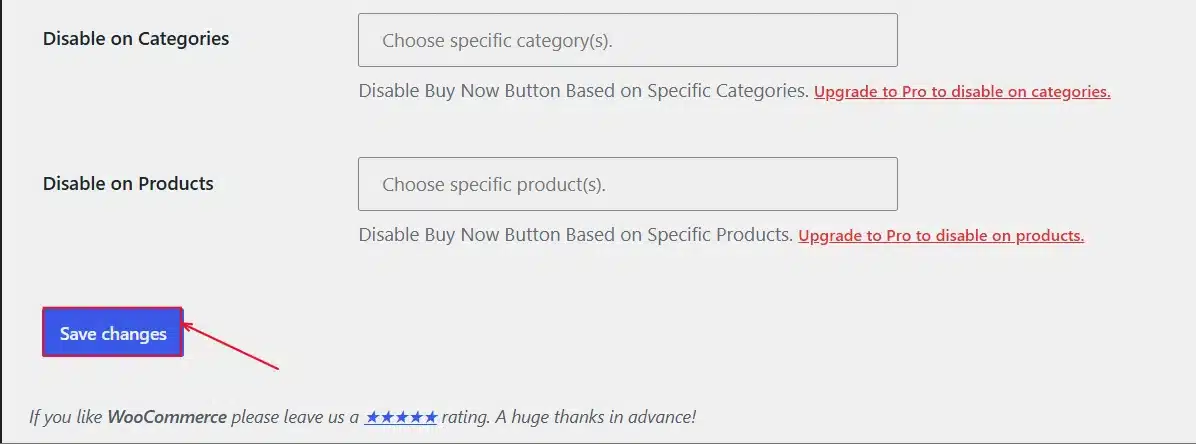
This method fits stores where each customer usually buys one item at a time.
Method 2: Express Checkout with Stripe, Apple Pay, and Google Pay
- Go to WooCommerce → Settings → Payments to set up payment options.
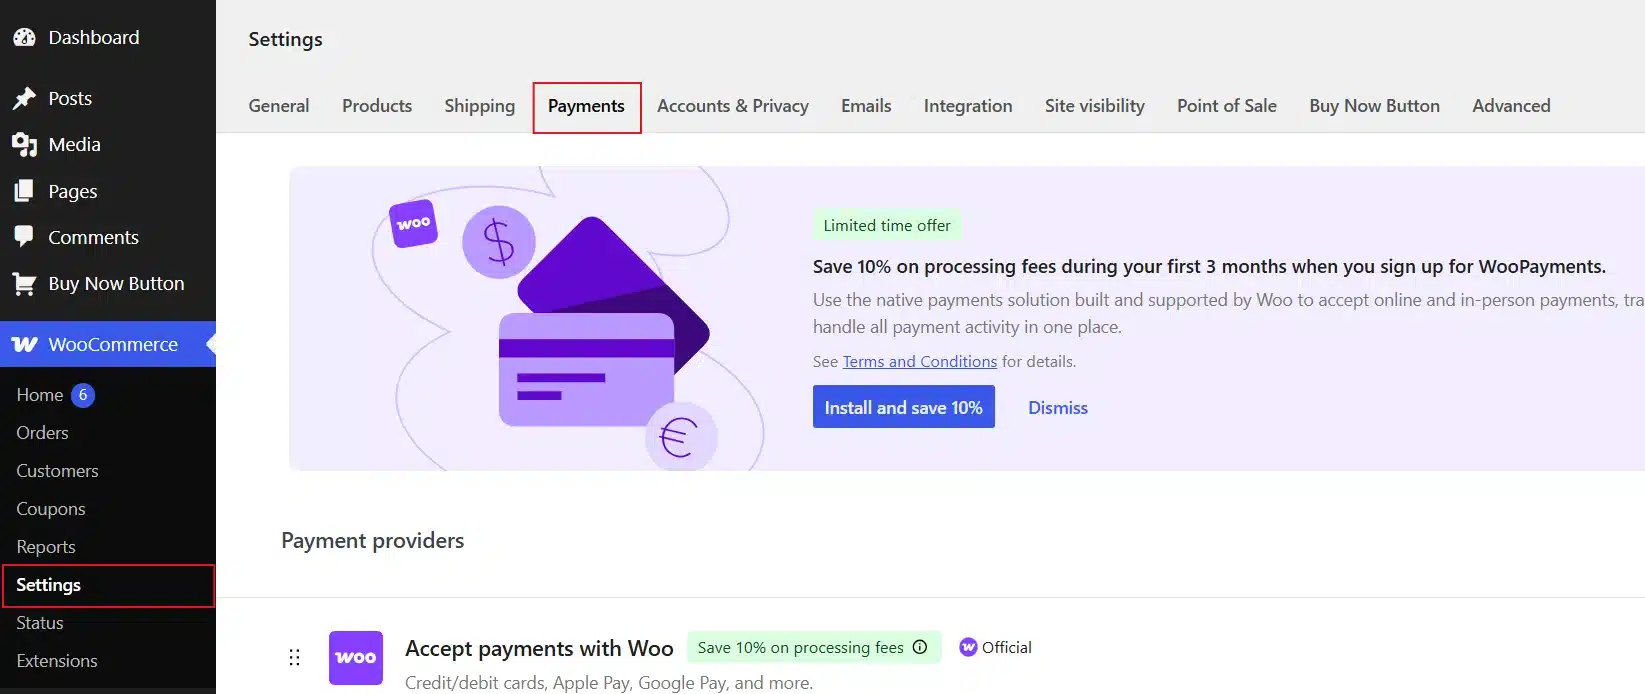
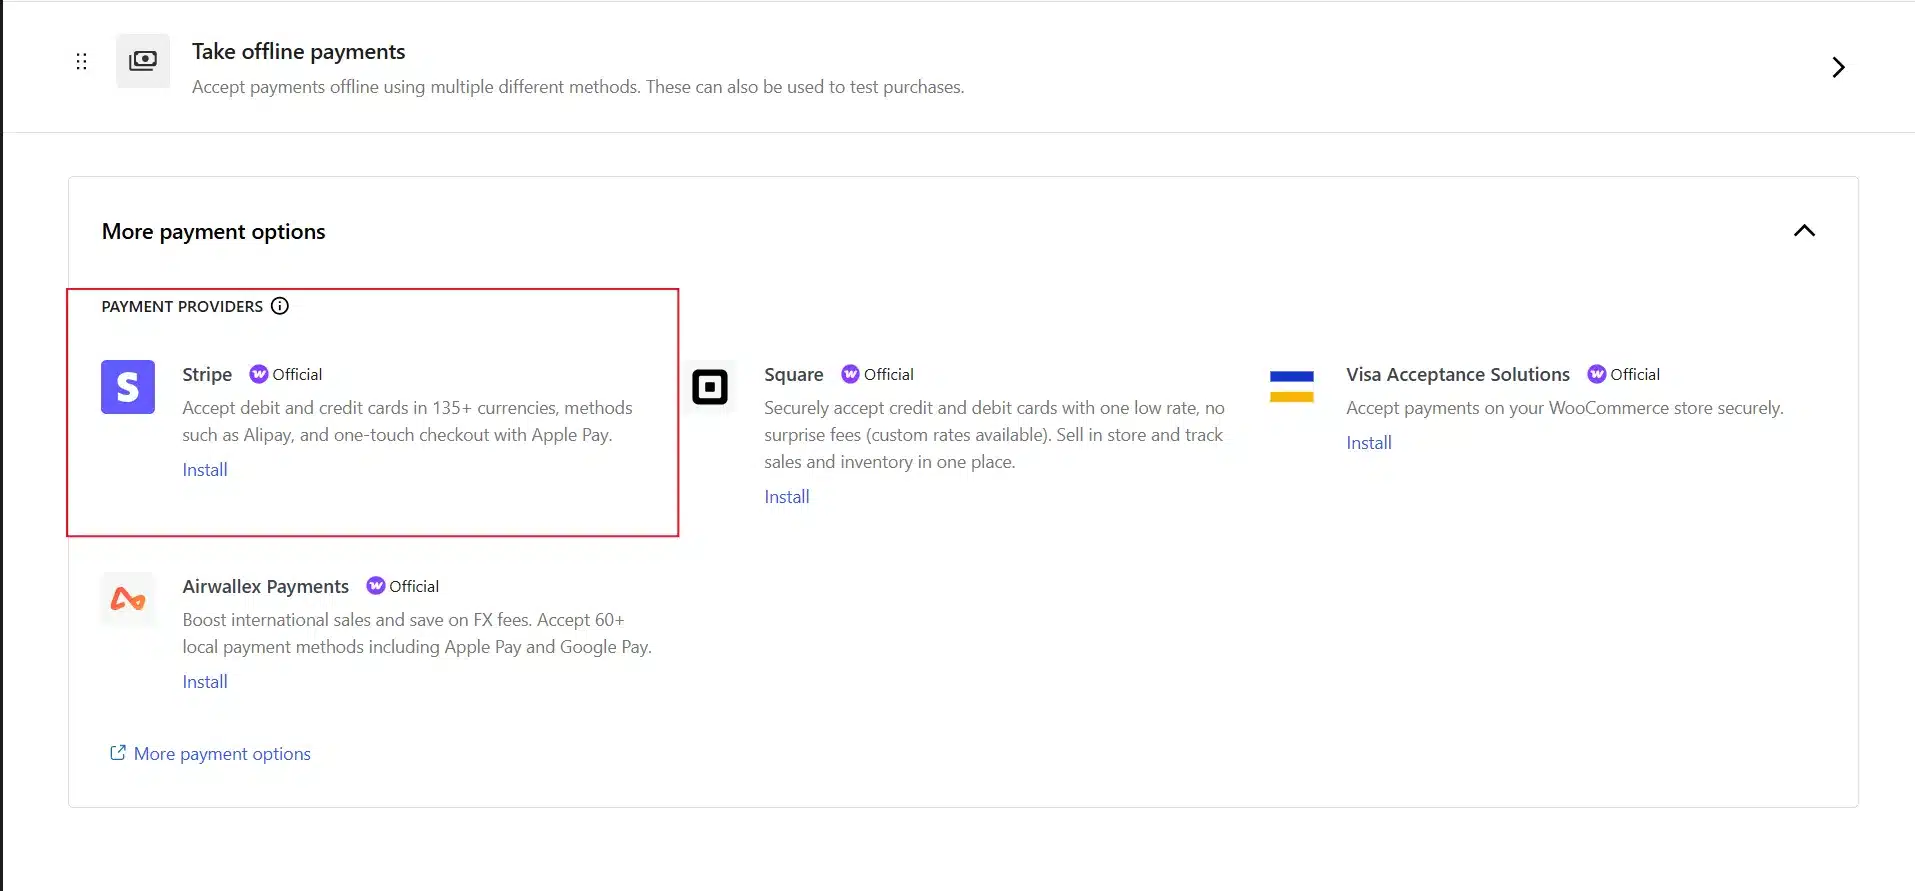
- Then install and connect a Stripe account if you haven’t already.
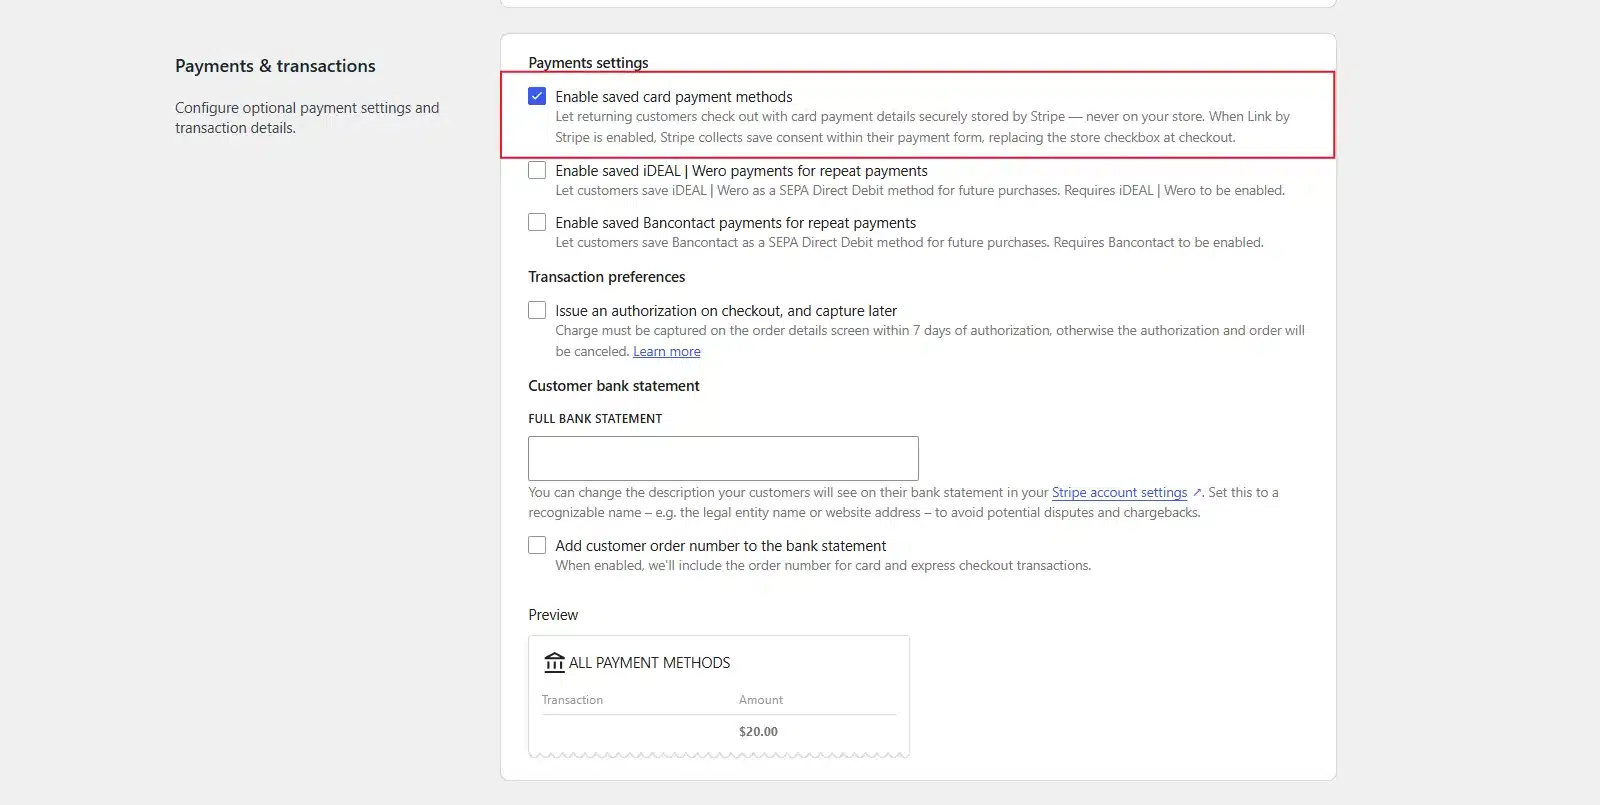
- In your Stripe payment settings, turn on Saved card payment methods. Customers need one completed Stripe order before this activates for them.
- Install a cart or checkout plugin with Express Pay support, such as FunnelKit Cart, to add the buttons to your product, cart, or checkout pages.
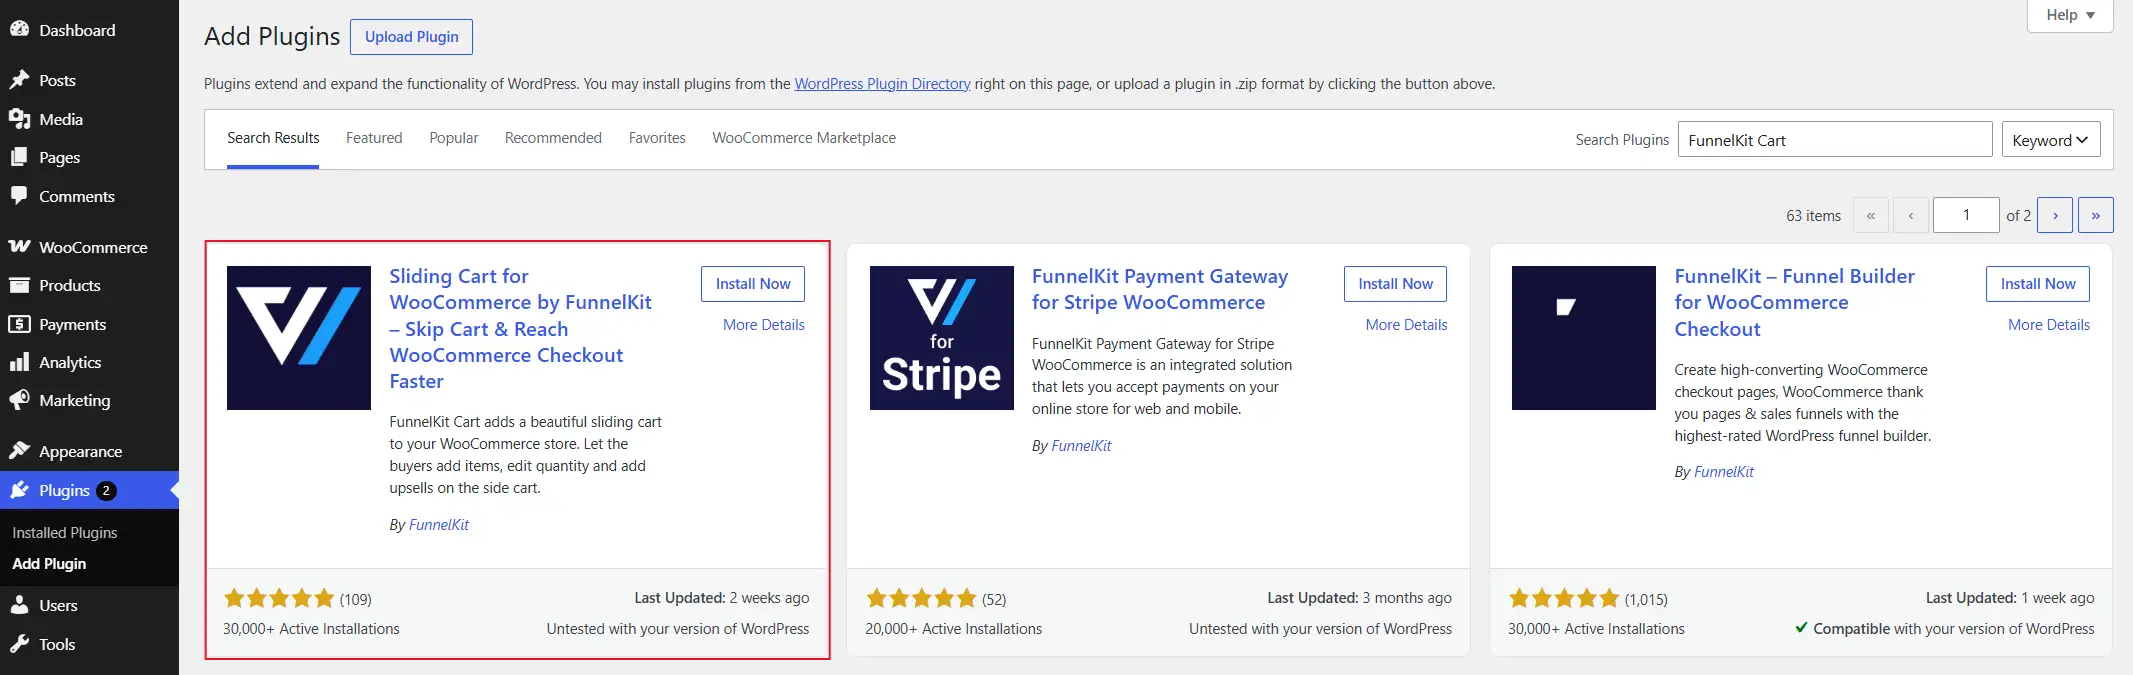
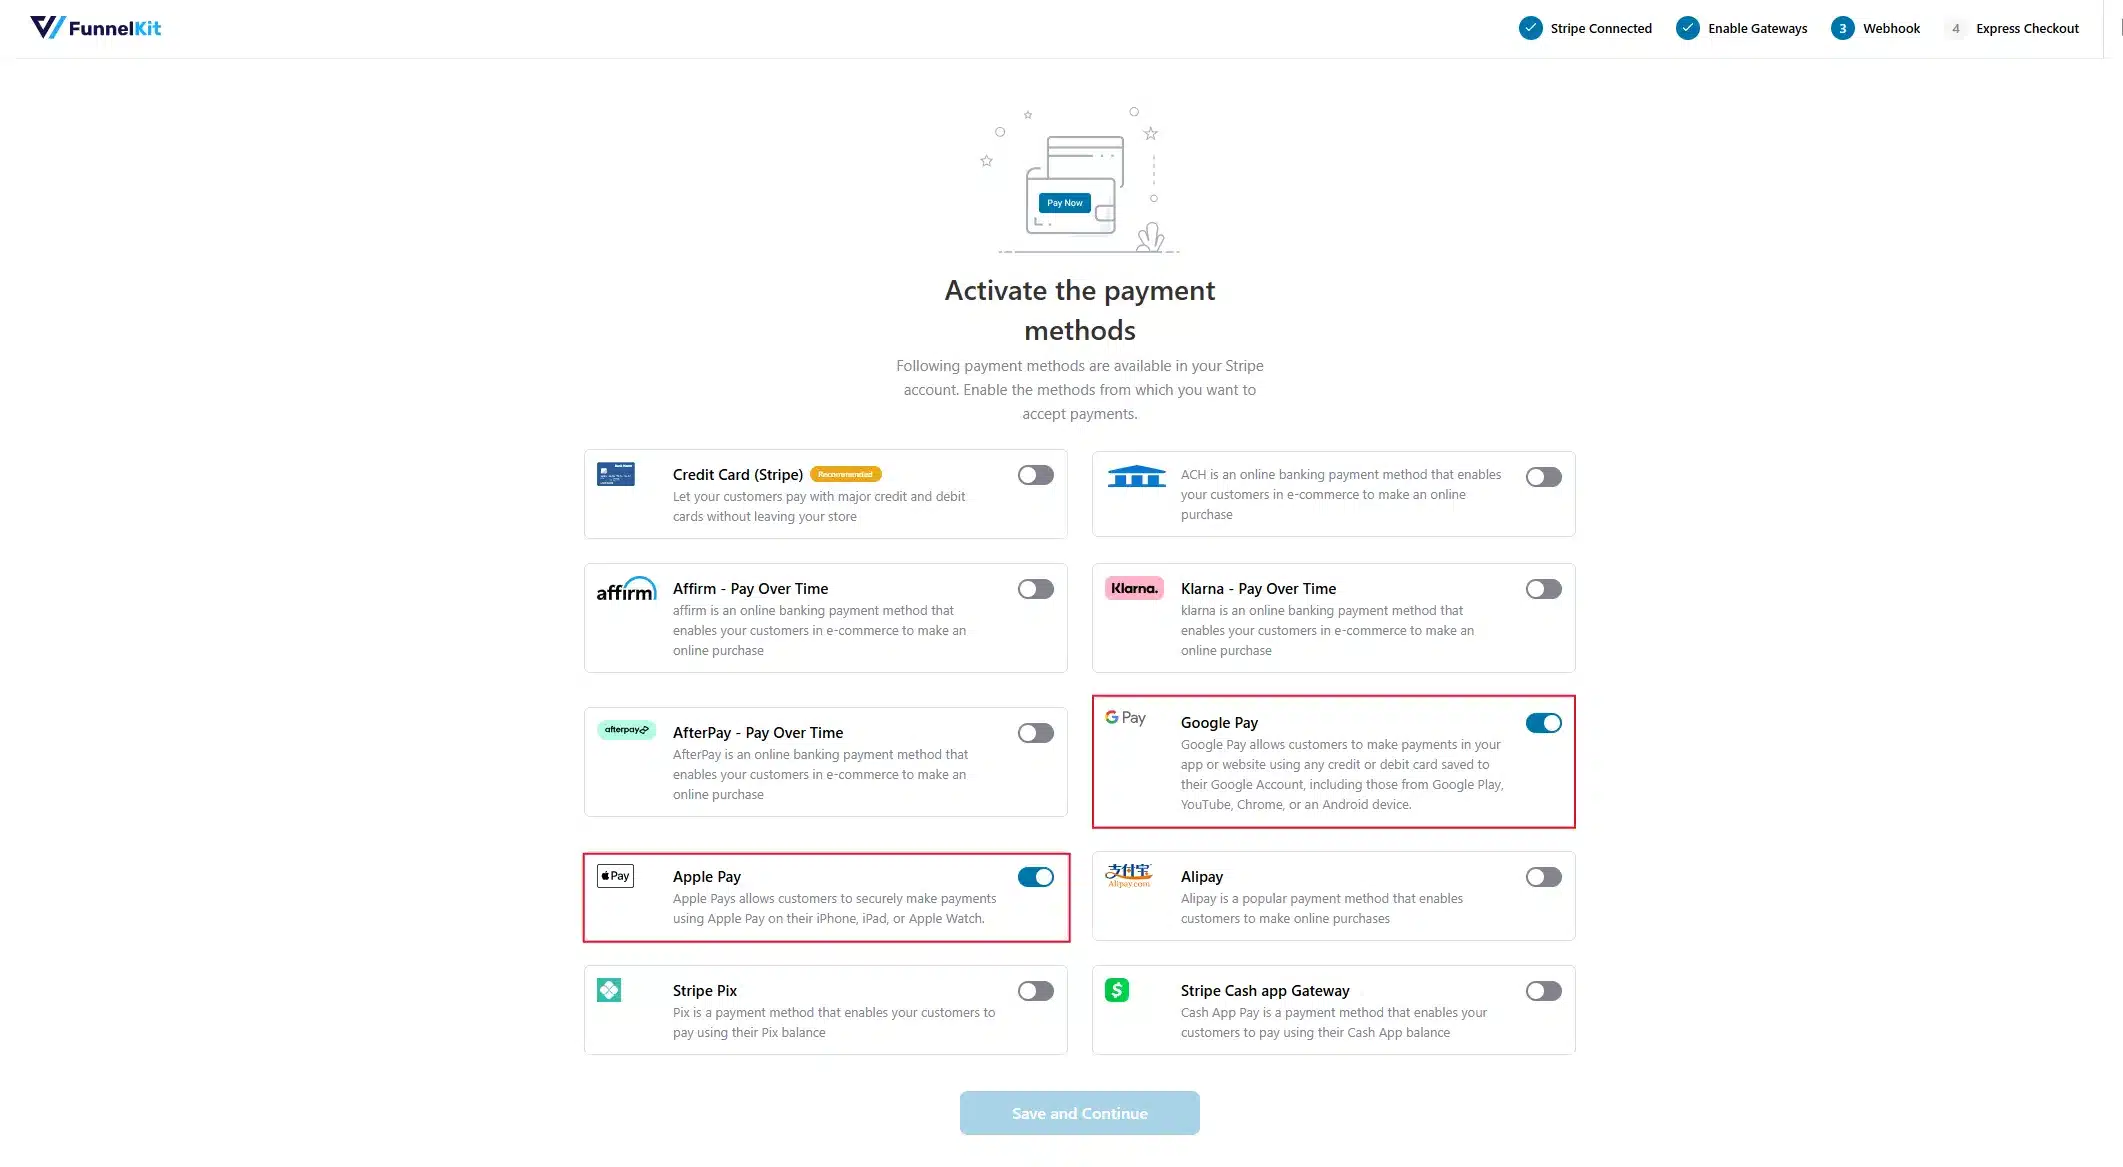
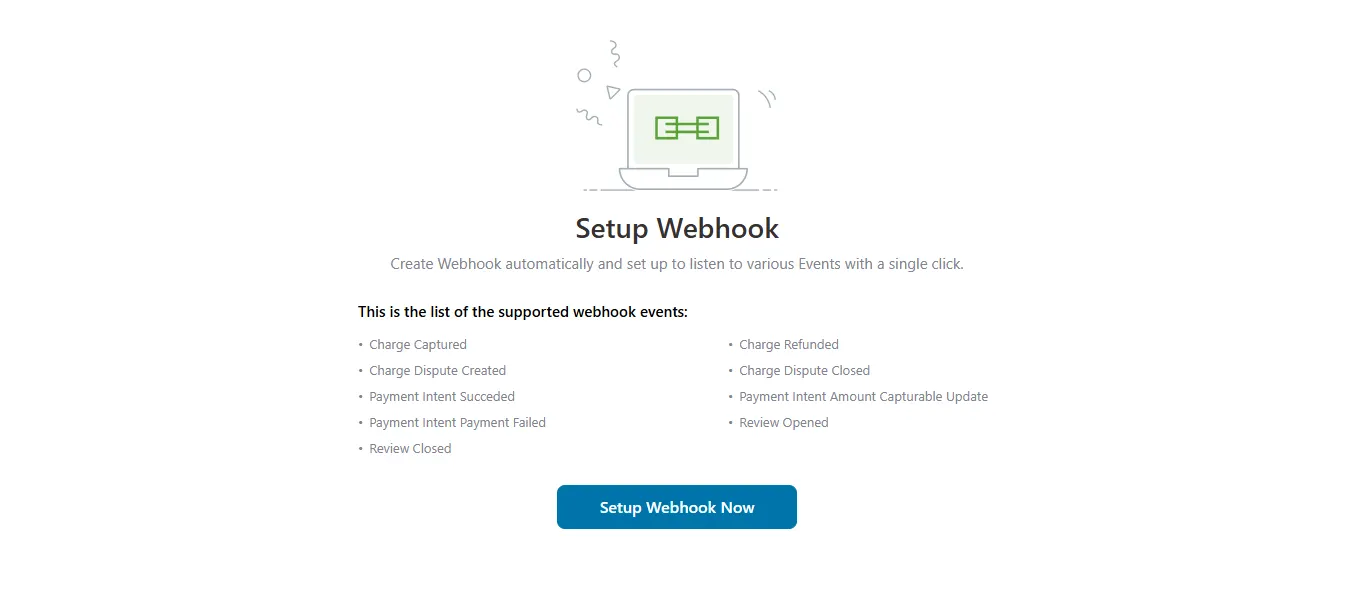
- Inside the plugin’s Express Checkout tab, turn on Apple Pay and Google Pay, then confirm the webhook setup when prompted.
- Test on a live product page. A funded Apple Pay or Google Pay account should prompt Face ID or a fingerprint, then complete the order right away.
Note: This method still asks for a final tap of confirmation. A true one-click button, like Method 1, places the order the instant it’s clicked.
Method 3: Custom Code (No Plugin)
- Go to Appearance → Theme File Editor in your WordPress Dashboard.
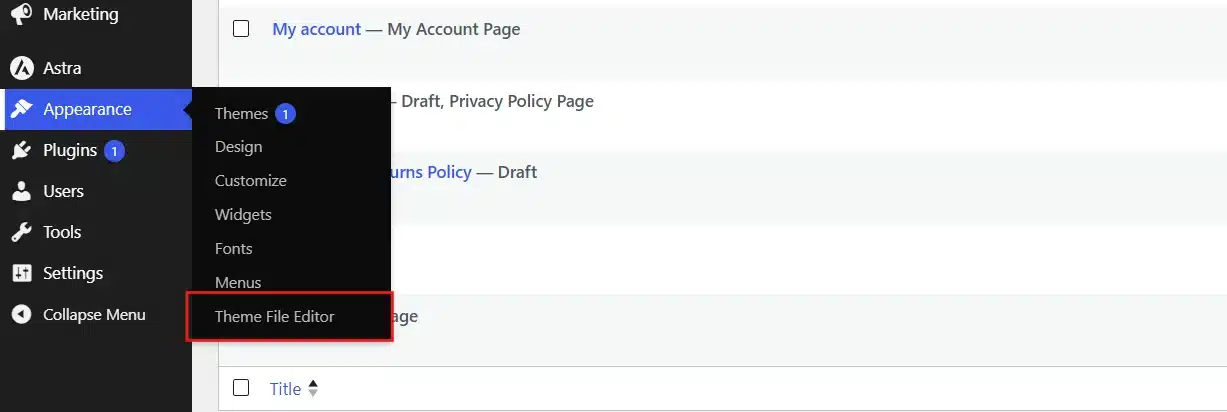
- Open
functions.phpfor your active theme, and back up the file first.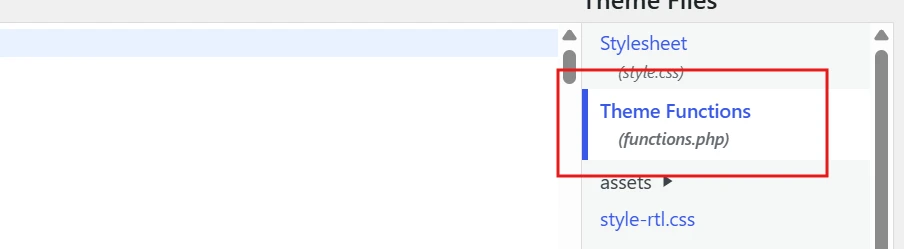
- Paste this at the end of the file:
add_filter( 'woocommerce_add_to_cart_redirect', 'custom_one_click_checkout' );

function custom_one_click_checkout( $url ) {
    return wc_get_checkout_url();
}

add_filter( 'wc_add_to_cart_message_html', '__return_null' );
- Click Update File to save the change.
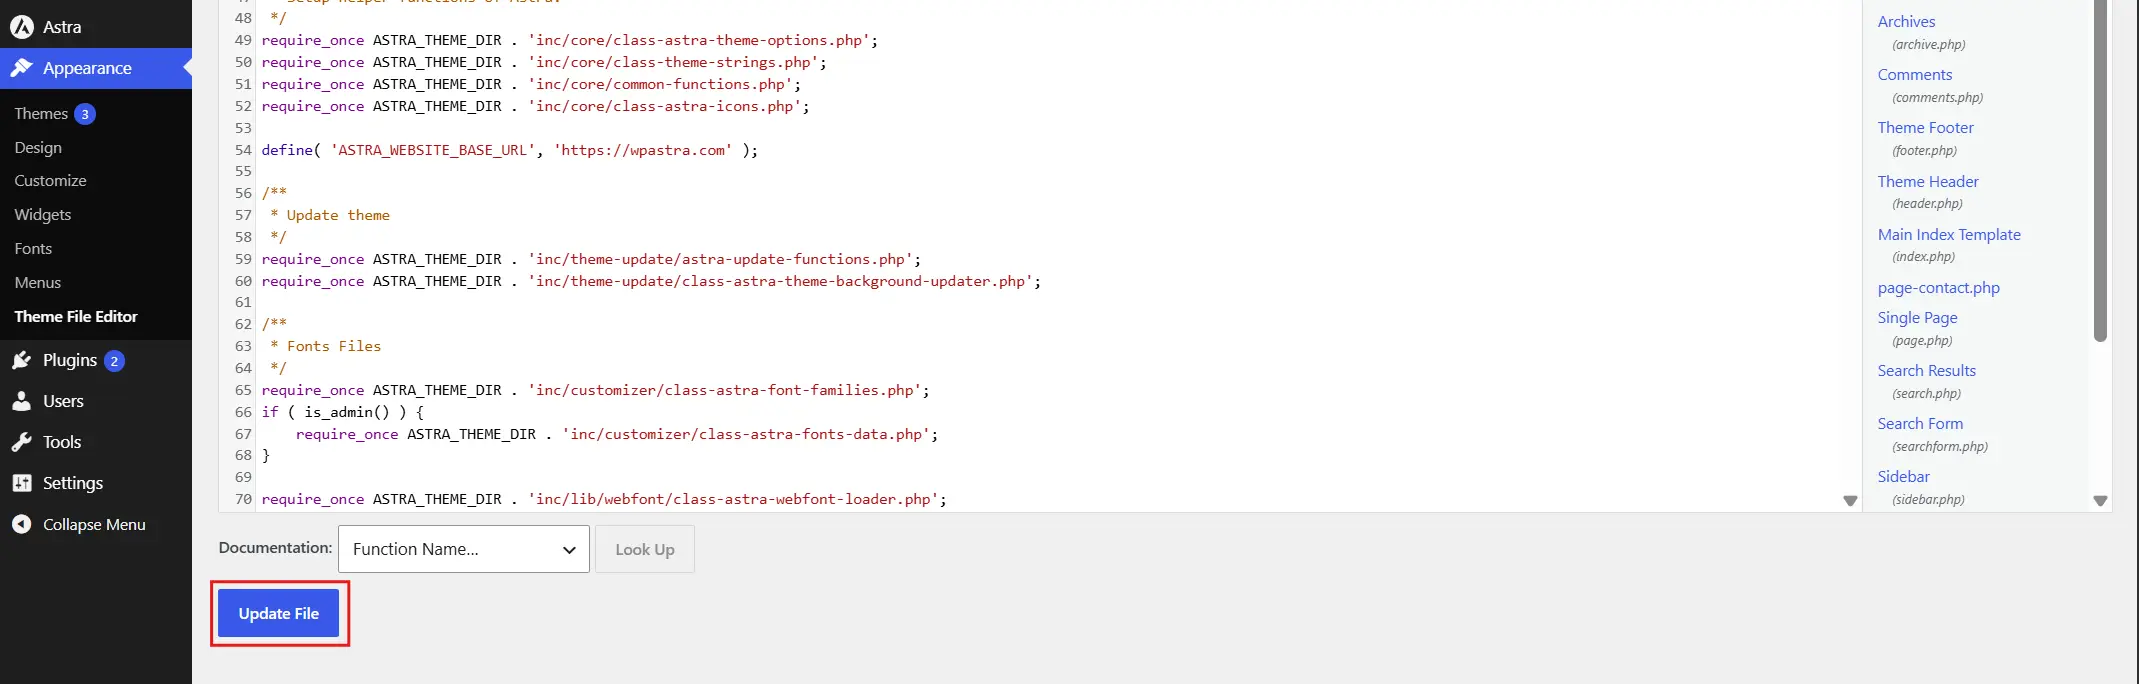
For a standalone Buy Now link on any product page, use this instead:
<a href="<?php echo esc_url( wc_get_checkout_url() . '?add-to-cart=' . get_the_ID() ); ?>" class="button">Buy Now</a>
This route gives full control with no plugin overhead, but also no support team to call if something breaks.
Is Your Setup Compatible with Block Checkout and HPOS?
WooCommerce’s newer checkout uses editable content blocks instead of the older shortcode-based page.
Stores increasingly run on HPOS too. It changes how order data gets stored, moving away from the older posts table.
An older plugin built for the classic checkout may not render correctly inside checkout blocks. Its button may show up in the wrong spot entirely.
Check the plugin’s WordPress.org listing for confirmed HPOS and block compatibility before installing. If you’re maintaining a plugin yourself, read how to make a WooCommerce plugin HPOS compatible.
Test on a staging copy of your site first if either is unconfirmed. It’s a five-minute check that saves a wasted afternoon later.
One-Click Checkout for Returning Customers Using a Wallet
A funded wallet pays for an order in one click, with no card form at all.
The customer tops up a balance once, and every purchase after that draws from it directly, with nothing to retype.
This fits stores with a lot of repeat buyers especially well: subscription boxes, consumable products, or memberships where the same shopper returns often.
The buyer never re-enters payment details after the first top-up. The WooCommerce store credit plugin adds this natively, and refunds route straight back into the wallet instead of the original card.
For a setup that goes beyond what a plugin covers, a custom WooCommerce checkout flow built for your store is worth considering.
Common Problems After Setup (and How to Fix Them)
A handful of the same issues show up in support tickets after setup. Here’s how to fix each one quickly.
| Problem | Fix |
|---|---|
| Button not showing on the product page | Almost always a caching issue. Clear your page cache and object cache, then reload in a private browser window. |
| Button visible but unresponsive when clicked | Check for a JavaScript conflict. Open your browser’s console (right-click, Inspect, Console tab) and look for a red error on click. |
| Guest checkout redirects to a blank cart error | A required field, like shipping address, likely wasn’t filled before the redirect fired. Most common with custom code setups. |
| Saved payment details missing for a returning customer | Confirm Saved cards is enabled in your payment gateway settings, not just in the plugin. This setting lives in two places. |
None of these need a developer to fix. Five minutes of checking usually finds the cause.
Best Practices to Get More Out of One-Click Checkout
- Offer guest checkout alongside the express option: forcing an account first defeats the purpose of a fast checkout.
- Keep payment options focused: two or three well-chosen methods convert better than a wall of six logos.
- Skip the coupon code box: a visible field sends shoppers hunting for a discount elsewhere, and some never come back. Auto-apply active promotions instead.
- Show delivery timing near the button: a shopper who sees “arrives by Thursday” hesitates less than one who has no idea.
- Test button placement: above the fold versus below it can shift conversions more than the plugin choice itself.
Conclusion
Setting up one-click checkout in WooCommerce comes down to picking the method that fits your store.
Use a free Buy Now plugin for the quickest setup, an express checkout plugin for a polished experience, or custom code for full control.
Confirm compatibility with your checkout type, block-based or classic, before rolling it out to every product.
For stores with a lot of repeat buyers, a wallet-based option is worth a look too. It removes the card form entirely after the first top-up.
One-click checkout isn’t the only way to cut checkout Extra effort. If a chunk of your customers hesitate over price rather than process, WooCommerce Buy Now Pay Later plugins solve a different piece of the same problem.
Frequestly Asked Questions (FAQs)
Q1. Does one-click checkout work with WooCommerce’s block-based checkout?
Most current plugins support it, but not all older ones do. Check the plugin’s listing for confirmed block compatibility, and test on staging first if you’re unsure.
Q2. Do I need a Stripe account to offer one-click checkout in WooCommerce?
Not for every method. A basic Buy Now button plugin works with whatever gateway you already have. Express checkout with Apple Pay, Google Pay, or Stripe Link specifically requires a connected Stripe account.
Q3. Is it safe to store customer payment details for one-click checkout?
Yes, through a PCI-compliant gateway like Stripe or PayPal. Card numbers stay on the payment processor’s secure servers, not on your WordPress database.
Q4. Can guest shoppers use one-click checkout, or do they need an account?
It depends on the method. Digital wallet options like Apple Pay and Google Pay work for guests. A true one-click Buy Now button usually needs a returning, logged-in customer with saved details on file.
Q5. What’s the difference between one-click checkout and express checkout?
A true one-click checkout places the order the instant the button is clicked. Express checkout, through Apple Pay or Google Pay, pre-fills saved details but still asks for one final confirmation tap.
Q6. Does one-click checkout work for subscription products?
Yes, and it’s a strong use case. Subscriptions already require saved payment details for recurring billing, so a one-click option for the first purchase fits naturally into that flow.
Q7. Does one-click checkout slow down my site?
No, a well-built plugin adds negligible load time. The button itself is lightweight. If your site does slow down after installing one, check for a caching or theme conflict rather than blaming the plugin outright.
Q8. Can I offer one-click checkout only for specific products?
Yes. Most Buy Now button plugins let you enable the button per product or per category from the product edit screen. It doesn’t have to run store-wide. This works well if only some items suit an instant purchase.
Q9. What happens if a customer’s saved card expires?
The one-click option simply won’t complete, and the customer gets redirected to a normal checkout form to update their payment details. Stripe’s saved-card system also auto-updates card numbers in many cases when a bank reissues a card.
Q10. Does one-click checkout work on mobile apps, or only in browsers?
It works in both, since the button lives on your WooCommerce product page rather than in a separate app. Apple Pay and Google Pay buttons are built for mobile first, and tend to convert better there than on desktop.