
You can change the link color in WordPress in under five minutes, no code required. The catch is that most tutorials skip the exact clicks and jump straight to a code snippet.
This guide walks through every screen, every menu, and every button. Follow along and take a screenshot at each step if you want a record for your team.
You’ll learn five separate methods: the Theme Customizer, the Full Site Editor for block themes, single link colors inside a post, custom CSS, and a plugin.
There’s also a dedicated section for WooCommerce store owners, since store links behave a little differently from regular content links.
Why Change the Link Color in WordPress?
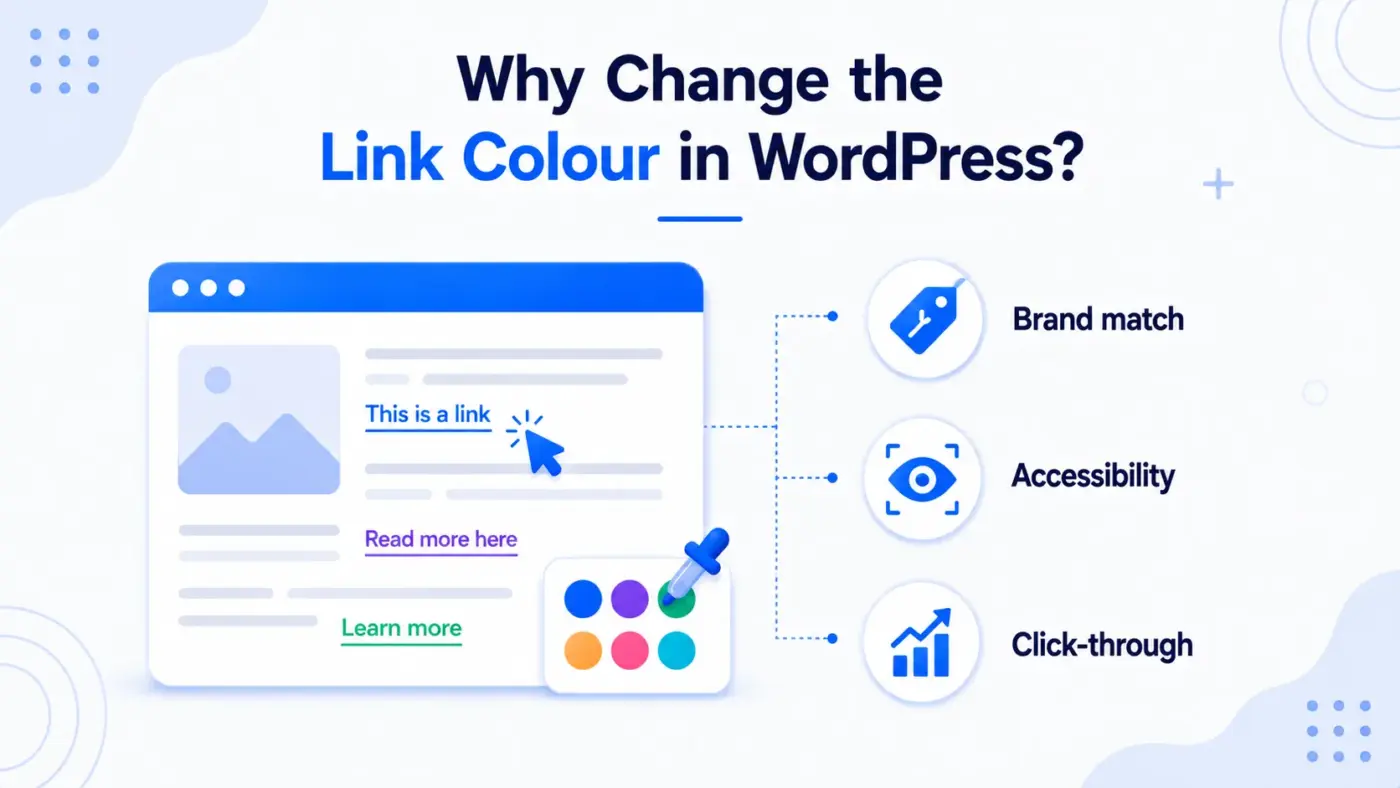
Link color affects three things: branding, readability, and clicks. A mismatched link color looks unfinished. A link that blends into your body text gets ignored. Neither is good for a site you want visitors to trust.
Here is the short version of why this matters:
- Brand match: Your links should feel like part of the same site as your logo and buttons, not an accident from a default theme.
- Accessibility: Visitors with low vision or color blindness rely on contrast to tell links apart from plain text.
- Click-through: A distinct link color, especially on hover, tells visitors exactly where they can interact.
Most WordPress themes ship with a link color already set. It is usually blue, sometimes your theme’s accent color. Changing it is a design decision, not a technical one. WordPress gives you several ways to make that decision without breaking anything else on the page.
Link color is one small piece of a bigger visual picture. If you are already tweaking design details, you might also want to change font size in WordPress at the same time, since both affect how readable your content feels.
Method 1: Change Link Color Using the WordPress Theme Customizer
This is the fastest option if your theme supports it, and it needs zero code.
- Log in to your dashboard, hover over Appearance → Customize.

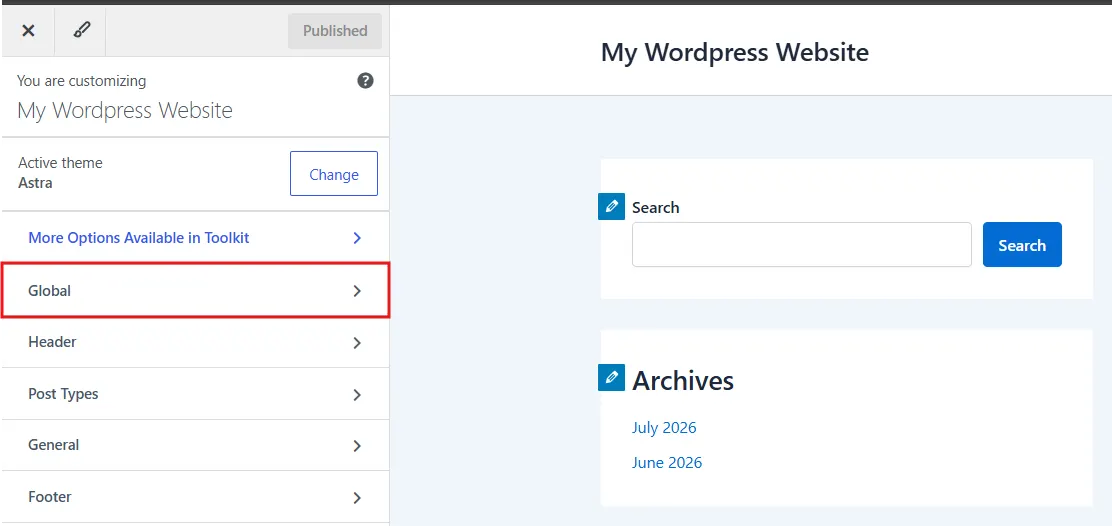
- Go to the Global Section inside the Customize tab.
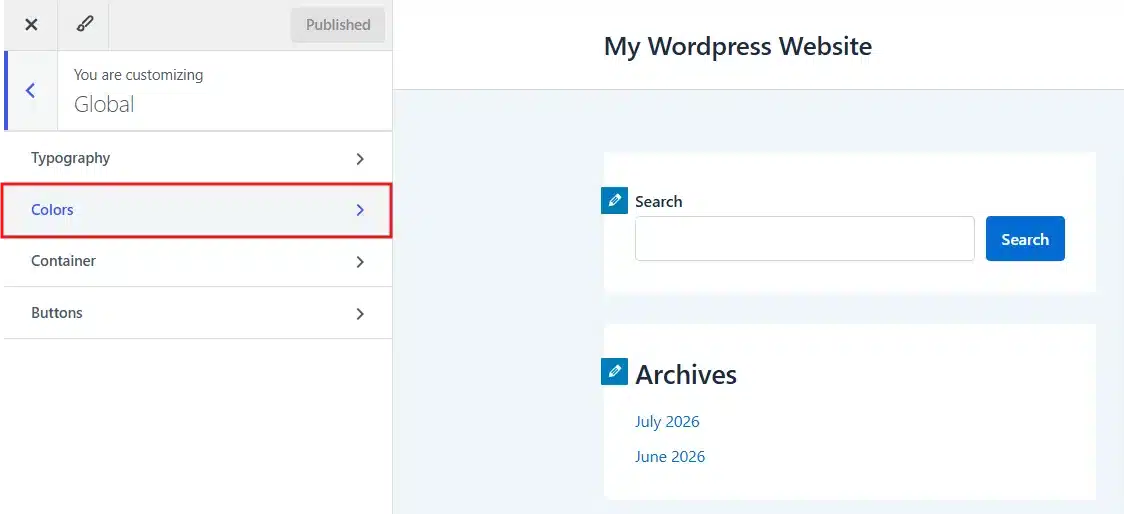
- Then, click the Colors Section to complete the remaining task.
- Locate the link color setting. Some themes list it plainly as Link Color. Others bury it under Accent Color or Primary Color, since that shade often controls links by default.
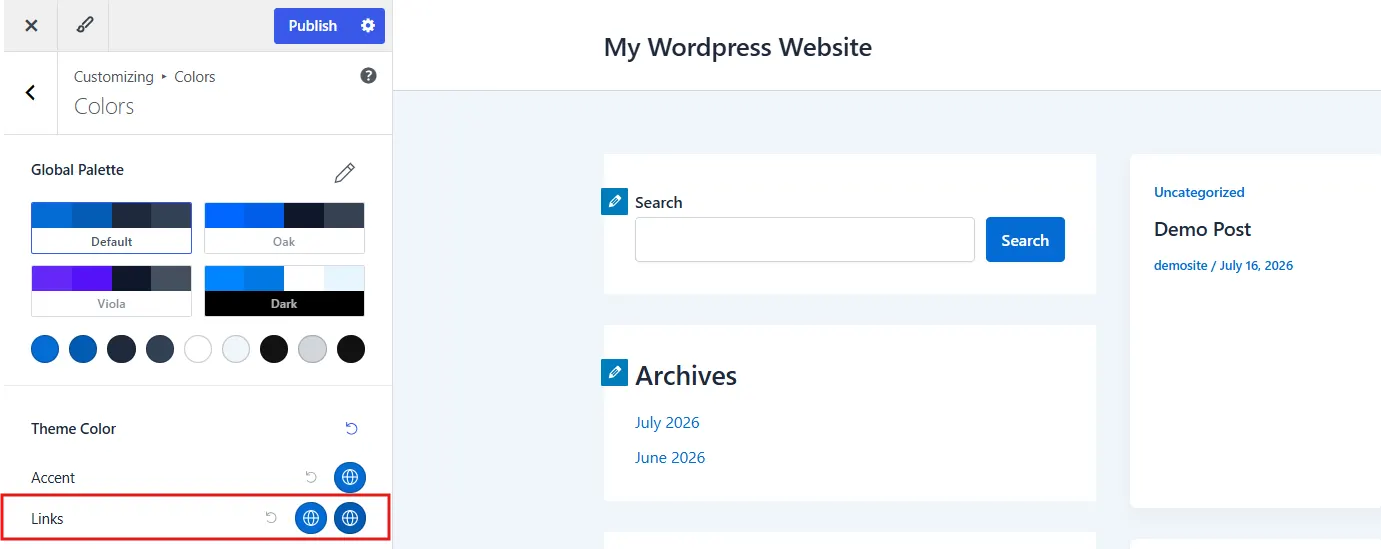
- Pick your new color. Click the color box. A picker opens where you can drag to a shade or type a specific hex code, like
#1e73be.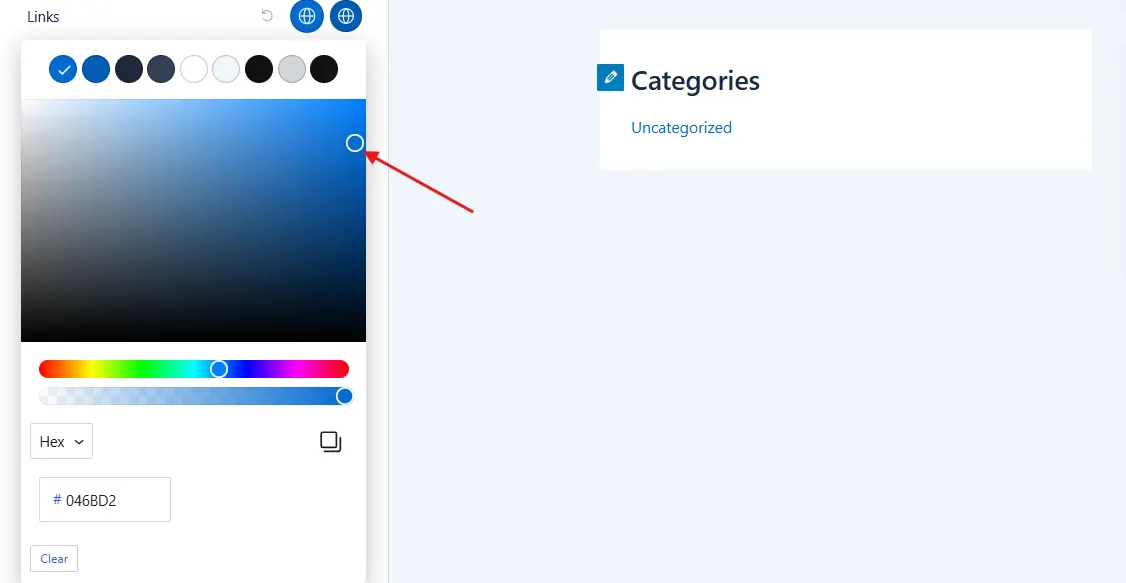
- Click Publish in the top bar. Your new link color goes live across the site immediately.
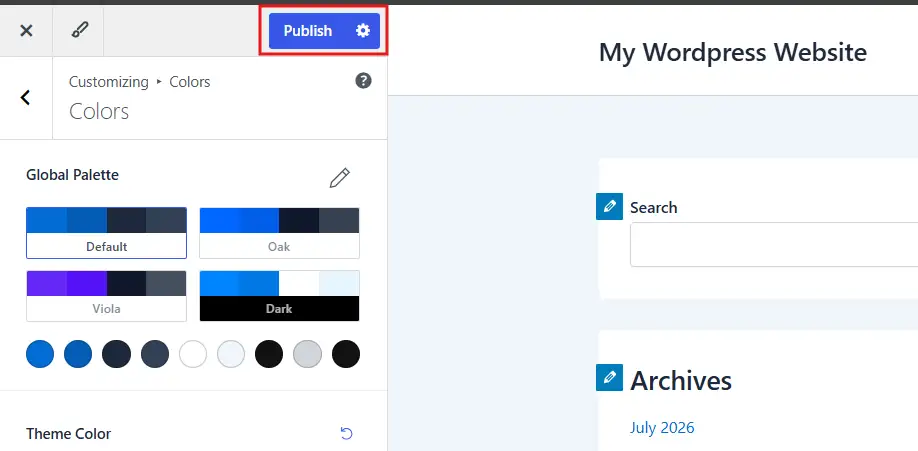
If you do not see a Colors section at all, your theme is likely a block theme. Skip ahead to Method 2.
Method 2: Change Link Color for Block Themes Using the Full Site Editor
Block themes, such as Twenty Twenty-Five or most newer default themes, do not use the classic Customizer. They use the Full Site Editor instead, and the steps look a little different.
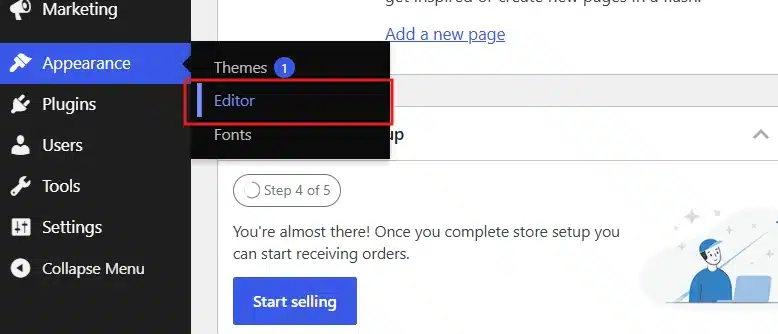
- Go to Appearance → Editor from your dashboard sidebar.
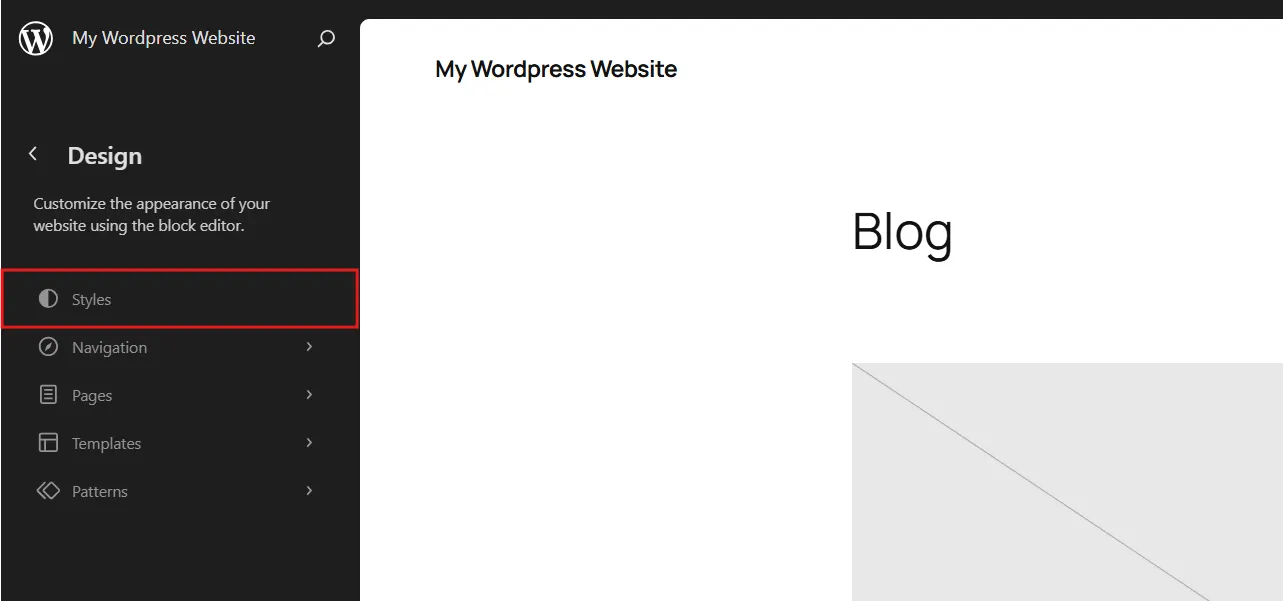
- Open the Styles panel. Inside the editor, click Styles in the top toolbar.
- Select Colors from the sidebar. You’ll see your theme’s default color palette listed here.
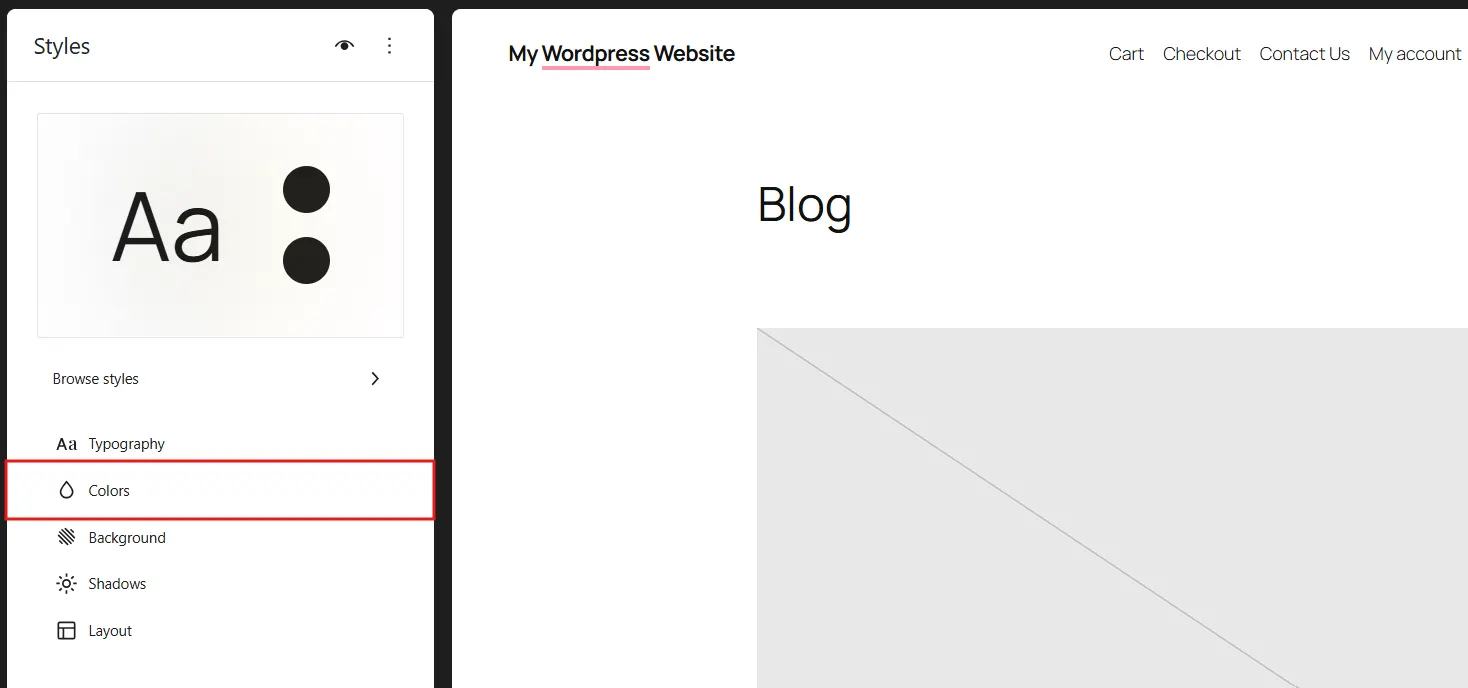
- Find the Link option. Click it. You should see two settings appear: one for the default link state and one for hover.
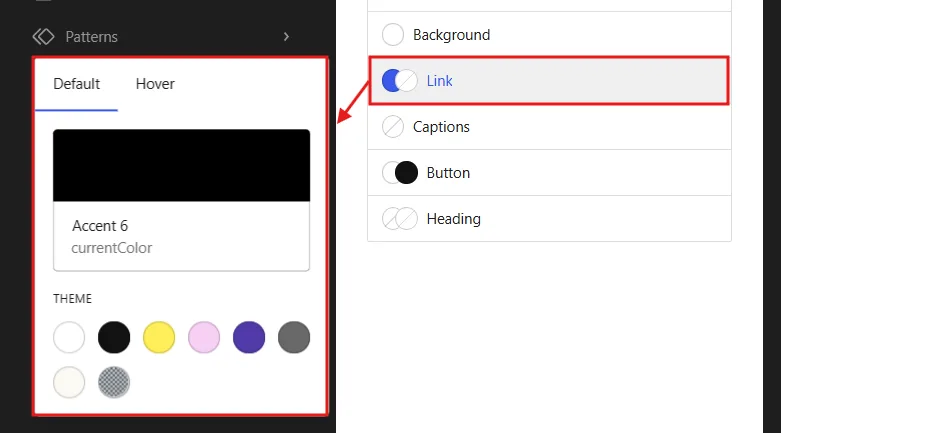
- Choose your colors. Set the default color first, then set a slightly different shade for hover, so visitors get visual feedback when they move their mouse over a link.
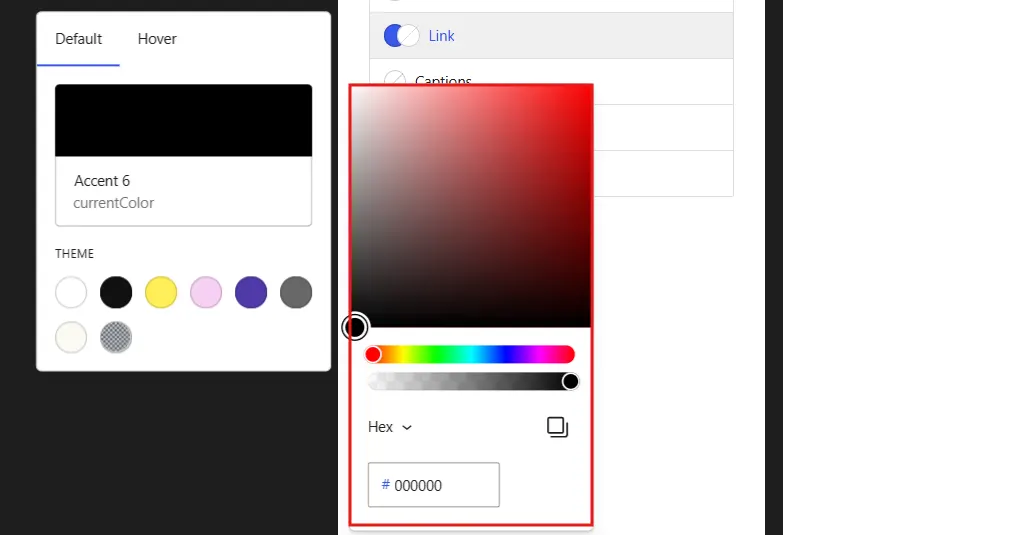
- Click Save in the bottom left corner of the editor.

A quick note from working inside the editor: some block themes apply link color globally through theme.json. A plugin or custom CSS rule elsewhere on your site can quietly override what you just set here. If your change doesn’t stick, that’s usually why.
Method 3: Change the Color of a Single Link, Not the Whole Site
Sometimes you don’t want every link on the site to change. Maybe you just want one call-to-action link inside a single post to stand out.
- Open the post or page in the block editor. Go to Posts or Pages, then click the one you want to edit.
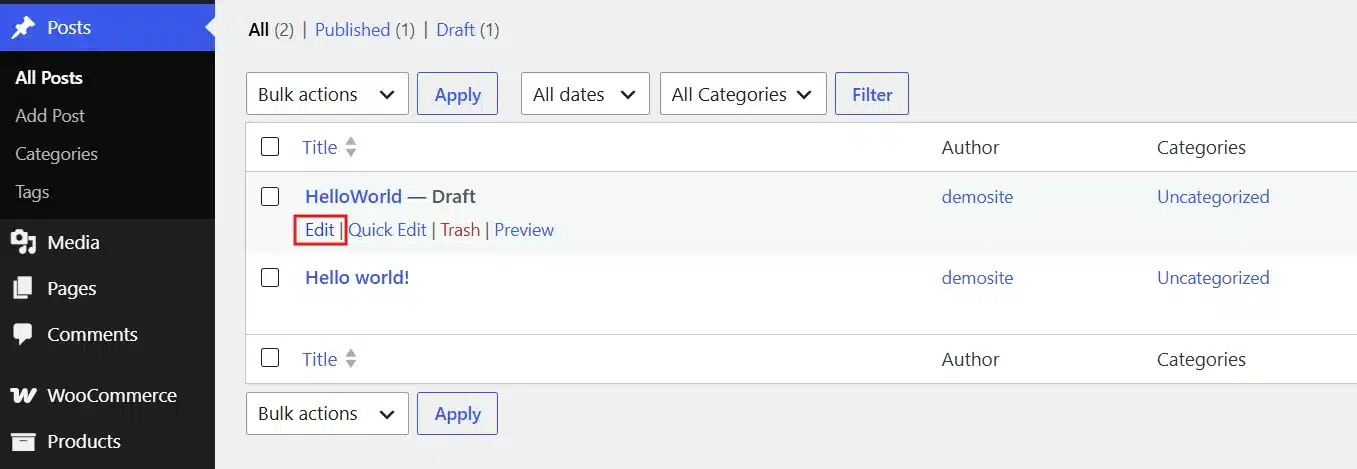
- Highlight the linked text, then open the Block → Text Section and pick a color from the palette.
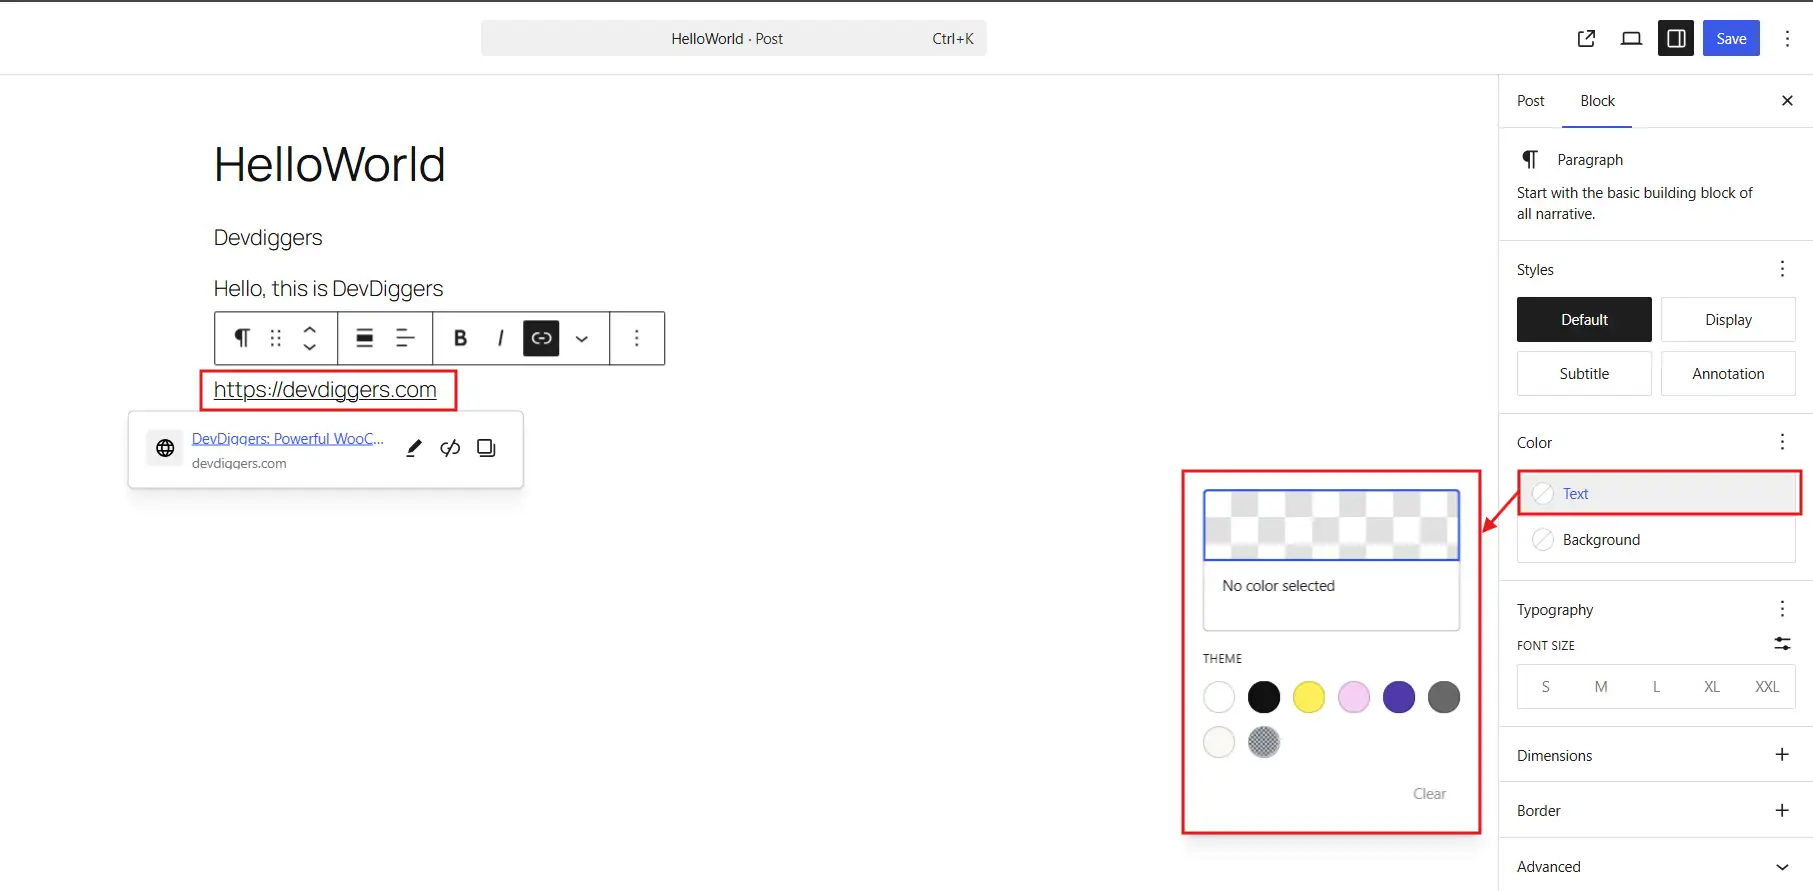
- Click Save or Publish on the post. Your change only affects this one link. Every other link on the site keeps its default color.

This method works well for a single link, but it doesn’t scale. If you find yourself repeating it across dozens of posts for the same effect, stop. Custom CSS in Method 4 will save you a lot of clicking.
Method 4: Change Link Color with Custom CSS
CSS gives you the most control, and it’s not as intimidating as it sounds once you understand four simple states.
a:linkTargets a normal, unvisited link.a:visitedTargets a link the visitor has already clicked.a:hoverTargets the moment the mouse is over the link.a:activetargets the split second a link is being clicked.
- Go to Appearance → Customize. Open the Customizer the same way you did in Method 1.
- Click Additional CSS. Scroll to the bottom of the left sidebar panel to find it.
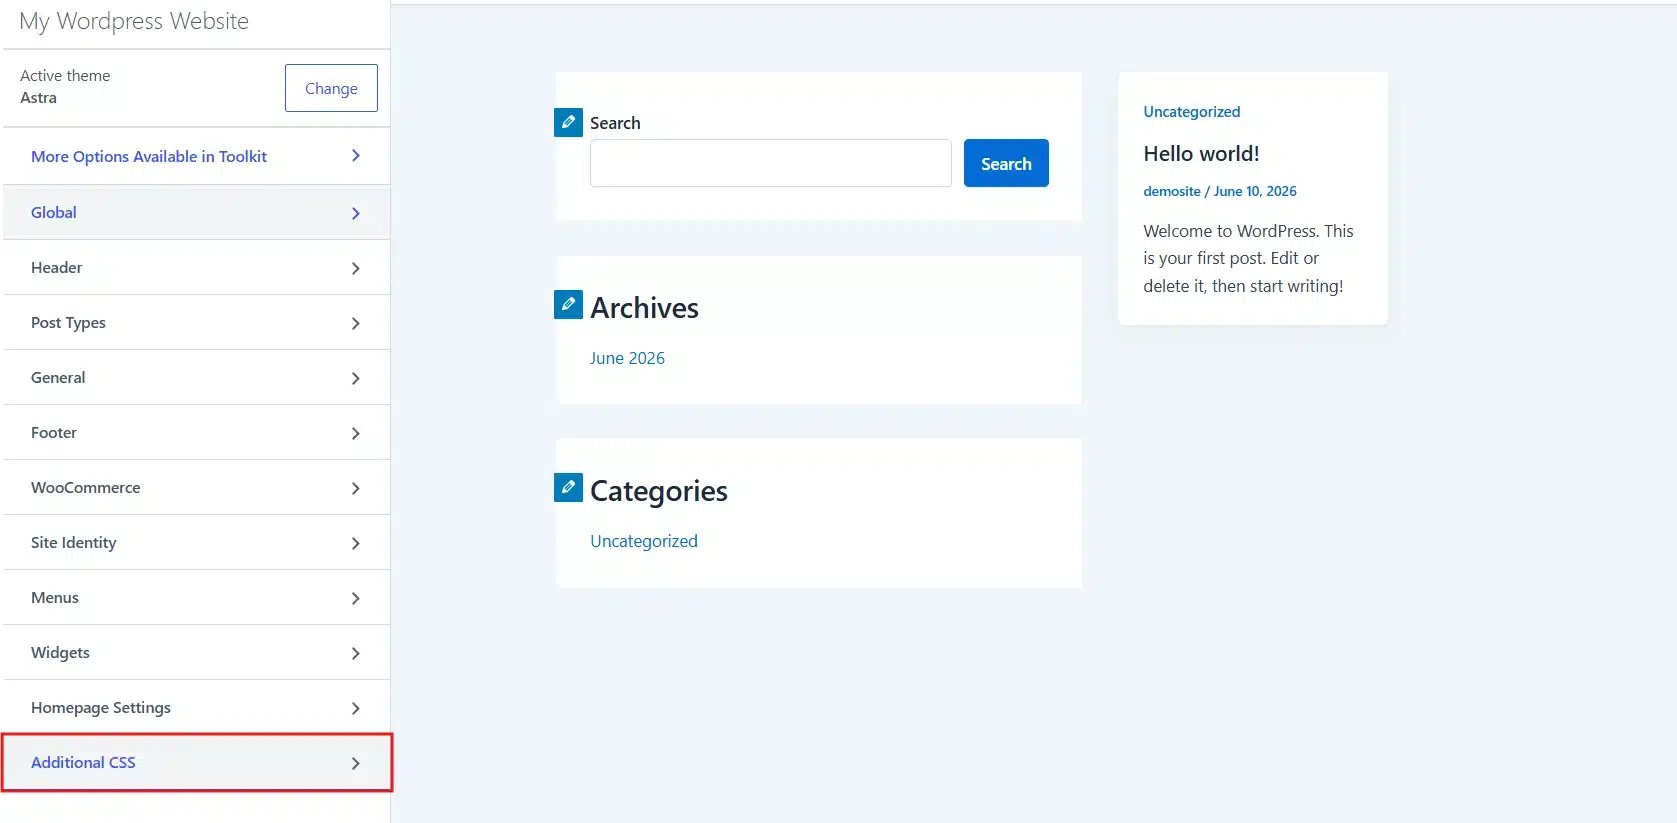
- Paste in your CSS. Here’s a starting snippet you can adjust:
a {
  color: #1e73be;
}

a:hover {
  color: #ff5a1f;
}

a:visited {
  color: #6b6b6b;
}
- Replace the hex codes with your own colors. Keep the hover color noticeably different from the default so the change is easy to notice.
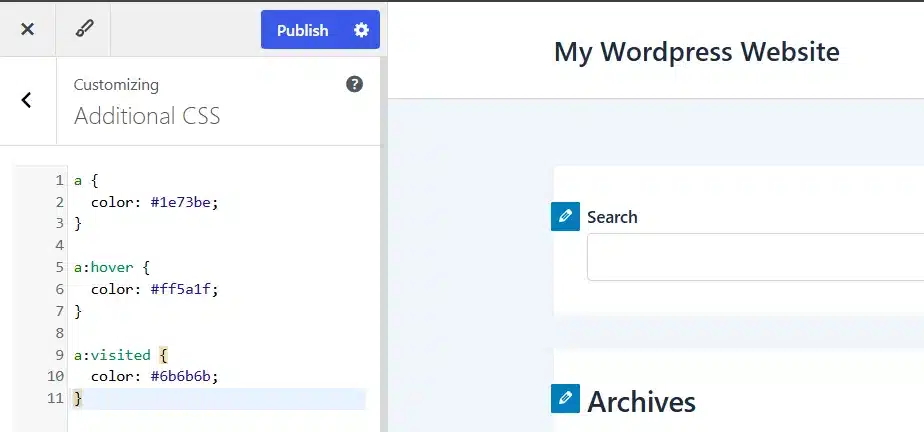
- Click Publish. Your CSS applies site-wide the moment you save.

If your theme still shows the old color after this, it likely has a more specific CSS rule already targeting links. Specificity wins over a general a selector. Add !important after your color value as a quick fix:
a {
  color: #1e73be !important;
}
This isn’t a long-term fix so much as a workaround. A cleaner approach, if you’re comfortable with a WordPress child theme, is to add the rule directly to the child theme’s stylesheet. That way it survives future theme updates on its own, with no Customizer dependency.
Method 5: Change Link Color Using a Plugin
If you prefer to avoid the Customizer’s CSS box, a code snippet plugin gives you a dedicated space to manage custom CSS.
- Go to Plugins, then Add New from your dashboard sidebar.
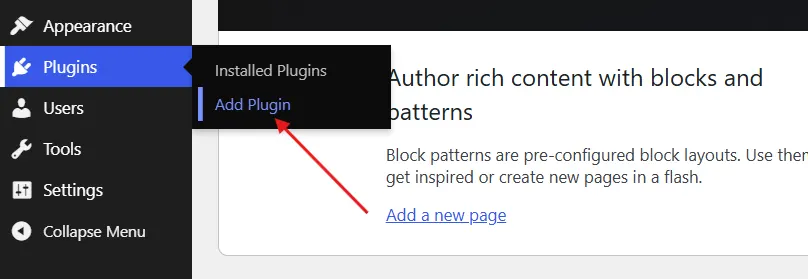
- Click Install Now, then Activate any CSS plugin (eg., WPCode and Simple CSS)
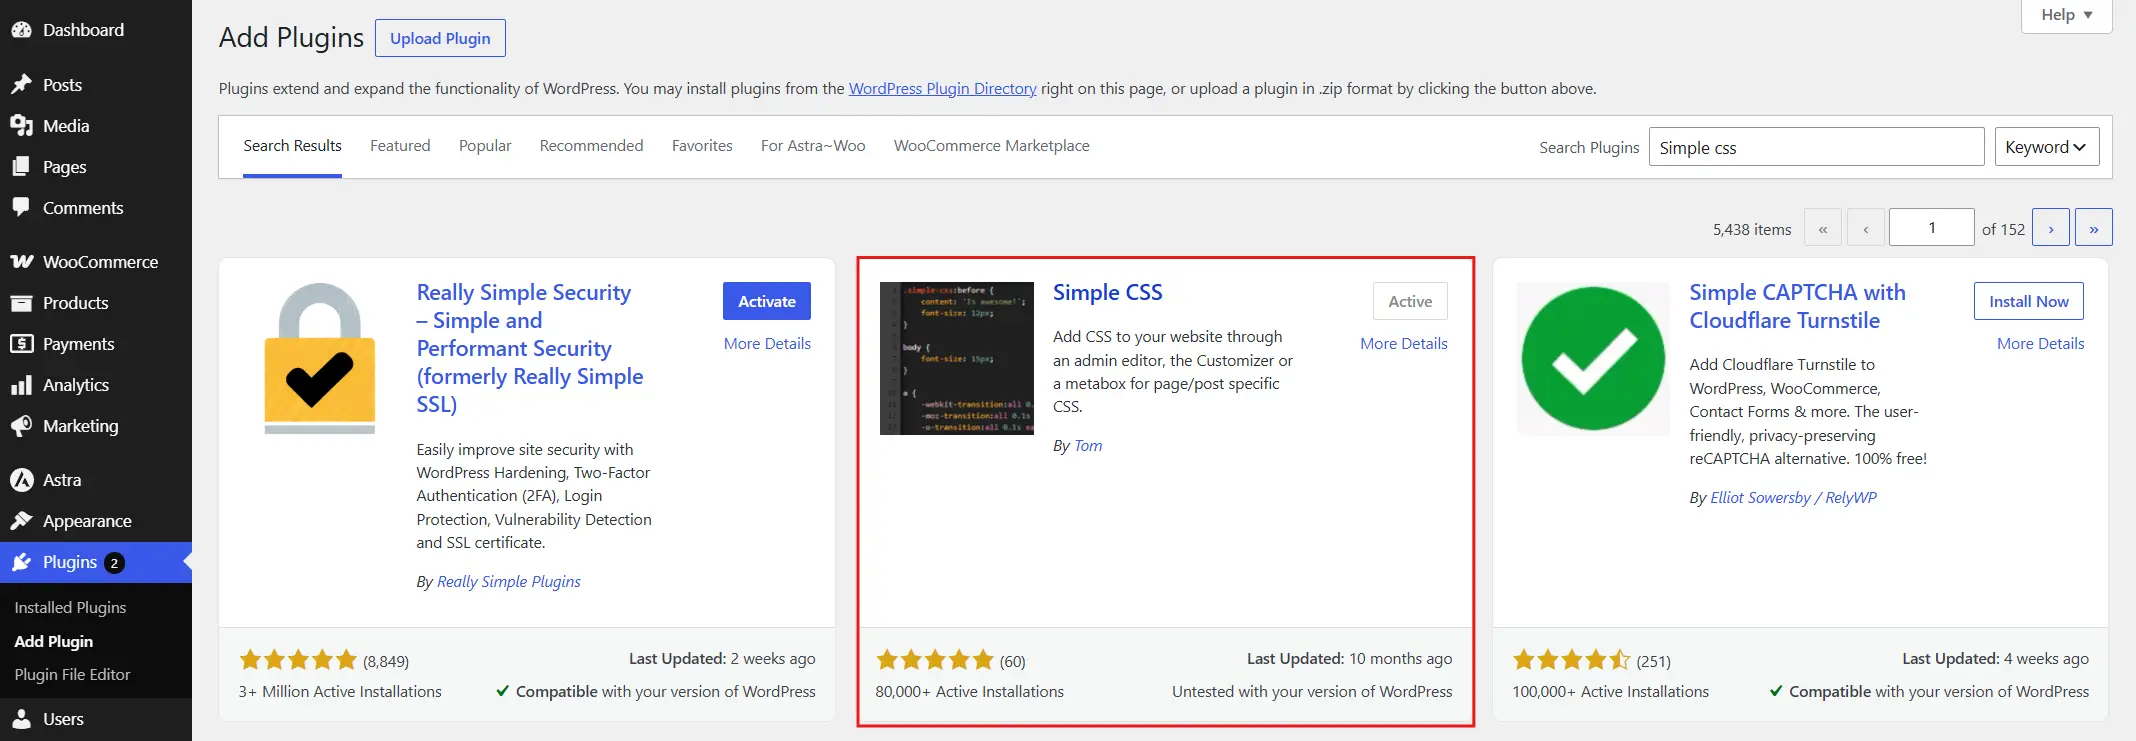
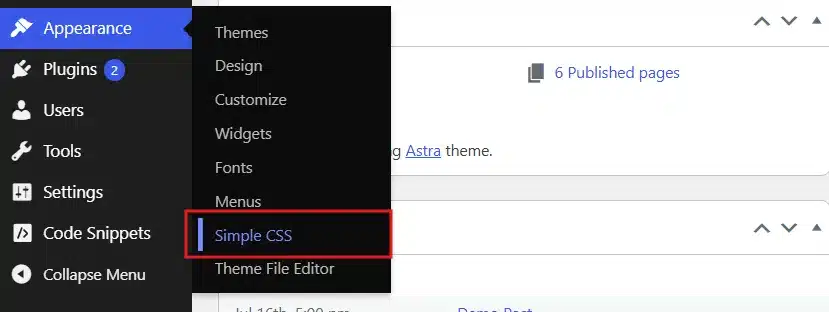
- If you are using the Simple CSS Plugin, go to Appearance → Simple CSS.
- Add your CSS snippet. Paste the same
a:hover, anda:visitedRules from Method 4.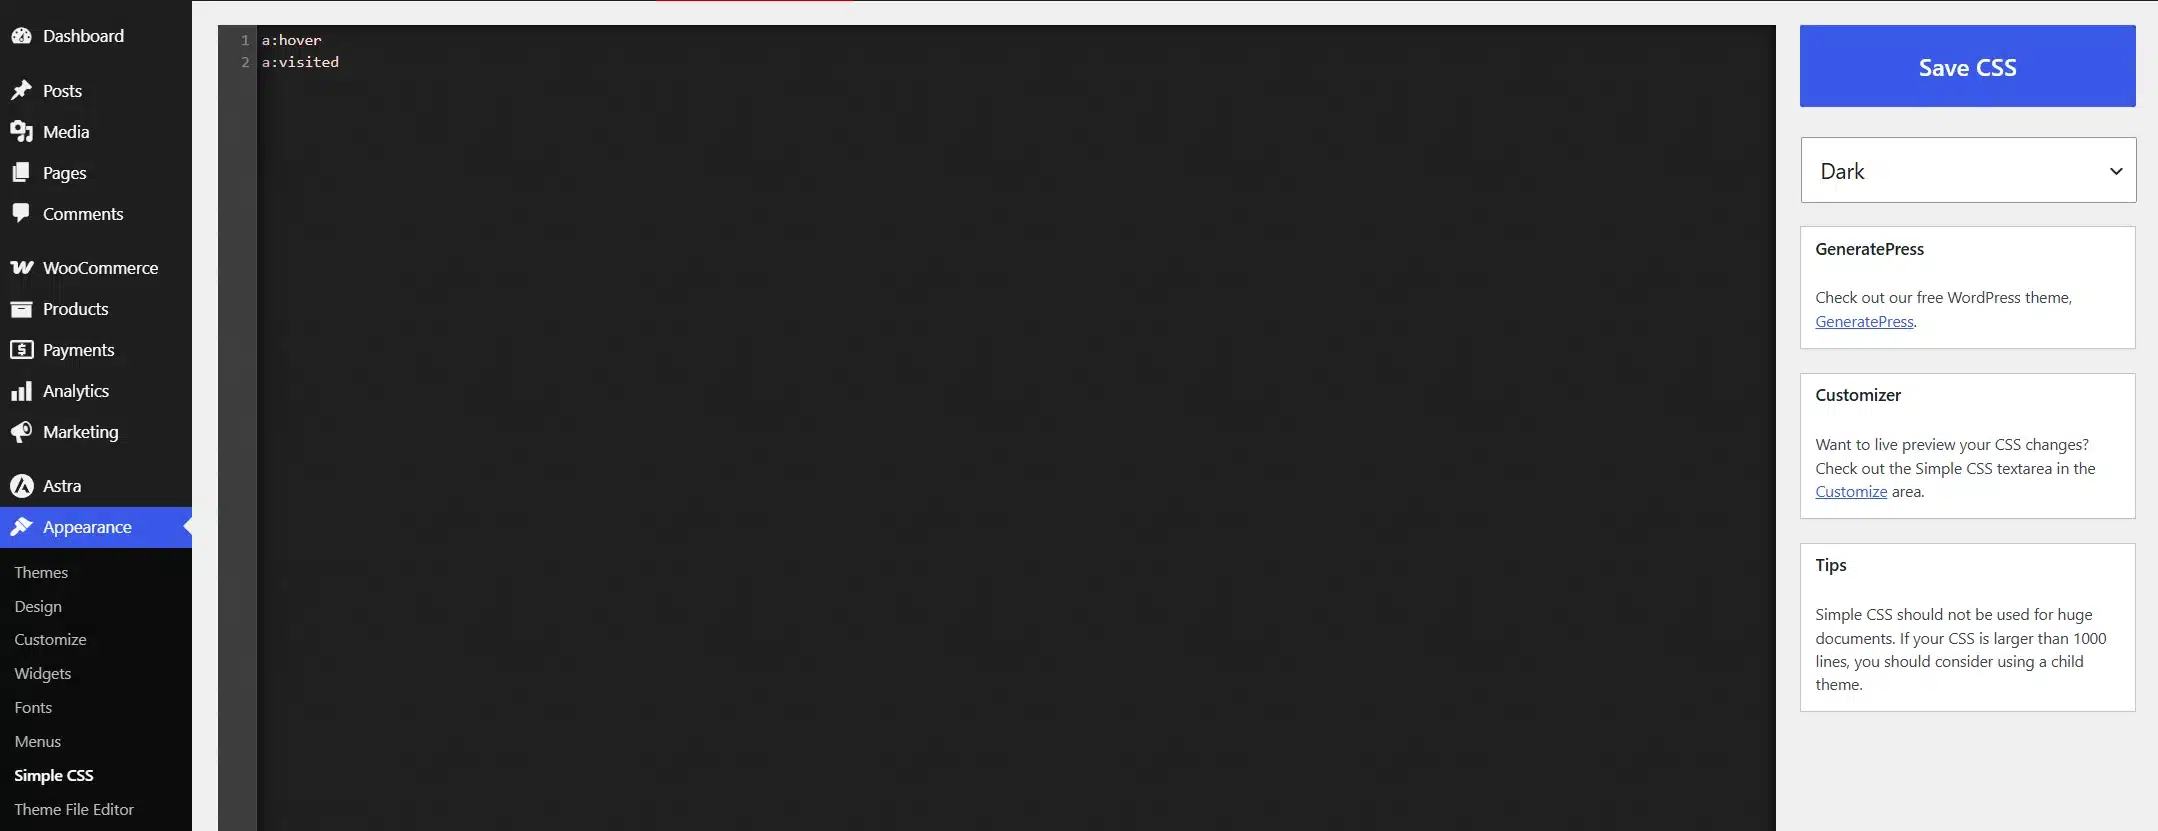
- Then click Save.

A plugin keeps your custom CSS separate from your theme, so an update to your theme won’t wipe it out. That’s the main advantage over pasting code straight into the Customizer.
Quick Comparison: Which Method Fits Your Site
With five methods on the table, picking one comes down to your theme type and how much control you want.
| Situation | Method | Why |
|---|---|---|
| Classic theme, no code | Method 1: Theme Customizer | Fastest path, needs no CSS at all |
| Block theme, no code | Method 2: Full Site Editor | Classic Customizer options won’t appear on these themes |
| One link, one post | Method 3: Single link color | Don’t touch site-wide settings for a single call-to-action link |
| Full control over every link state | Method 4: Custom CSS | The only method that separately handles hover, visited, and active states |
| Want your CSS to survive a theme update | Method 5: Plugin | Code pasted into the Customizer’s Additional CSS box is tied to that theme and can be lost if you switch themes |
There’s no single best answer here. A small blog with a supported theme rarely needs more than Method 1. A WooCommerce store managing multiple link states usually ends up at Method 4 or 5.
How to Change Link Colors in WooCommerce?
If your site runs WooCommerce, you have a few extra link types. WooCommerce store links are worth thinking about separately. Product title links, “Read More” links, and category links inside your shop pages all behave a little differently.
- Identify which links you want to change. WooCommerce product links usually inherit your theme’s general link color, so Methods 1 and 4 above will already cover most of them.
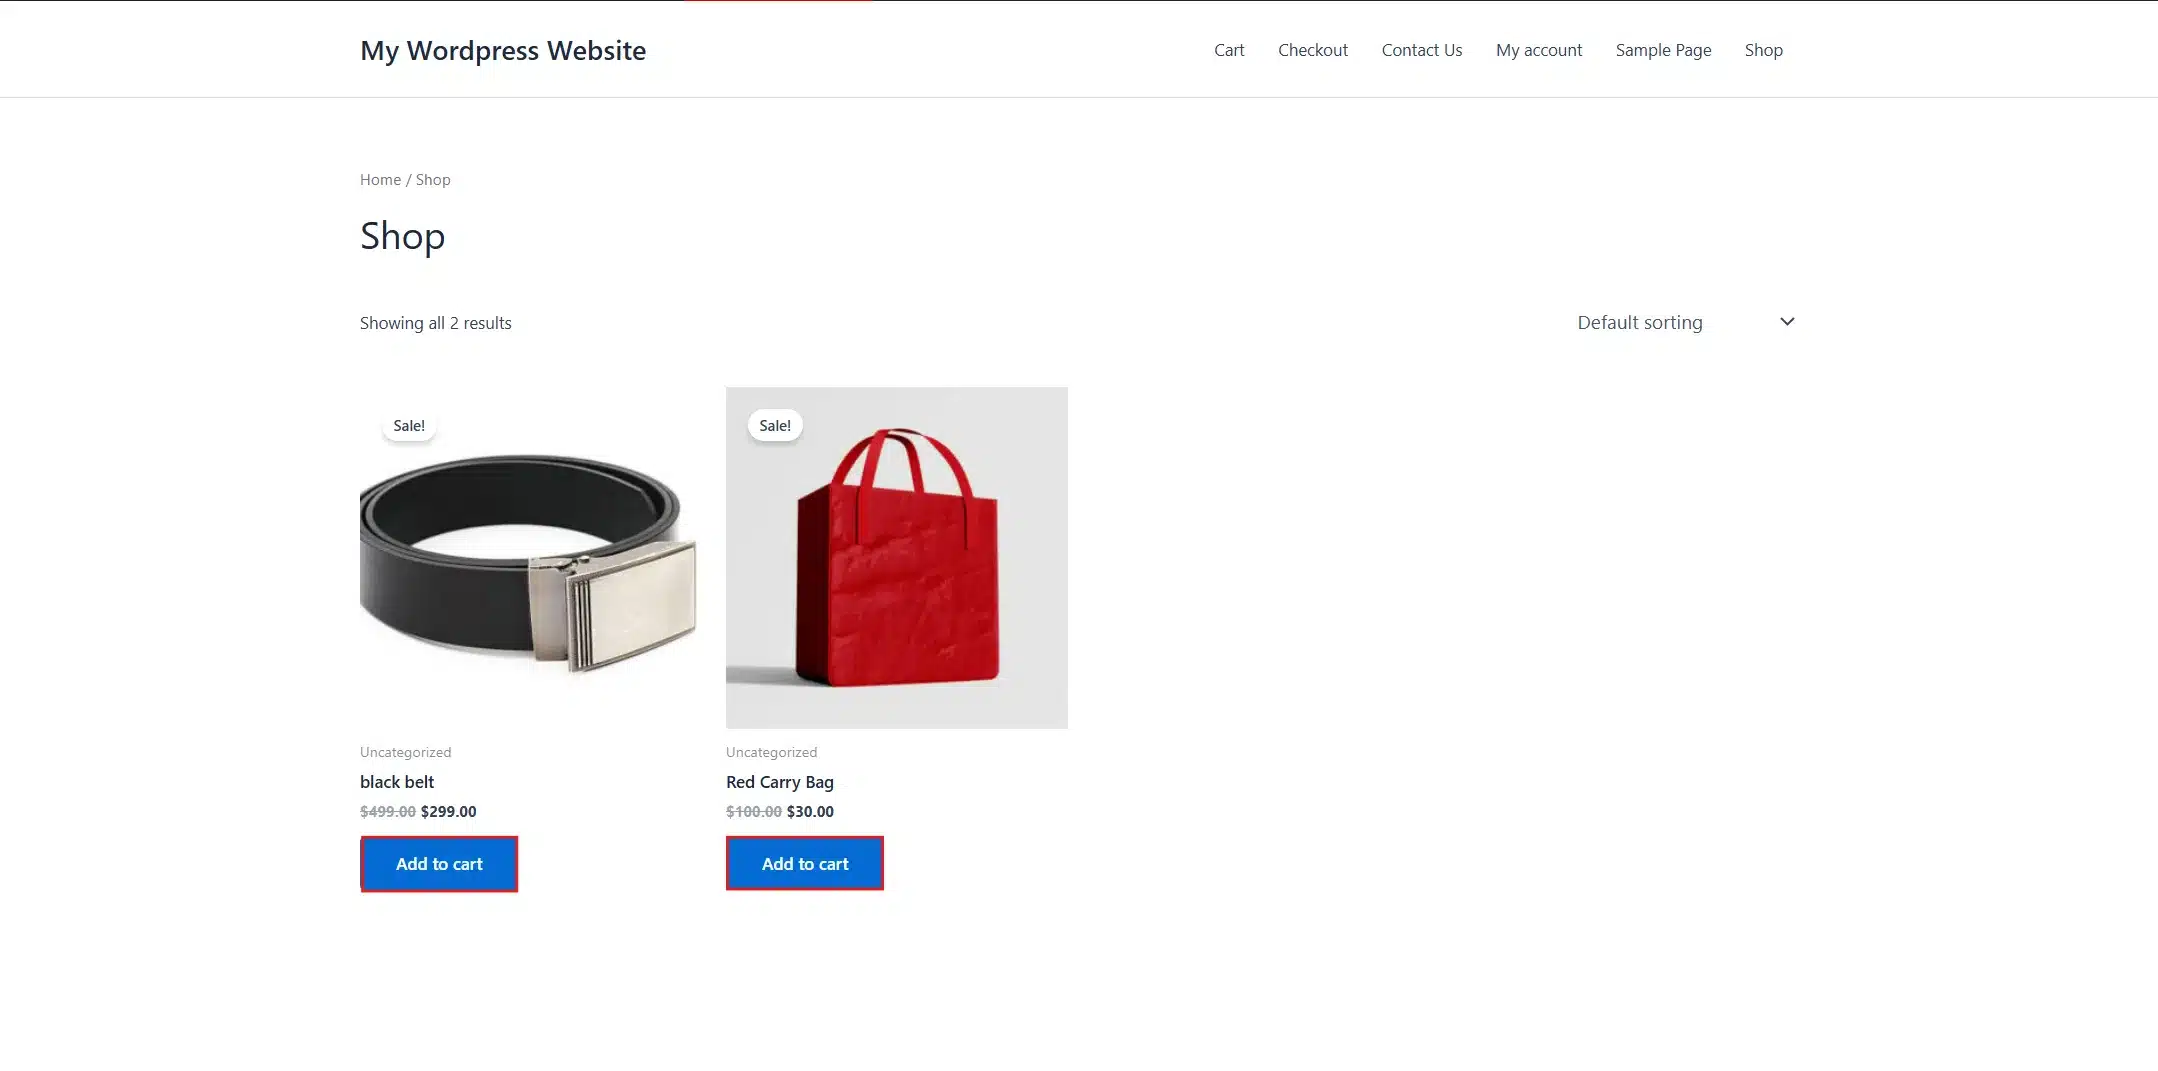
- Target WooCommerce elements specifically with CSS. If you want product links to look different from your blog post links, add a more specific CSS rule:
.woocommerce ul.products li.product a.woocommerce-loop-product__link {
  color: #6B1C62;
}
- Now the Shop Page elements (eg., Add to Cart and price links) get changed to the color you used in CSS.
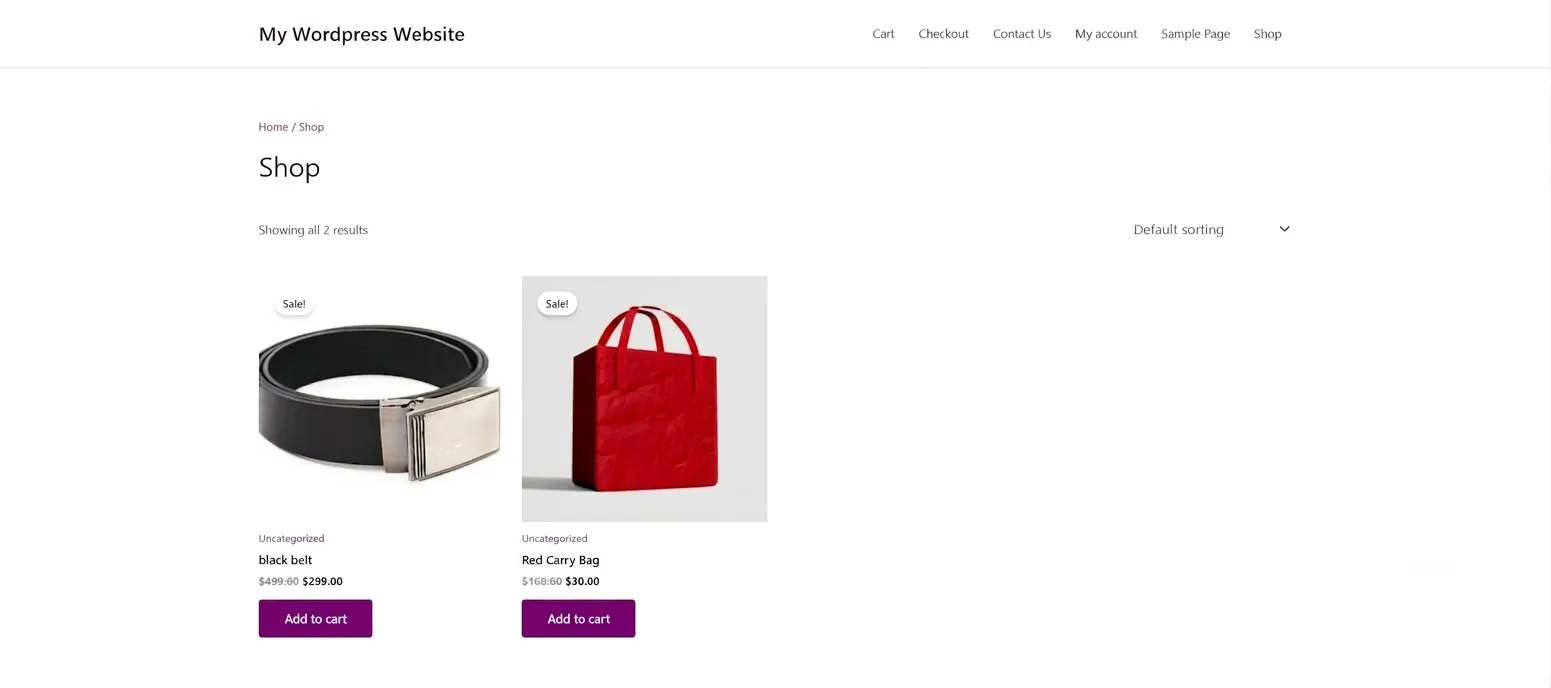
Something we see often in support: store owners change their global link color, then wonder why the Add to Cart button didn’t follow along. That button isn’t a plain link in most themes. It’s styled as its own element, so it needs its own rule.
If you’re managing a lot of these small styling adjustments across a growing store, it may be worth browsing DevDiggers’ collection of WooCommerce plugins for WordPress built for store owners who want more control without writing custom code for every change.
Choosing the Right Link Color (Contrast and Accessibility Check)
Picking a color that looks nice is only half the job. It also needs to be readable.
- Decide on a color from Methods 1 to 5 above. Then, open the WebAIM Contrast Checker in a new browser tab.
- Enter your link color and background color hex codes into the two fields.
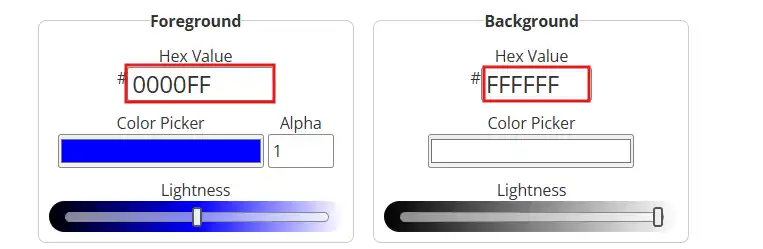
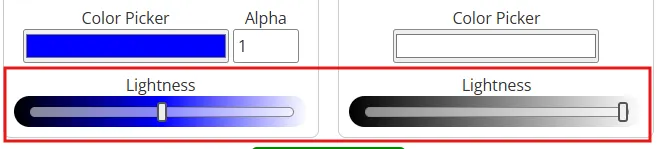
- Check the ratio against WCAG guidelines. The Web Content Accessibility Guidelines recommend a contrast ratio of at least 4.5 to 1 for normal-sized text. The tool tells you instantly whether your pairing passes
.
- Adjust if it fails. Darken or lighten your color slightly and test again until you pass.
Blue remains the most recognised link color for a reason. Visitors expect it, and it almost always passes contrast checks against light backgrounds. Just avoid red and green as a first choice, since roughly 8% of men have color blindness that makes those two hard to tell apart.
If your site has a dark mode toggle, run the contrast check twice, once against each background. A color that passes on white can fail badly on near-black.
Trade-off: A hover-only color change is invisible on touchscreens, since there’s no mouse to hover with. Keep the default link state distinct enough on its own, and treat hover as a bonus, not the only signal.
Troubleshooting: Link Color Not Changing?
- Your changes aren’t showing: This is almost always a caching problem. Clear your browser cache, then clear any caching plugin on your site, such as WP Rocket or W3 Total Cache.
- The Customizer color setting has no visible effect: Your theme likely has hardcoded CSS overriding the Customizer’s output. Use Method 4’s custom CSS! Important as a workaround.
- Custom CSS works on desktop but not on mobile: Some themes apply separate mobile styles. Add a media query targeting smaller screens, or check your theme’s mobile-specific color settings if it has any.
- A plugin is overriding your link color: Page builder plugins sometimes apply their own inline styles, which sit above your theme’s CSS. Deactivate suspected plugins one at a time to isolate the conflict.
- Links inside widgets stayed the old color: Widget areas sometimes use a separate CSS class from your main content area. Inspect the widget link with your browser’s developer tools to find its exact class, then target that class directly.
- Your color reverted after a theme update: This happens when the CSS lives inside the parent theme’s files instead of a child theme or a plugin. Move the snippet to a child theme’s stylesheet or a code snippet plugin so future updates don’t overwrite it.
Conclusion
Changing the link color in WordPress comes down to picking the right method for your setup. The Theme Customizer handles classic themes in a couple of clicks, while block themes need the Full Site Editor instead. Custom CSS gives you the most control across both, plus the ability to fine-tune WooCommerce links separately from your blog content.
Whichever method you use, run your final color choice through a contrast checker before publishing. A link that looks great but fails accessibility standards is a change worth reconsidering.
If a small color change turns into a bigger design project, DevDiggers offers WordPress development services for site owners who’d rather hand the styling work to someone else.
Frequently Asked Questions (FAQs)
Q1. Do I need coding knowledge to change link colors in WordPress?
No. The Theme Customizer and Full Site Editor methods above require no code at all. Custom CSS is optional and only needed if your theme does not expose link color settings directly.
Q2. Will changing my link color affect my WordPress SEO?
Not directly. Search engines do not rank pages based on link color. Better contrast and visibility can improve how long visitors stay on your site, which is a positive signal indirectly.
Q3. Can I set a different link color for just my mobile site?
Yes, using a CSS media query that targets smaller screen widths. This lets you keep one color on desktop and a different one on mobile if your design calls for it.
Q4. Why did my link color change work on one page but not another?
Different page templates, especially in WooCommerce, sometimes apply separate CSS classes to their links. Check the specific class on the page where the change did not apply.
Q5. What is the best link color for accessibility?
Any color that passes a 4.5 to 1 contrast ratio against your background, checked with a tool like WebAIM’s Contrast Checker. Blue is the most common choice because it almost always passes by default.
Q6. Do I need a plugin to change link colors, or can I do it without one?
A plugin is optional. The Theme Customizer, Full Site Editor, and Additional CSS box all let you change link colors without installing anything new.
Q7. Can I change my link color and my regular text color at the same time?
Yes, though they are separate settings. If you also want to adjust body text, see this guide on how to change font color in WordPress. It uses the same Customizer and CSS approach, just applied to text instead of links.